How to Start Straw Bale Gardening: A Step-by-Step Guide
Start a straw bale garden with a practical conditioning schedule, safe bale checks, crop choices, support tips, and a realistic plan for watering and reuse.
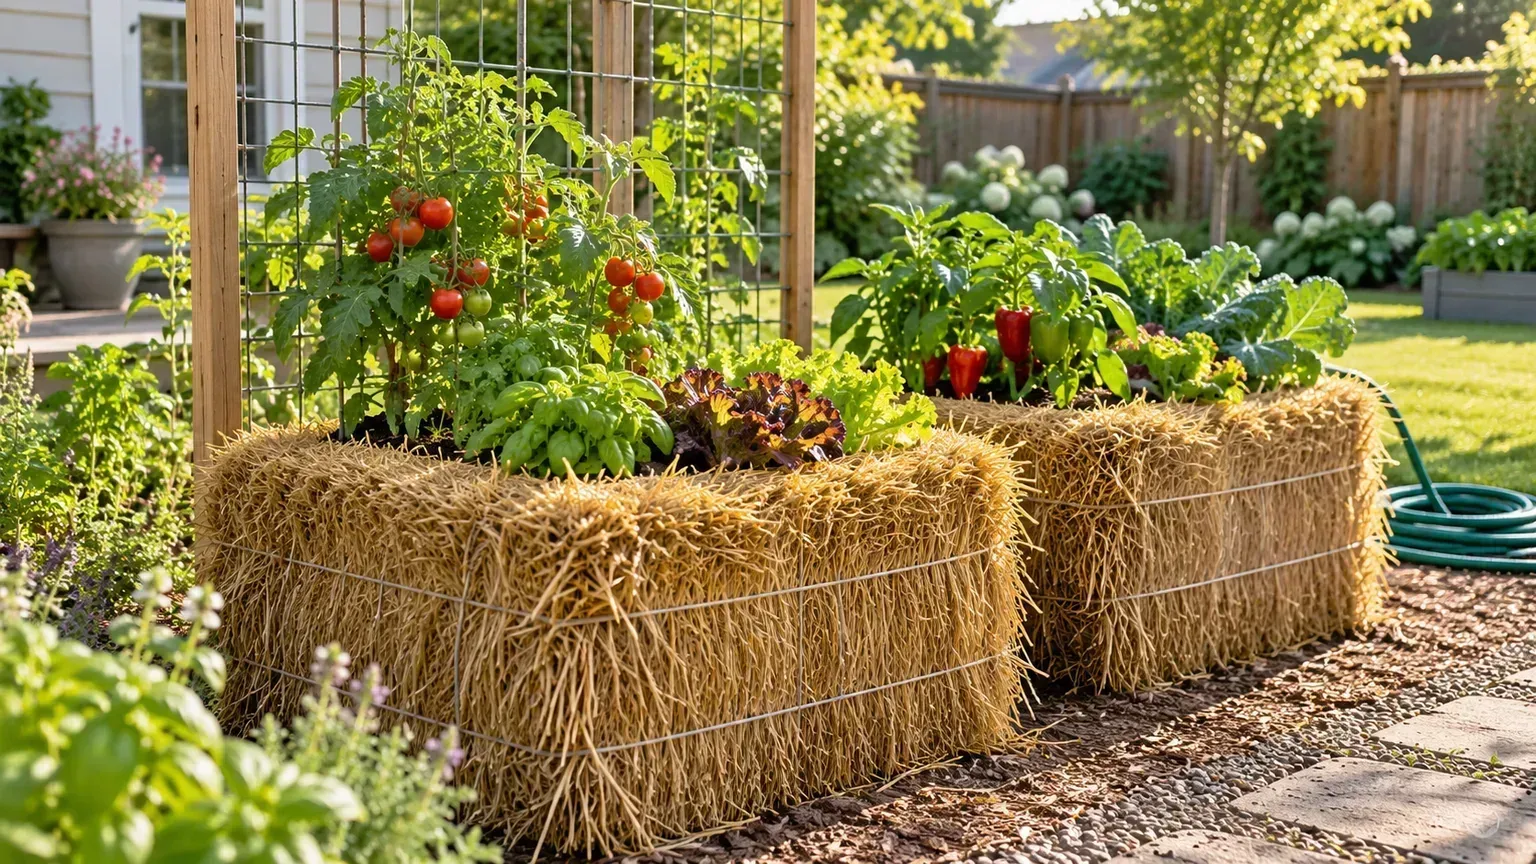
A straw bale can become a temporary raised bed, but it is not ready for planting when you bring it home. First you need to place it, wet it, and feed the decomposing straw so the interior becomes a stable rooting environment. If you plant into a bale that is still heating—or one that dries out every afternoon—young crops can struggle before they establish.
The payoff is a garden that can sit above poor soil, gravel, or pavement, with less digging and easier reach. The trade is that a bale is porous, needs close attention to water and nutrition, and usually has to be replaced after a season or two. This guide walks through a full setup, including how to choose a bale with a known history, condition it without confusing competing schedules, choose manageable crops, and troubleshoot problems before adding more fertilizer.
What a straw bale garden does—and when it makes sense
In straw bale gardening, the conditioned bale acts as both container and growing medium. Microbes break down straw after it receives moisture and nitrogen; as the material softens, roots grow into pockets or a shallow layer of potting mix or compost placed at the surface. This is different from simply using straw as mulch over soil: the plant’s root zone is inside the bale.
That arrangement is useful when garden soil is poor, compacted, contaminated, or simply too difficult to dig, and when a gardener needs a raised working height. A bale can sit on soil, grass, gravel, or a hard surface, as long as excess water can drain. Clemson and Alabama Cooperative Extension describe the method as a practical option for gardeners limited by soil, space, or mobility; both also emphasize that the bale must be conditioned before planting (Clemson Extension; Alabama Cooperative Extension).
The method is less attractive if you already have a productive, easy-to-work bed and want a permanent garden. A bale needs fertilizer to begin decomposing, additional feeding as crops grow, and more frequent moisture checks than many in-ground beds. Think of it as a one-season growing container made from a bulky, compostable material—not a free, maintenance-free replacement for soil.
Choose a clean, sturdy bale for food crops
Buy straw rather than hay. Straw is the leftover stem from a harvested grain crop, usually wheat or oats; hay is cut forage that may still contain seed heads and is more likely to sprout weeds. Wheat straw is a widely used choice because it absorbs water and breaks down more readily than pine needles. Whatever the crop, inspect the bale: it should be tightly bound, dry in storage, free of moldy or rotten patches, and compact enough that its shape will not collapse as it gets wet.
Ask the grower what was grown and whether persistent broadleaf herbicides were used on the field. Some herbicide residues, including aminopyralid, clopyralid, and picloram, can remain active in hay, straw, manure, or compost and injure sensitive vegetables. NC State Extension documents that these materials can cause distorted new growth and recommends a plant bioassay when the history is unknown (NC State Extension). For edible gardening, a bale with a traceable untreated history is the easiest choice; “organic-looking” or aged straw is not proof that residues are absent.
If you already have a bale but cannot get a clear answer, do not plant your whole food crop into it as a test. Take representative straw from several parts of the bale, wet it and mix it with a small amount of potting mix, then grow sensitive bean or pea seedlings alongside control seedlings in clean potting mix. Watch for cupped, twisted, or unusually narrow new leaves. A small pot test is a warning screen, not a laboratory clearance; if the test plants distort, keep that bale away from vegetables and use a known source instead.
Place the bale before it gets heavy
Choose the site before conditioning. A soaked bale is difficult to move, and the garden needs direct sun—around six hours or more for most fruiting vegetables—plus convenient access to a hose or irrigation line. Avoid a low spot where water pools. A bale should drain freely rather than sit in runoff, and plants need enough surrounding space for airflow, harvest access, and a trellis if you plan to grow climbing crops.
Set the bale with the cut ends of the straw facing up and the binding twine along the sides, parallel to the ground. The strings then help hold the bale together as its interior softens. Keep the twine intact; do not cut it when planting. If you need to stop grass or weeds from growing into the bottom, lay cardboard or newspaper under the bale before watering. Do not wrap the bale in plastic: it needs to drain and exchange air.
Check where the water will go. Conditioning uses repeated water and fertilizer, and later irrigation can carry nutrients out of the bottom. On a driveway or patio, keep that runoff away from storm drains and sensitive planting areas; use a catchment arrangement if necessary. A wet bale can also be a substantial load, so on an elevated deck or balcony, confirm that the surface can safely support it before setting one or more bales there.
Gather a short list of materials
You do not need a full set of raised-bed tools, but it helps to assemble everything before starting. For one standard bale, gather:
- A straw bale with tight, intact twine and a known source.
- A water source, plus a soaker hose or drip line if you will use more than one bale.
- A high-nitrogen fertilizer for conditioning and a complete vegetable fertilizer for later feeding; follow the product label and one extension schedule.
- A few bags of quality potting mix or mature, weed-free compost for seed rows and transplant pockets.
- A trowel, garden gloves, and a long-probe compost thermometer if you want a more reliable temperature check than your hand.
- Stakes or a trellis that can be anchored in the ground beneath or beside the bale, not only in loose straw.
A thermometer is optional, but useful for a first bale or early-season planting. Clemson Extension uses 99°F or cooler as a planting threshold and notes that hot interiors can injure seeds and transplants. Having that one measurement can prevent a common mistake: treating “about two weeks” as a guarantee when cold weather or a dry bale has slowed decomposition.
Condition the bale before planting
Conditioning starts the microbial decomposition that transforms tightly packed straw into a softer, more root-friendly medium. Water supplies the moisture microbes need; added nitrogen helps balance the carbon-rich straw. Decomposition produces heat, so a warm center is expected during preparation. Cornell Composting explains that microbial heat depends on conditions such as moisture and the carbon-to-nitrogen balance, which is why a bale can warm at different rates in different weather. Planting too early puts roots into an active hot spot, while a bale that stays dry may never begin breaking down evenly.
The exact calendar and fertilizer amounts vary among extension protocols and depend on fertilizer formulation, bale size, temperature, and water. Choose one complete, locally appropriate schedule and follow it rather than mixing pieces of recipes. Do not assume a scoop measurement transfers between products: a half cup of one nitrogen fertilizer does not provide the same nutrient amount as a half cup of another. Keep the bale moist, but avoid washing fertilizer through it and into runoff.
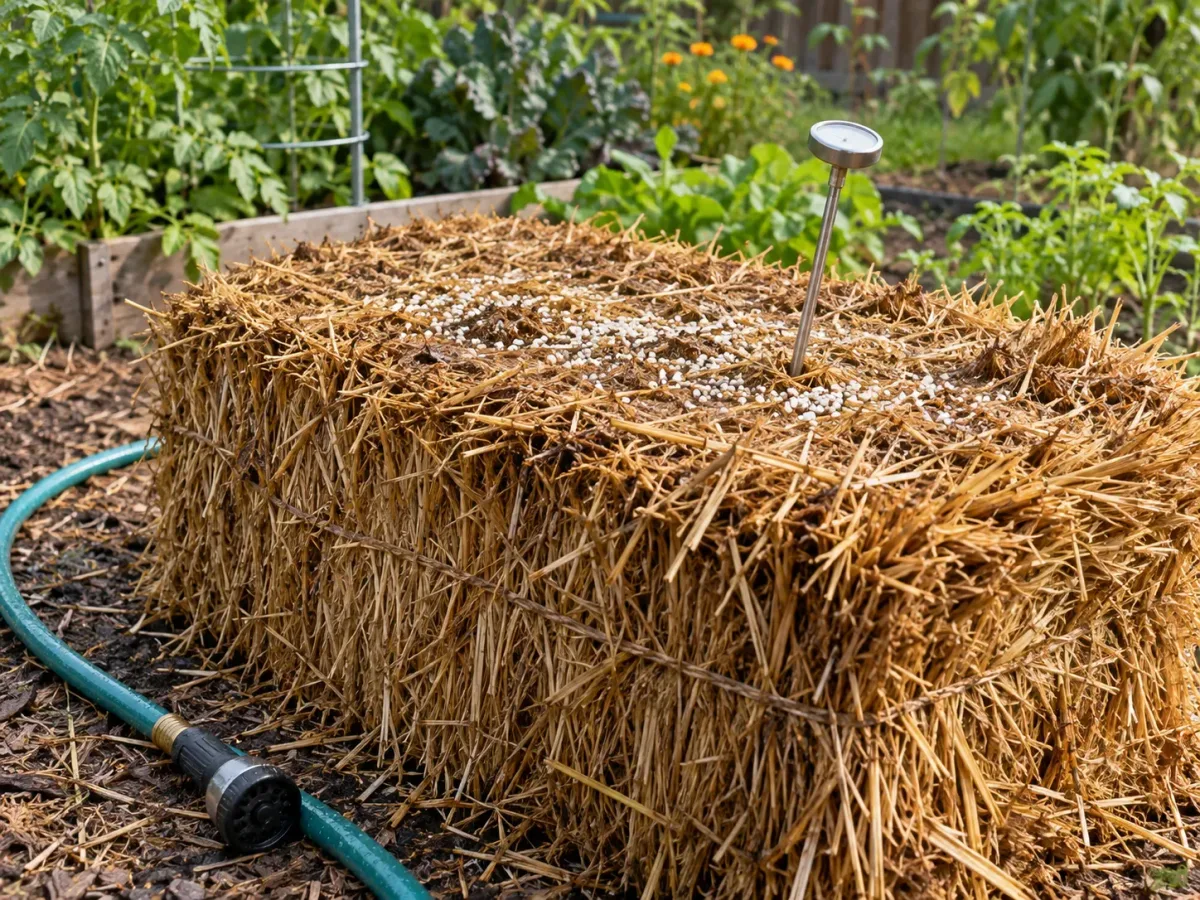
A practical 10- to 15-day conditioning sequence
A useful starting sequence is to saturate the bale for the first few days, apply the selected high-nitrogen fertilizer over the next several days, then switch to a balanced fertilizer if that is part of the extension method you chose. Clemson’s schedule uses a staged urea or ammonium-sulfate program and a balanced fertilizer near day 10; Alabama Extension uses a somewhat longer, roughly two-week sequence. Their rates differ, but both call for steady moisture and waiting until the bale is suitable before planting (Clemson Extension; Alabama Cooperative Extension).
Use a high-nitrogen product that is appropriate for this purpose and contains no weed killer or pre-emergent herbicide. A lawn product with “weed and feed” ingredients is not interchangeable with plain fertilizer. If you prefer an organic input such as blood meal, follow its package rate and allow for the fact that a less soluble material may act more slowly; do not substitute a cup-for-cup rate from a synthetic schedule.
For the first few days, water deeply enough that the inside becomes uniformly damp. Then water after each fertilizer application to move nutrients into the straw, but stop before a strong stream of nutrient-rich water runs out the bottom. During the active heating phase, keep checking moisture and water again when the surface is drying. Cold conditions can lengthen the process, while a warm, damp bale may move through it faster.
Wait for the bale to cool
Do not plant by the calendar alone. Push a compost thermometer well into the bale’s center, wait for the reading to settle, and check a second spot if the first reading seems unusual. Clemson Extension recommends planting when the internal temperature has fallen to about 99°F or below. If you do not own a thermometer, push a hand into the straw; the interior should feel warm rather than hot and should have begun to soften and crumble. A warm exterior does not tell you what the center is doing.
If the center is still hot, keep the bale moist and check it again in a day or two. Do not add more fertilizer just because the process is taking longer; cool spring weather, a dry interior, or uneven watering can all slow decomposition. If one side is dry while the other is wet, adjust the watering pattern rather than flooding the whole bale. Once it has cooled and softened, add a shallow planting layer or prepare pockets and move on to planting.
Plant into pockets or a shallow top layer
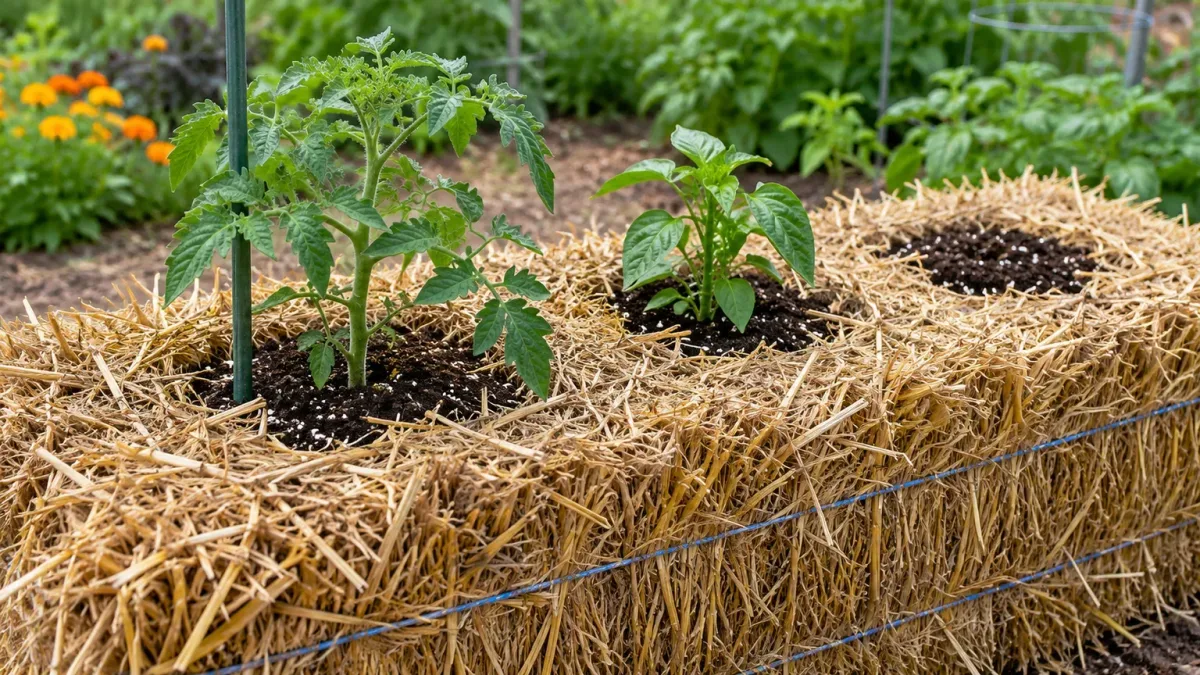
Most first-time gardeners have an easier start with transplants than with seeds. A transplant already has a root system, while a seed needs a consistent, fine-textured surface to germinate and stay moist. To plant a transplant, open a pocket with a trowel or small hand saw; add potting mix or mature compost around the root ball so it contacts a dependable medium. Set the plant at the depth recommended for that crop, then close the straw around the pocket without crushing the stem.
For direct-sown crops such as beans or leafy greens, spread a few inches of potting mix or mature compost across the top and sow at the packet’s depth and spacing. Keep that surface evenly moist until seedlings are established. Do not sow tiny seeds directly into loose straw and expect them to root through large air gaps. If the bale is still rough and fibrous, a seed-starting mix layer gives germinating seeds a more uniform beginning.
Pick crops by height, root habit, and support
A standard bale has limited planting area, so choose a few crops that fit rather than packing it full. Compact tomatoes, peppers, eggplant, cucumbers, bush beans, lettuce, and some herbs are common candidates. Determinate tomatoes and dwarf or bush varieties are easier to support than tall, sprawling indeterminate plants. Cucumbers and pole beans can work if you install a sturdy trellis and direct their growth away from neighboring plants.
Large crops such as corn, pumpkins, watermelons, and sprawling winter squash are often awkward on a single bale. Their mature size, weight, and space needs can outgrow the support the bale provides. Root vegetables are possible but require deeper, looser material and can be difficult to harvest without pulling the bale apart. Extension recommendations for plants-per-bale are not identical, so use the spacing on the seed packet and local guidance rather than treating one universal number as correct. Leave room to reach the plants and harvest without stepping on or reaching across the bale.
Cool-season crops can use the bale in a different window from summer vegetables. You might grow lettuce or greens when temperatures suit them, then plant a warm-season crop after the weather changes if the bale remains structurally sound. That is a useful possibility, not a promise that every bale will stay plantable for a second cycle; inspect for sagging and depleted, sour-smelling material before replanting.
Install support while the bale is still firm
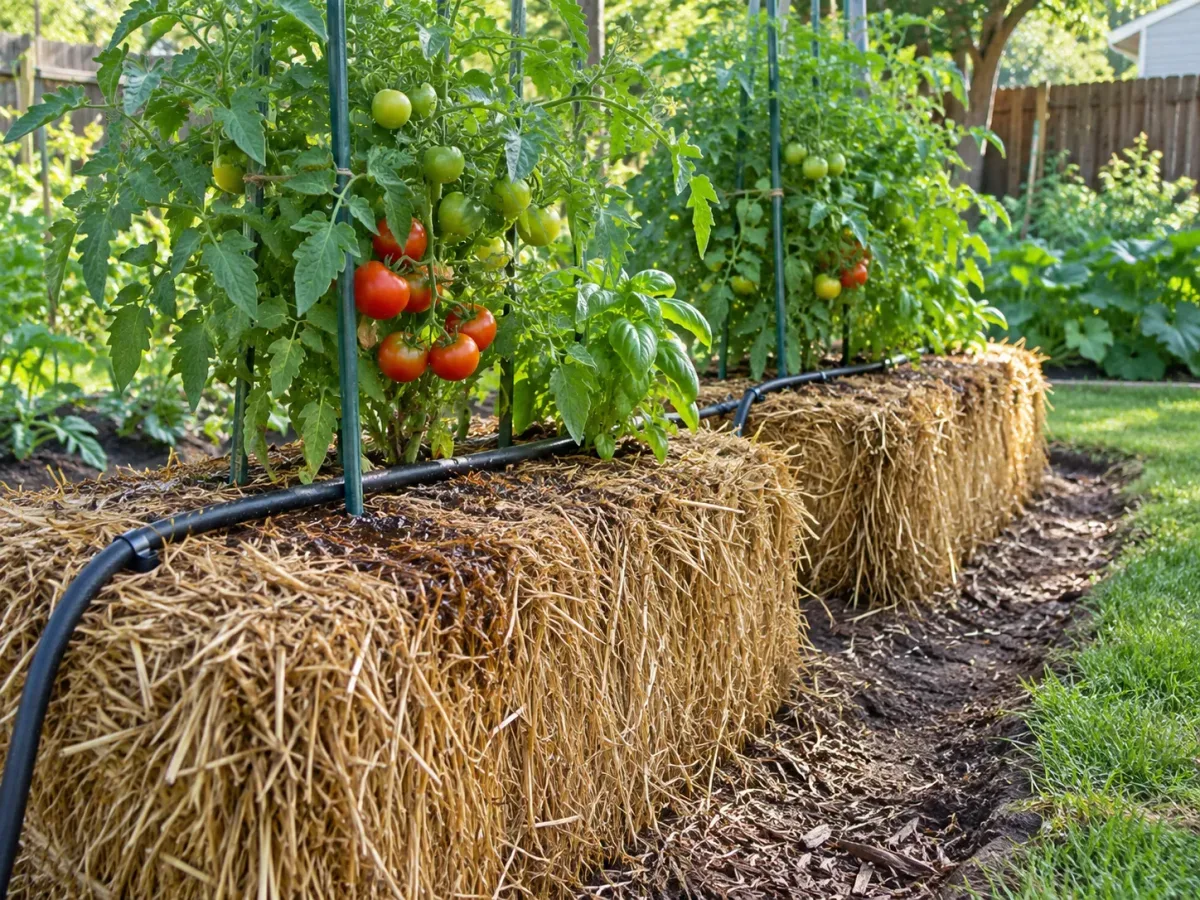
Plan support before the plants become heavy. A cage pushed only into straw can loosen as the bale decomposes, especially under a load of fruit or after wind. Drive a sturdy stake through the bale and into the ground beneath it, or anchor trellis posts beside the bale with a crossbar or wires above the plants. Install stakes before planting when possible so you do not spear roots later.
A row of bales can support a trellis system, but the bales themselves are not a substitute for posts. Keep tall crops on the side where they will cast the least shade on shorter plants, and leave a clear aisle for picking. If your site is paved and you cannot anchor into soil, use a freestanding support designed for that surface rather than relying on loose straw to hold it upright.
Keep water and nutrients consistent
Treat the bale like a container that is exposed on all sides. Wind, hot sun, and warm weather can dry the outer layers quickly, while the center may still hold moisture. Check the bale daily during warm weather: press a finger or a small trowel into the planting pocket and look beneath the surface, not just at the top. Water slowly until the root zone is moist, then let excess drain. A soaker hose along the bale’s top can make watering more even and reduce the number of missed spots.
There is no reliable fixed “once a day” rule for every climate. A small bale in full sun during a heat wave may need water more than once; a cool, rainy week may require far less. Watch the plant and bale together. Midday leaf droop that recovers by evening can have several causes, but a dry pocket plus a light, crumbly bale points toward lack of water. If the center is wet and the plant remains wilted, check drainage, heat, and root health before adding more water.
The starter nitrogen helps break down straw, but it does not guarantee a season-long supply for crops. Water can carry nutrients out, and decomposing microbes also use nutrients. As plants establish, feed with a balanced vegetable fertilizer according to its label and the chosen extension guidance; use a liquid feed if you need a controlled, evenly applied dose. Do not keep adding concentrated nitrogen whenever leaves pale. Excess nitrogen can push leafy growth over flowers and fruit, and the original cause may be heat, water stress, or herbicide injury rather than a simple shortage.
Troubleshoot based on the whole plant
If a bale does not heat during conditioning, check the basic inputs first: Is the interior actually wet? Did fertilizer reach the top evenly? Is the weather cold enough to slow microbial activity? If moisture is uneven, water more slowly and check a deeper spot. If it is damp and cool after the schedule, give it more time and consult the extension recipe for your fertilizer rather than doubling the dose blindly.
If seedlings wilt after planting, check the root pocket and internal temperature before assuming they need fertilizer. A hot center can stress roots, and a bale that has dried can be difficult to rewet. Water slowly in more than one pass so the straw absorbs moisture; if the pocket itself is dry, water directly at the root zone. If the plant stays wilted despite a moist, cool pocket, inspect stems and roots for damage before adding more water.
Yellowing or distorted growth has several possible causes. Nutrient loss is plausible when older leaves gradually pale and the bale has been watered heavily, but persistent herbicide injury often distorts new leaves—cupping, twisting, or narrow growth—and may affect several plants in the same bale. A fresh-bale test crop or a comparison plant in clean potting mix can help separate those patterns. Stop using suspect material for edible crops and seek local extension help if the symptoms continue.
For fruiting plants, uneven moisture can contribute to problems such as poor fruit set or blossom-end rot, but those symptoms are not a diagnosis by themselves. Check moisture consistency, crop variety, heat, and pollination conditions before changing fertilizer. Slugs and other pests can still reach a raised bale, and a warmer or cleaner starting medium does not make plants pest-proof. Remove weeds early, inspect leaves, and use appropriate local integrated pest management guidance rather than relying on the bale to prevent every garden problem.
Reuse the bale without carrying problems forward
At the end of the season, the straw may have settled and partially decomposed into a dark, crumbly material. If it came from a known, herbicide-safe source and was not affected by a serious disease or pesticide treatment, you can add it to a compost pile or use it as an organic amendment under established plantings. Clemson Extension and Alabama Extension both recommend recycling spent bales; Alabama notes that a second planting may be possible while the bale still has structure (Clemson Extension; Alabama Cooperative Extension).
Do not assume the bale is automatically clean just because it has composted. Persistent herbicide residues can survive in plant material, so keep a bale with uncertain history out of vegetable beds and home compost until you have a reliable history or a successful bioassay. If its provenance is good, remove remaining plant roots, inspect the material, and compost it with other suitable organic matter. If it is still firm and odor-free, it may support another crop, but it will have less structure and can be harder to water evenly than a new bale.
Compare straw bales with raised beds and containers
Choose straw bales when you want a temporary raised root zone, have little or poor soil, need less digging, and can place the bale near water. They are especially useful for trying a small garden without building a permanent frame. The method also turns straw into a usable growing surface before it eventually becomes compost.
Choose a conventional raised bed if you want a stable layout you can refill each year, need a deeper root zone, or do not want to repeat conditioning. A large container or grow bag may be easier to move, while a well-prepared in-ground bed may cost less and need less frequent watering over time. Straw bales are not necessarily the cheapest option after repeated annual purchases, fertilizer, potting mix, and irrigation are counted. Garden Myths raises useful questions about cost, water, and whether the method offers an advantage over a good soil bed; a first-season account from The Beginner’s Garden likewise shows why local watering demands and setup effort matter (Garden Myths; The Beginner’s Garden).
Use the comparison that fits your actual constraint. If the problem is hard ground, straw may let you grow this season; if the problem is lack of time to water, a bale may make it worse. If accessibility is the main goal, compare bale height and stability with a raised bed at a comfortable working height. The best choice is the one you can reach, water, support, and maintain through the hottest part of your growing season.
Conclusion
To start straw bale gardening, buy a tightly bound straw bale with a known field history, set it in a sunny place near water, and leave the twine intact. Condition it with one extension-backed fertilizer schedule, keep it moist, and wait for the interior to cool to about 99°F or below before planting. Use transplants or a shallow layer of potting mix for seeds, choose compact crops, and anchor heavy supports into the ground rather than loose straw.
Then treat the bale as a temporary container: check moisture often, feed according to the product label and local guidance, and investigate symptoms before reaching for more fertilizer. If the recurring watering and yearly setup fit your needs, a bale can make a productive garden where digging or soil quality gets in the way. If those ongoing demands do not fit, a permanent raised bed or container may be the better long-term investment.



