What to Do in the Garden Before Fall
Wondering what to do in the garden before fall? Remove diseased or spent plants, leave healthy habitat, and protect soil for fall crops.
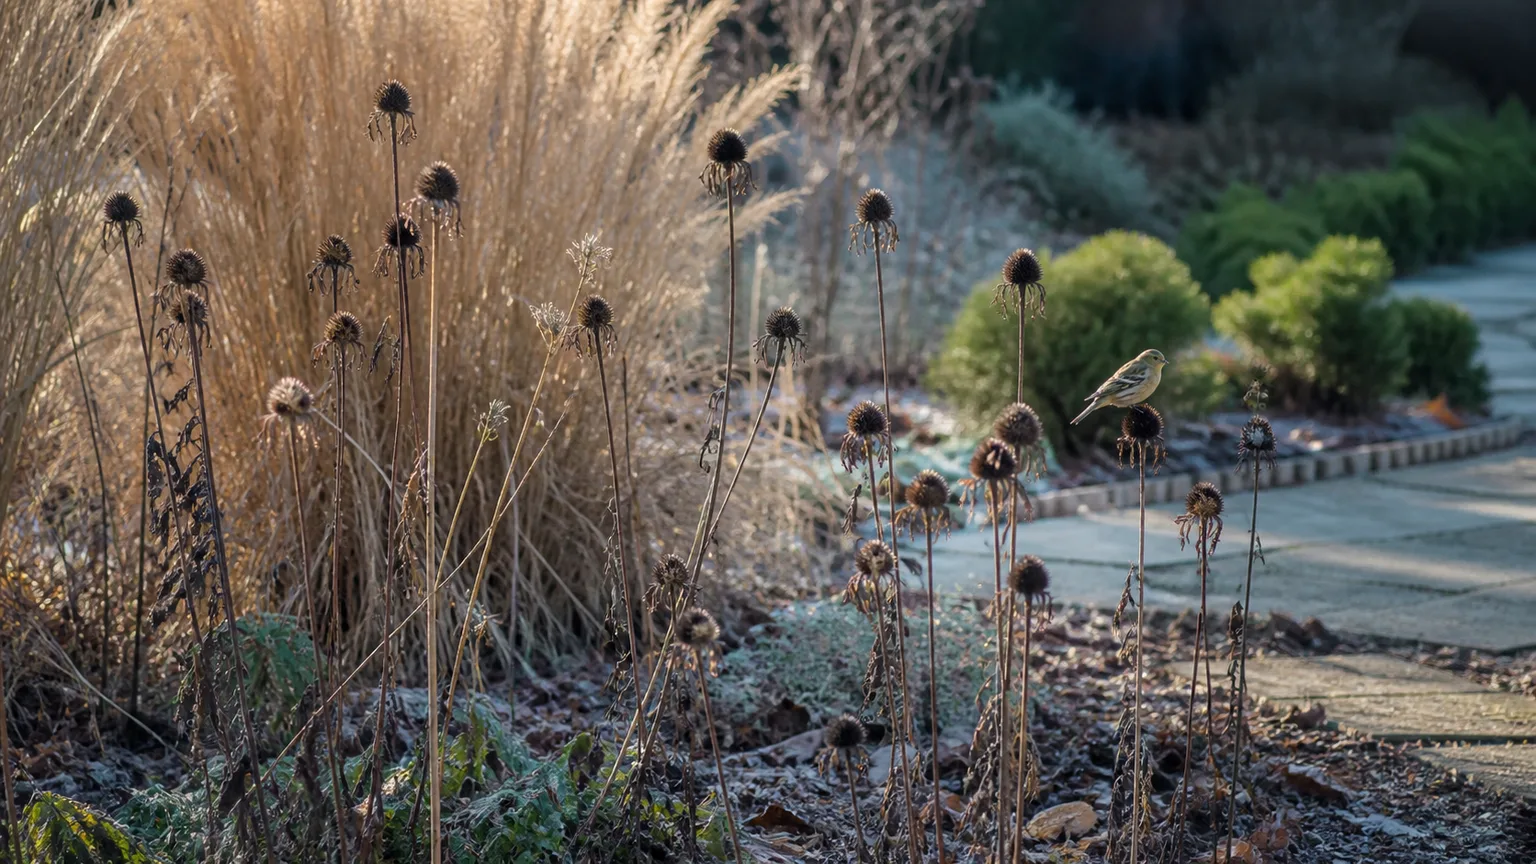
The most useful thing to do in the garden before fall is not to cut everything down. It is to remove the plants and debris that can carry disease, pests, unwanted seed, or excess moisture, then protect the soil and leave healthy habitat where it still serves a purpose.
That distinction matters because a late-summer garden can look exhausted while still producing food. Tomatoes may be ripening, herbs may be worth bringing indoors, and perennial seed heads may be feeding birds or sheltering insects. A blanket cleanup can waste those benefits; a hands-off approach can leave infected foliage and fallen fruit in place.
The practical sequence is simple: inspect, harvest, remove genuine risks, route clean material correctly, record what grew where, and cover exposed soil. The timing changes by climate and crop, but the decision process works whether your garden is a few containers, a raised bed, or a large mixed border.
The one fall task pros prioritize: selective cleanup
When gardeners say they clean up before fall, they often mean removing spent annuals and vegetable plants. That is the right starting point, but “spent” should mean more than brown. A plant is ready to leave when it has finished producing, is declining beyond recovery, is carrying a known pest or disease problem, or is occupying space needed for a fall crop.
University of Maryland Extension describes the sanitation reason clearly: old vegetable leaves, stems, and fallen fruit can harbor fungal spores that reinfect plants in later seasons. Its fall guidance recommends composting healthy plant parts, disposing of diseased material, adding compost after cleanup, and covering bare soil with compost, mulch, or a cover crop. University of Maryland Extension also cautions gardeners not to cut every perennial back simply for appearance.
Think of cleanup as risk reduction, not sterilization. Removing infected debris lowers the amount of inoculum and shelter immediately around a bed, but it does not erase pathogens from soil, stop a windborne spore, or keep every insect out. That honest framing leads to better choices: spend effort where it changes next season’s odds, and stop disturbing material that is doing useful work.
Use the five-minute remove-or-leave test
Before pulling a plant, ask five questions in order:
- Was it healthy? Look for unusual spotting, soft rot, cankers, powdery growth, sudden wilt, blackened stems, or a season-long pest problem.
- Will it reproduce where I do not want it? Mature weed seed, fallen fruit, and aggressive volunteers may justify removal even when the plant itself is healthy.
- Does its structure provide a benefit? Upright stems, seed heads, clean roots, and loose leaf litter can shelter wildlife or protect soil.
- Could it create a site problem? Remove material blocking paths, drains, irrigation, airflow, or fire-safe clearance.
- Do I have a safe destination? Healthy debris can often be composted; suspect debris should be contained and routed to trash or a municipal program according to local rules.
This test prevents “brown” from becoming a diagnosis. A dry coneflower stalk is not equivalent to a tomato vine that collapsed with a bacterial disease. A clean leaf layer in a perennial border is not equivalent to a pile of mummified fruit under diseased squash.
Remove first: disease, serious pests, and unwanted seed
Remove disease-affected material as soon as you recognize it; do not wait for the first frost. In vegetable beds, prioritize leaves and stems that show recurring spots, blight, mildew, cankers, mushy tissue, or unexplained collapse. Collect fallen fruit and leaves from directly beneath the plant too, because the material on the ground can be part of the problem.
Plants with a documented pest reservoir also move to the removal side of the test. Examples include a vine covered in squash bug eggs, fruit containing larvae, a brassica stalk with concentrated pest damage, or a plant that hosted a pest you struggled with all season. Remove the plant, nearby affected debris, and any old fruit that can keep the life cycle going.
Seed is a separate concern. If you want lettuce, tomato, basil, or a flower to reseed, leave it in a designated place and let it mature there. If you do not want volunteers in a tight bed, cut seed heads or collect ripe seed before moving the plant. A few minutes of restraint now can save a spring of thinning.
Work with dry foliage when possible. Set a bag, tarp, or bin beside the plant, cut or lift material onto it, and avoid dragging a diseased vine through healthy rows. Brush soil and plant fragments from pruners, stakes, cages, and shoes before moving from a problem bed to a clean one.
Leave longer: healthy stems, roots, and seed heads
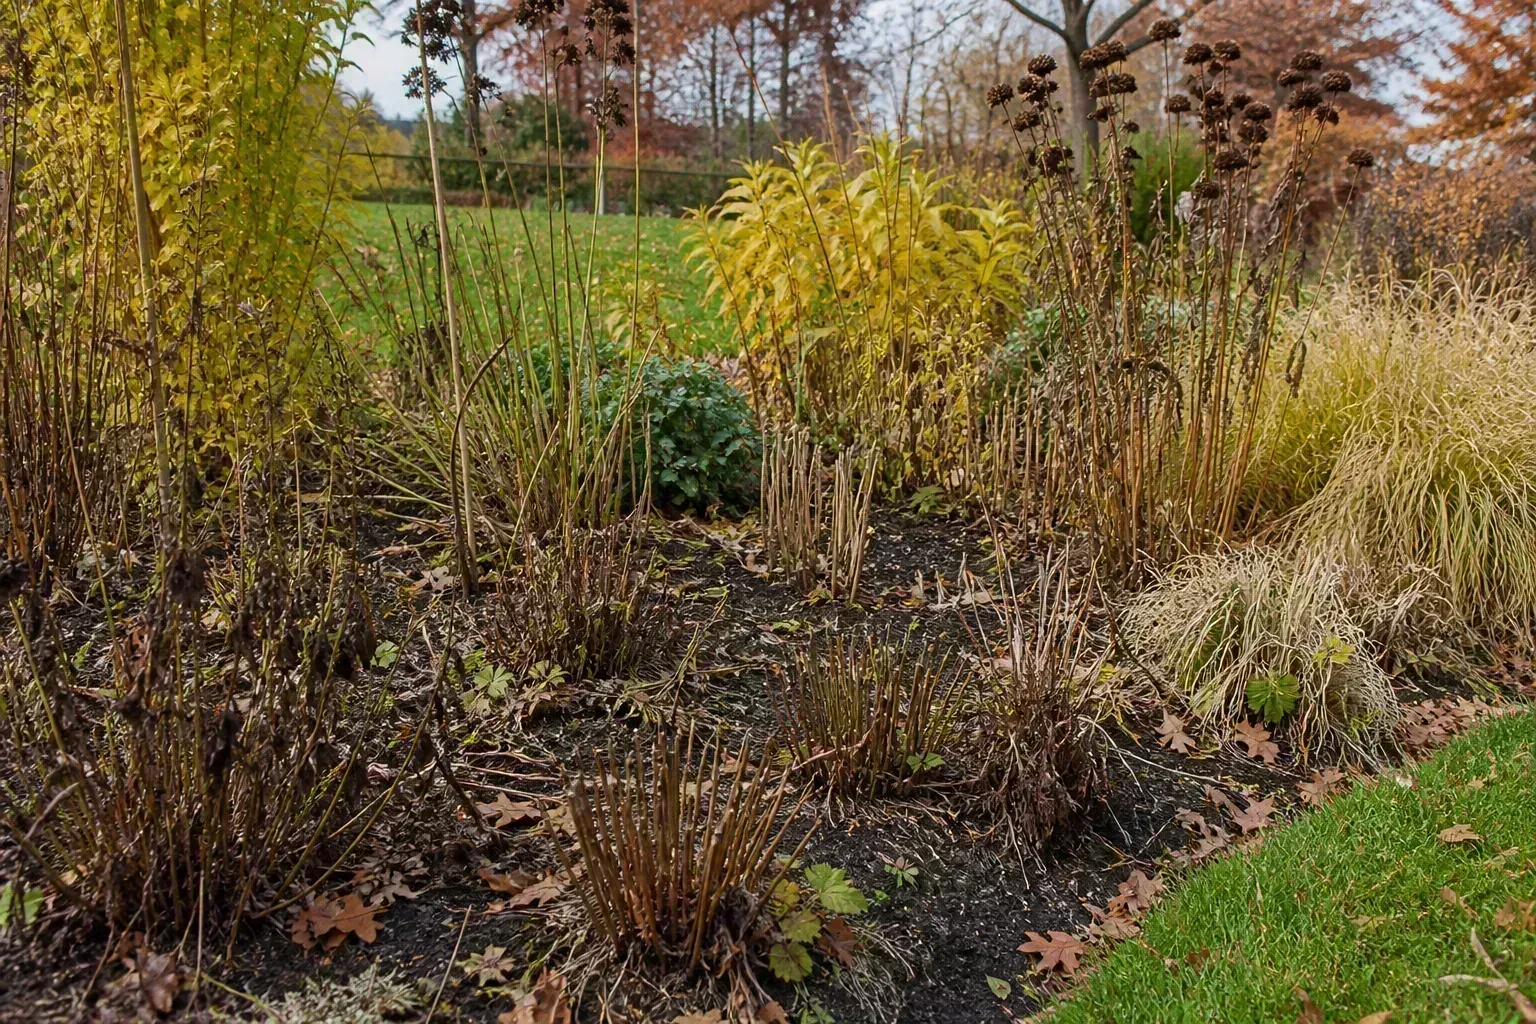
Healthy dead growth is not automatically a chore. Penn State Extension’s fall cleanup guidance explains that leaf litter, seed heads, and standing flower stems provide shelter and food for insects, birds, and other wildlife. It recommends a more selective approach: remove diseased plants, but leave many healthy perennial stems through winter when they are not hazardous or obstructive. Penn State Extension also suggests moving leaves into beds or quiet corners instead of treating every fallen leaf as trash.
Good candidates to leave include clean coneflowers, asters, goldenrods, ornamental grasses, sunflowers, bee balm, and other sturdy perennials with useful seed heads or hollow stems. Leave them in clusters rather than scattering a few lonely stalks across a completely bare bed. Clusters provide more shelter and often look intentional.
Healthy annual roots can sometimes stay in the soil after the tops are cut. Fine roots decay in place and leave channels behind, and avoiding needless digging preserves soil structure. Pull the whole plant when you need to inspect a suspicious crown, remove a perennial weed, clear a seedbed for direct sowing, or prevent an infected root system from remaining in the bed.
Leaves can also stay, but place matters. Keep a loose layer in ornamental beds and beneath shrubs where it will not smother crowns. Move leaves off lawns if they form a mat, and keep drains, paths, and evergreen rosettes clear. If habitat is a priority, leave some whole leaves in a sheltered corner instead of shredding every bit.
Different beds need different cleanup rules
Divide the property into production beds, ornamental borders, habitat zones, paths, and defensible space. Each area has a different job.
In a vegetable bed, sanitation and crop rotation carry more weight because plants are densely spaced, watered regularly, and often repeated by family. Clear diseased plants and fallen fruit promptly, and do not let an old crop dictate where the same family goes next year.
In an ornamental border, preserve clean structure. Leave seed heads and stems that feed birds or offer overwintering shelter, but cut back anything diseased, collapsed onto crowns, or likely to block spring growth. Some plants, including peonies, irises, and lilies, are commonly cut back once their foliage has finished, while other perennials benefit from standing growth.
In a habitat zone, keep leaf litter and standing stems unless they create a safety, drainage, or disease problem. Penn State’s guidance notes that all-or-nothing tidiness can remove overwintering habitat, so a loose leaf pile or less-manicured edge can be a deliberate garden feature rather than neglect.
Around paths, drains, buildings, and fire-prone areas, be stricter. Remove brittle stems that catch clothing, leaves that clog drainage, and dry material that conflicts with local fire-safety recommendations. A wildlife-friendly garden still needs safe access and functioning water flow.
Clear summer vegetable beds in the right order
Cleaning a vegetable bed works best as a sequence, not one dramatic pull-out day. Harvest first, inspect second, remove third, and protect the soil last. If you reverse that order, you may bury diseased residue, cover volunteer weeds, or miss a crop that could keep producing in cooler weather.
Harvest what is still worth keeping
Do one final harvest before deciding that a bed is finished. Pick tomatoes as they begin to color if pests or cool nights threaten them, bring in tender herbs before a cold snap, and collect mature beans, squash, or peppers. The Piedmont Master Gardeners describe the decision to stop harvesting as a judgment based on plant condition, pest pressure, and what you need the space to do next—not on the calendar alone. Piedmont Master Gardeners also emphasizes that earlier fall planting gives cool-season crops more time to grow before shorter days slow them down.
Do not keep a failing plant just because it is technically alive. If foliage is mostly diseased, fruit is rotting, or the plant is no longer making useful growth, its remaining value may be lower than the sanitation and space benefits of removal. Conversely, a healthy tomato with a few green fruits may be worth leaving until a forecasted freeze, especially if the bed is not needed immediately.
Save seed only from plants that are healthy, mature, and true to the variety you want to repeat. Label the variety and year, and remember that seed saved from a hybrid may not produce the same plant next season. If the parent plant had a serious disease, skip its seed and do not trade it as though it were clean.
Pull roots only when they solve a problem
There is no universal need to yank every vegetable root from the soil. Cut clean annuals at the soil line when the root mass will not interfere with the next planting. This leaves fine roots to break down and reduces the amount of soil you disturb.
Pull more completely when the plant had root rot, a crown disease, a serious wilt, a nematode concern, or an aggressive root system. Lift suspicious roots gently so you do not shake contaminated soil through the bed. If you are not sure what caused a perennial to die, inspect the crown and roots; mushy tissue, foul odor, galls, or unusual discoloration merit a conservative disposal route and, for recurring problems, an extension diagnosis.
Do not bury thick, woody, or visibly diseased stems in a bed you plan to plant soon. Clean soft material can be chopped and used as a thin surface mulch, but woody pieces break down slowly. A thick layer of fresh material can turn slimy, shelter slugs, or temporarily compete for available nitrogen as it decomposes.
Record crop families before you cover soil
Before compost or mulch hides the bed, take a phone photo and write down what grew there. Record the crop family, variety, approximate planting dates, pest or disease issues, and whether production was worth the space. This small record makes next year’s rotation more deliberate.
Rotate by family, not by the common name on the seed packet. Tomatoes, peppers, eggplants, and potatoes are all nightshades; moving from tomato to pepper in the same bed does not create a meaningful break. A bed that carried a serious disease may need several seasons without its host family, depending on the pathogen and your local extension guidance.
Rotation is not a cure by itself. Windborne spores, mobile insects, weeds, contaminated tools, and pathogens with broad host ranges can defeat a neat schedule. Combine rotation with resistant varieties, healthy transplants, sensible spacing, careful watering, and sanitation. Even in a one-bed garden, skipping one affected crop family or moving it into a container is an improvement over repeating the same problem blindly.
Compost clean material; isolate risky material
The question is not whether a plant is organic. Everything in the garden is organic material eventually. The question is whether the material is clean enough for your compost process and whether the finished compost will return to the same beds without increasing a problem.
What can go in a home compost pile
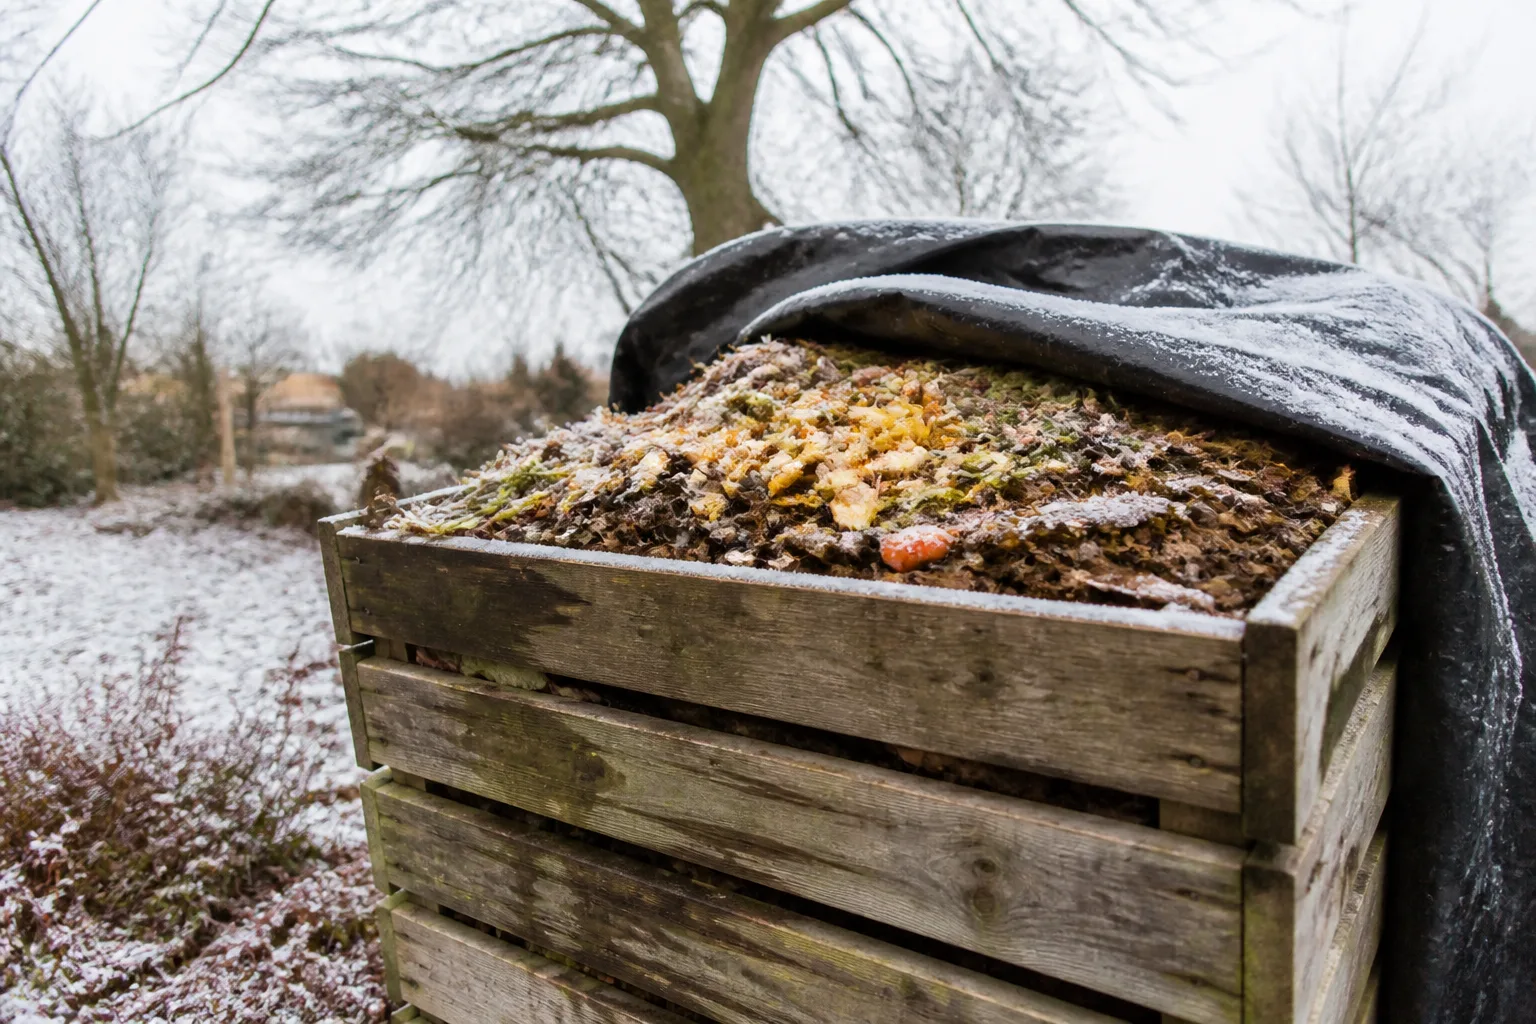
Healthy, seed-free leaves, soft stems, spent annuals, weeds pulled before they set seed, and vegetable trimmings are useful compost ingredients. Mix nitrogen-rich green material with carbon-rich leaves, straw, or dry stems, keep the pile appropriately moist, and turn or aerate it so decomposition can proceed rather than becoming a wet, airless heap.
Clean leaves can also become leaf mold or a loose surface mulch. Fine Gardening’s fall cleanup advice describes piling leaves separately or spreading them over a harvested bed so they break down and improve the soil. Fine Gardening is especially useful here because it treats fall debris as a resource while still separating diseased material from the compost stream.
Finished compost is a soil amendment, not a substitute for a soil test. If a bed has a known nutrient imbalance or you are applying lime or another amendment, test first and follow a local recommendation. Adding more of something simply because summer crops were heavy feeders can create a different problem.
What should not be composted at home
Do not put visibly diseased foliage, mummified fruit, plants with a heavy infestation, mature weed seed, invasive fragments, or material from a regulated pest into a casual backyard pile. A well-managed commercial composting facility may use a hotter, more monitored process and have rules for accepting material, but a home pile often has cool outer edges and uneven decomposition.
Bag suspect debris before carrying it across the garden. Use the trash or a municipal green-waste program if that is the route your local authority recommends, and check local rules for invasive plants or diseased material. Do not burn garden waste unless local fire authorities explicitly permit it; smoke and fire risk are poor substitutes for sanitation.
Clean tools and reusable supports after working in a problem bed. Scrub visible soil from pruners, trowels, cages, stakes, and pots first; dirt can shield pathogens from a disinfectant. Then follow the label for any disinfectant you use, respect contact time, rinse metal when the product requires it, dry tools, and lightly oil moving parts before storage.
Protect the bare bed for winter
Bare soil is not a neutral finish. Rain can compact its surface, wind can move fine particles, and late-season weeds can establish before spring. After cleanup, choose the lightest protection that fits your next use of the bed.
Compost and mulch for short-term protection
Add finished compost when the bed is clean and you want a simple soil-building layer. University of Maryland Extension suggests topping vegetable beds with roughly an inch or two of compost in fall; that layer feeds soil life, adds organic matter, and helps block winter annual weeds. The exact amount depends on existing soil, drainage, and whether you are planting immediately, so treat the range as a starting point rather than a prescription.
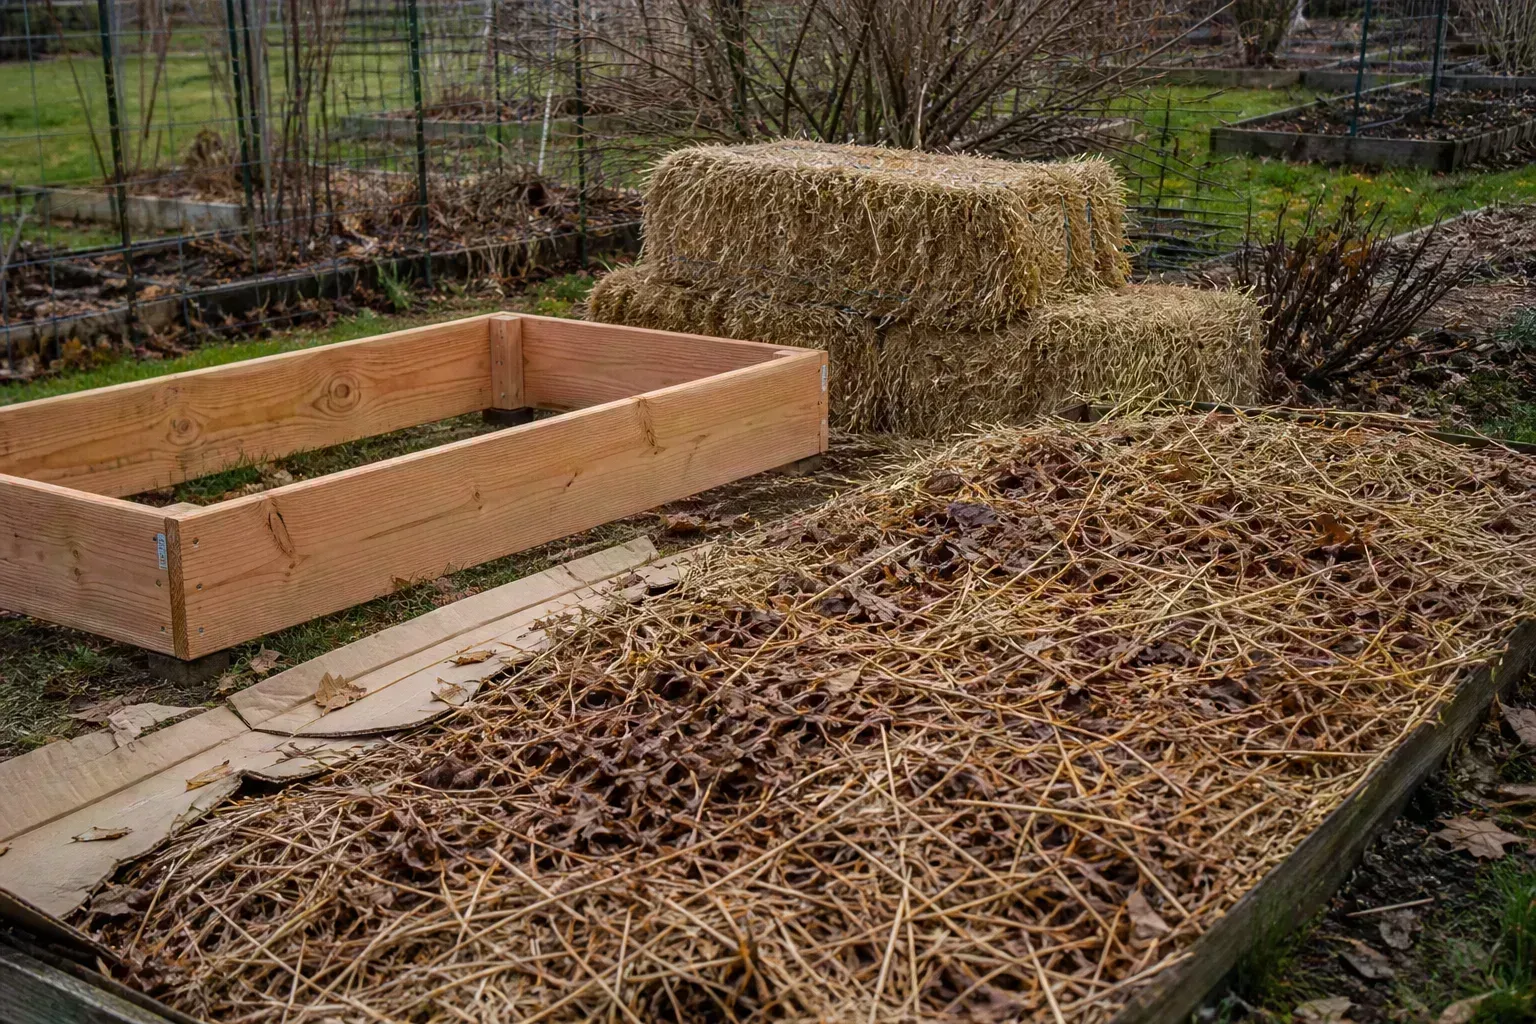
Use clean chopped leaves, leaf mold, straw, or aged wood chips as mulch where you need longer-lasting surface protection. Keep mulch away from crowns and stems, leave room around seedlings, and avoid packing wet material into a thick mat. A loose layer protects soil; a sealed, soggy layer can encourage rot and create shelter for slugs.
Match the material to the bed. Compost is convenient when you will plant again soon. Coarse mulch lasts longer but may need to be moved aside for seed sowing. Leaves are excellent for soil protection but can blow into paths. Straw is useful around established crops, but only if it is clean and not carrying mature seed.
Cover crops for longer soil protection
Cover crops make sense when a bed will stay unused long enough for plants to establish and when you have a plan for terminating them before the next crop. Maryland Extension notes that they block weeds, slow erosion, and feed soil as roots and foliage break down. Piedmont Master Gardeners describe winter-killed choices such as oats, field peas, and forage radish, alongside winter-hardy choices such as rye, wheat, hairy vetch, Austrian winter peas, and crimson clover.
The choice has consequences. A winter-killed cover is simpler in a cold climate because it dies after hard freezes and leaves residue to manage. A winter-hardy cover can protect soil and add more spring growth, but it must be cut or otherwise terminated at the right time. If you incorporate lush material, allow time for it to decompose before planting; Piedmont Master Gardeners recommend allowing two or three weeks after incorporation in their regional guidance.
Do not sow a cover crop over a diseased bed and assume the problem has vanished. Remove infected crop residue first, consider rotation, and choose a cover that does not share the same disease or pest concerns. Also do not plant a cover crop so late that it never establishes; a thin stand may provide less protection than a well-placed layer of clean mulch.
If you have a small bed, cover only the portion that will truly rest. A cover crop is a living crop with seed, water, and termination needs, not a decorative green blanket. When you cannot give it that follow-up, compost and mulch may be the more reliable choice.
Plant fall crops before the window closes
Fall is not the end of the garden; it is a change in the crop calendar. Kale, spinach, chard, collards, beets, radishes, turnips, lettuce, and other cool-season plants can fill space after summer crops, but they need enough growing time before daylight shortens and freezing weather arrives.
Work backward from first frost
Start with your area’s average first frost date, then count backward using the crop’s days to maturity. Add time for germination, transplant recovery, slower growth in shortening days, and a week or two of weather uncertainty. A packet’s days to maturity are not a promise; they are a planning estimate under suitable conditions.
Plant earlier in warmer or higher-light regions and later in cooler regions only when the crop’s maturity window still fits. The Piedmont Master Gardeners give a useful local example: spinach, lettuce, mustard, and radishes can be planted later than slower crops in their Zone 7b guidance, while greens that need more time should go in earlier. The principle travels better than the calendar date: use your own frost date and a crop’s pace.
Prepare the bed before sowing. Remove a finished crop, add only the amendments a soil test or crop plan supports, smooth the surface, and water the seedbed consistently. If pest pressure remains high, row cover can protect new plantings and extend harvest, but it can also shelter pests already living on a mature crop. Inspect first, then cover.
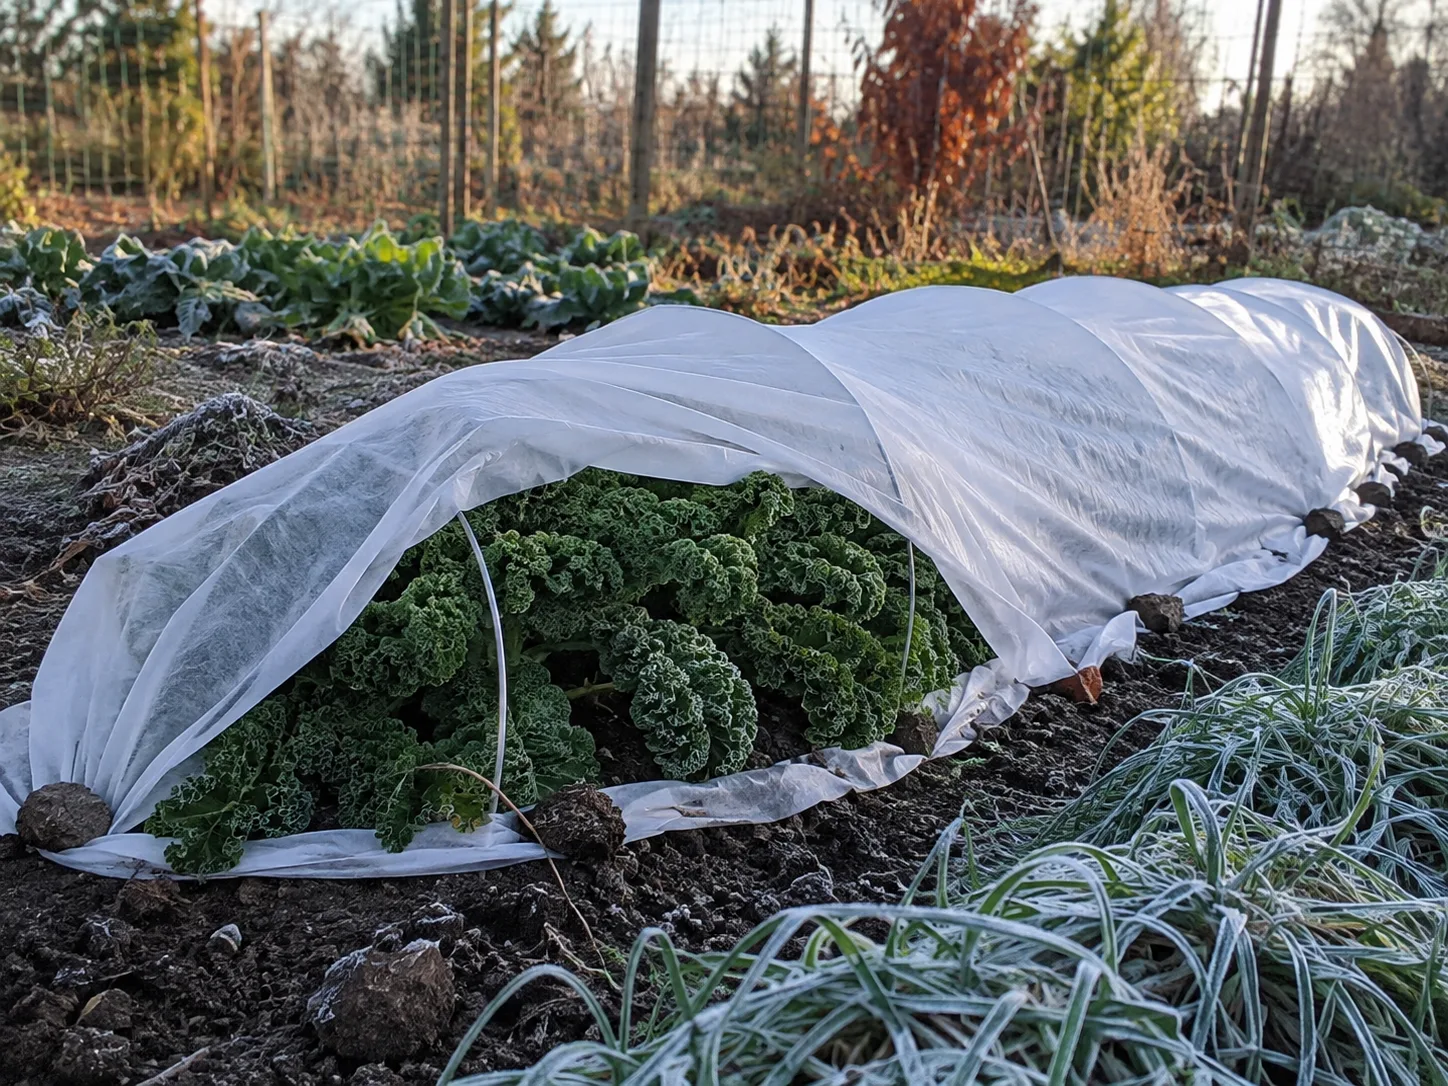
Fall watering deserves the same nuance. Water newly sown seeds and transplants when the soil is dry enough to need it, and water established plants deeply during an extended dry spell while they are still growing. Before a hard freeze, check the soil and plant condition rather than watering by superstition; waterlogged soil creates its own problems, and frozen ground cannot take up water normally. In warm-winter regions, fall may be an active growing season rather than a shutdown, so keep observing the plants instead of switching to a winter schedule by date.
Handle water, tools, and garden structures
Once beds are sorted, walk the infrastructure. Clean and dry stakes, tomato cages, trellises, pots, and seed trays before storing them. Remove plant residue from drip lines and check hoses, timers, and fittings; in freezing climates, drain equipment that could split. Repair broken supports now, while the layout and crop history are still familiar.
Keep paths and drains clear. A clean bed that sheds water into a blocked drain is not prepared for winter, and a pile of leaves against a foundation or low-lying gate can become a moisture problem. Move loose branches into a clean brush pile only if it will not attract pests near structures; otherwise chip or dispose of them according to local guidance.
Finish by photographing each bed and noting what you removed, what you left, what you planted, and what failed. The record turns fall cleanup into a feedback loop. Next year, you can compare varieties, shift crop families, sow fall crops earlier, or stop repeating a task that did not solve the problem.
Conclusion
The best answer to “what should I do in the garden before fall?” is selective cleanup followed by soil protection. Remove diseased, pest-ridden, seedy, hazardous, or truly finished material. Leave healthy stems, seed heads, roots, and leaf litter where they support wildlife or protect the ground. Compost only what your home process can safely handle, and send risky debris to the appropriate disposal route.
Then give each open bed a next job: compost and mulch it, sow a cover crop, or plant a fall vegetable using first frost as your deadline. That approach is tidier where tidiness matters, wilder where habitat matters, and far more useful than cutting every plant down on the same day.



