How to Get Rid of Brown Spots on Leaves
Learn how to get rid of brown spots on leaves by reading the pattern, separating disease from stress, and fixing watering, airflow, light, and sanitation.
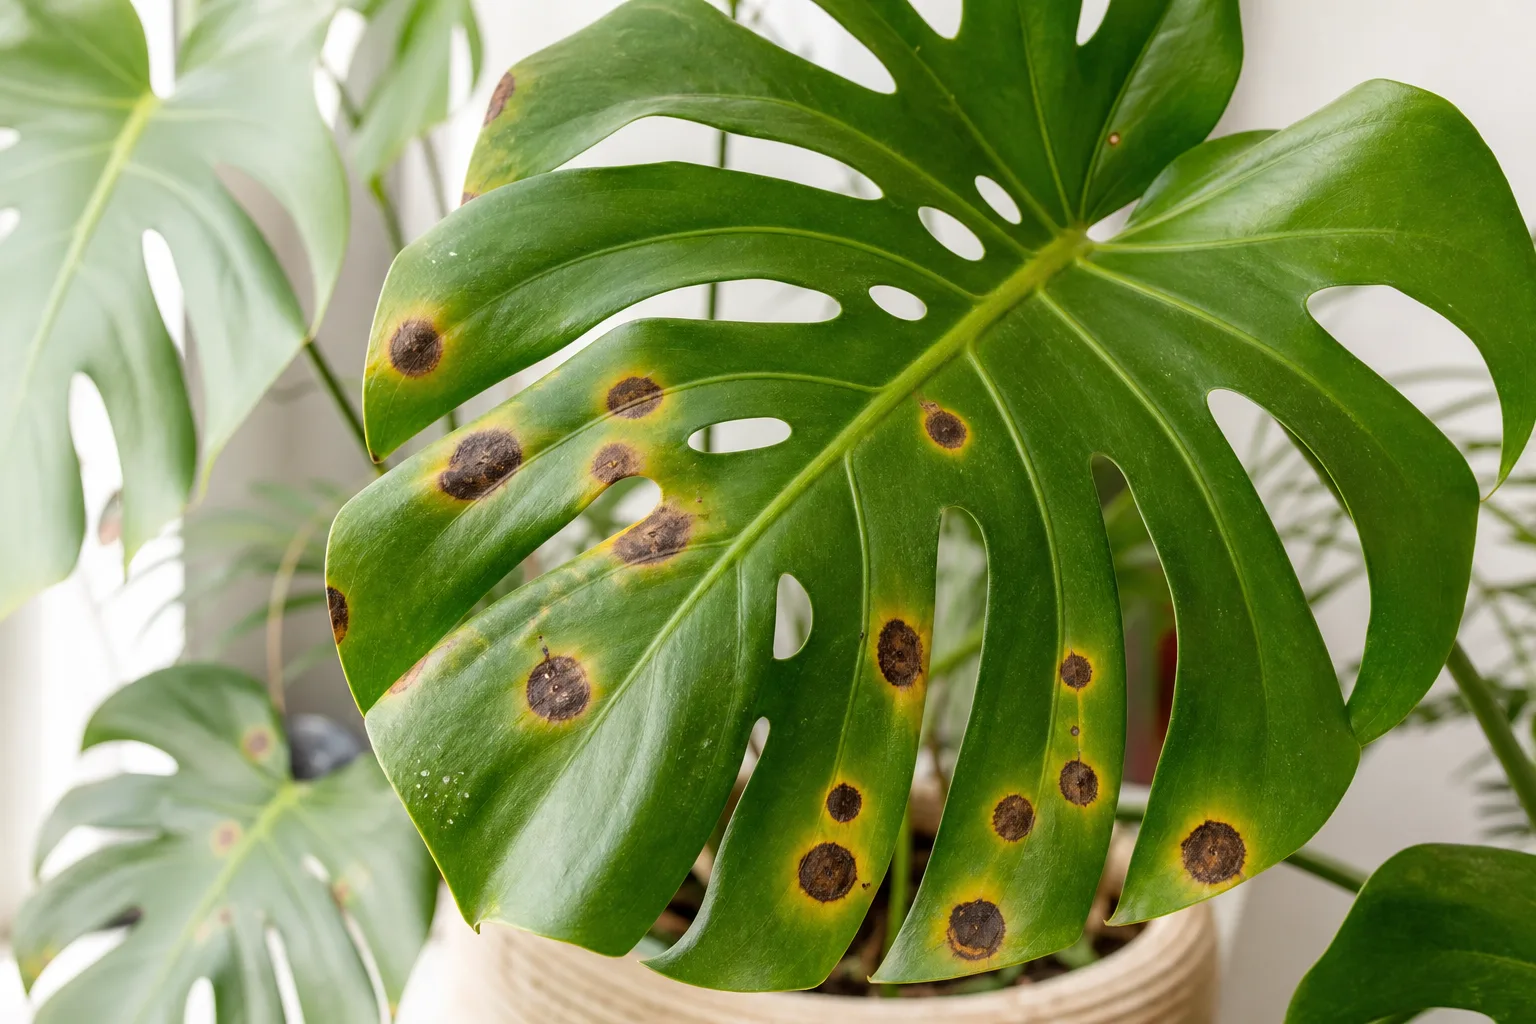
Brown spots are a symptom, not a diagnosis. A plant can develop them from fungal or bacterial leaf spot, waterlogged roots, edema, sunscald, a cold-water splash, fertilizer salts, pests, or one abrupt environmental change. The right first action depends on whether the mark is spreading, wet-looking, raised, crispy, or tied to a clear event.
Start by inspecting the whole plant rather than treating the most obvious leaf. A few stable brown scars on an otherwise healthy plant call for different care than new lesions appearing on several leaves each day. The goal is not to make old dead tissue green again; it is to stop new damage and support clean growth.
First, decide whether the spots are spreading
Look at the plant in bright, indirect light and compare old leaves with the newest leaves. Note the date, which side of the plant is affected, whether the spots are enlarging, and what changed recently: watering, misting, repotting, fertilizer, a move outdoors, a cold night, a hot window, or a new neighboring plant.
Spread is one of the most useful dividing lines. Penn State Extension’s plant-diagnosis framework distinguishes living causes, which can reproduce and move through a plant or between plants, from nonliving causes that tend to remain tied to the original exposure. It also recommends asking when the problem appeared, whether it was sudden or gradual, how much of the plant is affected, and whether the pattern is uniform or random. (Penn State Extension)
| What you notice | More likely | First move |
|---|---|---|
| New circular spots keep appearing, especially after wet foliage | Fungal leaf spot | Isolate, keep leaves dry, remove the worst tissue, and monitor new growth |
| Greasy or water-soaked marks enlarge quickly or reach petioles and stems | Bacterial disease or soft rot | Isolate immediately, avoid splash, sanitize tools, and assess whether the plant is salvageable |
| Raised marks stay in the same places after a dry-to-wet swing | Edema | Correct watering and airflow; do not spray a cosmetic scar |
| Damage is crispy, bleached, or limited to the window-facing side | Sun, heat, cold, aerosol, or salt injury | Reconstruct the exposure and correct it before pruning heavily |
If several unrelated plants show the same damage in a uniform pattern, suspect a shared environmental cause such as a heater, cold draft, irrigation water, spray drift, or a lighting change. If one susceptible plant develops lesions that continue to spread while neighbors remain clean, disease becomes more plausible, though only a laboratory or diagnostic clinic can name the exact pathogen.
Brown spots by visual pattern
Color alone cannot identify a leaf problem. The edge, texture, position, speed of change, and relationship to veins are more useful than whether the spot looks “brown” or “black.” Use the patterns below to choose a category, then confirm it against the plant’s recent history.
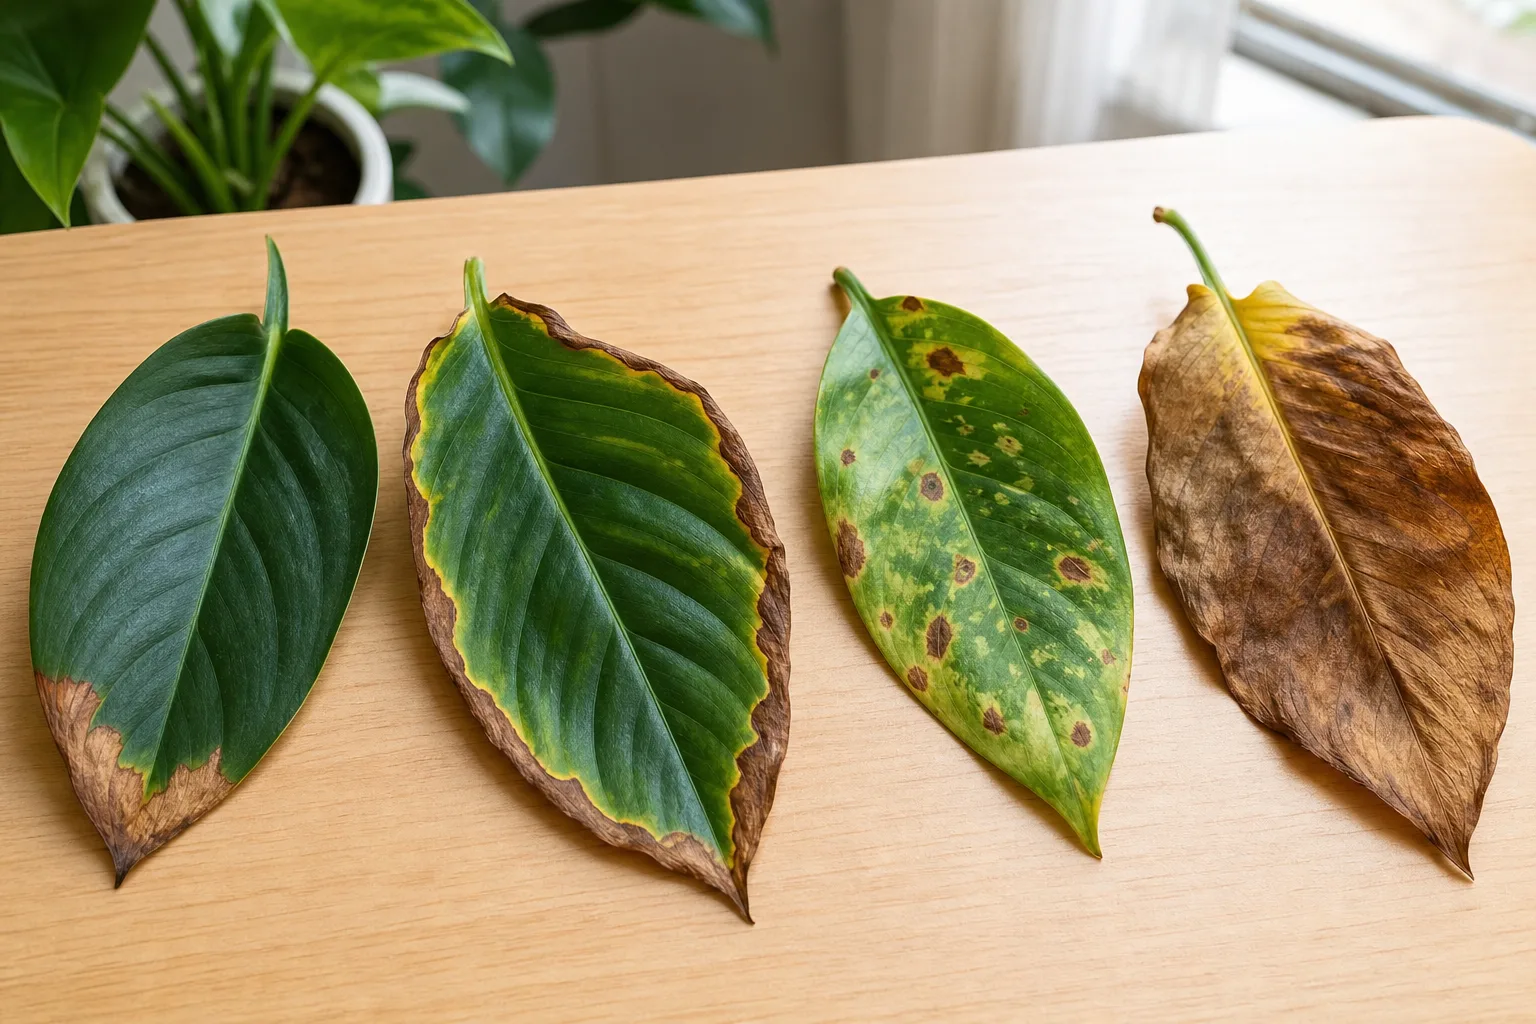
Circular or target-like spots with halos
Round tan, brown, reddish, or black lesions with a yellow or darker margin often fit fungal leaf spot. Some develop concentric rings, a dry papery center, or tiny dark fruiting bodies in the dead tissue. Spots may begin on lower or inner leaves, enlarge over time, and merge into irregular patches.
That pattern is a strong reason to stop misting and overhead watering, but it is not proof of one fungal species. The University of California Integrated Pest Management Program notes that houseplant fungal leaf spots can be roughly circular and range from tan to reddish brown or black; many of the fungi need hours of continuous leaf wetness to infect. (UC IPM)
Fungal spots do not usually disappear after the cause is corrected. A dry, firm lesion can remain as a scar while the plant grows normally. Watch the next leaves instead of cutting healthy foliage simply to make the plant look perfect.
Water-soaked, greasy, or angular lesions
Bacterial leaf spots often start as dark green, translucent, greasy, or water-soaked patches. They may be angular because veins restrict their spread, then turn tan, dark brown, or black with a yellow border. Affected tissue can enlarge and merge quickly when leaves stay wet.
The underside of a leaf can reveal the difference: bacterial lesions often look wet or oily there before the upper surface becomes obviously brown. Soft petioles, collapsing stems, a foul odor, or a lesion that travels from leaf into stem raises the risk of systemic bacterial disease rather than a contained leaf spot.
The University of Connecticut’s bacterial-leaf-spot guidance shows why wet plants are vulnerable: splashing water and work performed while foliage is wet can move bacteria through a crop. Its recommendations are crop-specific, but the general lesson applies broadly—reduce splash, remove early infected material, and follow the product label rather than borrowing a spray schedule from another plant. (UConn IPM)
Raised corky scars and shot holes
Small blisters or raised marks, especially on the underside of older leaves, point more toward edema, also spelled oedema, than infection. The blisters form when roots take up water faster than the leaves can release it. They can burst and harden into tan, rust-colored, corky scars; on thin leaves, the dead center may eventually fall out and leave a shot-hole appearance.
Edema often follows a recognizable sequence: the plant becomes very dry, then receives a heavy drink, or it sits in warm wet soil during cool, cloudy, humid weather. Low light, cool air, poor ventilation, and saturated mix make the imbalance more likely. Purdue Extension and Wisconsin Horticulture both describe edema as a physiological disorder that does not spread from leaf to leaf, although its scars can remain visible for the life of the leaf. (Purdue Extension) (Wisconsin Horticulture)
Do not reach for a fungicide when the marks are raised, corky, and stable. Let the mix drain, avoid another extreme dry-to-soggy cycle, improve gentle airflow, and adjust watering to the plant’s light and temperature. Existing scars are evidence of past cell damage, not an active infection that needs to be erased.
Crispy edges, bleached patches, or one-sided damage
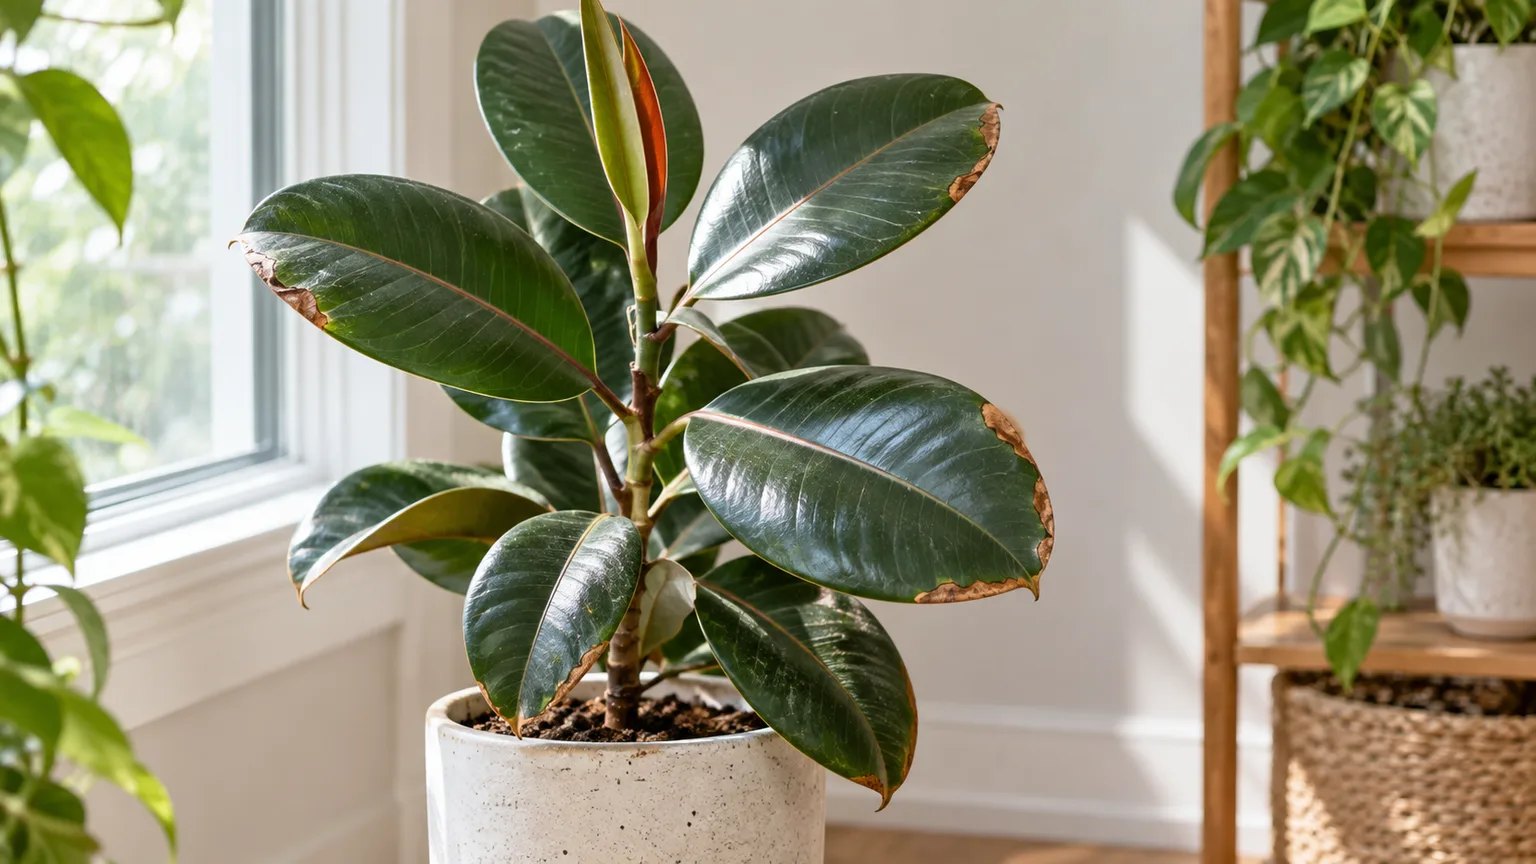
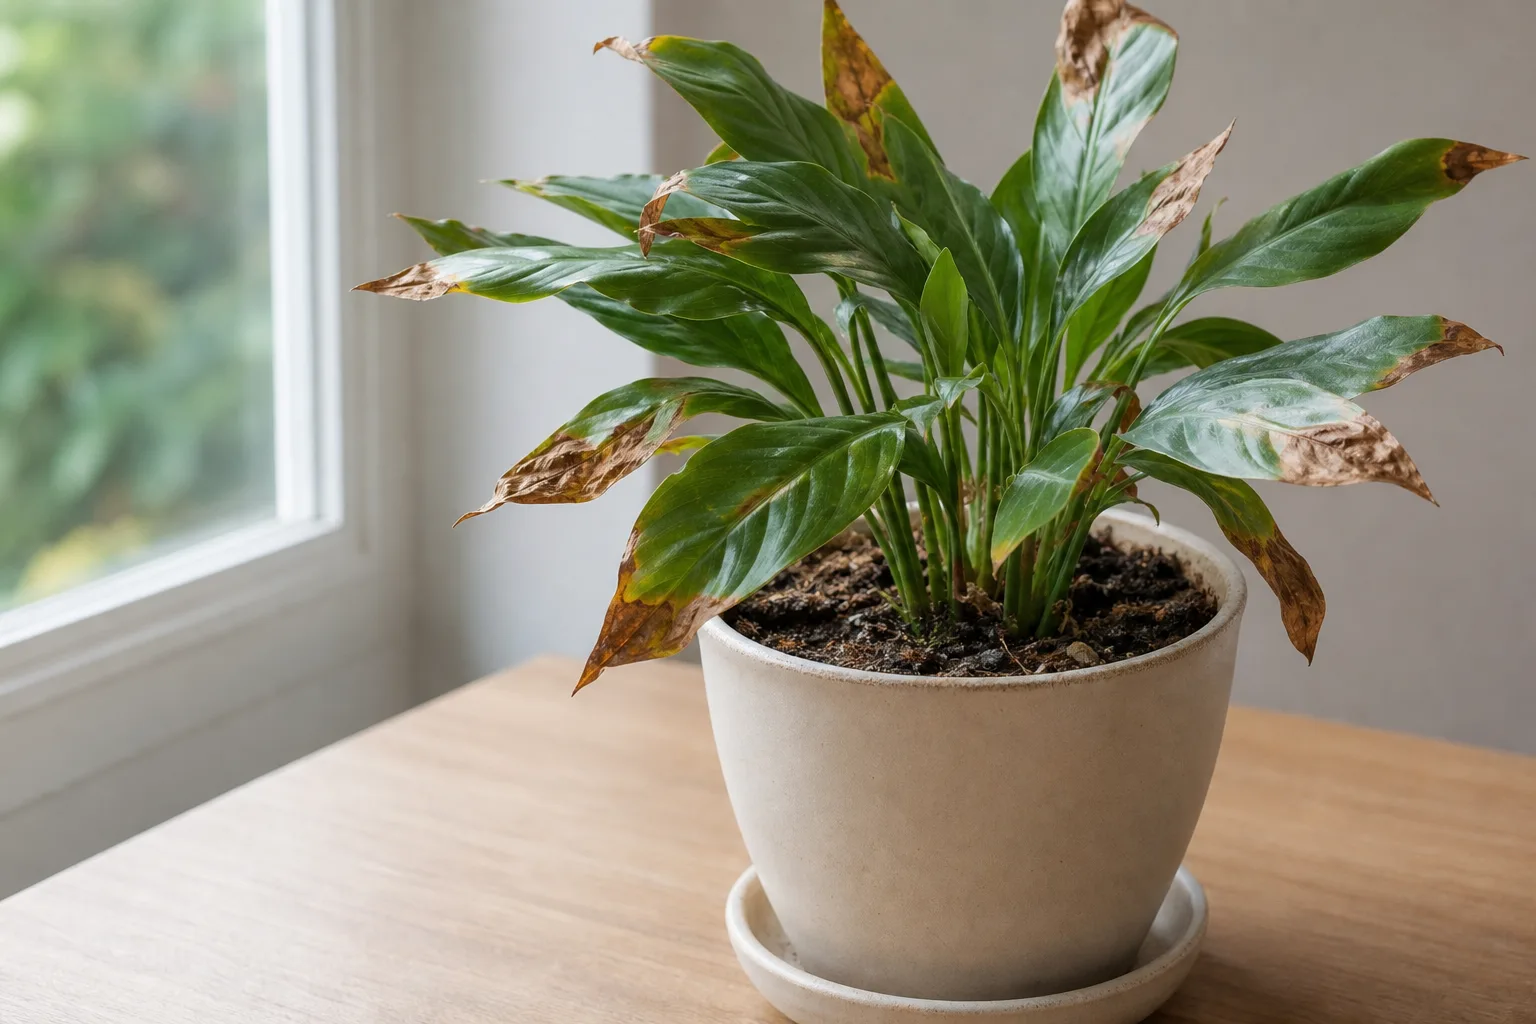
Browning that begins at tips and margins is more consistent with water stress, dry air, fertilizer salts, or root trouble than with classic leaf spot. A dry, crispy margin on several plants near a heating vent is a room problem; a large bleached patch on the window-facing side after a move is more consistent with sun injury. Browning in the middle of a leaf, especially with persistently wet soil, deserves a closer root and moisture check.
Cold can create a different pattern. A tropical plant pressed against cold glass or exposed to a draft may develop limp, translucent, water-soaked tissue that darkens over the next day or two. Cold-water splashes on sensitive foliage more often leave pale, white, or straw-colored rings rather than expanding dark lesions. The Royal Horticultural Society lists fungal leaf spot, cold-water splash, aerosol damage, excessive light, and edema as separate explanations for leaf spotting and gives different corrective actions for each. (RHS)
Fine pale stippling, bronze flecks, webbing, sticky honeydew, or visible insects point toward pests rather than a leaf-spot pathogen. Spider mite feeding, for example, produces many tiny light specks before leaves dry and fall; it does not usually create a few discrete brown circles. Check leaf undersides with a hand lens before treating a pest-like pattern as disease. (UC IPM)
What causes brown spots on leaves
Most cases fall into four cause buckets: infectious leaf spot, root or moisture imbalance, direct environmental injury, and pest or chemical damage. Two causes can overlap. A plant with damaged roots may be less able to replace water, while wet foliage and low airflow create a separate infection window, so correcting only one stressor may not stop the spots.
Fungal leaf spot
Fungi survive in infected leaves, fallen debris, potting mix, or nearby plant material and move when water splashes spores onto fresh foliage. Dense canopies, cool wet weather, crowded indoor shelves, and leaves that stay damp overnight all lengthen the infection window. Outdoor trees and shrubs may show spots in spring or during prolonged wet periods, while many indoor cases are linked to a plant brought home with disease or kept unusually wet and stagnant.
The University of Minnesota Extension describes leaf-spot diseases across trees and shrubs as a broad group rather than one disease, which is why the host plant, local weather, and symptom pattern matter. Gardening Know How likewise emphasizes clean leaf litter, dry foliage, mature-plant spacing, and avoiding random fertilizer as the main controls for most home landscape cases; chemical treatment is reserved for situations where disease repeatedly weakens the plant and the exact pathogen can guide the choice. (University of Minnesota Extension) (Gardening Know How)
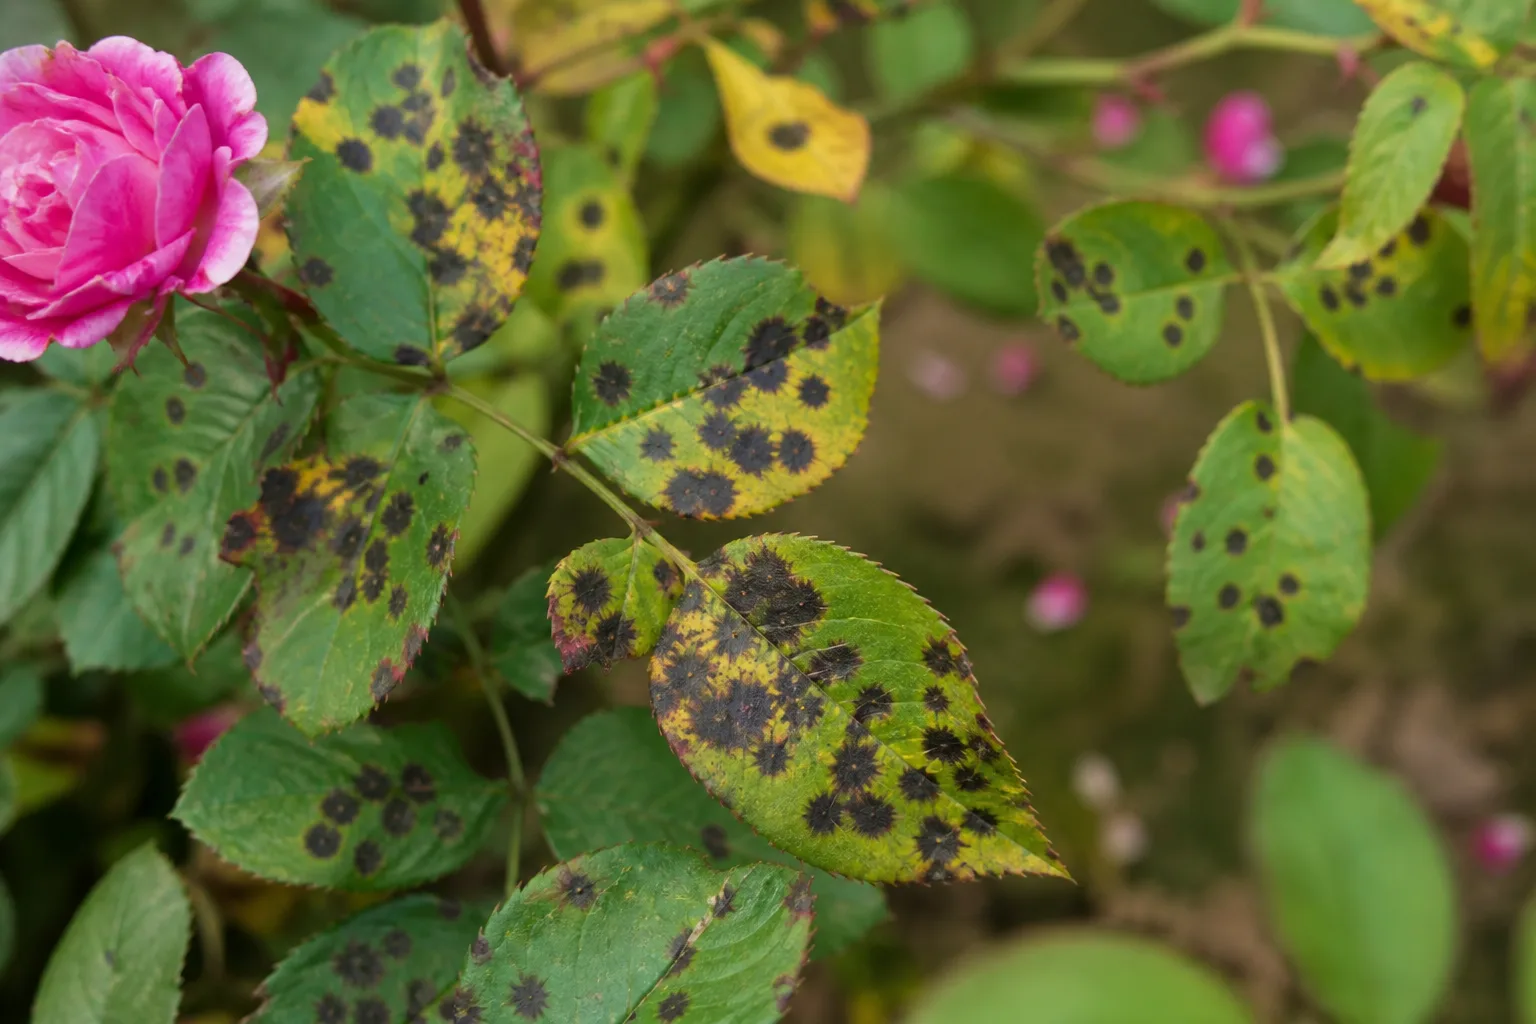
Septoria, anthracnose, rust, and many other named diseases can look similar at first. Do not identify them from a single photograph and then apply a product intended for another host. The useful home diagnosis is often “likely fungal leaf spot; dry, prune, sanitize, and watch new growth,” not a confident species name.
Bacterial leaf spot
Bacteria are favored by wet foliage, splash, crowding, contaminated tools, infected starts, and warm or humid conditions. The first spots may be small and water-soaked, but they can merge and move into petioles or stems. Outdoor vegetables and nursery plants may also carry bacteria into a garden before the gardener notices symptoms.
Localized bacterial spots can sometimes be contained by removing affected leaves and keeping the canopy dry. Systemic soft stem rot is a different problem: the UC IPM guidance describes soft, mushy, foul-smelling tissue and explains that sprays are not effective when bacteria are distributed through the plant; discarding the plant is often the safest management choice. (UC IPM)
Do not assume copper, sulfur, neem, or a homemade spray will cure every brown spot. Bactericides and fungicides have limited, label-specific uses, can injure sensitive leaves, and cannot reverse tissue that is already dead. If the plant is edible, follow the crop label, re-entry instructions, and preharvest interval rather than a houseplant recommendation.
Watering stress, root trouble, and edema
Overwatering does not mean “water was present once.” It means the root zone stays saturated or is watered again before the plant has used enough moisture. Compacted mix, a blocked drainage hole, a decorative pot with no inner drain pot, or a pot that is too large can keep roots short of oxygen. Roots may turn brown and soft, and the canopy can develop yellowing, limp growth, and brown patches even though the soil feels wet.
Underwatering creates a different pressure: roots and leaves cannot maintain hydration, so margins and tips dry first. Repeatedly swinging between bone-dry and saturated conditions can also trigger edema or split, damaged tissue. The cure is not a universal calendar; it is checking the root-zone moisture, plant demand, drainage, pot material, light, temperature, and recent weather before watering again.
If the soil is wet and the plant is wilting, inspect roots instead of adding more water. If roots are firm and the spots are stable, let the mix approach the plant’s normal watering threshold. If roots are soft or foul-smelling, repotting may be needed, but remove only dead roots and do not move a severely stressed plant into a much larger pot.
Sun, cold, salts, and chemical injury
A sudden move from shade to intense sun can scorch exposed tissue. Sunscald is usually one-sided, pale or tan at first, and associated with the direction of the strongest light. It will not spread through the plant like an infection, though continued exposure can create new damage.
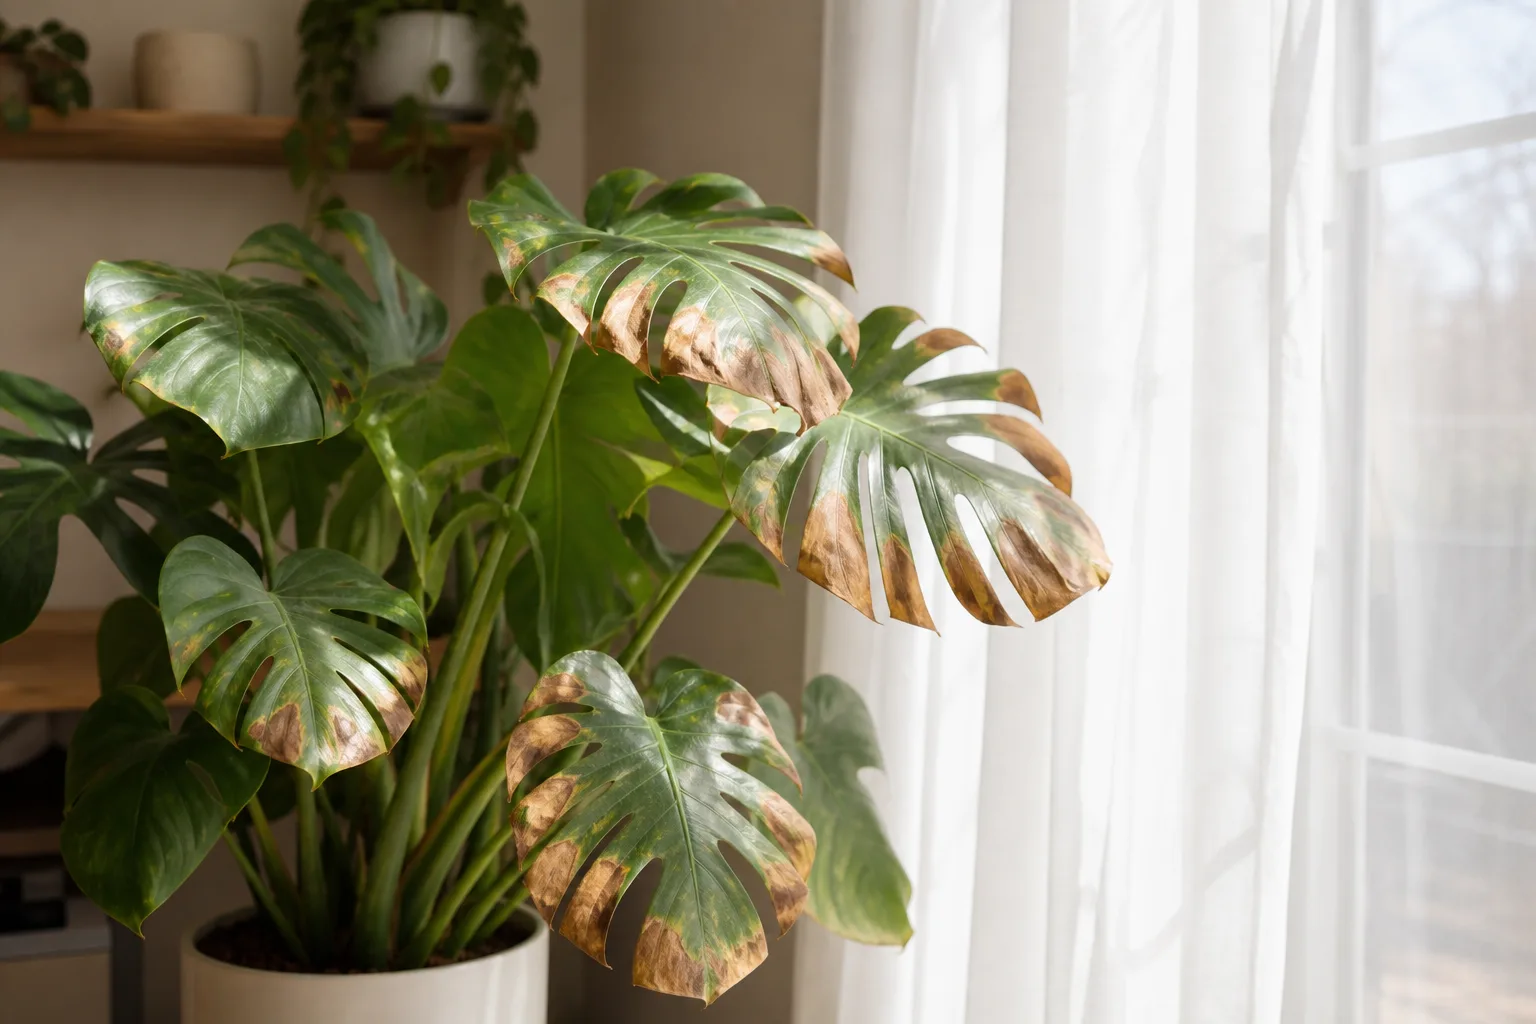
Fertilizer salts and hard-water minerals can accumulate in containers, especially when a plant is bottom-watered continuously or excess drainage is allowed to wick back into the pot. Look for white crust on the mix or pot rim, brown tips, and a pattern that does not match discrete lesions. Purdue Extension notes that occasional thorough top watering can flush salts from a container when the pot drains freely; discard the runoff instead of letting it sit under the pot. (Purdue Extension)
Aerosols, leaf-shine products, cleaning sprays, and cold water can also mark exposed foliage. Stop the suspected product, rinse only if the plant and conditions allow the leaves to dry quickly, and keep future applications away from direct sun and tender leaves. A stable mark after one exposure is not evidence that you need a fungicide.
How to get rid of brown spots step by step
Use this sequence whether the plant is in a pot, greenhouse, vegetable bed, or landscape. It separates immediate containment from longer-term care, so you do not repot, fertilize, prune, and spray all at once without knowing what changed.
1. Isolate and document the pattern
Move a symptomatic houseplant away from overlapping foliage while you investigate. Isolation reduces contact and splash spread if the cause is infectious and also makes it easier to see whether new spots form. For outdoor plants, mark the affected branch or photograph the canopy from the same angle every few days instead of disturbing a large tree unnecessarily.
Take one close photograph of the upper leaf, one of the underside, and one of the whole plant. Record the plant name, indoor or outdoor location, recent weather, watering interval, fertilizer, sprays, and whether the damage appeared on new or old growth. This short history is more useful to an extension office than a single cropped image.
2. Remove infected tissue and sanitize
Remove leaves that are heavily spotted, actively expanding, collapsing, or touching neighboring foliage. Keep mildly affected leaves if the plant needs the photosynthetic surface and the marks are stable; removing every leaf with one scar can weaken a plant and does not make edema or sun injury disappear.
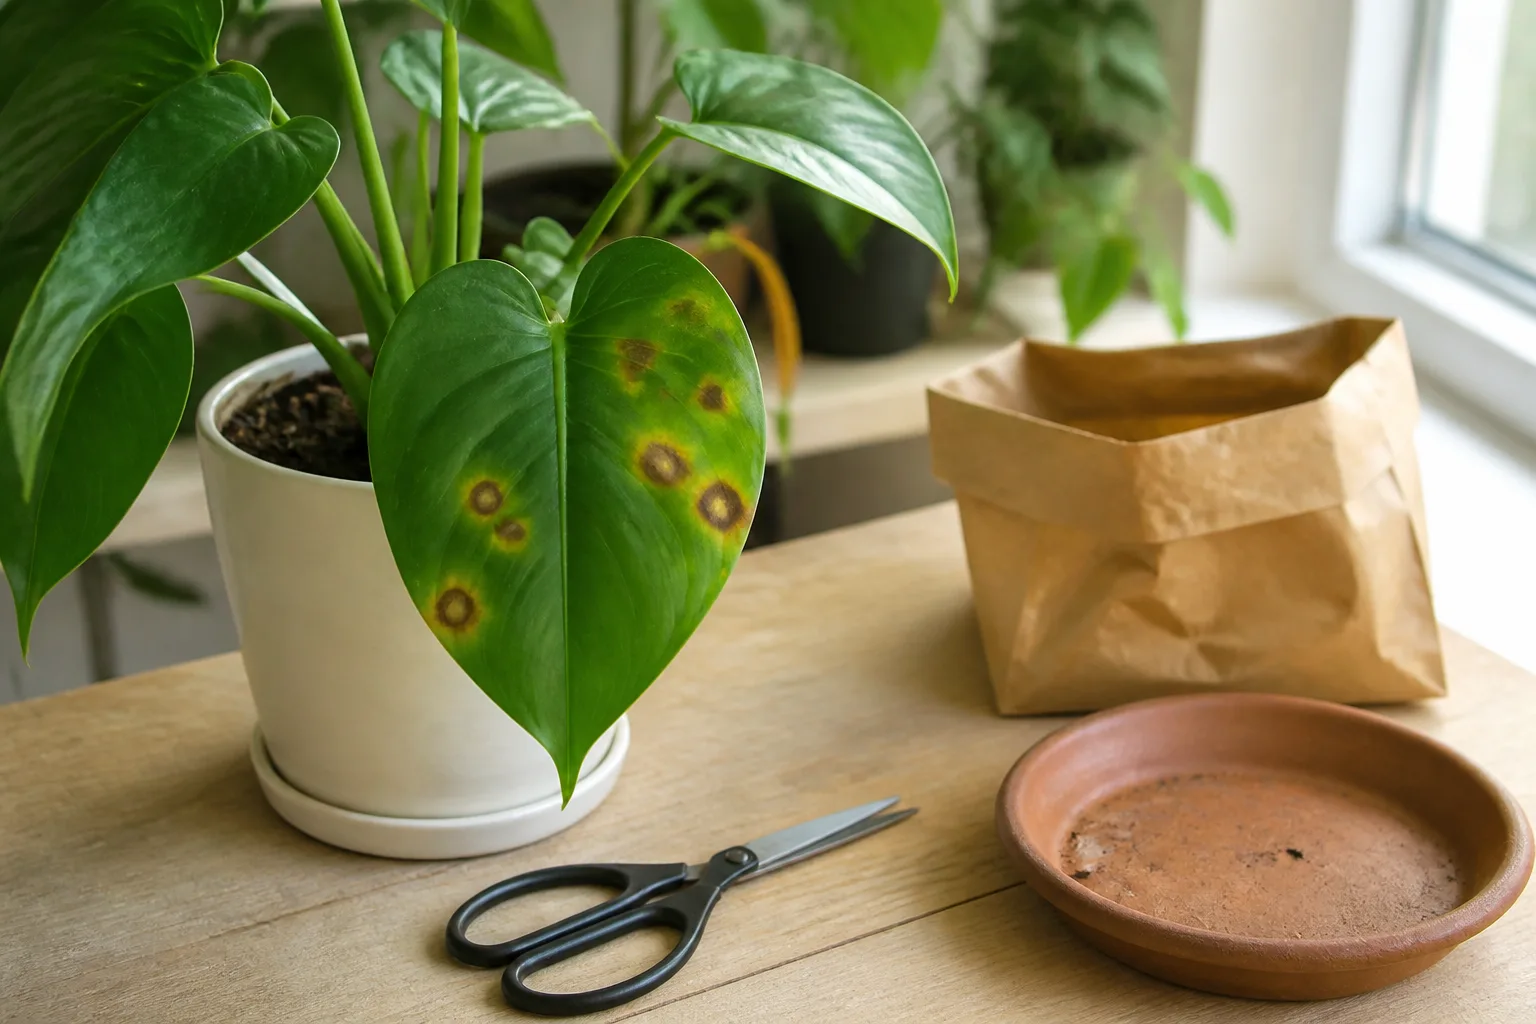
Use sharp, clean shears and make one decisive cut into firm tissue. Disinfect tools between plants and between cuts when bacterial or fungal disease is plausible. UC IPM specifically recommends disinfecting pruning tools in 70% alcohol after removing infected material; wash hands afterward, bag suspect debris, and remove fallen leaves from the soil surface. (UC IPM)
Do not compost leaves when you are unsure whether they carry an active disease, especially if the compost will return to the same bed. In the landscape, rake infected litter and remove badly affected twigs according to local disposal rules. Avoid severe pruning during heat, drought, or recovery from root damage unless the tissue is clearly dead or unsafe to leave.
3. Fix moisture, airflow, and light
Water the root zone rather than the leaves. For containers, water thoroughly when the plant’s normal moisture threshold is reached, then let the pot drain completely and empty the saucer. For beds, use drip or soaker irrigation where practical, water early enough for incidental moisture to dry, and avoid working through a wet canopy when bacterial spread is a concern.
Increase spacing between crowded pots and prune only enough outdoor growth to open the canopy without removing a large share of healthy leaves. A fan can provide gentle room circulation indoors, but blasting a plant with hot or cold air creates another stress. Outdoor trees and shrubs usually benefit more from planting with mature size in mind than from aggressive emergency pruning.
Correct the root cause you actually found. Let soggy mix drain and inspect roots if wilting continues; protect a sun-scorched plant from the strongest rays; move a tropical plant away from cold glass or drafts; and stop fertilizer until the plant is stable. A humidity tray can raise local humidity only when the pot sits above the waterline; it does not replace air circulation or fix wet roots.
4. Decide whether a product is warranted
Skip sprays when the spots are stable edema scars, old sunburn, cold-water marks, physical bruises, or salt injury. A product cannot restore dead tissue, and spraying a noninfectious problem can add leaf burn, residue, or another diagnostic distraction.
Consider a labeled fungicide only when the pattern strongly suggests fungal disease, new lesions continue after sanitation and environmental correction, the plant is valuable enough to justify treatment, and the product label specifically covers the plant and disease. The RHS recommends approved fungicides for fungal leaf disease but also separates fungal spots from cold-water and aerosol damage; Gardening Know How notes that chemical control is uncommon for most landscape leaf spots and may be too late to rescue already damaged leaves. (RHS) (Gardening Know How)
Read the entire label, including plant safety, protective equipment, ventilation, pollinator precautions, reapplication interval, and edible-crop restrictions. Do not combine products unless the label allows it, do not increase the concentration because spots look severe, and do not use an outdoor pesticide indoors. If lesions are bacterial or systemic, a fungicide is the wrong tool.
Prevent brown spots from returning
Prevention is a system, not a single spray. Start with healthy plants and inspect new purchases, cuttings, and plants that spent the summer outdoors before placing them among a collection. Quarantine a newcomer long enough to observe the leaves and soil, especially if it arrived in cool, wet packaging.
Keep foliage as dry as the plant’s culture allows. Water at soil level, water early when conditions permit, and avoid routine misting in a cool room with little airflow. Some tropical plants need humidity, but raising humidity while trapping wet air around leaves increases disease pressure; pair moisture with space, warmth appropriate to the species, and circulation.
Use clean pots, fresh or properly managed growing media, and containers with open drainage. Remove fallen leaves from pot surfaces and garden beds before they stay wet for days. In outdoor plantings, provide the mature spacing the tree or shrub will need, avoid overhead irrigation when leaf spot is active, and use mulch to moderate soil moisture without piling it against stems or trunks.
Scout on a schedule rather than waiting for a whole plant to decline. Once a week, inspect new leaves, lower foliage, leaf undersides, stems, and the soil line. For a vegetable crop, note the first affected plants and remove them early when the crop-specific extension guidance calls for it; for a prized tree or shrub, track whether the disease is cosmetic or is causing repeated defoliation and dieback.
Feed based on the plant’s growth and a soil or crop need, not as a reflex after spotting. Excess fertilizer can push soft new growth or add salts, while nutrient deficiency and root stress can also reduce resilience. Fix drainage and light first, then resume a diluted, plant-appropriate feeding routine once new growth is steady.
When to call an expert
Ask a local extension office, plant clinic, or qualified arborist when brown spots keep spreading after you have kept foliage dry and removed infected material, when several plants are affected, or when the plant is valuable, mature, edible, or near a production area. Outdoor tree and shrub problems often require host-specific identification because different pathogens can create similar circles, halos, shot holes, or premature leaf drop.
Seek help sooner when spots reach stems, tissue becomes soft or foul-smelling, the crown collapses, a plant wilts in wet soil, or new growth is affected first. These signs can indicate systemic bacterial disease, root rot, or another problem that pruning leaves alone will not solve. If the plant is poisonous or the spray decision could affect pets, children, pollinators, or food harvest, use the product label and local expert advice rather than an internet recipe.
For a useful diagnosis, submit fresh symptomatic tissue instead of a completely dried leaf, and include clear photos of the whole plant and lesion close-up. Add the plant’s exact name if known, location, growing medium, watering history, recent weather, fertilizer or pesticide applications, and the date the first spot appeared. Penn State Extension emphasizes that plant diagnosis takes observation and that a diagnostic clinic is the best way to verify a conclusion when the pattern remains uncertain. (Penn State Extension)
Conclusion
To get rid of brown spots on leaves, diagnose the pattern before you treat it. Isolate a plant that may be infectious, keep foliage dry, remove only actively spreading or heavily damaged tissue, disinfect tools, and correct the moisture, airflow, light, or exposure problem that created the mark.
Expect old spots to remain. A successful recovery looks like stopped expansion, firm stems and roots, and clean new leaves over the following weeks. If lesions stay wet-looking, spread into stems, return every season, or continue despite careful sanitation, stop guessing and ask an extension office, plant clinic, or arborist to identify the cause.