10 Tips for Watering Container Plants
Find out how often to water container plants, how to check below the surface, and when drainage, pot material, heat, or rain should change your routine.
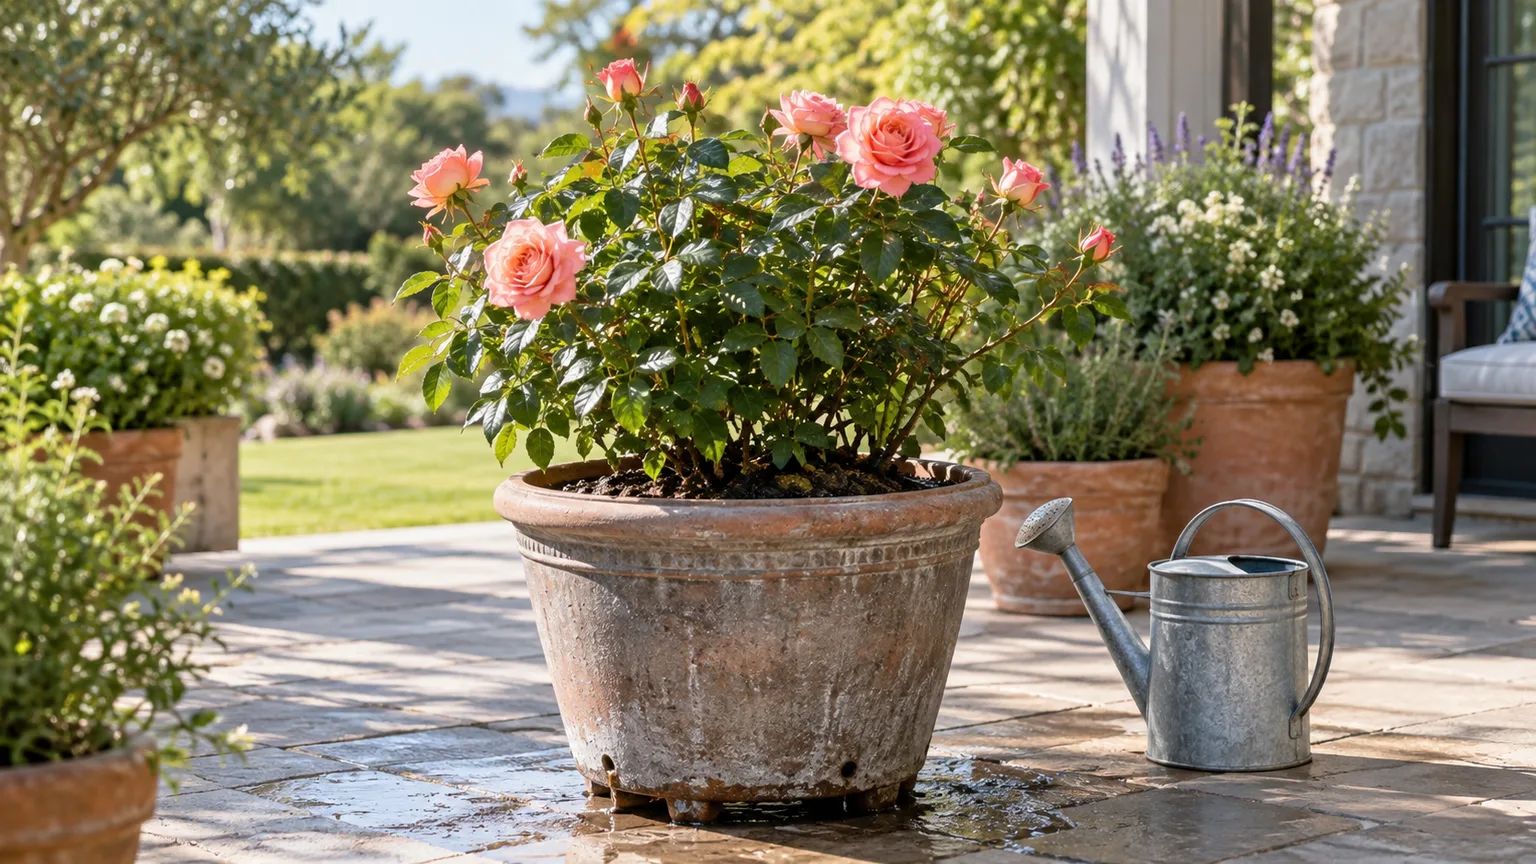
A pot can be wet on top and dry around the roots, or look dry at the surface while the lower mix is still damp. That is why container plants are hard to water by calendar: a sunny balcony, a large shaded planter, a thirsty tomato, and a succulent in terracotta do not use water at the same rate. Check the growing medium and the plant before you reach for the watering can.
For most outdoor pots, the useful routine is simple: check the mix below the surface, water slowly enough for it to absorb, then make sure the root ball is moist and excess water can drain away. In warm, dry weather you may need to check every day, sometimes more than once, but a daily check is not a command to water every pot daily. These ten tips explain how to make that judgment and what to change when a container keeps drying too fast or staying wet.
1. Wet the root ball, not just the surface
The goal is to bring usable moisture through the portion of potting mix where the active roots are growing. A quick splash that darkens the top may evaporate before it reaches the root ball. Conversely, water pouring from the bottom in seconds can mean the mix is saturated, but it can also be running through a gap or channel while the center of a dry root ball remains dry.
For an ordinary container with drainage holes, apply water over the mix surface until the root zone is evenly moist. Depending on the pot, medium, and plant, that may produce some drainage; do not judge by runoff alone. Water that starts draining after a slow, even soak is different from water that races out immediately while the mix inside remains dusty or the pot stays very light.
A practical confirmation is to check the mix in more than one place after watering: near the center as well as toward the edge, and at a depth that represents the root zone. A pot that feels much heavier after watering has usually taken up water; one that stays light may not have. NC State Extension explains that some container mixes develop channels that leave dry pockets, so filling those channels and watering again may be needed (NC State Extension). Naples Botanical Garden’s container-watering advice also starts with a finger check and watching how the plant responds after watering (Naples Botanical Garden). The point is not to force a large volume through every pot. It is to get water into the mix where roots can use it without keeping the lower soil airless.
2. Match watering to the plant’s moisture preference
Plants sharing one patio do not necessarily share one watering threshold. Lettuce, basil, leafy annuals, and many fruiting vegetables can use water quickly and often perform best when the mix stays relatively even in moisture. Cacti and many succulents need a more pronounced drying interval; watering them every time a neighboring flower pot is watered can leave their roots wet for too long.
Use the plant label or a reliable growing guide to learn whether a plant prefers evenly moist mix, a partial dry-down, or a substantial dry interval. “Moist but well-drained” does not mean wet all the time. It means that the mix holds enough water for roots while excess drains and air returns to the pore spaces. Plant age matters too: a newly planted annual with a small root system needs closer monitoring than an established drought-tolerant shrub in a large pot.
If several containers require very different moisture levels, group them by need rather than by flower color. That makes it easier to give thirsty plants a daily check without accidentally watering a drought-adapted plant on the same schedule. For edible containers, note that a vegetable’s water demand can rise as its foliage and fruit load increase. A small pepper transplant and a mature tomato in fruit may occupy similar-looking pots but should not be treated as equivalent drinkers.
3. Choose enough pot volume for roots and water
A small, shallow pot contains a small reserve of water and exposes more mix to sun and moving air. It can swing from adequately moist to too dry within a day in hot weather, especially if it is crowded with mature roots. A larger pot generally holds moisture longer, but only if its volume fits the plant and the mix drains well; a giant pot around a tiny plant can stay wet too long.
Choose a container with enough depth and volume for the plant’s mature roots, not simply the size of the nursery pot. NC State Extension notes that larger containers dry more slowly and may need less frequent watering, while also emphasizing that vegetable species have different minimum container sizes. Use those crop-specific recommendations when growing edibles rather than relying on one “minimum pot diameter” for every plant.
Hanging baskets and window boxes deserve extra attention because their exposed surfaces and limited soil volume dry quickly. A basket in full sun or a railing planter above hot pavement may need a morning check and another in late afternoon during a heat wave. If a container repeatedly dries before the next check, moving the plant into a more suitable larger container may be more effective than setting a permanent twice-daily watering alarm.
4. Account for pot material, color, and exposure
The container changes how quickly moisture leaves the mix. Unglazed terracotta can lose water through its porous sides; plastic and glazed pots retain more moisture. Metal containers can heat up in direct sun, warming the root zone and speeding drying. Dark-colored pots also absorb more heat than pale ones, so a black plastic pot on a sun-baked deck can be much drier by afternoon than a pale ceramic pot in partial shade.
These are tendencies, not a ranking that overrides everything else. A large terracotta pot in cool shade may remain moist longer than a tiny plastic pot in wind and direct sun. NC State Extension advises choosing pot material with the grower’s watering habits in mind: more porous material can suit someone prone to overwatering, while less porous material can help a gardener who often lets pots dry too quickly.
Look at the actual place where each container sits. A south- or west-facing wall, reflective paving, an exposed balcony, or a roof deck may add heat and wind; an east-facing location or a sheltered courtyard may reduce water loss. When a plant is otherwise thriving but one pot always dries first, the fix may be its position or container, not a different watering technique.
5. Check below the surface before watering
A dry-looking surface does not prove the whole pot needs water. Sun and airflow dry the top layer first, while the lower mix may still be damp. Poking a finger into the mix is a fast first check: assess moisture at roughly one-third of the pot’s depth, or several inches down in a deeper planter, rather than touching only the crust.
The Royal Horticultural Society recommends checking about a third of the way down and watering if the compost is dry there (RHS container-watering guide). For shallow pots, use a shallower check that does not damage roots. If the mix still feels cool and slightly damp, wait and check again later. If it is dry at root depth and the plant’s needs call for moisture, water.
Pot weight is a useful second signal, especially once you have learned the difference between a freshly watered container and a dry one. Lift a small pot before and after watering; the change is often more informative than color at the surface. Moisture meters can help when a container is deep or a gardener has difficulty judging by touch, but readings vary with the mix, salts, probe placement, and product calibration. Treat the meter as another clue, not a substitute for knowing the plant and checking more than one part of the pot.
6. Apply water slowly in rounds
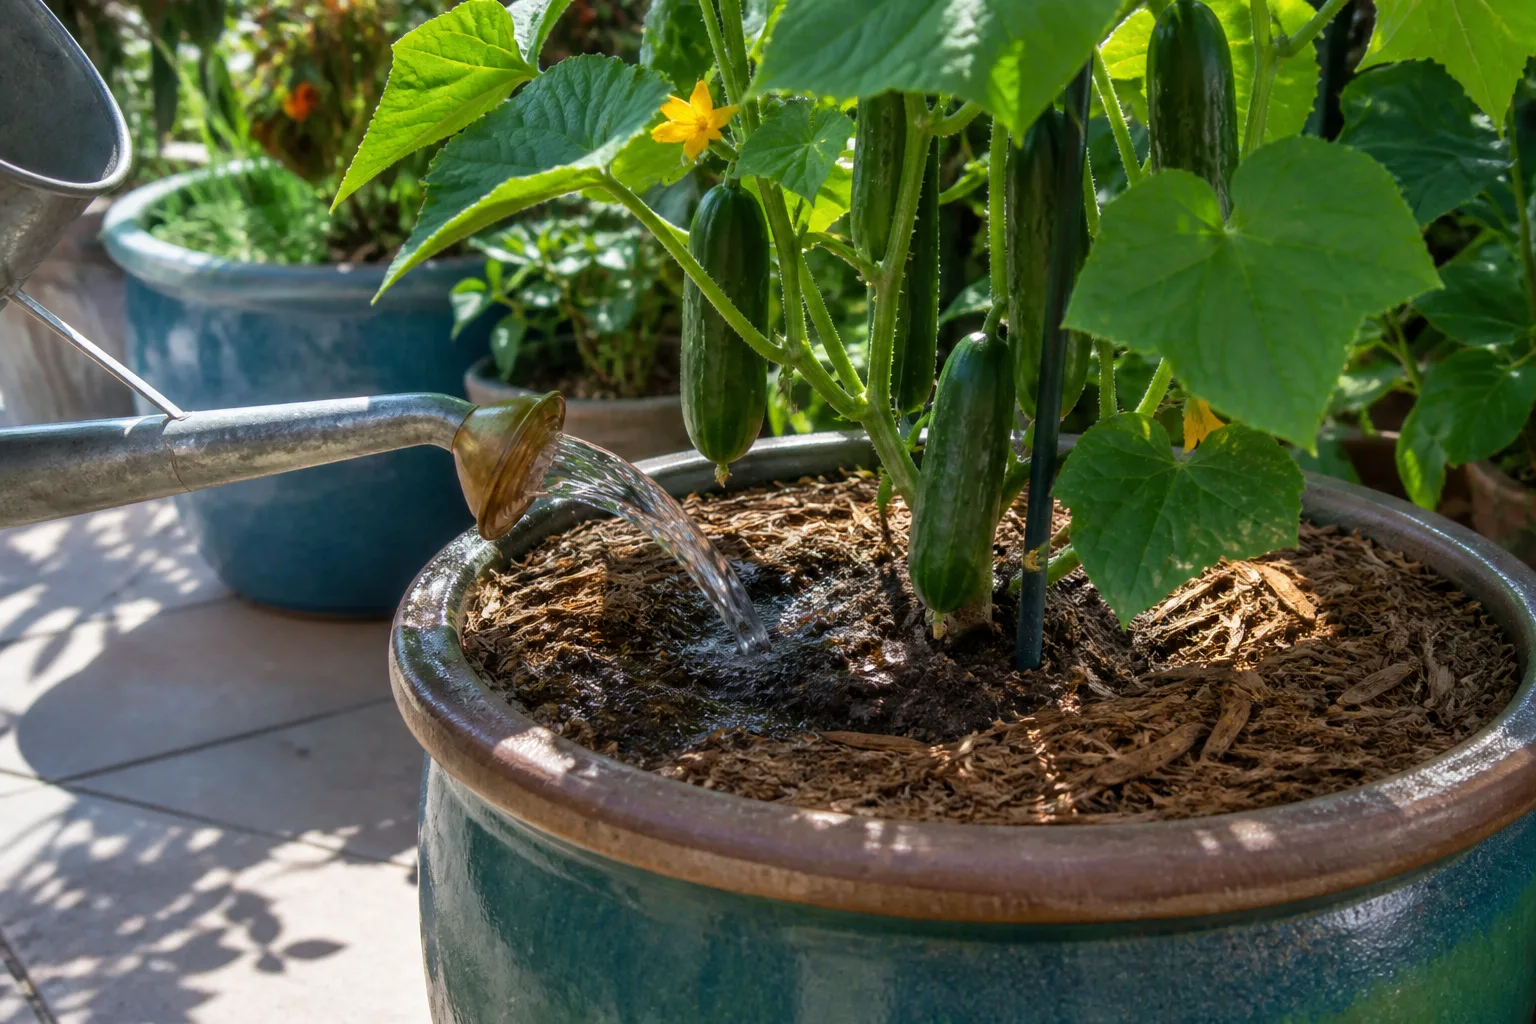
Pour close to the potting mix rather than over the leaves. A gentle stream is less likely to displace mix or send water over the rim, and it gives dry media time to absorb moisture. If water begins to run off the surface, stop briefly. Let it soak in, then apply another small round over the areas that remain dry.
For a very dry but still absorbent mix, the Royal Horticultural Society suggests watering slowly, allowing the compost to soak, then repeating once. Its guide advises stopping just before or as water starts to emerge from the drainage holes to limit wasted water and nutrient loss. WSU Extension’s houseplant guidance describes saturating the soil ball until water comes out of the drainage holes (WSU Extension). Those instructions point to the same practical test: wet the root zone thoroughly, but do not keep flushing water through a pot after the medium is already saturated.
Do not aim a hose at one spot and assume it has watered the whole root ball. A dense plant canopy can hide the mix, so direct a narrow spout underneath the leaves or use a watering wand to reach the soil. For a wide tub, distribute water around the surface rather than pouring one large dose against the stem. If the plant is in a newly planted or unusually dry mix, check the center and edge after the first pass and repeat only where the mix has not absorbed the water.
7. Keep drainage open and manage runoff
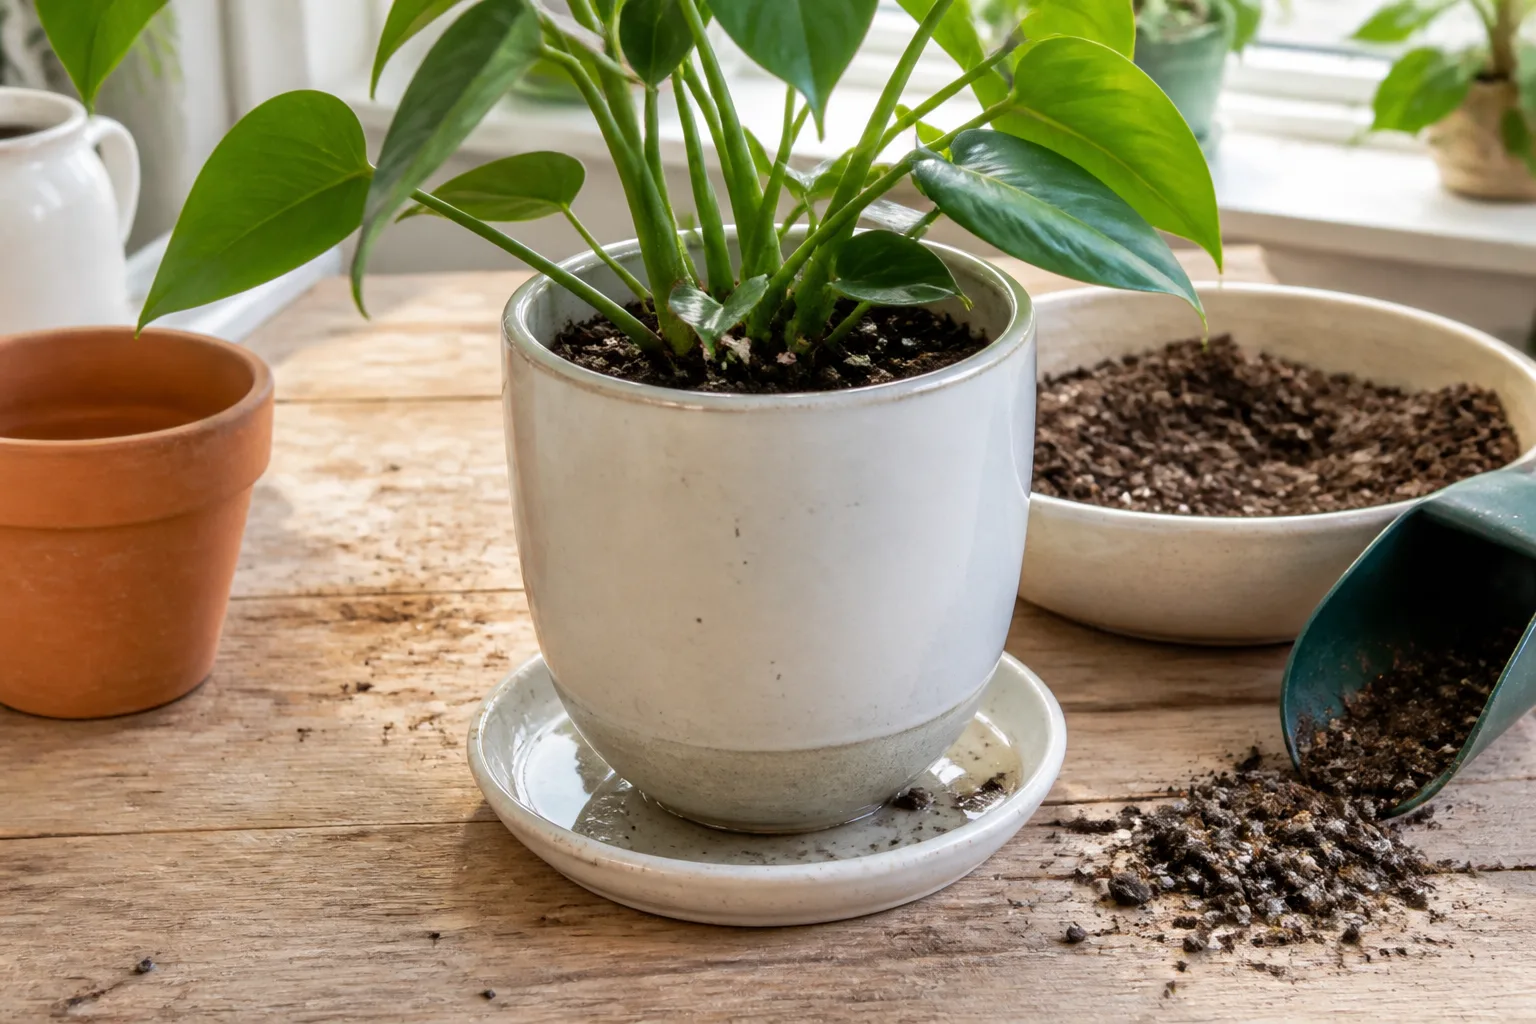
Most outdoor pots need drainage holes so that excess water can leave and roots are not left in stagnant, oxygen-poor mix. If you use a decorative cachepot without holes, keep the plant in a removable nursery pot inside it. Water the inner pot, let it drain fully, and empty any water collected in the outer container before returning it. A pot without drainage is difficult to manage because the bottom can remain wet even when the top feels dry.
Do not put gravel or stones at the bottom of a standard planting pot as a substitute for drainage holes. The gravel does not make water pass more freely through the mix above it; it can leave a saturated layer of potting mix at the bottom. NC State Extension specifically cautions against this common “drainage layer” practice. Use a suitable potting mix and a real outlet for excess water instead.
A saucer can protect a patio and catch a little runoff, but it should not become a permanent reservoir under a plant that does not tolerate wet roots. Empty it after watering once the excess has drained. In a heat wave, a temporary tray can reduce mess or provide a small reserve for certain setups, but standing water can keep the lower mix saturated and attract mosquitoes outdoors. Check the plant’s needs before using any watering method that leaves the pot in water.
8. Water at a practical, cooler time of day
Early morning is convenient because plants begin the day with moisture and less water is lost immediately to midday heat. The RHS recommends cooler parts of the day, including early morning or early evening, to reduce evaporation from container compost. Watering close to the soil also keeps foliage drier, which can help limit some leaf diseases.
Morning is a useful preference, not a rule worth leaving a dry plant thirsty for hours. If a container is dry at root depth and the plant is wilting in the afternoon, water it then. The immediate need for water matters more than a perfect time window. In very hot climates, a second check in late afternoon may show that a small pot needs another drink even after a proper morning soak.
Avoid making the leaves wet as the default watering method. Roots take up most of the water the plant uses, so splashing foliage does not replace watering the root zone. If overhead watering is the only practical method, do it when leaves can dry and make sure the soil itself receives water. For dense flowers, tomatoes, and leafy annuals, a watering can with a narrow spout or a hose nozzle aimed beneath the canopy gives better control.
9. Check the mix after rain
Rain is not a reliable watering measurement. A light shower may wet only the top few centimeters; a dense canopy can intercept water; and a pot tucked under an eave may receive none at all. The RHS notes that short showers often do not moisten compost deeply, so check the root zone after rain instead of marking the container “watered.”
After a steady soaking rain, some pots may remain moist for longer, while exposed baskets or small containers may dry quickly once wind and sun return. Check each group according to its conditions. Do not water automatically just because the calendar says it is watering day, and do not skip a check because the patio is wet.
If the container has no drainage, heavy rain can create the opposite problem: water may collect inside faster than it escapes. Move a portable pot out of prolonged rain if the plant prefers a drier mix, and remove water from a cachepot. For a planter with clogged drainage holes, clear them before the next storm. Rain should influence your decision through what the mix feels like, not through the forecast alone.
10. Rewet dry, water-repellent potting mix patiently
Potting mix that has dried completely can shrink away from the pot wall or become difficult to wet. Water then races down the gap and out of the drainage hole. The plant may stay wilted even though you have poured in a surprising amount of water. This is especially likely in a neglected pot, a hanging basket, or a mix containing ingredients that are difficult to rewet after they become bone dry.
For a small pot, set it in a basin of water so the mix can absorb from the drainage holes, then remove it when the root ball has moistened and allow it to drain. For a large pot that cannot be moved, pour a small amount over the surface, pause for several minutes, and repeat. A few shallow punctures with a wooden skewer can help water enter the mix, but avoid stabbing through the main root mass.
Check the center of the pot after rehydrating. If the outside feels damp but the core is dry, repeat a gentle soak rather than flooding the pot. NC State Extension notes that dry peat or pine bark can be hard to rehydrate and that water may channel through a container mix, leaving dry areas. Pre-moistening new mix before planting and preventing established plants from becoming bone dry are easier than recovering a severely shrunken root ball.
Adjust frequency for weather, season, and growth
There is no dependable number of days that applies to every container. In a warm, dry stretch, many outdoor pots need a daily moisture check and some may need watering each day or even a second check. In cool, cloudy weather, the same pot may stay moist for several days. Wind, low humidity, direct sun, plant size, root density, pot size, and the mix all change the rate of water use.
Use a short observation routine when conditions change. For the first week after planting, check new containers more often because roots have not spread into the surrounding mix. During hot or windy weather, check the smallest and most exposed pots in the morning and again later in the day. As temperatures fall and growth slows, check less often, but keep monitoring rather than switching to a fixed winter interval.
The plant’s stage also changes demand. A leafy vegetable or flowering annual that is growing rapidly uses more water than a dormant plant. A container filled with mature roots may dry faster because less of the volume is loose mix. The RHS advises that summer containers may need water daily or every other day in dry spells, while emphasizing checks before watering. That is a useful planning range for warm weather, not a guarantee or an instruction to keep every pot constantly wet.
Reduce water loss without keeping roots wet
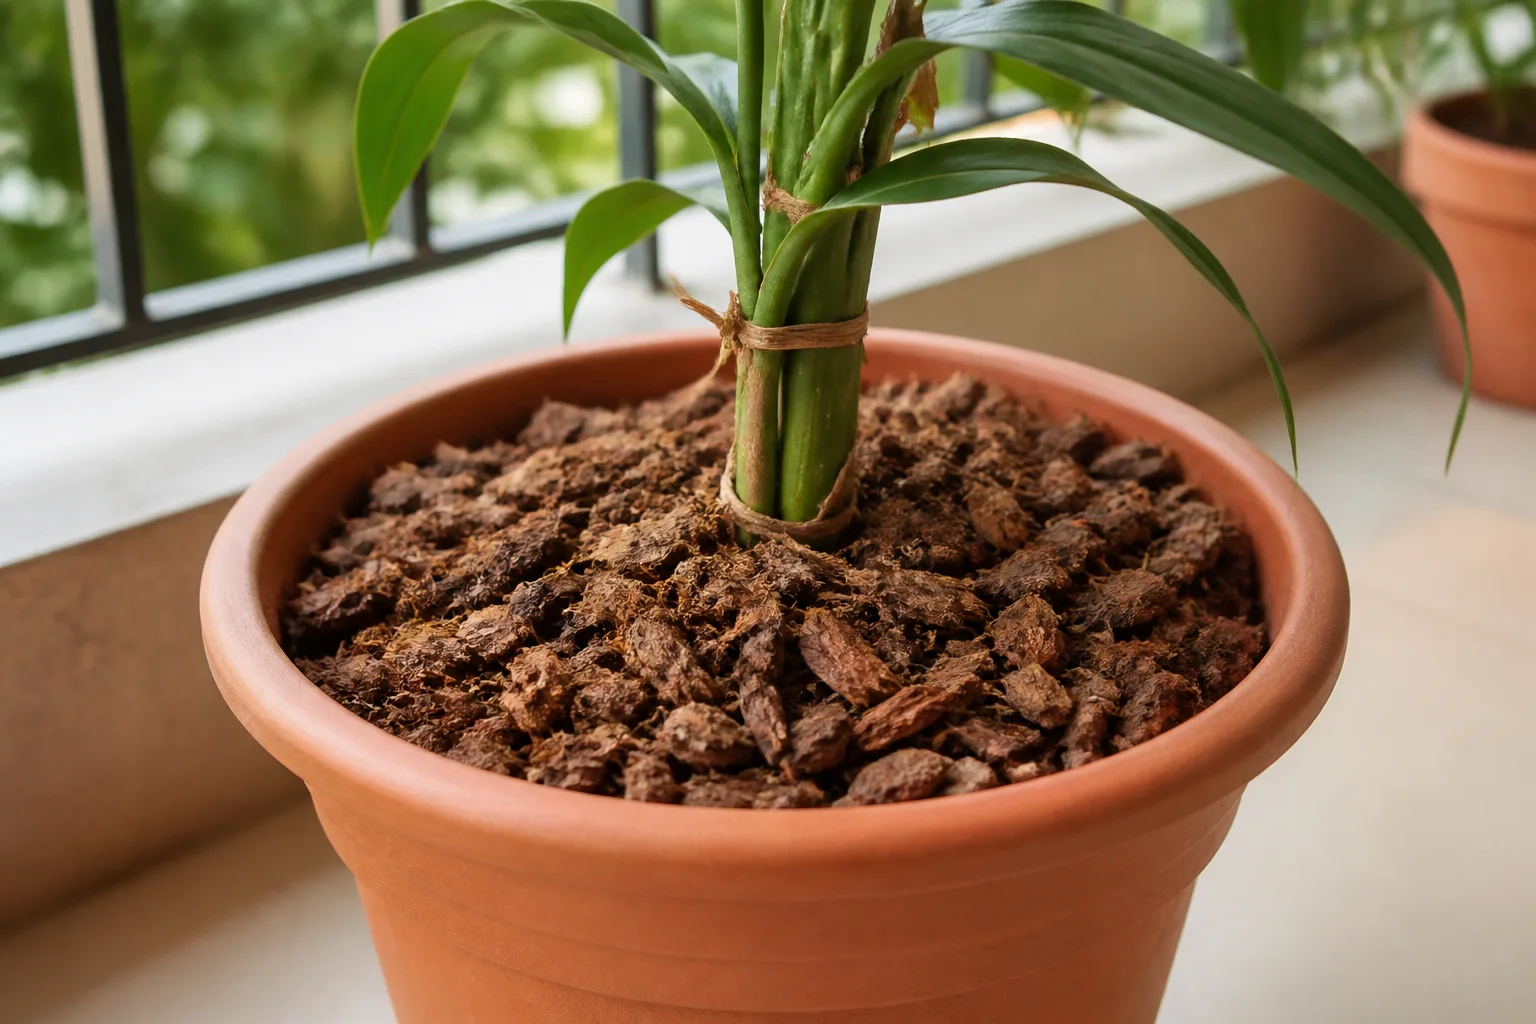
If a pot dries too quickly, first reduce the conditions that increase water loss. Group containers with similar water needs so their foliage creates a little shelter and the routine is easier to manage. During a heat wave, move portable pots temporarily into bright shade or away from reflective walls. A layer of suitable mulch over the mix can slow surface evaporation, but leave space around stems and do not use a thick, soggy layer that hides the soil.
A larger container, a lighter-colored outer pot, or a less porous material may help if the current pot is too small or exposed. For a plant in terracotta, setting the inner pot inside a larger decorative container can reduce side evaporation; leave enough space for air movement and make sure water is not trapped around the pot base. These adjustments can stretch the time between checks, but they do not eliminate the need to inspect the mix during hot, windy weather.
Keep the plant in the light it needs. Moving a sun-loving vegetable into deep shade to avoid watering can reduce flowering and fruiting. The goal is to reduce unnecessary heat stress, not to solve a moisture problem by depriving the plant of its growing conditions. The RHS recommends shade during very hot, dry spells for containers that can be moved, along with grouping, mulching, and stored rainwater to reduce water use.
Use self-watering pots and wicks with care
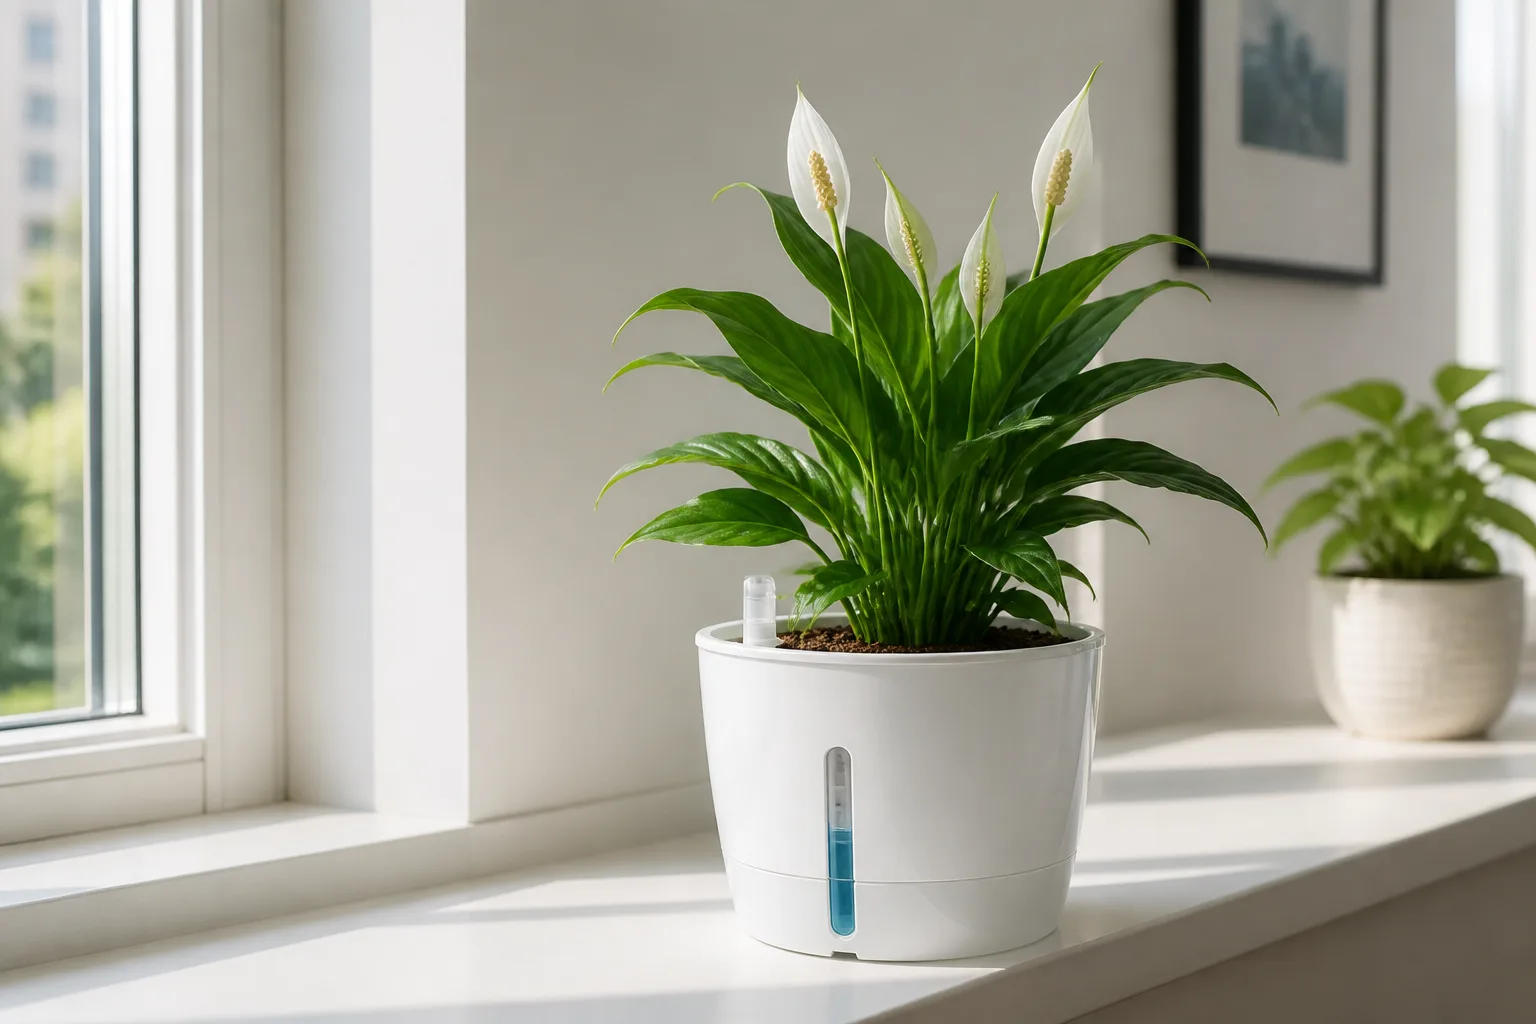
A self-watering planter stores water in a reservoir and supplies it to the mix, often through a wick or capillary action. It can reduce daily top watering for moisture-loving annuals, herbs, or vegetables, and it may help when you cannot check a pot every day. It is not an automatic fit for every plant: species that need the mix to dry between waterings can remain too wet if the reservoir is constantly full.
Follow the planter’s instructions and use a potting medium that can move water while retaining enough air. Check the reservoir rather than assuming the plant has access to water indefinitely. An empty reservoir, a blocked wick, a mix that does not contact the wick, or a newly transplanted root ball that has not spread toward the water source can all leave a plant dry even when the planter looks self-watering.
Bottom watering is another tool, not a universal replacement for watering from above. Letting a pot absorb water from a basin can help rehydrate a dry mix or avoid wetting sensitive foliage, but it takes time and the top may stay dry if the pot is removed too soon. WSU Extension notes that shared bottom-watering trays can also spread pests or disease between pots. Use clean water, do not leave plants sitting in stale water, and periodically water from the top so salts are not left accumulating in the upper mix.
Plan for containers when you travel
For a short absence in mild weather, water plants thoroughly when they need it before leaving, group them, and move vulnerable small pots out of harsh afternoon sun. Do not soak a pot that is already wet in hopes of making it last longer. That can deprive roots of air and create a different problem while you are away.
For a longer trip or hot forecast, use a timer-controlled drip line, a capillary mat, or a tested reservoir system suited to the plants. Test the setup several days before departure: verify that each emitter reaches the soil, that the timer runs at the intended time, and that the reservoir lasts. An irrigation system that drips beside the pot or runs too briefly can fail quietly.
Ask someone to check the smallest and thirstiest pots if the trip is long. Leave a short list that identifies which plants should be checked by touch, which should partly dry, and where the water supply is. If rain is expected, do not assume it will cover every container; a roof overhang or dense foliage can keep rain out. A backup person or second water source is safer than a new, untested gadget.
Diagnose wilt with both leaves and soil
Wilting tells you that a plant is under stress; it does not identify the cause by itself. If the mix is dry at root depth and the plant perks up after watering, underwatering is likely. If the mix is wet and the plant remains limp, adding more water can make the problem worse. Better Homes & Gardens also cautions that wilting can accompany either underwatering or overwatering, which is why the soil check matters (BHG watering guide). Roots need both water and oxygen, and permanently saturated mix can damage roots until they can no longer take up water.
Look for patterns across time. A pot that wilts every afternoon but recovers by evening may be losing water faster than its roots can replace it in heat; check soil moisture before deciding whether to water again. If it is already damp, provide temporary shade, reduce heat on the pot, and inspect drainage rather than repeating a soak. Yellowing leaves, slow growth, algae or fungus on the mix, and a sour smell can point toward excessive moisture or poor drainage, though none of those symptoms alone confirms root rot.
If a plant stays wilted in wet soil, slide it from the pot if practical and inspect the roots. Healthy roots are generally firm; brown, mushy roots or a foul smell suggest decay. Trim clearly dead roots with clean tools, repot in fresh, appropriately airy mix, and correct the underlying issue—often a blocked drainage hole, oversized pot, compacted mix, or repeated watering before the previous soak has dried enough. NC State Extension advises using root condition alongside watering history to distinguish underwatering from overwatering.
Conclusion
Watering container plants works best as an observation routine, not a fixed schedule. Check below the surface, account for the plant’s preferred moisture level and the pot’s size and material, then water slowly enough for the root ball to absorb it. Confirm that the mix is moist where the roots are, that excess water can escape, and that a saucer or cachepot is not holding the pot in standing water.
When a container behaves differently than expected, change one factor at a time: the timing of your check, the amount or speed of water, the pot’s position, or the drainage. A few days of checking at consistent times will show which containers dry first and which stay damp. With that information, you can water each pot when it needs it instead of guessing from the surface or copying a neighbor’s routine.



