How to Repot Orchids for Healthier Growth and Blooms
Learn when to repot orchids, how to choose bark and a pot, trim roots, handle air roots, and care for the plant afterward without sacrificing blooms.
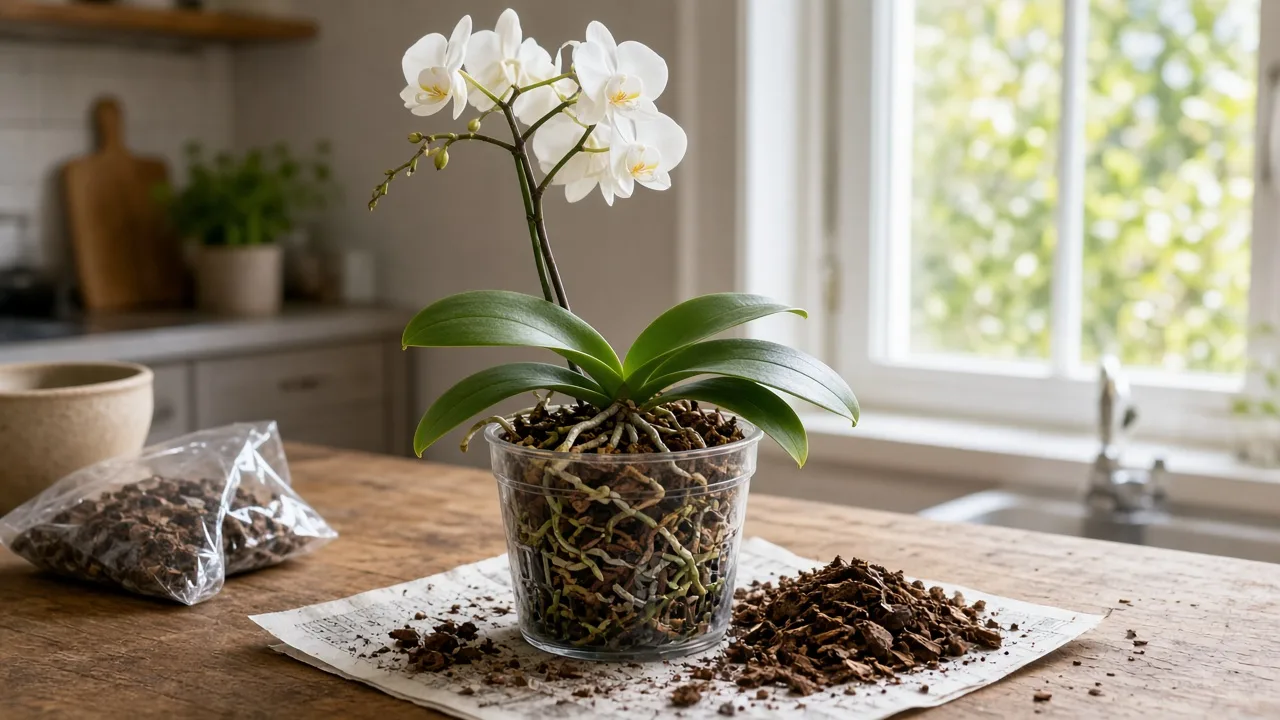
The calendar is only half the answer to when to repot orchids. If your plant has finished flowering, the old bark is breaking down, and fresh root tips are starting to appear, you have a useful growth window—often late winter through early summer for a common moth orchid. If it is actively blooming in a sound pot, leave it alone and enjoy the flowers.
Repotting does not force an orchid to produce larger flowers. It gives the roots the air, space, and predictable wet-to-dry rhythm they need to support new leaves and a future flower spike. The biggest improvement usually comes from correcting one hidden problem: a medium that has decomposed into a dense, wet mass around roots that evolved to cling to bark, not sit in garden soil.
The Best Time Is a Growth Window, Not a Calendar Date
The safest general window is after the current flowers fade and as new roots begin to grow. New root tips establish faster in fresh medium, so the plant can replace the roots disturbed during the move. The American Orchid Society describes repotting at the start of new root formation as the best way to limit a growth setback, while Clemson Extension places the ideal timing in late winter or early spring when new roots are visible (American Orchid Society; Clemson Extension).
That does not make June, March, or any other month universally correct. Indoor light, temperature, the orchid’s genus, and its flowering cycle all shift the window. Use the plant’s condition as the deciding signal: a spent bloom cycle plus visible root activity beats a date circled on the calendar.
For most Phalaenopsis orchids
The grocery-store orchid most people own is a Phalaenopsis, or moth orchid. It has one central crown with leaves arranged in a fan and roots emerging below the leaves, so its most practical repotting window is just after flowering or when the bark has deteriorated enough to stay wet and airless.
Moth orchids often flower from late winter into spring, but a plant in a warm, bright home may flower at another time. The University of Connecticut’s orchid-care guidance also recommends repotting right after flowering and notes that old bark deteriorates over roughly a two-year period (University of Connecticut Home and Garden Education Center). Treat that interval as an inspection reminder, not a mandatory appointment: a coarse mix in a well-ventilated pot may last longer, while compacted moss may need attention sooner.
For Cattleya, Oncidium, and other sympodial orchids
Sympodial orchids grow sideways along a rhizome, producing a chain of pseudobulbs rather than one continuously rising crown. Cattleya, Oncidium, and Cymbidium are familiar examples, although exact timing varies by genus and hybrid.
Repot these orchids when new roots are beginning from the newest pseudobulb, then position the oldest growth against the edge of the pot so the plant has room to move across the container. Do not divide just because you are repotting. The American Orchid Society recommends keeping at least three mature pseudobulbs with each division, which means a plant generally needs six or more before division is sensible (American Orchid Society).
If you cannot identify the orchid, repot only when there is a clear need and avoid a major division. A fresh medium and stable root system are more valuable than creating several undersized pieces that may take years to regain flowering strength.
When to Repot Immediately, Even if the Orchid Is Blooming
Waiting protects flowers, but it is not a rule worth following when the current setup threatens the plant. Repot now if the orchid is sitting in ordinary potting soil, has no usable drainage, is packed in permanently wet moss, has a sour or decomposing medium, or has widespread root rot. A broken pot or a plant that cannot stand upright also justifies acting sooner.
An actively blooming orchid may drop flowers or shorten the display after emergency handling. That is a disappointing trade-off, but losing flowers is reversible; allowing suffocating roots to continue declining is a larger problem. The American Orchid Society notes that repotting a plant in spike or bloom carries a risk of premature flower loss, while a plant that genuinely needs fresh medium should not be left in a damaging situation simply to preserve the display (American Orchid Society).
For a newly purchased orchid in a stable, airy inner pot, let it acclimate for about a week or two and wait until bloom is finished before changing containers. You can place that inner pot inside a heavier decorative cachepot immediately, provided the growing pot can be removed for watering and never sits in collected water.
Six Signs Your Orchid Needs Fresh Medium
The strongest reason to repot is not that an orchid has a few roots outside the pot. It is that the root zone no longer provides the combination of air, moisture, and physical support the plant needs.
- The bark has collapsed into small, soft pieces. As chunky bark decomposes, it holds more water and leaves fewer air spaces. Water may also flush tiny fragments out of the drainage holes.
- The pot smells sour or swampy. Odor suggests prolonged wetness and decomposition, especially when it appears with soft roots or a pot that stays heavy for many days.
- The roots are crowded inside the pot. A few roots curling around the inside is normal, but a solid root mass with almost no open medium is a sign that the pot no longer serves the plant.
- The orchid dries almost immediately after watering. If a much larger plant has filled a small pot with roots, there may not be enough medium to hold moisture between waterings. That calls for a root inspection, not automatic daily watering.
- The plant repeatedly tips over. A top-heavy Phalaenopsis may need a better anchor or a heavier pot of the same size rather than a much larger pot. Check the roots and medium before upsizing.
- Leaves stay limp despite sensible watering. Limp leaves can reflect thirst, but they can also signal root loss from rot, an undersized root zone, or decomposed medium that does not cycle air correctly.
“No flowers” by itself is not proof that repotting is needed. Low light, weak seasonal temperature cues, an unsuitable watering rhythm, and ordinary dormancy can all affect flowering, so use bloom failure as a reason to inspect the whole care setup rather than a reason to disturb the roots immediately.
That distinction also matters when the plant looks awkward rather than sick. Practical guidance from Epic Gardening treats crowding, top-heaviness, old medium, and a poor nursery pot as separate inspection triggers, which helps prevent the common mistake of choosing a much larger pot for a plant whose roots do not need one.
Choose a Pot That Drains and Fits the Roots
Choose the pot from the remaining root mass, not from the height of the leaves or the number of flower stems. If the roots fit comfortably and only the medium is old, use the same pot after cleaning it. If the roots are tightly packed, move up one pot size—usually about 1 to 2 inches wider, not several sizes at once.
An oversized pot looks generous but creates a larger reservoir of damp bark around a relatively small root system. That slows drying and makes the watering mistake that caused the original rot easier to repeat. A snug pot also helps the orchid stay upright while new roots attach to the fresh medium.
The simplest dependable choice is a plastic orchid pot with drainage holes in the base and, ideally, side ventilation. Clear plastic makes it easier to read root color and moisture without unpotting, but it is not a substitute for drainage. Terracotta dries faster and can steady a top-heavy plant; glazed ceramic can work when it has real drainage holes and is not merely a sealed decorative sleeve.
Avoid a sealed pot, a metal container, or any vessel whose only opening is a tiny saucer gap. The pot must let water leave freely. If you want a prettier presentation, use a draining inner pot inside a cachepot and empty the outer vessel after watering.
The same size-versus-next-size distinction appears in the step-by-step guidance from BBC Gardeners’ World Magazine: reuse the current container when the roots still fit, and move up only when the orchid is genuinely pot-bound. That is a better rule than sizing the pot to the plant’s flower stems.
Pick an Orchid Medium That Matches Your Watering
Most common epiphytic orchids need a chunky, airy orchid medium, not regular potting soil. A commercial orchid bark mix containing bark, perlite, and horticultural charcoal is a practical starting point. It creates open spaces where roots can receive air while still holding enough moisture to hydrate the plant between waterings.
Select the texture for your conditions. Coarse bark suits a frequent waterer, a humid room, a warm greenhouse, or a pot that dries slowly. A slightly finer mix or a modest amount of sphagnum can help in a very dry home, but it also requires closer attention because moss stays wet longer and can be difficult to re-wet evenly after it dries completely.
The American Orchid Society makes the useful point that medium choice must match care habits: if you change the mix without changing how often you water, the same problem can return in a different pot (American Orchid Society). The right medium is not the one with the longest ingredient list; it is the one that dries at a pace you can manage.
Bark, moss, and mixed media
Bark: Fir, pine, or a packaged orchid bark blend is the easiest default for many Phalaenopsis orchids. Large pieces preserve airflow but dry faster, while smaller pieces retain more moisture and may compact sooner.
Sphagnum moss: Moss can be useful for a plant that dries too rapidly, a small orchid, or a grower who can monitor moisture closely. It is also common in nursery production because it protects roots during shipping and retail display, but consistently wet moss can be risky as a long-term home medium; Clemson Extension specifically recommends moving moss-grown orchids into a bark mix after flowering (Clemson Extension).
Mixed media: Perlite and charcoal can keep a bark blend more open and alter how quickly it dries. Do not add garden soil, compost, or dense all-purpose potting mix to “feed” an epiphytic orchid; those materials fill the air gaps the roots depend on.
Assemble a Clean Repotting Station
Gather the new or cleaned pot, fresh orchid medium, a bowl of room-temperature water, sterile sharp snips, a chopstick or stake, and a washable work surface. Pre-moisten dry bark so dust and tiny fragments wash away and the pieces are easier to settle around roots. UGA Extension’s photo essay demonstrates soaking bark before potting and emphasizes that chunky pieces provide drainage and air around the roots (UGA Extension Forsyth County).
Clean a reusable pot with hot soapy water and rinse it thoroughly. Use a fresh blade or disinfect snips before cutting, and clean them again between plants if you are repotting a collection. Have the final location ready too: bright, indirect light, stable temperatures, and enough airflow to let the newly watered medium drain and dry on schedule.
How to Repot an Orchid Step by Step
Plan on about 20 to 30 minutes for an ordinary Phalaenopsis, with extra time if the root mass is tightly attached or the medium has become a solid plug. Work slowly; the goal is to remove failing material while preserving every firm, living root and the crown.
Remove the plant and old medium
Water the orchid a day before a planned repot if the medium is dry and the roots are brittle. Moist roots are more flexible, but do not soak a plant that is already sitting in saturated, foul-smelling mix just to make removal easier.
Squeeze the sides of a plastic pot and ease the plant out while supporting the base of the leaves. If roots are fastened to a terracotta pot, soak the outside of the pot briefly or sacrifice the old pot rather than tearing roots away. Pull off old moss and bark with your fingers, then rinse the roots in lukewarm water until you can see their condition.
Do not tug on a root that is attached to a chunk of bark. Rotate the pot, loosen the medium around it, and let the root release naturally. A snapped healthy root is a larger setback than leaving one small piece of old bark until you can remove it gently.
Inspect and trim the roots
After rinsing, separate roots just enough to inspect them. A healthy root is firm and plump; it may look silvery or white when dry and green after wetting. Dead roots are usually hollow, papery, collapsed, or mushy, and dark brown or black tissue that pulls apart should be removed. Color alone is not a perfect test, so pinch gently and judge texture.
Cut only the dead portion with sterile snips. If a root is firm above a damaged section, make the cut in healthy tissue just above the rot rather than removing the entire root. Clemson Extension advises trimming dead roots because they continue to decompose and hold moisture around the plant, and its photographs show the value of removing only the decayed sections (Clemson Extension).
If most roots are gone, do not compensate with a giant pot. Use the smallest draining container that fits the remaining roots, keep the plant stable, and focus on preventing another period of saturation. A severely rotted orchid may need a recovery setup rather than a routine “one size up” repot.
Set the plant at the right height
Put a shallow layer of the largest bark pieces in the bottom of the pot. Set the orchid so the crown—the point where the leaves meet—stays above the medium and the roots spread naturally through the pot. For a Phalaenopsis, center the plant; for a sympodial orchid, place the oldest pseudobulb toward the edge and leave room in front of the newest growth.
The base of the leaves should not be buried. Packed medium against the crown traps water where new leaves emerge and can cause crown rot. If the plant sits too low, lift it and add more coarse bark underneath rather than burying the leaves to make it look anchored.
Fill, anchor, and water
Add fresh medium in handfuls, guiding pieces between the roots with a chopstick. Tap the pot gently so the bark settles, but do not crush or pack it into a dense block. The mix should hold the plant in position while leaving visible air spaces.
If the plant wobbles, use a stake, orchid clip, or soft tie to stabilize it until new roots grip the medium. A stable plant makes it easier for new roots to grow without being repeatedly torn by movement. UConn’s repotting instructions also recommend a stake or chopstick beside the plant when the loose bark does not anchor it well (University of Connecticut Home and Garden Education Center).
Water the completed pot thoroughly with room-temperature water and let every drop drain. Rinse away loose fines, check that the crown stayed dry, and add a little more bark if the level settles. Do not leave the pot standing in a full saucer or in the bottom of a decorative container.
What to Do With Air Roots
Air roots are not automatically a sign that the pot is too small. Epiphytic orchids naturally grow roots into open air so the roots can attach to bark and take up moisture from the humid environment. A few firm roots arching over the rim are normal, especially on Phalaenopsis orchids.
During repotting, tuck a flexible aerial root into the medium only if it bends without cracking and naturally points that way. Do not cut healthy air roots just to make the plant look tidy, and do not force stiff roots into a small pot. Broken roots create wounds; the orchid can adapt to having some roots outside the container.
The practical test is whether the roots inside the pot have enough room and whether the medium drains. Excessive roots outside a crowded pot can support a decision to repot, but exposed roots alone are not an emergency. The goal is a functional root zone, not a perfectly hidden one.
Aftercare for New Roots and Future Flower Spikes
Return the orchid to bright, indirect light rather than putting it in harsh direct sun immediately after the move. Keep the temperature and location steady for the first several weeks; a newly handled plant is a poor candidate for a simultaneous window change, fertilizer experiment, and watering overhaul.
Water when the medium is nearly dry, not because a certain number of days has passed. In a clear pot, roots that have shifted from green to silvery and bark that feels light are useful clues. Soak the bark thoroughly, then drain it completely. UConn recommends keeping orchid bark moist without allowing water to collect in the crown, and specifically warns against leaving the pot sitting in water (University of Connecticut Home and Garden Education Center).
Hold off on aggressive feeding while the plant is adjusting. Once it is hydrated, stable, and beginning active growth, resume the weak, regular fertilizer routine appropriate for your medium and label directions; extra fertilizer cannot replace healthy roots. Keep water out of the crown and leaf axils, and provide gentle air movement so the damp pot dries predictably.
Do not expect a new flower spike immediately. Repotting can improve the conditions for future growth, but blooming also depends on sufficient light, mature plant size, seasonal temperature changes, and the orchid’s natural cycle. The best near-term sign is a firm new root tip or leaf, not a flower spike appearing on demand.
Troubleshoot the First Month After Repotting
The plant is loose: Add a stake or clip rather than pressing more medium around the crown. Orchid bark remains relatively open, so temporary support is normal while roots reattach.
The pot stays wet: Check for an oversized container, a sealed cachepot, blocked holes, or a mix that is too fine for the room. Move the inner pot to brighter indirect light with better airflow and extend the interval before the next soak; if the medium is already sour or collapsing, correct it rather than trying to “water less” forever.
Leaves become limp: First check the roots and medium. A rotted root system cannot take up water no matter how often you water, while a root mass that was heavily reduced may need time to rebuild. More water is only the answer when the roots are still firm and the mix is actually dry.
Flowers or buds drop: Handling an orchid in bloom can shorten the display, and a change in temperature or light can do the same. Keep the plant stable, do not cut a still-green spike just because flowers fell, and wait for the plant to show its next growth signal.
There is no new growth: Give the plant time before repotting again. Confirm that it receives enough bright, indirect light and that the medium is drying between thorough waterings. Repeated unpotting adds stress and will not solve a light or seasonal-temperature problem.
A few roots turn brown after the move: Recheck texture rather than reacting to color alone. Roots that are firm can remain; roots that are hollow or mushy should be removed at the next necessary intervention, while a sudden whole-pot decline warrants a closer inspection for standing water or crown damage.
Conclusion
The best time to repot an orchid is usually after flowering, when new roots are beginning, not simply on a particular date. If the current pot drains, the medium is fresh, and the roots are firm, wait; if the mix is decomposing, the roots are rotting, or the plant is trapped in a bad container, act even if flowers are still open.
Use a pot that fits the root mass, an airy medium that matches your watering habits, and sterile snips that remove only dead tissue. Keep the crown above the bark, leave healthy air roots alone, stabilize the plant, and judge aftercare by moisture and root activity rather than a rigid schedule. Those choices do not guarantee bigger blooms, but they give the orchid the root system and growing conditions that make strong new growth—and better future flowering—possible.



