9 Causes of White Spots on Tomato Leaves
White spots on tomato leaves can mean mildew, pests, residue, sun injury, or virus. Learn how to identify the pattern and choose the right fix.
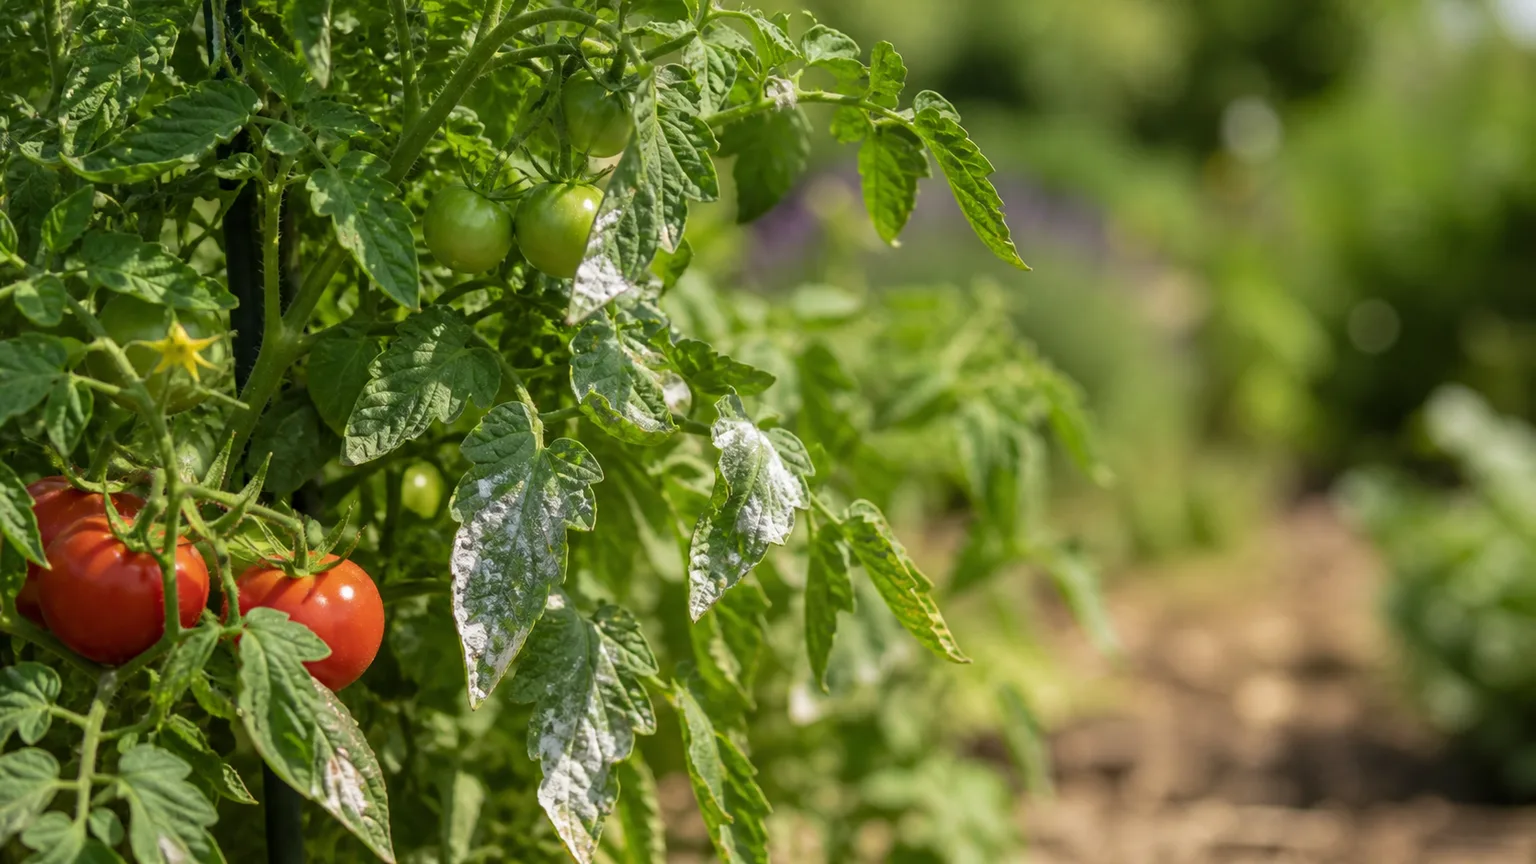
White spots on tomato leaves are a symptom, not a diagnosis. A floury coating, a hard crust, a winding tunnel, and a pale patch burned by the sun can all look “white” from a few feet away, but they require completely different responses.
Before you prune or spray, check whether the mark sits on the leaf surface or has changed the leaf tissue itself. Then inspect the underside, look for insects or webbing, and compare the newest leaves with the oldest ones. That short exam prevents a common mistake: treating a residue or virus with a fungicide, or treating a pest problem with a nutrient product.
The nine causes below cover the most useful possibilities for a home garden. They are arranged around what you can actually see, so you can move from “what does it look like?” to “what should I do next?” without guessing.
Start With the Spot Pattern, Not a Spray
The fastest diagnosis comes from four observations: texture, location, pattern, and pace. A mark that wipes away is a surface problem until proven otherwise; a mark that follows the leaf veins, forms a tunnel, or arrives with distorted new growth points elsewhere.
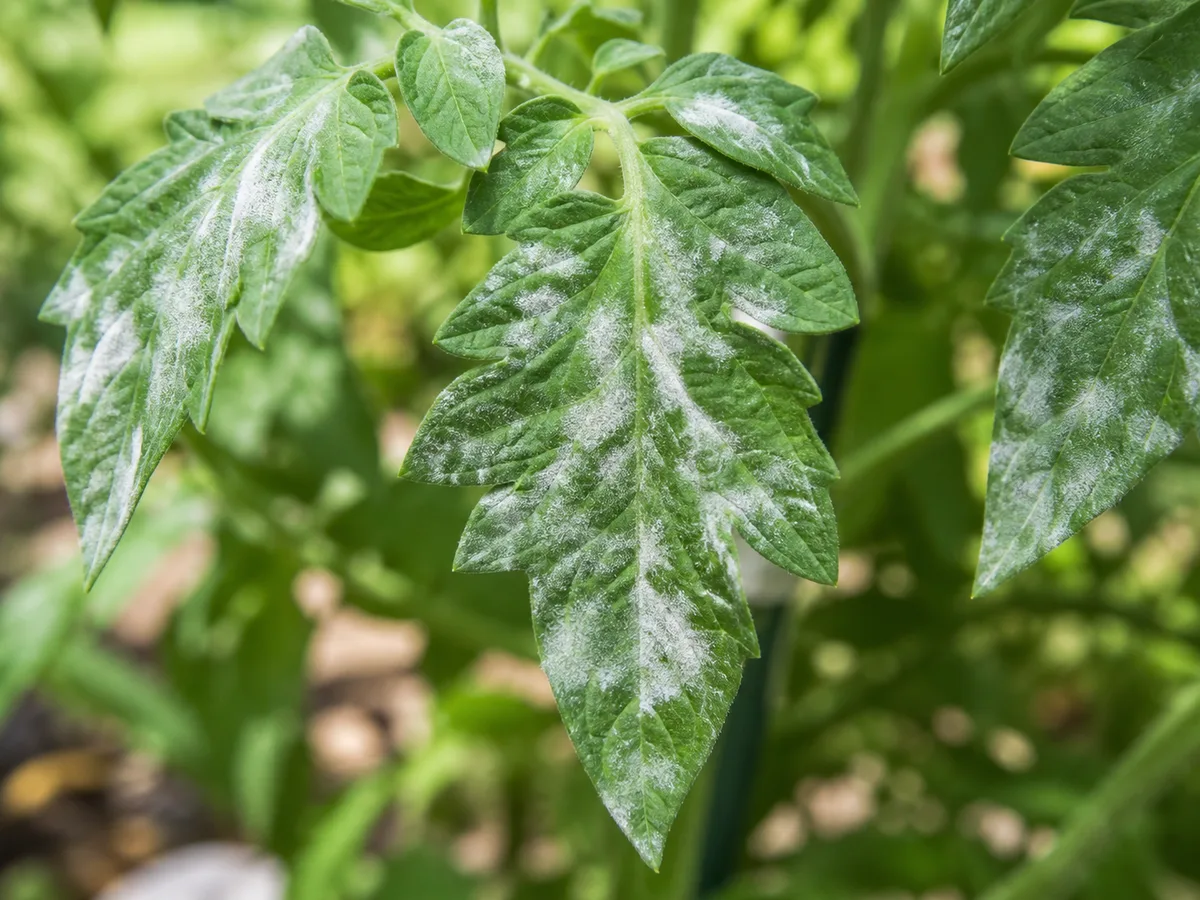
A close-up of white powdery patches on tomato leaves; a surface coating is only one of several possible causes.
The 60-second inspection that narrows the diagnosis
Choose one affected leaf and one healthy-looking leaf from the same plant. Look at both sides in bright, indirect light, and use your phone’s macro setting or a simple hand lens if you have one. Do not handle several plants first and then inspect: sap, spores, and tiny pests can travel on hands and clothing.
Ask these questions in order:
- Does the mark wipe off? A loose film, water spot, or mineral deposit may disappear from one test area. A disease lesion or sun injury will not.
- Is it powdery, papery, crusty, stippled, or tunnel-like? Texture is often more useful than color.
- Is the underside different? Whiteflies, spider mites, and some diseases hide or show their strongest signs below the leaf.
- Are insects, webbing, sticky honeydew, or black sooty mold present? If yes, start with pest management rather than nutrition.
- Is the whole plant changing? Mottled new growth, stunting, rapid collapse, or fruit symptoms raise the stakes beyond a cosmetic leaf mark.
If the plant has just been sprayed, watered with hard water, moved into strong sun, or fertilized heavily, record that timing. A symptom that appeared the day after a treatment is evidence; do not erase it by immediately applying another product.
| What you see | Most likely direction | First move |
|---|---|---|
| White powder that expands into patches | Powdery mildew | Remove the worst leaves, open the canopy, and check a labeled treatment only if fresh patches continue. |
| Hard crust or droplets along leaf edges and drip paths | Mineral, fertilizer, or spray residue | Wipe or rinse one test area and review water and spray history. |
| Bleached, papery tissue on the sun-facing side | Sun or heat injury | Provide temporary shade and avoid removing the whole canopy. |
| Many tiny pale dots, often with webbing | Spider mites | Inspect the underside and rinse or treat only after confirming mites. |
| Thin winding white trails inside the leaf | Leafminers | Remove mined leaves selectively and protect natural enemies. |
| Tiny flying insects and sticky leaves | Whiteflies | Check leaf undersides and use an integrated pest approach. |
| White fuzz under a rapidly expanding dark, water-soaked lesion | Late blight or another serious foliar disease | Isolate the problem, avoid wet-plant handling, and contact local extension guidance. |
| Blotchy light-and-dark green mosaic with distorted growth | Virus or herbicide injury | Stop spraying, clean tools, and seek a diagnosis before propagating or saving seed. |
| Whole-plant paling without a surface coating | Root-zone or nutrient stress | Check moisture and soil fertility; do not add fertilizer by guesswork. |
9 Causes of White Spots on Tomato Leaves
1. Powdery mildew
Powdery mildew looks like flour dusted across the upper leaf surface, although patches can also appear underneath or on stems. It often begins as separate round spots and then merges into a larger white film. Affected leaves may yellow, curl, or age early, but the white growth itself remains the key clue.
This disease is easy to misunderstand because many powdery mildews thrive in warm conditions with humid air around the plant without needing a continuously wet leaf. Crowded plants, shade, still air, and lush growth can create the pocket the fungus needs. Epic Gardening’s tomato guidance explains why powdery mildew can weaken photosynthesis even when it does not kill the plant outright, while GrowVeg’s tomato powdery-mildew guide is useful for the practical reminder to improve airflow and avoid dense, stressed growth.
Remove leaves with broad active patches and bag them rather than shaking them over the plant. Thin crowded foliage, water the root zone, and keep the leaves from touching neighboring plants. If clean new growth continues, you may not need a spray; if fresh patches keep appearing, use only a product labeled for powdery mildew on tomatoes and follow its rate, interval, heat warning, and harvest restrictions.
Do not assume neem oil, baking soda, milk, or dish soap is automatically safe because it is described as natural or homemade. Test any permitted treatment on a small area first, avoid heat-stressed foliage, and never substitute a kitchen recipe for a crop label.
2. Mineral, fertilizer, or spray residue
Residue sits on the leaf instead of growing through it. It may look like white paint flecks, a chalky film, or hard crystals along the edge of a droplet. It is especially likely after overhead watering with mineral-rich water, foliar feeding, sulfur or other sprays, or fertilizer splashing onto leaves and drying there.
Test the diagnosis on one leaf: moisten a soft cloth or use clean water to rinse a small area, then photograph the leaf and check it again after it dries. If the mark disappears without leaving dead tissue, the plant may not be diseased. If the leaf underneath is bleached, sunken, or still changing, residue may be masking a second problem.
Do not scrub tomato leaves aggressively. Rinse early in the day when the plant can dry quickly, correct the spray or watering method, and flush excess fertilizer from the root zone only if the soil and container drainage make that safe. A flush is not a universal cure for poor drainage or root rot; it is a response to suspected soluble-salt accumulation, not a reason to flood a stressed plant.
3. Sunscald and heat injury
Sun or heat injury creates flat, pale white-to-tan patches that feel dry or papery rather than fuzzy. It often follows sudden exposure to intense sun, a heat wave, transplanting, or heavy pruning that removed the leaves previously shading the canopy. The exposed side of the leaf is usually more affected, and you will not find powder, insects, or a spreading trail.
Protect the plant during the hottest part of an extreme day with properly supported shade cloth, and give newly transplanted plants a gradual hardening-off period. Keep the root zone evenly moist, but do not respond to a burned leaf by watering constantly. Damaged tissue will not turn green again; the goal is to protect new growth and avoid exposing more leaves at once.
Avoid stripping more foliage from an already sun-injured tomato. Tomatoes need leaves to make energy for fruit, and aggressive pruning can increase both heat exposure and harvest stress. If the plant is otherwise growing normally, leave mildly damaged leaves in place until new growth replaces their function.
4. Spider mite stippling
Spider mites do not usually paint a leaf with a solid white coating. They puncture individual cells while feeding, creating thousands of tiny pale dots that can merge into a washed-out or bronze appearance. Fine webbing on the underside, moving specks, and damage concentrated in hot, dry conditions make this cause more likely.
Inspect the underside of several leaves, especially near the midrib. Hold a sheet of white paper under a leaf and tap it; tiny moving dots are a clue, although the test is not a substitute for close inspection. The University of Maryland Extension’s tomato problem key describes the characteristic white stippling that can progress to yellow blotching.
For a small outbreak, a firm but non-damaging water rinse aimed at leaf undersides can reduce numbers. Repeat only as the plant tolerates it and allow foliage to dry quickly. Preserve predatory mites and other beneficials; broad-spectrum insecticides can flare mite problems by removing their natural enemies. If a miticide or horticultural oil is needed, choose a product labeled for tomatoes and mites, test for burn, and follow the label.
5. Leafminer tunnels
Leafminers leave narrow, winding white or translucent trails inside the leaf. The trail is not a deposit you can wipe away: the larva has eaten tissue between the leaf surfaces, so the line remains when you rub it. Heavy damage can join into pale blotches, and mined leaves may yellow, drop early, or expose fruit to too much sun.
The UC Integrated Pest Management guide for tomato leafminers recommends paying attention to natural enemies because parasitic wasps often suppress light infestations. That makes indiscriminate spraying counterproductive. Remove leaves that are heavily mined, check new transplants before planting, and clear old tomato plants after harvest so the pest has fewer places to continue its cycle.
Do not expect a contact spray on the leaf surface to reach a larva protected inside the mine. If damage is increasing quickly or a commercial crop is involved, use local extension thresholds and a labeled product rather than copying a rate from a different crop or region.
6. Whiteflies and honeydew
Whiteflies cause pale stippling, yellowing, curling, and general loss of vigor rather than neat white spots. When you disturb the plant, adults rise in a small cloud; nymphs and pupae remain attached to the undersides. Their honeydew can make leaves shiny and allow black sooty mold to grow, which may make the canopy look dusty or gray.
The UC IPM whitefly guidance for tomatoes recommends monitoring leaf undersides, conserving natural enemies, and using insecticides only when needed. For a home plant, start by washing the undersides with a targeted stream of water and using yellow sticky cards for monitoring, not as the sole solution. Insecticidal soap or horticultural oil can work by contact, so coverage of the underside matters and repeat applications may be required.

An open tomato bed is easier to scout and manage than a dense, closed canopy; companion plants do not replace pest monitoring.
Avoid spraying blooming plants when bees are foraging, and follow the label’s directions for edible crops. Reflective mulch can delay early colonization in some production settings, but it becomes less useful as the canopy covers the reflective surface. Companion planting is not a substitute for inspecting the plant and managing weeds or infected transplants.
7. Late blight or another foliar disease
Late blight is the urgent look-alike. It begins with dark, water-soaked lesions that enlarge quickly; under humid conditions, white mold may appear along the lesion margins on the underside of leaves. The combination of rapid spread, wet-looking brown or black tissue, and white growth below the leaf is more concerning than a few dry white flecks.
Penn State Extension’s tomato disease guide notes that late blight can defoliate tomato plants rapidly and that spores move with wind and rain. The same guide distinguishes Septoria leaf spot, which generally starts as dark spots whose centers become whitish to tan, from the powdery film of mildew. Because leaf diseases overlap visually, a local extension office or plant clinic is worth contacting when symptoms are spreading fast.
Do not work through a wet tomato patch, drag a suspicious plant past healthy ones, or compost clearly diseased leaves in a small home pile. Remove badly affected tissue or the whole plant only after considering the likely disease and local disposal rules, disinfect tools, and avoid planting tomatoes or potatoes in the same spot without a rotation plan.
8. Mosaic virus
Mosaic virus does not usually create isolated white dots. It produces a patchwork of light and dark green, yellow streaks or spots, distorted leaves, shortened growth, and sometimes uneven or damaged fruit. The pattern may look pale or whitish in strong light, which is why it belongs in a white-spot diagnosis—but the whole-plant pattern is the important clue.
NC State Extension’s tobamovirus factsheet explains that Tomato mosaic virus and related tobamoviruses can move through contaminated seed, transplants, tools, sap, hands, and plant debris. There is no curative chemical treatment for an infected plant. If the pattern is strongly suggestive, stop pruning and handling healthy plants until you clean your tools and hands, remove the suspect plant, and dispose of it according to local guidance.
Do not save seed, cuttings, or suckers from a plant with unexplained mosaic symptoms. Herbicide injury and severe nutrient stress can mimic mosaic, so a valuable planting deserves a diagnostic opinion before removal when the evidence is mixed.
9. Nutrient or root-zone stress
Nutrient problems are often blamed for “white spots,” but a deficiency more commonly causes broad paling, interveinal chlorosis, distorted new growth, or a gradual loss of green color—not a powdery patch on one leaf. Root damage, fluctuating moisture, high soil pH, or excess soluble salts can also prevent nutrients from reaching the plant and create pale tissue.
Look for a pattern across many leaves. Older leaves that fade first suggest a mobile nutrient issue; newest leaves that emerge pale or distorted suggest a different problem. Check drainage, recent fertilizer, root-zone moisture, and the soil test before adding a corrective product. Penn State groups nutrient, moisture, and light problems under environmental stresses, a useful reminder that “feed it” is not a diagnosis.
Never pour a concentrated fertilizer onto a tomato because one leaf looks pale. Excess salts can injure roots and leave residue on leaves, creating a second problem while the original stress remains. Correct the growing conditions first, then use a soil test or local extension recommendation to guide any amendment.
What to Do Today
Your first response should reduce risk while you gather evidence. Photograph the plant, mark the affected leaves with removable garden tape or a note, and inspect again in 24 to 48 hours. A symptom that changes rapidly needs a different level of attention from a crust that remains identical after a rinse.
Match the treatment to the cause
Use this sequence unless the plant is collapsing or late blight is strongly suspected:
- Stop unnecessary sprays and fertilizer. You need a clean baseline before adding another variable.
- Inspect both leaf surfaces and nearby plants. Look for insects, webbing, honeydew, tunnels, or matching symptoms.
- Remove only clearly damaged or heavily infected leaves. Keep enough green canopy to support fruit, and bag diseased material rather than shaking it around.
- Correct the environment. Open crowded foliage, water at the soil line, protect from sudden heat, and avoid keeping the canopy wet overnight.
- Choose a labeled treatment only when the diagnosis and crop fit. Follow the label’s rate, protective equipment, reentry instructions, pollinator precautions, and preharvest interval.
Fungicides can protect healthy tissue or slow a fungal disease; they cannot reverse sunscald, remove a leafminer larva from a mine, cure a virus, or make dead cells green. Oils and insecticidal soaps are contact materials that need coverage, and homemade mixtures can burn tomato foliage. If a product label does not list tomatoes and the target problem, do not improvise.
Know when to remove the plant
Remove a plant promptly when it is collapsing, the stem is girdled, symptoms are spreading through the canopy faster than cleanup can contain them, or a virus is strongly suspected. Also remove heavily infested plants that are acting as a source for nearby tomatoes when they have little healthy growth left to protect.
Monitor instead when the damage is limited to a few older leaves, the plant is still producing clean new growth, and the pattern fits residue, sun injury, light mite damage, or a manageable leaf spot. Old marks may stay visible for the rest of the season; judge success by whether new leaves stay healthy, not by whether a scar disappears.
Ask an extension service or diagnostic lab when several plants are affected, the pattern does not fit any category, a valuable crop is involved, or a disease keeps returning after correct sanitation and label-led treatment. Send a whole-plant photo, close-ups of both leaf surfaces, the growing location, recent weather, watering and spray history, and the date symptoms began.
Prevent White Spots Next Season
Most tomato leaf problems become easier to manage when the crop starts clean and the canopy has room to dry. Prevention cannot block every disease, but it reduces the number of opportunities for spores, pests, contaminated tools, and plant stress to work together.
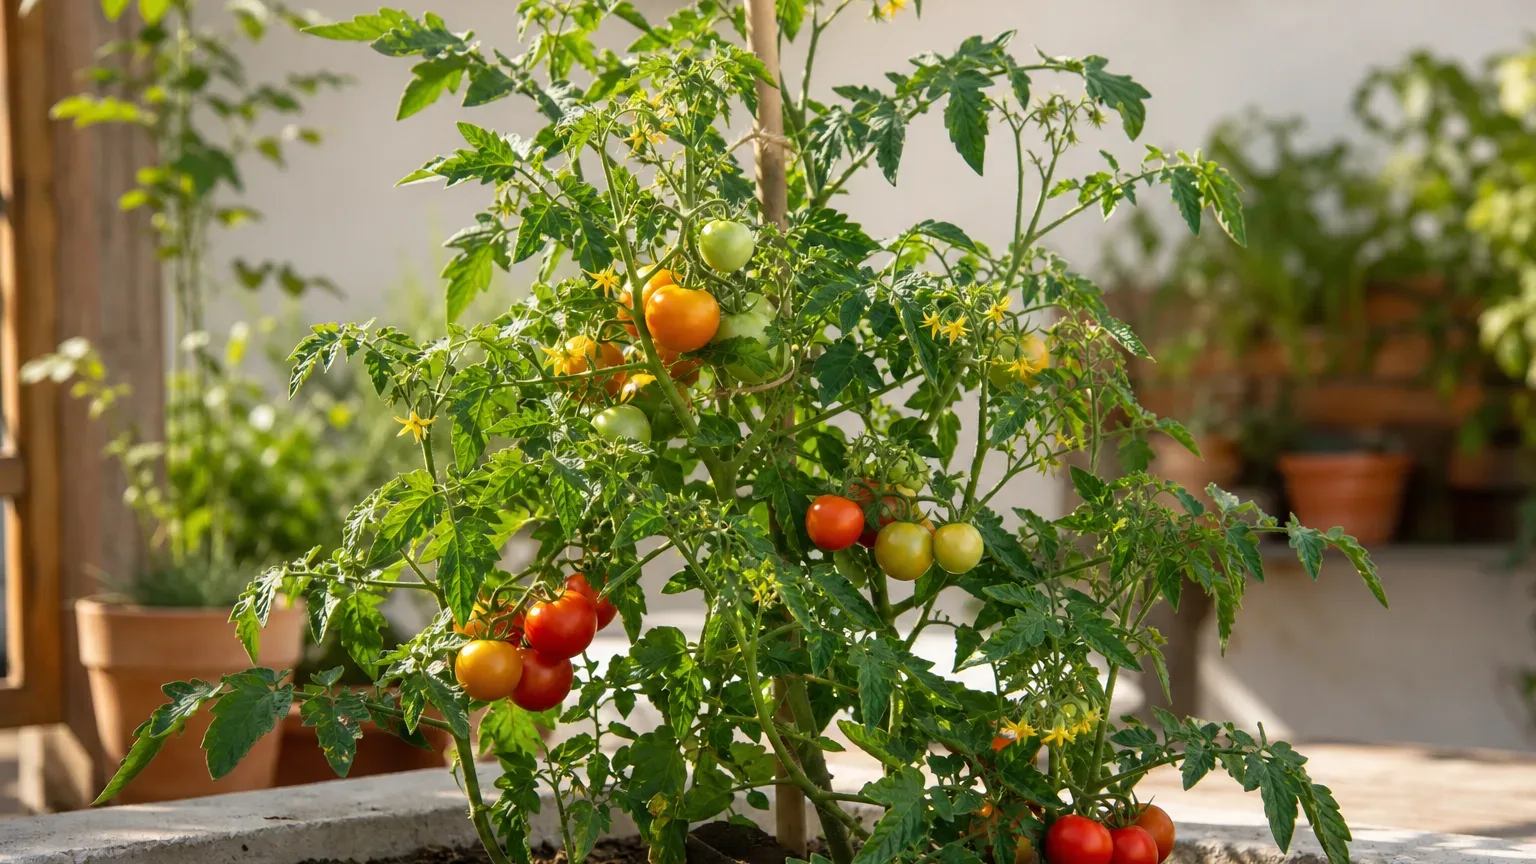
A healthy, open tomato canopy gives you a useful baseline for spotting new leaf changes early.
Keep foliage, tools, and transplants clean
Buy vigorous, symptom-free transplants and inspect the undersides of leaves before planting. Space tomatoes according to the variety’s mature size, stake or trellis them so foliage is not lying on soil, and remove old plants promptly after harvest. Rotate tomatoes and potatoes away from the same bed when practical, especially after a serious disease outbreak.
Clean pruners between plants and after cutting suspicious tissue. Wash hands before moving from a symptomatic plant to a healthy one, and do not share unwashed stakes, ties, trays, or potting tools. NC State’s tomato disease resources provide crop-specific factsheets for disease identification and management when a symptom needs more than a field guess.
Build a canopy that dries and breathes
Water deeply at the base when the soil needs it, preferably early enough that accidental splashes dry quickly. Avoid routine overhead watering, nighttime misting, excess nitrogen, and dense pruning that leaves tender growth packed together. In hot climates, use shade cloth or afternoon protection strategically rather than removing all the leaves that shade fruit and the upper canopy.
Scout once or twice a week, with extra attention after humid nights, rain, heat waves, transplanting, or a new spray. The best time to act is when you see one or two suspicious leaves and can still decide between wiping, rinsing, pruning, monitoring, or treating. By the time a whole tomato plant looks white, the diagnosis matters more than the product aisle.
Conclusion
White spots on tomato leaves can be powdery mildew, residue, sun injury, mites, leafminers, whiteflies, a serious foliar disease, mosaic virus, or root-zone stress. The reliable fix starts with the pattern: wipe one spot, inspect the underside, look for insects or tunnels, compare old and new growth, and note how quickly the symptom is spreading.
Once you know what you are seeing, use the smallest intervention that fits. Remove active disease, correct airflow and watering, protect fresh growth from heat, preserve beneficial insects, and use only a tomato-labeled product when the diagnosis and label agree. When the plant is collapsing or showing a systemic mosaic pattern, stop experimenting and ask local extension or diagnostic help before the problem reaches the rest of the crop.



