10 Reasons Outdoor Plant Leaves Turn Yellow
Outdoor plant leaves turning yellow? Match the pattern to ten likely causes, run safe checks first, and learn when soil testing or expert help matters.
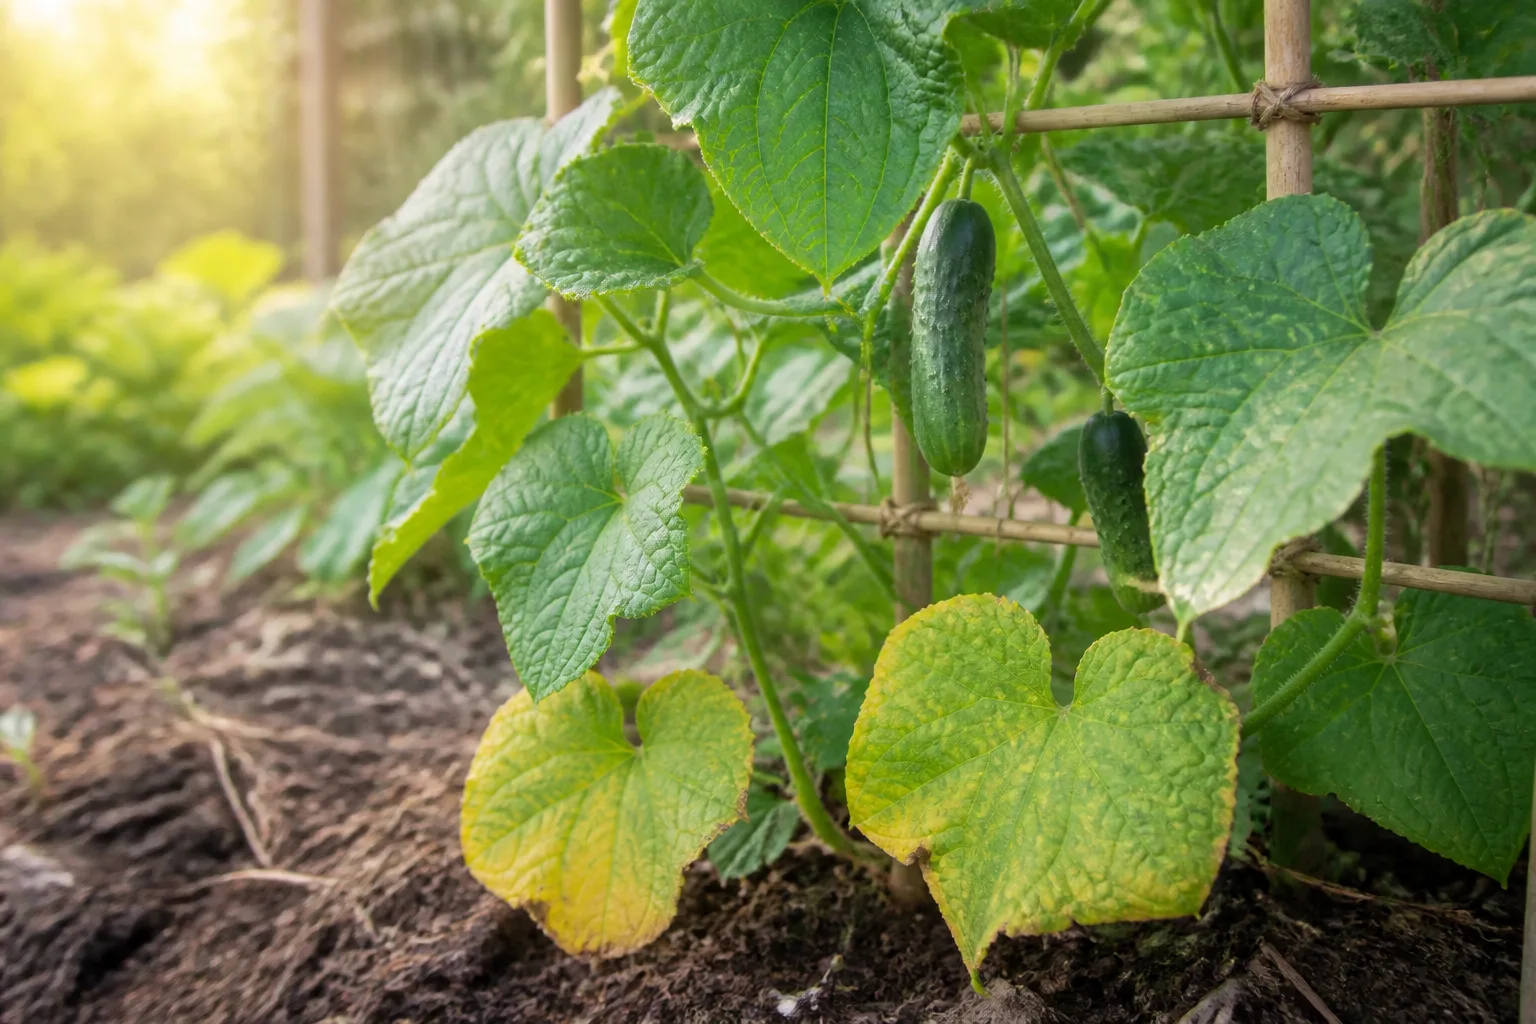
A yellow leaf is a symptom, not a diagnosis. Drought, saturated roots, low light, nutrient problems, pests, disease, chemical injury, and normal aging can all reduce green color, so adding water or fertilizer simply because a leaf looks yellow can make the wrong problem worse.
Start with four clues: which leaves changed first, what the yellow pattern looks like, whether the whole plant or one branch is affected, and what changed in the weather or garden recently. Then check the soil and underside of leaves before you prune, feed, spray, or dig up a plant.
Start with the pattern, not the color
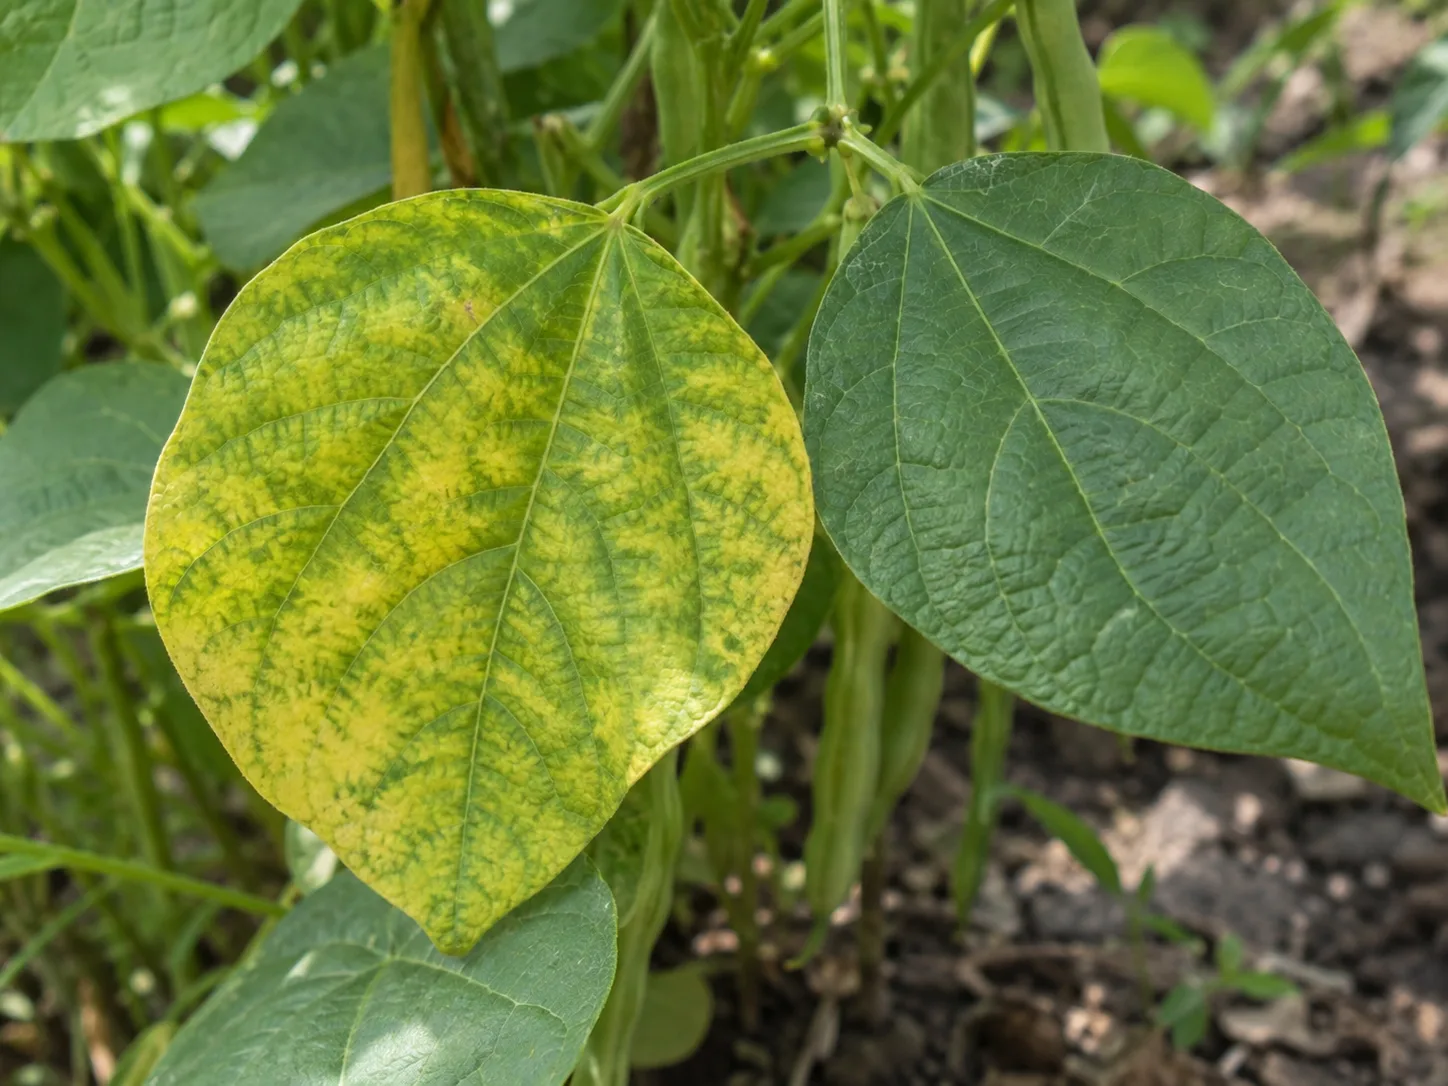
Look at the plant as a whole before inspecting one dramatic leaf. Note whether symptoms begin on older leaves near the base or on the newest growth at the tips; whether yellowing is even, between veins, along margins, or in separate spots; and whether the change is limited to one branch, one side, one bed, or many plants. These patterns narrow the possibilities, but they do not identify a nutrient or disease with certainty on their own. The Royal Horticultural Society (RHS) emphasizes that chlorosis has many causes and that leaf position, pattern, and accompanying symptoms matter together (RHS chlorosis guide).
A simple timeline is often more useful than a close-up. Write down the date yellowing began, the last deep rain or irrigation, recent fertilizer and spray applications, heat or cold events, and any transplanting, pruning, or soil disturbance. If several species in the same area change at once, suspect a shared exposure such as irrigation, drainage, spray drift, or weather before assuming that every plant has the same disease.
Use this distinction carefully: a pattern is a clue that tells you what to check next. It is not proof. For instance, yellow tissue between green veins can fit iron, manganese, or magnesium problems, but poor roots, cool conditions, and pH can also interfere with uptake. A soil test and a plant-specific history are more reliable than a color chart.
1. The plant is getting less light than it needs
A plant growing in deeper shade than its needs may produce paler, thinner growth, stretch toward a light source, or lose vigor over time. The change often affects the shaded side or lower interior of a dense shrub first, especially after a neighboring tree leafs out or a structure begins casting a longer shadow. The clue is a repeated relationship between where the foliage sits and how much light reaches it, not a single yellow leaf.
Check before moving or pruning: Compare the plant’s location with its species or cultivar’s published light requirement, then observe the site at several times of day. A quick glance at noon can miss morning or afternoon shade. Also check whether the plant recently moved from a nursery’s brighter, more protected setting into an exposed one; excessive sun and heat can also bleach or scorch leaves, so “more light” is not a universal fix.
For a container, move it gradually toward the appropriate light level and watch new growth rather than expecting already yellow tissue to recolor. For an in-ground plant, do not remove a healthy tree canopy just to test a hunch. If the location is persistently unsuitable, consider whether the plant can be relocated in its appropriate planting season or replaced with one suited to the site.
2. The root zone is too dry
Dry soil can interrupt water delivery to leaves, particularly during hot, windy weather, in sandy soil, beneath shallow-rooted trees, or soon after planting when a root ball has not grown into the surrounding ground. Leaves may look limp or curl before yellowing, and crispy margins or premature leaf drop may follow. A newly planted shrub can wilt even when the garden around it looks moist because its original root ball and nearby soil dry at different rates.
Test the soil, not the leaf: Push a finger, trowel, or narrow soil probe several inches into the root zone, checking both the original root ball and surrounding soil. Surface dryness alone is not enough: mulch and a dry crust can hide moist soil below, while a wet surface can cover a dry root ball. Compare moisture at more than one point and account for recent rainfall; a fixed calendar does not reflect plant size, soil texture, or weather.
If the root zone is genuinely dry, water slowly enough for the soil to absorb it rather than letting water run off. Recheck later at depth. Newly planted woody plants often need more attentive watering while roots establish, but established plants differ in drought tolerance. Avoid frequent shallow sprinkling that wets only the surface, and do not continue watering if the soil is already saturated. The RHS notes that drought-related yellowing can progress to browning and leaf loss, especially in poorly established new plants (RHS chlorosis guide).
3. Soil stays wet and roots lose oxygen
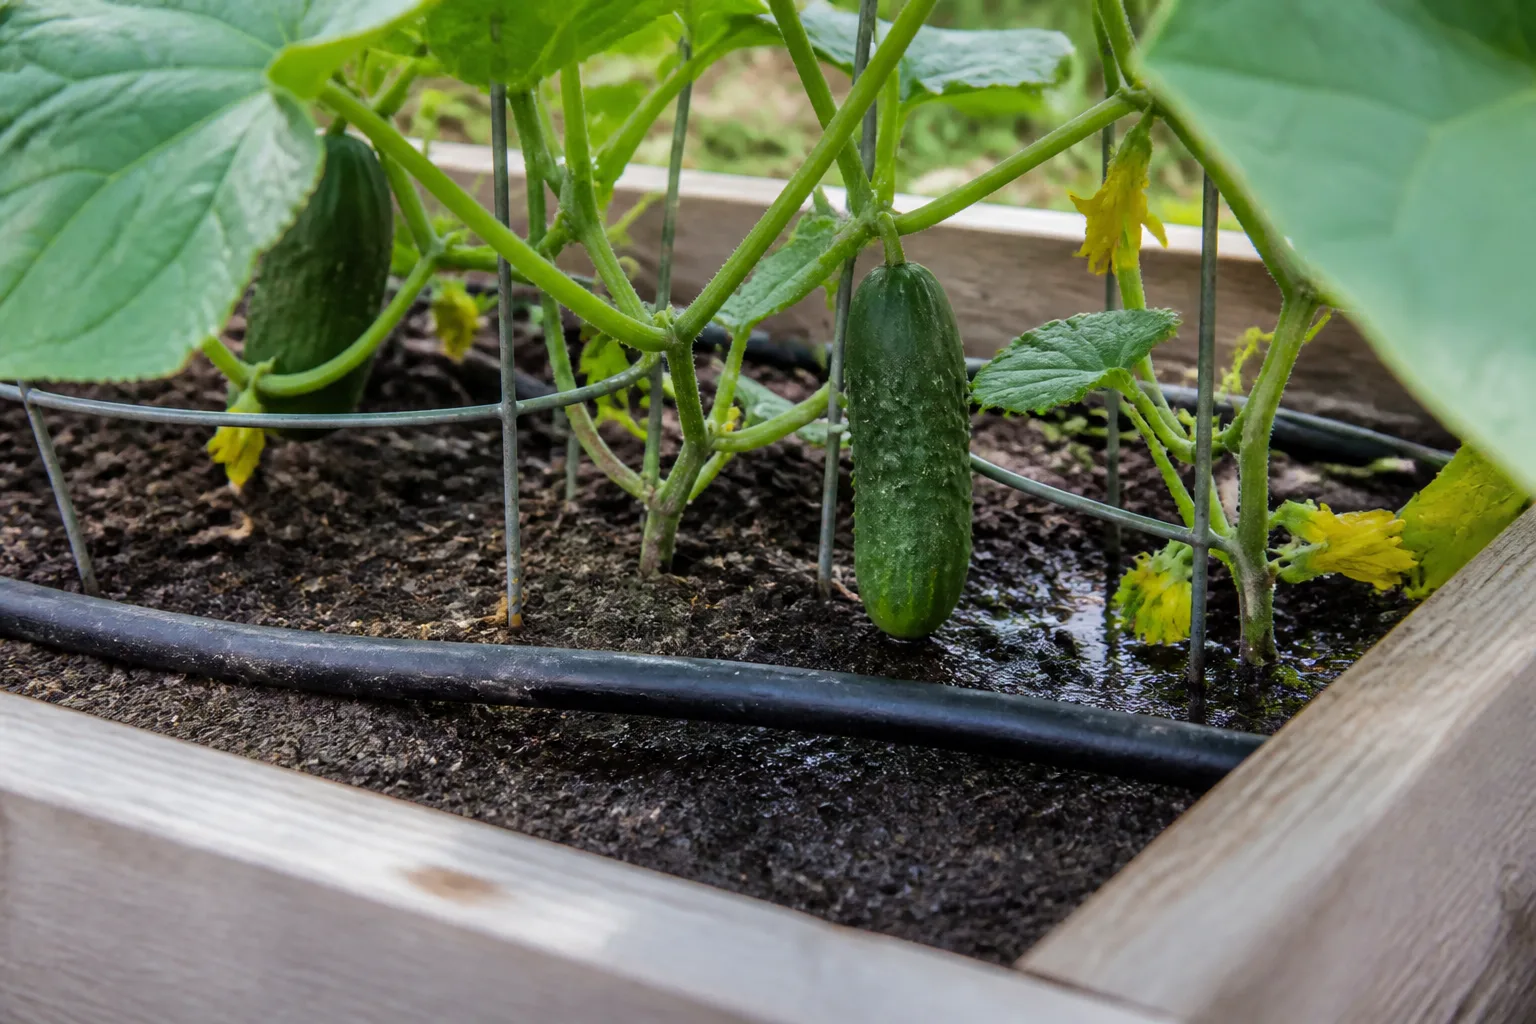
Too much water can create a plant that looks thirsty. When soil remains saturated, air spaces fill with water and roots lose access to oxygen; damaged roots then absorb water and nutrients poorly. You may see yellowing, soft or decaying foliage, stalled growth, wilting despite wet soil, or a sour smell from badly decayed roots. The RHS describes prolonged waterlogging as a cause of reduced root function, yellow leaves, root rot, and decline (RHS waterlogging guidance).
Confirm persistence: Check the soil at root depth after ordinary rain or irrigation, not just immediately after a storm. Look for puddles that remain, a low point where runoff collects, compacted soil, a downspout emptying beside the plant, or a container without free drainage. One brief downpour is not the same as prolonged waterlogging; how long the soil stays saturated and whether the species tolerates wet ground matter more than the fact that it rained.
If the site is persistently wet, stop adding water and address the cause first. Redirect runoff, clear blocked drainage where appropriate, avoid walking on saturated ground, and plan longer-term changes only after understanding the soil and site. Do not pour in fertilizer to “green up” a plant with impaired roots. Do not dig around a mature shrub or tree aggressively: cutting roots can add another stress. A plant adapted to wet conditions may be a better long-term choice than trying to turn a naturally wet bed into a dry one.
4. A nutrient is missing or unavailable
Nutrient shortages can cause chlorosis, but the clue is often the age and pattern of affected leaves, not simply the shade of yellow. Nitrogen shortage commonly starts on older leaves with more general paling and reduced vigor. Iron deficiency often affects young leaves first and can leave veins greener than the tissue between them; magnesium and manganese patterns may begin on older or more mature foliage. Potassium problems can show more yellowing or browning at leaf edges. These are tendencies, not field diagnoses: species, growth stage, root condition, and combinations of stresses can change the pattern.
The RHS nutrient guide also cautions that growing conditions can resemble deficiencies: dry roots cannot take up nutrients, soggy compost or soil can impair absorption, and nutrient availability changes with pH (RHS nutrient deficiency guidance). A peer-reviewed study found that iron deficiency produced chlorosis in areca palm seedlings under its controlled conditions, while excessive iron also reduced plant performance (Li et al., 2021). That research supports a key practical point—more of a nutrient is not automatically better—and it should not be generalized into an iron treatment for unrelated garden plants.
Test before feeding: For an in-ground plant, use a representative soil test that reports pH and the nutrients relevant to the crop or landscape. Sample according to the lab’s directions and avoid fertilizer granules, compost piles, or recently amended spots. For a container, review when and how it was fed, how long the mix has been in use, drainage, and the plant’s needs. Correct a confirmed shortage at the labeled rate; do not add a broad trace-element blend, Epsom salts, or high-nitrogen fertilizer just because leaves are yellow.
5. Soil pH is blocking nutrient uptake
A plant can have access to iron in the soil and still be unable to take it up efficiently when the soil reaction is unsuitable for that species. Alkaline or chalky soil can make iron and manganese less available, so acid-loving plants such as blueberries, rhododendrons, and azaleas may develop pale new leaves with greener veins in a high-pH site. RHS guidance identifies alkaline conditions as a common reason these nutrients are less available to roots (nutrient deficiencies; soil pH and testing).
Confirm the soil reaction and the plant requirement together. A low-cost kit can screen for pH, but a lab soil analysis is more useful when the result will drive amendment choices. Test the actual root zone and use a method suited to your soil. If the soil is acidic but a plant still shows a suspected iron pattern, pH may not be the issue; root damage, waterlogging, cold soil, or a different disorder can imitate it.
Do not scatter sulfur, lime, vinegar, coffee grounds, or iron products over a bed to change its pH by guesswork. The amount and feasibility of a pH change depend on the soil’s texture and buffering capacity, and large or repeated amendments can create a new imbalance. Where the native soil is naturally alkaline and the plant is strongly acid-loving, a suitable container mix or a better-matched plant may be more practical than trying to remake the entire bed.
6. Fertilizer salts have injured the plant
A fertilizer injury becomes more plausible when yellowing, brown leaf tips, or scorched margins appear soon after a concentrated feeding, a spill, or an application during hot, dry weather. Granules left against stems or foliage can create a localized burn; excess soluble salts in the root zone can make it harder for roots to take up water. A sharp boundary near where product landed is a stronger clue than uniform yellowing that began weeks earlier.
Check the application record: Identify the product, amount, placement, and date. Look for undissolved granules on leaves or around the stem and compare the damaged area with the treated area. Then check soil moisture and drainage: drought or waterlogging can coexist with fertilizer injury, so the product timing does not prove it was the only cause.
Remove granules from foliage without rubbing or spreading them. Do not add more fertilizer, Epsom salts, or a “tonic.” Whether leaching is appropriate depends on soil drainage, product, and local water conditions; flushing a poorly drained bed can further deprive roots of oxygen and carry nutrients away. Follow the label and seek local extension advice if the application was heavy, the plant is valuable, or nearby waterways could be affected. Prevention is straightforward: measure rather than estimate, keep concentrated products off foliage and stems, and apply only when the soil and plant can tolerate it.
7. Pesticide or herbicide contacted the foliage
Chemical injury becomes a leading possibility when leaf changes start soon after a spray, appear on the side facing an application area, or follow a neighbor’s weed treatment. Herbicide injury can include unusual twisting, cupping, strapping, distorted new growth, yellowing, and dieback; contact products may leave patchy marks where droplets landed. Some symptoms develop after a delay, and drought, heat, frost, or disease can look similar, so a spray history is a clue rather than proof.
Reconstruct exposure before treating: Write down the product name, dilution, date, temperature, wind, whether the foliage was wet, and which plants were nearby. Compare new and older growth, and inspect unaffected plants outside the likely drift path. If a product was used, retain its label and take clear photographs; this information helps a local extension office or diagnostic clinic assess the pattern.
Do not spray a second product to counteract the first, and do not assume an “organic” product cannot injure leaves. Avoid making pesticide recommendations based on yellow color alone. For any future application, use only a product labeled for the intended plant and problem, follow all label directions, and avoid drift conditions; the label is the controlling instructions for safe application. Damaged tissue usually remains damaged, so judge recovery by healthy new growth rather than by whether old leaves turn green again.
8. A disease is creating spots, streaks, or decline
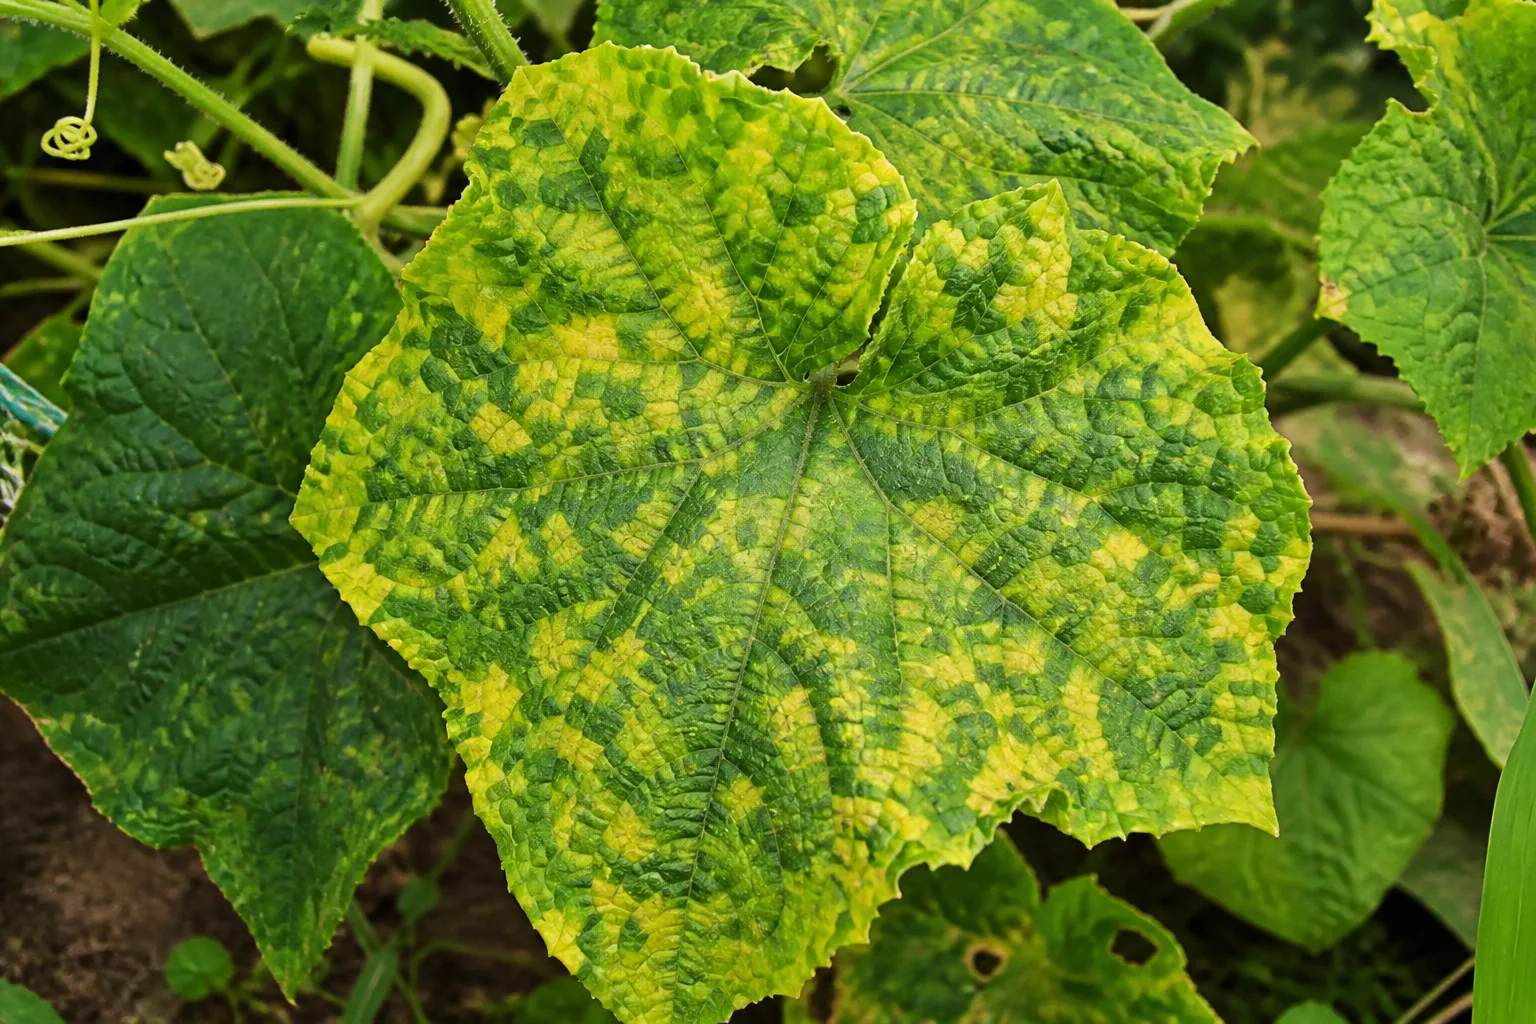
Disease moves up the list when yellowing comes with expanding lesions, dark margins, rings, a mosaic or mottled pattern, fuzzy growth, stem cankers, or progressive dieback. Fungal leaf spots often have discrete centers or halos; rust may produce colored pustules; some mildews leave surface growth. Viruses can create irregular mosaics, streaks, distortion, or stunting. Root or vascular diseases may instead cause a branch or side of the plant to wilt and yellow while soil moisture seems adequate.
The RHS notes that chlorosis linked to viruses varies by plant and pathogen, and that leaf spots, rusts, mildews, root disease, and vascular disease may all yellow foliage in different ways (RHS chlorosis guide; leaf damage on woody plants). This is why a broad label such as “fungus” is not enough to choose a treatment. A cucumber mosaic pattern, for example, is not interchangeable with nitrogen shortage, even if both include yellow patches.
Look for a pattern and spread: Photograph the whole plant and close details, including the underside of leaves. Note whether new lesions appear, whether neighboring plants show the same symptom, and whether the problem follows wet foliage or splash exposure. Avoid handling multiple plants with the same unclean pruning tool. Remove only clearly dead or diseased material when doing so is appropriate for the plant, and bag suspect tissue if an expert requests it. If the plant is an important fruit tree, vegetable, or specimen and symptoms are advancing, use a local plant diagnostic clinic before applying a fungicide or removing the plant.
9. Sap-feeding insects or root feeders are present
Aphids, whiteflies, and spider mites can drain sap and create pale stippling, speckling, curling, sticky honeydew, fine webbing, or clusters of insects on new growth or leaf undersides. A few pests may be difficult to spot until you turn a leaf over or tap it over white paper. Root-feeding insects are harder to confirm without examining the root zone and may cause whole-plant decline that resembles a water problem.
Inspect before spraying: Check both sides of several leaves, tender stems, and the growing tip on more than one branch. Use a hand lens if available. Look for live insects or characteristic residue rather than treating a plant because it is yellow. Also inspect the plants around it; pests may concentrate on a particular species while nearby plants remain clean. Yellow sticky cards can monitor flying adults in some situations, but they do not identify every pest or solve the underlying infestation by themselves.
If you find a small, localized population, start with a targeted, low-impact response appropriate to the pest and plant, such as removing heavily infested leaves or washing pests off sturdy foliage. Preserve beneficial insects when possible. If a pesticide is warranted, identify the pest first and use a product labeled for that plant and pest exactly as directed; broad-spectrum spraying can harm pollinators and natural enemies. Root pests or a spreading infestation merit local expert help because control depends on the insect’s life stage and host.
10. Older leaves are being shed normally
A few lower or inner leaves turning yellow one at a time can be ordinary leaf turnover when the plant is otherwise growing well. Evergreen shrubs and perennials replace foliage too; the older leaves do not remain indefinitely. Seasonal timing, the plant’s natural habit, and steady healthy new growth matter more than the color of one leaf.
Watch the rate and the plant’s new growth. If yellowing is limited to old foliage near the base, happens gradually, and does not come with wilting, spotting, distortion, dieback, or loss of vigor, leave the plant alone for a short observation period. The RHS notes that some evergreens shed older leaves in a noticeable flush, while loss of young leaves or other decline warrants further investigation (RHS chlorosis guide).
Remove a fully yellow leaf only if it detaches easily or is unsightly; cutting healthy green tissue is unnecessary. Do not prune a shrub heavily to “reset” it, and do not fertilize just to prevent normal aging. If the yellowing accelerates, spreads to young leaves, or appears with another symptom, return to the pattern-and-site checks above.
A safe first-pass diagnosis you can do today
- Map the change. Photograph the whole plant and close-ups. Mark whether old or new leaves, margins, veins, spots, one branch, or one side changed first.
- Check the recent timeline. Review rainfall, irrigation, heat, cold, transplanting, pruning, fertilizer, herbicide, and pesticide use from the weeks before symptoms appeared.
- Inspect the root zone. Check moisture below the surface at several points, examine drainage after rain, and compare the root ball with surrounding soil on new plantings.
- Inspect leaves and stems. Look beneath leaves for insects, webbing, eggs, and residue; check spots for borders or surface growth; note distortion and dieback.
- Change one confirmed factor. If the soil is dry, water appropriately; if it is saturated, stop adding water and address drainage; if pests are present, identify them; if nutrients or pH are suspected, test before amending.
- Recheck new growth. Keep a short photo record over the next one to two weeks, adjusting that interval for weather and how quickly the species grows. Existing yellow tissue may not recover, so improvement means fewer new symptoms and healthier new leaves.
This sequence protects the plant from a common diagnostic trap: treating the most familiar cause before checking whether it fits. It also makes follow-up more informative. If one measured change does not slow the problem, you can report what you tested rather than layering more treatments on top.
What not to do while you are still diagnosing
Do not water daily because the leaves look limp, fertilize because the leaves look pale, or spray because you saw one insect. Wet roots may already be failing, and a plant with damaged roots can look thirsty. Likewise, yellowing from pH or root stress will not necessarily improve with fertilizer, and an incidental insect may not be responsible for a larger pattern.
Avoid making several changes at once. Adding compost, fertilizer, sulfur, lime, iron, and more irrigation together may temporarily change symptoms but removes the chance to learn which condition mattered. It can also create salinity or nutrient excess, shift pH too far, or increase runoff. Make the least disruptive correction that follows from a check you actually performed, then watch the new growth.
Do not strip every yellow leaf immediately. A plant may still move usable nutrients out of an aging leaf before it drops, while premature pruning removes photosynthetic tissue. Remove foliage that is fully dead, broken, or clearly infected when sanitation calls for it, but keep some unaffected leaves and avoid leaving a plant suddenly bare.
When to use a soil test or ask for expert help
A soil test is worthwhile when the same area repeatedly shows poor growth, you suspect pH or nutrient imbalance, or fertilizer use has not helped. Ask the lab what sample depth, number of subsamples, and test package fit your plant and soil. For a single container, review the potting mix, feeding history, drainage, and root health first; garden-bed soil analysis does not diagnose every problem in a pot.
Contact a county or regional extension service, horticultural society, or plant diagnostic clinic when the plant is valuable, symptoms are rapidly spreading, a tree or shrub is wilting branch by branch, multiple plants show patterned lesions, or chemical drift is possible. Provide a whole-plant image, close-up, affected and unaffected leaves, plant identity, location, symptom timeline, weather, watering, and treatment history. A well-chosen sample is more useful than a bag of leaves with no context.
Seek confirmation before removing a mature plant or using a pesticide, fungicide, sulfur, lime, or concentrated nutrient product. A laboratory may be able to distinguish a pathogen or nutrient issue, but it may also need fresh tissue, roots, or soil collected to its specifications. Ask first rather than mailing a sample that is too old, too small, or from the wrong part of the plant.
Conclusion
Yellow leaves are easiest to solve when you treat them as evidence and follow the pattern. Check the age and location of affected leaves, look for spots or insects, review recent weather and applications, and test soil moisture and drainage before adding water or nutrients.
If the clues point to a specific cause, make one measured correction and judge the result by new growth. If they do not, hold off on stronger treatment and use a soil test or local plant diagnostic service. That slower first check is usually faster—and safer—than guessing at the color.



