How to Mulch Your Garden for Winter Protection
Winter mulching is not the same as spring mulching. Get timing, depth, material, and placement rules that stop frost heave, crown rot, and rodent damage.

You pulled the last tomatoes, cut back what needed cutting, maybe even shut off the outdoor spigot—and then you treated the garden like it was finished. That is the mistake even experienced gardeners make: skipping winter mulch, or applying the same thin spring layer at the wrong time. Fall cleanup feels like closure. Winter mulch is the insurance policy that keeps dormant roots from heaving out of frozen soil, stops bare vegetable ground from eroding, and holds beds in a steady cold dormancy instead of a rollercoaster of thaw-and-refreeze cycles.
This is not about making plants cozy. Winter mulching is a different job than summer mulching. In warm months, mulch cools soil, holds moisture, and blocks weeds. In winter, the goal is to moderate soil temperature swings, protect crowns from frost heave, and shield empty beds from wind and water erosion. Get the timing, depth, and material wrong and mulch can rot crowns, feed voles, or delay spring growth as badly as leaving beds bare.
The Forgotten Step Is Winter Mulch — Not Your Spring Layer
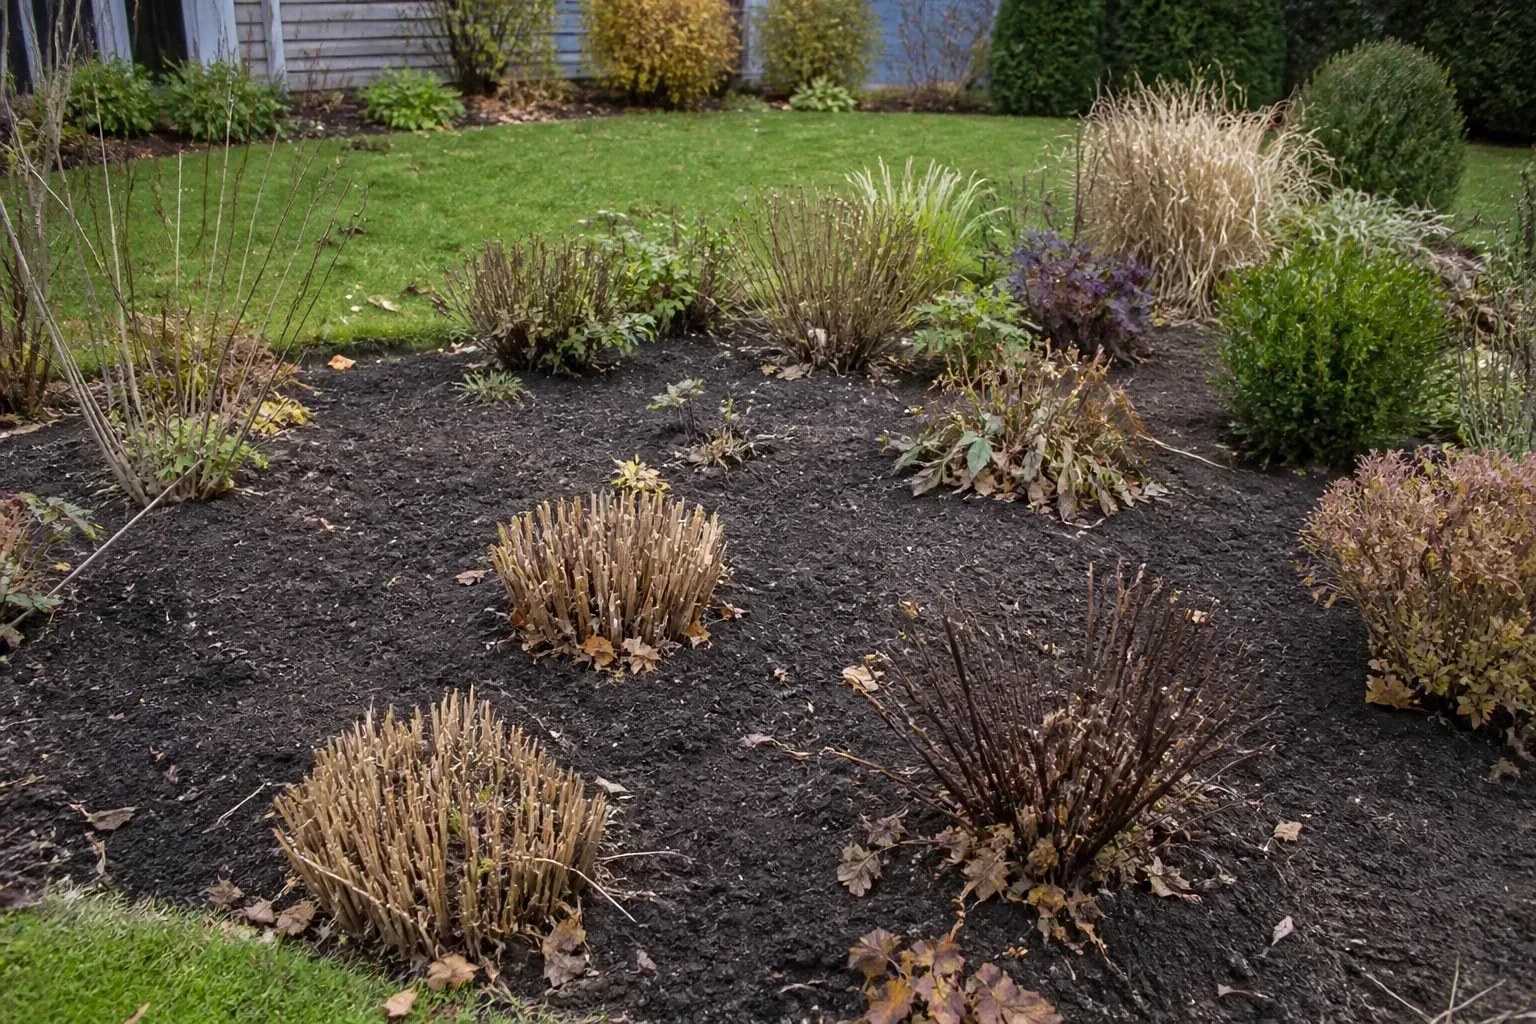
Most gardeners mulch in spring without thinking twice. By late fall, energy is gone and the list is long: drain hoses, water evergreens one last time, stash tools, rake leaves. Mulch drops off that list because dormant beds look fine—and established perennials have survived before.
The problem is that today’s winters are less predictable. Snow may arrive late, melt between storms, or never pile deep enough to insulate. Bare soil goes through repeated freeze-thaw cycles. Shallow-rooted perennials, fresh fall plantings, and bulbs heave out of the ground. Vegetable beds lose the organic matter you built all season. Winter mulch fills the gap when reliable snow cover does not show up.
If you already read a general fall checklist, winter mulch is the step that turns cleanup into protection. For bed prep tasks you can start earlier in the season, see our guide on ways to start prepping garden beds in winter. The two guides pair well: early winter is for planning, soil tests, and light cleanup; late fall after hard freeze is for the protective mulch layer on living beds.
Experienced gardeners sometimes assume a thick leaf layer from autumn raking counts as winter mulch. Loose dry leaves help, but a thin scatter that blows away or a wet matted mat against crowns is not the same as a deliberate 4–6 inch insulating layer applied at the right moment. If your leaves are already there, top them up after freeze rather than counting on whatever survived October wind.
Why Winter Mulch Works Differently Than Summer Mulch
Frost Heaving and the Freeze-Thaw Cycle
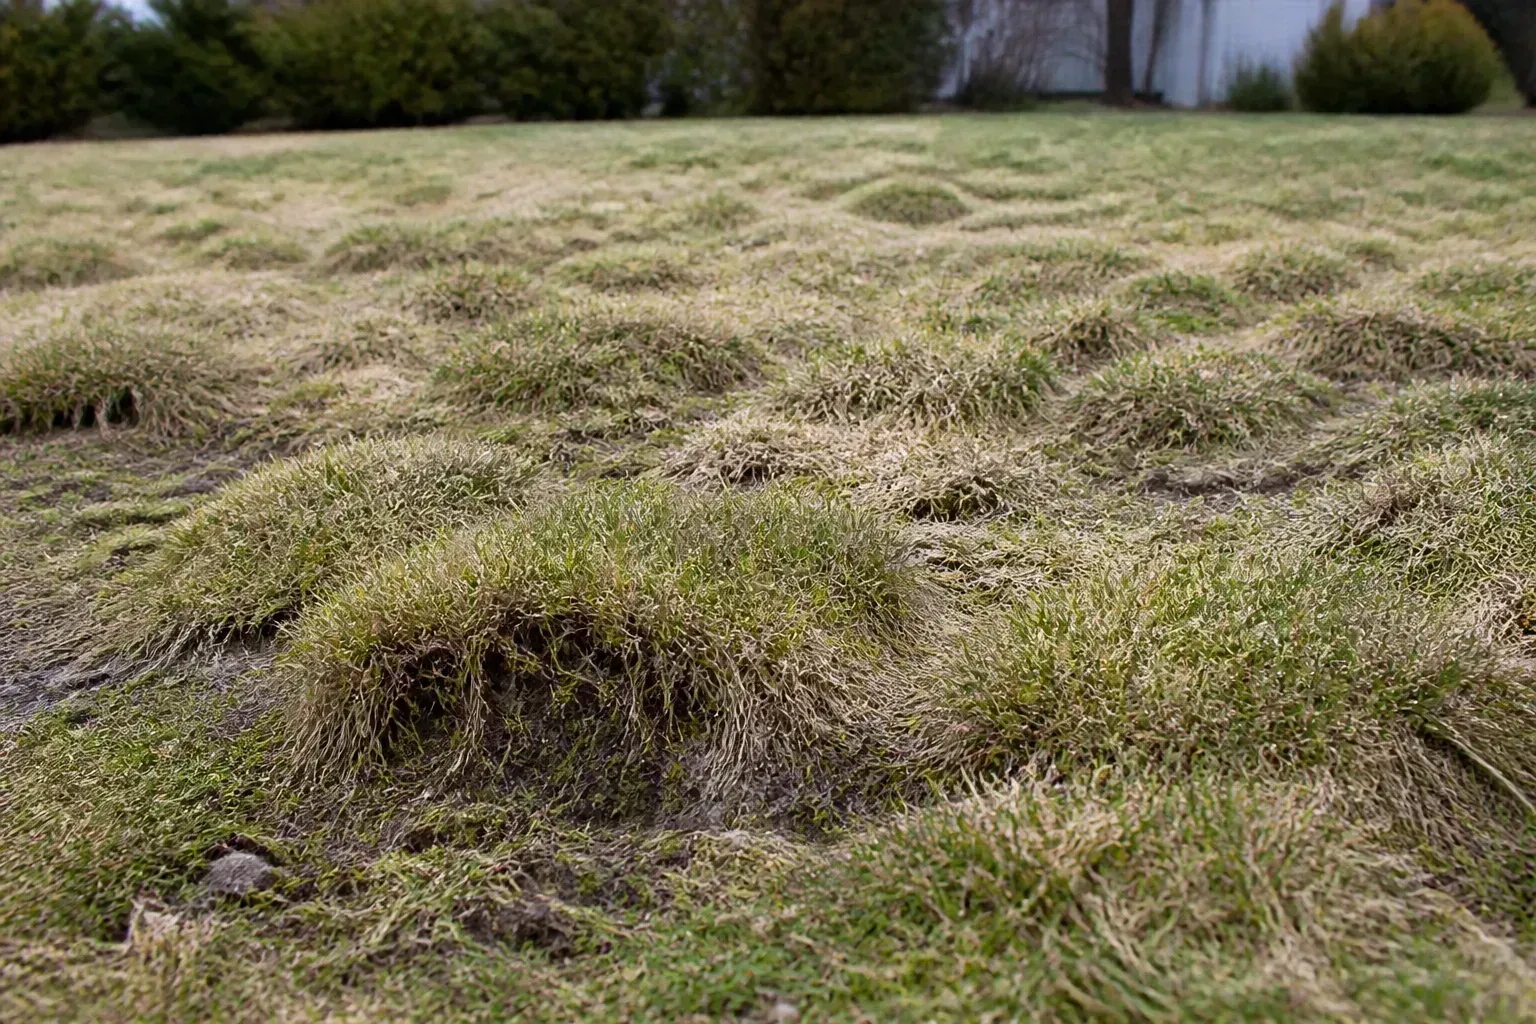
Frost heaving happens when moist soil freezes, expands, and pushes plant crowns and roots upward. On the next warm day the soil thaws and settles, but the plant may stay partially exposed. Repeat that cycle and roots dry out, crowns freeze, and spring finds you with dead patches that looked healthy in October.
According to the Missouri Botanical Garden’s mulch factsheet, mulches reduce heaving by loosening soil structure and lessening the tension between water molecules as they form subsurface ice—the physical pressure that tears crowns and roots. Mulch does not prevent freezing in cold climates; it slows and smooths the freeze-thaw rhythm so crowns stay anchored.
Heaving shows up as plants sitting higher than you planted them, roots visible at the surface, or perennials that wobble when you tug gently. Bulbs may sprout in spring from odd angles. The same mechanism affects lawns—bumpy turf after snowmelt is often frost heave, not snow damage alone. Our guide on signs snow damaged your lawn walks through heave on turf; in beds, mulch is the fix before snow even arrives.
Clay-heavy and poorly drained beds heave aggressively because they hold more water to expand when frozen. Sandy beds heave less but dry out faster when crowns lift. Mulch helps both: on clay it moderates temperature swings; on sand it reduces desiccation when crowns are briefly exposed during a mid-winter thaw.
Locking in Cold After Plants Go Dormant
Here is the counterintuitive part most articles bury in one sentence: apply winter mulch after a hard freeze, not before. The National Gardening Association explains that winter mulch’s main job is to lock in cold and keep soil conditions consistent—not to keep plants warm. Early mulch keeps soil warm, which can delay dormancy or trigger late growth that gets killed when cold returns.
Wait until the ground begins to freeze—typically after a hard or killing frost when soil starts to crust. Plants should be fully dormant. Then mulch holds that cold steady through midwinter thaws. That consistency prevents the on-again, off-again dormancy that damages roots more than steady cold ever does.
Think of it like closing a freezer door after food is already frozen—not while it is still cooling down. If you insulate too soon, you trap warmth and moisture at the crown while the plant is still metabolically active. Rodents also notice: voles and mice nest in thick mulch over unfrozen soil, then feed all winter. Waiting for freeze reduces that window.
Which Plants Actually Need Winter Mulch
Priority Targets: New Plantings and Borderline-Hardy Varieties
Not every plant in your yard needs a winter blanket. Use this priority list before you haul mulch:
Mulch first: anything planted this calendar year; perennials and shrubs at the cold edge of their USDA hardiness range (for example, listed zones 5–9 in zone 5); shallow-rooted plants like heuchera, strawberries, and many spring bulbs; roses, grafted fruit, and newly divided clumps; beds with a history of heaving.
Mulch for soil, not crowns: empty vegetable plots after cleanup—here the goal is erosion control and organic matter, not root insulation.
Usually optional: well-established natives and plants solidly inside their hardiness range with deep root systems; areas that reliably hold deep snow all winter; Mediterranean herbs in warm zones that need sharp drainage more than insulation.
Borderline-hardy is about your microclimate, not just the zone on the map. A south-facing foundation bed in zone 6 behaves differently from an exposed low spot in the same zip code. Wind, reflected heat off pavement, and elevation all shift whether a “zone 5” plant survives without help.
For spring bulbs and garlic planted in fall, mulch after freeze like other perennials—the cloves and bulbs need stable cold, not premature warmth. Garlic especially benefits from straw after the ground stiffens; without it, alternate thaws can heave cloves toward the surface where they dry out.
When You Can Safely Skip Extra Mulch
Skipping mulch is reasonable when deep, consistent snow cover already insulates beds, when plants are fully hardy with no heave history, or when you are in a warm zone where winter mulch on some perennials causes crown rot by staying wet too long.
If you are unsure, mulch lightly around new and heave-prone plants only. Proper mulching rarely hurts established hardy stock; improper timing hurts everyone. In zones 7 and warmer, some gardeners skip heavy organic mulch on lavender, rosemary, and other drought lovers that rot in wet winter crowns—sharp drainage and an open crown matter more than insulation there.
When to Apply Winter Mulch: After the Hard Freeze
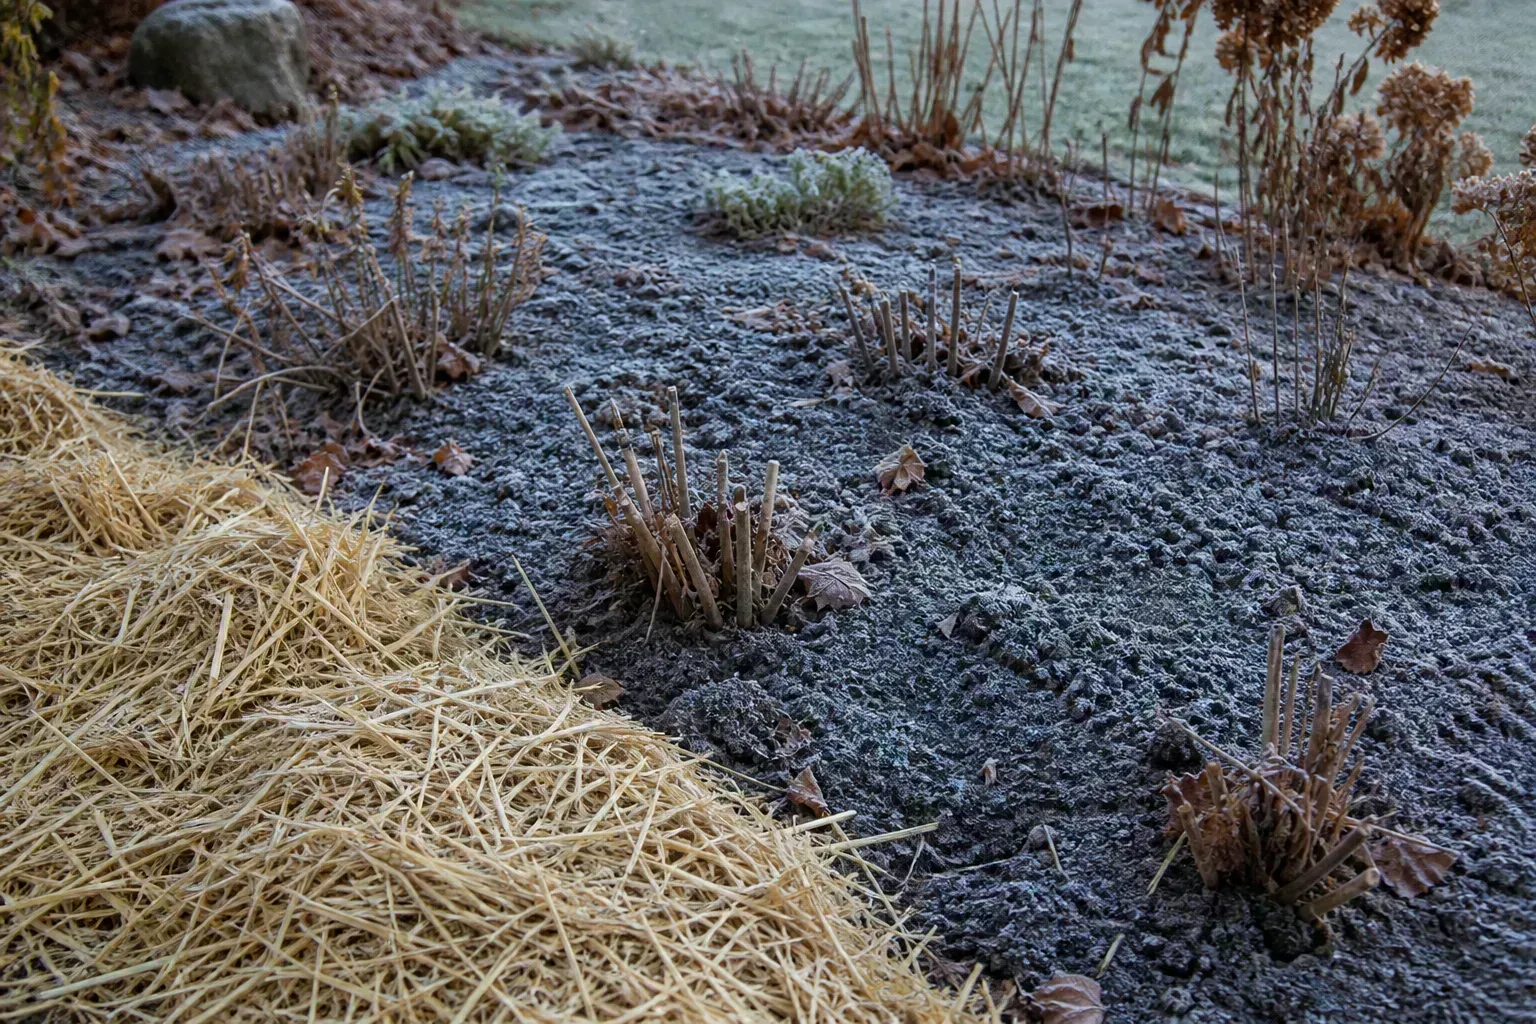
How to Know the Ground Is Ready
Use these field tests instead of a calendar date:
Hard frost has occurred. Annuals are dead, tender growth has blackened, and perennials have shut down.
Soil is beginning to freeze. A spade or trowel meets resistance in the top inch or two; the surface may crunch in the morning.
Plants are dormant. No soft new shoots at the crown; deciduous wood is bare; evergreen growth has hardened off.
In many northern gardens that window opens from late November through December. In milder regions it may slide to January. Vegetable beds are the exception: once you have pulled dead plants and finished cleanup, you can mulch bare soil for erosion control without waiting for deep freeze—there are no living crowns to smother.
If you mulched too early in a warm fall, watch for soft new basal growth after a November warm spell, vole runways under mulch before freeze, or crown rot on plants that stayed wet under a thick layer while still respiring. Pull mulch back from crowns until freeze sets in, then reapply at proper depth after the ground stiffens.
Do not wait so long that you cannot work the soil at all—a skim of frozen crust is enough. If a prolonged cold snap locks the ground solid before you mulched, spread mulch on the frozen surface; it still moderates temperature swings at the crown level even if you missed injecting insulation from above.
Depth, Placement, and the Donut Rule
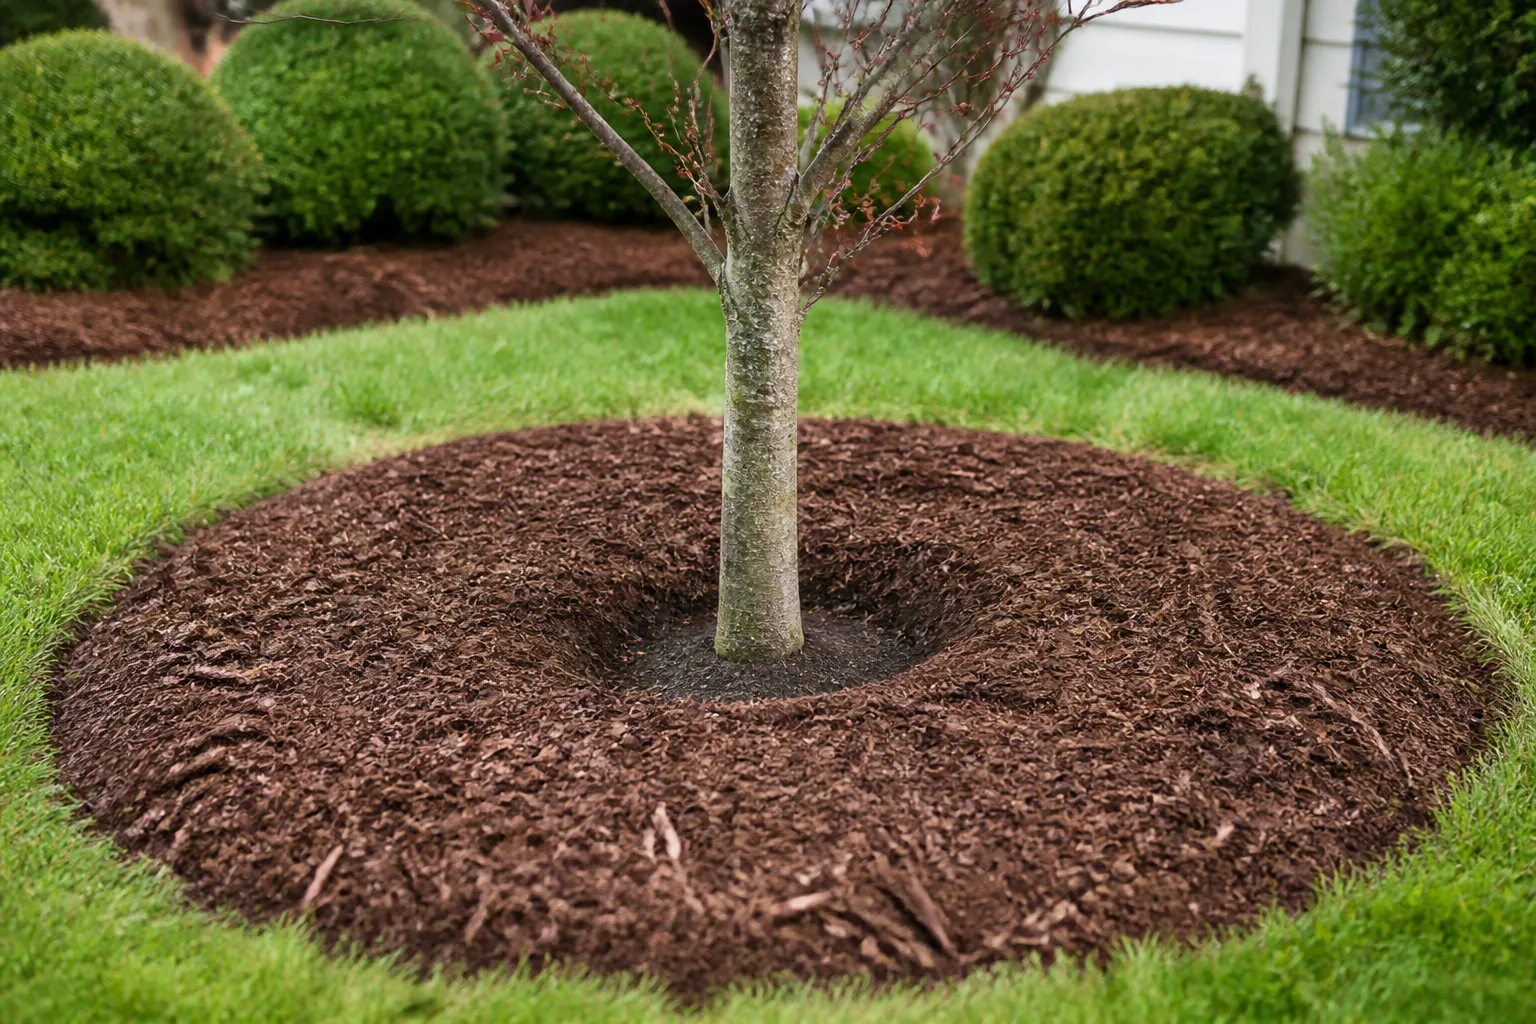
Depth depends on bed type. Around trees, shrubs, and woody perennials, a 2–4 inch layer of bark or wood chips is standard for winter—enough to moderate temperature without suffocating roots. For herbaceous perennial and bulb beds, the National Gardening Association recommends 4–6 inches of loose organic mulch because the insulation goal is stronger and the material settles and compacts over winter.
Placement matters more than brand. Never pile mulch against trunks or crowns—the classic volcano mulch mistake. Keep a 2–3 inch clear ring around the base so air reaches the crown and moisture does not sit against bark or stems. Think donut, not volcano. On trees, volcano mulch keeps bark wet, invites borers and rot, and does not protect roots that extend outward anyway.
For isolated trees and shrubs, mulch at least to the drip line—roots spread roughly as wide as the branch spread. Mulching a narrow ring tight to the trunk protects almost nothing while creating the perfect rodent hiding spot.
Ornamental Beds vs Open Vegetable Ground
In ornamental beds, uniform coverage across the whole bed prevents heave at the edges of root zones. Leave stems standing on many perennials if you can; dead stalks help catch snow and hold mulch in place. The National Gardening Association notes you can mulch up to and over dormant stems for winter on herbaceous plants—then pull back hard in spring.
In the vegetable garden, spread mulch over the entire plot after cleanup. Depth is less fussy because there are no crowns to rot—aim for enough to stop rain and wind from washing away topsoil. Pull it aside or incorporate it in spring before planting. Straw on empty beds is ideal because it breaks down quickly and adds organic matter by the time you till or no-till plant.
Choosing the Right Mulch Material by Bed Type
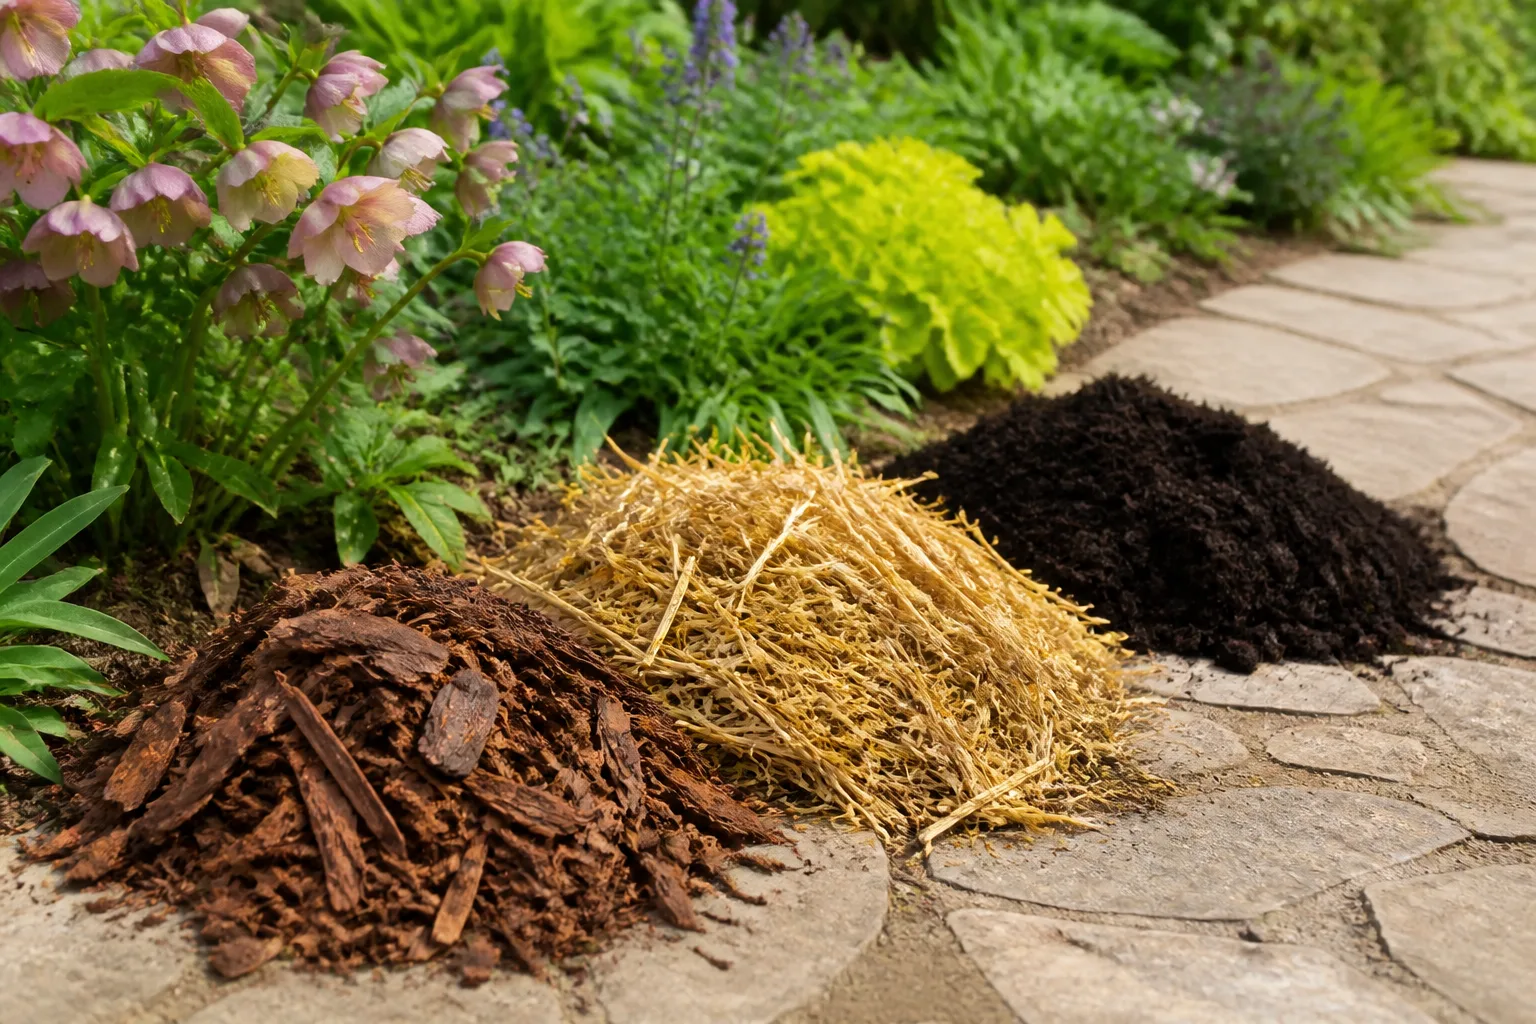
| Bed type | Best winter materials | Avoid |
|---|---|---|
| Trees and shrubs | Shredded bark, wood chips, pine needles | Fresh hot compost, fine sawdust alone |
| Perennials and bulbs | Shredded leaves, straw, pine needles, light compost | Heavy whole wood chips on soft crowns |
| Roses and tender shrubs | Straw mound over crown, evergreen boughs on top | Packed bark against graft union |
| Vegetable ground (empty) | Straw, shredded leaves, seed-free hay | Fresh grass clippings (mat and smell) |
Bark and Wood Chips for Trees and Shrubs
Shredded bark and wood chips break down slowly, stay in place on slopes, and suit woody root zones. Keep depth moderate—3 inches is a common target around established trees and shrubs—and refresh the donut clearance in spring. Finely shredded bark mixed with leaves lightens a heavy layer for mixed borders.
Avoid fresh arborist chips piled deep against trunks in fall; they can heat slightly as they break in and hold excess moisture. Aged chips are safer. Pine needles acidify slowly and work well around acid-loving shrubs like azaleas and blueberries when you already manage pH.
Straw, Leaves, and Compost for Perennials and Bulbs
Straw is the classic winter mulch for vegetable beds and many perennial rows: loose, insulating, and easy to rake off in spring. Use seed-free straw when you can; hay may introduce weeds unless you know the source.
Shredded leaves are free and effective if they are dry and not matted. Run a mower over them before spreading so they do not form a wet slab. Oak and maple leaves work; walnut leaves need composting first because of juglone.
Well-aged compost can top a leaf or straw base but should not be hot or still actively decomposing—that generates heat and moisture at the crown. Evergreen boughs from holiday trimmings make an excellent removable cap over straw on roses and tender perennials; they shed water and add structure without packing down.
Mulching Empty Vegetable Beds to Protect Soil
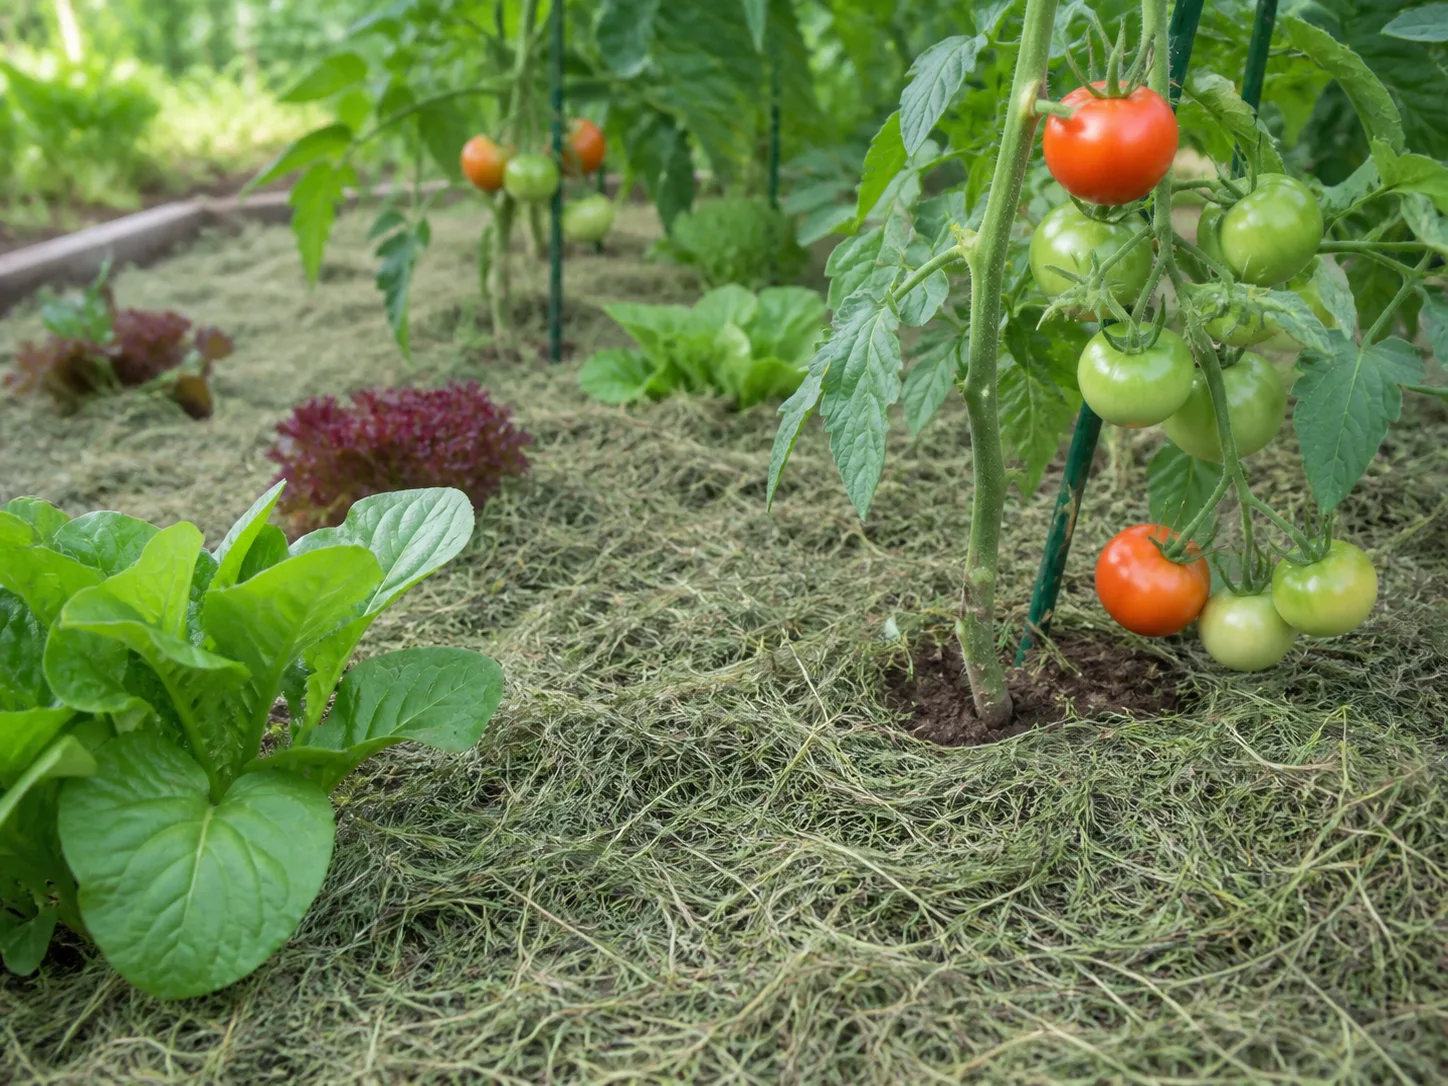
After tomatoes, peppers, and squash are gone, bare soil is vulnerable. Winter rain and wind strip fines from the surface and carry nutrients downhill. A straw or leaf mulch on empty beds prevents erosion and adds organic matter that breaks down by spring planting.
This is where timing differs from perennial beds: mulch vegetable ground as soon as cleanup finishes. You are protecting soil structure, not keeping a living plant dormant. If you grow a winter cover crop instead—winter rye, hairy vetch, or a mix—skip the mulch layer; living roots already hold soil and add nitrogen when you terminate the cover in spring.
Raised beds lose volume to erosion faster than in-ground plots because edges expose soil to splash. A full-bed straw blanket after clearing summer crops pays off on raised beds especially. If you practice no-till, leave the mulch in place and part it only where you dibble transplants in spring.
Rodents, Crown Rot, and Other Winter Mulch Mistakes
Thick mulch before freeze is not the only failure mode:
Vole habitat: Utah State University Extension notes that voles prefer heavy ground cover and make runways in turf and mulch. Deep fluffy mulch against crowns gives rodents shelter while they chew bark and roots on young trees and shrubs. Keep mulch pulled back from trunks, set snap traps with triggers in active runways if damage appeared last year, and avoid mulching thickly around young fruit trees in vole-prone yards.
Crown rot: Wet mulch piled on active crowns in warm fall spells invites fungal rot on perennials like heuchera and sedum. The donut rule and post-freeze timing prevent most cases.
Over-depth everywhere: More than 6 inches of fine material on small perennials can exclude oxygen and hold moisture against the crown all winter.
Wrong material: Fresh grass clippings mat, heat, and smell. Whole unmowed leaves pack wet. Dyed decorative mulch adds little insulation value and can crust.
Never removing it: Winter mulch left at full depth into May keeps soil cold and can smother emerging shoots—then you blame the winter when spring culture was the problem.
Pulling Back Mulch in Spring Without Delaying Growth
Winter mulch must come off in stages. The National Gardening Association recommends pulling back the top 3–4 inches in early spring when the top layer thaws and new growth begins to show—often when shoots poke through or the top inch of mulch softens. Leave a thin rotting bottom layer as soil food, but clear mulch completely away from crowns so light and air reach new stems.
It is fine to remove mulch while nights still dip below freezing if plants are hardy in your zone—you are preventing delayed emergence, not exposing tropicals. If the lower mulch layer is still frozen, peel it back over several days. Reapply a 2–3 inch summer weed-control layer once soil warms, not the winter depth.
For evergreens that received root-zone mulch, the same spring pull-back applies; pair it with late-winter watering if dry spells hit. See our evergreen winter pruning guide for the full dormant-season care picture. Early bulbs like crocus and snowdrops may need you to rake mulch aside the moment tips show—buried shoots elongate pale and weak if you wait.
Where Winter Mulch Fits in Your Full Fall Shutdown Checklist
Treat winter mulch as the last outdoor bed task, not the first:
- Finish harvest and cleanup — remove diseased debris; compost healthy material.
- Plant spring bulbs and garlic before the ground freezes hard.
- Water deeply if fall has been dry—especially evergreens and new plantings.
- Drain hoses and shut outdoor water before hard freeze.
- Wait for hard frost and initial soil freeze.
- Apply winter mulch at proper depth and placement.
- Note vole-prone beds for spring trap checks.
Skipping step six after doing everything else is like locking the door but leaving the windows open. The garden looks put to bed; the soil still heaves. Other fall mistakes—stopping watering too soon on evergreens, leaving diseased tomato vines in place, or pruning spring bloomers—compound winter damage, but missing mulch is the silent one because beds look tidy until March gaps appear.
Keep a bag of straw or a leaf pile staged near the shed before freeze arrives. When the forecast shows the first hard-killing night, you are ready to spread the day the soil stiffens—not scrambling after a surprise cold snap when the mulch aisle is empty and the ground is already too frozen to work cleanly.
Conclusion
The one step even seasoned gardeners forget is not dramatic or expensive—it is winter mulch applied at the right time, at the right depth, with the right material for each bed. Wait until after a hard freeze when soil begins to stiffen, then insulate ornamental beds with 2–6 inches of loose organic mulch while keeping a clear ring around every crown. Mulch empty vegetable ground for erosion as soon as cleanup ends. Pull excess back in early spring so shoots are not smothered.
Done correctly, winter mulch prevents frost heave, holds moisture in frozen soil, and keeps dormancy stable through unreliable winters. Done late, early, or in a volcano pile around trunks, it causes the very damage you were trying to avoid. Add this step to your fall shutdown list and your spring self will find fewer heaved crowns, fewer bare patches in the vegetable plot, and beds that wake up on schedule—not in recovery mode.



