Yellow Pear Tomato Care: Planting to Harvest
Learn how to grow Yellow Pear tomatoes from seed or transplant, with planting dates, support, watering, pruning, container tips, harvest cues, and seed saving.
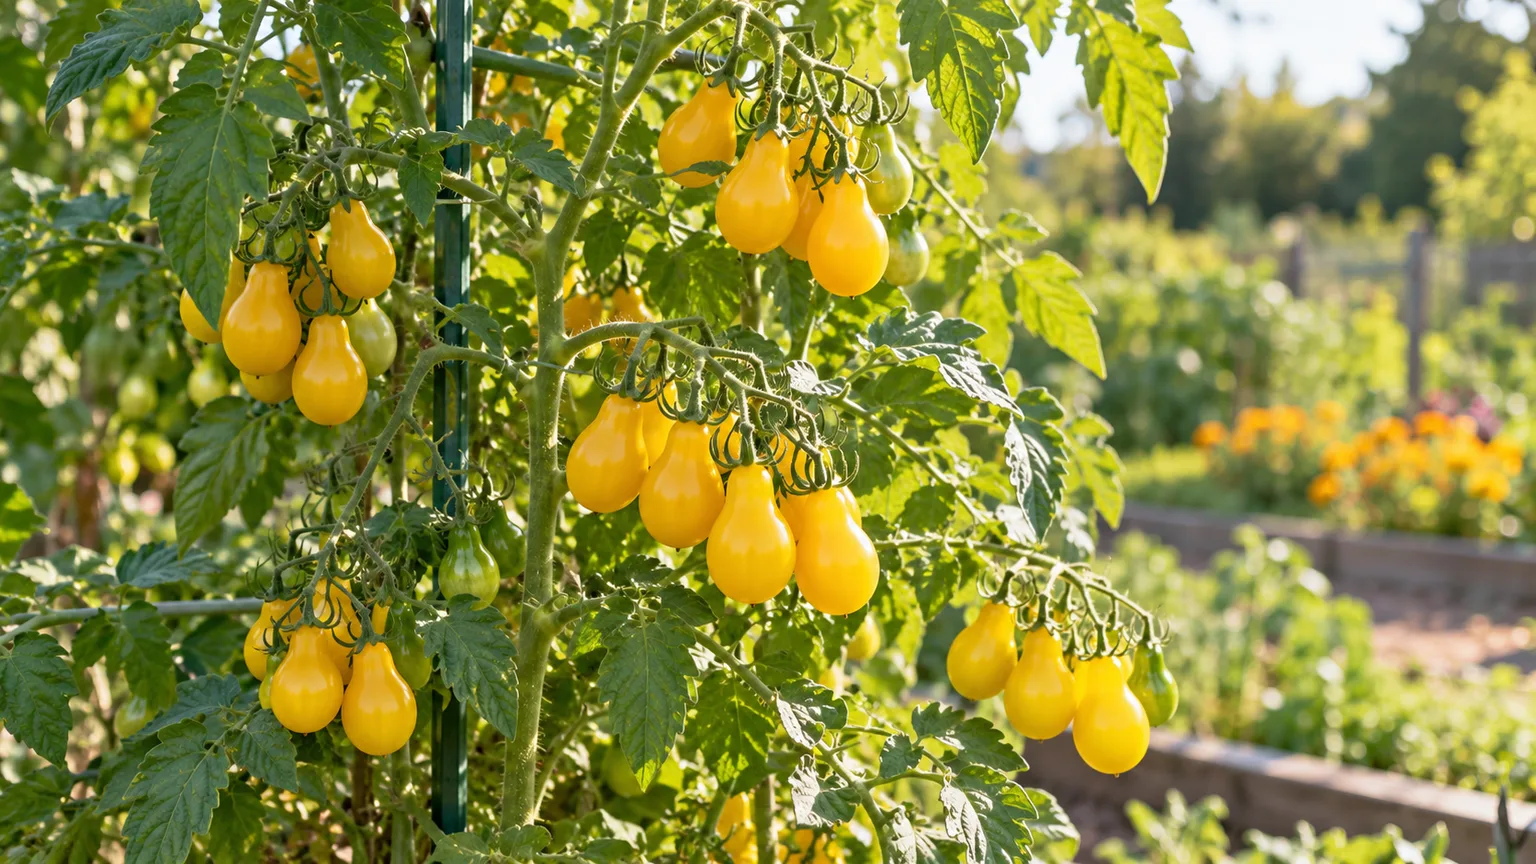
Yellow Pear tomato is an indeterminate, open-pollinated variety that produces clusters of small, yellow, pear-shaped fruits over a long summer season. Give it a warm planting site, at least six hours of direct sun, a strong support installed at planting, and soil that stays evenly moist without becoming waterlogged. The plant is productive, but its sprawling growth makes it a poor match for a tiny pot or a bed where you cannot reach the fruit regularly.
The simplest route to a good crop is to start seeds indoors several weeks before your last frost, or buy a sturdy transplant, then wait until cold nights have passed before planting outside. From there, the most important decisions are how you will train the vine, how you will keep its roots from swinging between dry and soaked, and whether your growing season is long enough for repeated harvests.
The quick answer: give this indeterminate tomato sun, room, and support
Treat Yellow Pear like a vigorous vining cherry tomato rather than a compact bush variety. Plant one seedling in a sunny bed after frost danger has passed, space it about 2 to 3 feet from another trained vine, and set a tall cage, stake, or trellis beside it before the roots spread. A large, stable container can work, but it needs more frequent moisture checks than garden soil.
The variety’s small fruit is easy to pick and useful for snacking, salads, roasting, and pickling, but it does not mean the plant itself stays small. Harvest to Table lists Yellow Pear as open-pollinated and indeterminate, with a mild, sweet flavor, yellow pear-shaped fruit, and an approximate 75-day harvest estimate. That estimate is a planning guide, not a promise: check the seed packet, remember that “days to maturity” is usually counted from transplanting, and expect temperature, light, and transplant size to shift the first harvest.
What Yellow Pear tomatoes are like
Yellow Pear is a cultivar of Solanum lycopersicum, the common cultivated tomato. Its defining feature is its fruit: small, bright yellow, and narrowed at the blossom end into a pear shape. Individual seed lines and growing conditions can affect exact size and shape, so expect variation rather than identical miniature fruit on every truss.
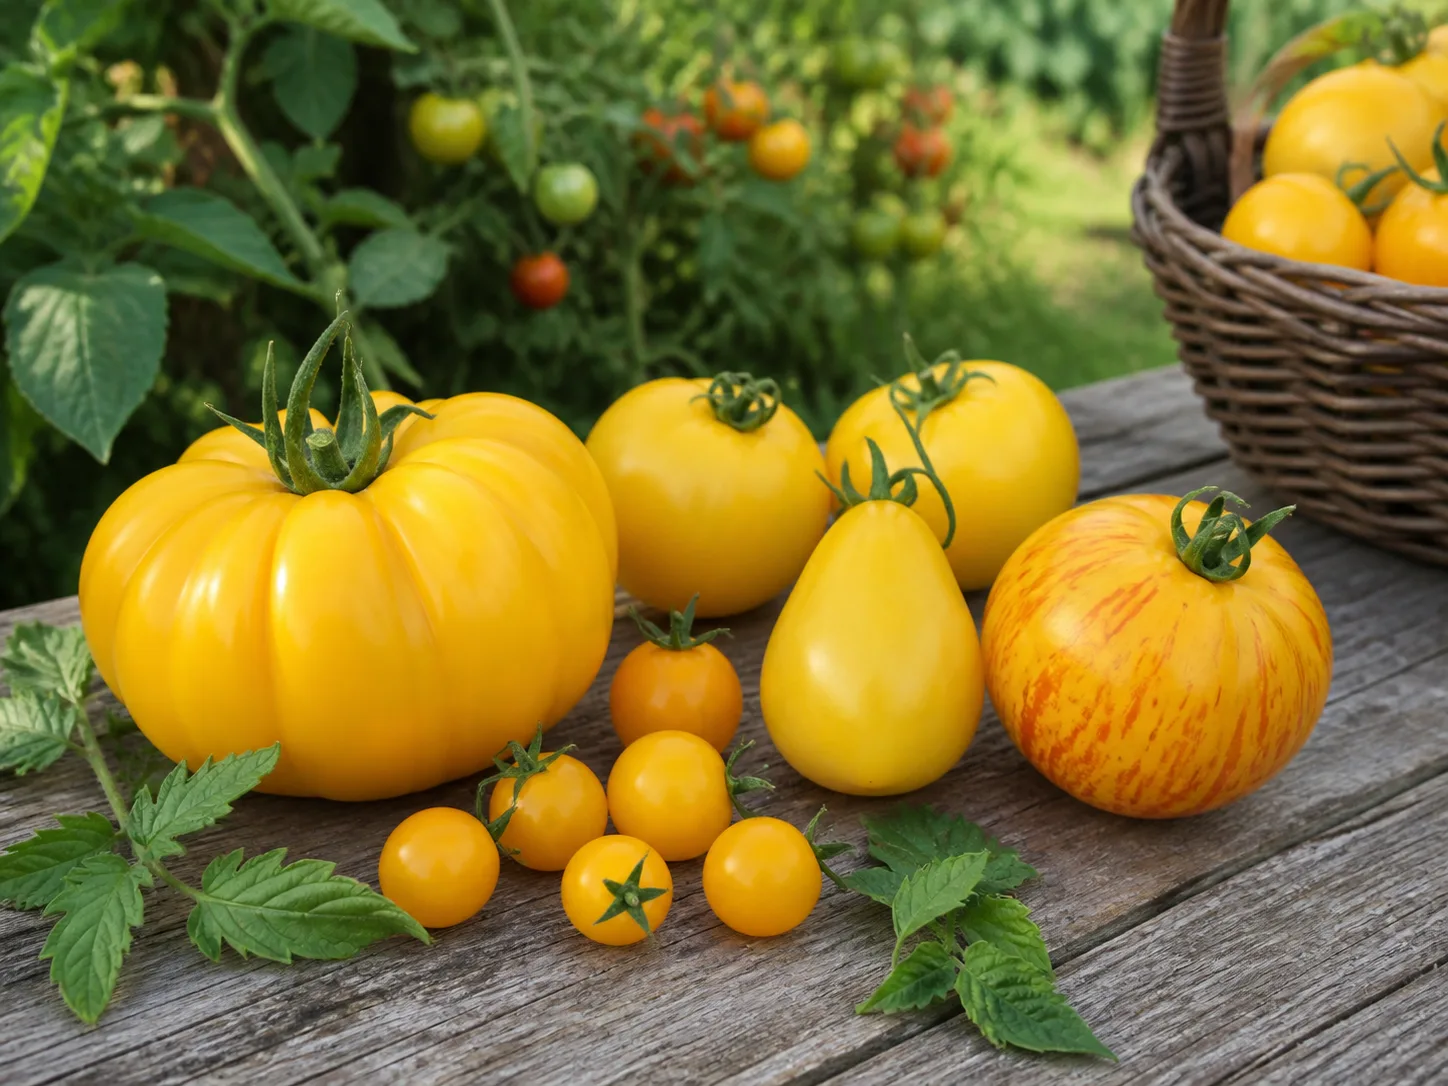
The plant is indeterminate, meaning its main stems keep growing and setting new flower clusters during the season until cold or disease stops them. A supported vine can reach several feet and may outgrow a short cage, which is why a support plan matters more than a rigid height estimate. In a warm, long season, the continuing flushes of flowers and fruit can be an advantage; in a short season, late flowers may never ripen before frost.
Yellow Pear is also open-pollinated, not a guaranteed hybrid. That makes it a reasonable candidate for gardeners interested in saving seed, though nearby tomato varieties can cross-pollinate and make next year’s seedlings less predictable. The mild, relatively low-acid flavor described by seed references is subjective; taste one fully ripe fruit before deciding whether you prefer it fresh, cooked, or preserved.
Start from seed or buy a transplant
A nursery transplant is the faster, simpler choice if your warm-weather window is short or you only want one plant. Look for a compact seedling with sturdy stems, healthy green leaves, and no spots, insects, or roots circling tightly around the bottom of its pot. Avoid plants that are already tall, pale, and leaning unless you have time and light to rehabilitate them before transplanting.
Starting from seed gives you more choice and lets you raise several seedlings for a later planting, but it requires bright light and careful timing. Sow more seeds than you need, then keep only the strongest seedlings; this is more reliable than trying to rescue weak, stretched plants after they have grown in poor light.
Start seeds indoors at the right time
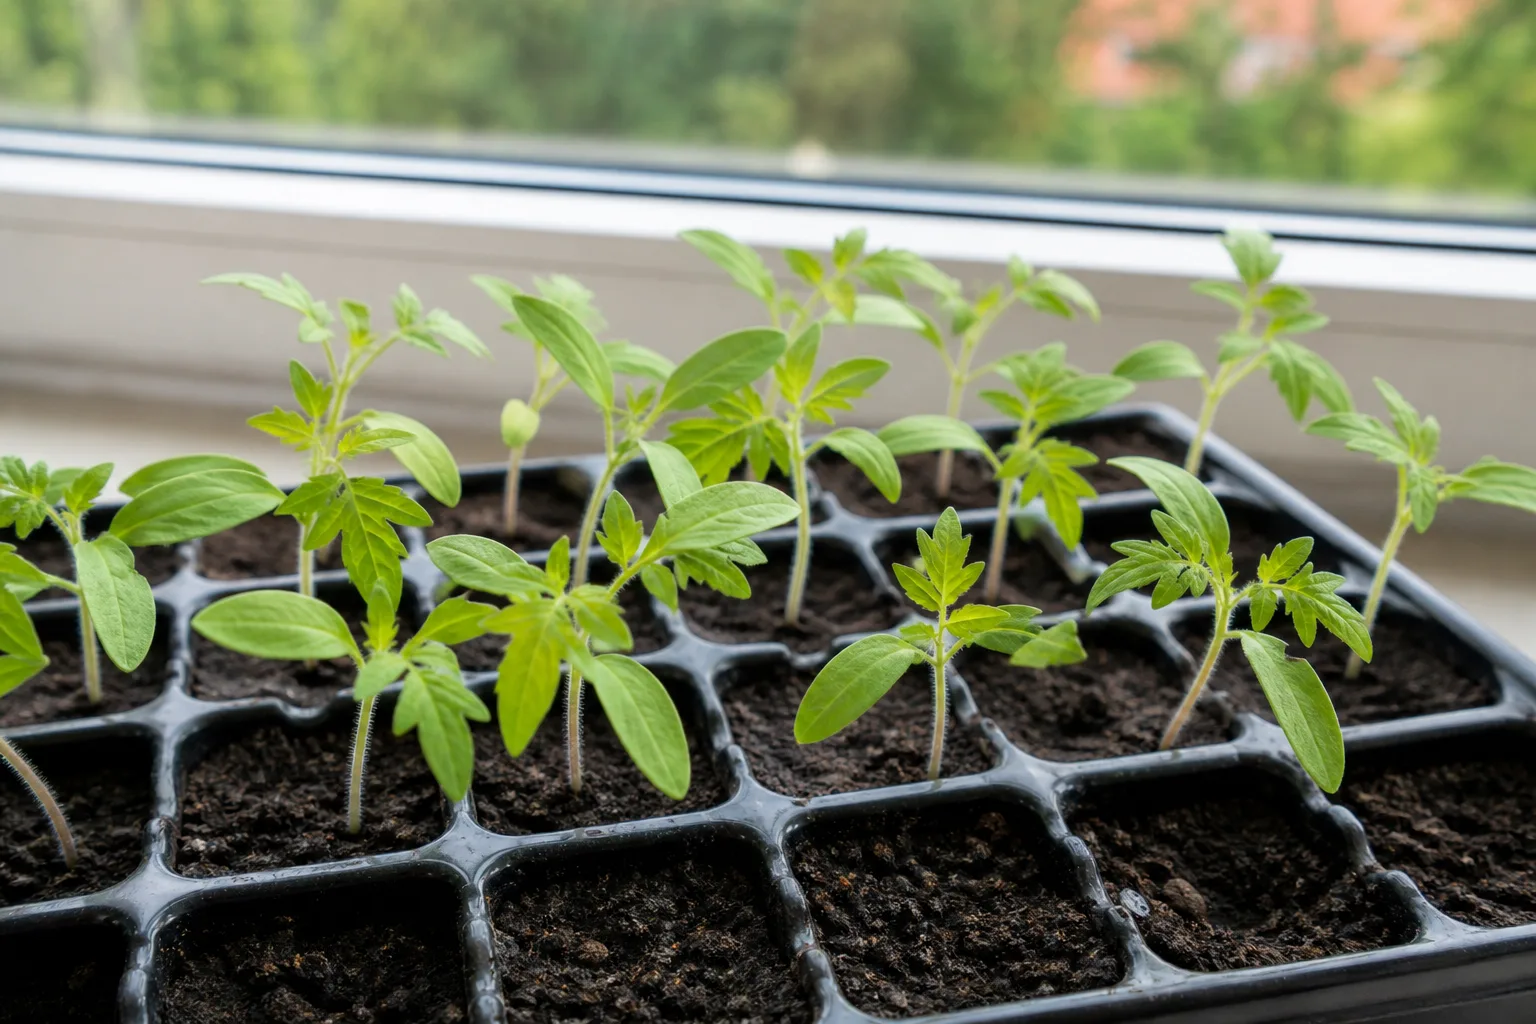
Sow indoors about six to eight weeks before your area’s expected last frost, adjusting that window if local extension guidance or the seed packet gives a different schedule. Use a clean tray or small pots with drainage and a loose seed-starting mix. Plant each seed about ¼ inch deep, moisten the mix evenly, and keep it warm; the Royal Horticultural Society tomato-growing guide gives roughly 64°F (18°C) as a useful germination temperature for tomatoes.
A clear cover can help the mix stay moist while seeds germinate, but remove it once green shoots appear. Move seedlings into the brightest light you can provide, ideally a grow light close enough to prevent long, weak stems without heating the leaves. Turn a sunny-window tray regularly, keep the mix lightly moist rather than saturated, and pot seedlings into individual containers after they develop their first true leaves or begin crowding one another.
Before outdoor planting, harden the seedlings off over about a week. Start with a short period in a sheltered, bright-shade spot, then lengthen outdoor time and gradually increase sun and breeze exposure. If a cold night, strong wind, or extreme heat is forecast, keep them protected; the point is to acclimate, not to stress a young plant into toughness.
Choose a warm planting date and sunny site
Do not set the calendar as your only planting signal. Wait until frost danger has passed, the soil has warmed, and nights are no longer cold enough to stall the seedling. The RHS tomato guide recommends planting young tomatoes outside when temperatures are reliably above about 60°F (16°C), while Penn State Extension’s tomato guidance warns that frost kills tomatoes and that cool or excessively hot nights can contribute to flower drop.
Choose the sunniest practical part of the garden, with at least six hours of direct sun and preferably closer to eight in a cool or cloudy climate. Morning sun helps dry dew from leaves; open air around the canopy makes it easier to inspect for pests and disease. Avoid a low spot where water pools after rain or a site shaded by corn, a fence, or a mature crop during the afternoon.
If your summer regularly brings long stretches of extreme heat, prioritize morning sun and some late-afternoon relief rather than baking the roots beside a south-facing wall or reflective paving. In a cool region, shelter from wind and a south-facing wall can help the plant use its limited season. The best site balances light, warmth, air movement, and access to water rather than maximizing any one factor.
Prepare the soil and transplant without stalling the plant
Tomatoes grow best in fertile soil that drains freely but still holds enough moisture between waterings. If you can, use a soil test before planting; it is more useful than adding lime, phosphorus, or a “bloom booster” based on a leaf color guess. Work mature compost into the planting area, loosen compacted soil, and do not plant where water stands after ordinary rain.
Tomato stems can form additional roots where they are buried, so a leggy seedling can be planted more deeply than it sat in its nursery pot. Remove the lowest leaves that would be underground, set the root ball and lower stem in a deep hole or shallow trench, and leave the remaining foliage above soil. Firm the soil gently, water the root zone well, and keep any foliage from resting on damp ground.
Space plants about 24 to 36 inches apart if you are training them vertically, using wider spacing in humid weather or when you plan to let several stems grow. Leave enough room between rows to reach the plant, harvest without snapping branches, and examine leaf undersides. A tight layout may look efficient on planting day, but it becomes a shaded, slow-drying tangle once indeterminate vines branch and fill their supports.
Support the vine before it gets heavy
Install support when you transplant, not after clusters of fruit begin pulling on the branches. A tall, sturdy cage is the lowest-maintenance choice for a plant you want to grow with several stems. A stake or trellis saves ground space and makes fruit easier to see, but it works best when you tie the main stem in loosely and check it as it extends.
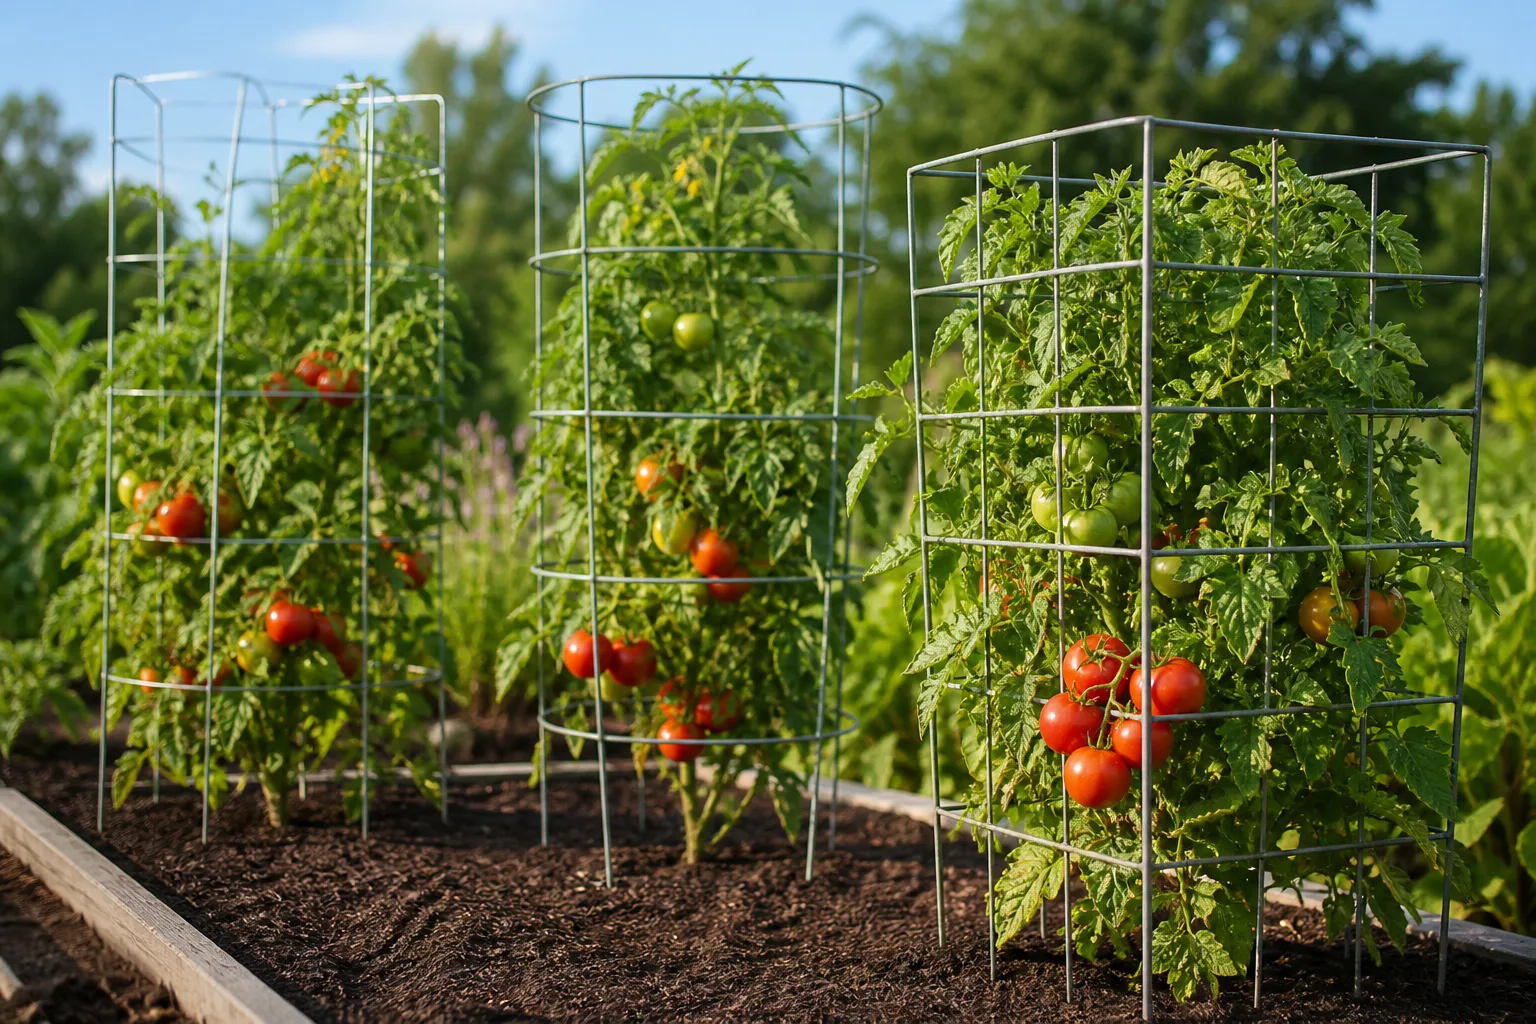
For a stake-trained plant, use soft ties and attach the stem at intervals that hold it upright without cutting into it. For a cage, choose one tall and wide enough to contain a vigorous vine; small decorative cages often topple or disappear inside the foliage. The RHS tomato-growing guide describes tall supports and regular tie-ins for vigorous cordon tomatoes. Set the support firmly enough to withstand wind and the weight of wet leaves and fruit, and avoid driving a stake deeply beside an established plant where it may cut roots.
The training choice changes your routine. A caged plant can keep more side shoots and usually needs less frequent pruning, but it occupies more space and can develop a dense center. A single-stem plant is easier to reach and may dry faster after rain, but it needs regular tying and the stem carries more of the plant’s weight. Pick the method that matches your available space and the time you can give the vine.
Water evenly from establishment through fruit set
Keep the root zone consistently moist, not swampy. Penn State Extension’s tomato guidance gives 1 to 1½ inches of water per week as a general garden benchmark, but rainfall, soil texture, heat, wind, mulch, and plant size change what that means in your bed. Check the soil a couple of inches down; if it is dry there, water slowly enough to reach the roots instead of wetting only the surface. Utah State University Extension likewise emphasizes uniform moisture for tomatoes because irregular water availability can contribute to flower drop, blossom-end rot, and fruit cracking.
Water near the soil line in the morning when practical. Drip irrigation or a soaker hose keeps leaves drier than repeated overhead watering, while a layer of clean mulch buffers moisture and reduces soil splash onto lower leaves. In a raised bed or sandy soil you may need shorter intervals; in heavier soil, water less often and make sure excess drains away.
Containers need a different check because their limited soil volume dries quickly. In hot, windy weather, feel the mix daily and water thoroughly when the upper layer is dry, allowing extra water to drain from the bottom. Do not interpret that as “water every day”: a large pot in mild weather may stay moist longer, while a small pot in direct afternoon heat may dry before evening.
Large wet-to-dry swings can contribute to fruit cracking and blossom-end rot, especially when a dry spell is followed by heavy rain or a deep watering. Steady moisture is more useful than trying to correct each symptom with a supplement. If cracking is recurring, adjust irrigation and mulch first; if the plant wilts even though the soil is wet, investigate drainage and root health instead of adding more water.
Feed for fruit instead of excess foliage
Build the soil before planting and use a vegetable fertilizer according to its label if the soil test or plant growth calls for one. Avoid automatically repeating a strong nitrogen feed every few weeks. Penn State notes that too much or high-nitrogen fertilizer can encourage lush foliage while delaying flowering and fruiting, exactly the result you do not want from a vigorous indeterminate variety.
A plant that is dark green and growing rapidly but producing few flowers may be overfed, shaded, or struggling with heat; fertilizer is not the first answer. Penn State Extension notes that excess nitrogen can delay flowering and fruiting. A pale plant can also have waterlogged roots, a cold root zone, or a nutrient problem, and those causes call for different fixes. Check moisture, drainage, sun, and recent feeding history before adding anything.
For containers, nutrients leach out with frequent watering, so follow the potting mix and fertilizer directions and watch the plant’s growth through the season. Do not combine slow-release granules, liquid feed, compost tea, and other products unless their labels make that combination appropriate. If a plant is heat-stressed or its roots are saturated, correct those conditions before feeding.
Protect flowers from heat and improve pollination conditions
Tomato flowers can pollinate themselves, so you do not need a second Yellow Pear plant to get fruit. The pollen still needs to move within the flower, usually with vibration from wind or an insect. Outdoors, normal air movement and pollinator activity are generally enough; in a sheltered greenhouse, gently tapping a flower cluster during a dry morning can help release pollen. The RHS tomato guide also describes simple ways to improve pollination in protected growing spaces.
Flower drop is often a weather signal rather than a fertilizer emergency. Penn State Extension notes that cold nights below about 55°F (13°C) and hot nights above about 75°F (24°C) can lead to blossom drop. Sudden heat, drought, or overly wet roots can also interrupt fruit set, so compare the timing of dropped flowers with recent temperatures and soil moisture before changing the feeding routine.
In a heat wave, keep the root zone evenly watered and avoid severe pruning that exposes fruit to sunscald. A temporary shade cloth during the hottest part of the day may help in extreme conditions, but do not wrap the plant in a way that traps humid air or prevents pollination. Once temperatures moderate, new blossoms may set even if the first flush did not.
Grow Yellow Pear tomato in a container
Container growing is possible if you provide enough root volume and a stable support. Use one plant per large pot with multiple drainage holes; a 10-gallon container is a practical lower limit, while a 15- to 20-gallon pot gives an indeterminate vine more room and a larger moisture reserve. The RHS suggests a 12- to 18-inch container for a single tomato plant, but larger is helpful for a vigorous cultivar and for gardeners who cannot check water several times a day.
Choose quality potting mix rather than filling the pot with heavy garden soil, which can compact and drain poorly. Set the cage or stake into the pot before roots fill it, or secure a trellis so it cannot tip. Place the container in full sun, but watch for overheated roots if it sits on dark paving; a light-colored pot or a little late-day shade can reduce stress.
A container changes the margin for error. The plant may need more frequent watering and label-directed feeding than one in a bed, especially once the canopy is large and the fruit clusters are filling. If you are away often, use a properly installed drip system or ask someone to check the pot rather than relying on a shallow saucer or guessing that a self-watering reservoir will stay full.
Prune only to solve a real space or airflow problem
You do not have to strip Yellow Pear tomato down to one stem to get fruit. With a large cage and room around the plant, leaving several healthy suckers can produce more flowering stems and a larger, denser canopy. The trade-off is that the plant takes more space, may dry more slowly after rain, and can be harder to inspect and harvest.
If you have limited room, train one or two strong stems and remove a few small suckers where they emerge in the angle between a leaf and the main stem. Do this while shoots are small, using clean fingers or pruners, and keep enough foliage to shade fruit and protect the plant from sunscald. Remove leaves that touch the soil, clearly diseased growth, and a small amount of congested lower foliage rather than cutting away a large section at once.
A stake-trained vine benefits from more deliberate pruning because the support is designed for fewer stems; a cage-grown plant can usually be pruned more lightly. If the plant is healthy and the branches are supported, there is no need to chase a perfectly open silhouette. During the last part of the season, remove new flowers only when there is not enough warm time left for them to mature and you want the plant to focus on existing fruit.
Troubleshoot fruit, flower, pest, and disease problems
Start by identifying what changed and where it appears. Blossom-end rot is a dark, sunken patch at the bottom of a fruit; it is associated with disrupted calcium movement, often when root-zone moisture fluctuates, and it does not automatically mean the soil needs a calcium additive. Utah State University Extension identifies blossom-end rot and fruit cracking among problems linked with inconsistent water availability. Keep moisture more even, check the roots and drainage, and avoid adding supplements without a soil or diagnosis-based reason.
Splits often appear after a dry period followed by heavy irrigation or rain, when fruit expands faster than its skin can stretch. Harvest ripe or nearly ripe tomatoes before forecast downpours and use mulch to reduce moisture swings. Flower drop points toward weather or stress during bloom, while a plant that wilts in wet soil needs a drainage check rather than more water.
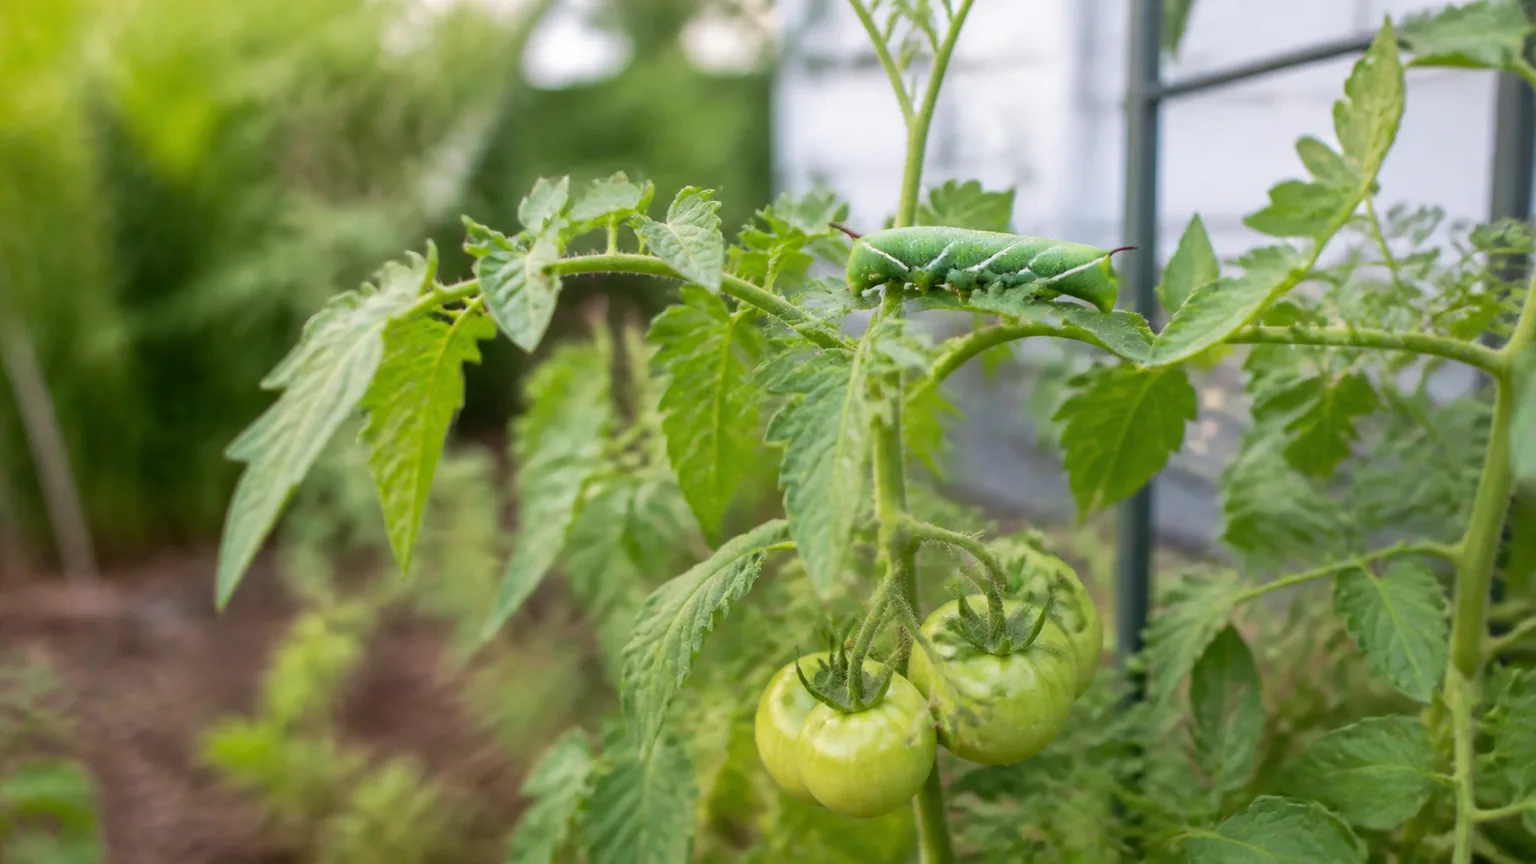
Inspect plants at least weekly, including leaf undersides and the stems near the soil. Tomato hornworms can strip foliage quickly; look for large caterpillars and dark droppings, then remove them by hand if you can identify them safely. Aphids and stink bugs may also appear, but do not spray simply because an insect is present: confirm that it is causing damage, preserve beneficial insects where possible, and follow local extension advice and product labels if treatment is necessary.
Fungal and bacterial leaf diseases are harder to diagnose from one mark. Keep lower foliage off the soil, avoid handling wet plants, water at the base, rotate tomatoes and related nightshades when space allows, and remove badly diseased debris instead of leaving it in the bed. If spots spread quickly, stems collapse, or fruit develops widespread lesions, compare clear photos with a local extension diagnosis service before deciding whether to remove the plant or use a treatment.
Harvest by color and feel, not calendar alone
Yellow Pear tomatoes are ready when the fruit has turned yellow through most or all of its skin, has reached its expected size, and gives slightly when pressed gently. A ripe fruit should separate with a light twist or snip from its short stem; if the cluster is loaded, use clean pruners rather than pulling hard enough to break a branch. Fruit can vary in exact shape, so use color and texture together instead of waiting for every tomato to look identical.
Check the vine every day or two once the first fruit begins to color. Small tomatoes can ripen and soften quickly in warm weather, and a missed cluster may attract insects, split, or drop. Pick into a shallow basket so the lower fruit does not get crushed, and keep ripe tomatoes at room temperature if you will eat them soon.
For salads and snacking, harvest fully yellow fruit for the mild, sweet flavor typical of the variety. If frost threatens, pick fruit that has started to color and let it finish indoors at room temperature; fully green fruit may ripen unevenly and should not be mistaken for the same flavor or quality. Remove cracked, moldy, or soft fruit from the vine promptly so it does not become a source of decay in the canopy.
Save seed and close out the season thoughtfully
Because Yellow Pear is open-pollinated, seed saving can preserve the variety if the parent plant is healthy and the flowers were not crossed with another tomato nearby. If you grow several tomato cultivars and want more predictable seed, isolate or protect a few flowers before they open, then label fruit from those trusses. Seed from an unprotected flower may still germinate well, but the next generation can differ in shape, color, or growth habit.
Choose fruit that is fully ripe and typical of the plant you want to keep. Remove the seeds and gel, clean and dry the seeds completely, then store them in a labeled, sealed container in a cool, dry, dark place. Keep the variety name and year with the seed so you can compare germination and fruit traits in later seasons.
As the season ends, pick fruit that has begun to ripen before a hard frost and remove the spent plant rather than leaving diseased vines in the bed. Compost only healthy plant material where your compost system gets hot enough to break it down; discard diseased vines according to local guidance. Rotate next year’s tomatoes away from this bed when possible, especially if you saw recurring blight or soil-borne disease.
Keep pets away from tomato foliage and green fruit
The tomato plant is part of the nightshade family, and its leaves and stems should not be treated as pet food. The ASPCA tomato plant profile lists tomato plants as toxic to dogs, cats, and horses while noting that ripe fruit is non-toxic. Keep pruned foliage and unripe fruit out of reach, and do not leave a fallen crop where pets can chew it.
If a pet may have eaten leaves, stems, or green tomatoes, contact a veterinarian or animal poison-control service promptly rather than waiting for symptoms. The risk depends on the amount and the animal, and an online plant profile cannot diagnose an individual exposure. Wash harvested fruit and keep the harvest basket separate from plant debris.
Conclusion
Yellow Pear is a rewarding choice when you want a long-season vine covered in small, bright fruit and can give it dependable support. Start with a healthy seedling, plant only after cold weather has passed, provide full sun and a spacious root zone, and water deeply enough to keep moisture steady without leaving the roots saturated.
Then make care decisions from what the plant shows you: train it to suit your space, feed only when the soil or growth warrants it, and connect flower drop or damaged fruit to recent weather and watering before reaching for a quick fix. Harvest when the fruit is yellow and slightly yielding, and keep foliage and green fruit away from pets. With that routine, one plant can turn into a steady stream of snack-size tomatoes rather than an unsupported tangle.



