Rust Disease on Amaranth: How to Check for White Blister
Quick answer
First, isolate the affected amaranth pot or row section from other amaranths. Check both sides of fresh leaves for raised blisters, and get a diagnosis before spraying: white blister rust has been reported on Amaranthus tricolor, but a leaf photo cannot identify the pathogen.
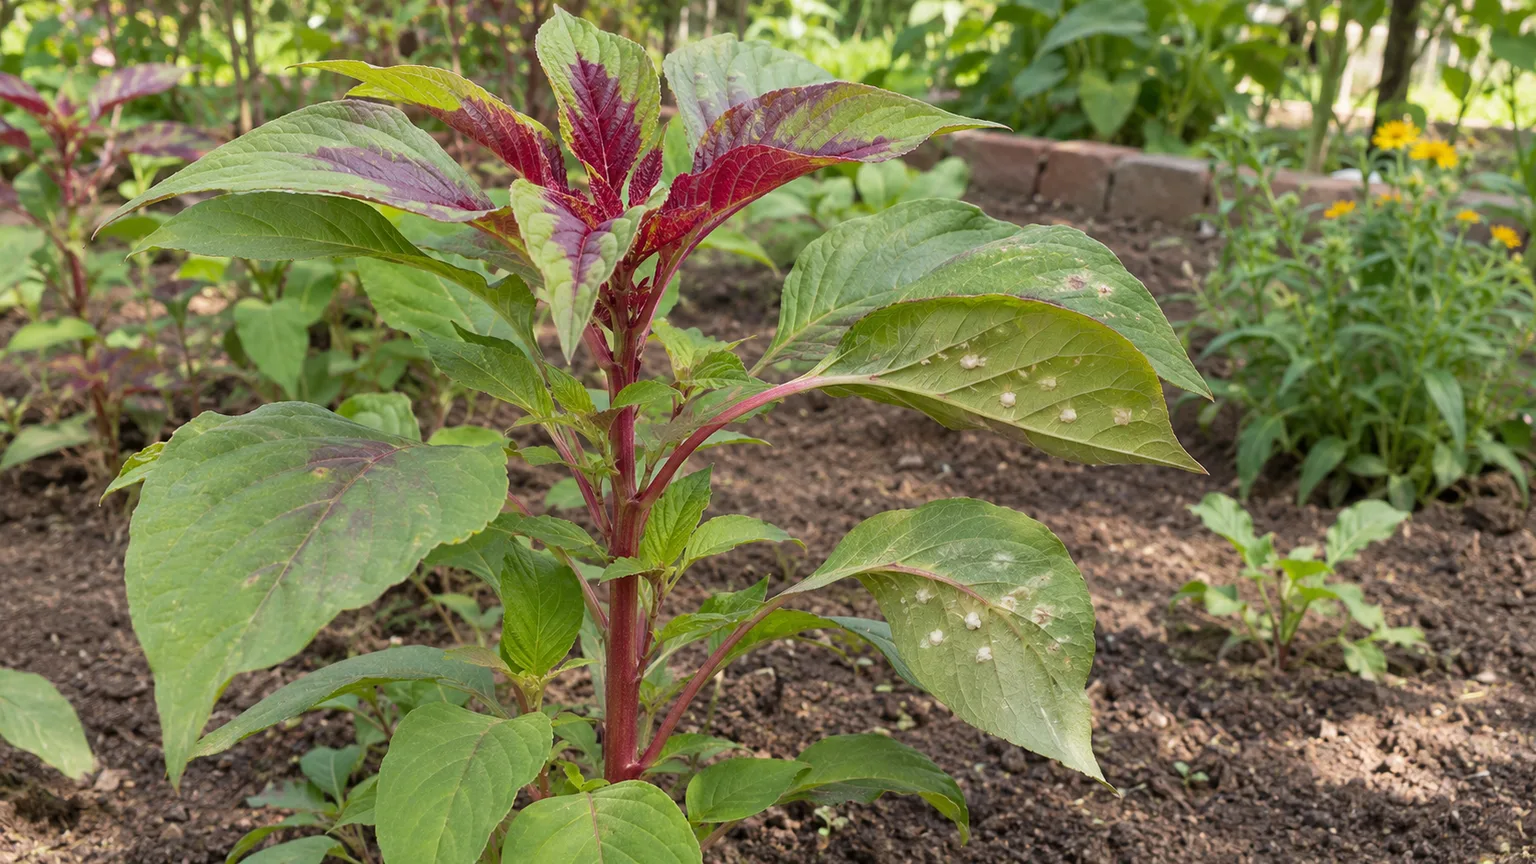
Rust Disease on Amaranth: Check for White Blister Rust
This guide covers rust disease on Amaranth. See also the general Rust Disease guide, watering, and light pages for this plant.
Rust Disease on Amaranth: Check for White Blister Rust
Rust Disease on Amaranth (Chaulai): Check for White Blister Rust
On chaulai, “rust” is a symptom label, not a confirmed diagnosis. White, raised blisters beneath a leaf make white blister rust one possibility. Orange or cinnamon powdery pustules fit the familiar fungal true-rust pattern, a different pathogen group. First, isolate the affected pot or row section from other amaranths. Then inspect fresh leaves before pruning or choosing a treatment.
Here, amaranth means leafy Amaranthus tricolor (chaulai), an annual edible crop. A 2024 field-study preprint reports white rust on red amaranth, but it has not been peer reviewed and cannot identify the disease on an individual plant. A separate molecular study confirmed Wilsoniana amaranthi, an oomycete, on another species, A. retroflexus; that finding does not establish the pathogen on chaulai. For general rust symptoms, see our Rust Disease guide; for the crop’s identity and short growing season, start with the Amaranth plant hub.
What rust disease looks like on amaranth
Turn over a fresh marked leaf and look for a fixed, slightly raised blister or pustule. A color patch by itself is not enough to diagnose rust. A hand lens or clear phone photo of both surfaces is more useful than rubbing the leaf, which can remove spores or damage the tissue.
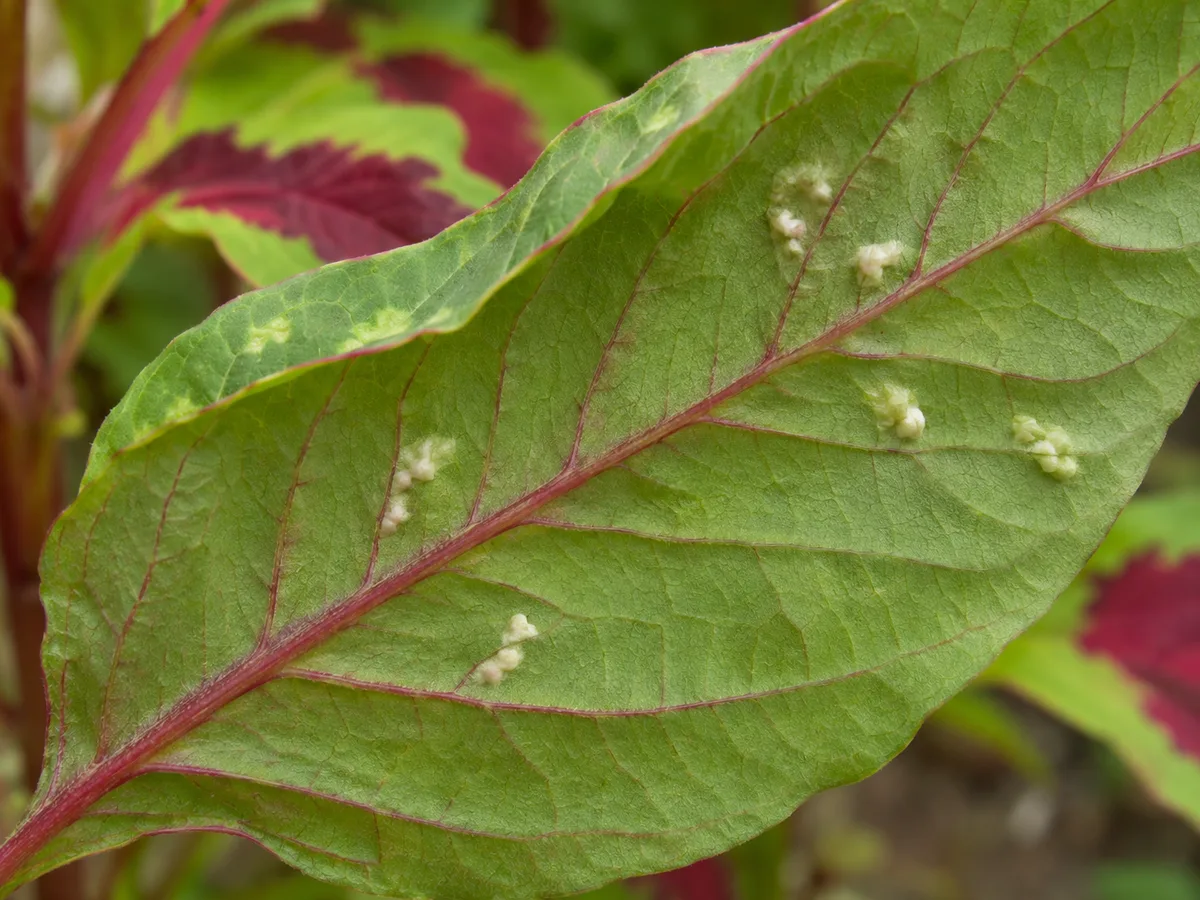
White blister-like lesions are a reason to investigate possible white blister rust, not proof of the pathogen.
Amaranth makes this check less straightforward because cultivated types can have red, green, or variegated foliage. Use texture, shape, and whether a lesion is raised instead of treating every red or pale area as disease.
Read color and leaf texture on chaulai
On red-leaf chaulai, compare a suspicious mark with the same part of an unaffected leaf rather than with a green-leaved plant. Normal cultivar color is usually distributed through the blade or follows a repeatable pattern; a new, localized blister or powder-producing spot deserves closer inspection. If the change is a flat scorch or broad paling after a move into stronger sun, use the Amaranth light guide to check exposure before treating it as a disease.
Classic fungal rusts may start as pale spots and powdery pustules, often on the lower leaf surface. Their colors vary by rust species, and rust fungi generally have limited host ranges, so a diagnosis on one plant should not be applied to every nearby species. A photograph can suggest a disease group but cannot confirm its species.
| What you see | What it suggests | What to do next |
|---|---|---|
| Fixed white blisters, especially on the underside | Possible white blister rust | Isolate the plant and request host-aware diagnosis |
| Orange, brown, or black powdery pustules | Possible true fungal rust | Photograph both leaf surfaces; do not assume the pathogen from color |
| Even red, green, or patterned color without raised lesions | Normal cultivar pigment is more likely | Compare with healthy leaves of the same amaranth |
| Flat marks without blisters or powder | Rust is unconfirmed | Review recent sun, watering, and leaf handling before treating |
Confirm the disease before treatment
Check several leaves, including young growth, and note whether the marks are on the upper surface, underside, or both. Photograph one leaf in place and another against a plain background. Recheck the same leaves after several days: a growing cluster of new pustules is different from a stable old scar.
The species-level name matters here, so ask a local agriculture extension office or plant diagnostic clinic to identify the disease before choosing a treatment. Do not use a generic houseplant fungicide or copy a study schedule on an edible crop. Record the cultivar, where the first lesions appeared, and whether new marks develop; those details help a diagnostician assess the pattern.
Why chaulai’s short harvest window changes the decision
Leafy amaranth is a warm-season annual harvested young, not a long-lived ornamental that must be preserved at any cost. UF/IFAS gives a typical first harvest window of three to six weeks after planting. If only a few older leaves are marked and new tips remain clean, contain the plant and monitor its next growth. If the growing tips are affected across most of a dense sowing, or the crop is already flowering, removing the affected plants and starting a fresh warm-season sowing may cost less than prolonged treatment.
Do not strip every spotted leaf at once. Amaranth is grown for its foliage, so heavy pruning also removes the harvest and the plant’s remaining leaf area. If a few leaves carry clear, active lesions, remove only those after isolation and retain healthy growing tips.
Remove suspect leaves and keep the canopy dry
Use clean scissors and avoid brushing suspect leaves against neighboring plants. Keep removed material separate until you know what you are dealing with; the RHS recommends prompt, careful handling of diseased garden material, and disposal guidance can differ by pathogen. Do not shake or compost an unidentified infection beside the crop.
While diagnosis is pending, water at soil level and avoid leaving the canopy wet overnight. UConn notes that wet leaf surfaces and splashing can spread and support infection by true rust fungi; that guidance is a conservative hygiene step, not evidence that an oomycete white blister rust has been confirmed. If the whole plant is wilting or yellowing as well as spotted, check actual root-zone moisture and drainage with the Amaranth watering guide and Amaranth soil guide. Tricolor amaranth also declines in standing water, so do not try to solve leaf disease by keeping its roots saturated.
Prevent a repeat in the next amaranth sowing
Thin a crowded stand so leaves can be inspected and dry between watering. UF/IFAS recommends thinning vegetable amaranth seedlings to about three inches apart. Give the crop a mix that drains freely and avoid trying to offset crowding with overhead watering.
Water the soil, not the foliage, when possible. If warm, humid weather keeps leaves wet or a crowded canopy closes over, thin or harvest selectively instead of adding more water to the leaves. Use the Amaranth fertilizer guide only for a diagnosed nutrition need; fertilizer does not identify or clear a leaf pathogen.
When to use this page vs other Amaranth guides
Use this page when you see discrete raised or powdery marks on amaranth leaves and need to decide whether disease is plausible. Use Amaranth watering or Amaranth soil when the main pattern is whole-plant wilt on wet or dry mix; use the Amaranth problems hub to compare other diagnosed issues.
Related tool
If the leaf pattern remains ambiguous, use the Plant Disease Identifier to organize symptom observations before contacting a local diagnostic service.
Related Amaranth guides
The Amaranth plant hub explains cultivar type and the crop’s warm-season rhythm. Use light for broad color changes after a placement shift, watering for wilt or dry-down checks, and soil when drainage is poor. The problems hub is the route to other amaranth diagnoses; this page is specifically for suspected rust-like leaf pustules.