Green Chilli Repotting: Pot Size, Timing & Steps
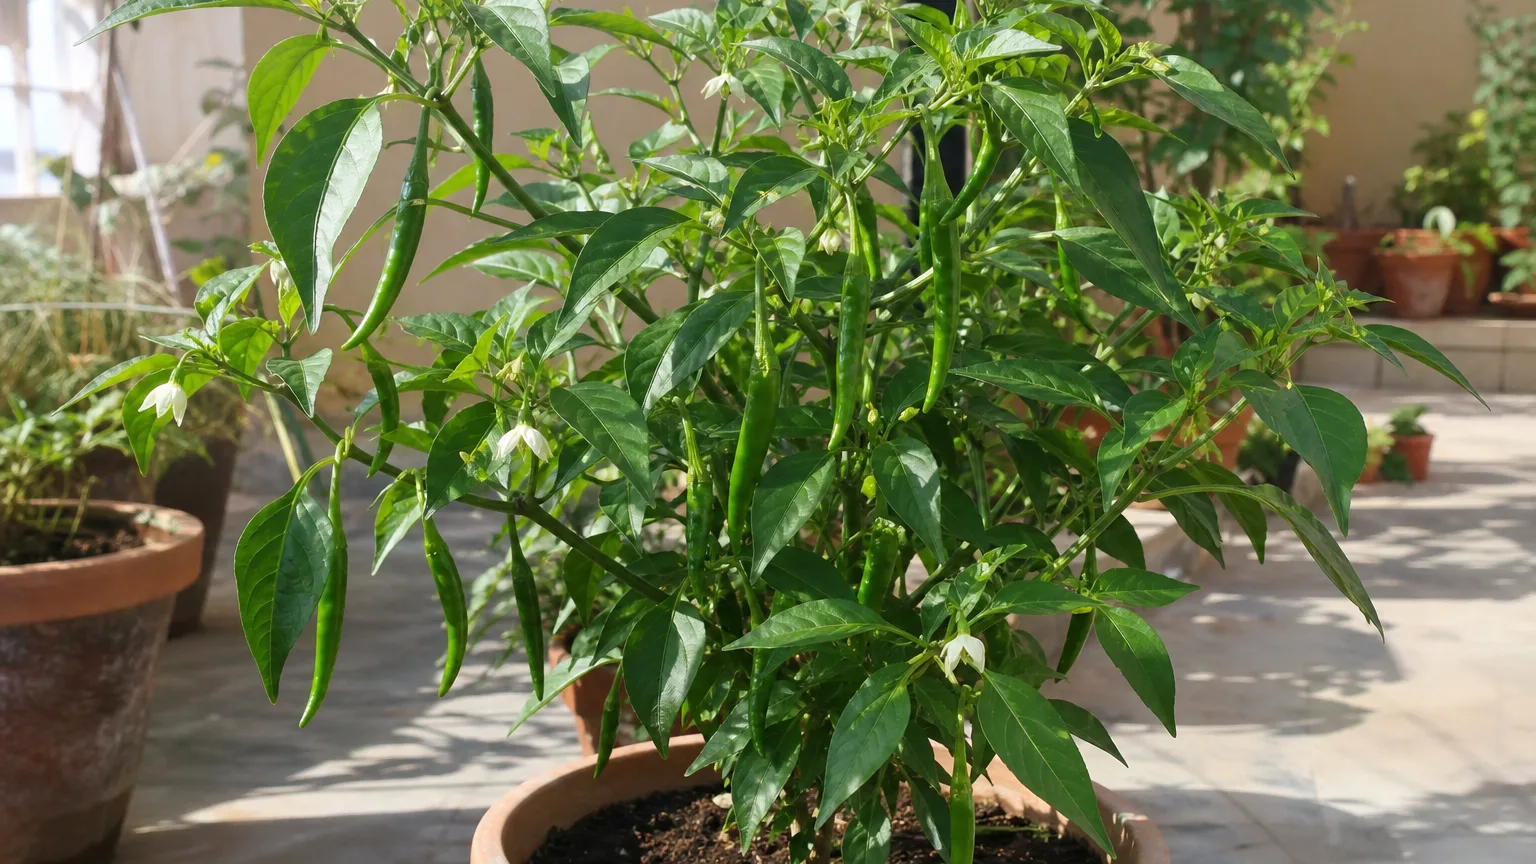
Green Chilli Repotting: Pot Size, Timing & Steps
Green Chilli Repotting: Pot Size, Timing & Steps
Repotting Green Chilli (Capsicum annuum, Hari Mirch) is usually a sequence, not one dramatic jump from seed tray to a huge decorative planter. A seedling first needs enough private root space to grow a compact plug. It then needs gradual exposure to outdoor sun and wind, followed by a careful move into its final container or garden bed. An older plant may need only fresh mix and a root inspection at the start of another warm growing season.
That sequence matters because peppers can be temperamental when their roots are disturbed. Both NC State Extension and Missouri Botanical Garden describe this sensitivity. The practical rule is simple: move the root ball intact, change only as much as necessary, and avoid stacking repotting with harsh sun, drought, pruning, or heavy feeding.
Green chilli repotting: the quick answer
Pot up very young chilli seedlings individually once they are large enough to handle and roots begin holding the plug together. The RHS chilli-growing guide moves 2–3 cm seedlings into individual modules or small pots, then into 13 cm pots when roots show at the drainage holes. That is a useful progression, not a demand to repot every time one root tip appears.
Move the established young plant into its final pot at the start of reliably warm growth. Keep it at the same soil level, preserve the root ball, water once to settle the mix, and give temporary shelter from severe midday sun or wind. One plant per final container is the clearest default; competing root balls make moisture, feeding, and support harder to manage.
Treat seedling pot-up, hardening, and transplanting as separate jobs
“Repotting” can mean three different transitions for a chilli. Potting up gives a seedling more root volume indoors. Hardening acclimates tender foliage to outdoor conditions without changing the roots. Final transplanting moves the hardened plant into its season-long pot or bed. Doing all three on the same hot afternoon creates avoidable stress.
Pot up a seedling when roots hold the plug together
Handle a chilli seedling by a leaf, not by pinching its thin stem. Water the tray beforehand so the plug is moist but not collapsing, lift from below, and place the root ball into a small pot at the same depth. Do not tease fine roots apart merely to make them look spread out; Capsicum annuum gains little from cosmetic root surgery.
A ready seedling has true leaves, active top growth, and enough roots that the plug comes out as one piece. A seedling that falls out with loose sowing mix has been moved too early. One that has a dense mat circling repeatedly around the plug has waited too long. Utah State recommends well-developed pepper transplants with six to nine mature leaves for final planting, which is a later milestone than the first small pot-up (Utah State University Extension).
Harden an indoor-raised chilli before outdoor life
Hardening is not repotting, but it determines whether the final move succeeds. Start with a sheltered, bright outdoor position for a few hours, then increase sun, breeze, and time outside gradually. Bring plants back under protection at night until conditions are warm and stable. The RHS hardening guidance recommends a gradual two- to three-week transition for tender indoor-raised plants and stresses that hardening does not make a frost-sensitive crop frost-hardy.
In a hot Indian pre-monsoon period, the danger may be abrupt solar and wind exposure rather than frost. Begin with morning sun and afternoon shade, keep the small pot from drying hard, and delay the final transplant during a severe heatwave. In a cool hill climate, wait for reliably warm nights. In humid monsoon weather, protect the pot from prolonged saturation even though the air is warm.
Make the final transplant with the root ball intact
Prepare the final pot and support before removing the plant from its nursery container. A prepared hole lets the root ball move directly from old pot to new instead of waiting exposed while you search for mix or a cane. Set the plant at its previous depth; the RHS likewise advises planting chillies at the same level at which they were already growing.
Press the surrounding mix lightly with your fingertips rather than compacting it with your palm. Water slowly until drainage begins, then let the container empty. If the plant is tall, secure it loosely to its support after watering, using a soft tie that leaves room for the stem to thicken.
Signs a Green Chilli actually needs a larger pot
Roots emerging from a drainage hole are one clue, but judge the whole plant. Repot when several signals agree: roots densely circle the outside of the ball, the pot becomes unstable, water runs around a shrunken root mass, or the mix dries again within a day in otherwise moderate weather. Growth that stalls before flowering despite warmth, sun, and appropriate feeding can also indicate that the root volume is exhausted.
Do not use one pale leaf as proof of a cramped pot. Yellowing with wet mix may instead point to poor drainage; wilting in a dry lightweight pot points to water stress. Check the Green Chilli watering guide and Green Chilli soil guide before upsizing a plant whose root ball is still loose and sparsely rooted.
Best time to repot in India and similar climates
The safest window is the start of warm active growth, before the plant carries a heavy crop. In much of peninsular India, that may align with a locally mild, sunny planting window rather than a textbook “spring.” In northern plains or hill regions, wait until cold nights have passed. Commercial guidance from Penn State Extension uses a soil temperature of about 16°C (60°F) as a minimum field-transplant threshold; home growers can use that as evidence that cold wet soil is not a suitable final home for pepper roots.
If a nursery plant is already flowering in a tiny sleeve, move it only when the root ball is genuinely congested and conditions are stable. Utah State notes that pepper transplants already carrying flowers or fruit establish more slowly. A modest move with the ball intact can still be preferable to leaving a vigorous plant trapped in an undersized pot, but avoid shaking off soil or moving it during midday heat.
Choose the final container by cultivar and root ball
There is no honest universal “best chilli pot” because Capsicum annuum includes compact patio cultivars, upright cayenne-like plants, jalapeño types, and broader branching hot peppers. The RHS lists compact chillies as small as 20–30 cm and other cultivars at 60 cm or more. Its baseline container recommendation is one chilli in a 22 cm pot, which can suit a compact plant under attentive watering.
For a vigorous or tall cultivar in a hot balcony, choose a broader, heavier final container than that baseline so the plant remains stable and the root zone does not dry within hours. Increase from the existing root ball rather than surrounding a small seedling with a vast reservoir of wet mix. A practical decision is to choose the smallest final pot that can stay evenly moist through a normal hot day, drain promptly after watering, and resist tipping once fruit develops.
Match support to height, branching, and fruit load
Install support during the final transplant, before roots occupy the pot. A compact, self-branching chilli carrying many small upright fruits may need only a short cane or none at first. A taller long-fruited cultivar, or a plant exposed to balcony wind, benefits from one or more canes and soft figure-eight ties. The RHS warns that chilli stems can be brittle, while Penn State notes that staking needs vary with cultivar and cultivation method.
Push the cane near the pot edge rather than through the centre of an established root ball. Check ties as stems thicken and fruit weight increases. Support should prevent snapping, not hold every branch rigidly.
Use fresh mix and unobstructed drainage
Use a fertile mix that holds useful moisture but releases excess water quickly. A workable blend is quality potting mix with finished compost plus a coarse aeration ingredient such as perlite, pumice, or fine bark. Do not fill a final container with dense field soil: in a pot it can settle around roots, drain slowly, and become difficult to re-wet evenly after drying.
Every final container needs a clear drainage hole, and runoff must be able to escape. Peppers prefer rich, moist, well-drained soil according to NC State Extension, while Utah State says they perform poorly in heavy wet soils. Cover a large hole with mesh or a pot shard if mix spills out, but do not create a gravel layer; the goal is a continuous, structured root medium with an open exit.
How to repot Green Chilli step by step
- Water and inspect first. Moisten the old root ball several hours before the move. Confirm that roots, not a watering or light problem, justify repotting.
- Prepare the destination. Clean the pot, open its drainage holes, add enough fresh mix to keep the original soil line at the correct height, and position any cane near the edge.
- Release without pulling the stem. Support the soil surface, invert or tip the nursery pot, and squeeze or tap its sides. Cut a disposable sleeve if that is safer than tugging.
- Inspect conservatively. Healthy roots are firm and the ball smells earthy. Remove only clearly dead, soft, or foul material; do not bare-root a healthy chilli.
- Set at the same depth. Centre the intact ball and fill around it. Avoid burying a long section of stem as if the plant were a tomato.
- Settle the mix gently. Tap the pot and press lightly to close large air gaps without packing out the pore space.
- Water once and drain. Apply water slowly across the surface until excess exits. Empty the saucer and place the plant in bright shelter while it regains turgor.
Clean hands and tools matter when several peppers or other nightshade crops are being moved. Missouri Botanical Garden advises against repeatedly planting peppers where peppers, tomatoes, or eggplants grew previously because these relatives can share soil-borne diseases. For containers, the useful translation is to avoid reusing suspect mix from a diseased solanaceous plant.
Care after repotting
Keep the root ball evenly moist, not continuously saturated, during establishment. Check the old root ball as well as the fresh outer mix: the two can dry at different rates. A slight temporary droop during the first hot afternoon is not unusual, but a plant that remains limp overnight needs a root-zone check rather than automatic extra water.
Give bright light with protection from the harshest sun and wind for a few days, then complete the gradual return to full sun. Do not apply a strong fertiliser immediately to a damaged or inactive root system. Resume the normal Green Chilli fertilizer guide once new leaves or side shoots show that roots are functioning.
When not to repot
Do not repot merely because a calendar reminder fired. Delay the move when the plant is heat-wilted, severely dehydrated, pest-ridden, sitting in cold wet mix, or carrying a heavy crop in an adequately sized container. Stabilise the immediate problem first. If root rot is suspected, however, inspection is not an optional cosmetic repot: it is a rescue operation that may require removing dead tissue and changing contaminated mix.
Avoid combining a major pot change with hard pruning, full-strength feeding, and a sudden transfer from shade to roof-terrace sun. The Green Chilli light guide covers acclimation, while the Green Chilli pruning guide covers canopy work. Change one major stressor at a time whenever the season allows.
Repotting an overwintered chilli
Green Chilli is commonly treated as an annual, but Capsicum annuum is a frost-tender, short-lived perennial under suitable conditions. Missouri Botanical Garden lists the Hot Pepper Group as perennial in warm zones and says container plants can be maintained longer with sufficiently sunny indoor wintering. The RHS likewise says chilli plants can be overwintered warm and bright with sparse watering.
That does not mean every old plant needs a larger pot each year. At the start of renewed warm growth, slide the root ball out and inspect it. If roots are healthy and there is usable space, replace the loose upper mix and keep the same pot. If the ball is densely packed, either move up modestly or root-prune only if you are experienced and willing to accept a slower restart.
In frost-free Indian climates, “overwintering” may be a cooler or drier seasonal slowdown rather than indoor storage. Keep the plant only if it remains healthy and productive. Whiteflies, mites, viral symptoms, stem decline, or exhausted structure can make a clean new seed-grown plant more sensible than preserving an old chilli indefinitely.
Common repotting mistakes
Jumping from a tiny plug to a huge pot leaves a large volume of wet, unrooted mix. Breaking up a healthy root ball adds damage without benefit. Planting too deeply raises the risk of stem-base trouble, and using a blocked decorative pot defeats a good soil mix.
Other frequent errors are moving an unhardened seedling straight into all-day sun, choosing a light narrow pot for a tall cultivar, adding support only after roots fill the container, and feeding heavily before new growth resumes. The correction is not a special tonic. It is better staging: right-sized pot, intact roots, stable warmth, gradual exposure, clear drainage, and patient aftercare.
When to use this page vs other Green Chilli guides
- Use the Green Chilli overview for the plant’s whole-season growth habit, crop expectations, and general care.
- Use the Green Chilli propagation guide for sowing, germination, and raising the seedling before its first pot-up.
- Use the Green Chilli soil guide to refine the container blend or diagnose slow drainage.
- Use the Green Chilli watering guide when wilting or rapid dry-down is the main symptom rather than root crowding.
- Use this page for pot progression, hardening, final transplant, support placement, post-move care, and the spring root check of a retained plant.
Related Green Chilli guides
- Green Chilli care overview — identity, placement, and whole-plant priorities
- Green Chilli light — sun exposure before and after outdoor acclimation
- Green Chilli watering — moisture checks in nursery and final pots
- Green Chilli soil — fertile, aerated container mixes
- Green Chilli fertilizer — when feeding can resume after establishment
- Green Chilli propagation — seed-to-seedling steps before pot-up
- Green Chilli pruning — canopy management separate from root work
Conclusion
Successful Green Chilli repotting is mostly about timing and restraint. Pot seedlings on before they become tightly matted, harden indoor-raised plants gradually, and make the final move into warm conditions with the root ball intact. Choose the final container and support for the cultivar you are actually growing: a compact patio chilli and a tall, long-fruited plant do not create the same stability or water-demand problem.
Use fresh, free-draining mix, retain the previous planting depth, water once to settle, and protect the plant while roots reconnect with the new medium. Treat overwintering as an option for a healthy frost-tender perennial, not an obligation to keep upsizing an exhausted plant. If new growth resumes without persistent wilt and the pot drains predictably, the transplant has done its job.