Thyme Care Guide: Sun, Water, Soil and Pruning
Thymus vulgaris
Grow common thyme (Thymus vulgaris) in full sun and lean, free-draining soil. Learn how to water pots, trim woody growth, and harvest aromatic leaves.
Thyme Care Guide: Sun, Water, Soil and Pruning
Start with wateringThe most common care mistake for ThymeWatering guide →Thyme care essentials
Light
Water
Established thyme is drought-tolerant and rarely needs extra water in the ground. Water new plants while they establish, and water container plants when the mix has dried several centimetres below the surface.
Soil
Lean, light sandy, gritty, rocky, or loamy soil that drains freely; thyme tolerates neutral to alkaline conditions.
Humidity
Temperature
Fertilizer
About Thyme
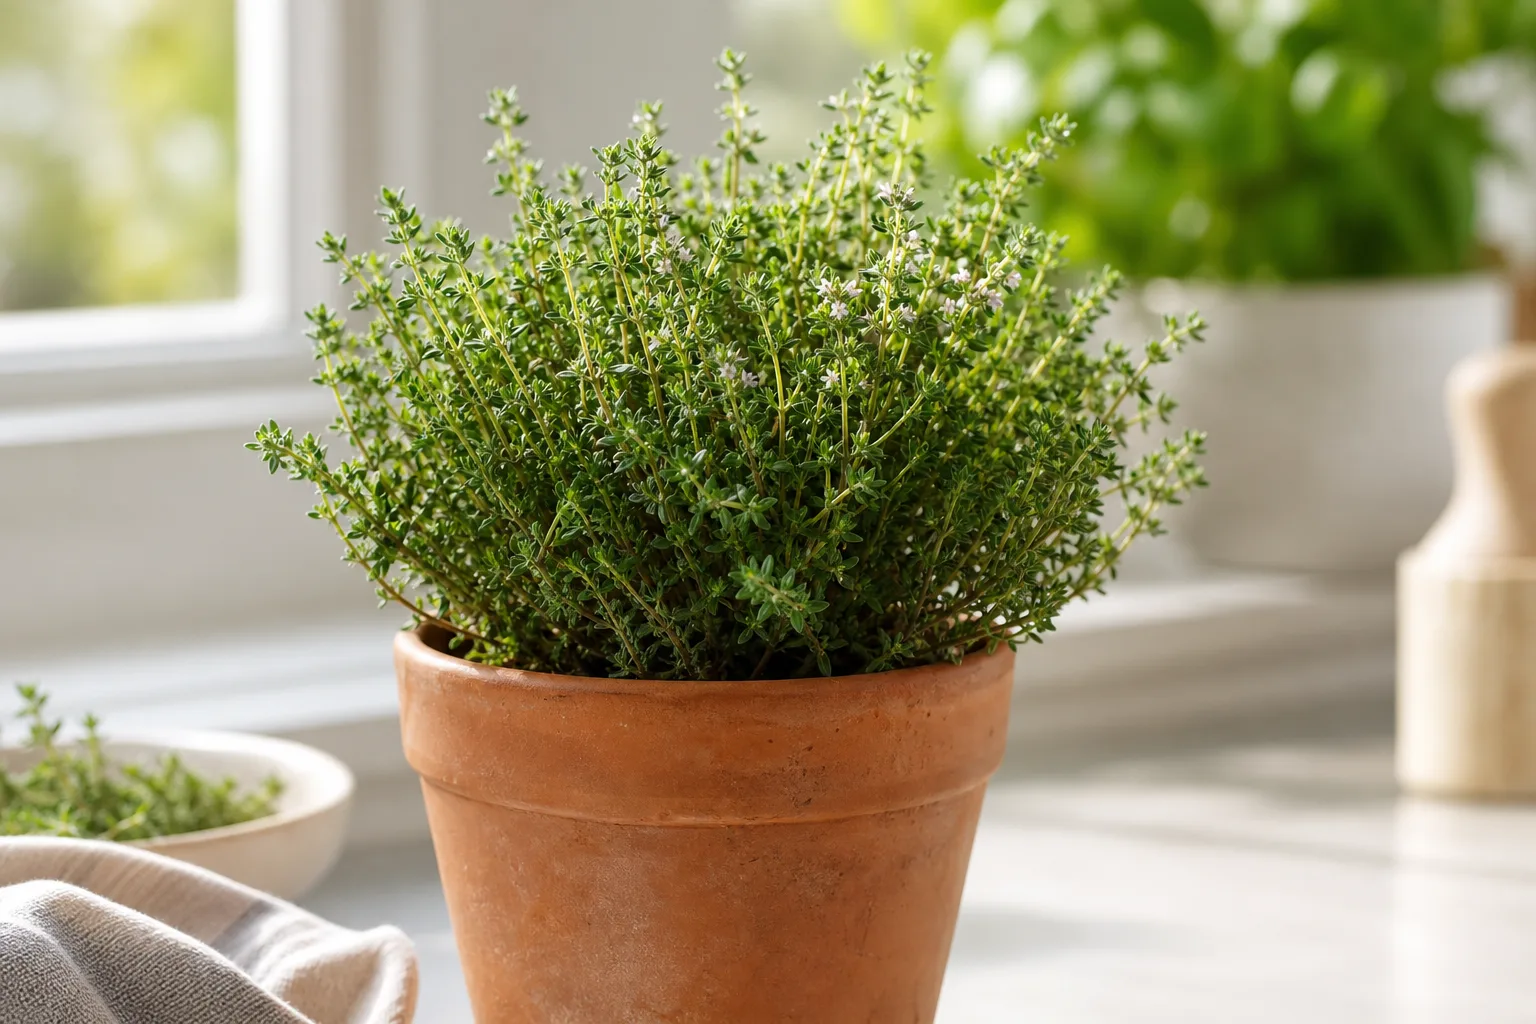
Thyme is native to Southern Europe and the western Mediterranean; Penn State also notes northern Africa, typically reaches About 15–30 cm tall and 15–40 cm wide; size varies by cultivar indoors, with slow to moderate; seed-grown plants can take several years to reach harvest size growth. Thyme has a compact, bushy evergreen woody subshrub and perennial culinary herb growth habit and part of the Lamiaceae family. It is also known as Common thyme, Garden thyme, German thyme, English thyme, and Pot-herb thyme.
| Detail | Information |
|---|---|
| Also known as | Common thyme, Garden thyme, German thyme, English thyme, Pot-herb thyme |
| Native region | Southern Europe and the western Mediterranean; Penn State also notes northern Africa |
| Mature size | About 15–30 cm tall and 15–40 cm wide; size varies by cultivar |
| Growth rate | Slow to moderate; seed-grown plants can take several years to reach harvest size |
| Growth habit | Compact, Bushy Evergreen Woody Subshrub And Perennial Culinary Herb |
| Scientific name | Thymus vulgaris |
| Family | Lamiaceae |
Thyme Care Guide: Sun, Water, Soil and Pruning
Thyme’s actual care baseline
Common thyme is happiest when its roots receive more air and sunlight than many kitchen herbs do. Give it a bright, sunny position, a loose mix that drains promptly, and enough water to establish roots without leaving the root zone continually damp. Thymus vulgaris is a woody-based Mediterranean perennial; it does not need the rich, constantly moist conditions suited to leafy annual herbs. NC State Extension describes common thyme as a dry-soil, full-sun plant that tolerates drought once established (NC State Extension).
For the quickest correction, check the pot’s drainage and the amount of direct light before changing fertilizer. If the mix stays wet for days or the plant sits in shade, more feeding will not fix the underlying conditions. The dedicated Thyme soil guide and Thyme light guide explain those two foundations in detail.
Identify common thyme before copying care advice
This page focuses on common or garden thyme, Thymus vulgaris. It forms a compact, bushy mound with small aromatic leaves and a woody base; the Royal Horticultural Society describes it as an evergreen dwarf shrub, while other plants sold as thyme may creep flat across the ground or have different growth habits (RHS plant profile). Penn State Extension also distinguishes common culinary thyme from creeping and woolly thymes, which are often grown as groundcovers (Penn State Extension).
That distinction matters when choosing a pot, pruning, or deciding how to harvest. Low, mat-forming creeping thyme should not be treated as though it were a small upright culinary shrub. For this plant, the goal is a compact, leafy crown with healthy green shoots emerging above the older woody framework.
Start with the right site and container
Thyme can grow in a garden bed, raised bed, or pot. The essential features are a bright position and drainage holes that let excess water escape. If you are starting with a nursery plant, keep the root ball at its original depth and settle it into the new mix without packing the soil hard around it. A shallow decorative bowl without drainage makes moisture management harder, especially in a rainy or humid climate.
Choose a container only modestly larger than the root ball. A pot that is much too large holds a broad volume of wet mix around a small root system and dries slowly. The practical Thyme repotting guide covers sizing and transplant recovery.
Give outdoor thyme full sun
Aim for a site with at least six hours of direct sun, and more where the climate is mild and the soil drains well. The RHS recommends a warm, sunny location for thyme and identifies full sun for T. vulgaris (RHS how-to-grow guide). NC State similarly lists full sun as a preferred condition. In a hot Indian summer, morning sun with some relief from punishing late-afternoon heat can be a sensible container compromise, but keep the plant bright and airy rather than moving it into deep shade.
A thyme plant that stretches toward light, becomes sparse in the center, or produces weak shoots is asking for a brighter position. Move a container gradually over several days if it has been kept indoors or in shade; sudden exposure to hot midday sun can scorch foliage that has not acclimated. See the Thyme light guide for window placement and acclimation steps.
Grow thyme indoors with realistic expectations
Indoor thyme is possible if a sunny window provides several hours of direct light. A south- or west-facing window may work in cooler climates; in a hot room, monitor the leaves for heat stress and pull the pot a little back from searing glass. Turn the pot occasionally so growth does not lean strongly toward the window. If natural light is weak, a grow light close enough to brighten the foliage can help, but indoor thyme still needs an airy, fast-drying root zone.
Keep the plant away from persistently damp kitchen corners and crowded shelves with poor air movement. If it becomes leggy indoors, first increase usable light rather than fertilizing it. The Thyme watering guide explains why a slower-growing indoor plant usually needs less frequent watering than one outdoors in summer.
Build a lean, free-draining root zone
Use a gritty, open mix rather than a dense, moisture-retentive compost. Thyme naturally suits dry, sandy or rocky ground, and NC State notes its preference for well-drained soils (NC State Extension). For containers, combine a quality potting medium with a substantial mineral component such as coarse horticultural grit or perlite. The mix should wet evenly but release excess water freely.
Do not add a thick layer of rich compost just to make the plant grow faster. Excessively rich, wet conditions encourage soft growth and make the woody crown harder to keep healthy. The RHS plant profile lists neutral to alkaline soil and well-drained conditions for common thyme (RHS plant profile); gardeners need not chase a precise pH if the plant is growing well in an ordinary free-draining mix.
Choose a pot that dries at a reasonable pace
A pot needs at least one clear drainage hole. Unglazed terracotta can help a mix dry sooner than plastic or glazed ceramic, though the plant still depends on a suitable soil blend. The top of the mix drying does not always mean the whole root ball is dry, so check below the surface before watering. Gardening Know How emphasizes drainage and a lighter soil texture for thyme, particularly where garden soil is heavy (Gardening Know How).
If water pools on the surface, drains very slowly, or remains in an outer cachepot, fix the container setup. Empty saucers after watering. Do not add stones at the bottom as a substitute for a drainage hole; use a draining inner pot instead.
Water by the root zone, not the calendar
Water a newly planted thyme thoroughly, then let the excess drain. While it establishes, check moisture more often and water when the upper portion of the mix has dried, rather than letting a young root ball become bone dry for long periods. Once established, thyme tolerates dry spells and needs far less frequent watering than basil or parsley. Penn State notes that established thyme needs little watering, while young plants should be kept moist as they establish (Penn State Extension).
For a container, push a finger or wooden skewer into the mix. If it is still cool and damp below the surface, wait. When the root zone has dried appreciably, water slowly until excess flows from the drainage holes, then empty the saucer. Avoid frequent sips that wet only the surface. For step-by-step checks and seasonal examples, use the Thyme watering guide.
Adjust care for seasons and humid weather
The interval between waterings changes with pot size, sunlight, temperature, rain and air movement. A small terracotta pot on a sunny balcony may dry quickly in hot weather; a large plastic pot in a rainy monsoon spell may remain damp much longer. Check the mix rather than using a fixed weekly schedule. The Royal Horticultural Society specifically warns that thyme dislikes winter wet and recommends free-draining conditions (RHS how-to-grow guide).
During humid, rainy periods, protect container plants from repeated soaking, keep foliage uncluttered, and do not let the pot stand in runoff. In cooler or dimmer months, growth and water use slow, so extend the dry-down between watering. A brief dry spell is generally less risky for established thyme than roots left cold and waterlogged.
Feed lightly, if at all
Thyme is not a heavy feeder. Penn State Extension says established plants do not require fertilizer (Penn State Extension). Start with a modest, well-drained potting mix and observe growth. If a container plant has been in the same mix for a long time and is pale or weak despite good light and healthy roots, a dilute balanced feed during active growth is a reasonable trial; avoid routine heavy feeding.
Do not treat fertilizer as a remedy for low light, root rot, or waterlogged soil. Excess nitrogen can produce soft, lush shoots that are less suited to the compact, aromatic growth most growers want. The Thyme fertilizer guide explains when feeding may help and when to skip it.
Prune and harvest without stripping the woody base
Harvest small amounts from green shoots once the plant is established. Use clean scissors, and leave enough leafy growth for the plant to keep photosynthesizing. The RHS notes that thyme is evergreen and that spring and summer growth often has the best flavor (RHS how-to-grow guide). For a fuller plant, pinch or lightly trim green tips rather than shearing deep into the old, leafless stems.
Common thyme develops woody lower growth as it matures. NC State recommends trimming to limit legginess and woody growth, and The Spruce cautions against cutting into old wood that may not regrow reliably (The Spruce). Bonnie Plants gives the same practical boundary: trim above visible new growth instead of cutting into leafless stems (Bonnie Plants). If the center has become bare, use light staged trims and encourage new shoots rather than removing a large portion at once. The Thyme pruning guide covers seasonal cuts and harvest limits.
Repot only when the root system needs it
Thyme does not need a large container to be healthy. Repot when roots densely circle the root ball, the mix has broken down and stays wet, or the plant dries exceptionally fast despite suitable conditions. Move it into a pot only one size larger and refresh the mix with a free-draining blend. Avoid repotting into a much larger volume of soil.
After repotting, water the mix to settle it and let it drain fully. Keep the plant in bright light but shield it briefly from extreme heat while roots recover. Do not fertilize immediately into fresh mix. The Thyme repotting guide walks through root checks and recovery signs.
Propagate from cuttings, layers or divisions
Stem cuttings, layering and division are reliable options for common thyme. NC State lists all three methods and notes that seed can germinate unevenly (NC State Extension). Penn State recommends spring division of established plants and cuttings from new growth in late spring (Penn State Extension). For a cutting, select a healthy non-flowering shoot, remove the leaves from the lower portion, and place it in a clean, lightly moist rooting medium. Keep it bright but out of harsh direct midday sun until roots form.
Layering is gentle: bend a flexible low stem to the soil, cover one section while leaving its tip exposed, and separate it after roots have formed. Divide only a healthy, established plant and keep rooted pieces intact. See the Thyme propagation guide for the method choice and aftercare.
Read the plant’s warning signs
Yellowing leaves with persistently damp soil, a sour smell, or a collapsing crown point toward poor drainage or excess moisture. Correct the root environment first; adding fertilizer to distressed roots can make recovery harder. Sparse, stretched growth points toward inadequate light. A brown, leafless center can reflect age, shade, or repeated cuts into old wood, so inspect where the remaining green shoots are before pruning again.
Do not diagnose by one leaf alone. Check the root zone, recent weather and the plant’s light exposure together. If a symptom persists after correcting the underlying care, compare it with the plant’s problem pages or ask a local horticulturist to identify pests or disease.
Pets and kitchen use
The ASPCA lists Thymus vulgaris as non-toxic to cats and dogs (ASPCA Animal Poison Control). That classification does not make every preparation suitable for pets; keep concentrated essential oils and large quantities of any plant material out of reach.
Adapt thyme care for India and tropical climates
Common thyme evolved in Mediterranean conditions, so prolonged monsoon saturation and warm, humid still air can be more challenging than a short dry spell. In coastal or humid regions, a raised bed or container under a bright, breezy roof edge can be easier to manage than heavy garden soil. Do not shelter it so deeply that it loses sun. During intense heat, give morning sun and afternoon protection if the plant shows heat stress, while keeping the medium open and draining.
In drier inland regions, check containers more often during hot spells, but still water only after checking below the surface. In cooler northern areas, protect the pot from repeated winter rain and cold wet soil. The exact schedule depends on exposure and pot material; observe how quickly the mix dries in your own conditions.
Set up a simple first-month routine
Place the pot in the brightest suitable position, confirm that water exits freely, and check the root zone every few days while the plant settles. Water only when the mix has dried enough at root depth. Avoid feeding in the first few weeks if the plant is already in fresh potting mix. Remove only damaged or overly long green tips, and note whether new growth stays compact.
After the first month, adjust one factor at a time. If the plant stretches, increase light. If soil remains wet, improve drainage or rainfall protection. If it wilts while the mix is dry, water thoroughly and review heat exposure. This simple sequence makes it easier to identify the cause than changing soil, water and fertilizer all at once.
Conclusion
Successful common thyme care is mostly about restraint: strong light, a lean root zone that drains, watering based on actual dry-down, and pruning that stays above the leafy growth. Those conditions suit its woody, drought-tolerant habit far better than a rich, constantly moist setup. Check the roots and placement first whenever the plant declines; then adjust the smallest practical part of its routine.
When to use this page vs other Thyme guides
- Thyme light focuses on outdoor sun and indoor window placement.
- Thyme watering gives a moisture-check method and seasonal adjustments.
- Thyme soil covers mix ingredients, drainage and container media.
- Thyme fertilizer explains how to decide whether feeding is needed.
- Thyme repotting helps with pot sizing and recovery.
- Thyme propagation compares cuttings, layering and division.
- Thyme pruning covers renewal cuts and harvest timing.
Related Thyme guides
- Thyme overview gives the plant profile and links to its full care cluster.
- Use Thyme soil and Thyme watering together when potting mix stays wet for too long.
- See Thyme pruning when the center becomes woody or sparse.
- Visit Thyme propagation to raise replacements from healthy growth.
How to care for Thyme?
When should you water Thyme?
Established thyme is drought-tolerant and rarely needs extra water in the ground. Water new plants while they establish, and water container plants when the mix has dried several centimetres below the surface.
- Push a finger about 5 cm into the potting mix. If it is dry at that depth - Established thyme is drought-tolerant and rarely needs extra water in the ground.
- water the pot thoroughly and let excess drain away - Water new plants while they establish, and water container plants when the mix has dried several centimetres below the surface.
- Drain excess water - Established thyme is drought-tolerant and rarely needs extra water in the ground.
What soil works best for Thyme?
Lean, light sandy, gritty, rocky, or loamy soil that drains freely; thyme tolerates neutral to alkaline conditions.
- Use a free-draining, peat-free potting compost for container thyme - Lean, light sandy, gritty, rocky, or loamy soil that drains freely; thyme tolerates neutral to alkaline conditions.
- Blend in horticultural grit - Lean, light sandy, gritty, rocky, or loamy soil that drains freely; thyme tolerates neutral to alkaline conditions.
- coarse sand - Lean, light sandy, gritty, rocky, or loamy soil that drains freely; thyme tolerates neutral to alkaline conditions.
- or perlite if the mix holds water - Lean, light sandy, gritty, rocky, or loamy soil that drains freely; thyme tolerates neutral to alkaline conditions.
- Choose a pot with drainage holes - Lean, light sandy, gritty, rocky, or loamy soil that drains freely; thyme tolerates neutral to alkaline conditions.
- clay or terracotta can help the mix dry between waterings - Lean, light sandy, gritty, rocky, or loamy soil that drains freely; thyme tolerates neutral to alkaline conditions.
Grower notes for Thyme
Check the label for culinary common thyme
Thyme is a name used for many species. Common or garden thyme is Thymus vulgaris, a bushy, woody-based culinary herb; creeping thymes are usually grown as low ground cover. Check the botanical label when you want a kitchen herb rather than a mat-forming ornamental.
Give the plant sun and lean, open soil
Common thyme grows best in full sun and light soil that drains well. If your garden bed is heavy or stays wet, use a raised bed or a pot with drainage holes. A modest, free-draining mix suits thyme better than a rich, moisture-holding one.
Water according to the root zone
Keep newly planted thyme watered as it establishes. After that, garden plants usually need extra water only during prolonged heat or drought. Pots dry faster, so check several centimetres below the surface in hot, sunny weather and let all excess water drain from the pot.
Harvest and trim lightly
Snip leafy sprigs regularly; the soft new growth in late spring and summer has especially good flavour. Harvesting helps keep a thyme clump compact. Lightly trim bushy plants in spring or after flowering, but avoid cutting hard into old, bare wood because it may not regrow.
Keep wet winter weather off the roots
Common thyme is drought-tolerant once established, but persistent dampness can cause root rot, especially in winter. Move pots into a sheltered rain shadow during wet spells. If an older plant becomes woody or sparse, spring cuttings or division can provide replacements; seed-grown plants take longer to reach a useful harvest size.
Is Thyme Safe for Pets?
ASPCA lists common thyme (Thymus vulgaris) as non-toxic to cats, dogs, and horses. Keep pets from eating large quantities of any garden plant, and contact a veterinarian if an animal becomes unwell after chewing it.
ASPCA classifies common thyme (Thymus vulgaris) as non-toxic to cats, dogs, and horses. The plant's listed toxic principle is non-toxic; the classification is specific to the species named on its page.
Watering Thyme
For Thyme, push a finger about 5 cm into the potting mix. If it is dry at that depth, water the pot thoroughly and let excess drain away. and water water young plants during establishment. Once established, water garden thyme only during prolonged heat or drought; check pots during hot, dry weather and soak thoroughly after the mix dries. Reduce watering in cool or rainy weather. Thyme roots are vulnerable to damp winter conditions, so move containers to a sheltered, rain-shadow position during prolonged wet spells.
| Detail | Information |
|---|---|
| How often | Water young plants during establishment. Once established, water garden thyme only during prolonged heat or drought; check pots during hot, dry weather and soak thoroughly after the mix dries. |
| How to check | Push a finger about 5 cm into the potting mix. If it is dry at that depth, water the pot thoroughly and let excess drain away. |
| Seasonal changes | Reduce watering in cool or rainy weather. Thyme roots are vulnerable to damp winter conditions, so move containers to a sheltered, rain-shadow position during prolonged wet spells. |
Signs of overwatering
- Potting mix or garden soil stays damp between waterings
- Leaves brown, wilt, or drop while the root zone remains wet
- Roots or lower stems show signs of rot
Signs of underwatering
- Newly planted thyme droops during a prolonged dry spell before it is established
- Container mix is dry several centimetres below the surface in hot weather
- Established plants usually tolerate short dry periods, so check the soil before watering
Soil & potting for Thyme
Use a mix of Use a free-draining, peat-free potting compost for container thyme, Blend in horticultural grit, coarse sand, or perlite if the mix holds water, Choose a pot with drainage holes; clay or terracotta can help the mix dry between waterings for Thyme. Free drainage is essential. Use a raised bed or a container with drainage holes where garden soil stays wet, and keep the root zone from sitting in water. Target soil pH around Approximately 6.0–8.0; neutral to alkaline soil is suitable. Repot repot when roots fill the container or the potting mix has compacted and no longer drains freely; move it into a slightly larger pot., ideally in spring, as new growth resumes.
| Detail | Information |
|---|---|
| Recommended mix | Use a free-draining, peat-free potting compost for container thyme, Blend in horticultural grit, coarse sand, or perlite if the mix holds water, Choose a pot with drainage holes; clay or terracotta can help the mix dry between waterings |
| Drainage | Free drainage is essential. Use a raised bed or a container with drainage holes where garden soil stays wet, and keep the root zone from sitting in water. |
| Soil pH | Approximately 6.0–8.0; neutral to alkaline soil is suitable |
| Repotting frequency | Repot when roots fill the container or the potting mix has compacted and no longer drains freely; move it into a slightly larger pot. |
| Best season to repot | Spring, as new growth resumes |
Signs it needs repotting
- Roots fill the pot or emerge from its drainage holes
- The mix has compacted or remains wet for too long
- The clump has outgrown its container and needs fresh, free-draining mix