How to Grow and Care for Freesia
Grow freesia successfully with a climate-based planting schedule, cool temperatures, well-drained soil, careful watering, staking, storage, and bloom fixes.
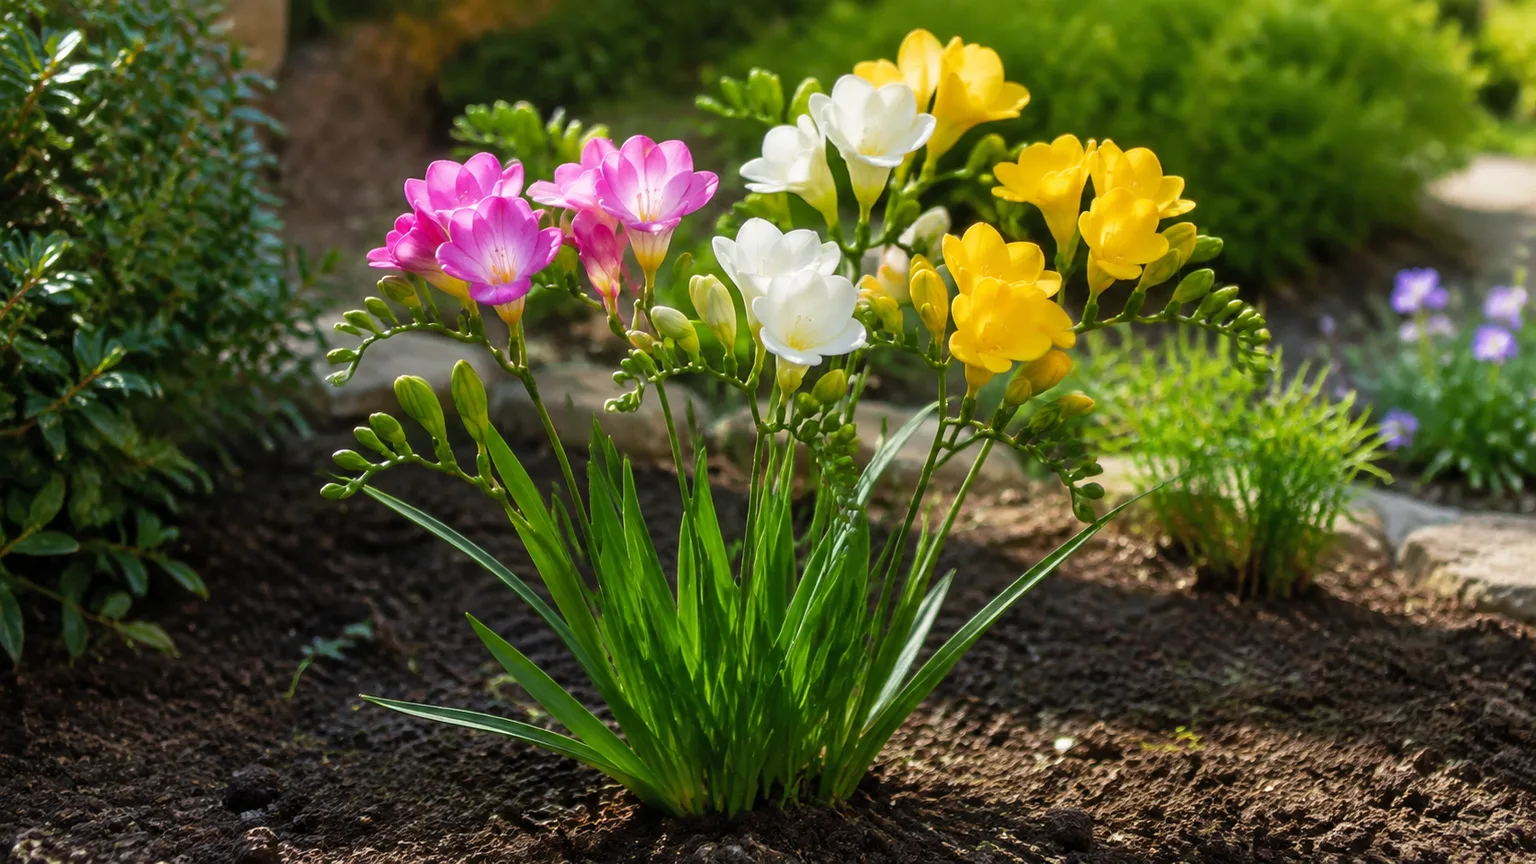
Freesia is a cool-season corm that earns its place in a garden or pot with two things most flowers cannot match: clean, fruity fragrance and flowers that open one after another along an arching stem. The growing trick is easy to state but easy to miss: freesia wants cool growing weather, yet its corms are damaged by frost. Your planting date must therefore follow the temperature pattern in your garden, not a universal month on the calendar.
In practice, grow freesia in full sun or bright partial shade, loose soil that drains quickly, and a location where daytime temperatures stay moderate and nights are cool. Water more consistently after shoots appear, support the slender stems before they flop, and leave the foliage in place after flowering so the corm can rebuild. In cold-winter climates, treat the plant as a seasonal annual unless you are willing to lift and store the corms.
Freesia care at a glance
Freesias (Freesia spp.) are herbaceous plants in the iris family, Iridaceae, grown from conical corms rather than true bulbs. NC State Extension describes plants about 1 to 2 feet tall, with narrow, sword-shaped leaves and five to ten funnel-shaped flowers arranged in a one-sided raceme. Hybrids vary in height, flower form, and scent, so the packet or cultivar label should take precedence over a generic care chart (NC State Extension Gardener Plant Toolbox).
Use this as your starting checklist:
- Light: Full sun in cool weather; morning sun and afternoon protection help in hot climates.
- Soil: Fertile, porous, and well drained. Sandy or gritty soil is safer than a heavy, wet bed.
- Planting: About 1 to 2 inches deep in containers and roughly 2 inches outdoors; point the growing tip upward.
- Moisture: Keep the root zone evenly moist while leaves and buds are developing, never saturated.
- Temperature: Cool days and nights encourage flowers; frost and sustained heat cause trouble.
- Support: Add a ring, low grid, canes, or twiggy branches early because stems become top-heavy quickly.
- After bloom: Deadhead the flower stalks, but keep green leaves until they yellow naturally.
- Winter: Leave corms in the ground only where frost is rare and summer drainage is excellent; otherwise lift, dry, and store them.
Expect roughly three to four months from planting to flowers under good conditions, although prepared corms, cultivar, light, and temperature can move that window. Flowering is sequential rather than simultaneous, which is why a freesia stem can stay useful in a vase or bed after its first flower opens.
Know what you are growing: corms, flowers, and seasons
A freesia corm is a swollen underground stem that stores energy for the next flush of roots, leaves, and flowers. It is often sold as a “bulb,” but the distinction matters when you are deciding what to do after bloom: the old corm is gradually replaced by a new corm, and small offsets form beside it. Those offsets are the easiest way to increase your stock, but they may need one or more growing seasons before they reach flowering size.
The plant’s visible cycle is also different from the cycle of many familiar spring bulbs. In a climate with cool, relatively moist winters and dry summers, freesias can grow from fall into spring and then rest as temperatures rise. In a frost-prone garden, the same cycle is usually shifted: plant after the last frost for a spring or summer display, then lift the corms before the next hard freeze. The Royal Horticultural Society calls freesia a frost-vulnerable plant that is often most successful in containers, greenhouses, or sheltered microclimates (RHS freesia growing guide).
Flowers may be single or double and range from white, yellow, orange, pink, red, lavender, and purple to bicolors. The leaves are narrow and grass-like, while the flower stem bends or arcs under the weight of its upward-facing, trumpet-shaped blooms. A crowded clump can look excellent in a pot or cutting bed, but individual stems still need air movement and support.
Choose planting time by climate and bloom goal
Start with one question: will the corms experience frost before the foliage has finished, or will hot weather arrive before they can flower? If frost is the first threat, delay outdoor planting until the soil is workable and the frost risk has passed. If heat is the first threat, plant early enough that the plant can grow and form buds while nights remain cool.
In USDA Zones 9 and 10, and in comparable frost-free microclimates, unprepared corms are commonly planted in fall for winter-to-spring growth. A sheltered bed beside a sunny wall may work even in a cooler region if drainage is sharp and you can protect the plants from a cold snap, but do not assume a hardiness zone guarantees success: wet winter soil can be as damaging as cold.
In colder zones, plant outdoors in spring after the last frost for summer flowers. Prepared corms have been treated by growers to alter their flowering response, so they can be useful for a timed seasonal display, but the label matters. Do not mix a prepared-corm schedule with an unprepared-corm schedule and then assume a missed bloom means the plant is dead.
For winter or early-spring flowers indoors, plant corms in pots from late summer into fall and give them a cool, frost-free rooting period before moving them to brighter light. For a longer display, plant a few pots or groups at two- to three-week intervals rather than putting every corm in the ground on one day. The dates are only a framework; a thermometer and the corm supplier’s instructions are better guides than a fixed national calendar.
Pick a sunny, cool, well-drained site
Freesia needs light to build sturdy foliage and flowering stems, but heat can shorten the display or stop bud formation. Choose full sun during the cool part of the year. Where spring or summer afternoons are intense, morning sun with light afternoon shade can protect flowers and reduce water stress without putting the plant in deep shade.
Drainage is the non-negotiable site requirement. Freesia corms dislike standing water, and the combination of wet soil plus warm weather is especially risky. A raised bed, a sandy loam, or a container with large drainage holes is easier to manage than a low spot that stays damp after rain. Mix compost into thin soil for fertility, but do not turn a heavy clay pocket into a rich bathtub by adding organic matter only inside the planting hole.
Allow for air movement and a support structure. A freesia clump is narrow at the base but may carry a surprising number of flowers, and wind can bend the stems against wet foliage. A sheltered position near a wall, fence, or taller perennial is useful as long as the plant still receives light and is not trapped in stagnant, humid air.
Plant freesia corms correctly
Buy firm corms with intact outer coverings and no soft, wet, moldy, or strongly shriveled areas. Larger, plump corms generally have more stored energy than tiny offsets, which is why a packet of inexpensive small corms may produce foliage first and flowers later. Keep dormant corms dry and out of direct heat until planting, and plant them soon after the recommended planting window opens.
Depth, direction, and spacing
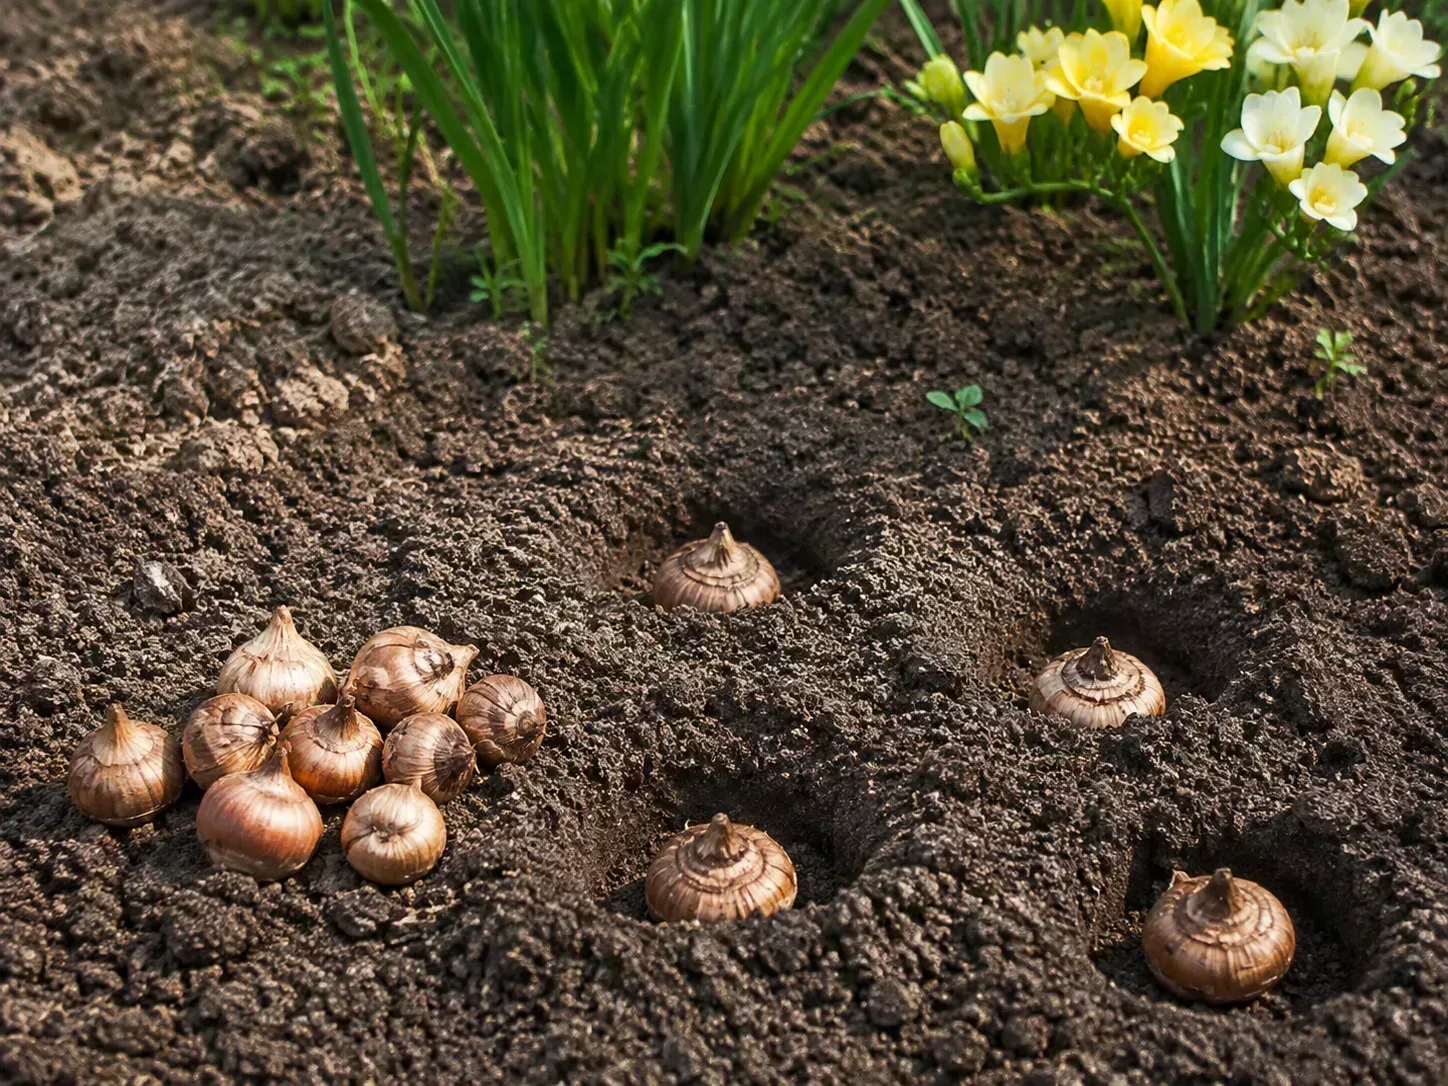
Loosen the bed to at least the depth needed for roots, then plant with the pointed growing tip up. A practical range is about 1 to 2 inches deep in a container and around 2 inches outdoors; some growers use slightly deeper outdoor planting in loose soil, while others stay shallower to keep the corm in a cool, well-drained layer. If your supplier specifies a depth for a named hybrid, follow that instruction.
Space corms about 2 to 4 inches apart in the ground, or closer in a pot if the container is deep and drainage is excellent. Groups of five to eight create a stronger visual mass and help the stems support one another, but do not pack them so tightly that leaves remain wet and airless. Cover gently, water once to settle the soil, and mark the planting so you do not disturb it while waiting for shoots.
Until shoots appear, water sparingly. The dormant corm has little transpiring leaf area, so repeatedly wetting the planting area is more likely to encourage decay than speed growth. Once green growth is visible, increase watering gradually and begin monitoring the root zone rather than watering by habit.
Manage light and temperature for flowers
Freesia’s ideal temperature range is narrower than its casual reputation suggests. NC State Extension lists roughly 60–70°F days and 40–55°F nights as favorable conditions. The exact threshold varies by cultivar and growing system, but the principle is reliable: cool nights help the plant form and hold flower buds, while prolonged heat encourages dormancy, lanky growth, short stems, or flowers that fade quickly.
Give a newly sprouted pot its brightest cool location, not the hottest glasshouse corner. A south-facing window can work in winter if the room stays cool; move the pot back from hot glass and radiators. Outdoors, afternoon shade is more useful once the weather turns warm, but too much shade produces thin foliage and fewer flowers. Rotate pots every few days if stems lean toward the window.
Frost protection and heat protection are two separate jobs. A light cover or temporary move under cover may protect a container from a brief cold night, but it will not make a permanently exposed bed frost hardy. Likewise, extra water cannot reliably compensate for a planting date that puts the entire flowering period into hot weather.
Water without rotting corms
Use the soil as your guide. After shoots emerge, water deeply enough to moisten the root zone, then wait until the surface has begun to dry and the deeper mix is no longer wet before watering again. In a pot, lift it or feel the weight if possible; a pot that remains heavy for days after watering is a drainage warning, not evidence that the plant is well hydrated.
During active growth and budding, aim for steady moisture rather than repeated drought followed by a flood. Containers may need checking every day in warm weather, while an in-ground bed may go several days between waterings after rain. Water at the base in the morning when practical, and avoid keeping flowers and foliage wet overnight.
Yellow leaves and wilting do not automatically mean thirst. A dry plant may wilt and recover after a thorough soak, but a waterlogged plant can wilt because damaged roots cannot supply water even though the soil is wet. If the mix is soggy, stop adding water, check the drainage holes, and inspect the corm or roots rather than treating the symptom with another drink.
As the plant finishes flowering and the foliage begins to yellow, reduce watering. Do not abruptly abandon green leaves, but once they are fading and the corm has had time to store energy, allow the medium to dry more fully for dormancy.
Feed, support, and deadhead
Freesia benefits from a fertile starting mix, but fertilizer is not a substitute for light, cool temperatures, or drainage. If the soil contains compost or the potting mix is fresh, wait until shoots are established before feeding. Then use a dilute, complete liquid fertilizer according to its label. When buds form, a bloom-oriented or relatively potassium-rich feed can support the flowering phase; avoid repeated high-nitrogen applications that produce plenty of leaves without solving a temperature or light problem.
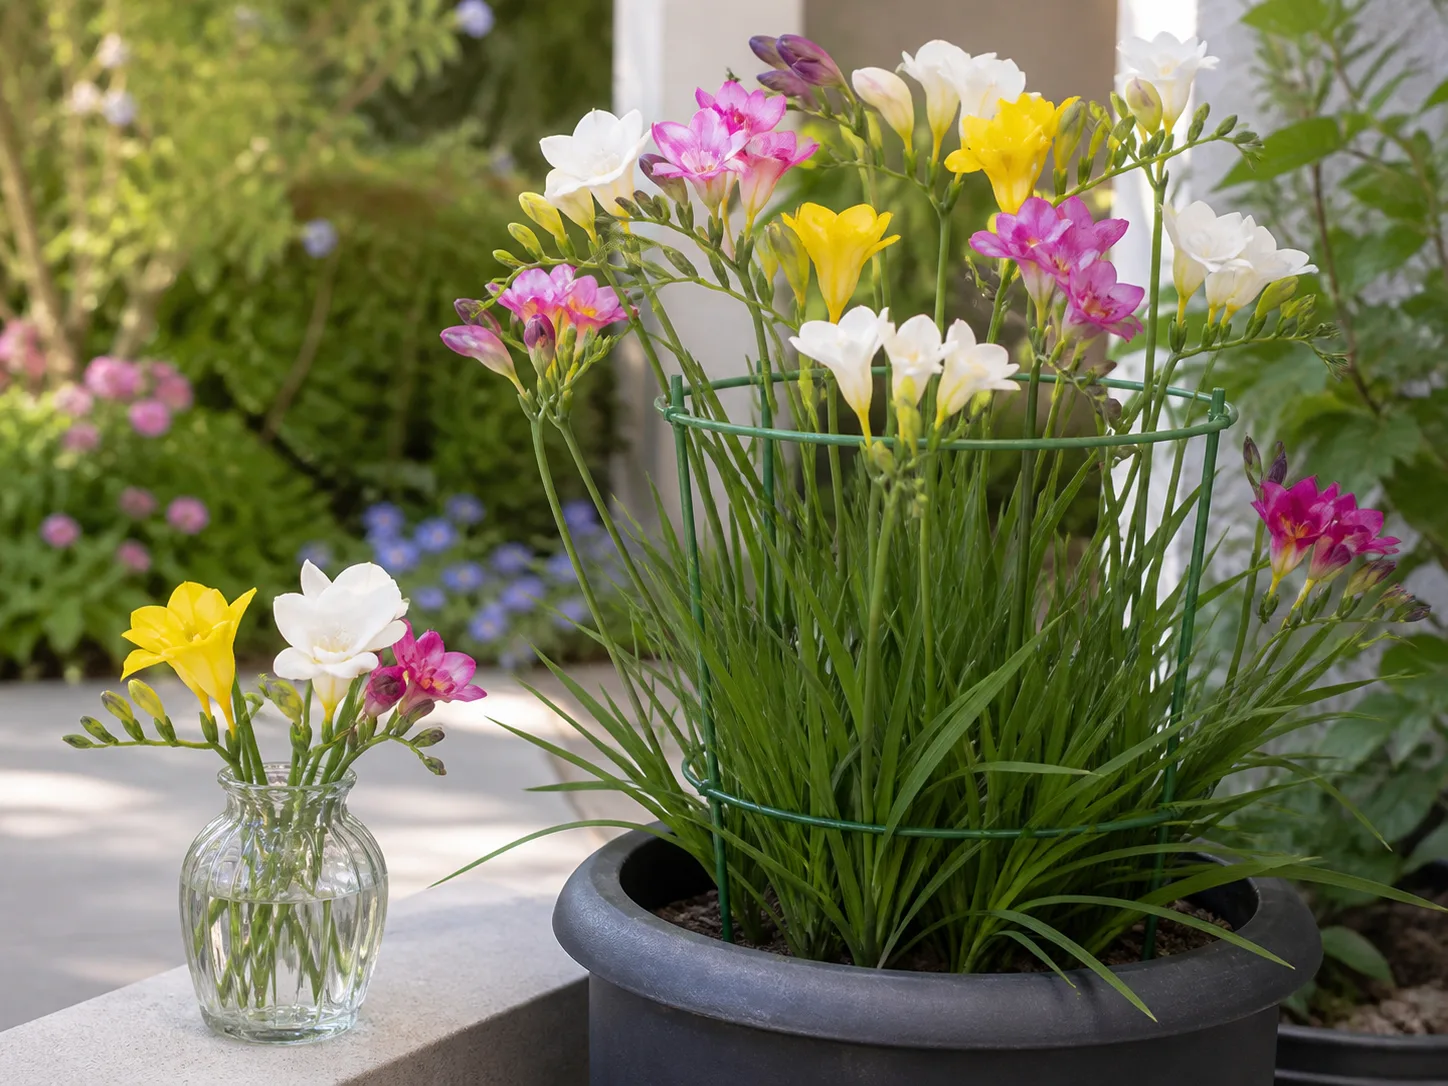
Install support while the plant is young. A low grow-through grid, ring support, triangle of canes, or a few twiggy branches can hold the leaves and stems without forcing them into a rigid upright shape. Put the support in place before the pot is crowded with roots; pushing a stake through a mature clump can injure the corms.
Remove faded flowers at the base of the spent flower stalk if you do not want seed. Deadheading keeps the plant from spending as much energy on seed production and keeps a pot tidy. Leave the foliage alone. The green leaves are the plant’s solar panels, and removing or tying them into a tight knot too early can reduce the next display.
Grow freesia in containers indoors
Containers are often the most reliable option outside a mild, frost-free climate because you can move the plant when the weather changes. Choose a pot deep enough for the long roots, with several unobstructed drainage holes. A tall 6-inch pot can hold a small group of corms, but a wider or deeper container is better if you want a larger clump and enough soil volume to buffer moisture swings.
Use a porous potting mix amended with horticultural grit, coarse sand, or another drainage-improving material that is compatible with the mix. Do not use a sealed decorative cachepot as the only container, and do not leave the growing pot standing in runoff. The pot should drain freely after every thorough watering.
After planting, keep the container cool, frost-free, and only lightly moist until shoots show. Then move it into bright light and increase watering as growth accelerates. A cool conservatory, unheated sunroom, or bright room away from heating vents is usually more suitable than a warm living room. When outdoor temperatures are mild, acclimate the pot gradually before placing it outside so bright sun and wind do not scorch fresh leaves.
Indoor freesia is not a permanent foliage houseplant. After flowering, keep feeding and watering while leaves are green, then let the plant enter dormancy. You can lift and store the corms or let the pot dry and rest in a protected place, but replace the mix if it has become compacted, sour, or chronically wet.
Cut freesia for longer vase life
Freesia is an excellent cutting flower because the blooms open in sequence. Cut stems when the first flower is open or just showing color and the remaining buds are plump. Cutting too late gives you a fuller stem immediately but leaves fewer unopened flowers to extend the arrangement.
Use a clean, sharp blade and cut in the cool part of the day. Remove foliage that would sit below the waterline, place the stems in a clean vase, and keep the arrangement away from direct sun, hot appliances, and ripening fruit. Recut the stems and change the water every few days. Garden Design recommends cutting at the closed-bud stage and notes that home-grown stems can remain useful for a long period when handled cool and clean (Garden Design freesia guide).
Cutting flowers does not harm the corm when the plant still has healthy leaves. The leaves, not the flowers, are what replenish the underground storage organ. If you want seed, leave a few flowers to mature; otherwise, remove spent flower stalks and direct the plant’s remaining energy into corm renewal.
Let foliage recharge the corm
The post-flowering stage is where many freesias are lost. Flowers fade, leaves become untidy, and the plant looks finished, but the corm is still working. Keep the plant in good light and continue modest watering and feeding while the foliage is green. This period helps the new corm and offsets gain the reserves they need for the next cycle.
Wait until leaves are yellow, brown, and clearly drying before cutting them off. The RHS recommends keeping foliage for at least several weeks after flowering and continuing water and feed until it begins to wither; removing it while it is still green can reduce future flowering (RHS freesia growing guide). Do not braid, knot, or aggressively flatten the leaves to make the pot look neater. If the plant is in a bed, place it behind a lower seasonal plant rather than sacrificing the green tissue.
Once most foliage has died back, stop routine watering and let the corms enter dormancy. In a frost-free, dry-summer climate, you may leave them where they are if the soil drains sharply. In a wet summer or a freezing winter, lifting is the safer choice.
Lift, cure, and store corms
Lift corms after the foliage has faded and before frost or prolonged wet weather reaches them. Loosen the soil with a fork rather than pulling hard on dead leaves. Brush off excess soil, discard soft or damaged corms, and let healthy corms dry in a warm, airy place out of direct sun. Do not seal damp corms in plastic.
Freesia needs a warm ripening period to prepare flower buds, followed by a cool, dry resting period before replanting. The exact schedule depends on the cultivar and whether the corms were prepared, but RHS guidance describes a warm period around 80°F with moderate humidity for several weeks, while other growing systems store dry corms cooler after curing. That apparent disagreement reflects different production goals and climates, not permission to store wet corms in a hot container.
For a home method, dry the corms thoroughly, separate loose offsets, and store them in a paper bag or open tray in a dry, ventilated place where temperatures remain stable and frost-free. Label the color and date. Inspect once or twice during storage and remove any corm that becomes soft or moldy so the problem does not spread.
When it is time to plant, choose the coolest part of the suitable growing window, refresh the potting mix if needed, and water only after the corms are positioned. If a stored corm produces leaves but no flowers, consider whether it received enough warm curing, whether it was too small, and whether the new growing season became hot too quickly.
Propagate from offsets or seed
Offsets are the practical home-propagation method. When dormant corms are lifted, you may see small cormels attached to the parent or clustered nearby. Gently separate firm offsets, allow any fresh break to dry briefly, and plant them at the same orientation as mature corms. Give small offsets a little more room to develop, but do not bury them deeply.
Expect patience. An offset may produce leaves in its first season but not enough stored energy for a full flower stem. Keep it growing through the green-leaf stage, protect it from frost and saturated soil, and judge success by gradual size increase rather than an immediate bouquet.
Seed propagation is possible but slow and less predictable for named hybrids. The resulting plants may not match the parent, and flowering can take several years. Choose seed if you want to experiment or raise many plants; choose offsets if your goal is to preserve a favorite color or fragrance.
Troubleshoot poor flowering and weak growth
When freesia has leaves but no flowers, check problems in this order: temperature, light, corm maturity, planting depth, crowding, and foliage aftercare. A plant that grew through warm weather may be healthy but physiologically finished for that season. Move a container to a cooler, brighter position and adjust the next planting date rather than continually adding fertilizer.
Tall, thin foliage with no buds usually points to insufficient light, excessive warmth, or both. Give the plant more direct light if the climate is cool, or more morning sun and afternoon protection if heat is the limiting factor. Many leaves but few flowers can also mean the corms are too crowded, immature offsets were expected to bloom too soon, or nitrogen has been overused.
Short stems or flowers that fade quickly are often a temperature or timing issue. Freesia can look lush and still fail when nights stay warm. Staking helps a weak stem stand up, but it cannot turn heat-stressed growth into a long-lasting cut stem.
Wilting in wet soil is a drainage or root-health problem until proven otherwise. Check the pot holes, smell the mix, and inspect the corm. Wilting in dry soil calls for a slow, thorough watering, followed by a change in the watering pattern so the plant does not cycle repeatedly from bone dry to saturated.
Yellowing after flowering can be normal dormancy. Yellowing early in the season, especially with stunting, twisted growth, pests, or soft tissue, needs closer inspection for aphids, rot, disease, or temperature stress. Do not cut every yellow leaf immediately; first determine whether the plant is naturally finishing its cycle.
Common pests and disease prevention
Aphids and thrips may distort young foliage, buds, or flowers. Inspect the undersides of leaves and new growth weekly, wash small populations away with a firm stream of water, and improve airflow. If a labeled insecticidal soap or horticultural oil is needed, follow that product’s directions and avoid spraying open flowers or active pollinators; “natural” does not mean risk-free for beneficial insects.
Slugs and snails chew leaves and flower stems, especially in damp beds. Remove hiding places, water in the morning, and hand-pick pests when practical. Mice or voles may also damage dormant corms, so a container or protective mesh can be worthwhile when missing plants are the main clue.
Disease prevention begins with drainage, clean tools, and dry foliage. NC State lists root rot, bacterial leaf spot, iris leaf spot, Fusarium wilt, viruses, and blights among possible problems (NC State Extension Gardener Plant Toolbox). Small spots after splashy rain may improve when watering is corrected and affected tissue is removed. Dark, spreading, water-soaked, or mushy tissue is more concerning: isolate the pot, remove badly affected material, and discard a plant with extensive or suspected systemic infection rather than composting it.
Never save a corm that is soft, foul-smelling, or visibly rotted. Clean tools between plants, avoid reusing contaminated potting mix, and do not plant new corms into a bed that repeatedly stays wet. Good drainage and sensible spacing are more reliable disease controls than a calendar of sprays.
Conclusion
Freesia succeeds when you coordinate four conditions: cool growing temperatures, bright light, even moisture, and fast drainage. Plant at the right time for your frost and heat pattern, use a deep container or a loose bed, and support the stems before flowers open. The corms are not difficult, but they are unforgiving of wet storage, frozen soil, and premature leaf removal.
If you are growing freesia for the first time, start with a small group of firm corms in a movable container. That lets you learn how quickly your weather changes, how long the mix stays moist, and where the coolest bright spot is in your home or garden. Once you can keep the plant leafy through bloom and dormancy, save the offsets, stagger the next planting, and build a fragrant display that is far more dependable than a one-season experiment.



