Garden Pest Control: A Practical Guide to Prevention
Control garden pests with a clear IPM plan: identify the culprit, set a damage threshold, prevent repeat outbreaks, and choose targeted controls safely.
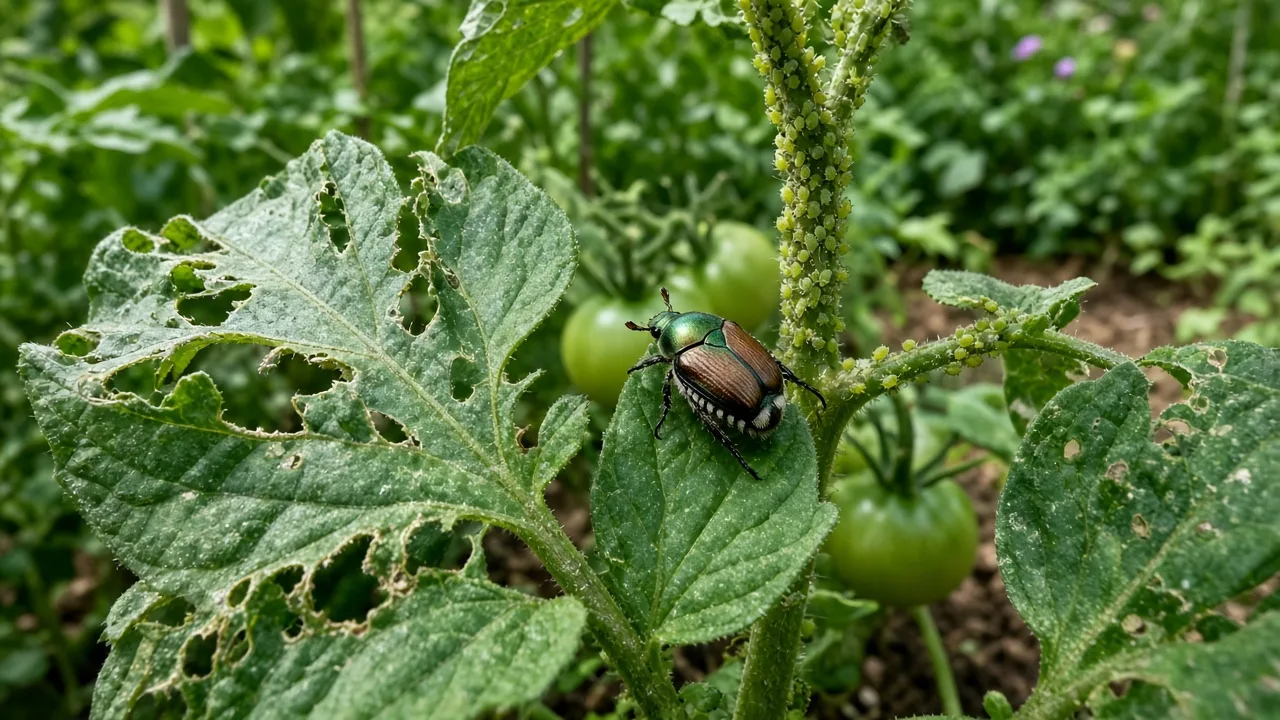
Good outdoor pest control is not the same as making a garden insect-free. A few chewed leaves rarely justify a spray, and many insects you notice are predators, pollinators, or harmless visitors. The useful goal is to prevent recurring damage, identify the organism responsible, and intervene only when the loss matters.
That approach is integrated pest management, or IPM: observe, identify, choose the least disruptive effective control, then check the result. It works for a vegetable bed, flower border, fruit tree, or mixed backyard landscape, although the right tactic depends on whether the culprit is an insect, a slug, or a hungry mammal.
Start With the Damage, Not the Spray
Look at the plant before you look for a product. Fresh holes, ragged edges, skeletonized leaves, and droppings point toward chewing insects such as caterpillars or beetles; pale stippling, curled new growth, sticky honeydew, or silvery scars are more consistent with sap-feeding pests such as aphids, mites, or thrips. A missing seedling or a cleanly clipped stem at soil level suggests a different problem from a leaf with small round holes.
Inspect both sides of several affected leaves, the newest growth, stems, flowers, and the soil line. Search at the time damage appears: slugs are easier to catch after dusk or rain, while some beetles feed in full sun and cutworms hide near the base by day. Look for eggs, shed skins, webbing, slime trails, frass, tracks, and the pest itself; a single hole is rarely enough to name a culprit. The National Gardening Association’s IPM field guide groups clues by feeding type and recommends considering non-pest causes such as moisture or nutrient stress before treating.
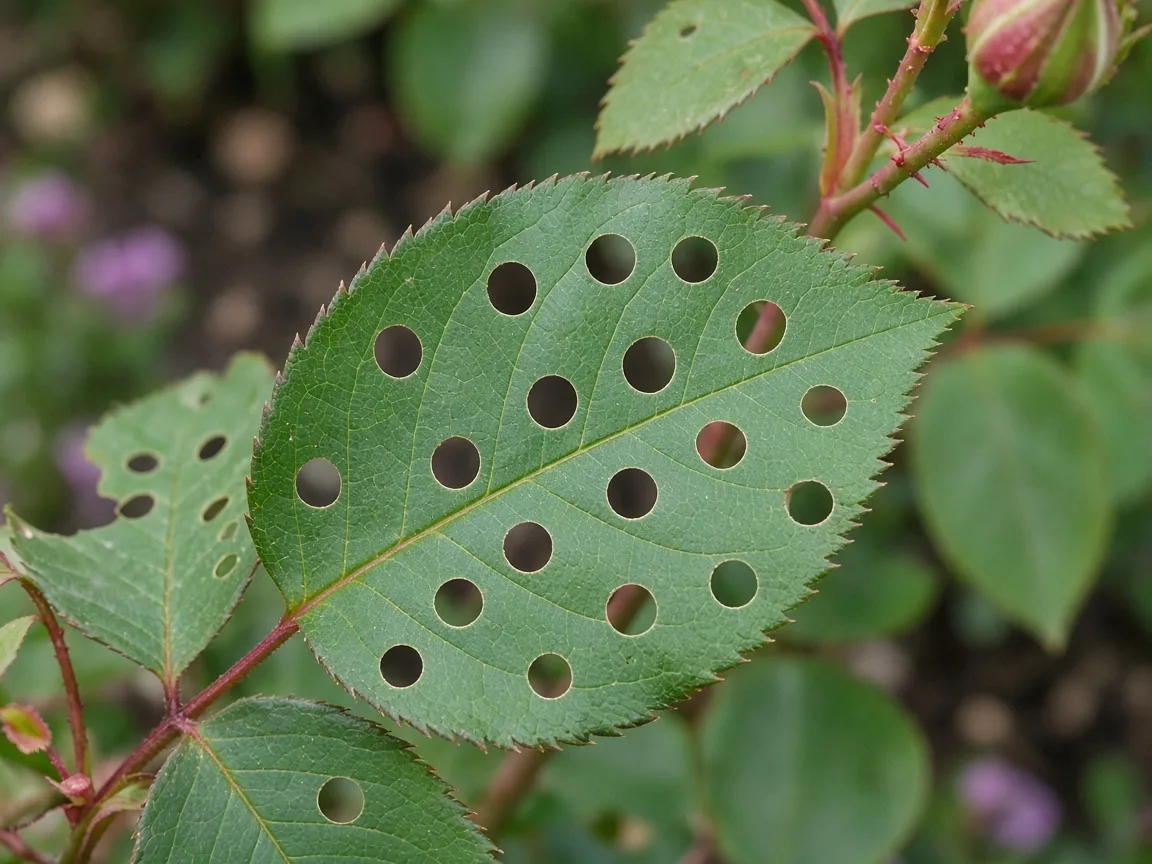
Damage patterns narrow the possibilities, but they do not always identify a species. Chewing is not automatically insect damage: hail, wind tearing, birds, and leafcutter bees can also leave holes or cuts. If you see neat circular pieces removed from a leaf but the plant is otherwise healthy, avoid spraying first; a leafcutter bee may have taken material to line a nest rather than feed on the foliage.
When you cannot identify the insect, photograph it next to a ruler or coin and include the whole plant, the damaged area, and a close-up of the underside of a leaf. The University of Minnesota Extension insect diagnostic sorts garden insects by visible features and size; a local cooperative extension office or master gardener program can help with regional pests and lookalikes.
Decide Whether a Pest Is a Problem Worth Treating
Before taking action, decide what loss you can accept. A few holes in a mature kale leaf may not affect the harvest, while a seedling cut at the stem or a rapidly expanding infestation on a small plant can change the outcome. There is no single damage percentage that applies to every crop, stage, climate, and gardener; use the plant’s health, the value of the crop, the pace of spread, and the effort required to intervene.
Ask four questions: Is the plant still growing? Is the damage increasing between checks? Is the affected tissue important now, such as flowers, fruit, or young seedlings? Can you remove the pest or protect the plant without creating a larger risk? If the answer to most is no, monitor rather than spray. Penn State Extension notes that home gardeners can set an acceptable level of insect damage for their own gardens and that IPM does not mean exterminating every pest.
Treating every insect you see can make later problems harder to manage. Broad-spectrum products may kill predators along with pests, and repeated use of the same pesticide can select for resistant populations. A sensible threshold is therefore not a loophole for neglect; it keeps an isolated blemish from turning into unnecessary treatment and protects the organisms that help contain outbreaks.
Use a Simple IPM Sequence
Use this sequence whenever damage appears: observe, identify, choose, evaluate. First record where the damage is and whether it is new. Next identify the pest as confidently as possible. Choose the least disruptive method that can reach that pest at its current life stage, then return to the same plants and see whether new damage slows.
The sequence prevents a common failure: treating the symptom rather than the cause. A curled leaf might result from aphids, drought, herbicide drift, or heat; spraying an insecticide will not correct the latter three. If the first intervention does not work, do not repeat it automatically. Recheck identification, timing, coverage, weather, and whether the pest is still in the life stage the product or barrier can affect.
Keep a short record: date, plant, damage, suspected pest, action, and result a few days later. This turns “the garden always gets eaten” into useful information: perhaps a crop is planted during the pest’s peak, a row cover goes on too late, or damage returns after a particular rainfall. Utah State University Extension’s IPM control procedures use the same core decisions—identify, estimate pest levels, compare them with a threshold, select a control, and evaluate its success.
Prevent Outbreaks Before Planting
Prevention starts with matching a plant to its site. Plants crowded into shade, dry soil, or a persistently wet corner are harder to keep vigorous and more difficult to inspect. Choose varieties suited to local conditions and look for resistance to the specific disease or insect problem known in your area; “resistant” does not mean immune, and a plant resistant to one problem can remain vulnerable to another.
Give plants enough room for airflow and access. Spacing is not a pest repellent, but it lets leaves dry, reduces tangled hiding places, and makes it easier to notice the first egg cluster or colony. Water the root zone rather than keeping foliage wet for long periods, and avoid pushing excessive nitrogen that produces a flush of tender growth attractive to some sap feeders.
Choose the Right Plant for the Right Place
Design can prevent repeat work. If the same ornamental is severely browsed every year, replace it near the path with a plant that is less attractive to the local deer or rabbit population, or protect that plant with a barrier. If a vegetable attracts one pest every season, shift the planting date where the crop can still mature, or grow it under insect mesh during the vulnerable seedling stage.
Diversify beds rather than planting a large uninterrupted block of one susceptible species. This does not make pests vanish, and companion planting is not a force field. It can make it harder for some pests to find a continuous host and gives beneficial insects more varied sources of nectar and pollen. Utah State Extension recommends diverse landscape plantings and plant choices that fit the site as part of a risk-reducing control plan.
Rotate Susceptible Crops When Pests Stay Put
Crop rotation can help when the pest or disease overwinters in the bed or nearby residue and depends on a particular plant family. Moving related crops to another bed for a few seasons can interrupt that cycle; the National Gardening Association describes a three-year rotation as one option for vegetable families with recurring soil-associated pressure. Rotation will do little against a mobile adult insect that flies in from outside the garden, so match it to the pest’s life history rather than rotating for its own sake.
Make a simple bed map before planting. Track plant families—such as tomato, pepper, and eggplant together—rather than only individual varieties. If space is limited, combine rotation with resistant varieties, clean transplants, barriers, and prompt removal of plants that are seriously diseased.
Clean Up Selectively and Remove Easy Food Sources
Remove dropped fruit, rotting vegetables, heavily infested leaves, and diseased crop residue when they can shelter pests or keep a problem cycling. Clean tools after handling a confirmed diseased plant, and do not move its suspect material into a home compost pile that may not heat consistently. Healthy stems and leaves can usually be composted, so sanitation does not mean scraping every bit of organic matter from the garden.
Keep trash, pet food, fallen birdseed, and compost lids from becoming easy meals for rodents or raccoons. Store ripe produce promptly and close gaps beneath gates or shed doors. These steps are more reliable than scattering strong-smelling powders around the yard because they remove a real attractant rather than hoping an animal dislikes a scent.
Do not strip all leaf litter, stems, or habitat from a landscape. Some native bees nest in hollow stems, and ground beetles and other predators use shelter at the bed edge. Clean up the material linked to the target pest, then leave a separate, managed habitat patch if you want to support wildlife.
Scout on a Schedule and Keep a Useful Record
In a small garden, a brief walk two or three times each week is often enough to catch a problem before it becomes a rescue project. Check a consistent sample—several plants from each crop, including leaf undersides and the newest growth—rather than glancing at the garden from the patio. After rain, heat, or a known local pest emergence, inspect vulnerable seedlings more often.
Look for both pests and their natural enemies. Lady beetle larvae, lacewing eggs, spiders, hoverfly larvae, and parasitic wasps can be mistaken for pests or overlooked because they are small. If you find a few aphids together with predators and new growth remains healthy, give the predators time; if the colony is expanding on a stressed seedling, remove the most infested tips or use a targeted physical control and reassess.
Your notes need not become a spreadsheet. A phone photo with the date and a one-line note—“bean leaves: five beetles on top, row cover not sealed at end”—is enough to compare later. Recording the result matters as much as recording the action: if the damage continues, the first diagnosis or method may have been wrong.
Use Barriers Before an Outbreak
Physical barriers are often the cleanest way to protect a valuable crop because they prevent contact rather than trying to kill a pest after it arrives. Lightweight row cover or insect mesh can protect seedlings and leafy crops from egg-laying adults. Secure the edges against soil or a bed frame, check for tears, and inspect under the cover after installation so you do not trap pests inside.
Barriers need a crop-specific plan. Remove or open them when a fruiting vegetable needs pollination, when plants outgrow the cover, or when heat builds up beneath the fabric. A cover that stays shut through bloom can prevent the insects that pollinate squash or cucumbers from reaching the flowers. The Garden.org guide discusses row covers as a useful exclusion tactic while noting that crops requiring pollination need access at the right time.
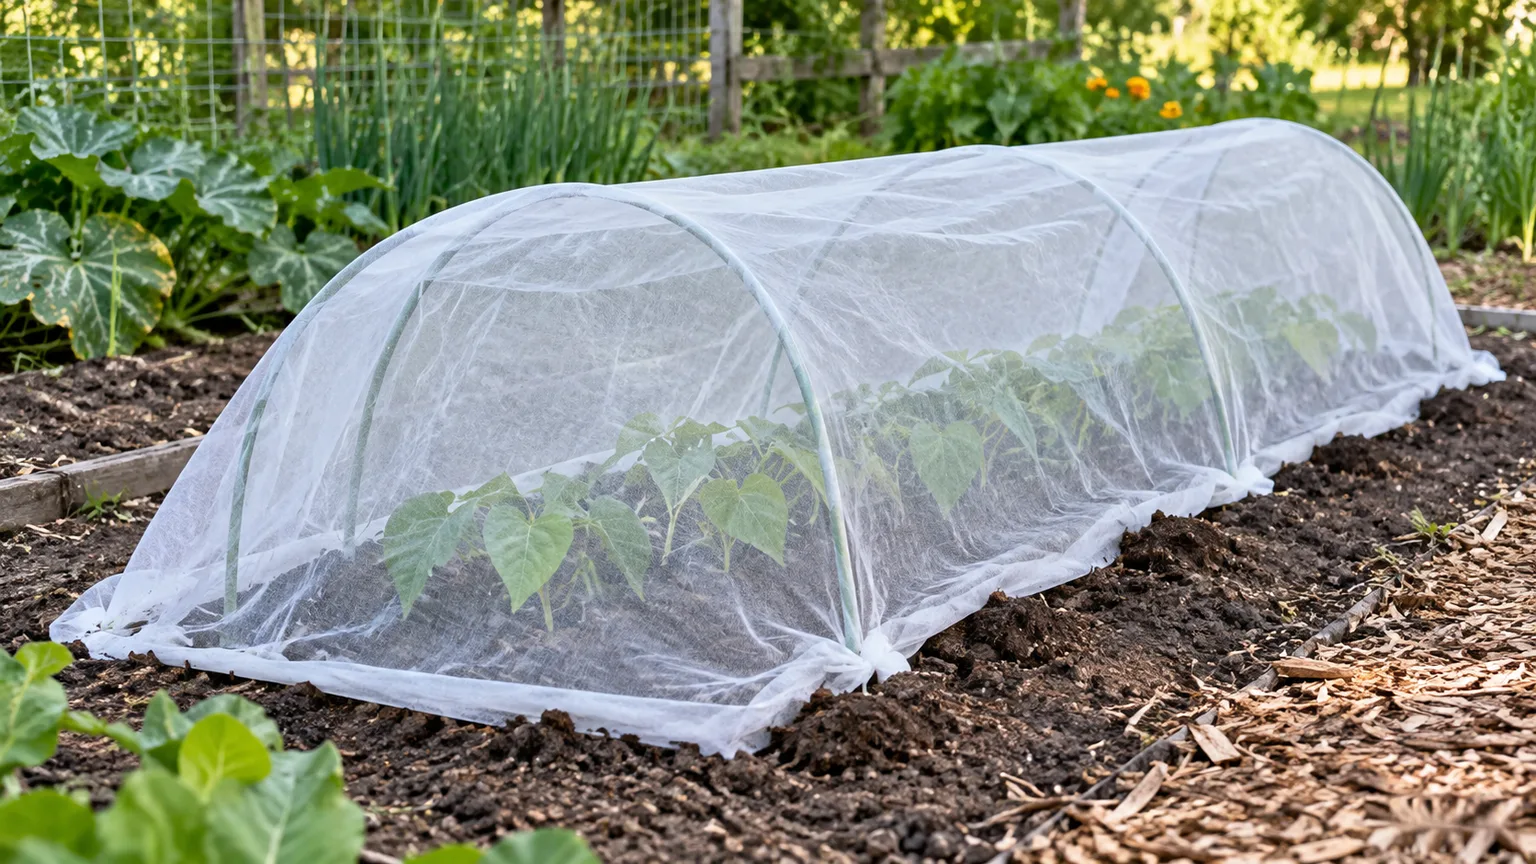
For stems vulnerable to cutworms, a collar around each transplant can protect the short period when the stem is exposed. For fruit, netting must be sized and installed so animals cannot become entangled; keep it taut, check it frequently, and take it down when protection is no longer needed. Every barrier should fit closely enough to exclude the target while still allowing the plant to grow and the gardener to inspect it.
Respond to Common Plant-Feeding Insects
For insects, first separate chewing damage from sap feeding. The methods differ: a leaf-chewing caterpillar can be removed by hand or controlled at a labeled larval stage, while aphids may wash off with a strong stream of water. Applying one “all-purpose” spray across both problems is usually less precise and can harm insects that are not causing damage.
Aphids and Other Sap Feeders
Aphids usually gather on tender tips, buds, and the undersides of leaves. For a small colony, pinch off a badly infested tip or wash the insects from the plant with water, taking care not to break stems. Then wait and inspect fresh growth; a spray that hits only the visible upper surface may miss pests tucked beneath leaves.
If the colony persists and is damaging new growth, use a commercially formulated insecticidal soap or other product only if its label lists the crop and target pest. These contact products must reach the insect, and coverage matters more than spraying every plant in the bed. Test a small area first, follow all label directions, and avoid treating open flowers or active pollinators.
Sticky honeydew may attract ants, but ants are not always the original cause of plant damage. Find the sap-feeding insect first. Treating ants while leaving an aphid colony untouched is unlikely to solve the issue, and ants in soil or on a tree can have other explanations.
Caterpillars, Beetles, and Leaf Chewers
Inspect the underside of leaves for eggs and look for frass near fresh chewing. Handpick a few visible caterpillars or beetles from a small planting; wear gloves if you are unsure of the species. Before removing a striking caterpillar, identify it: a native butterfly larva on its host plant may be worth tolerating, while an outbreak stripping a crop can require action.
For a confirmed caterpillar pest, a product containing a target-specific biological active ingredient may fit better than a broad-spectrum spray, but only when its label lists that crop and pest. Some caterpillar controls affect the larvae of beneficial moths and butterflies too, so use them only on the affected plant and at the vulnerable life stage. A small plant with a few holes may need no treatment at all.
Beetles can be easier to manage by exclusion while plants are young. If adults are already feeding, pick them into a container or use a pest-specific extension recommendation for your region; beetle life cycles and control timing vary. Do not assume that a lawn treatment will fix beetles chewing leaves, since the damaging stage and the location of that stage may differ.
Treat Slugs and Snails as a Separate Problem
Slugs and snails are mollusks, not insects, so many insect sprays will not control them. Confirm their presence with fresh slime trails, feeding damage, or a dusk inspection around seedlings, pots, boards, and damp bed edges. Holes alone are not proof; caterpillars, beetles, and weather can make similar marks.
Reduce their hiding places immediately next to vulnerable seedlings, water early enough that the soil surface can dry before night, and handpick at dusk if the area is small. If you use a trap or bait, choose a product designed for slugs or snails and follow its label around children, pets, and edible crops. A barrier or trap is a local control, not a garden-wide solution, so check whether new damage actually declines before expanding the treatment.
Avoid salt on soil or plants. It can injure the garden you are trying to protect, and scattered salt does not solve the conditions that keep bringing mollusks to a bed. If the problem returns, look at irrigation timing, dense groundcover, boards, and the location of the most tender plants.
Protect Beds From Rabbits, Deer, Squirrels, and Rodents
For mammals, physical exclusion is usually more dependable than a scent deterrent. A fence should be high enough for the local animal and closed at ground level; rabbits and groundhogs may dig beneath a barrier, while deer can clear low fencing. Use a small-mesh lower section where young plants are vulnerable, and check gate corners and soil gaps after rain or digging.
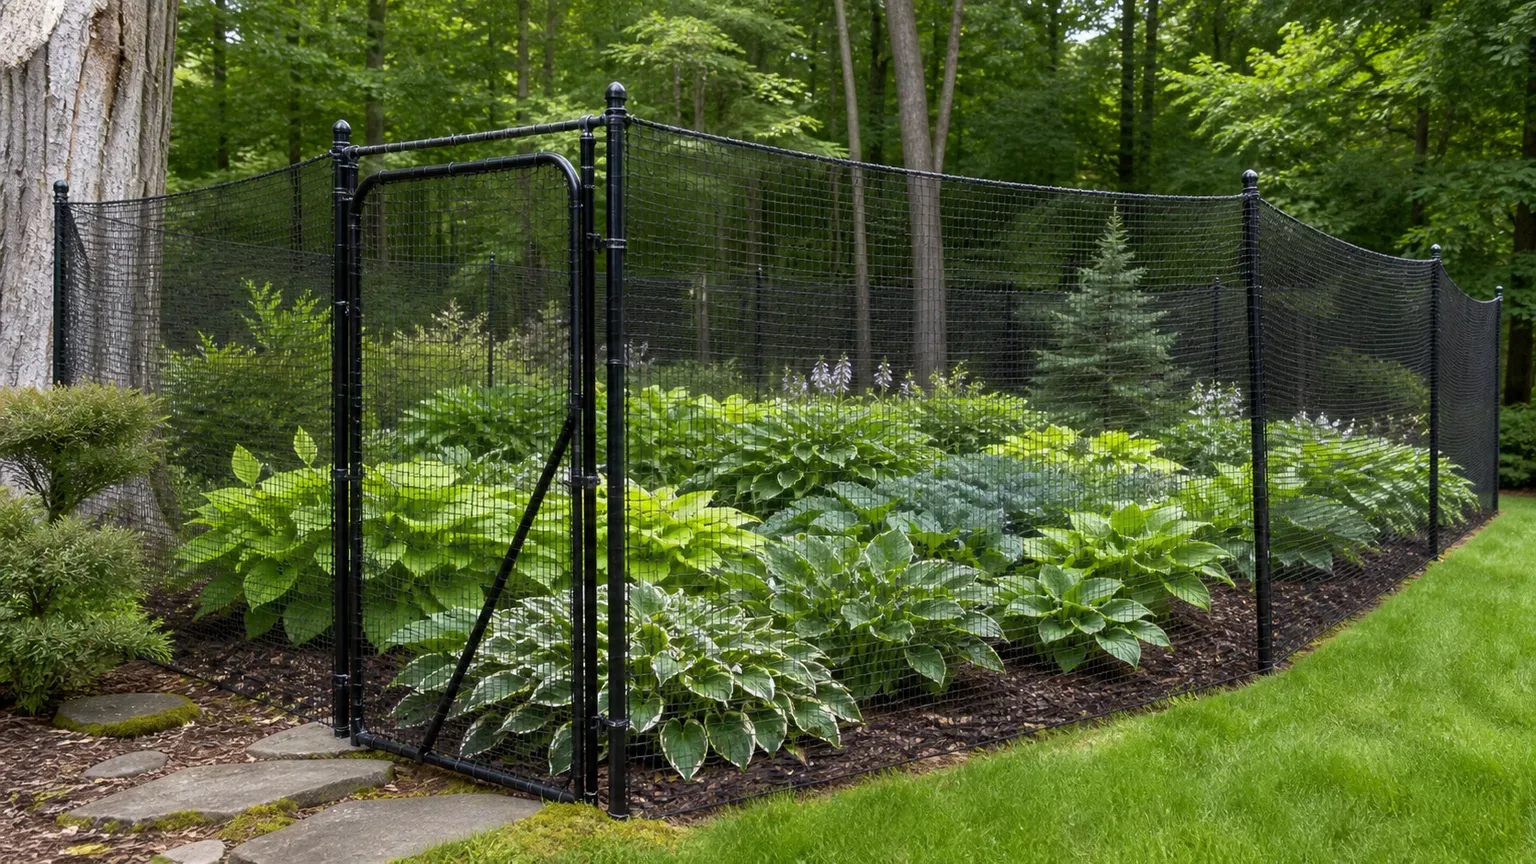
Match the clue to the likely visitor. Cleanly clipped seedlings and small tracks can suggest rabbits; higher browsing on shrubs may point toward deer; disturbed soil around new seeds may be squirrels or other diggers. These clues are not proof, so a simple trail camera or repeated observation at dawn and dusk may save you from installing the wrong fence.
Repellents can be temporary and need reapplication after rain or new growth; their performance depends on the animal, product, food availability, and how habituated local wildlife is. Do not rely on an untested kitchen smell to protect a harvest. If trapping, relocation, or a protected wildlife species is involved, check local rules or contact a wildlife professional before acting.
Keep Beneficial Insects and Birds in the System
Predators and parasitoids can suppress some pests, but they need time and suitable habitat. Lady beetles and lacewings feed on aphids and other small insects; hoverfly larvae are predators even though adult hoverflies visit flowers. Spiders and ground beetles also take prey. A garden with staggered blooms, some undisturbed shelter, and fewer broad-spectrum treatments gives these helpers a better chance to stay.
Use flowers that provide accessible nectar and pollen across the season, and choose species suited to your region. Small-flowered herbs and flowering perennials can feed beneficial insects, while a mix of native plants supports more kinds of wildlife than a single ornamental cultivar. The goal is not to attract every insect to every bed; place habitat nearby without letting it shade crops or become difficult to manage.
Birds can consume insects, but a feeder placed directly beside a crop can also attract seed-eaters or animals that raid fruit. A birdbath or habitat planting is not a targeted pest treatment. Preserve beneficial wildlife where it fits, protect the harvest with barriers, and decide based on observed damage rather than assuming that more birds or bought lady beetles will solve a specific infestation.
Choose Sprays, Traps, and Biological Controls With Care
Use a spray only after identification and only when nonchemical methods are inadequate for the level of damage. Read the label for the exact crop, pest, application rate, protective equipment, temperature limits, harvest interval, and precautions for pollinators and pets. More concentrate is not better. Penn State Extension specifically advises following label directions and notes that commercial insecticidal soaps are preferable to home remedies because they are tested on plants for safety.
A contact spray must land on the pest, so treat only the affected plant and the surfaces where the pest is feeding. Apply in conditions allowed by the label, avoid windy weather and open blooms, and do not spray a drought-stressed plant. Test a few leaves and wait the stated interval before treating the rest. If the label does not include your crop or the pest, do not improvise a rate.
Traps can help confirm timing or reduce a localized population, but a capture count is not the same as proof of crop damage. Use a trap matched to the target, place it according to the product instructions, and check it regularly. A lure intended to monitor an insect may attract adults from beyond the plant you are protecting, so do not place it beside a small bed without checking its use directions.
Biological controls are specific tools, not universal “natural” fixes. Beneficial nematodes, predators, or microbial products work only when the target species, life stage, soil or weather conditions, and release timing fit. Ask a local extension service whether the proposed control has evidence for your pest; even a living control can be wasted if it is released after the vulnerable stage has passed.
Avoid Popular Shortcuts That Create New Problems
“Natural” does not automatically mean effective or harmless. Some current gardening roundups suggest household dish-soap or cayenne mixtures, but ingredients and concentrations vary and can injure foliage, fail to control the target, or expose people who handle the treated plant. For example, Farmers’ Almanac’s natural-control roundup includes kitchen-spray recipes; treat such recipes as claims to verify, not as tested pesticide labels. Extension guidance favors a formulated product tested for its stated use and careful label-following.
The same skepticism applies to universal claims about companion plants, coffee grounds, citrus peels, garden lime, or a particular essential oil. A plant can provide habitat or be useful as a trap crop under a specific setup, but it rarely repels every pest simply by growing nearby. If a proposed remedy cannot name the target pest, explain how to verify success, and account for pollinators, pets, and edible crops, it is not a good first response.
Avoid preventive blanket sprays on a fixed calendar unless a region-specific extension recommendation and the product label support that use. Spraying before pests appear can harm natural enemies and leaves you without a baseline to tell whether the tactic worked. Prevention should mostly mean good plant selection, well-timed barriers, clean tools, crop rotation where relevant, and steady scouting.
Follow a Season-by-Season Prevention Routine
Before planting, review last year’s notes, check local pest alerts, buy healthy transplants, and decide which crops need a row cover, fence, or rotation. Set barriers before the first pest flight rather than after eggs are laid. If you cannot identify last season’s damage, take photos and request a local diagnosis before repeating a treatment.
During early growth, inspect seedlings every few days, check leaf undersides, seal row-cover edges, and remove egg clusters or a few pests by hand. Keep a small number of plants under close observation rather than trying to inspect every leaf. Revisit the bed after storms and irrigation changes because weather can change both plant stress and pest activity.
At flowering and fruiting, open covers when pollination requires access, collect ripe produce promptly, and watch for damage to fruit rather than treating every leaf blemish. Protect the harvest from mammals with fencing or netting that is checked for gaps and wildlife entanglement. If an intervention is needed, use only the most targeted method that reaches the pest at that stage.
At the end of the season, remove diseased or heavily infested crop material, clean supports and tools, and note which controls helped. Leave healthy habitat where it will not shelter the specific pest you are managing. A one-page annual record of pest, timing, damage, action, and outcome is more useful next spring than buying a stack of general-purpose sprays.
Conclusion
Effective outdoor pest control starts with diagnosis and a decision about how much damage matters. Give the garden a chance to tolerate minor feeding, then use barriers, sanitation, hand removal, habitat management, or a correctly labeled treatment that fits the actual pest.
The most reliable prevention plan is specific: choose suitable plants, inspect them on a schedule, protect vulnerable crops before an outbreak, and record what happens after each step. When the pest is uncertain or the proposed treatment could affect people, pets, pollinators, or a regulated species, pause and ask local extension or a qualified professional for a targeted recommendation.



