How to Grow and Care for Gaura (Wandflower)
Learn how to grow gaura with the right sun, drainage, watering, pruning, cultivars, propagation, container care, and winter protection.
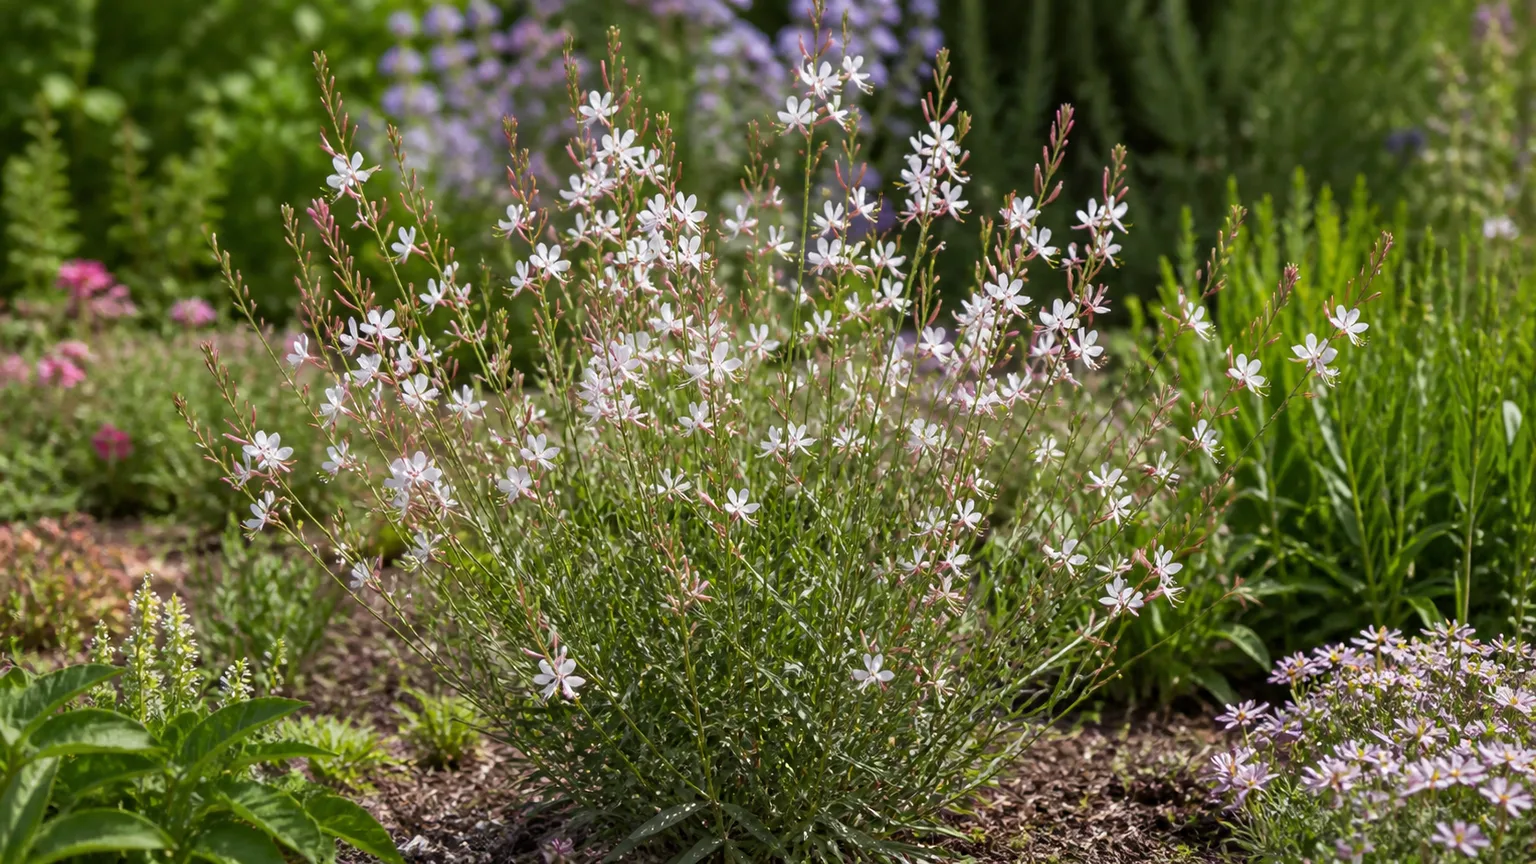
Gaura earns its common name, wandflower, from tall, slender stems that carry small four-petaled flowers like butterflies suspended in the air. It is one of the best perennials for a sunny border that needs movement and late-season color, but it is not a plant to tuck into any convenient patch of soil. The same deep taproot that helps gaura handle heat and dry spells also makes it resent wet ground and repeated transplanting.
The reliable formula is simple: give it at least six hours of sun, a permanent site with excellent drainage, moderate water while it establishes, and very little fertilizer. The plant’s natural open shape is part of its charm. You can make it bushier and tidier with well-timed cuts, but trying to turn every tall stem into a rigid column usually creates more work than beauty.
What Is Gaura?
Gaura is the familiar garden name for Oenothera lindheimeri, a clumping herbaceous perennial in the evening primrose family. Many nurseries still label it Gaura lindheimeri, its former botanical name, so both names may appear on seed packets and plant tags. Other common names include whirling butterflies, bee blossom, and Lindheimer’s beeblossom.
The species is native to south-central North America, especially Texas and Louisiana, where it grows in prairies, pinelands, and open areas near water. NC State Extension describes plants with a basal clump of narrow leaves and wiry, upright to arching stems about 3 to 5 feet tall in the species form. White or pink-tinged flowers open a few at a time along the stems, so a plant can keep presenting fresh blooms rather than showing one short, uniform flush. NC State Extension’s plant profile also notes the plant’s value to bees, butterflies, hummingbirds, and the caterpillars of the white-lined sphinx moth.
Garden cultivars vary dramatically from that tall, loose species habit. Compact selections may stay around 12 to 24 inches tall, while larger forms can reach 4 feet or more. That range is why identifying the cultivar before planting matters almost as much as knowing the species.
Choose a Site Before You Plant
Choose the permanent location first, then buy the plant that fits it. Gaura develops a thick, carrot-like taproot, and an established plant can be difficult to dig, divide, or move without setting it back. A spot that looks slightly too open at planting time may be exactly right once the basal clump and flower wands mature.
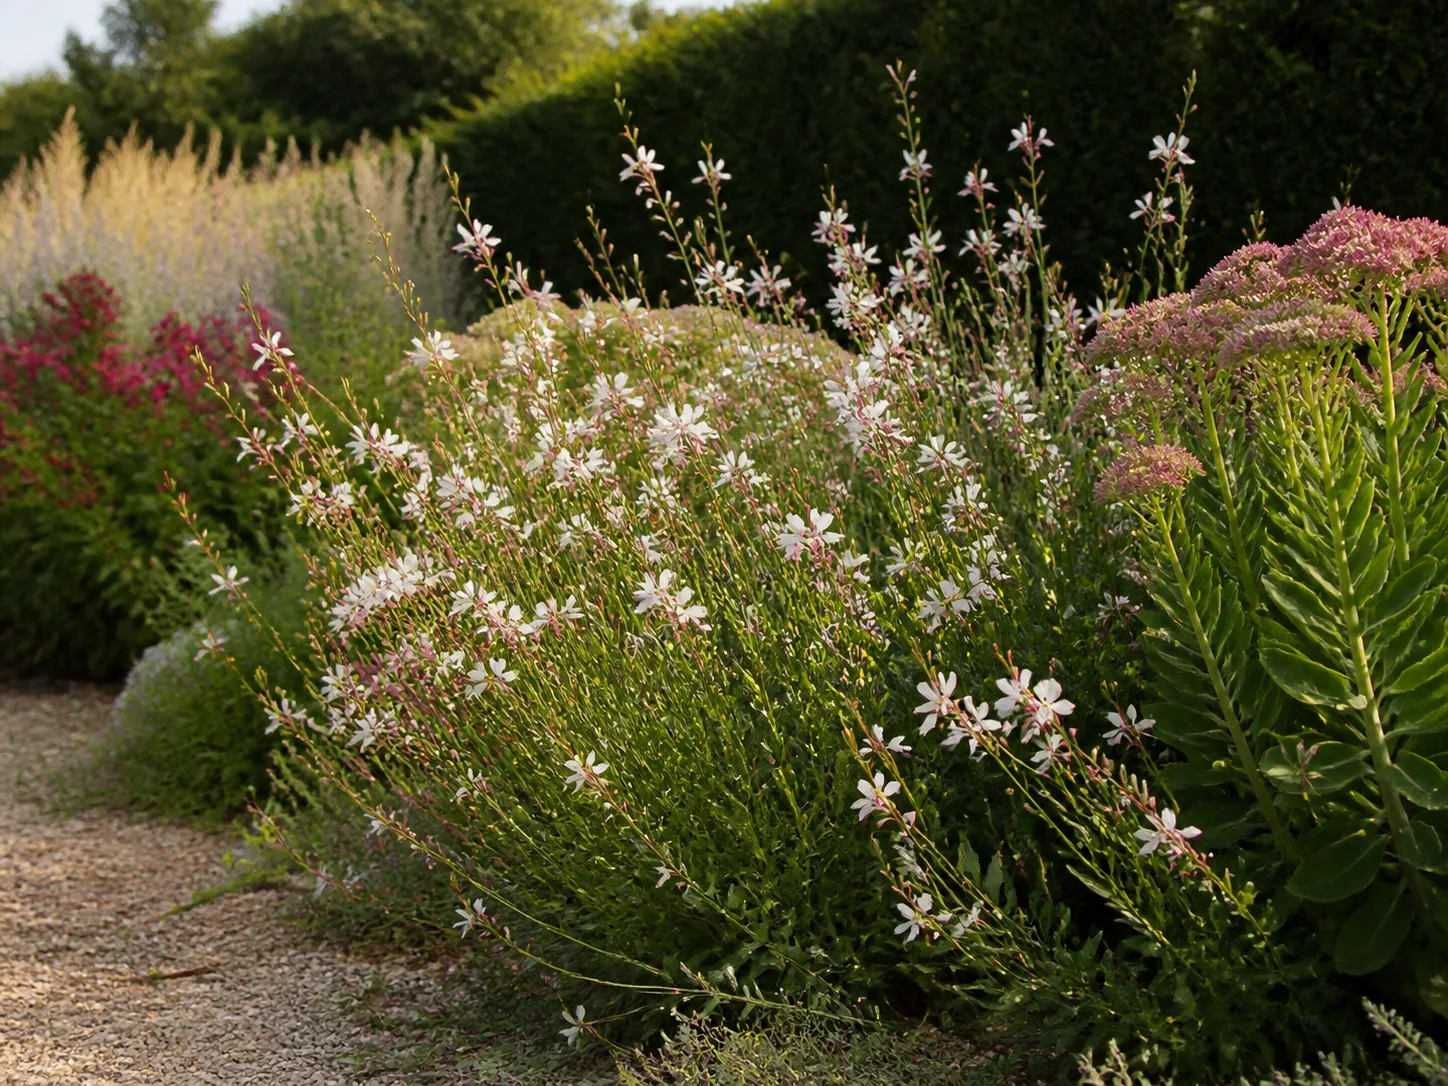
Look for a sunny border, gravel garden, raised bed, rock garden, or the dry edge of a pollinator planting. Gaura’s nearly transparent stems look best where they can catch backlight and breeze, not where dense foliage will hide them. It works especially well in groups of three or five, toward the front or middle of a mixed border, with sturdier plants behind it to give the airy stems visual and physical support.
Six or more hours of direct sun is the dependable baseline. In a very hot climate, light afternoon shade can reduce heat stress, but shade for most of the day usually produces fewer flowers and longer, weaker stems. If the proposed site receives irrigation every day for a nearby lawn or bedding plant, gaura is probably a poor match unless you can improve the drainage and adjust the watering pattern.
Planting Gaura: Timing, Depth, and Spacing
Plant nursery-grown gaura in spring after the danger of hard frost has passed. Spring planting gives the taproot a long growing season before winter, which is particularly helpful in colder zones. In warmer regions with reliably free-draining soil, fall planting can work for perennial cultivars, but avoid installing small plants immediately before a cold, wet season.
Prepare a hole no deeper than the root ball and roughly twice its width. Set the plant at the same level it was growing in its container; burying the crown invites rot, while raising it above the surrounding soil can dry the root ball too quickly. Water thoroughly at planting to settle air pockets, then let the surface begin to dry before watering again.
Space plants according to the mature cultivar, not the size of the starter pot. A useful starting range is 2 to 3 feet for tall, open forms and roughly 12 to 18 inches for compact varieties. Crowding increases competition for light and airflow, while excessive isolation can leave tall stems visually unsupported. Harvest to Table and Garden Design both place gaura in the 24- to 36-inch spacing range for many garden forms, but the plant tag should win when a named cultivar gives a different mature width.
Soil and Drainage
Gaura needs soil that is deep, lean, and fast-draining. Sandy or loamy soil is ideal, but the decisive test is what happens after a heavy rain: water should not remain pooled around the crown for hours. NC State Extension lists clay, loam, and sand as possible textures when drainage is good, so “gaura requires sand” is too narrow. Heavy clay can work on a slope or raised bed; cold, saturated clay around the roots is the real danger.
Loosen the planting area to about 12 inches deep so the taproot can move downward. Do not fill the whole hole with rich compost that holds more moisture than the surrounding soil. If your native ground is dense, improve the bed broadly with mineral material and organic matter or, more reliably, raise the planting area so excess water can leave. A tiny pocket of amended soil inside impermeable clay can act like a bowl and keep the roots wetter, not safer.
For containers, use a quality potting mix amended with a material that increases air space, such as perlite or pumice. Drainage holes are essential, and a saucer should be emptied after rain or watering. The goal is not bone-dry soil; gaura likes moderate moisture while establishing. The goal is a root zone that can return to slightly dry conditions instead of staying waterlogged.
Watering: Establish Deep Roots, Then Step Back
Water newly planted gaura deeply whenever the root zone begins to dry. During the first growing season, a thorough soak about once a week when rainfall is scarce is a reasonable starting point, then adjust for heat, soil, wind, and container size. Probe several inches down rather than watering by the calendar if the weather has been cool or rainy.
Once the taproot and surrounding feeder roots are established, gaura needs much less supplemental water than shallow-rooted annuals. Water slowly and deeply during a genuine drought, then let the soil drain. In-ground plants in heavy rain are more likely to suffer from excess water than from a missed drink. Container plants dry faster because the root zone is limited, so check them more often even though the mix must still drain freely.
Do not use drought tolerance as permission to ignore a newly planted specimen. A young plant has not yet built the root system that makes it resilient. Conversely, do not keep an established plant constantly damp in the hope of producing more flowers; persistent moisture can encourage sprawling growth and root problems. The right transition is frequent enough watering to establish the plant, followed by longer intervals between deep soaks.
Fertilizer: Keep the Soil Lean
In average garden soil, gaura usually needs no routine fertilizer. NC State Extension and Adams Fairacre Farms warn that overly rich soil encourages foliage and weak, leggy growth at the expense of the airy flowering habit. A plant that looks lush but flops and blooms sparsely may be overfed rather than hungry.
Skip high-nitrogen lawn fertilizer, manure-heavy top dressing, and repeated bloom-boosting products around the crown. If a soil test shows a genuine nutrient deficiency, correct that specific deficiency according to the test rather than applying a blanket feeding schedule. In very poor sandy soil, a single light, balanced spring feeding may be reasonable, but it should be the exception, not the default.
The practical rule is to improve drainage before adding fertility. If gaura is weak because its roots stay wet or because it receives too little light, more food will not solve the underlying problem. It can make the foliage larger and the stems less self-supporting.
Pruning Gaura for Bushier Growth and Repeat Bloom
Pruning is optional, but it lets you choose between an earlier, looser display and a shorter, bushier plant. Gaura flowers sequentially along wiry stems, so cutting every stem at once removes developing buds as well as spent flowers. Use the lightest method that solves the problem.
For a fuller plant, shear the basal growth or young stems back by about one-third to one-half in late spring, before the main bloom is underway. This delays the first flowers slightly but encourages branching. Garden Design recommends a light midsummer shear for compact cultivars to refresh the plant and encourage new blooms; the same approach works on larger forms when the lower stems look tired and the plant still has time to regrow before frost.
For the longest uninterrupted show, remove only spent flower spikes or cut individual stems back to a strong side branch. This keeps more active buds in place and preserves the plant’s floating shape. If the plant becomes ragged during peak summer, a more substantial midsummer cut can produce a later flush, but give it several weeks to recover rather than cutting repeatedly.
After a hard frost, cut dead stems back to a few inches in cold regions and remove the debris in spring once new basal growth appears. In mild climates, leaving some dry stems through winter can provide crown shelter and habitat interest; cut them back in late winter before fresh growth gets tall.
Keep Gaura Upright Without Fighting Its Habit
Some flopping is normal. Gaura is an open, vase-shaped plant with thin stems designed to move in the wind, not a rigid bedding plant. The useful question is whether the stems are gently arching or collapsing into wet soil.
Too little light, rich soil, excess water, and crowding all make the problem worse. Correct those conditions first. Then use a discreet ring support early in the season, or place gaura beside upright companions such as yarrow, liatris, sedum, butterfly weed, or ornamental grasses. Companion plants support the stems while also making the loose habit look intentional.
Avoid tying every flower wand tightly to a stake. That creates a conspicuous bundle and can bend stems at the tie points. If the plant is regularly flattened by storms, select a compact cultivar next season or relocate it to a spot with better light and support. Pruning young growth by one-third in late spring is often more effective than trying to rescue a tall, unsupported plant in midsummer.
Choose a Cultivar for Your Space
Buy for mature size, flower color, and seed behavior rather than the photograph alone. NC State Extension lists a broad selection of gaura cultivars, including compact and variegated forms.
| Cultivar or group | Typical garden use | What to know |
|---|---|---|
| ‘Whirling Butterflies’ | Front of a border, containers, and informal massing | White flowers emerge from pink buds; its open habit needs some space |
| ‘Siskiyou Pink’ | Pink-focused borders and pollinator plantings | Rose-pink flowers and a compact-to-medium habit; seedlings may vary |
| ‘Corrie’s Gold’ | Foliage contrast in a sunny bed | The gold is in the variegated leaves, not the flowers |
| ‘Belleza’ series | Containers, edging, and small gardens | Compact forms are easier to keep proportionate in limited space |
| ‘Sparkle White’ | White-flowered borders and mixed containers | A white-flowered selection with a tidy, showy display |
Cultivar names and sizes can vary by grower and region, so read the current plant tag. For a narrow bed, a compact selection is usually a better solution than repeatedly cutting a tall species plant. For a naturalistic border, the taller form can be more graceful and needs less intervention if neighboring plants catch the stems.
Propagation: Seed, Basal Cuttings, or Division
Choose propagation based on what you want to preserve. Seed is inexpensive and useful for producing more plants, while basal cuttings are the better route when you want a named cultivar’s flower color and habit. Division is possible, but the taproot makes it less forgiving than division of a fibrous-rooted perennial.
To grow from seed, sow in spring in a prepared bed or start indoors several weeks before outdoor planting. Press seed into the surface or cover it only very lightly because light helps gaura seed germinate. Keep the medium evenly moist, not saturated, and provide bright light after seedlings emerge. Plants raised from hybrid or self-sown seed may differ from the parent, especially in flower color, height, and compactness.
For basal cuttings, take short, vigorous shoots from the crown in spring before the plant is in full bloom. Use a clean blade, insert the lower portion into a sterile, free-draining propagation medium, and keep it lightly moist in bright shade until roots form. Once rooted, grow the young plant on before setting it in its permanent location. Make only a few cuttings from a healthy crown so the parent plant still has enough shoots to recover.
Divide only when there is a clear reason, such as renewing a crowded clump, and do it in early spring while the plant is small and actively restarting. Lift as much of the root system as possible, avoid chopping through the taproot unnecessarily, and pot divisions first if they are small or root-poor. If an established gaura is failing in the wrong site, replacing it with a new plant is often safer than trying to transplant the old one.
Growing Gaura in Containers
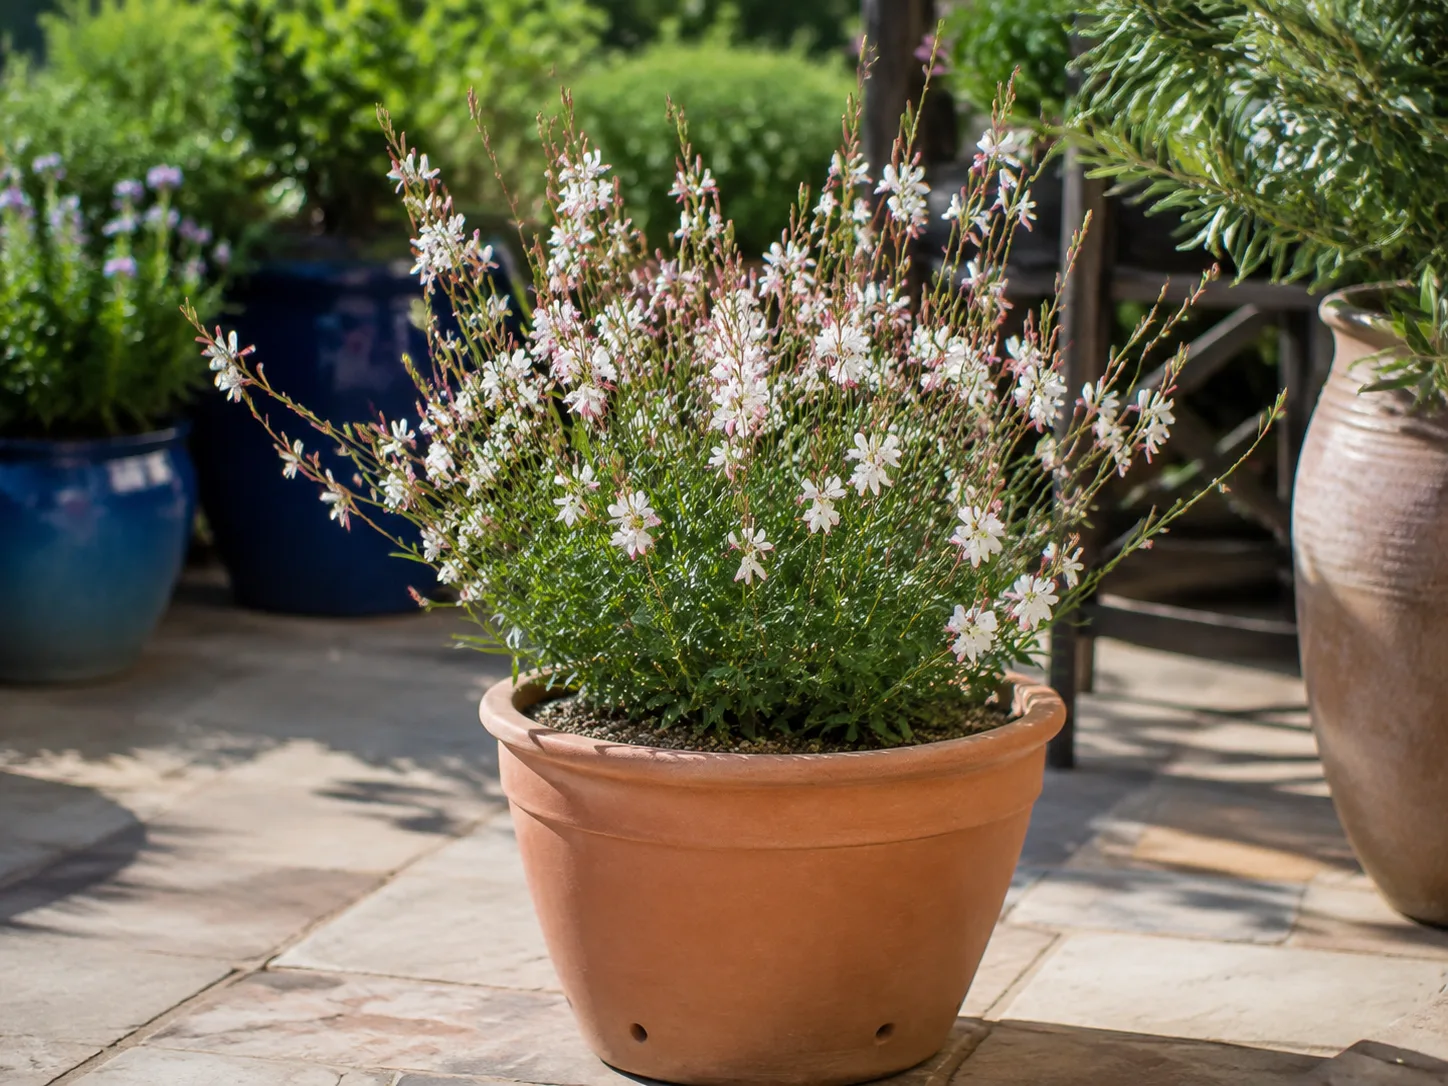
A container is useful when your garden soil is heavy, your winter is marginal, or you want a compact cultivar on a sunny patio. Choose a pot at least about 12 inches deep and 10 inches wide for a small plant, with larger volume for a taller cultivar. The container must have several open drainage holes; decorative cachepots without drainage are a common cause of decline.
Use a well-drained potting mix rather than garden soil. Place the pot where gaura receives six or more hours of sun and where air can move around the stems. Container gaura may need water more often than in-ground plants, but water only when the mix has begun to dry, then soak until water exits the holes. Do not leave the pot standing in runoff.
Compact cultivars are easier to manage in a container because they need less staking and are less likely to topple. A tall plant in a lightweight pot can become top-heavy, so use a heavy container or group it with sturdier plants. Remember that a container magnifies winter cold: roots are less insulated than roots in the ground, so a marginally hardy gaura may need shelter even when an in-ground plant survives.
Winter Care by Climate and Hardiness Zone
Gaura is commonly grown as a perennial in USDA Zones 5 through 9, with the species listed by NC State Extension across 5a to 9b. Zone ratings are not a guarantee. Winter survival depends on the specific cultivar, snow cover, exposure, and especially whether the crown sits in cold, saturated soil.
In Zones 5 and 6, plant in the warmest, best-drained site you have, preferably a raised bed or slope. After the ground begins to freeze, add a loose layer of straw or shredded leaves over the crown if your local conditions call for extra insulation. Applying heavy, wet mulch too early can hold moisture against the crown. Remove or thin it in spring once new shoots emerge so the crown can dry and warm.
In Zones 7 and 8, gaura may die back partly or remain semi-evergreen. Cut frost-damaged stems after the main freeze, but do not mistake dormant brown growth for a dead crown in early winter. In Zone 9 and other mild climates, plants may stay leafy longer; a late-winter cut can refresh the clump before spring growth.
Container plants need a separate plan. Move them to a sheltered, bright location before a hard freeze, reduce watering as growth slows, and keep the mix from staying wet. Do not bring a dormant outdoor container into a warm, dark room and expect it to thrive; cool shelter with light is usually less stressful than forcing winter growth.
How to Keep Gaura Blooming
Long bloom is mostly a site-selection result, not a fertilizer result. Full sun gives the plant energy for flowers, while lean soil discourages the floppy foliage that shades and overwhelms the flowering stems. Regularly removing spent spikes can keep the display tidy and encourage new flowering, but gaura will often continue blooming without obsessive deadheading.
If you want a single long season, deadhead selectively and water during extended drought. If you want a tidy plant with a second flush, shear it after the first main wave has faded, leaving enough growing season for regrowth. Do not make a severe cut during a heat wave or just before frost. A late-season display is worth more than a perfectly shaped plant that has been repeatedly stressed.
First-year gaura may flower modestly while it builds its root system. Judge the plant after it has had a full growing season in the right site. A mature plant that suddenly stops flowering deserves a site check before a feeding: count direct-sun hours, inspect drainage after rain, look for fertilizer exposure, and check whether neighboring plants have crowded the crown.
Troubleshooting Yellow Leaves, Flopping, and Few Flowers
Yellow leaves: Start with the soil, not the leaf. If the ground or container mix stays wet, yellowing may indicate root stress or root rot; reduce irrigation and improve drainage. If the soil is dry several inches down during a hot spell, drought stress is more likely. Remove badly damaged foliage only after correcting the cause.
Flopping stems: A gentle arch is normal, but stems collapsing across the soil usually point to insufficient light, excessive fertility, overwatering, or an oversized cultivar. Move future plantings into stronger light, stop routine fertilizer, let the root zone drain, and use neighboring plants or an early support ring. If stems are already long and weak, cut them back rather than tying them into a dense bundle.
Few flowers: Check light first. Fewer than six hours of direct sun can produce a leafy, lax plant. Next check soil fertility and moisture. Rich soil, repeated feeding, and constant irrigation can all favor foliage. Finally, consider timing: a newly planted gaura may be spending its first season establishing roots, and a cultivar sold as compact may naturally flower on shorter stems than the species.
Sudden decline: Dig or gently expose the crown only if the plant is failing despite correct light and watering. Brown, mushy roots and a sour-smelling, saturated root zone suggest rot. There is no pruning trick that repairs a crown kept wet through winter; take healthy basal cuttings if any remain and replant future gaura in a raised or better-drained site.
Pests and Diseases
Gaura is usually low-maintenance when it receives enough sun and drainage. NC State Extension lists aphids, whiteflies, and flea beetles among possible insect pests, along with root rot, rust, and powdery mildew. Garden Design also notes leaf spot and spider mites as occasional problems.
Inspect new growth and the undersides of leaves before treating. A small aphid or whitefly population may be reduced with a strong water spray, while removing crowded stems and improving airflow can reduce the conditions that favor mildew and leaf spotting. Water at the soil line when practical, and remove heavily diseased debris rather than composting it if you are unsure whether the problem will persist.
Root rot is the problem to prevent, not merely react to. Fungicides will not compensate for a planting bed that stays saturated. If a pesticide or horticultural oil is ever warranted, identify the pest first, read the product label for the crop and application site, and avoid spraying open flowers when pollinators are actively visiting. Broad “natural” labels do not make a product harmless to beneficial insects.
Self-Seeding, Deer, and Pet Safety
Gaura is not generally treated as an invasive garden plant in the way highly disruptive introduced species are, but species plants and some cultivars can self-seed. Seedlings may appear around an open, lightly managed bed, and their traits may not match the parent. Deadhead before seed matures if you want a contained planting; leave a few stems if you enjoy naturalization and have room for volunteers.
NC State Extension tags gaura as deer resistant and valuable to pollinators, but “deer resistant” is not deer proof. Hungry deer can browse plants they usually ignore, especially in a new planting. Use physical protection if browsing pressure is high rather than relying on a label.
Garden Design lists gaura as non-toxic to dogs, cats, and horses, but any plant material can cause digestive upset when eaten in quantity. Keep pets from chewing treated foliage and contact a veterinarian or animal poison service if an animal has eaten a large amount or shows concerning symptoms. That is a sensible precaution even for plants with a favorable toxicity listing.
Conclusion
Gaura grows best when you respect what it is: a prairie-rooted, sun-loving perennial with a deep taproot and naturally airy stems. Put it in a permanent site with excellent drainage, water it consistently while young and sparingly once established, and resist the urge to make it lush with fertilizer.
Choose a compact cultivar for a pot or small border, a taller form for a breezy mixed planting, and basal cuttings when you want to preserve a favorite plant. Prune lightly for continuous flowers or shear strategically for a bushier flush, then protect the crown according to your winter and soil conditions. If the plant flops or turns yellow, inspect light, moisture, and fertility in that order. Those few decisions solve most gaura problems before they become permanent.



