How to Grow and Care for Coreopsis (Tickseed)
Learn how to grow and care for coreopsis with the right sun, drainage, watering, deadheading, seed-starting, division, container, and winter routine.
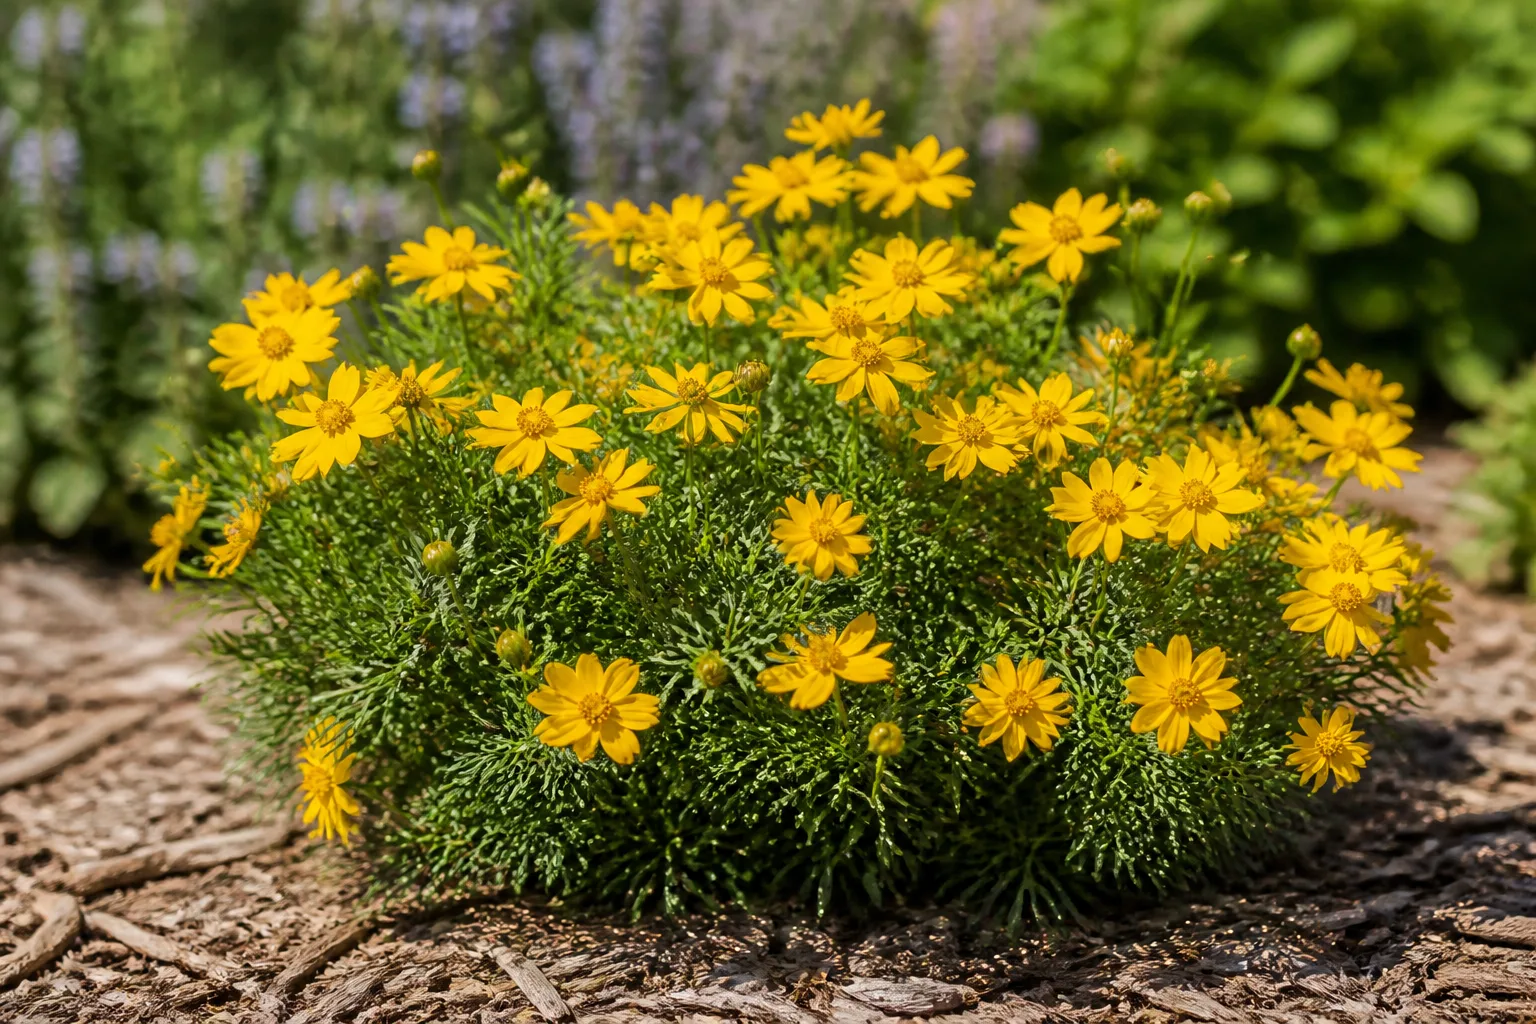
Coreopsis, commonly called tickseed, is at its best when you give it the conditions that resemble its natural strengths: strong light, open soil, and enough water to establish without leaving the roots wet. That combination produces the bright, daisy-like flowers people want, while also keeping stems shorter, foliage healthier, and the plant less likely to collapse in a summer storm.
The name covers a large group rather than one uniform plant. Some coreopsis are short-lived perennials, some are annuals, and cultivars range from compact container plants to tall meadow forms. The most reliable care plan starts with the plant tag, then adjusts the routine for your soil, rainfall, and whether you want a tidy border or a self-seeding wildlife patch.
Is Coreopsis Annual or Perennial?
Coreopsis can be either annual or perennial, depending on the species and cultivar. Many garden favorites, including large-flowered, lanceleaf, and threadleaf types, are grown as herbaceous perennials, but some may be short-lived or behave like annuals outside their hardiness range. Plains coreopsis (Coreopsis tinctoria) is commonly grown as an annual, while a perennial cultivar may return for several seasons before its central crown loses vigor.
That distinction matters when you are deciding whether a plant has failed. An annual can finish its life cycle after flowering and setting seed; cutting it back will not turn it into a perennial. A perennial coreopsis can still disappear after a wet winter, decline after several years, or fail to return if its roots were never established before severe cold. Check the cultivar label for its hardiness range rather than applying a single zone number to the whole genus.
Lanceleaf coreopsis is a useful example of the variation within the group. NC State Extension describes it as a clumping wildflower with narrow, lance-shaped leaves, full-sun preference, good drought tolerance, and a tendency to self-seed; the NC State Extension plant profile places that species across a broad but specific hardiness range of zones 4a through 9b. Your own coreopsis may have a different range, flower season, height, or lifespan.
Choose the Right Coreopsis for Your Garden
Choose coreopsis by site and habit first, then flower color. A variety that is beautiful in a catalog can be a poor fit if it is too tall for the front of a border, too thirsty for a dry bed, or too tender for the way you expect it to overwinter.
Large-flowered and lanceleaf coreopsis
Large-flowered coreopsis (Coreopsis grandiflora) makes a strong cottage-garden and cutting-garden plant. Look for cultivars such as ‘Early Sunrise’ when you want large, showy flowers and a relatively compact clump. It often performs best with regular deadheading or a midseason shear, but it may not be as long-lived as a sturdier, more wild-form species.
Lanceleaf coreopsis (Coreopsis lanceolata) has a looser, more natural shape and narrow leaves concentrated toward the lower part of the stems. It suits a meadow edge, pollinator border, roadside-style planting, or any place where a little self-seeding is welcome. The University of Georgia Extension’s coreopsis notes also distinguish the lanceleaf form from prairie coreopsis by its flower and leaf shape, a useful reminder that “coreopsis” is not enough information for precise identification.
Threadleaf, pink, and annual coreopsis
Threadleaf coreopsis (Coreopsis verticillata) has fine, airy foliage and a softer texture than lanceleaf types. ‘Moonbeam’ is a familiar buttery-yellow selection; ‘Zagreb’ is another compact, bright-flowering choice. Threadleaf forms can look light and graceful, but some become sparse or short-lived, so do not judge their value by the permanence of a shrub.
Pink coreopsis (Coreopsis rosea) generally prefers more consistent moisture than the most drought-adapted yellow species. Annual types such as plains coreopsis can be excellent for filling a new bed quickly, but they may reseed freely. In a wildlife or meadow planting, that is a feature; in a tightly designed border, remove some flower heads before seed ripens and leave only the amount of reseeding you can manage.
Give Coreopsis the Sunniest Useful Site
Aim for at least six hours of direct sun on most days. More light usually means more flowers and sturdier stems, while too much shade produces stretched growth, fewer buds, and a plant that leans toward whatever light is available. The NC State profile defines full sun as six or more hours of direct light for lanceleaf coreopsis.
There is one important qualification: full sun is not the same as unlimited heat. In a climate with brutal afternoon temperatures, a coreopsis planted beside a heat-reflecting wall may appreciate light afternoon shade, especially in a container whose roots heat and dry quickly. Morning sun with some late-day relief can preserve flowers and reduce stress without turning the plant into a shade perennial.
Watch the site for a full day before planting. A spot that looks sunny at 9 a.m. may be shaded by a house or tree by lunch. If a mature plant is floppy and flowering only at the outer edge of the clump, light competition is a better first suspect than fertilizer deficiency.
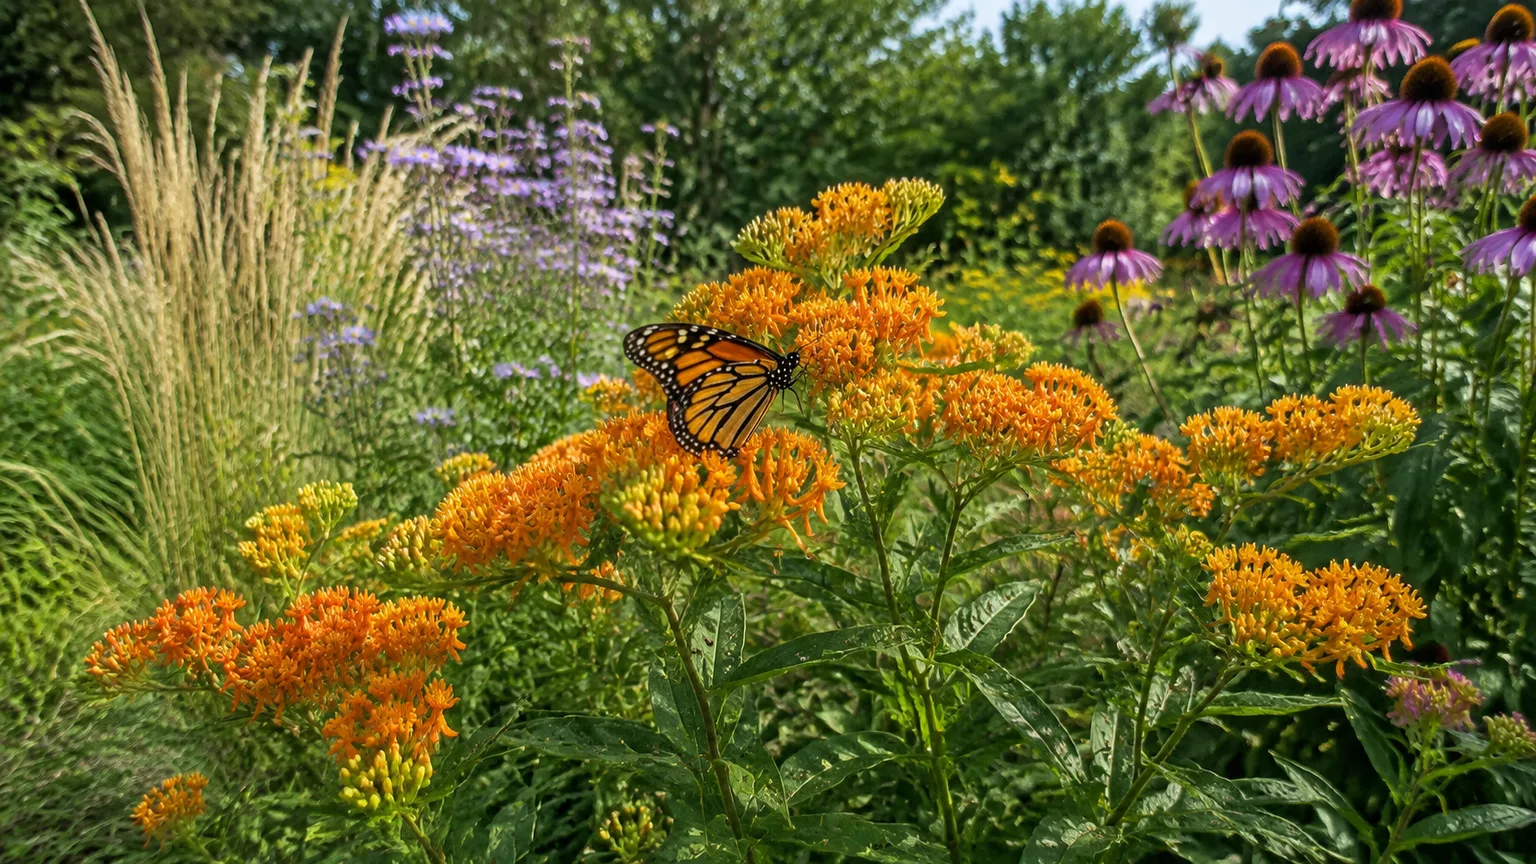
Coreopsis works especially well in an open pollinator border, meadow edge, or sunny mixed planting where air can move between stems. For more site ideas, compare the spacing and plant-layer logic in tips to attract pollinators to your yard.
Build Fast-Draining Soil
Coreopsis is adaptable about fertility, but it is not forgiving of water that sits around the crown. Sandy, rocky, or ordinary loamy soil can work if it drains promptly after rain. Heavy clay is not automatically disqualifying, but a low spot that stays saturated through winter is a poor location unless you can correct the drainage.
Do not respond to clay by dumping in a little sand. Small amounts of sand can fill the gaps between clay particles and leave a dense, difficult mixture. Instead, improve the planting area broadly with finished organic matter, avoid walking on wet soil, and consider a raised or gently mounded site if water naturally collects there. A soil test is useful when growth is poor, but drainage is a physical site issue that fertilizer cannot solve.
Rich soil creates a different problem. Too much nitrogen or repeated high-fertility amendments can push leafy, tall growth at the expense of flower production, and soft stems are more likely to sprawl. The Gardening Know How coreopsis guide likewise emphasizes adaptable soil with excellent drainage and warns that rich soil can produce overly tall or wiry plants.
Keep mulch a little away from the crown. A thin layer can reduce weeds and moderate moisture, but a thick, constantly wet collar around the stems encourages rot. Coreopsis would rather have a modestly fertile root zone that dries at the surface than a dark, overfed bed that never breathes.
Plant Coreopsis at the Right Time and Spacing
Plant nursery coreopsis in spring after the soil is workable and the hardest frost risk has passed, or in early fall early enough for roots to grow before the ground freezes. Fall planting can work well for perennials in mild climates, but avoid putting a small plant into cold, waterlogged soil just before winter.
Space plants according to the mature width on the label, commonly about 12 to 24 inches for compact forms and more for tall or spreading selections. Wider spacing is not wasted space: it gives stems room to dry after rain, makes deadheading easier, and reduces the shaded, congested center that develops when clumps are packed together.
Set the crown at the same level it occupied in its nursery pot. Backfill with the native soil, firm gently, and water once to settle the root ball. Do not bury the crown under a mound of compost or create a saucer that holds irrigation water around the stem base.
If the plant is root-bound, tease only the outer roots that are circling tightly; avoid shredding the entire root ball. A new transplant may look unimpressive for a few weeks while it builds roots. Judge establishment by new growth and resistance to midday wilt, not by whether it has reached mature size immediately.
Water for Establishment, Then Let the Soil Breathe
Water newly planted or divided coreopsis deeply when the upper inch or two of soil begins to dry, adjusting for rainfall and soil type. The goal is a moist root zone during establishment, not a permanently wet one. A short daily sprinkle wets the surface but may leave the lower root ball dry, especially in a mulched bed.
Once a perennial is rooted into the surrounding soil, it can usually tolerate dry spells better than it did during its first season. Drought tolerance does not mean zero water forever: a deep soak during prolonged heat can protect flower production, particularly for plants in shallow soil or exposed to reflected heat. Let the surface dry again before watering deeply.
Containers need a different schedule. Potting mix loses water from both the drainage holes and the exposed surface, so a potted coreopsis may need watering weekly in ordinary weather and much more often during extreme heat. The Gardening Know How guidance notes that container plants still need regular supplemental water even after establishment, and Stacy Ling’s container-growing field notes are a useful practical comparison for how quickly a sunny pot can dry.
Water the soil rather than repeatedly wetting the foliage late in the day. If a bed stays damp for days, solve the drainage or spacing problem before reaching for a fungicide. Brown or wilted foliage can come from either drought or damaged roots, and adding more water to a saturated root zone makes the second problem worse.
Fertilizer: Why Less Is Usually More
Most established coreopsis does not need a fertilizer program. If the soil is genuinely poor, incorporate a modest amount of finished compost when planting or in early spring, then watch the plant. Avoid treating fewer flowers as an automatic sign that more feed is needed; light, cultivar age, moisture, and pruning often matter more.
If a plant has lush leaves and long weak stems but few buds, stop high-nitrogen feeding first. Also check whether lawn fertilizer or runoff reaches the bed. A soil test can show whether a true nutrient shortage exists, but random fertilizer can worsen the tall, floppy growth you were trying to fix.
Container coreopsis is the exception to “never feed.” Repeated watering leaches nutrients from potting mix, so a light, balanced, slow-release feed at the beginning of the growing season can be reasonable if the product label allows it. Keep the dose modest; a container is small enough that excess salts or nitrogen show up quickly as weak growth, scorched roots, or poor flowering.
Deadhead or Shear? Pick the Goal First
Deadheading has two jobs: encouraging another flush of flowers and preventing some seed formation. To deadhead, follow a spent flower stem down to a healthy set of leaves or a branching point and cut just above it. Removing only the brown head leaves a long, bare stem; cutting farther down usually gives the plant a cleaner outline.
Shearing is better when the entire clump has finished a major flush and looks tired. Cut the plant back by roughly one-third to one-half, leaving enough healthy foliage for recovery. Compact cultivars may only need scattered deadheads, while a tall, open lanceleaf planting can benefit from a stronger reset after its main bloom.
Do not deadhead every flower if you want birds to use the seeds or you want the plant to naturalize. A practical compromise is to remove spent flowers near paths and seating areas, then leave a portion of the patch standing. The NC State profile specifically connects deadheading with both additional blooms and control of self-seeding.
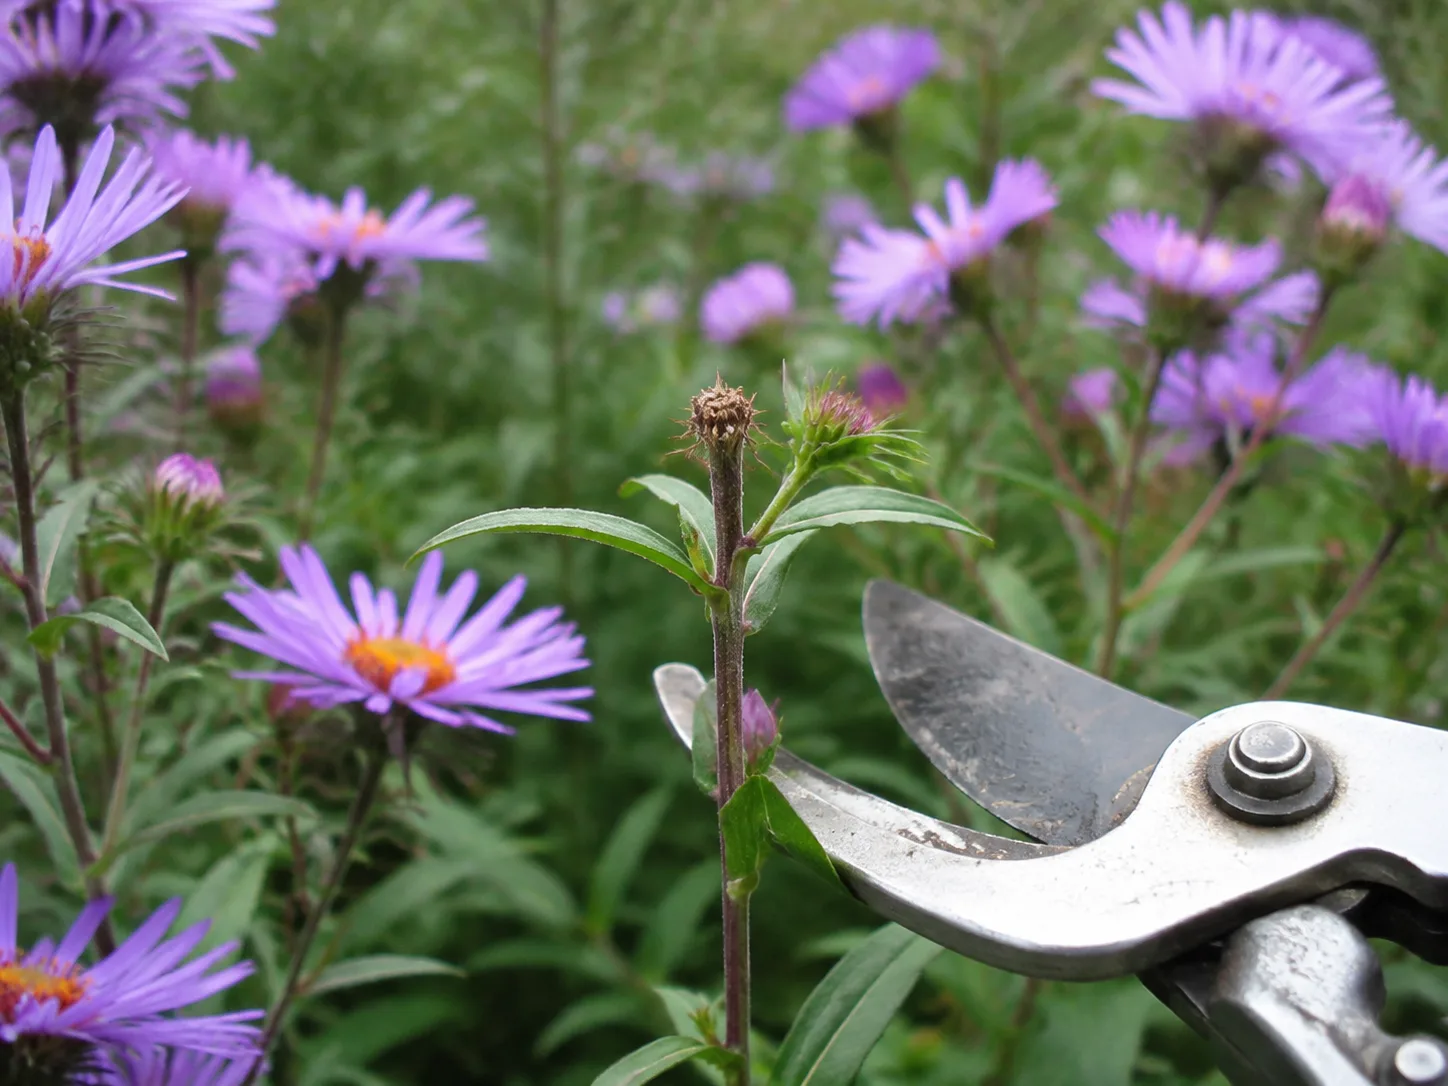
The exact cut matters less than matching the intervention to the goal. Use how to deadhead asters as a visual comparison for locating a spent flower and cutting back to useful growth; the same stem-following principle applies to coreopsis even though the pictured perennial is different.
Stake and Cut Back Floppy Plants
Flopping usually has a cause, and staking is only the final support. First check for insufficient light, overfertilization, excess moisture, overcrowding, or a naturally tall cultivar planted at the front of a border. A plant grown too soft and lush will often fall outward even if you tie it upright.
For next season, move or divide the plant if its current location is too shady or congested. In spring, pinch the growing tips of a tall cultivar once it is actively growing to encourage branching, but do not keep pinching after flower buds begin forming. A discreet ring support installed early is less noticeable than trying to rescue a flattened plant in midsummer.
After flowering, cut back a declining perennial coreopsis close to the ground if the cultivar and season allow it. Leave enough time for new growth to harden before a freeze, and do not cut a stressed, newly transplanted plant simply to make it look tidy. The best maintenance cut is one the plant has the energy to recover from.
Grow Coreopsis From Seed
Seed is an inexpensive way to create a drift of coreopsis, but it is not always the fastest route to a named cultivar. Open-pollinated seedlings may vary in height and flower form, and some hybrids do not come true from saved seed. Use division or a purchased plant when you need the exact color and habit on the label.
Direct sowing
Direct sow in a prepared bed after the recommended frost window for your species, or sow in late fall where natural cold exposure is appropriate. Clear the surface of weeds, loosen only the top layer, and press the seed into the soil rather than burying it deeply. Small coreopsis seed can struggle to emerge through a heavy covering.
Keep the seedbed evenly and lightly moist until germination, then reduce the frequency as seedlings develop. The Gardening Know How guide reports germination commonly within one to two weeks under favorable conditions. Thin crowded seedlings early so they grow sturdy roots rather than competing in a dense mat.
Follow the packet if it calls for cold stratification or light exposure. That instruction is species- and seed-lot-specific, and treating every coreopsis seed identically is an easy way to lose time. Mark the row because small seedlings can look like weeds before their foliage becomes distinctive.
Indoor starting
Start seeds indoors roughly six to eight weeks before the local last frost date only when you can give seedlings strong light and enough space. Use a clean seed-starting mix, shallow cells, and gentle bottom watering or a fine spray. A sunny window may be adequate for short-term germination but can produce stretched seedlings once growth accelerates.
Move seedlings outdoors gradually after frost risk has passed. Begin in bright shade protected from wind, then increase direct sun over about a week. Putting tender indoor-grown seedlings straight into hot afternoon sun can scorch leaves even though mature coreopsis thrives in full sun.
Transplant when seedlings have several true leaves and a root system that holds the mix together. Water them in, provide a short period of closer observation, and resist feeding heavily while they are still small. Early root development and light are more important than rapid top growth.
Divide Mature Clumps to Renew Them
Divide when a perennial coreopsis becomes thin in the center, flowers less despite good light, or outgrows its allotted space. Many clumps respond well to division every two or three years, while some cultivars are naturally short-lived and may be better replaced from seed or a new plant. Division is renewal, not a cure for a permanently wet site.
Early spring, as new shoots emerge, is usually the easiest window. Early fall can also work where roots have time to establish before hard freezes. Water the clump the day before, lift it with a spade, and keep as much of the root system intact as possible.
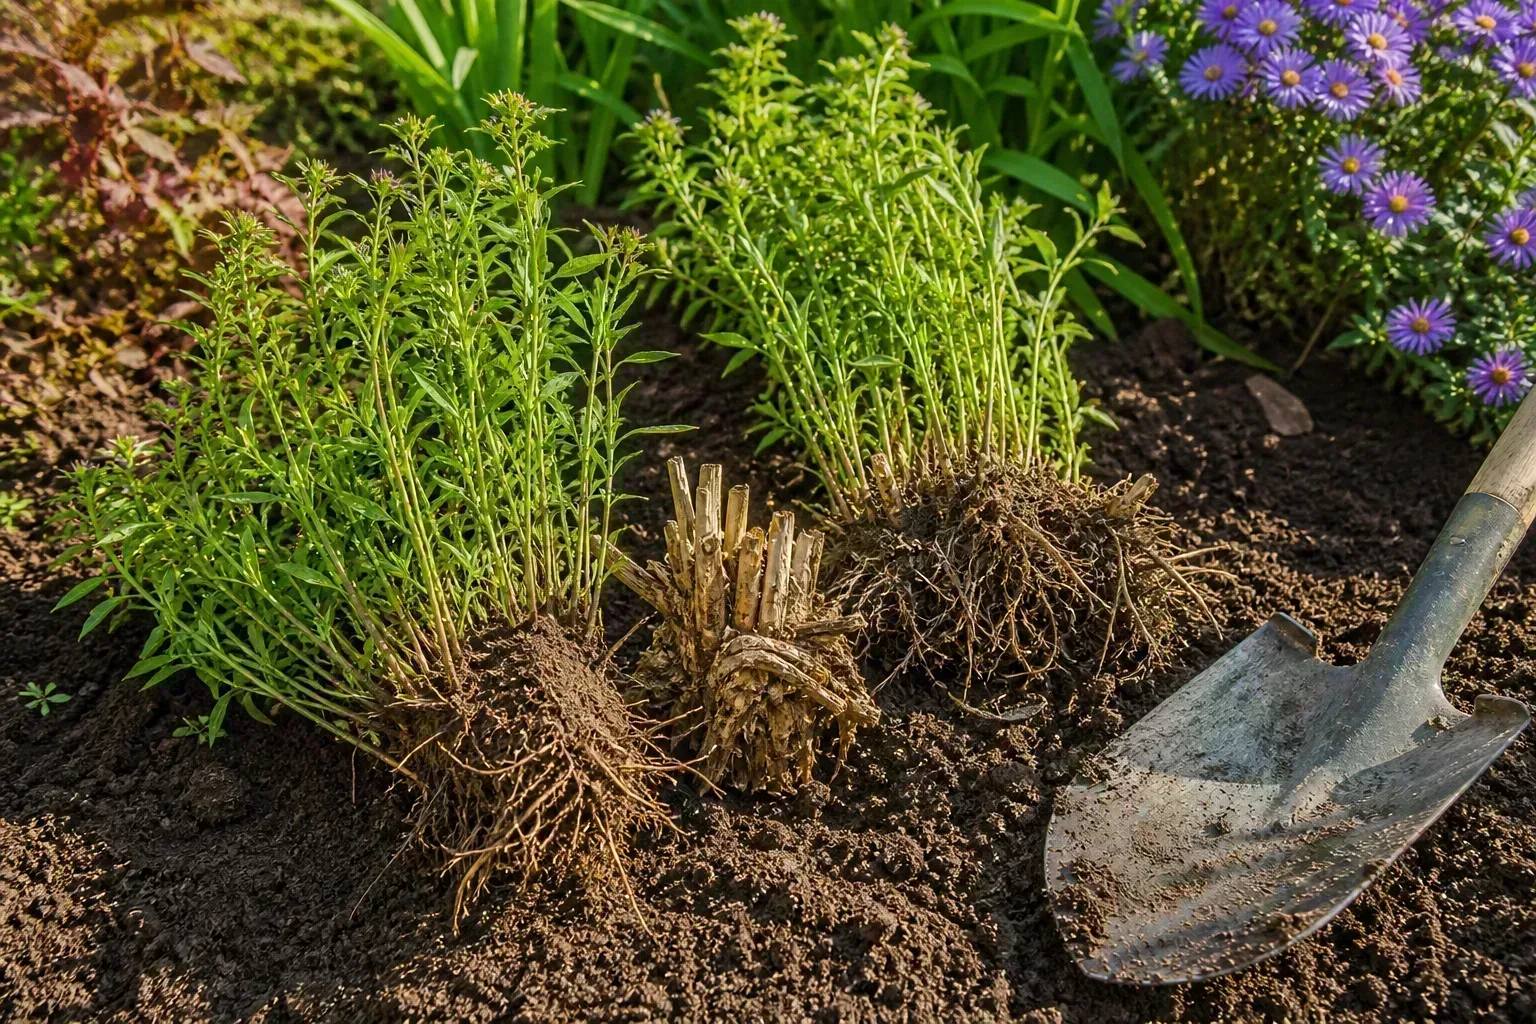
Shake or wash away enough soil to see the crown. Pull apart small natural sections or cut through the clump with a sharp knife, making sure every division has healthy roots and several growing points. Remove a dead, woody center instead of planting it as if it will recover. Replant divisions promptly at their original depth, firm the soil, and keep them evenly watered while new growth appears.
If the center declines again quickly, inspect the site rather than dividing more aggressively. Persistent winter wet, too much nitrogen, or severe root competition can make every new division fail for the same reason. The NC State profile lists division as a way to maintain robustness, but the surrounding growing conditions still determine the result.
Grow Coreopsis in Containers
Coreopsis can brighten a sunny patio or balcony, especially compact cultivars. Use a container at least 8 to 12 inches wide and deep for a young plant, with generous drainage holes and a quality potting mix. Choose a larger container for a vigorous perennial or a combination planting, but do not compensate for poor drainage with a decorative pot that has nowhere for water to escape.
Containers dry faster than beds, heat faster, and have less margin for missed care. Check the mix with a finger or moisture meter rather than watering by calendar alone. When the top layer has dried and the pot feels light, water thoroughly until excess drains, then empty any saucer.
Rotate the container if one side leans toward the sun. A tall selection may need a small support, and a compact cultivar will usually be easier to keep balanced. If roots fill the pot or water runs straight through the sides, divide and refresh the mix in spring rather than moving the plant into a dramatically oversized container that stays wet at the bottom.
Overwintering a container is harder than overwintering a plant in the ground because roots experience colder, faster temperature changes above soil level. Use the cultivar’s hardiness rating conservatively, move the pot to a sheltered location after dormancy, and protect it from prolonged saturation. In cold regions, treating a tender or short-lived selection as a seasonal container plant may be more realistic than forcing it to return.
Troubleshoot Pests, Disease, and Yellow Leaves
Coreopsis is generally resilient, but stress and poor site conditions create openings for problems. Begin with the pattern: Is damage limited to a few leaves, concentrated at the crown, following wet weather, or appearing across the whole plant? That first observation prevents a minor pest from being mistaken for a nutrient crisis.
Holes or ragged edges suggest slugs, snails, caterpillars, or chewing beetles. Inspect at dusk and under leaves before treating. A few damaged leaves on a vigorous plant may not justify intervention; widespread feeding, visible pests, or damage to new growth calls for a targeted response based on the pest and the product label.
Fine stippling or distorted tips can come from sap-feeding insects such as aphids or spider mites, especially during hot, dry weather. Start by rinsing foliage with a firm stream of water and checking again after several days. Avoid broad-spectrum sprays during bloom when pollinators are visiting, and never apply a pesticide without confirming the pest and following its label.
Powdery mildew or leaf spots become more likely when foliage stays damp, air is trapped by crowded stems, or the plant is grown in shade. Thin or divide congested clumps, water at the soil line in the morning, remove badly affected debris, and correct drainage. The Gardening Know How reference also places root and crown rot, leaf spot, and powdery mildew among the issues associated with excess moisture and poor growing conditions.
Yellow leaves need a pattern-based diagnosis. Older leaves yellowing while the soil is wet points first to overwatering or poor drainage; yellow new growth can indicate a nutrient or root problem, but it is not proof that the plant needs fertilizer. If yellowing follows a sudden move from indoor light to harsh sun, inspect for bleached or crispy patches and consider sunburn. Let the root zone tell you what to do next: improve drainage and pause irrigation for wet soil, provide a deep soak for genuinely dry soil, or test before feeding a plant that otherwise grows well.
Few flowers are most often a light, timing, or growth-balance issue. Confirm the plant receives enough direct sun, check whether it is a first-year seed-grown perennial, and look for nitrogen-rich runoff or very lush foliage. Deadheading can extend the display, but it cannot make a shade-grown plant bloom like one in full sun.
Overwinter and Plan Next Season
Most perennial coreopsis needs little winter decoration. After a killing frost, the foliage may collapse and the plant may enter dormancy. In a cold region, a light mulch layer over the root zone can buffer temperature swings, but keep it loose and pull it back from the crown when growth resumes.
Whether to cut back in fall depends on your priorities. Cut diseased or collapsing foliage if it is likely to harbor problems, or tidy a front-border planting after wildlife use has finished. Leave some healthy seed heads standing when birds, winter texture, and self-seeding matter more than a clean outline. The choice is about the garden you want, not a universal rule that every coreopsis must be cut to the ground.
Keep watering new fall plantings until the ground begins to freeze, but do not keep a dormant plant constantly wet. In spring, remove soggy debris, check whether the crown has heaved, and wait for new growth before deciding that the plant is dead. Mark the location because dormant perennial coreopsis can be surprisingly easy to disturb during early bed cleanup.
Use the next season to correct one cause at a time. Move a shade-stretched plant, divide a crowded clump, reduce fertilizer near the bed, change the watering rhythm, or replace a cultivar that simply does not match your climate. A short note about bloom date, rainfall, and the plant’s behavior will make the next decision far more accurate than memory.
Conclusion
The dependable coreopsis formula is simple but specific: match the cultivar to your climate, plant it in real sun, give it drainage before fertilizer, water deeply while it establishes, and prune according to whether you want more flowers, a tidier shape, or seed for wildlife. That approach works better than treating every tickseed as an identical low-maintenance perennial.
If you are planting one this season, start with the site. Choose a sunny, open spot, keep the crown at soil level, watch moisture closely during the first year, and wait to feed until the plant gives you a reason. From there, deadhead for repeat color, leave selected seed heads for birds, divide declining clumps, and let the plant’s habit—not a rigid calendar—guide the care.



