How to Grow Sage: Sun, Soil, Pruning, and Harvest
Learn how to grow sage in beds or pots, choose culinary sage, improve drainage, water by plant age, prune without cutting into bare wood, and harvest well.
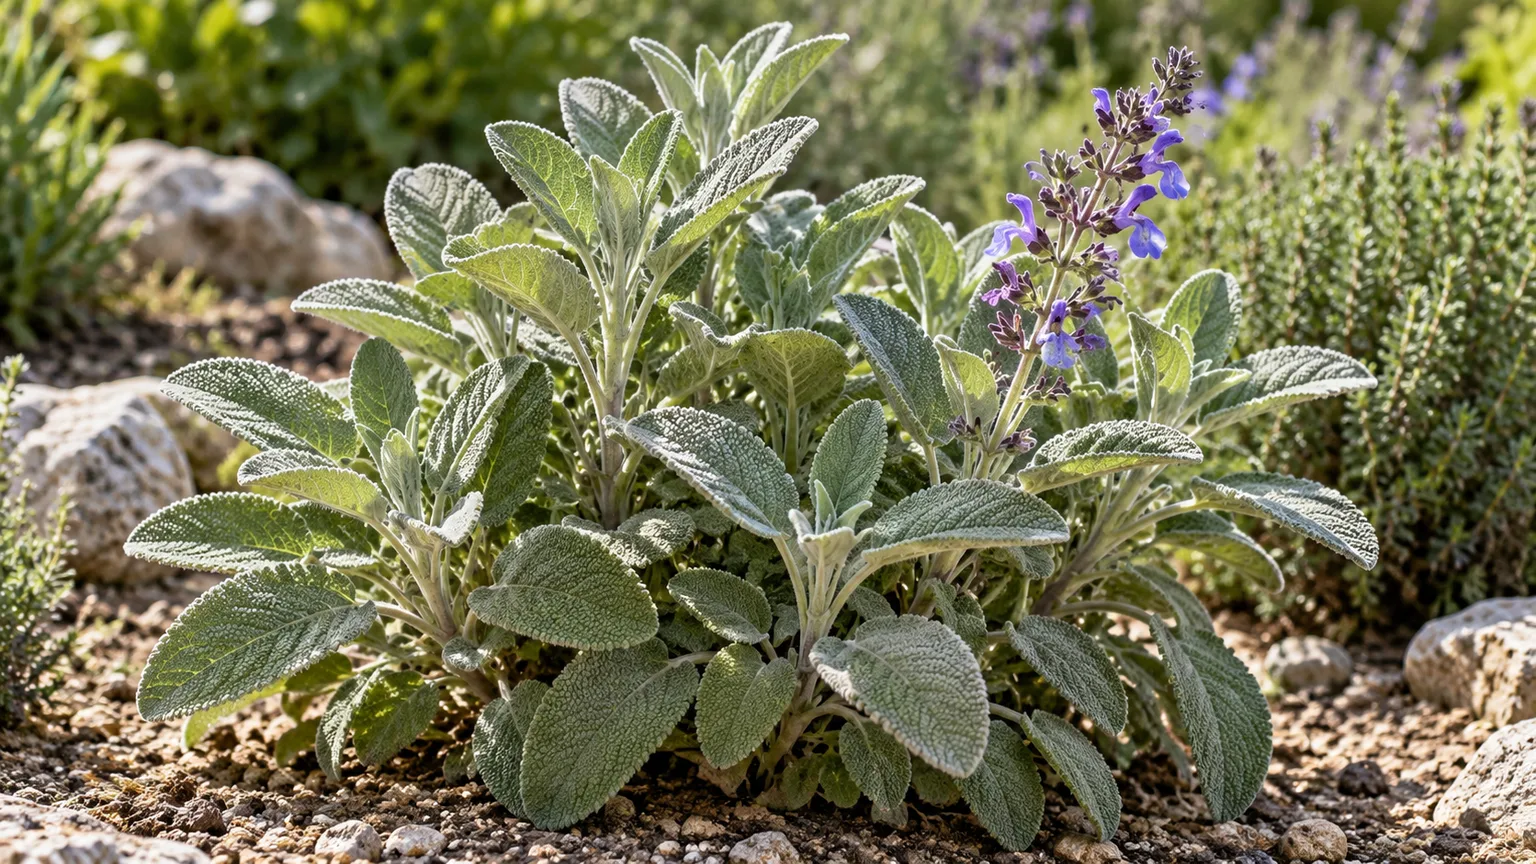
Grow culinary sage in a sunny spot where water drains away quickly. The plant people usually mean by “sage” for cooking is common sage, Salvia officinalis: a fragrant, gray-green perennial subshrub that develops woody stems as it ages. It needs regular water while establishing, but a mature plant in the ground is more likely to suffer from persistently wet soil than from a short dry spell.
The most useful growing rule is to match care to the plant’s stage and setting. Water a new transplant through its first season, check a pot more often because it dries faster, and prune only where you can see live leafy growth below the cut. If your soil stays soggy in winter, choose a raised bed or a pot instead of trying to fix the problem with fertilizer or a thicker mulch.
Identify the culinary sage you want to grow
Before buying a plant or seed packet, check the botanical name. Salvia officinalis is culinary sage, also called common or garden sage. It has opposite, textured, slightly fuzzy gray-green leaves, green stems that become woody, and usually blue-violet flowers. It comes from the Mediterranean and is adapted to sunny, well-drained conditions rather than a constantly moist herb-bed soil.
“Sage” on a plant label can refer to many different plants. Russian sage, pineapple sage, hummingbird sage, and ornamental salvias may belong to the same broad genus or share a common name, but they are not interchangeable in flavor, size, hardiness, or care. NC State Extension also notes that Greek sage (Salvia fruticosa) is sometimes sold as fresh culinary sage; identify what you have rather than assuming every sage-scented salvia tastes like common sage. Use culinary varieties sold for food, and never eat an unidentified ornamental plant.
Cultivars of S. officinalis vary in leaf color, size, and winter performance. ‘Berggarten’ has broad silvery leaves, while ‘Purpurascens’ has purple-tinged foliage; variegated forms are often chosen for appearance. Flavor and hardiness can differ even within the species, so if your priority is cooking or overwintering outdoors, look for a cultivar described for that purpose and check local nursery or extension advice. The RHS lists culinary selections such as ‘Icterina’ and ‘Tricolor’, while extension descriptions caution that some ornamental selections may have weaker flavor or lower cold tolerance.
Choose a site that stays sunny and drains quickly
Sage grows best where it gets ample direct light and its crown does not sit in wet ground. Allow room for the plant to become a small, spreading shrub: typical plants can approach 2 feet tall and 2 to 3 feet wide, although compact cultivars stay smaller. Give plants roughly 18 to 24 inches of spacing, or follow the variety label if it describes a larger spread. Extra airflow between plants matters in humid gardens because dense, damp foliage is slower to dry.
The site’s drainage is often the deciding factor. After rain or watering, does water remain around the planting for hours, or is the soil still sticky and saturated the next day? If so, raise the planting, improve the bed across a broad area, or use a container with open drainage holes. A small amount of gravel placed only in the bottom of a planting hole will not correct a poorly drained site; water can still collect in the surrounding soil.
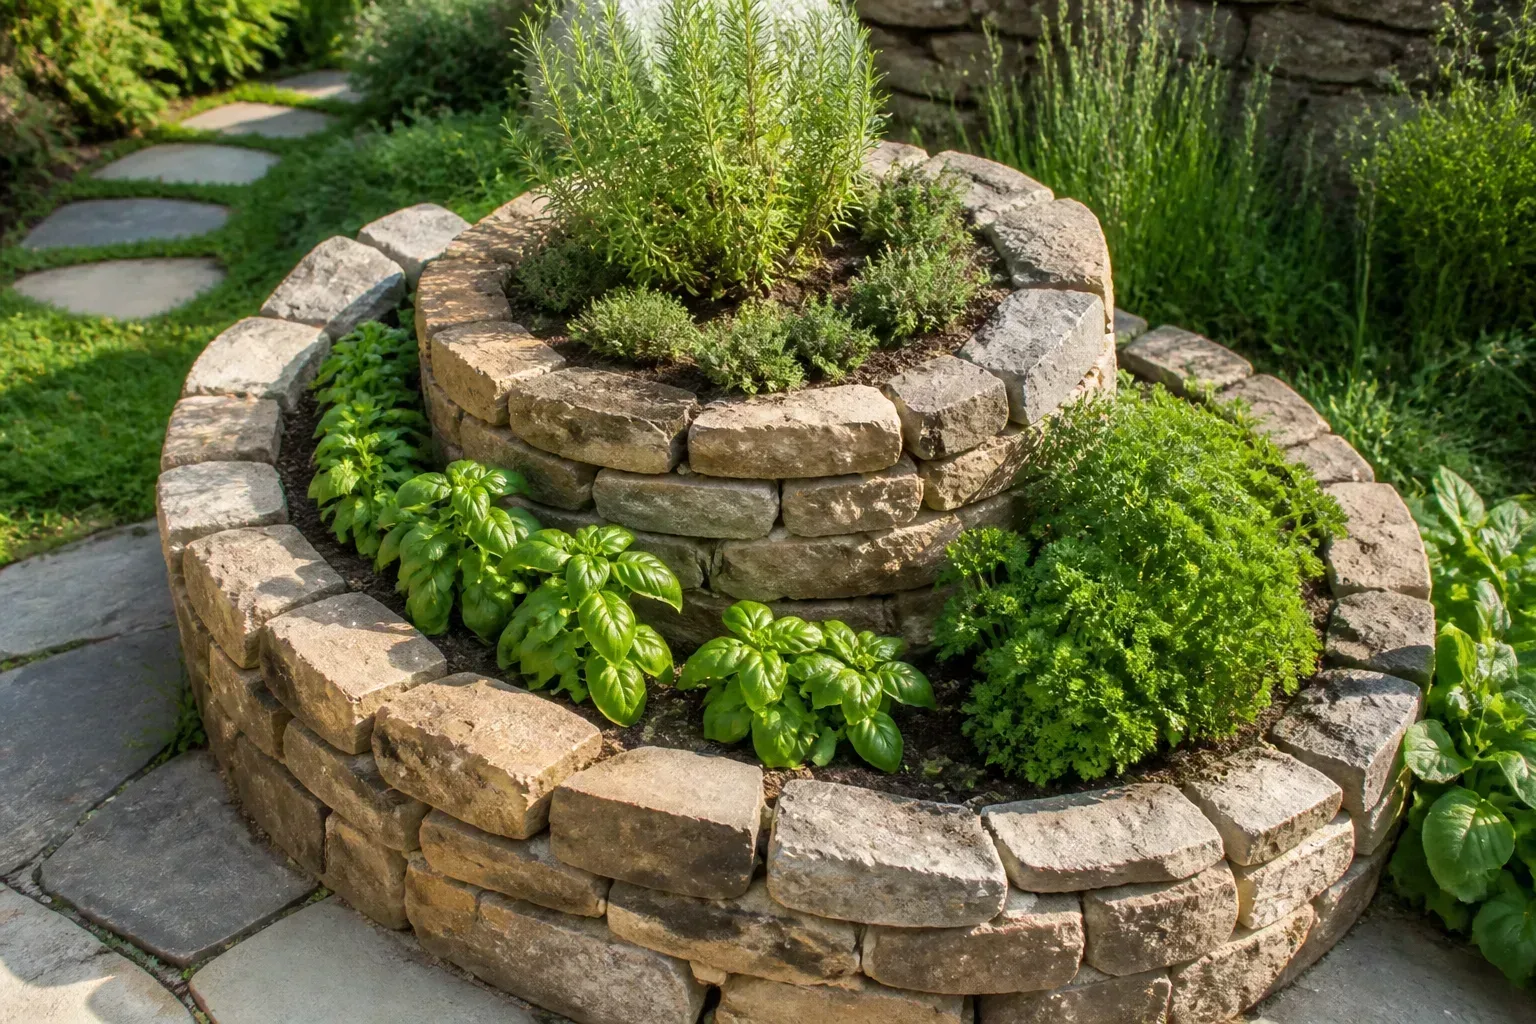
Light: full sun, with a heat exception
Start with full sun, commonly at least six hours of direct light. In a mild summer climate, an all-day sunny position usually produces compact growth and aromatic foliage. In a hot inland garden, especially where afternoon temperatures are intense, a location with morning sun and light afternoon shade can reduce stress without leaving the plant in deep shade.
Do not use midday drooping alone as a watering signal. If the leaves recover as the day cools and the root zone is still moist, adding more water may worsen the real problem. Check the soil several inches down; if it is dry, water at the base, but if it is damp, let the plant rest and consider temporary afternoon shade during a heat wave. In persistently dim conditions, sage can become open and leggy, with less vigorous new growth.
Soil: drainage matters more than fertility
Give sage lean to moderately fertile soil that drains freely. Sandy or loamy ground is easy to manage, but a heavier soil can work if it is raised or amended across the bed so water does not perch around the roots. NC State Extension describes common sage as intolerant of wet or poorly drained soil and tolerant of drought and poor fertility; Wisconsin Extension also recommends sun and well-drained soil. That is why improving drainage is usually more valuable than adding rich compost or frequent fertilizer.
Sage tolerates a fairly broad soil reaction. A soil test can help if the whole bed is struggling, but you do not need to chase an exact pH before planting. If you are using a gritty or sandy amendment in clay, mix it through a generous planting area or build a raised bed rather than creating a tiny pocket surrounded by compacted soil. Keep the woody crown at soil level; burying the base or piling wet mulch against it can keep the stem collar damp.
Plant sage at the right time and depth
In most temperate regions, plant sage in spring after severe frost has passed and the soil is beginning to warm. Spring gives roots time to settle before winter. In a mild, dry climate, early fall can also work, but avoid setting out a small plant just before a cold, wet season. A garden-center transplant is the quickest route to usable foliage; UF/IFAS recommends transplants as the fastest way to get started, while also noting that sage can be grown from seed or cuttings.
Water the nursery pot before planting so its root ball is evenly moist. Set the plant at the same depth it was growing in its pot, backfill, and water once to settle soil around the roots. Do not bury the crown. During the first growing season, water during extended dry periods while roots spread; once the plant is established in the ground, it can usually handle ordinary dry intervals without frequent irrigation.
If you are planting more than one, leave enough room for mature width and harvest access. A sage plant wedged between vigorous herbs may stay damp inside and be difficult to prune cleanly. Keep the center open enough that air can move through it, and place the plant where you can reach it for occasional clipping without stepping on the woody base.
Start sage from seed or a vegetative cutting
Seeds are a practical way to grow the straight species, but they take longer to produce a substantial harvest than a purchased plant. A cutting is preferable when you want another plant with the same traits as a named cultivar. Named varieties are often propagated vegetatively, and seed-grown offspring may not reliably match the parent’s leaf color, size, or flavor.
Starting seeds indoors
Sow seeds indoors in spring, about six to eight weeks before your usual last frost. Use a clean seed-starting mix, moisten it first, and cover seeds lightly; they need contact with the mix but should not be buried deeply. Place the tray in bright light and keep the surface evenly damp, not waterlogged. The RHS says sage seeds may germinate in about two weeks under warm conditions, but allow longer and sow a few extra because germination and seedling speed vary.
Once seedlings have several true leaves, pot them on so they can develop a root system without crowding. Before moving them outdoors, harden them off over about a week: set them outside in a sheltered spot for a short period at first, then gradually increase their time and exposure. Transplant only after the seedlings can tolerate outdoor conditions. Seed-grown plants may need a full season or more before they can support regular picking, so harvest lightly in their first year rather than treating them like a mature shrub.
Direct sowing is possible where spring is mild and the bed is prepared, but small seedlings can be difficult to distinguish from weeds and are vulnerable to drying at the surface. Indoor sowing gives you more control over moisture and makes it easier to label the correct culinary species. If a packet is old, test a small batch rather than relying on it for your entire herb planting.
Rooting stem cuttings
Take a 3- to 4-inch cutting from healthy, nonflowering new growth in late spring or early summer. Use clean snips, remove the leaves from the lower part of the stem, and place that bare section in a small pot of moist, free-draining propagation mix. Keep it in bright indirect light while roots form; the mix should stay slightly moist, never saturated. Avoid taking a cutting from a plant with pest or disease symptoms.
New leaves alone do not prove that a cutting has rooted; they can grow using stored energy. After a few weeks, tug very gently. Resistance suggests roots have anchored the cutting. Pot it up when there is a small root system, then grow it on until it handles a light tug and the potting mix dries at a normal rate. Wisconsin Extension notes that summer softwood cuttings root in moist, well-drained potting mix; the RHS also identifies softwood cuttings as a quick way to reproduce a favored variety.
Water according to the plant’s age and setting
There is no useful single weekly schedule for every sage plant. Newly planted sage needs more consistent attention than a mature shrub because its roots have not yet explored the soil. Keep the root zone from drying completely during its first season, but do not keep it constantly wet. Once the plant is established in a garden bed, water during a prolonged dry spell if the soil has dried several inches down and the plant is not recovering overnight.
Containers need more frequent checks because wind, sun, and limited soil volume dry them quickly. Push a finger into the mix rather than watering because the top looks pale; if the upper inch or two is dry and the pot feels lighter, water thoroughly until some drains out. Empty any saucer so roots are not left standing in water. In cool or rainy weather, the same pot may need far less water than it does during a hot week.
If sage is wilting, first check whether the mix is actually dry. A limp plant in wet soil may have oxygen-starved or damaged roots, and more water can make that problem worse. On the other hand, a pot that is bone-dry and shedding water down its sides may need slow, repeated watering so the root ball can rehydrate. Let the surface dry between thorough waterings instead of keeping the entire root zone soggy.
Feed lightly, if at all
Established sage in the ground usually does not need routine fertilizer. Very rich soil or frequent high-nitrogen feeding can push soft, leafy growth that is less compact and more vulnerable to weather and pests. If the plant is pale or stunted, check light, drainage, root health, and planting competition before feeding; fertilizer will not repair waterlogged roots or shade.
Container sage has a smaller reserve of nutrients. If it has been in the same pot for more than a year and is growing weakly despite good light and drainage, apply a modest amount of balanced, slow-release fertilizer in spring or early summer according to the label. Do not feed late in the season when tender growth would have little time to harden before cold. The RHS similarly distinguishes in-ground plants, which generally need no feeding, from older container plants that may benefit from a light spring or early-summer feed.
Grow sage in a pot without keeping it wet
A container is a useful solution when garden soil drains poorly or you want to move the plant to shelter in winter. Choose a pot at least about 12 inches wide and deep for a full-size sage, with several unobstructed drainage holes. A smaller pot can work for a compact cultivar, but it dries faster and may need more frequent checking. Unglazed clay dries quickly in hot weather; plastic or glazed pots retain moisture longer, so adjust watering to the material and climate rather than assuming one pot type is best everywhere.
Use a free-draining potting mix, not dense garden soil. The RHS recommends a soil-based compost with horticultural grit added to improve drainage, up to roughly one-quarter by volume. A quality container mix blended with grit or another coarse drainage material can also work; avoid making the mix so coarse that water runs straight through before the root ball has absorbed it. Do not put a layer of stones in the pot bottom as a substitute for drainage holes.
Set the pot in full sun or morning sun with some relief from extreme afternoon heat. Raise it slightly on pot feet if rain collects beneath it, and keep the drainage holes clear. In winter, move containers out of prolonged rain and harsh wind, but do not bring a hardy plant into a warm, dim room and expect it to thrive there. A bright, cool, sheltered position is more suitable if the local climate is too wet or cold for the cultivar.
Harvest leaves without exhausting the plant
You can pick individual leaves or clip short, leafy sprigs once a plant is growing strongly. Fresh spring and summer growth is usually the most tender, but established evergreen sage can provide leaves outside that window in mild weather. The RHS allows picking at any time of year, while Wisconsin Extension advises light harvesting in the first year so a young plant can become established. Those recommendations fit together: harvest according to plant vigor, not a fixed number of days after sowing.
Use clean scissors or pinch just above a pair of leaves so the remaining stem can branch. Take a little from several parts of the plant rather than stripping one branch bare. Do not remove more than about one-third of the leafy growth at one time, and take less from a small transplant, a seedling, or a plant that has recently suffered heat or drought. Stop heavy harvesting as autumn approaches in cold regions; late, severe cutting can trigger tender growth just before frost and leaves the crown with fewer resources.
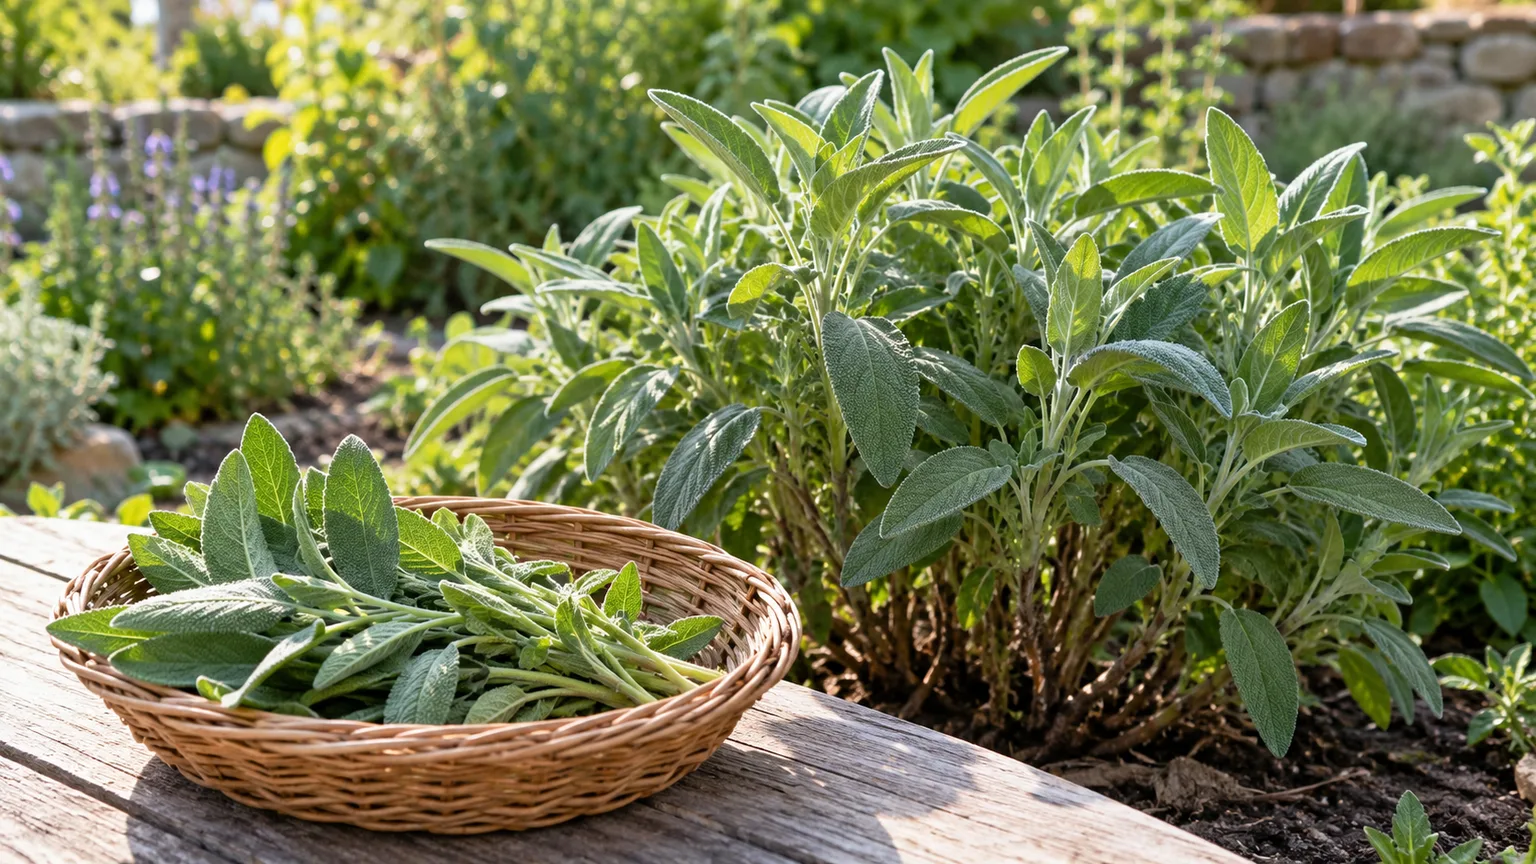
Sage flowers are a choice, not a problem to fix automatically. If your main goal is a steady supply of tender leaves, clip flower stalks when they appear and continue light harvesting. If you want pollinator activity or to enjoy the flowers, let some stems bloom; bees visit the blue-violet flower spikes. The plant remains edible, and flowering does not suddenly make the leaves unusable, though the newest foliage may be more tender than older leaves.
Dry and store leaves without losing aroma
Use fresh sage soon after picking, or refrigerate unwashed sprigs loosely wrapped for a short period. To dry a larger harvest, rinse only if needed and dry the leaves completely, then spread sprigs in a warm, shaded, well-ventilated place. Avoid direct sun and humid, stagnant air, which can slow drying and dull aroma. When leaves are crisp, strip them from the stems and store whole in an airtight jar away from heat and light; crumble them only when cooking.
Freezing is another option when you have more fresh sage than you can use. Chop the leaves and freeze them with a little water or oil in an ice-cube tray, then transfer the frozen portions to a sealed container. The flavor and texture will soften after thawing, so frozen sage is best used in cooked dishes rather than as a fresh garnish. Label the container with the date and use the oldest portions first.
Prune sage where leafy growth can replace it
Prune established plants in mid- to late spring, once you can see new growth and the risk of severe frost has eased. Remove winter-damaged tips and shorten long stems to a lower leafy side shoot. The key is to leave green leaves or visible buds below each cut. A cut into old, bare wood may not produce new shoots, so do not shear the whole shrub down to its woody framework; NC State Extension and the RHS both warn that old bare stems may not reshoot reliably.
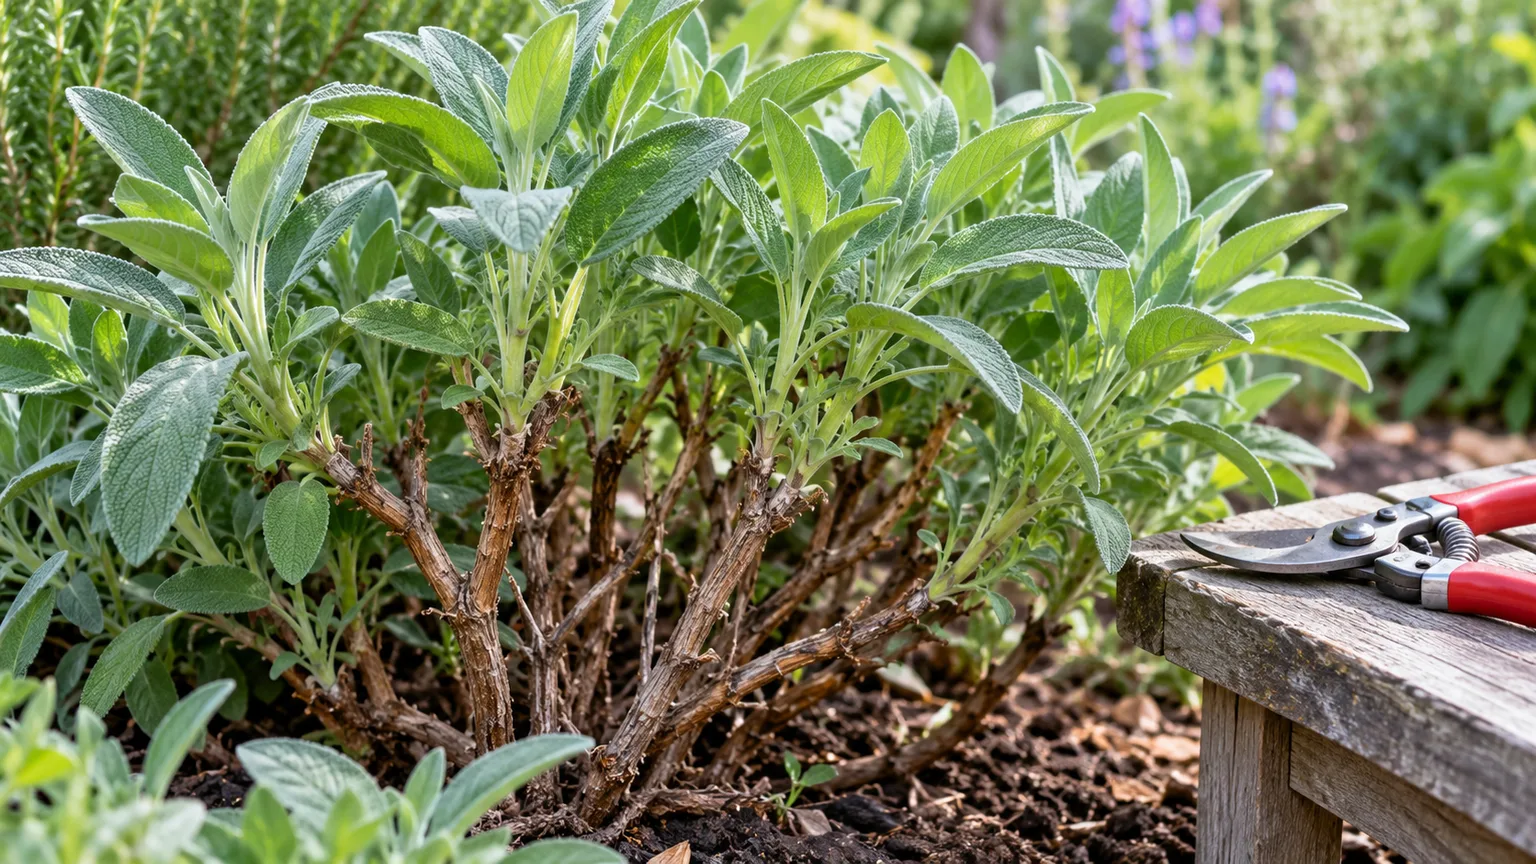
During the growing season, light tip-pruning and regular harvesting can keep a young plant compact. Make selective cuts with clean, sharp shears, taking only as much as the plant can replace. You can remove spent flower stalks if you want to keep the plant focused on foliage, but avoid heavy fall pruning. Leaving the remaining structure through winter helps protect the crown and avoids a flush of soft growth that may be damaged by cold.
If a sage plant has a thick bare center and only a few tufts at the tips, it may be past the point where pruning can restore a dense shape. Do not attempt a drastic cut just because the plant looks untidy. Instead, take cuttings or layer a low leafy branch while the plant is healthy, then replace it once the new plants are established.
Manage heat, humidity, and winter weather
Common sage is a perennial subshrub, but published hardiness ranges differ: Wisconsin Extension lists a broader zone range than NC State’s plant profile and Fine Gardening. Cultivar, site, and winter conditions all affect survival. Treat a hardiness-zone label as a starting point, not a promise. Ask a local extension service or nursery which culinary sage cultivars overwinter reliably in your area, especially if the garden has wet winters or sharp temperature swings.
In cold regions, plant in soil that drains well before winter and avoid late-season hard pruning. A light, airy mulch can buffer severe cold in exposed sites, but keep it away from the woody crown and remove wet, compacted material. Do not wrap the plant tightly or smother it beneath a water-holding blanket. The greater risk in many gardens is a crown sitting cold and saturated for weeks, not a brief frost by itself.
In warm, humid regions, prioritize drainage and airflow. A raised bed or container can keep roots drier during summer rains, while spacing and selective thinning help leaves dry after storms. If afternoon heat is intense, provide some shade at the hottest part of the day, but keep enough direct light for compact growth. In a very hot climate, a sage plant may behave as a short-lived perennial even where winter cold is not a concern; replacing or propagating it before decline is a sensible plan.
Troubleshoot weak, woody, or declining sage
Blackened stems or a collapsing crown after wet weather point to excessive moisture or root/crown damage. Stop automatic watering, make sure the pot drains, and inspect the soil. If the bed stays saturated, move a healthy portion to a raised, better-drained position or take cuttings from unaffected leafy stems before the decline spreads. Root rot is not cured by adding fertilizer; NC State Extension identifies root rot and foliar disease risks and emphasizes good drainage and airflow.
Long, sparse stems usually call for more light, careful spring pruning, or both. Move a potted plant to a sunnier place gradually, then cut back only to leafy growth. White powder or mottled foliage can indicate a foliar disease or pest; first improve airflow, remove badly affected leaves, and water at the soil rather than repeatedly wetting foliage. Sage can also attract leafhoppers, spittlebugs, slugs, and spider mites, but check the plant closely before treating it. A few cosmetic feeding marks do not automatically justify a pesticide, especially on an edible herb.
A plant that wilts despite damp soil may have root stress rather than thirst. A plant that wilts with dry, shrunken potting mix needs a thorough rewatering and a review of how fast the pot dries. A shrub with a bare woody middle may need replacement rather than a hard reset. These distinctions prevent the common cycle of adding water to a plant that needs better drainage or cutting a plant below every viable bud.
Conclusion
For reliable culinary sage, start with the correct species, give it strong light, and make sure water can leave the root zone. Keep a new plant evenly established without saturating it, check pots more often than beds, and prune in spring only above live leafy growth. The plant may flower, become woody over time, or struggle in a climate outside its cultivar’s comfort zone; none of those outcomes means you should cut it back blindly or keep it wetter.
If you remember one priority, make it drainage. A sunny raised bed or well-drained pot gives Salvia officinalis a better chance to survive wet seasons, stay aromatic, and provide a useful harvest. Take cuttings from a strong plant before it becomes too woody, and you can renew your supply without waiting for seed-grown plants to mature.