How to Grow Peas: Planting, Care, and Harvest
Grow shelling, snap, or snow peas with clear timing, seed depth, watering, trellis, and harvest guidance, plus fixes for poor germination and empty pods.
Peas are easiest to grow when you treat them as a cool-weather crop with a short season, not as a summer vegetable that can be planted whenever the bed opens up. Sow them into workable, drained soil early enough to mature before sustained heat, give climbing types a support before their tendrils reach for one, and keep moisture steady while flowers turn into pods.
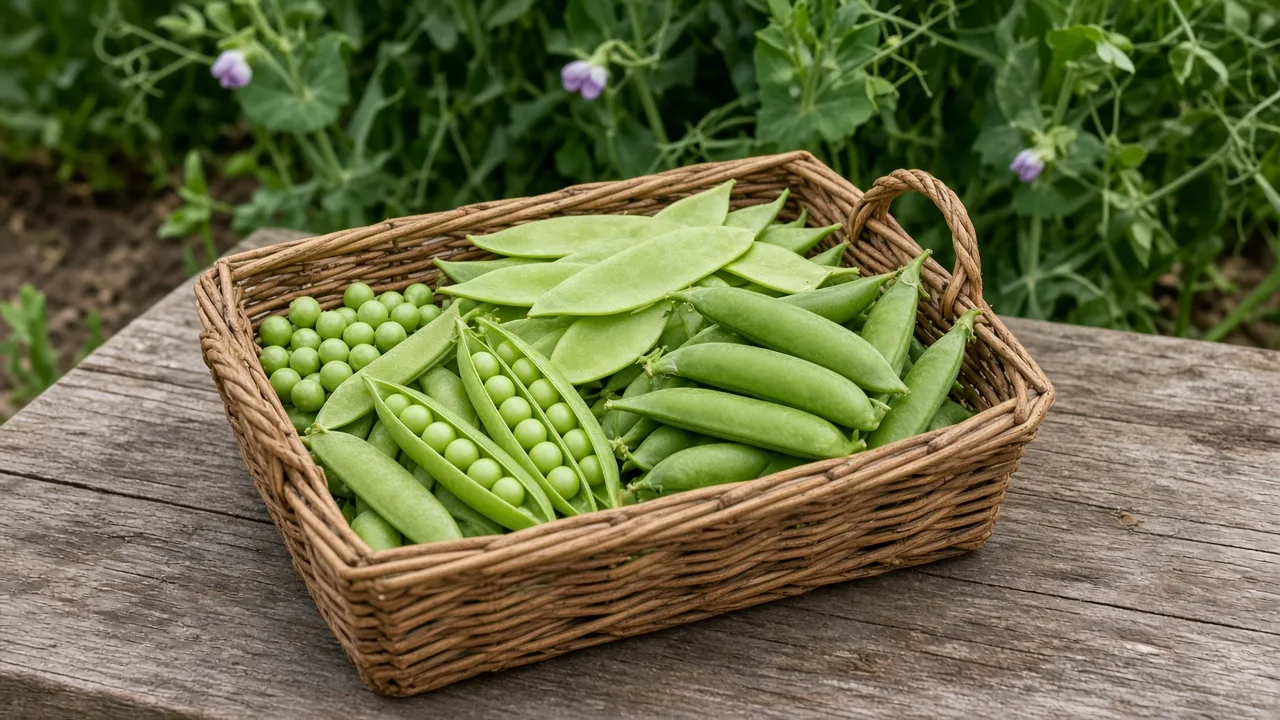
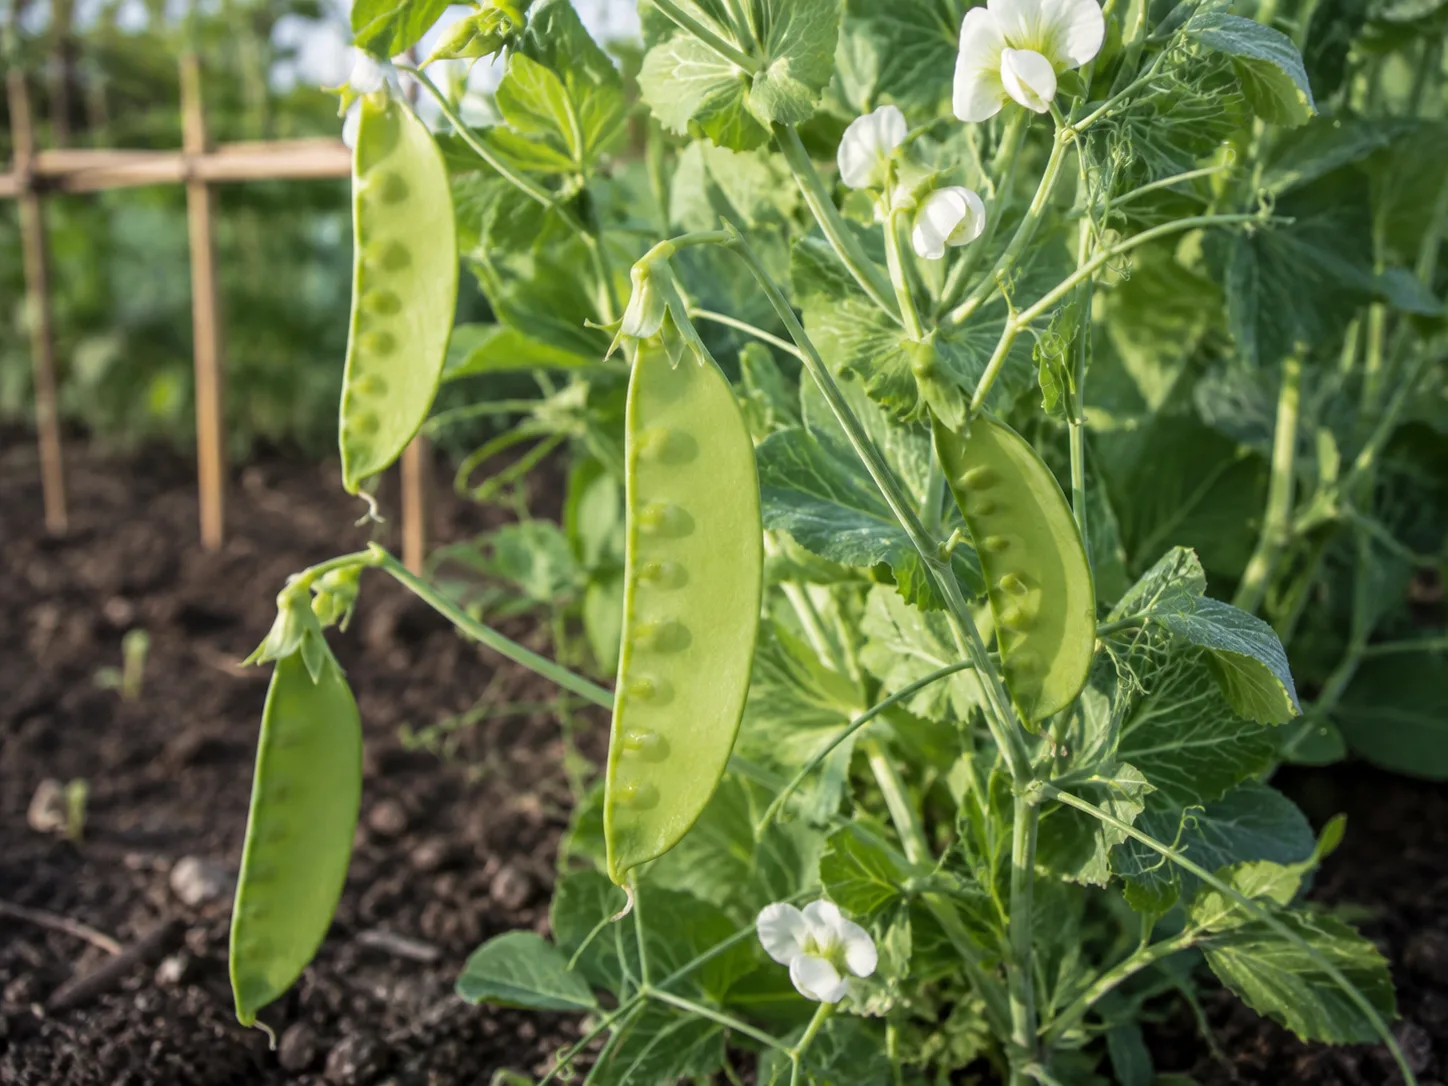
First decide what you want to eat. Shelling peas are grown for the round seeds inside the pod; snap peas have tender, edible pods that become sweet and plump; snow peas are harvested flat, before the seeds swell. All three are forms of Pisum sativum, but their varieties differ in height, maturity, and the best picking stage.
Choose shelling, snap, or snow peas
The three main types differ at harvest, not in the basic way you plant them. Choose shelling or garden peas if you want fresh peas to shell, freeze, or cook; choose snap peas if you want a crisp edible pod with full-size peas inside; and choose snow peas for flat pods picked while the peas are just beginning to show. Seed catalogs may call shelling peas “English peas” or “garden peas,” while “sugar snap” and “mangetout” often identify edible-podded types.
Read the seed packet for more than its days-to-maturity figure. Check whether the plant is a dwarf/bush type or a taller climber, whether it is resistant to common diseases such as powdery mildew, and whether its maturity fits the cool window in your area. A compact variety is easier to fit in a pot or narrow bed; a tall variety usually needs a trellis and more vertical room but is easier to pick when vines are lifted off the ground.
| Type | What you eat | Harvest cue | Typical growing choice |
|---|---|---|---|
| Shelling/garden pea | Seeds, removed from the pod | Pods are full and bright green; seeds are rounded but not starchy | Bush or climbing varieties |
| Snap pea | Whole pod and peas | Pod is plump, crisp, and still tender | Often a vigorous climber; compact cultivars also exist |
| Snow pea | Whole pod | Pod is flat and tender, before seeds become prominent | Usually benefits from a trellis even if the variety is short |
If you are unsure, grow one short row of a type you will actually cook. Peas are a relatively brief crop, and a small planting can tell you whether you prefer shelling time, edible-pod harvest, or the space-saving habit of a dwarf cultivar before you devote a large bed to it.
Time planting for cool weather
Pea roots tolerate cool soil better than many warm-season vegetables, but seeds still need air and drainage. A practical spring rule is to sow about four to six weeks before your expected last frost date, once the soil can be worked without sticking in clods or smearing into a wet ribbon; the calendar is secondary to the bed’s condition.
Peas can germinate at soil temperatures just above 40°F, but emergence is usually quicker and more even as soil warms into the 50s and low 60s. Utah State University Extension reports emergence in roughly 7 to 10 days when soil is about 55–65°F and notes that hot conditions reduce growth. Its home-garden pea guide is a useful regional reference, but its planting cutoff dates are specific to Utah and should not be copied as dates for another climate.
Cold, wet ground is the important exception to “plant early.” Pea seed can sit in saturated soil, rot, or emerge unevenly, especially if a late cold rain follows sowing; waiting a few days for the bed to drain is often better than planting into mud. Conversely, don’t wait for summer warmth: when daytime heat settles in, peas often flower briefly, drop blossoms, and produce fewer tender pods.
Spring planting: sow when soil is workable
In most regions, a spring sowing is the easiest crop to manage. Start as soon as the bed drains and can be prepared, then check the seed packet’s maturity range and compare it with how long your area usually stays cool after the last frost; peas commonly need around 55–70 days from sowing, but cultivar and weather make that estimate variable.
Young plants can withstand light frosts better than warm-season crops, but a severe freeze can injure seedlings, and flower or pod production becomes unreliable in heat. If a hard freeze is forecast just after emergence, a secured row cover can buffer the short cold spell; remove it once the risk passes if it traps heat or presses against growing vines. Don’t use a cover as a reason to push a crop into waterlogged soil.
If your spring warms quickly, choose an early variety, plant on the cool side of a building or fence only if it still receives enough sun, and harvest frequently as pods mature. A succession sowing every 10–14 days can spread the harvest, but only while each planting has a realistic chance to finish before hot weather; later rows do not extend the season if the weather has already turned too warm.
Fall planting: count backward from frost
Fall peas work best where late summer is followed by a long, mild autumn. Start with the first expected fall frost, count backward by the variety’s days to maturity, and add a buffer for slower germination in hot soil and shorter days; a packet that says 60 days does not promise harvest exactly 60 days after a late-summer sowing.
The challenge is getting seed established while the soil is still hot and dry. Water the bed before sowing, keep the seed zone evenly moist until seedlings emerge, and use a temporary shade cloth or light mulch if the surface overheats; remove shade once plants are established and make sure the vines still receive enough sun. In humid regions, choose varieties with powdery-mildew resistance and give the row more airflow, because late-season peas face a different disease balance than an early spring crop.
Fall yields may be smaller than spring yields, particularly where frost arrives soon after the pods begin to fill. If your area has a short fall, prioritize an early-maturing variety and a sheltered but sunny bed, or skip the crop rather than sowing too late for it to mature.
Choose and prepare the site
Give peas at least six hours of direct sun for a productive crop. In places with hot late afternoons, some light afternoon shade can slow heat stress, but deep shade produces weak vines and fewer flowers; morning sun and good airflow are a better compromise than a damp, enclosed corner.
Drainage matters as much as fertility. Peas grow in many soil textures, but roots struggle in compacted or persistently saturated ground, where seedlings can rot and older plants can develop root disease. If water stands after rain, loosen the bed without working it wet, improve the growing area with mature compost, or use a raised bed; adding sand to heavy clay in small quantities is not a dependable fix.
If possible, test soil before adding fertilizer or lime. A slightly acidic to near-neutral soil is suitable, while the right amendment depends on the actual pH and nutrient levels; avoid assuming that yellow leaves automatically mean the bed needs fertilizer. University of Minnesota Extension explains that soil pH and excess available nitrogen can affect the plant’s relationship with nitrogen-fixing bacteria, so a soil test can prevent an unnecessary nitrogen application.
Rotate peas and other legumes away from the same bed for at least three years when space allows. That interval helps reduce the buildup of some pea root pathogens; if a lab or local extension service identifies a persistent disease, follow its longer rotation guidance because some soilborne pathogens survive for more than three years. Remove diseased pea debris instead of composting it in a home pile that does not reliably heat throughout.
Sow directly, at the right depth and spacing
Peas are normally direct-sown where they will grow. Their early roots dislike disturbance, and the crop is quick enough that indoor starts rarely justify the transplant risk; if a very short season makes starting indoors necessary, use deep individual cells and move seedlings while small, with the root ball intact.
Loosen the top several inches of soil, remove large clods, and make a shallow trench. Sow seeds about 1 inch deep and 1–2 inches apart, then cover, firm gently, and water enough to moisten the seed zone without flooding it. Utah State University’s suggested depth ranges from ½ to 1 inch, while Johnny’s Selected Seeds recommends ½–1 inch; in light, drying soil use the deeper end, and in heavy soil avoid burying seeds too deeply.
Leave roughly 18–24 inches between rows as a useful home-garden starting point, widening that gap for tall trellises or when you need to harvest from both sides. Recommendations vary with variety and support arrangement: the Johnny’s Selected Seeds growing guide gives wider row spacing for trellised production, while Utah State’s home-garden advice allows closer rows. Make a layout you can reach without stepping on the bed or crushing neighboring vines.
You generally do not need to thin a normal row sown at this spacing. If you sow more densely because seed is old or germination is uncertain, wait for seedlings to emerge and snip out only the most crowded plants rather than pulling at roots that are intertwined; avoid deep hoeing near young peas because their feeder roots are shallow.
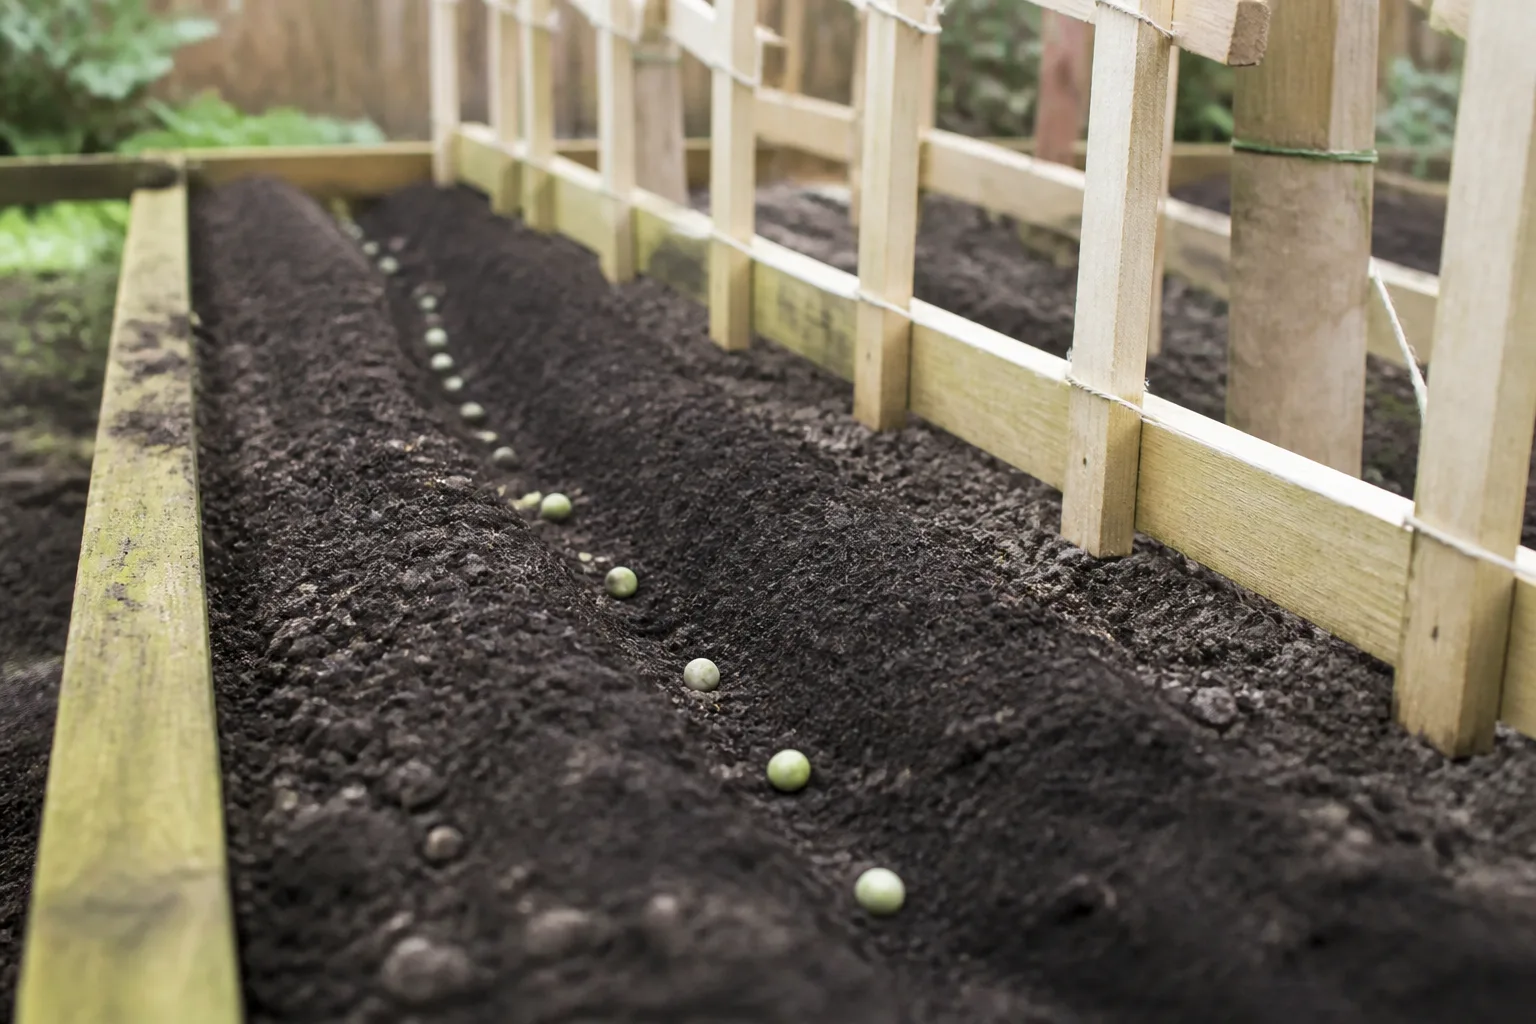
Do not soak seed overnight as a standard step. A dry seed placed in moist, well-drained soil absorbs water gradually; a pre-soaked seed left in cold saturated soil can be more vulnerable to rot, and soaking does not fix old or poorly stored seed. The practical guidance in Urban Farmer’s pea growing guide similarly favors direct sowing and warns against soaking in cold conditions.
Decide whether pea seed inoculant is useful
Peas can form a partnership with specific rhizobia bacteria that convert atmospheric nitrogen into a form the plant can use. A pea-specific inoculant can be helpful if peas have not grown in the bed, the garden is new, soil is acidic, or you do not know whether compatible bacteria are present; it is optional in a healthy rotation where legumes have grown successfully.
If you inoculate, buy a product labeled for peas or the appropriate pea group, check its expiry and storage conditions, keep it out of direct sun, and apply it exactly as the label directs. Inoculants are living organisms, not general-purpose fertilizer; an inoculant meant for a different legume may not contain the right bacteria. The University of Minnesota Extension’s guidance on peas and beans explains how crop-specific rhizobia, pH, and soil nitrogen affect nodulation.
You can check nodulation by gently lifting one healthy plant later in the season and looking for small swellings on fine roots; pink or tan interiors are a sign of active nodules. This is a rough observation, not a laboratory diagnosis, and a plant that has nodules still needs adequate water, phosphorus, potassium, and other nutrients. Inoculant does not compensate for poor drainage, cold-saturated soil, or a severely depleted bed.
Put trellis support in before vines climb
Check the mature height on the seed packet before choosing a support. Compact peas may stay under about 2 feet and can sometimes stand without a tall trellis, while climbing snap, snow, and shelling varieties can reach several feet; even a short row is easier to harvest when the plants are held off wet soil.
Install netting, a mesh trellis, or sturdy fencing at sowing time, before roots fill the row. Peas climb with tendrils, so the support needs openings narrow enough for a tendril to catch; a smooth, solid wall does not give vines much to grip. Set the trellis firmly enough to resist wind and the combined weight of damp foliage, then leave an access path on one or both sides so you can pick pods without leaning across the vines.
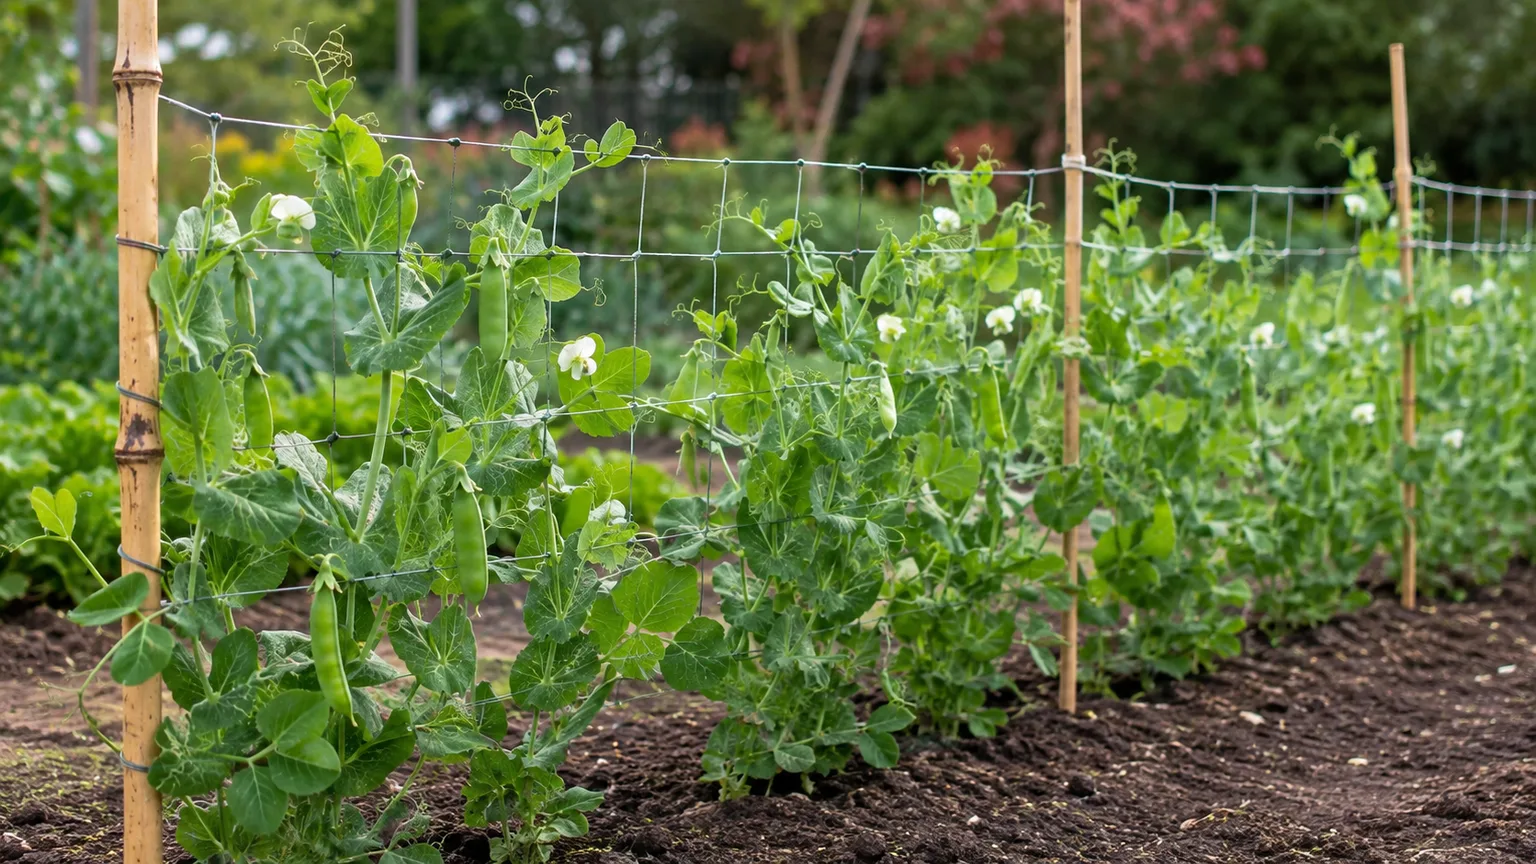
As seedlings grow, gently guide loose tendrils toward the mesh rather than tying every stem. Do not yank a vine off the support once it has attached; redirect a new shoot or loosen a snag carefully because brittle stems can break at the node. If a variety is naturally bushy, a low net or a few twiggy supports may be all it needs.
Keep plants evenly watered and weeded
Peas need regular moisture, but not soggy roots. About 1 inch of water per week from rain and irrigation is a useful starting point, not a fixed prescription; sandy soil, wind, containers, and warm spells dry faster, while heavy soil may stay wet for days. Check moisture an inch or two below the surface and water deeply when that layer begins to dry.
The most important time to avoid drought is around flowering and pod fill. A dry spell at that stage can cause flowers to drop, young pods to stall, or mature pods to become smaller and less tender; large swings between dry soil and heavy watering also stress roots. Water at the soil line in the morning when possible, and use a light mulch after seedlings emerge to slow evaporation and limit weeds without burying the stems.
Keep weeds down while pea plants are small, when weeds compete most strongly for light and water. Hand-pull close to the row and cultivate only shallowly; deep cultivation can sever pea roots and set back a crop that has little extra time to recover. Once vines cover the bed, their shade suppresses some weeds, but keep paths clear for airflow and picking.
Feed for pods, not leaves
Do not automatically apply a high-nitrogen fertilizer. Peas can fix nitrogen when the right bacteria are present, and excess available nitrogen may encourage leafy growth at the expense of flowering; Utah State Extension specifically cautions that extra nitrogen can delay flowering and reduce pod set. Add well-finished compost before planting if the soil needs organic matter, and use a soil-test-based vegetable fertilizer only when there is a demonstrated need.
Nitrogen fixation does not make peas independent of all nutrients. They still need balanced fertility, and phosphorus or potassium deficiencies cannot be corrected by adding more nitrogen; use your soil test or local extension recommendations to choose an amendment. If plants are pale, stunted, or flowering poorly, inspect root color, drainage, moisture, and pests before feeding, because stress symptoms often look like a nutrient problem.
Grow peas in containers
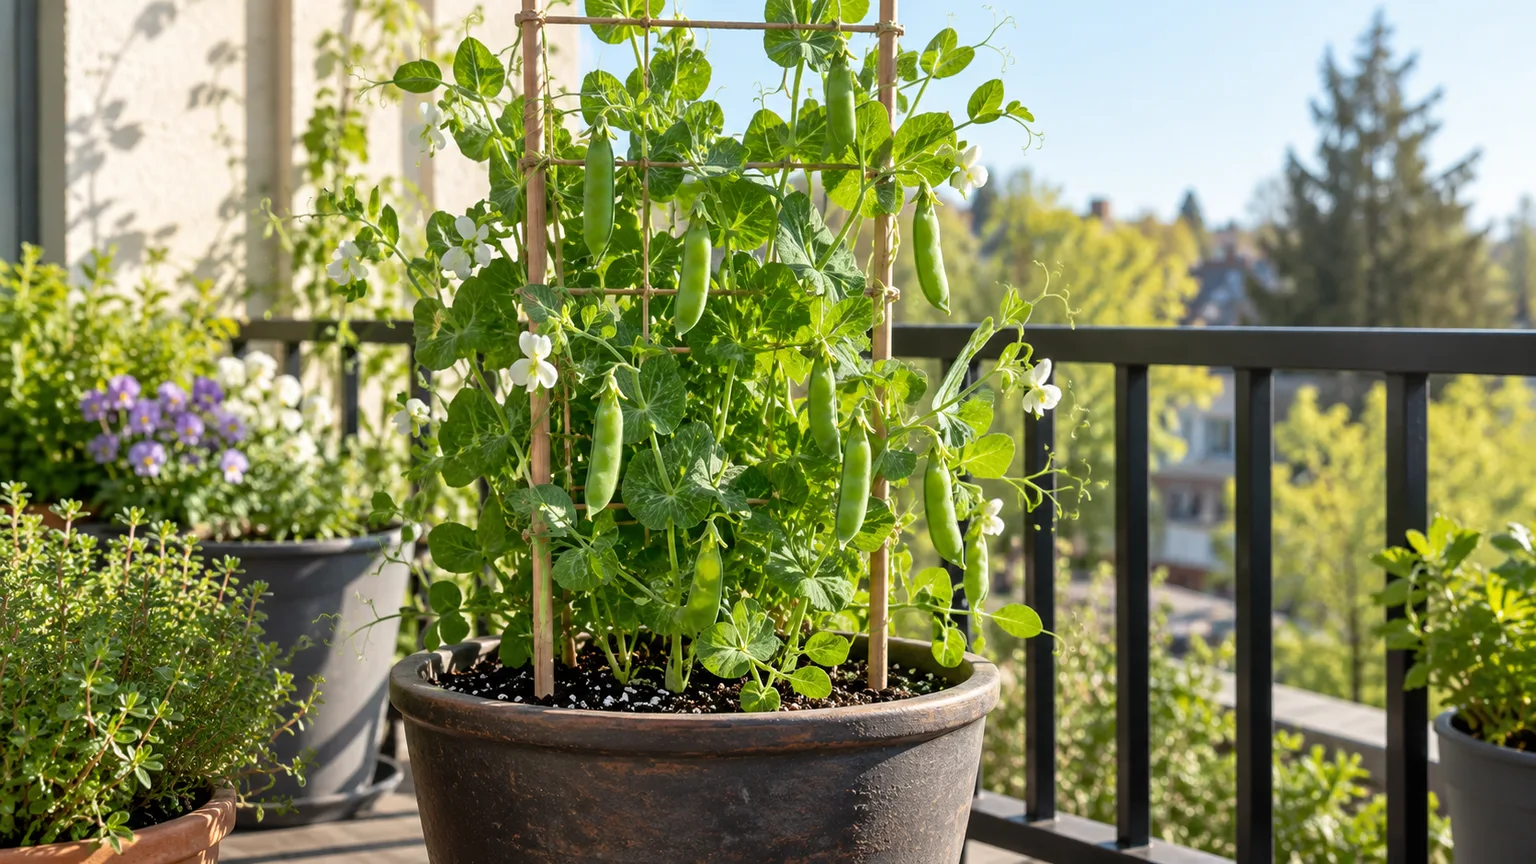
Peas can produce in containers if you choose a compact variety, give the roots enough depth, and monitor moisture closely. Use a pot at least 10–12 inches deep with drainage holes, filled with fresh, well-draining vegetable potting mix; a container roughly 12 inches wide can hold a small planting, but a wider or larger pot gives vines more room and dries more slowly.
Sow seeds directly in the final container about 2 inches apart, and put a small trellis or netting in place before seedlings emerge. Choose a dwarf or container-friendly cultivar if you are growing on a balcony, but do not assume every bush pea is truly support-free; check the packet’s mature height and keep the vines from flopping over the rim into a walking area.
Containers lose water faster than garden beds, especially in sun and wind. Check the mix daily during warm weather and water when the top layer starts to dry, allowing excess to drain freely; do not leave pots standing in a full saucer. Container-grown peas may benefit from a modest, balanced fertilizer if the potting mix is not pre-fertilized, but follow the product label rather than adding extra nitrogen to make the vines look darker green.
The setup is useful for gardeners with poor soil or limited ground space, but it will not extend the crop into hot weather. A shaded patio can reduce stress, yet the plant still needs enough direct light to flower; if the container is too small, expect faster drying, fewer pods, and more tangled growth than a bed-grown row.
Harvest shelling, snap, and snow peas at different stages
Begin checking pods as soon as the first flowers fade. Pea pods do not all reach their best eating stage at the same time, and picking often encourages you to catch the next pods before heat or maturity makes them tough. Pick in the cool part of the day if convenient, and hold the vine with one hand while twisting or snipping the pod with the other to avoid pulling the plant off its support.
| Pea type | Pick when | Leave it longer and you get |
|---|---|---|
| Snow peas | Pods are full-sized but still flat, crisp, and tender; the peas inside have barely begun to swell | Thicker, less tender pods and more visible peas |
| Snap peas | Pods are rounded and glossy, with peas filling the pod but the walls still juicy | Stringier, tougher pods and overlarge peas |
| Shelling peas | Pods are bright green and rounded with plump seeds inside | Larger but starchier peas and pods that may yellow or wrinkle |
Those are sensory cues, not strict day counts. Some seed guides use days after flowering and others use days from sowing; weather, variety, and pod size all change timing. The Urban Farmer guide and Utah State Extension’s harvest advice both emphasize picking by pod type and maturity, which is more reliable than waiting for every variety to match one calendar date.
Check the vines every day or two when production is underway, because a few missed pods can pass their tender stage quickly. Shell peas soon after picking, chill fresh pods promptly, and use them within several days for best quality; peas lose sweetness and tenderness after harvest. If you have more than you can eat, blanch and freeze them rather than leaving ripe pods on the vine.
Diagnose poor germination, yellowing, and missing pods
Start with the conditions that affect several symptoms at once: seed quality, soil temperature, drainage, and moisture. A weak crop is rarely fixed by adding a random fertilizer or spraying the first insect you see; inspect a few plants and the soil around their roots, then address the specific cause.
Check seed, soil moisture, heat, and pests
If seeds do not emerge, dig carefully beside one or two planting spots. A firm, swollen seed may still be germinating; a soft, brown seed has likely rotted in cold, saturated soil; a dry, hard seed may not have received enough moisture; and no seed at all can mean birds or rodents removed it. Resow into drained soil with fresh seed, water gently, and protect the row with a secured cover if animals are the likely cause.
Yellowing and stunting can have more than one cause. If the bed stays wet, improve drainage and stop irrigating until the surface begins to dry; if the soil is dry several inches down, water deeply and add a light mulch after the ground cools. If older leaves yellow while the whole plant declines, inspect the roots for dark or soft tissue and review the rotation history; root disease is more likely in waterlogged soil or a bed that has carried peas and beans repeatedly.
Flowers without pods often point to heat or water stress. Check whether hot weather arrived during bloom, whether the root zone dried out, and whether the plants were overfed with nitrogen; replanting later in the season will only help if the new crop can mature during another cool window. Missing pods can also result from aphids feeding on growing tips and flowers, so inspect new growth and the undersides of leaves for clusters.
Small aphid colonies can often be dislodged with a firm stream of water, repeated as needed while protecting tender stems. Preserve lady beetles, lacewings, and hoverfly larvae that prey on aphids; broad-spectrum insecticides can remove those helpful insects along with pests and should not be the first response. The University of Minnesota Extension’s pea and bean crop-planning guidance describes aphid pressure during flowering and pod development, as well as the value of natural enemies.
White powdery growth on leaves may signal powdery mildew, especially on late-season plants during warm days and cool, dewy nights. Improve spacing and airflow, avoid overhead watering late in the day, choose resistant varieties for fall planting, and remove badly diseased residue after harvest. If plants collapse or yellow despite appropriate watering, a local extension diagnostic service can help distinguish root rot, wilt, nutrient issues, and other causes before you plant peas or beans in that bed again.
Prune lightly, eat shoots, and save seed
Routine pruning is unnecessary for a pea crop. Remove only broken or diseased stems and leaves that are pressed against wet soil; cutting healthy vines does not make the plant branch into a higher-yielding bush, and every leaf is helping support flowers and pods. If stems have become tangled, separate or guide new growth gently instead of pulling apart attached tendrils.
Young pea shoots and tendrils are edible and have a fresh, mild pea flavor. Harvest a small amount from vigorous plants, but remember the tradeoff: every shoot you eat is growth the plant cannot use for pods, so avoid stripping seedlings or repeatedly pinching the tips if a full pod harvest is your priority. Use only leaves from correctly identified, untreated garden peas, and wash them before eating.
You can save seed from healthy, open-pollinated varieties by leaving a few pods on the plant until they turn brown and dry. Shell the seeds, spread them in a dry, airy place for several additional days, and store fully dry seed in a labeled envelope or airtight container in a cool, dark spot; discard moldy or insect-damaged seed. Hybrid varieties may not produce seedlings that match the parent, so use saved seed mainly when the packet identifies the cultivar as open-pollinated or heirloom.
Peas are annuals, so the plants finish after their crop rather than returning from winter as a perennial. After the final picking, remove vines and diseased material, then plan the next pea planting in a different part of the garden to reduce soilborne disease pressure.
Conclusion
To grow peas successfully, match the variety to the way you want to eat it, sow directly when spring soil is workable and drained, and schedule the crop around cool weather rather than a fixed date. Give tall varieties a trellis at planting, maintain steady moisture from flowering through pod fill, and avoid heavy nitrogen applications that favor leaves over pods.
The harvest cue is simple once you distinguish the types: pick snow peas while flat, snap peas when plump but crisp, and shelling peas when their pods are full but still bright. If germination or production falters, check seed condition, drainage, moisture, heat, and aphids before changing the soil or reaching for a spray; those checks solve the most common pea-growing problems while keeping the next planting on track.



