How to Grow Quinoa at Home: Planting to Harvest
Learn how to grow quinoa at home: choose seed, time planting for cool nights, manage water and weeds, harvest dry panicles, rinse saponins, and store seed.
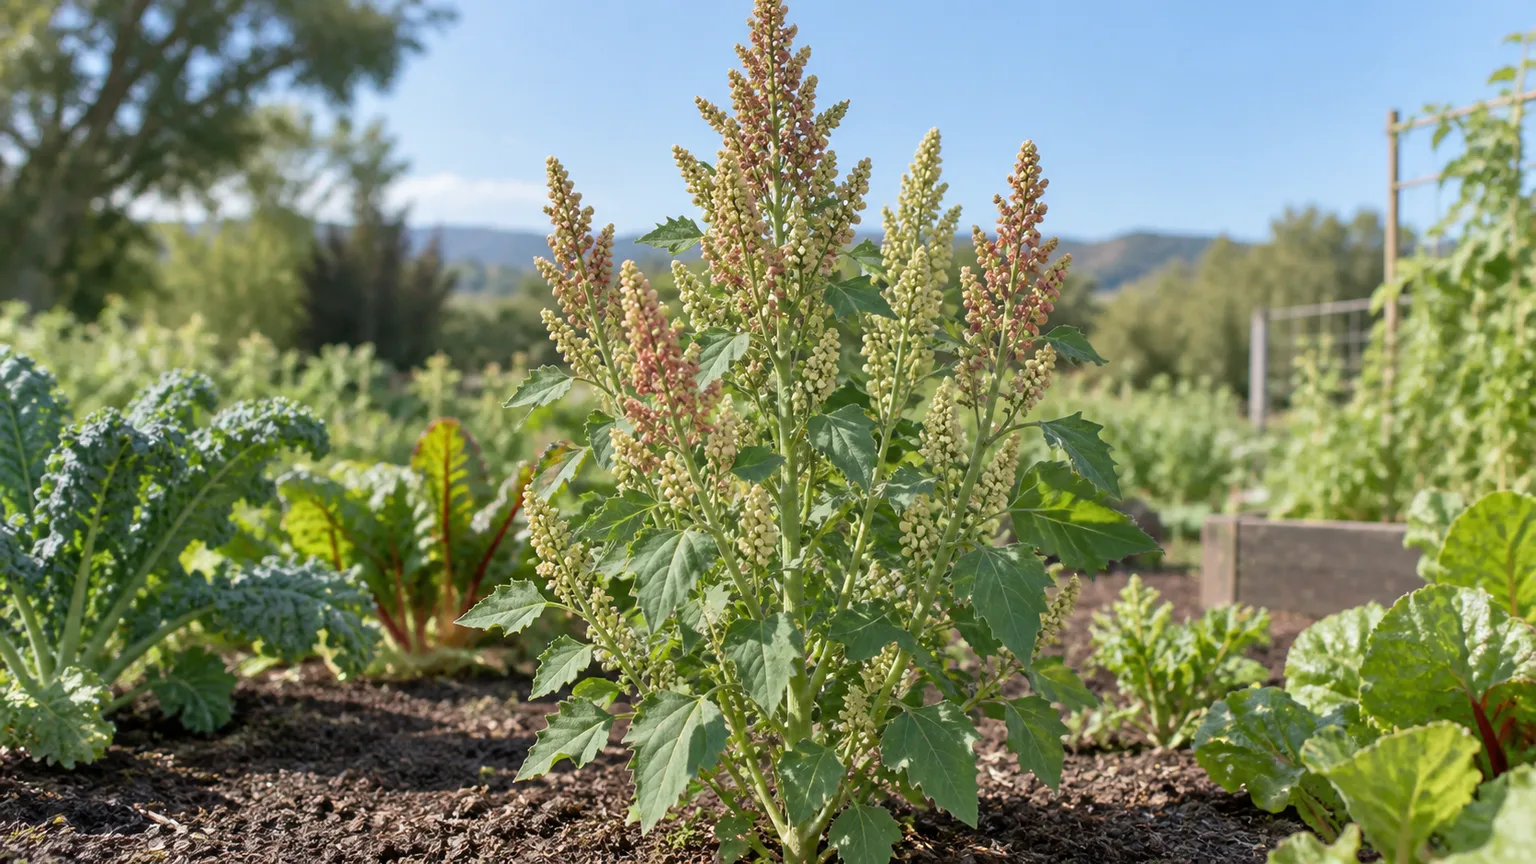
Quinoa is a beautiful, upright annual that can give you edible greens and a small harvest of seed, but it is not a universal warm-weather crop. The deciding factor is whether your garden can provide cool nights while quinoa flowers and fills its seed heads; a plant can look vigorous and still yield poorly when heat arrives at the wrong time.
This guide takes you from a climate check to a clean, dry harvest. It also sets realistic expectations: a few plants are a rewarding experiment and ornamental edible crop, not a reliable way to replace the bag of quinoa in your pantry.
Quinoa at a Glance
Quinoa (Chenopodium quinoa) is a broadleaf pseudocereal in the Amaranthaceae family, related to spinach, beets, lamb’s quarters, and amaranth. The seeds are used like a grain, but botanically they are seeds from a flowering plant. Mature plants commonly reach about 3 to 7 feet, and their branching panicles can be green, cream, gold, red, or purple depending on the cultivar.
The crop has a useful split personality. Young leaves can be cooked like a tender green, while the mature plant produces the seed you likely want to harvest. The Agricultural Marketing Resource Center describes quinoa as widely adaptable and drought tolerant, but also emphasizes that high temperatures during flowering can make pollen sterile. That is why “warm-season crop” does not mean “plant it after the weather gets hot.” Quinoa’s Andean history and cultural importance are summarized by the Food and Agriculture Organization of the United Nations, which also explains why this crop is grown well beyond its original range.
Decide Whether Your Climate Can Finish a Crop
Start with your weather, not your seed packet. Quinoa often needs roughly 90 to 120 days from planting to harvest, although cultivar, latitude, elevation, and heat can move that range. Count backward from the period when your garden normally turns hot, humid, or rainy, and ask whether flowering and seed filling will happen before the stressful stretch.
Cool-summer areas, high elevations, northern gardens, and places with dry late summers are the easiest fits. The Pacific Northwest, northern Midwest, New England, and inland mountain areas are promising examples, but a favorable microclimate matters more than a state line. A coastal garden with cool nights may outperform a hotter inland garden in the same broad zone.
Frost dates only tell you when the crop can begin. The more important question is whether daytime temperatures will stay below roughly 90°F during flowering. AGMRC gives a similar production rule and notes that quinoa germinates best in soil around 65–75°F, while seedlings can emerge near 60°F; use those figures as planning cues rather than guarantees for every cultivar.
If your nights are already warm when you sow, the plant may grow leaves but fail to set a worthwhile amount of seed. In a hot region, try the earliest safe spring planting, choose an early or day-length-neutral cultivar if available, and treat the first season as a test. If your spring is cool but summer arrives abruptly, sow a small trial block in stages so you can compare which planting reaches flowering at the best time.
Choose Seed for Your Region and Goal
Buy seed sold for garden growing when possible. Look for a cultivar described as early, regionally adapted, day-length neutral, or suited to your latitude. Colored panicles can make the plant a striking edible border, while an early, compact type may be the better choice if your season is short or windy.
Do not choose only by seed color. Ask whether the variety matures before your typical heat or wet season, whether the seller provides growing-region information, and whether you want a food harvest, edible leaves, saved seed, or ornamental panicles. A variety that is spectacular but late can be a poor choice in a short summer.
Can you plant grocery-store quinoa? Sometimes, but it is a weak experiment compared with dedicated seed. Commercial quinoa may have been polished, heat-treated, or otherwise processed, and the label rarely tells you the cultivar, maturity, or day-length response. A packet from a seed supplier gives you better odds and makes the result easier to repeat.
If you try pantry seed, sow it as a small side-by-side test rather than your whole crop. Mark the row, expect uneven germination, and do not assume that a successful sprout will finish before your hottest weather. Keep the packet or original label from garden seed so you can record what worked next season.
Prepare a Bed That Drains
Choose a site with full sun and good air movement. Six to eight hours of direct light supports sturdy growth and seed production, but airflow is just as valuable late in the season when dense panicles meet dew or rain. Avoid a low pocket where water sits after storms and avoid a bed beside a frequently irrigated lawn.
Quinoa prefers a sandy loam or other loose, well-drained soil with moderate fertility. A slightly acidic to alkaline range is tolerated; AGMRC lists roughly pH 6.0 to 8.5, with the caveat that a garden soil test is more useful than chasing a number blindly. If clay stays wet, use a raised bed or improve structure with finished compost before planting rather than trying to turn heavy clay into sand.
Work the top 4 to 6 inches into a fine, crumbly seedbed. Remove perennial weeds before sowing because quinoa seedlings are small and slow for their first few weeks. Add a modest layer of finished compost; rich soil does not mean a heavy dose of nitrogen.
Plant Quinoa by Calendar and Soil Temperature
For beginners, direct sow after the average last spring frost when the soil is workable and at least about 60°F. In a cool, reliable spring, some growers sow a week or two earlier because young plants can tolerate a light frost, but that approach carries more risk if the soil stays cold and wet. The safer rule is to protect your seed from a hard freeze, then sow while you still have enough cool growing weather left for the crop to mature.
Rows about 18 to 30 inches apart leave room for weeding and airflow. The plants will eventually need roughly 10 to 18 inches within the row, depending on cultivar and whether you value large seed heads or simply want a dense trial. Wider spacing is easier to harvest and dries faster after rain.
Direct-Sowing Method
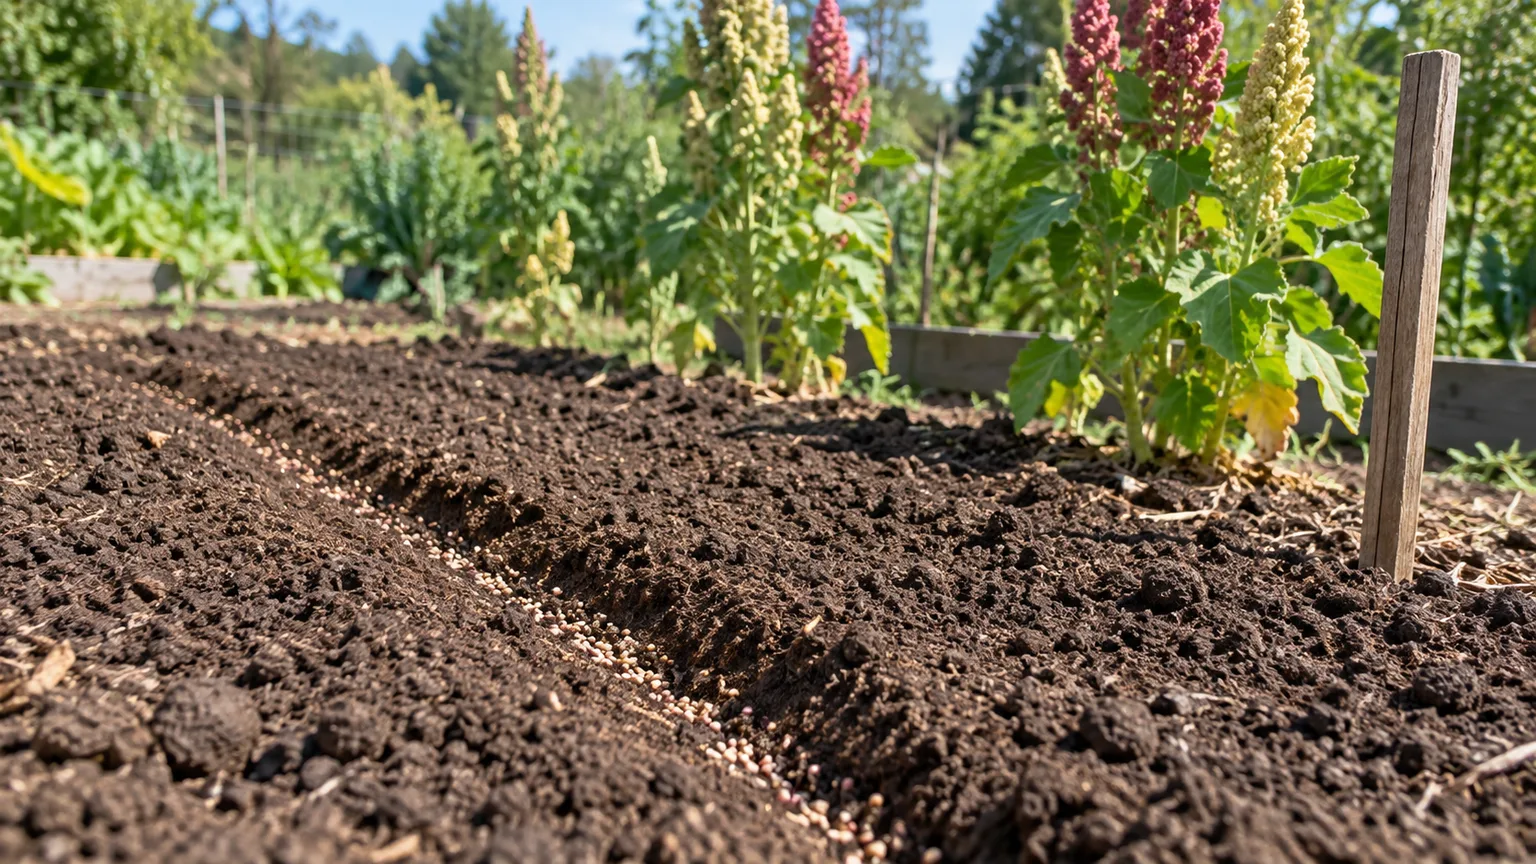
- Make a shallow furrow about 1/4 inch deep. Quinoa seeds are small; deep planting is a common reason a row appears empty.
- Sow thinly, aiming for about 1 inch between seeds. It is fine if the spacing is imperfect because you will thin the row later.
- Cover with a light dusting of fine soil and press gently for seed-to-soil contact.
- Water with a fine spray so the seeds do not wash into a clump. Keep the surface evenly moist until emergence, but never saturated.
- Mark the row. Quinoa can resemble lamb’s quarters as a young seedling, and an unmarked row is easy to weed out by accident.
Under favorable conditions, seedlings can appear in about 4 to 10 days. This shallow, moist direct-sowing approach is also consistent with the GrowVeg quinoa crop guide. If nothing emerges after that window, check for crusted soil, seed buried too deeply, rotting from excess water, or a night-temperature problem before reseeding the entire bed.
Thin, Weed, and Support Before Plants Get Top-Heavy
Thin when seedlings are about 3 to 4 inches tall or have several true leaves. Remove the weakest plants until the remaining plants are about 10 to 12 inches apart for a typical home row. The thinnings are usable as young greens if they are clean and have not been treated with anything not labeled for edible crops.
Early weed control is more important than constant later fussing. Hand-weed carefully during the first 4 to 6 weeks, then mulch between rows with a thin layer of clean straw or leaves. Keep mulch off the stems so the crown stays dry. Once quinoa reaches about a foot, its canopy usually shades many summer weeds, but do not let vigorous weeds compete through the establishment phase.
Inspect the plant after a windy rain. Tall varieties can become top-heavy when the panicles fill, especially in fertile soil. Place a stake beside the plant while it is still small and use soft ties loosely; adding support after the stem has bent often breaks branches.
Watering and Feeding Through the Season
Keep the seedbed evenly moist until seedlings are established. After that, water deeply when the soil has begun to dry several inches down rather than giving a shallow daily sprinkle. Mature quinoa can tolerate dry conditions, but drought during rapid growth can shorten the plant and reduce the size of its seed heads.
The crop’s water needs change as it matures. Give the most reliable moisture during germination and early vegetative growth, then be more restrained once flowering and seed filling begin. Avoid overhead watering when panicles are forming, especially late in the day; drip or a low stream at the soil line keeps foliage and developing seed drier.
Compost applied before planting is often enough. If a soil test or genuinely pale, stunted growth shows a need, use a balanced, modest side-dressing early in the season. High-nitrogen feeding can produce an impressive leafy plant that is less interested in finishing seed.
Slow growth in a wet bed, yellowing lower leaves, a soft stem base, or a sour-smelling root zone points first to drainage and watering frequency—not a need for more fertilizer. Let the surface dry slightly, correct the runoff path, and check whether the roots are staying oxygenated.
Very tall, floppy plants with lush leaves and sparse panicles are more consistent with excessive fertility, crowding, low light, or heat than with hunger. Do not respond by adding more feed. Thin crowded plants where possible, stake them, and review whether flowering coincided with a hot spell.
Manage Heat, Wind, and Rain
Heat at flowering is the hardest problem to repair because you cannot reverse failed pollination with extra water. Shade cloth may reduce afternoon stress in a small trial, but it will not turn a hot, humid site into a cool quinoa climate. In the next planting, move the sowing date earlier or select a faster, locally adapted seed source.
Wind and rain create different risks. Stake tall plants before storms, but leave enough space for air movement. When mature panicles are wet, do not automatically wait for a perfect dry week: quinoa seed can sprout on the plant after rain or prolonged humidity. A 2024 study in Plants identified pre-harvest sprouting as a yield and quality problem triggered by wet conditions and found that susceptibility differs among genotypes; that is a strong reason to inspect mature panicles daily and harvest a dry crop promptly.
Pollination, Seed Purity, and Crop Neighbors
Quinoa is primarily self-pollinating, so a single plant can produce seed. Several plants are better for learning and yield, though, and a block gives you more chances to compare maturity, height, and heat response.
If you plan to save seed, separate different quinoa cultivars and remove flowering amaranth or obvious lamb’s quarters near the seed crop. Cross-pollination is not guaranteed, but it is possible among related plants and can make next year’s result less predictable. Label each variety at sowing and save seed only from plants that were early, healthy, upright, and productive.
Common Pests and Disease Decisions
Quinoa is not pest-free, but a small home planting can usually be managed by observation and physical control. Flea beetles leave small holes in young leaves; aphids cluster on tender growth; leaf miners make tunnels; caterpillars chew leaves; and lygus-type bugs can damage developing seed. Birds and rodents may become the biggest problem once the panicles begin to dry.
Start with the least disruptive response that fits the damage. A strong water spray can dislodge aphids, a floating row cover can protect young plants from flea beetles, and hand-picking works well for a few caterpillars. Use netting when birds are taking seed, but install it so panicles cannot press against the mesh and so pollinators are not trapped during flowering.
Wet foliage, crowded plants, and poor air circulation raise disease risk. Downy mildew can appear as pale or gray-purple areas, often more noticeable on leaf undersides, while stem or crown rot is associated with excess moisture and stress. Remove badly collapsing plants, improve spacing and drainage, and avoid saving seed from diseased plants.
When to Use a Cover and When to Pull a Plant
Cover a row early when insects are present and the plants do not need pollinator access. Remove the cover once flowering begins unless you are certain the crop can self-pollinate adequately in your conditions, then use bird netting only after seed begins to mature.
Pull a plant when the stem base is rotting, the plant is spreading disease through the row, or a virus-like pattern is paired with severe stunting. Do not spray a random insecticide on a crop you plan to eat. AGMRC notes that pesticide registration can be a constraint in quinoa production, so any product must be legal for quinoa in your location and used exactly according to its label.
Harvest at Hard-Dough Stage
Do not harvest by calendar alone. Quinoa is ready when most leaves have yellowed and fallen, the panicles are dry and papery, and the seeds resist a fingernail rather than denting easily. Mature seed heads often shift from green to the cultivar’s final color before drying further.
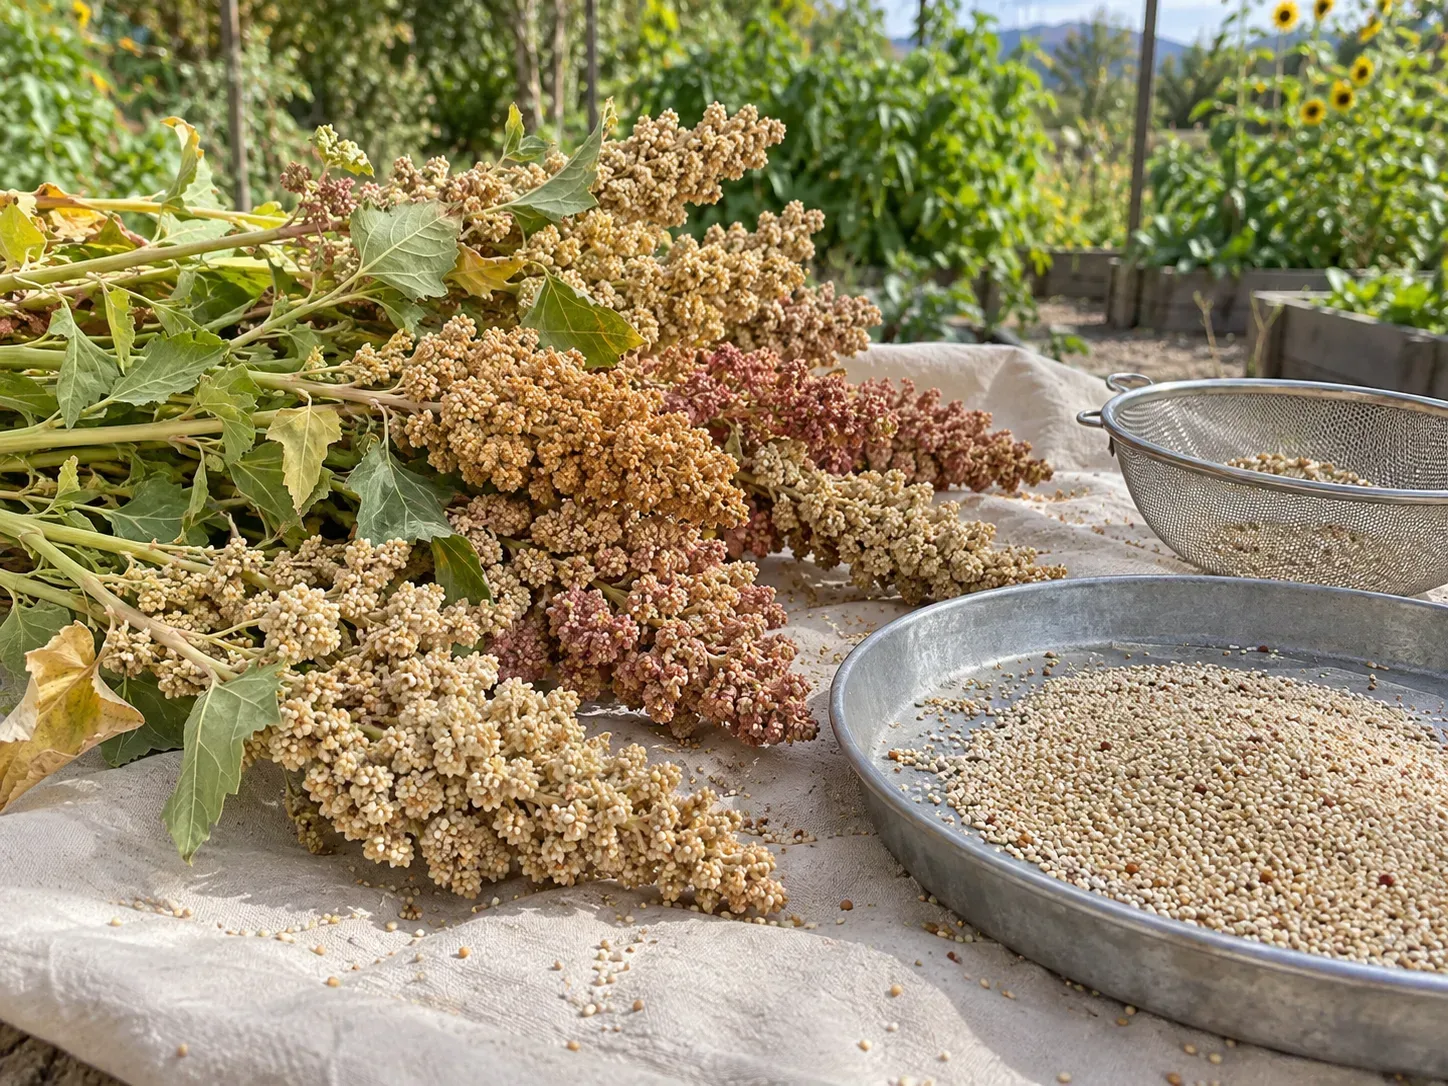
Weather decides the final moment. Harvest when the panicles are dry if possible, ideally before a forecast of sustained rain. If the upper panicle is dry but side branches are still green, cut the mature top first and give the lower branches more time; this staged approach reduces both immature seed and rain exposure.
For a small garden, cut stems below the panicles with clean pruners and place them on a tarp or in a well-ventilated, dry shelter. Leave enough stem to handle the heads without crushing them. The small-batch cut, dry, thresh, and winnow sequence is also described by Gardening Know How’s quinoa harvest guide. If you must bring wet material indoors, spread it in a single layer and provide moving air; a heap of damp panicles can heat and mold.
Thresh and Winnow Small Batches
Threshing separates the seed from the dried flower structure. Once the heads are crisp, rub them over a clean tarp or inside a large paper yard-waste bag. Work gently at first so you learn how much pressure releases seed without pulverizing the panicle into extra chaff.
Winnowing separates heavier seed from lighter debris. Pour the mixture slowly between two buckets outdoors in a gentle breeze, or use a fan indoors with the airflow low enough that seeds fall back while chaff drifts away. Repeat several times, then pick out stems and damaged material by hand.
Keep harvested lots separate until you know which plants were mature and healthy. Mixing an early, dry lot with a damp late lot makes drying and storage harder and hides the source of a mold problem.
Remove Saponins and Dry Seed Safely
Fresh quinoa seed carries a bitter, soapy coating of saponins. The coating helps deter birds and insects, but it should be removed before you cook the seed. The AGMRC processing overview explains that commercial processing may polish or wash the coating away; at home, washing is the practical option.
Put a small batch in a fine strainer or bowl, cover with cool water, and rub the seed vigorously. Pour off the cloudy, foamy water and repeat until the rinse is much less soapy. A fine strainer matters because quinoa seed is small enough to disappear down a standard kitchen colander.
Spread the washed seed in a thin layer on clean trays or screens. Dry it completely in a warm, well-ventilated, sunless place, stirring occasionally; a dehydrator on a low setting can help in humid weather. Do not seal seed that feels soft, bends, or clumps. Moisture left inside a sealed container is a faster route to mold than a slightly longer drying period.
Store Seed and Save Your Best Seed
Once dry, store quinoa in an airtight container in a cool, dark cupboard. Label the cultivar, harvest date, and garden conditions. Check the container after a few days for condensation or clumping; if you see either, spread the seed out again and finish drying before resealing.
For seed saving, choose the earliest plants that filled well without lodging, disease, or insect damage. Quinoa is largely self-pollinating, but nearby related plants can introduce crosses, so saved seed is most reliable when the variety was isolated and clearly labeled. Keep a backup sample in a second sealed container rather than risking your entire selection to one storage failure.
Expected Yield: Plan the Bed Before Planting
A single home-grown quinoa plant may produce roughly 1 to 3 ounces of seed under favorable conditions, but the range is wide. That planning range is echoed in the Ancient Grains Alliance home-growing guide. The figure depends on cultivar, plant spacing, pollination weather, fertility, rain at maturity, and how much seed you lose during threshing and winnowing.
Use that range to plan honestly. Ten productive plants might give you less than two pounds or around two pounds, not a pantry year’s supply. A larger bed can make the harvest more noticeable, but it also increases the labor of weeding, staking, drying, washing, and separating chaff.
The best reasons to grow quinoa are fresh experimentation, unusual colored seed heads, edible young leaves, and the satisfaction of completing a crop that is rarely grown in home gardens. If your only goal is saving money, compare the likely yield with the value of your garden space and time before planting a large block.
Quinoa vs. Amaranth: Which Fits Your Garden?
Quinoa and amaranth are related pseudocereals with edible seeds and colorful flower structures, so they are easy to confuse at a glance. Quinoa generally has the stronger preference for cool conditions during flowering and is especially vulnerable to poor seed set when nights and days stay hot. Amaranth usually handles heat better and can be a more dependable choice in a long, warm season.
Choose quinoa when you have cool nights, a dry finish to summer, and a reason to grow a relatively small seed crop. Choose amaranth when heat tolerance, ornamental foliage, or a more forgiving summer crop matters more. Either way, keep the labels clear if you are saving seed because related crops can complicate what grows in the next generation.
Conclusion
Successful quinoa growing is mostly a timing exercise. Give the seedlings a clean, moist start, thin them before competition builds, feed modestly, and protect the crop from the combination that causes the most trouble: hot flowering weather followed by wet, mature panicles.
Start with a small, clearly marked row and record the sowing date, first flowering, heat spells, harvest date, and final dry weight. That simple record will tell you more than a generic zone label: whether your garden can finish quinoa, which cultivar fits, and whether the crop deserves a larger bed next season.



