How to Make a DIY Wasp Trap
Build a DIY wasp trap from a soda bottle, match bait to the season, place it safely away from patios, and avoid catching honeybees.
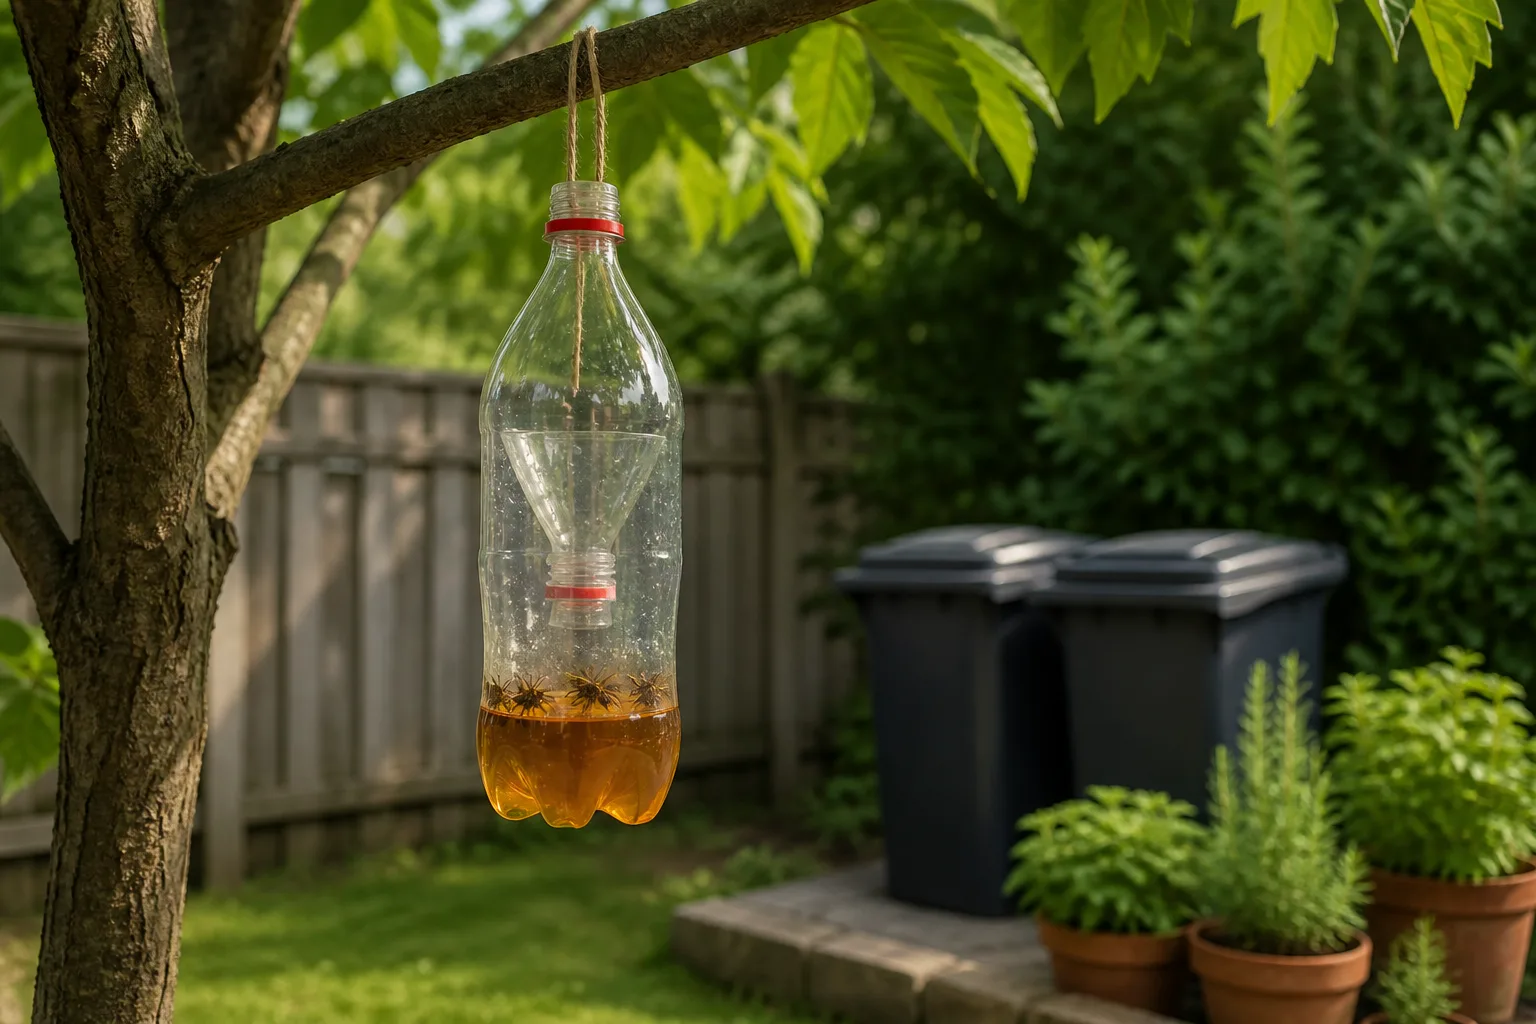
A DIY wasp trap made from a soda bottle costs almost nothing, takes about ten minutes, and can pull dozens of scavenging yellowjackets away from your patio when bait and placement match the season. The build is simple. The decisions around it are not—and that is where most homemade traps fail before a single wasp lands.
This guide walks through the standard inverted-funnel bottle trap, the bait switch that colony biology demands across the year, and the placement rules that keep traps from drawing wasps toward the people you are trying to protect. It also covers what these traps cannot do, because a full bottle is not the same thing as a solved nest problem.
What a Homemade Wasp Trap Actually Does (and Does Not Do)
Homemade traps target foraging yellowjackets—the bold, banded wasps that hover over grills, dive into open soda cans, and nest in ground burrows or wall voids. According to UC IPM Pest Notes on yellowjackets, trapping can reduce localized foraging around patios and picnic areas, especially when traps sit on the property perimeter rather than beside food. It does not eliminate an established colony, and it is not the primary tool for other social wasp groups.
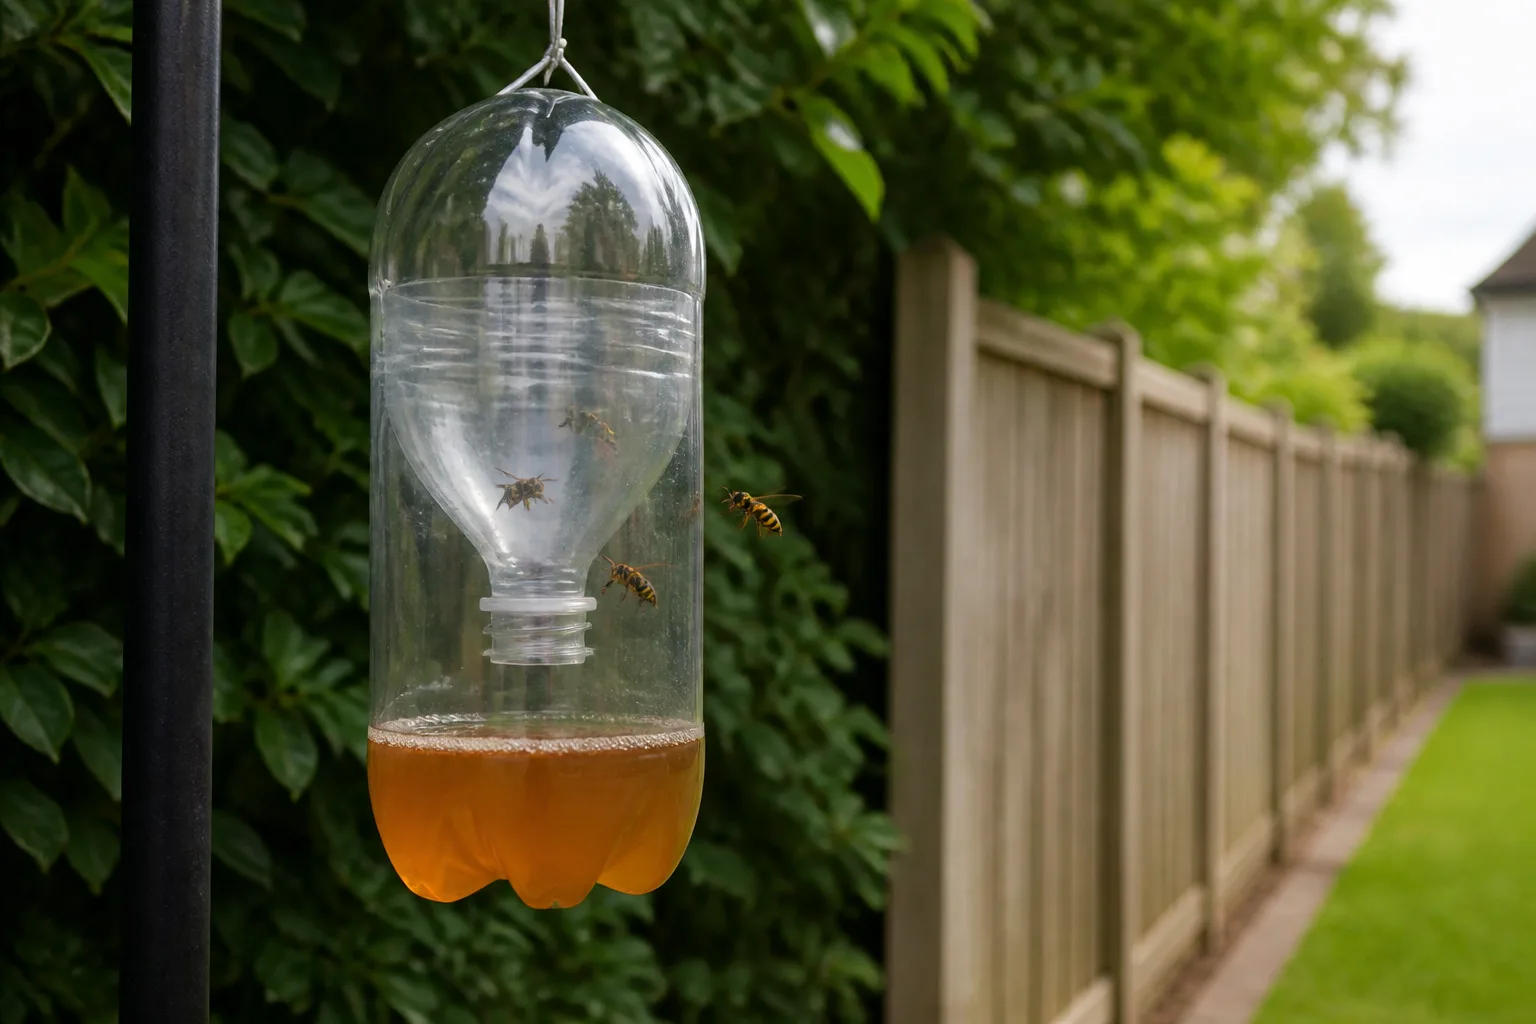
The physics are straightforward. A wasp crawls down through a narrow downward-facing opening to reach bait. When it tries to leave, its instinct is to fly upward toward light—not back down through the small hole. Add a few drops of dish soap to liquid bait and the surface tension breaks, so wasps that fall in drown instead of skating across the top. Smear a thin film of cooking oil inside the funnel and fewer wasps get enough grip to walk back out.
Yellowjackets vs Paper Wasps and Hornets
Before you cut a bottle, identify what is bothering you. Yellowjackets (Vespula and Dolichovespula) scavenge protein and sugar and respond well to baited traps. Paper wasps (Polistes) hunt live insects for their larvae and sip nectar; they rarely enter bait traps in meaningful numbers. If your problem is the open umbrella-shaped nest under the eave, trapping will not fix it—you need nest-focused methods such as those in our how to get rid of a wasp nest guide.
Hornets are a type of large wasp; the same seasonal bait logic applies to scavenging species, but aggressive aerial nests still require direct treatment or professional help—not a bottle on the fence line. If you are unsure what you are seeing, compare behavior: scavengers at trash and drinks are trap candidates; hunters carrying caterpillars to a visible comb are not.
Materials and Tools You Need
Gather these before you start:
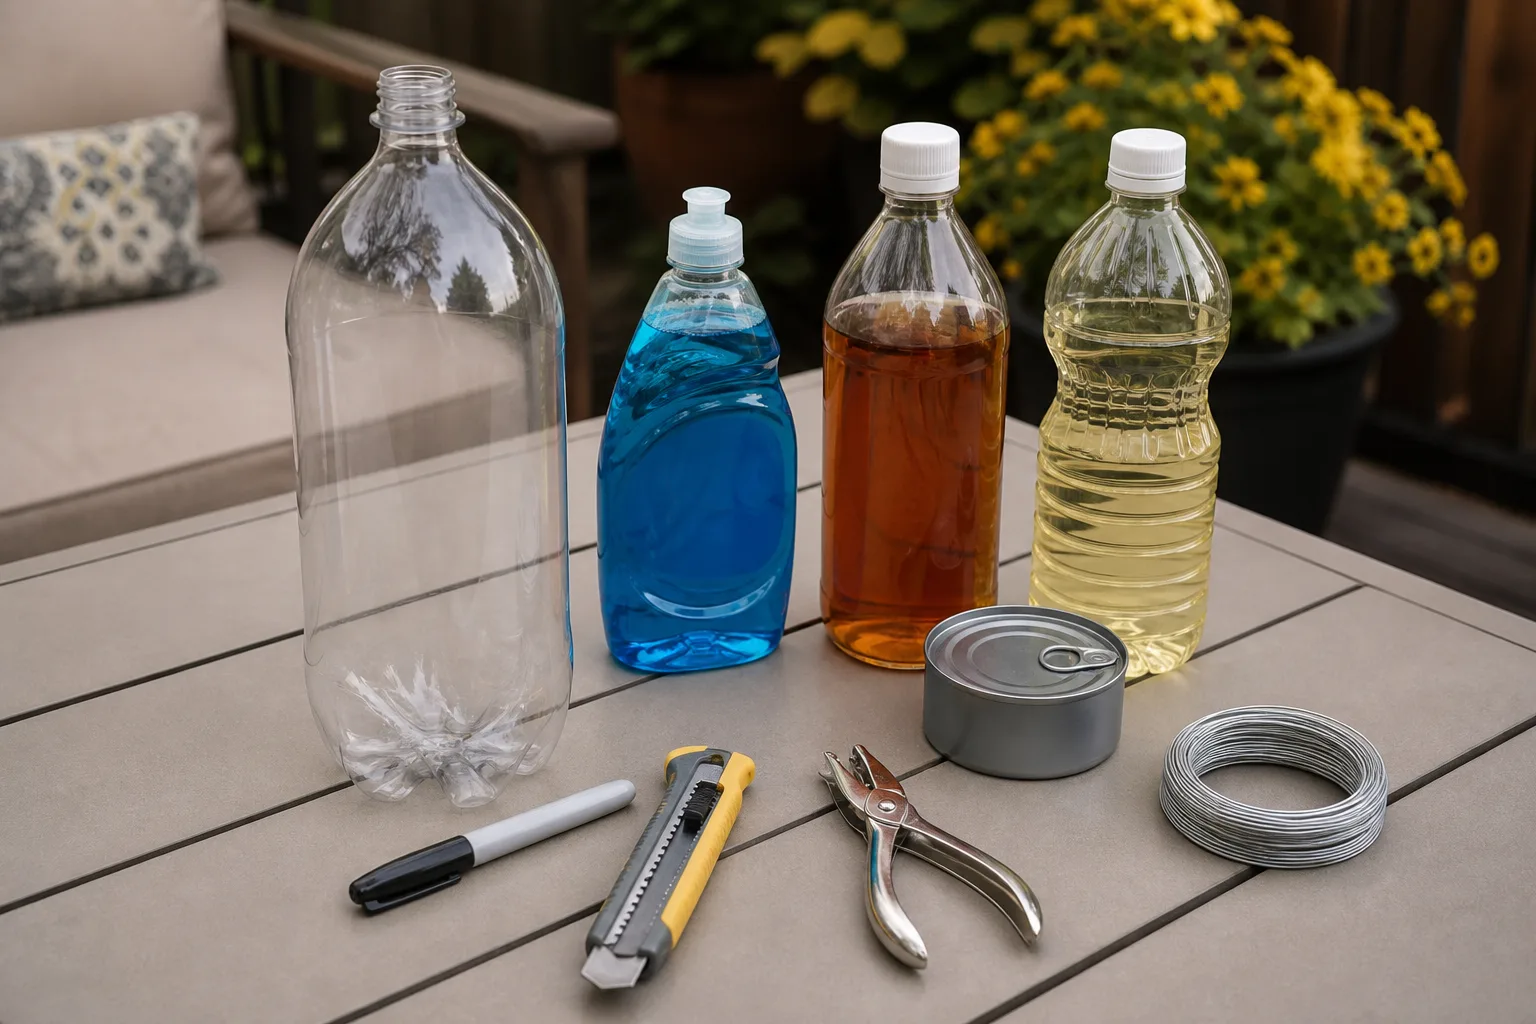
- Empty two-liter soda bottle (a straight-sided bottle is easier to cut cleanly)
- Permanent marker and optional rubber band or string as a cutting guide
- Sharp utility knife, box cutter, or sturdy scissors
- Dish soap (a half teaspoon per batch of liquid bait)
- Season-appropriate bait (protein or sweet—details below)
- Apple cider vinegar for sweet baits if honeybees are active nearby
- Cooking oil (a tablespoon to coat the inside of the funnel)
- Hole punch or awl, plus wire or sturdy string for hanging
- Tape or staples to secure the funnel rim (optional but helpful on windy sites)
Wear long sleeves and closed shoes when you hang or service traps, even if you are not allergic. Wasps trapped alive in a dry funnel can still sting.
Choosing the Right Bottle or Container
The classic two-liter soda bottle remains the best balance of funnel depth, visibility, and cost. Smaller bottles work in a pinch but hold less bait and fill with corpses faster. Clear plastic helps trapped wasps orient to the walls instead of the exit hole; keep the upper section transparent.
For early-summer protein season, consider a five-gallon bucket variation: fill the bucket two-thirds with soapy water and suspend a chunk of raw meat an inch or two above the surface on a string. Yellowjackets cut off a piece, become overweight on takeoff, and drop into the water—no funnel required. UC IPM describes this meat-over-water approach as especially useful for queen trapping in late winter through early spring and for reducing foragers later in the season when placed away from seating areas.
Step-by-Step: Build the Soda-Bottle Trap
Total active time is about ten minutes once you have materials on hand. Work on a stable surface and cut away from your body.
Mark and Cut the Bottle Neck
Rinse the bottle and remove the label if you want a cleaner look. Use a marker to draw a line just below the shoulder, where the curved neck meets the straight cylinder—roughly one-third down from the top. A rubber band or string tied level around the bottle keeps the line straight.
Cut on that line with a utility knife or scissors. Set the top section aside and discard the cap; you want an open funnel, not a sealed chamber. Keep the cut edge as even as you can so the funnel sits flush later.
Add Bait and Assemble the Funnel
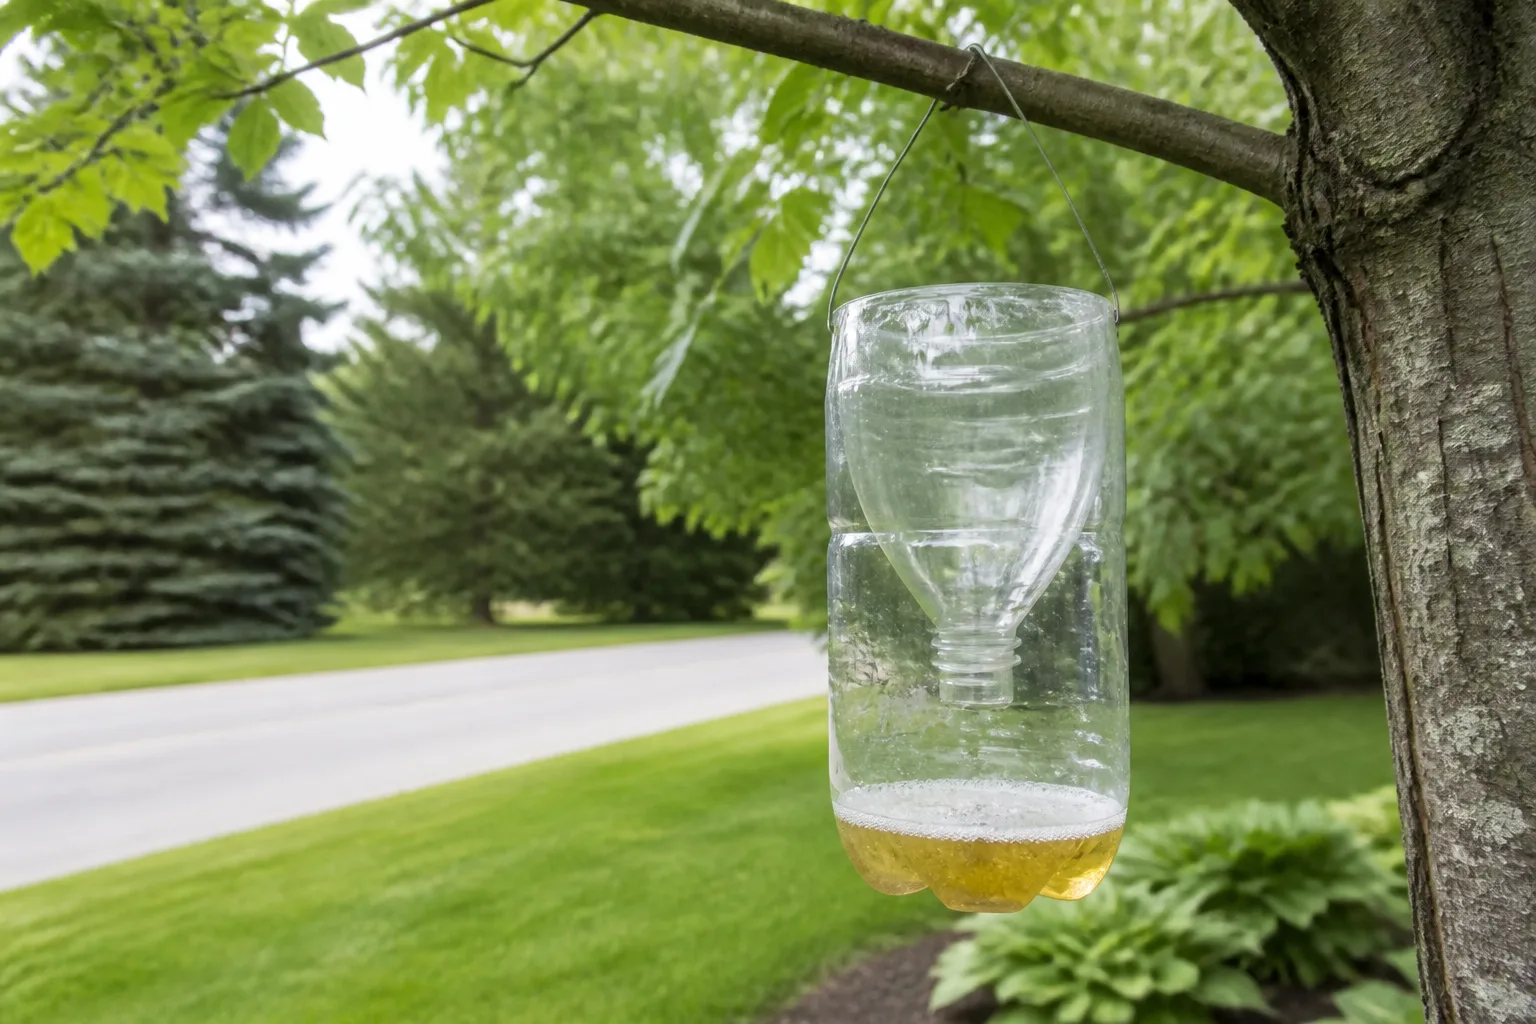
Pour bait into the bottom section first—about 1 to 2 inches deep, never so full that liquid touches the funnel tip. Leave at least one inch of air gap between the funnel opening and the liquid surface. If bait touches the opening, wasps feed at the rim and fly out.
Smear a thin film of cooking oil on the inside of the inverted top section. Invert the top into the base so the neck points downward like a funnel. Tape or staple the rim in two or three spots if wind shifts it. The funnel should sit stable without wobbling.
Hang the Trap Safely
Punch two holes through the double layer of plastic near the top rim and thread wire or string for a handle. Hang the trap four to six feet off the ground—high enough to stay out of reach of curious pets, low enough to service without a ladder.
Do not set the trap on the picnic table. Traps are attractants. The goal is to intercept wasps on the way in, not invite them to dinner. More on placement below.
Seasonal Bait Guide: Protein, Sugar, and Transition Months
Yellowjacket colonies change what workers hunt across the season. UC IPM notes that from spring through midsummer, larvae need protein and workers forage mainly for insects and some sugars; by late summer, colonies demand large amounts of sugar to maintain the queen and workers, and foragers aggressively seek sweets. Match your bait to that shift or your trap stays empty while wasps raid your grill.
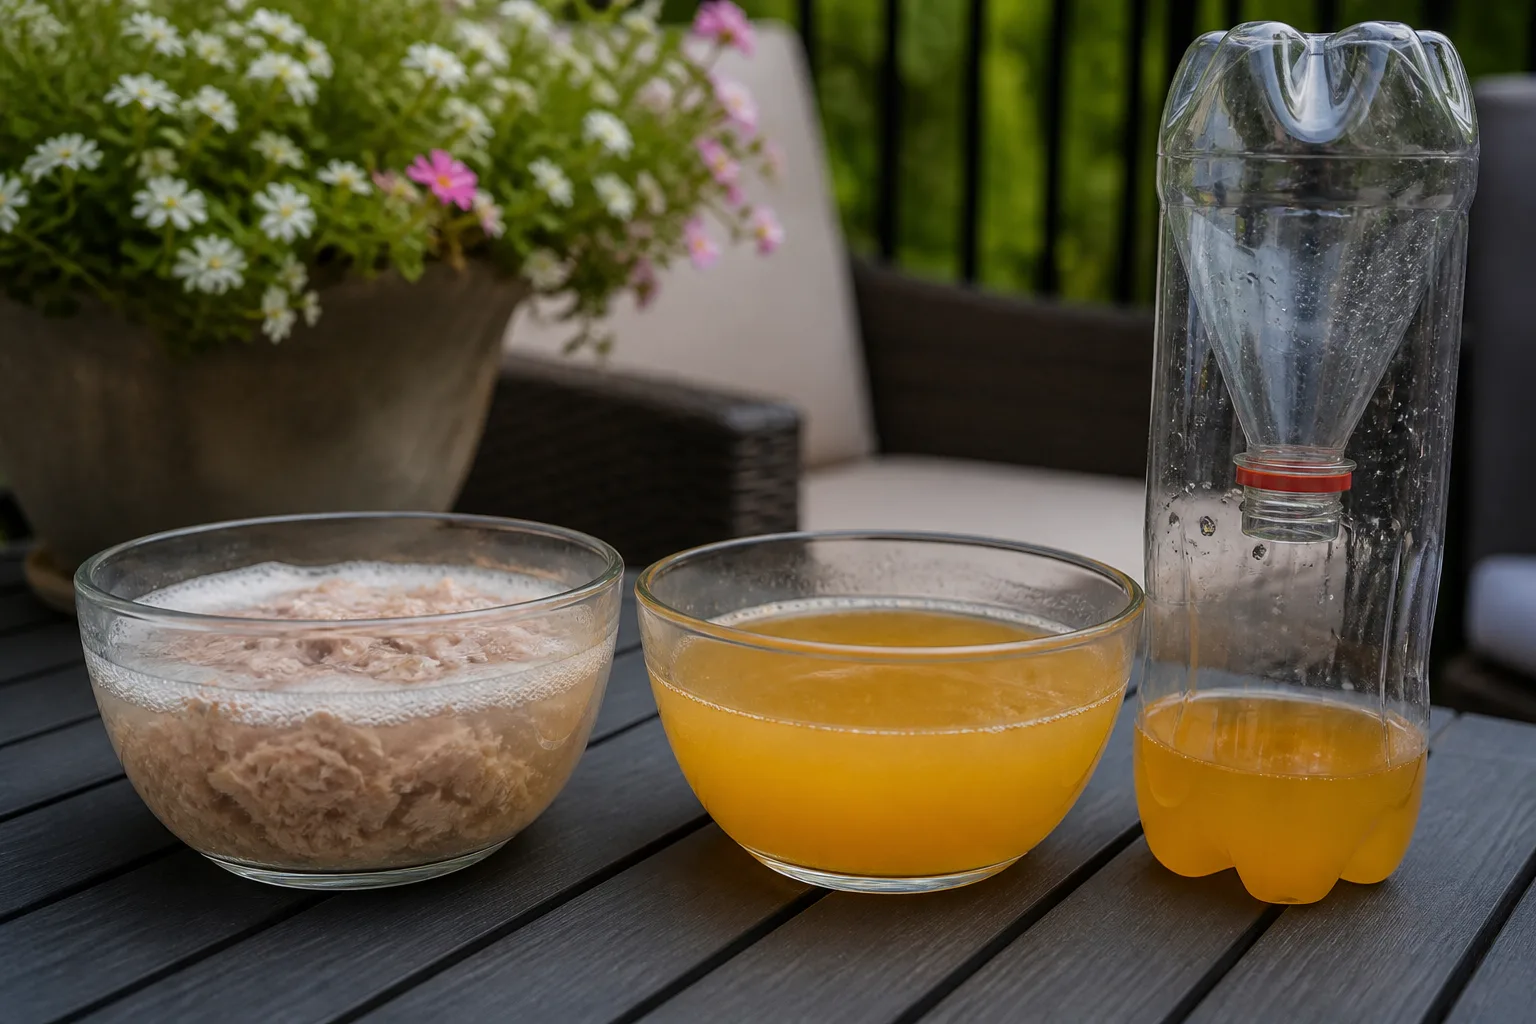
Colorado State University Extension emphasizes early-season queen trapping—each founding queen caught in spring is a colony that never builds. Realistic expectations matter: many queens fail naturally, but spring traps are cheap insurance before worker numbers explode.
Spring and Early Summer Protein Baits
From roughly April through June, use protein:
- A few ounces of canned tuna in oil, cat food, raw chicken, or lunch meat
- 2 cups water plus ½ teaspoon dish soap
- Mash protein into the water so oils spread on the surface
Refresh protein bait every two to three days in heat—yellowjackets are not attracted to rotting meat, as UC IPM notes for commercial meat-augmented lure traps. Replace it while it still smells fresh.
Late Summer and Fall Sweet Baits
From August through October, switch to sugar:
- 1 cup apple juice or fruit soda plus ¼ cup sugar
- ¼ cup apple cider vinegar (bee deterrent—see below)
- ½ teaspoon dish soap
- Overripe fruit mashed into the mix, or flat beer with a spoonful of sugar, also work well
Sweet bait ferments past usefulness in three to five hot days. Rebait weekly at minimum during peak wasp season.
Vinegar, Dish Soap, and Why Never to Use Honey
Never use honey as bait. Honey attracts honeybees, which are hairy, slower-moving pollinators you do not want drowning in your yard. Extension guidance consistently warns against honey in wasp traps for that reason.
For sweet baits during bloom, add roughly ¼ cup apple cider vinegar per cup of sweet liquid. Vinegar makes the mix less appealing to honeybees while yellowjackets still investigate. If bees continue to enter, move the trap farther from flowering plants and favor protein bait whenever it still catches in your area—bees ignore meat baits entirely.
Dish soap is not optional in liquid traps. It breaks surface tension so wasps cannot stand on the water. A few drops per batch is enough.
Where to Place Traps So They Work Instead of Backfiring
Placement matters more than bottle brand. Follow these rules:
- Perimeter, not patio: Hang traps at least 20 feet from seating, doors, grills, and play areas. UC IPM recommends placing lure traps along the property edge, between your protected zone and native landscapes where wasps nest. Yellowjackets commonly forage within about a quarter mile, so intercept them before they reach your table.
- Downwind of food when possible: Scent travels. Position traps so prevailing breeze carries bait odor away from eating areas, not across them.
- Morning sun, afternoon shade: Warmth spreads scent in the morning; full afternoon sun spoils bait quickly and evaporates liquid.
- Two to four traps for a typical yard: One bottle is a token effort on a busy suburban lot. Ring the property with traps rather than clustering them.
- Remove competing food first: Open trash cans, fallen fruit, dirty grills, and uncovered pet food out-bait any bottle. Pair traps with the cleanup steps in our what attracts wasps and how to keep wasps away guides.
If you are trying to protect a picnic, set a trap short distance away so wasps encounter the stronger bait scent before they reach your spread—never on the table itself.
Maintain, Empty, and Refresh Without Getting Stung
Assume live wasps remain inside until proven otherwise, especially in dry funnel traps without much liquid.
Service traps after dark or at first light when foraging drops and temperatures are cool. Wear gloves and long sleeves. Before opening, submerge the entire trap in a bucket of soapy water for a minute, or pour soapy water through the funnel and wait—this kills stragglers.
Dump contents far from the house, rinse the bottle, rebait, and rehang. Many people simply build a new bottle each week and discard the old one; that is a valid choice if you prefer not to open a container full of wasps.
Check traps before maintenance for movement. Remove dead wasps regularly so liquid capacity stays useful. Rebait at least weekly; more often during heat waves or after heavy catch days.
If you squash wasps during cleanup, remember that crushed wasps can release alarm pheromones that draw aggressive attention nearby. Knock them into soapy water instead of smashing them on the deck.
When a Trap Is Not Enough
Be honest about limits so you do not waste August chasing a wall void with a soda bottle.
Traps do not remove nests. A mature yellowjacket colony can hold thousands of workers; the queen keeps laying. Trapping thins scavengers in your airspace—it does not end the colony inside your siding or under the deck. Active nests where people walk or children play need direct treatment or a professional, especially if anyone nearby carries an EpiPen. See how to get rid of a wasp nest and safety tips for spraying wasp spray before you escalate.
Traps take days to show results. Meaningful catch often appears after two or three days; noticeable relief at the patio may take one to two weeks of consistent trapping plus source removal.
Paper wasps and solitary species will not bail you out. Mud daubers and cicada killers ignore bait. Fake nest decoys and exclusion help paper wasps more than bottles—see fake wasp nests to keep wasps away and wasp repellent strategies for prevention layers.
Store-bought lure traps using heptyl butyrate catch western yellowjackets well but miss other species; meat-augmented commercial traps behave differently by region. Homemade bottles remain the cheapest entry point; our best wasp sprays guide covers when labeled products make sense alongside trapping.
Conclusion
A working DIY wasp trap is a cut soda bottle, an oiled inverted funnel, seasonal bait—protein in spring, sugar in fall—and a perimeter placement far from where people eat. Add dish soap to every liquid batch, vinegar to sweet baits when bees are foraging, and refresh bait before it rots or ferments into uselessness.
Done right, trapping is one of the safest ways to reduce yellowjacket pressure at the backyard table because it never puts you face to face with a nest entrance. Done wrong—wrong bait month, trap on the patio, honey in the mix—it wastes your time or makes the problem louder.
Build two or three bottles this week, match bait to the calendar, and pair them with sealed trash and smart nest decisions. That combination returns the yard without pretending a plastic funnel is a full extermination plan.



