How to Plant, Divide, and Store Dahlia Tubers
Plant dahlia tubers at the right depth, divide clumps without losing eyes, and store tubers through winter with this step-by-step pro guide.
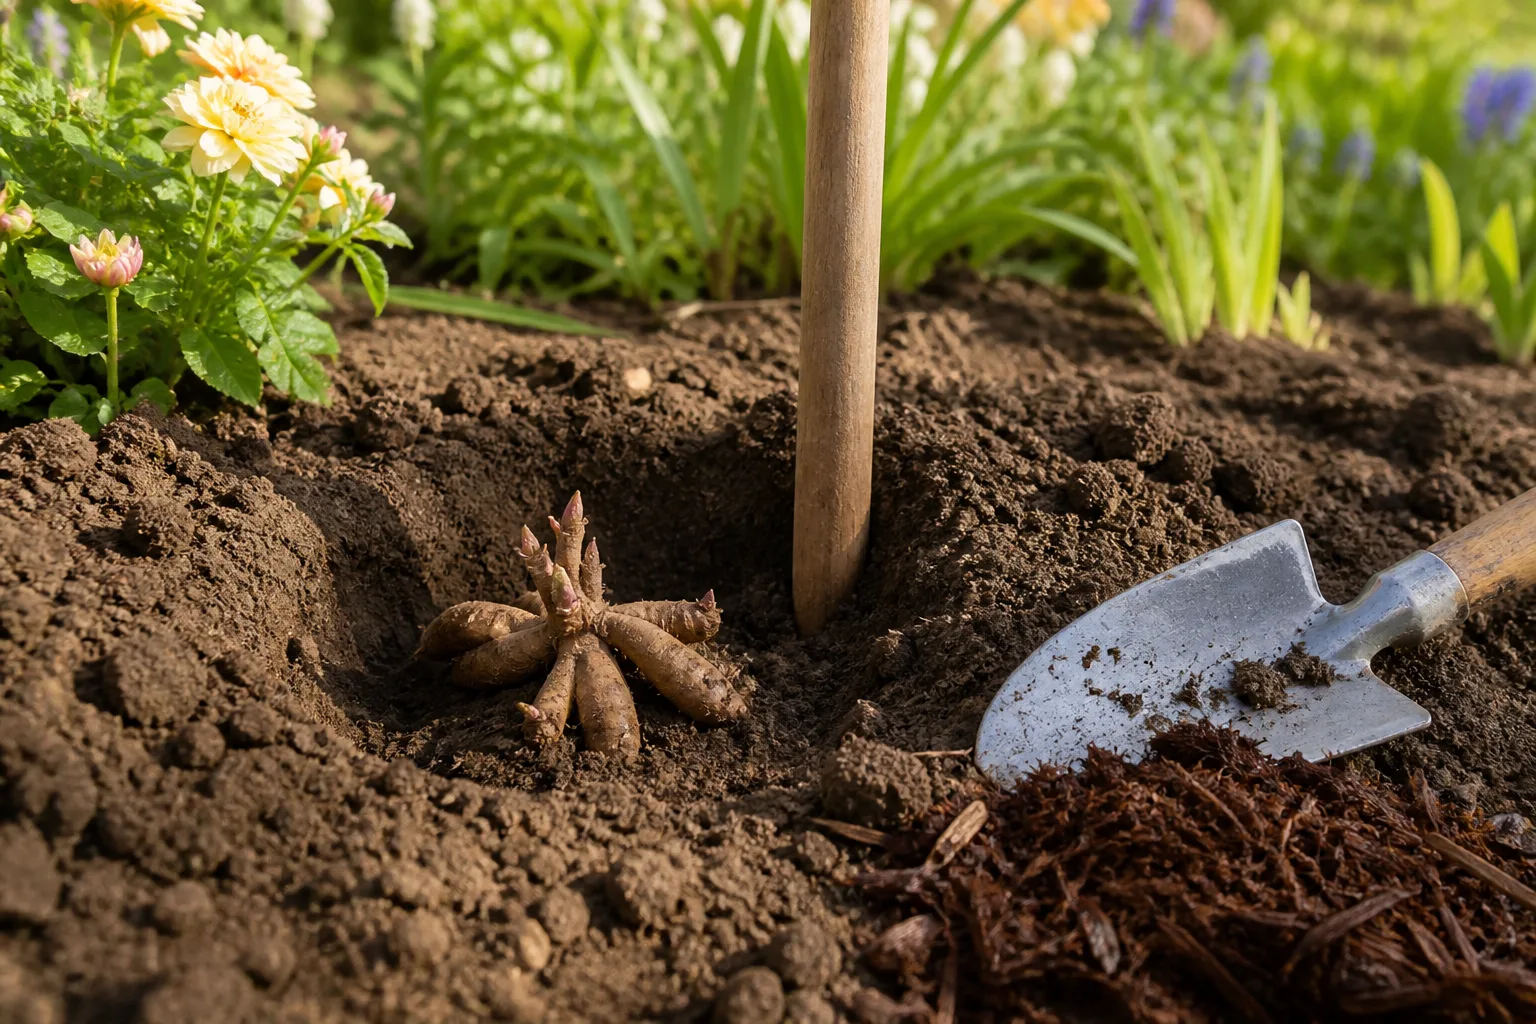
Dahlia tubers are not mysterious once you understand one anatomical rule: new shoots emerge only from eyes on the crown—the short neck where tubers attach to last year’s stem—not from random spots on the swollen root body. Get that right and planting, dividing, and winter storage stop feeling like guesswork. This guide walks the full cycle from tuber inspection through spring replanting, with depth, spacing, and storage decisions spelled out so you can grow the same varieties year after year instead of rebuying every season. For season-long care after shoots emerge, see our dahlia growing guide.
Dahlia Tubers Explained: Eyes, Crowns, and What You Are Buying
A dahlia “tuber” is really a cluster of storage roots joined at a central crown. Think of the crown as a hub and the tubers as spokes. The eye is a small bump or pinkish bud sitting on the crown near where a tuber meets the stem—similar to a potato eye, but critically located only on that junction zone (American Dahlia Society). UGA Extension emphasizes that if a tuber breaks off without a piece of crown bearing an eye, it will not sprout (UGA Extension C576).
When you buy a single tuber, you are buying one storage root plus its share of crown tissue. When you lift a mature plant in fall, you often pull a clump of six or more tubers still connected to the old stem. That clump can be stored whole or divided into individual plantable units—each needing crown tissue and at least one eye.
What Healthy Dahlia Tubers Look Like Before Planting
Before any soil touches a tuber, run a quick inspection:
- Firm and plump — like a fresh potato, not hollow or squishy.
- Visible eye or swollen bud on the crown (spring divisions are easier because eyes swell and turn obvious).
- Intact neck connecting tuber to crown; a clean break at the neck often means a blind tuber.
- No black mold, sour smell, or weeping rot — discard affected pieces so disease does not spread in storage.
Shriveled tubers can sometimes be rehydrated in slightly damp peat for a few days, but severely desiccated or soft tubers are poor bets. Named varieties from reputable suppliers outperform anonymous color-mix bags when you care about flower form and stem length.
When to Plant Dahlia Tubers in Your Climate
Dahlias are warm-season plants. Tubers need soil warmed to roughly 60–75°F (15–24°C) before they reliably sprout. A practical benchmark used by dahlia growers nationwide: plant when you would set out tomatoes—after the last frost and when the ground has lost its winter chill (American Dahlia Society). In USDA zones 3–7, that often means late spring through early summer; in zones 8–10, April through early June plantings are common.
Soil that is cold and wet is more dangerous than a light late frost on dormant tubers still underground. Missouri Botanical Garden notes tubers can go out one to two weeks before the last frost date in organically rich, well-drained soil, because shoots may not appear until early summer when frost danger has passed (Missouri Botanical Garden). If you need blooms as early as possible, start tubers indoors about four weeks before outdoor planting time.
Dahlias bloom from midsummer until frost, but extreme heat above about 90°F (32°C) can pause flowering on some varieties. In hot-summer regions, choosing earlier-maturing types or providing afternoon shade can keep color coming into autumn.
Starting Tubers Indoors vs Planting Directly Outdoors
Indoor start (recommended in short seasons): Pot dormant tubers in peat-free multipurpose compost with the crown just below the surface. Keep frost-free, in bright light, and barely moist until shoots appear—overwatering dormant tubers is a fast route to rot (RHS). Harden off before transplanting after frost.
Direct outdoor planting: Dig a deep hole, set the crown a few inches below eventual soil level, and mulch. Shoots may appear later than pre-started plants, but roots establish in place without transplant shock. Mid- to late April direct planting can work where soil no longer freezes even if air frosts continue.
Where Dahlias Grow Best in the Garden
Choose a site with full sun—six to eight hours of direct light daily. In hot climates, light afternoon shade reduces heat stress. Dahlias want fertile, moist, well-drained soil; they rot in standing water and struggle in baked, nutrient-poor sand without amendment (RHS).
Shelter tall varieties from strong wind, or plan to stake early. Match height to placement: bedding types 12–18 inches tall suit pots and front edges; 3–4 foot mid-border types fill the middle; 5-foot giants belong at the back with sturdy support. Dahlias and tomatoes share similar cultural needs—if one thrives in a bed, the other usually will too.
Work aged compost or well-rotted manure into the planting area. UGA Extension recommends a planting hole about 24 inches wide and 18 inches deep, backfilled with one-third organic matter to two-thirds native soil for strong root systems (UGA Extension C576).
Spacing and Depth Rules by Dahlia Size
Spacing and depth are not one-size-fits-all. Use mature height as your guide:
| Dahlia class (mature height) | Spacing | Planting depth |
|---|---|---|
| Bedding / dwarf (12–18 in.) | 12–15 in. apart | 2–3 in. deep to crown |
| Mid-border (30–40 in.) | 18–24 in. apart | 4–6 in. deep to crown |
| Tall / dinner-plate (4–5+ ft.) | 30–36 in. apart | 6–7 in. deep using progressive fill |
Plant in groups of three to five for visual impact, but keep enough space between clumps for airflow and your knees at maintenance time. Avoid tucking late-blooming dahlias where early-summer perennials will shade them by August.
The Progressive-Fill Method for Varieties Over 4 Feet
For dahlias taller than four feet, Missouri Botanical Garden and experienced growers recommend a progressive-fill planting:
- Dig a hole about 12 inches deep and amend the bottom.
- Return 6 inches of soil to the hole.
- Set the tuber with the eye up and cover with about 1 inch of soil.
- As shoots emerge, add another inch of soil at a time until the hole is filled.
This buries the base of the stem for extra stability and gives you a reason to install stakes at planting time—driving stakes later risks spearing tubers. Tomato cages work for medium heights; single sturdy stakes suit exhibition types.
How to Plant Dahlia Tubers Step by Step
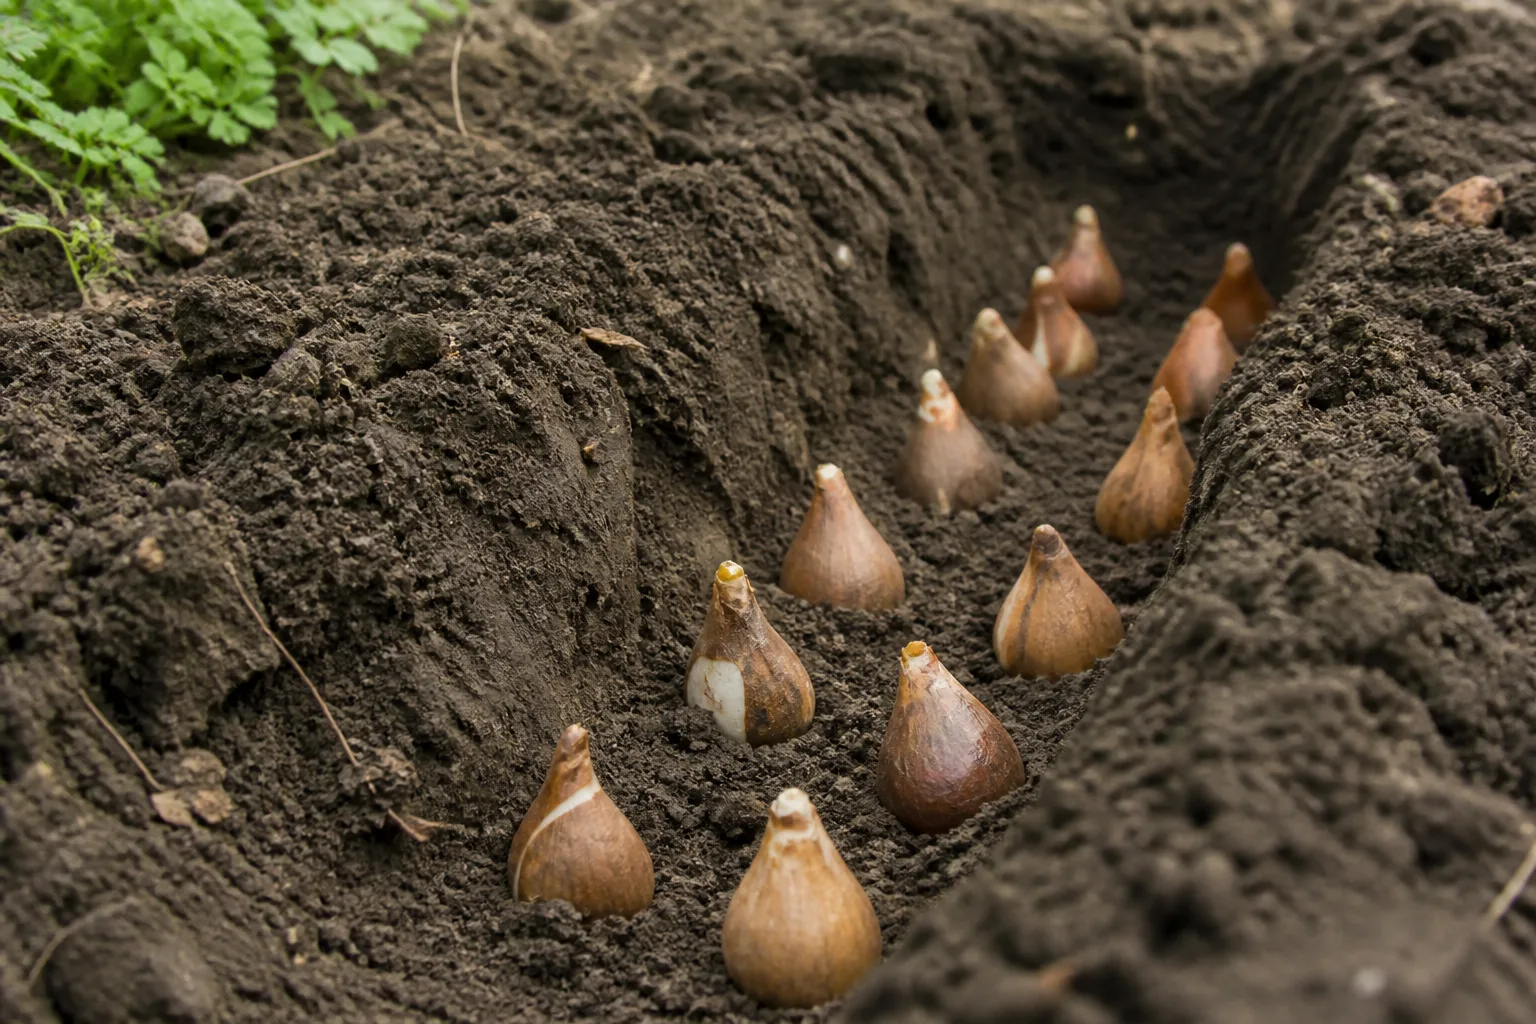
Whether you are planting one show dahlia or a row of cutting flowers, the sequence is the same:
- Dig and amend the hole per spacing/depth rules above.
- Place the stake before the tuber if the variety needs support.
- Orient the eye upward and position the crown at the correct depth—eye facing sky, tubers hanging naturally below.
- Backfill gently without compacting air out of heavy clay.
- Water only if the soil is dry at planting; otherwise wait.
- Label the variety at the stake—foliage looks alike until flowers open.
In containers, use a pot at least 12–16 inches wide for one standard dahlia, with drainage holes and quality potting mix. Compact bedding types can share larger pots; see our dahlia growing guide for container feeding and watering rhythms.
Watering and Early-Season Care After Planting
The most common spring mistake is watering dormant tubers on a schedule. Until green shoots show, tubers need minimal moisture—soggy soil invites rot (American Dahlia Society). If soil was dry at planting, one thorough soak is enough; then hold off until sprouting.
Once growth appears, keep soil evenly moist—about an inch of water per week including rain for in-ground plants, more frequent for pots. Mulch with compost or shredded bark to retain moisture and suppress weeds, leaving a gap around stems. Protect emerging shoots from slugs in damp springs; hand-pick at dawn or use labeled slug controls.
Feeding begins after several sets of leaves; a balanced or bloom-forward fertilizer every two to three weeks supports flowers without excessive leafy growth. For pinching and disbudding techniques that shape bloom size, see when and how to pinch dahlias.
Staking at Planting Time Saves Regret Later
A five-foot dahlia in full bloom can snap in one summer storm. Install stakes when you plant, not after the root system spreads. UGA Extension suggests stakes at least six feet long, driven about a foot into the ground, with soft ties added as the plant grows (UGA Extension C576).
Tie at the lower stalk first, then branch points as they elongate. Tomato cages reduce tying on bushier types. The goal is to support stems before flowers add top weight—once a hollow stem kinks, it rarely recovers cleanly.
When to Lift Dahlia Clumps in Fall
Dahlias bloom until frost. After the first killing frost blackens foliage, cut stems to a few inches above ground and wait one to two weeks so tubers can toughen skin before digging—unless rot or saturated soil forces earlier action.
Dig carefully: thrust a spade in a circle 12–18 inches from the stem and 6–12 inches deep, then pry the clump upward without yanking tubers off the crown. Shake off loose soil; do not blast with a hose if you plan to dry tubers for storage.
In regions where tubers stay in the ground, cut back after frost and mulch heavily. Everywhere else, lifting is insurance against winter wet and freeze-thaw cycles that turn tubers to mush.
How to Divide Dahlia Tubers Without Losing the Eyes
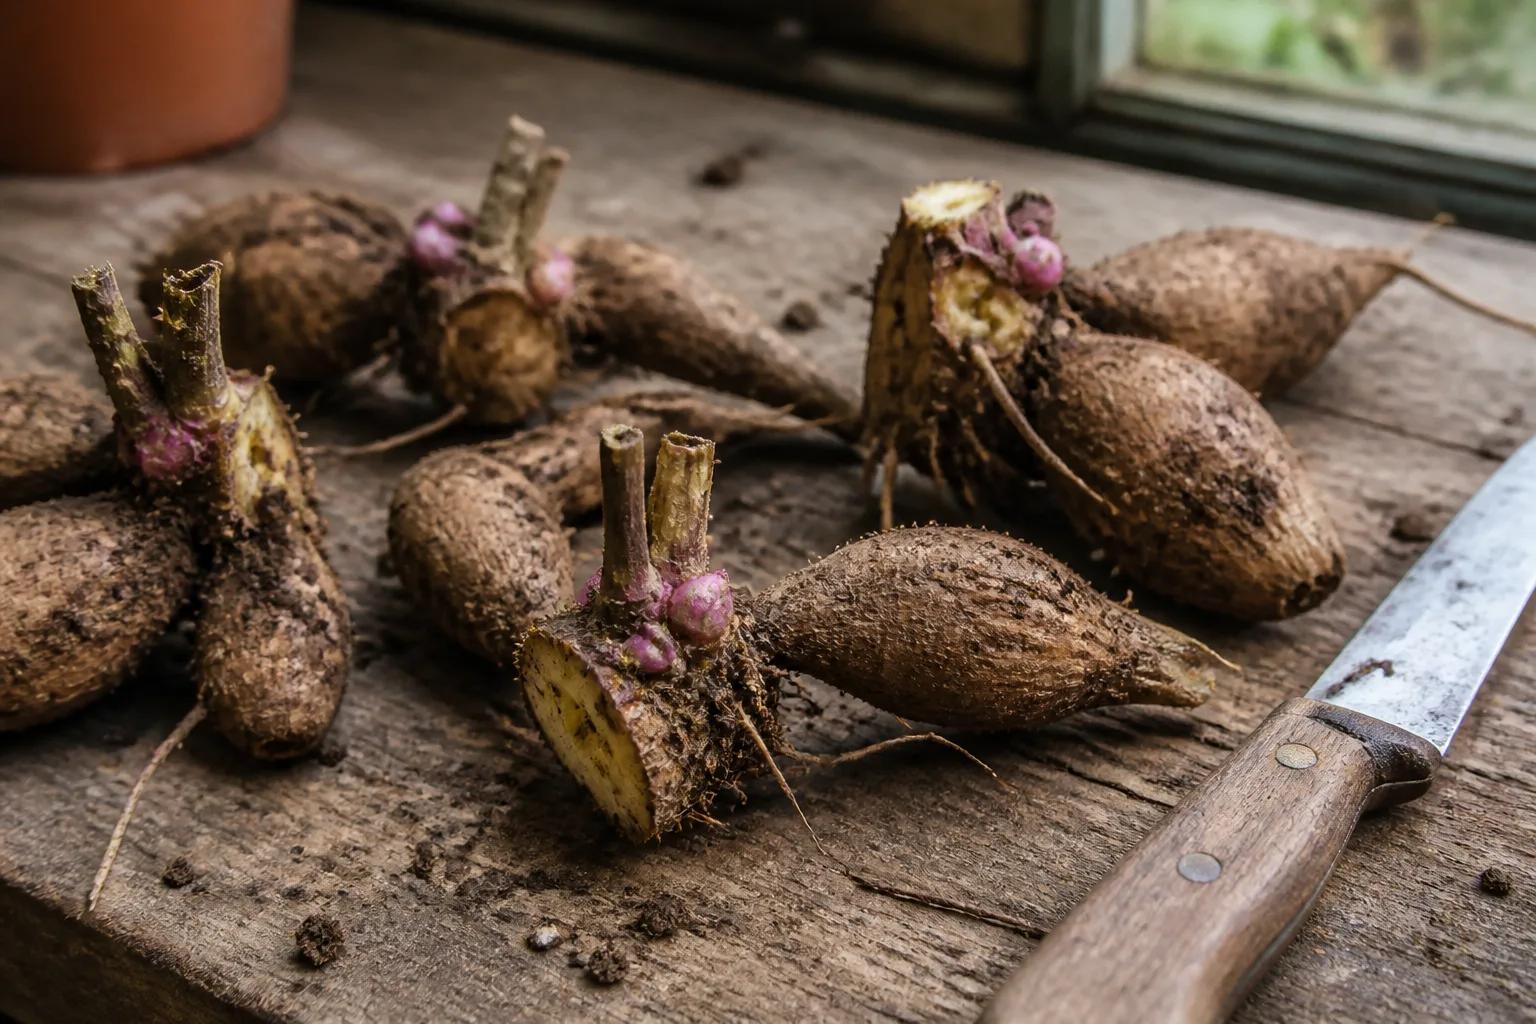
Division multiplies your collection and produces vigorous single-stem plants next year—clumps left intact sprout crowded, weaker growth. Each division needs a piece of crown with at least one eye and a healthy tuber attached (UGA Extension C576).
Basic steps after lifting:
- Trim the stem to an inch or two above the crown.
- Wash soil off the clump if needed for visibility.
- Locate eyes on the crown ring where tubers meet the stem.
- Cut with a clean, sharp knife so each piece includes crown tissue, an eye, and one tuber (some growers keep two small tubers per division).
- Discard mother stem wood, broken blind tubers, and any rot.
- Label divisions if you grow multiple varieties.
Never pull tubers apart by hand unless they separate naturally at the crown with eyes intact.
Fall Division vs Spring Division: Which Timing Wins
| Timing | Advantages | Disadvantages |
|---|---|---|
| Fall (at lift) | Fewer stored clumps; more storage space; rot isolated before packing | Eyes harder to see; cuts may not callus in very humid rooms |
| Spring (before planting) | Swollen eyes are obvious; less winter handling | Whole clumps need storage room; one rotten tuber can spread in the box |
There is no single wrong answer. Humid climates often favor spring division when eyes are unmistakable. Dry, cool storage rooms handle fall-divided pieces well if you let cuts air-dry one to three days before packing. Many exhibition growers divide in spring; busy backyard gardeners divide in fall to avoid double handling.
How to Dry, Pack, and Store Dahlia Tubers Over Winter
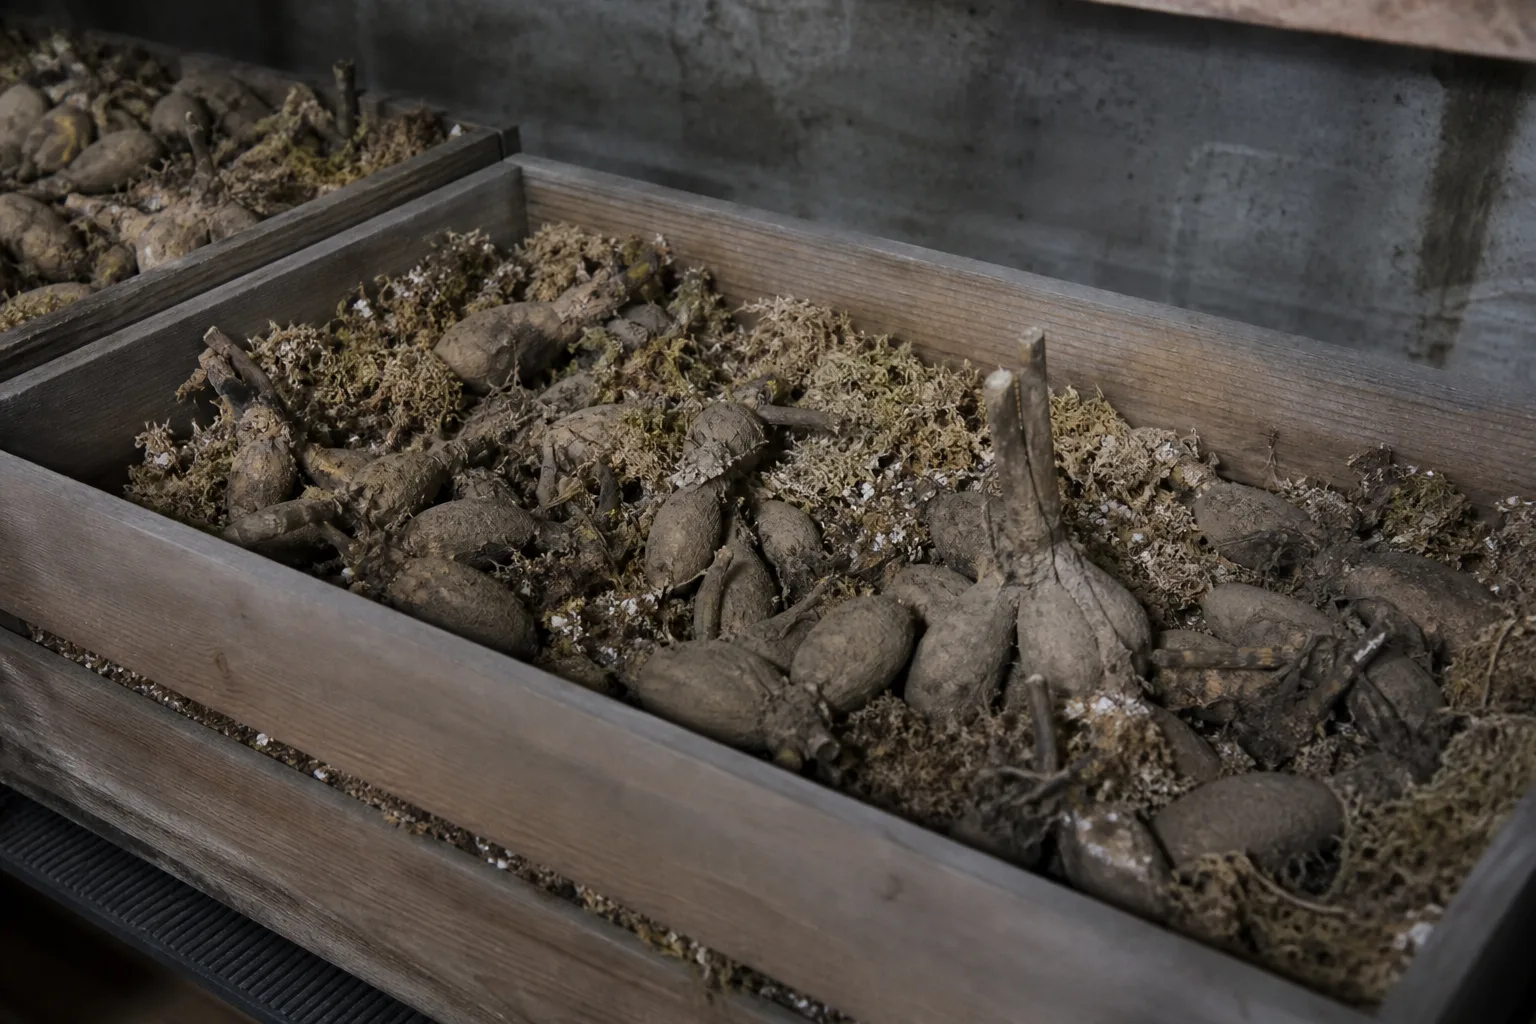
Storage is a temperature and humidity balancing act. Target 35–50°F (2–10°C), dark, and frost-free (UGA Extension C576). Basements, unheated garages, and cool closets work if they do not freeze or bake.
After digging (and dividing, if done in fall):
- Air-dry upside down one to three days in a shaded, ventilated spot so cuts callus.
- Pack loosely in crates, paper bags, or boxes with slightly damp (not wet) sphagnum moss, vermiculite, or dry wood shavings—enough humidity to prevent shrivel, not enough to mold.
- Check monthly through winter. Remove anything soft, black, or smelly.
- Spritz packing medium lightly if tubers wrinkle like raisins; add dry medium if condensation appears.
Some growers wrap individual tubers in plastic wrap with a vent hole; others store whole clumps in mesh bags. The constant is cool, dark, and monitored—not a forgotten box in a warm spare room where tubers sprout etiolated white shoots months too early.
Should You Leave Dahlia Tubers in the Ground?
In USDA zones 8–10 with dry winters, dahlias may survive in place with a thick dry mulch after cutting back frost-killed tops (Missouri Botanical Garden). Even then, many growers still lift because winter rainfall rots tubers faster than cold alone.
Zone-by-Zone Leave-in-Ground vs Lift-and-Store Decisions
- Zones 3–7: Plan to lift and store every year. Treat dahlias as tender perennials you overwinter indoors.
- Zone 8: Borderline—lift if winters are wet; mulch heavily only if soil drains sharply and stays above freezing.
- Zones 9–10: In-ground survival is realistic with mulch, but lifting lets you divide, inspect, and replant on your schedule.
Wherever you garden, a severe freeze without mulch will kill in-ground tubers. Lifting costs an afternoon; rebuying favorite cultivars costs more.
Common Dahlia Tuber Mistakes and Quick Fixes
Planting too early into cold, wet soil — Wait for tomato timing and workable beds. Cold tubers sit dormant while rot organisms multiply.
Wrong orientation or depth — Eyes up, crown at proper depth. Too shallow dries the crown; too deep delays emergence.
Overwatering before sprouts — Dry until green shows, then water regularly.
Dividing without eyes — Blind tubers will not grow; cut back to sections with visible crown buds.
Warm or bright storage — Causes premature sprouting and weak spring plants. Cool and dark.
Ignoring labels — Mixing varieties in one box makes spring planting guesswork. Tag at division.
For post-bloom stem care that keeps plants productive until frost, see should you cut dead dahlia flowers.
Conclusion
Pro-level dahlia tuber work is less about secret techniques than about respecting crown anatomy and seasonal timing. Inspect tubers before planting, match depth and spacing to mature size, stake at planting, water conservatively until shoots appear, lift after frost, divide with eyes intact, and store cool and dark while checking monthly. Do that cycle once and you will understand why dahlia growers treat tubers like garden currency—each healthy division is next summer’s color, paid forward.



