Lemon Button Fern Care: Light, Water & Humidity
Learn lemon button fern care for bright indirect light, steady moisture, humidity, feeding, division, repotting, and a clear plan for brown or yellow fronds.
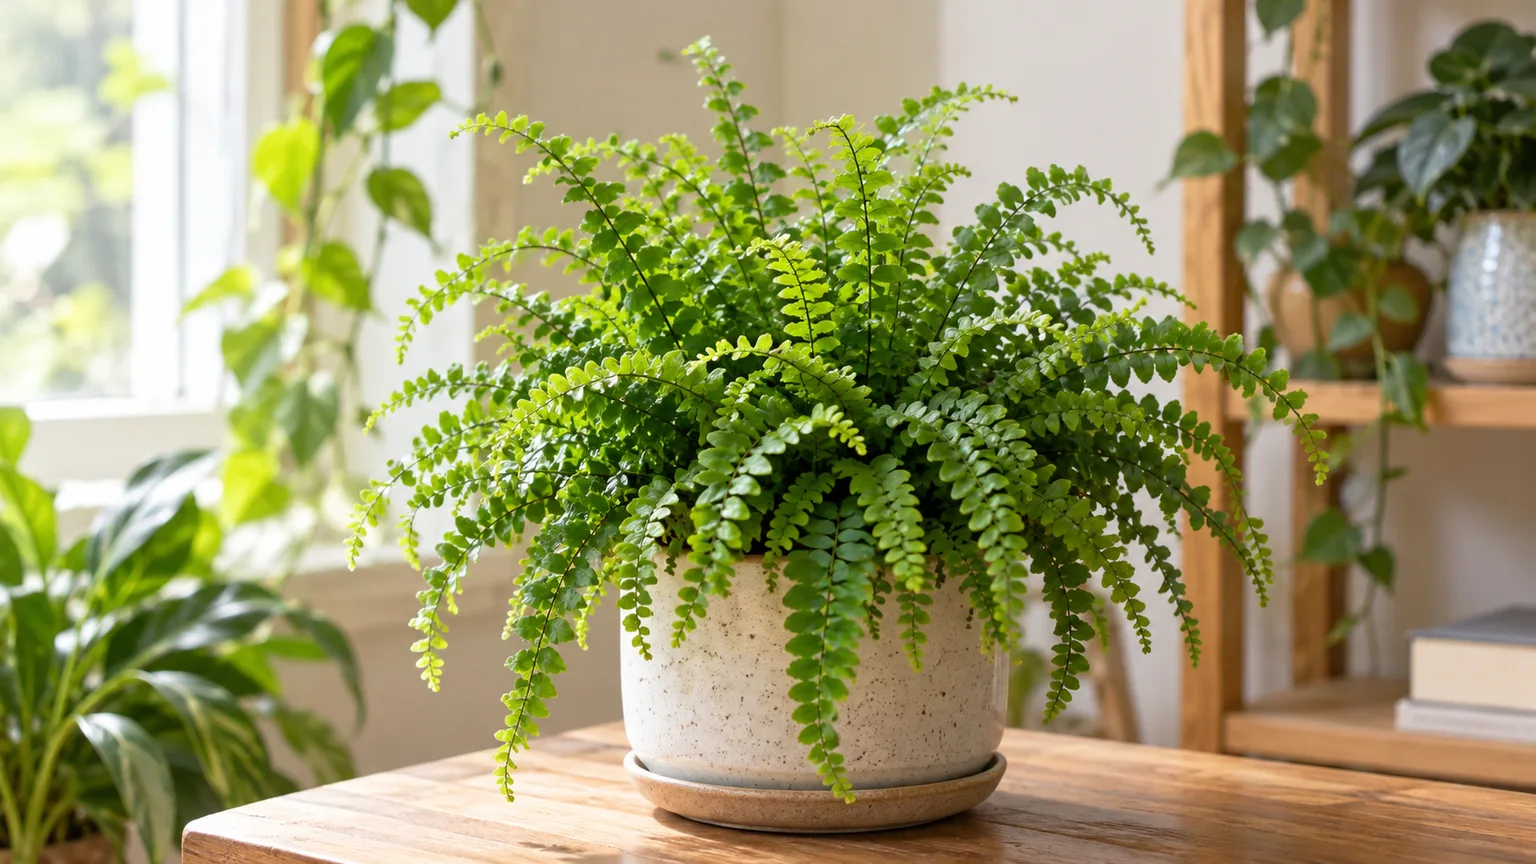
A lemon button fern is a compact sword fern with small rounded leaflets arranged close along arching fronds. It earns its name from those buttonlike pinnae and the mild lemon scent some plants release when the foliage is brushed. The plant is forgiving compared with ferns that demand constant attention, but it still needs a workable balance: bright filtered light, a potting mix that stays lightly moist, and roots that can drain freely.
Most problems start when a grower treats “fern” as a watering schedule. A small pot beside a sunny window may dry quickly; the same plant in a cool room with a dense mix can stay wet for days.
Read the pot and the fronds together, then make one adjustment at a time. That approach is more reliable than watering every Saturday or moving the plant each time a leaflet browns.
Start by identifying the fern you bought
Lemon button fern is commonly sold as Nephrolepis cordifolia ‘Duffii’. The Royal Horticultural Society lists it as Nephrolepis duffii and records N. cordifolia ‘Duffii’ and N. exaltata ‘Duffy’ as synonyms.
Garden-center tags may therefore differ while referring to the same compact fern sold under the lemon-button name. The RHS describes it as an evergreen, clump-forming plant with dense, divided fronds and a mild lemon fragrance during the growing season (RHS plant profile).
The practical distinction is the foliage. Lemon button fern has small, rounded leaflets along an upright-to-arching frond and grows as a dense little clump.
A “button fern” sold without the word lemon may instead be Pellaea rotundifolia, a different fern with a different growth habit. If the plant you own has a label, save it; if not, compare the leaflet shape before borrowing advice meant for a Boston fern or a true button fern. Their basic indoor care overlaps, but their size and frond form do not.
Expect a compact houseplant rather than a fast-growing floor specimen. The mature size varies with cultivar identity, pot, and growing conditions, so use the plant’s root system and new growth—not a seller’s exact height promise—to decide when it needs attention. Healthy new fronds should emerge from the center of the clump; older outer fronds may eventually yellow and die as part of normal turnover.
Give it bright, filtered light
Set the fern where it receives plenty of daylight without hot, direct midday sun striking the fronds. An east-facing window, a bright north-facing window, or a position a few feet back from a stronger south or west window can work.
A sheer curtain also softens a bright exposure. The RHS recommends partial shade and bright filtered light for cultivation, while Terrarium Tribe likewise treats bright, indirect light as the dependable starting point (RHS; Terrarium Tribe).
“Low-light tolerant” does not mean “thrives in a dark corner.” The fern may survive away from windows, but growth slows, the clump can thin, and the mix may remain wet longer because the plant uses less water. Before adding fertilizer to a plant that has stopped growing, improve the light gradually and watch for new fronds. A grow light can help if the room has no bright window, but keep it at a comfortable distance and follow the fixture’s instructions rather than placing a hot lamp against delicate foliage.
Direct sun is a separate risk from ordinary brightness. If leaflets fade, develop dry patches on the window-facing side, or crisp after a move, shift the plant back from the glass or add a curtain.
Make that change gradually; a fern moved abruptly from a dim shelf to a strong window can scorch even if the new location seems like an upgrade. Rotate the pot occasionally if growth leans toward the light, but avoid repeatedly relocating a plant that is otherwise putting out healthy fronds.
Water for steady moisture, not a wet pot
Lemon button fern roots prefer consistent moisture, but the root ball should not sit in stagnant water. Water thoroughly enough to moisten the whole mix, then let the excess drain through the pot’s holes.
Empty the cachepot or saucer after watering. A pot without drainage turns a forgiving plant into a root-rot risk because there is no reliable way to remove runoff from the root zone.
Use the mix as your watering cue
Check the upper layer of mix with a finger rather than watering according to a fixed interval. When the surface has just begun to feel dry while the mix below remains faintly moist, water.
If the upper layer is still wet, wait and check again later. The exact timing changes with pot size, soil structure, light, room temperature, airflow, and season; a small nursery pot in a warm bright room may need water much sooner than a larger glazed pot in winter.
When you water, pour slowly across the surface until water emerges from the drainage holes. If very dry mix pulls away from the pot and water runs down the sides, apply water in two or three small passes, pausing between them so the root ball can absorb it.
Then drain completely. Do not keep the pot standing in runoff to imitate a bog: moist roots need air as well as water. The RHS advises moderate watering in active growth and less in winter; Terrarium Tribe’s practical method is to water through and discard excess rather than leave the fern in a tray of water.
A self-watering pot can help an attentive grower maintain an even supply, but it is not automatically safer. The reservoir must not keep a poorly aerated mix saturated, and you still need to check that the potting medium is not sour-smelling or persistently wet. If you tend to forget, a smaller pot with a clear drainage path and a consistent check-in may be simpler than a more complex watering system.
Choose a loose, moisture-holding potting mix
Aim for a mix that holds enough water for the fern’s fine roots but drains before it becomes airless. A quality peat-free houseplant compost or multipurpose mix can work; if it dries into a hard block or stays soggy for several days, amend it with a small amount of fine bark or perlite to open the structure.
Coir is another moisture-holding ingredient, but it still needs a freer-draining component. The RHS recommends peat-free multipurpose compost or a loam, sand, and leaf-mould mix, with moist but well-drained conditions and acidic-to-neutral pH (RHS cultivation guidance).
You do not need to chase a precise pH number or replace a healthy mix because a product label says “fern soil.” Consistent moisture, drainage, and a pot with open holes matter more in a typical home. Avoid dense garden soil in a small indoor container; it can compact and dry unevenly. Avoid a gritty cactus mix by itself as well, since it may drain so fast that the small root ball dries before you notice.
Keep the crown—the point where fronds emerge—at the surface when planting or repotting. Burying the center can trap moisture against the growing point.
A thin layer of loose mix around the roots is fine; packing it tightly or mounding it over the crown is not. If a thin white mineral crust accumulates on the mix or pot rim, flush the pot thoroughly over a sink and let it drain; if the crust returns quickly, consider lower-mineral water such as rainwater where safe and available.
Raise humidity without keeping fronds wet
Dry air can contribute to crisp edges, especially when indoor heating runs in winter, but humidity is only one possible cause of browning. A dry root ball, hot sun, a draft, or damaged roots can produce similar symptoms.
The RHS places the plant in moderate-to-high humidity with good ventilation, and specialist grower guidance also emphasizes avoiding very dry air (RHS; Mossfield). Start by checking the potting mix and light before assuming that brown leaflets need a humidifier.
Choose a humidifier over repeated misting
A small hygrometer tells you what the air is doing near the plant, rather than what the rest of the house feels like. If the room is consistently dry and fronds keep crisping despite correct watering and filtered light, a room humidifier is the most controllable fix.
Grouping plants can create a slightly more humid pocket, and a bright bathroom can work if it has enough light and ventilation. Keep foliage from pressing against cold glass or sitting in a stagnant, wet cluster.
Misting wets the surface briefly but does not keep humidity elevated for long in a ventilated room. Repeatedly leaving fronds wet can also encourage spotting where air movement is poor.
Pebble trays are often presented as a lasting humidity solution, but their effect is local and modest; use one only if the pot sits above the waterline, and do not rely on it to humidify an entire room. A humidifier should be cleaned according to its manufacturer’s directions so it does not become another source of residue or microbial growth.
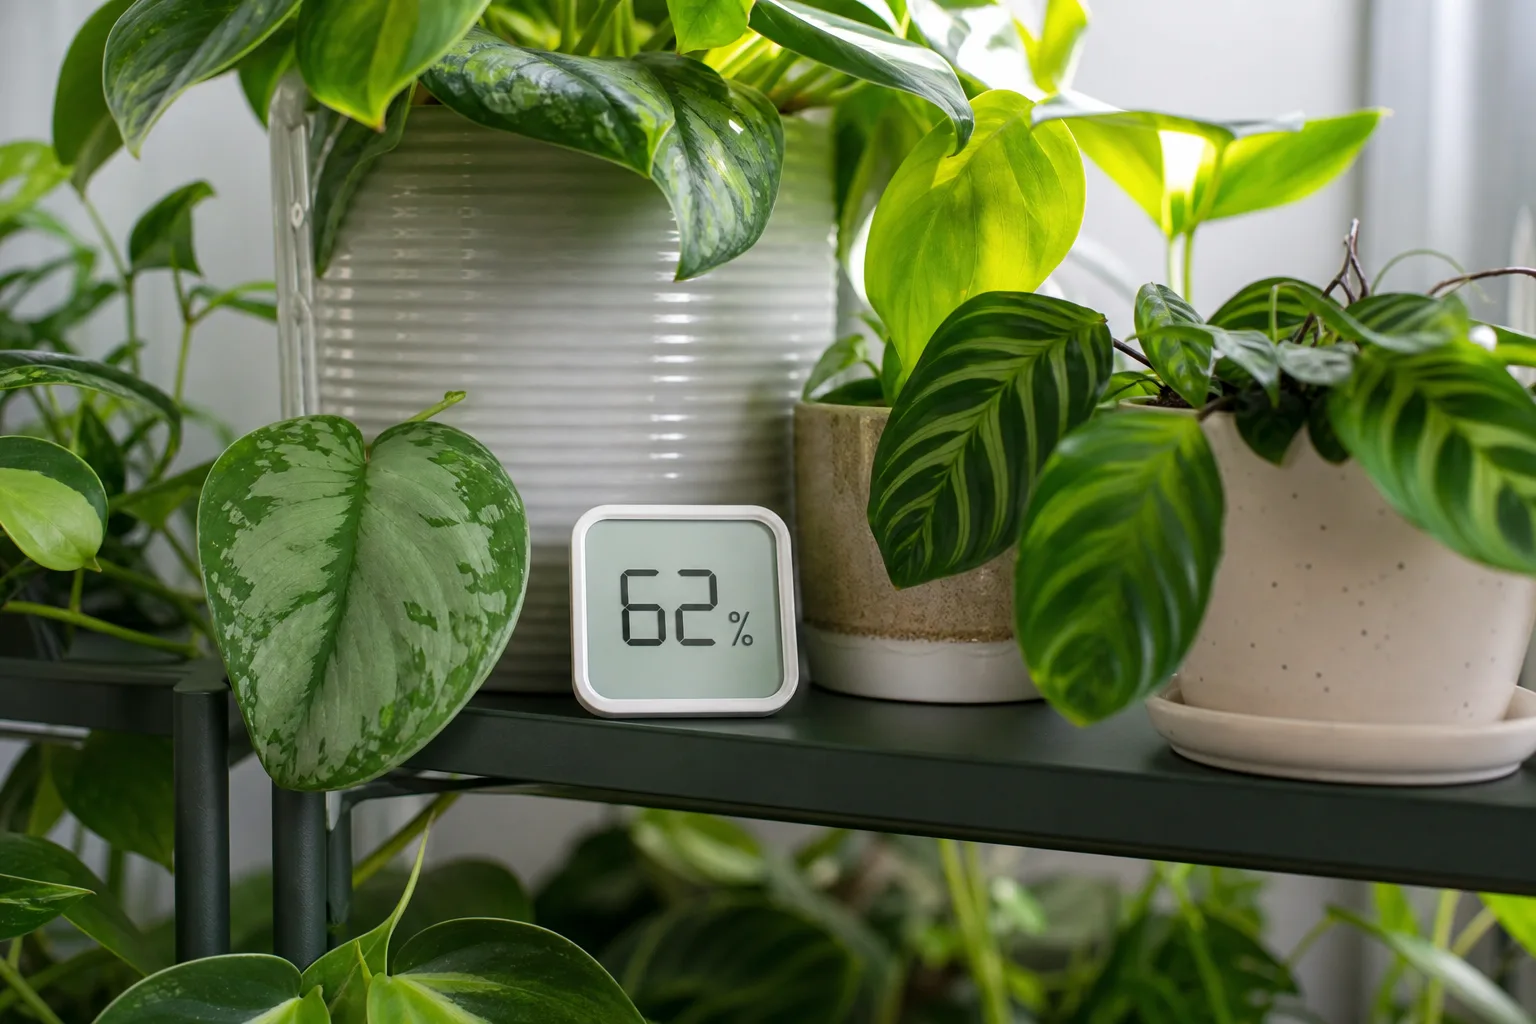 Use a hygrometer near the fern to tell whether the room is consistently dry before changing its care.
Keep temperatures stable through the year
A comfortable room temperature is usually suitable. Protect the fern from cold windowsills, open winter windows, exterior doors, and blasts from heating or air-conditioning vents.
Fast swings and moving air dry fronds faster than a stable room, so look at the plant’s immediate spot as well as the thermostat setting. If the window turns cold at night, pull the pot a little farther into the room rather than keeping it on the sill.
The RHS lists this fern as a conservatory or greenhouse plant in its UK profile and recommends indoor or under-glass cultivation. For a houseplant, that is a useful reminder that “fern” does not mean tolerant of frost.
Do not leave it outdoors through a cold snap. In a mild climate, a shaded outdoor stay can be temporary, but acclimate it gradually and bring it back inside before temperatures approach conditions it has not experienced. Sudden shifts from an air-conditioned room to hot patio sun can stress it even when neither place is extreme on its own.
Feed lightly while it is growing
Ferns are not heavy feeders, and a compact lemon button fern can be damaged by an enthusiastic fertilizer schedule. During active spring and summer growth, use a balanced liquid houseplant fertilizer at half the label strength, following the product’s directions.
The RHS recommends a half-strength balanced feed monthly during the growing season and sparing water in winter. If the plant has no new growth because it is in low light or has unhealthy roots, fix those conditions first rather than trying to force growth with more fertilizer.
Do not fertilize a completely dry root ball, a newly divided plant, or a fern that is already stressed. Water first if the mix is dry, then feed only when the plant is hydrated and growing.
In autumn and winter, reduce or pause feeding as growth slows; extra salts accumulate when the plant is using less water. If the pot develops a crust or the leaf tips brown after repeated feeding, stop fertilizing and flush the mix with clean water, letting it drain well.
Prune damaged fronds at the base
Routine shaping is unnecessary. Use clean scissors to remove a frond that is fully brown, badly damaged, or yellowing from the outside of the clump.
Cut its stem close to the base without pulling it, which can disturb the crown or tear neighboring growth. If only a small leaflet tip is brown, you can trim the dry edge for appearance, but the cut tissue will not turn green again.
Do not strip the plant of every older frond just because one or two have faded. Ferns naturally replace leaves over time, and green fronds still contribute energy even if they are not perfectly symmetrical.
If many fronds decline together, pause before pruning and diagnose the cause: check whether the mix is bone dry or waterlogged, inspect for sun scorch, and look for pests under the leaflets. Pruning removes the evidence but does not fix the underlying condition.
Repot only when roots need more room
Repot in spring or early summer when roots fill the container, water runs through unusually quickly, or the clump is pushing itself upward. A plant that has slowed in winter or shed an occasional old frond does not automatically need a new pot.
Slide it out gently and inspect the root ball. A dense ring of roots or a mix that has broken down and no longer drains evenly is a better signal than a calendar date alone.
Choose a pot with drainage holes only modestly wider than the current root ball. Oversizing leaves a large volume of mix wet around a small root system, increasing the time it stays damp.
Loosen only the outer circling roots and keep the crown at its original level. Fill around it with fresh, airy mix, water once to settle the medium, and let it drain fully. Keep the plant in bright filtered light while it adjusts; wait to fertilize until it resumes healthy growth.
If the roots are dark, soft, and unpleasant-smelling, this is not ordinary root crowding. Remove only the mushy material with clean scissors, discard the saturated mix, and pot the remaining firm roots in a clean container with drainage.
Recovery is uncertain if the crown has rotted, so preserve any healthy rooted section rather than repeatedly disturbing a failing plant. If roots look firm and pale to tan, simply refresh the mix and return the fern to its usual conditions.
Propagate by dividing a rooted clump or runner
The most reliable home method is to divide a healthy clump in spring, when the plant can resume growth. Water the day before if the root ball is dry, ease the fern out of its pot, and tease apart a section with its own roots and several fronds.
Use clean scissors for a stubborn section instead of wrenching it away. Keep each division large enough to support itself; tiny pieces with a single weak frond often stall.
Pot each division in a container only slightly wider than its roots, with the crown level with the mix. Water thoroughly and drain.
Put the new plants in bright filtered light, away from strong sun, and keep the mix lightly moist while roots re-establish. Do not add fertilizer right away. Some drooping or loss of a few outer fronds can happen after division, but a firm crown and fresh central growth are better recovery signs than the appearance of every old leaflet.
The RHS recommends separating rooted runners in late winter or early spring, and Terrarium Tribe describes division of rooted rhizome sections as a practical propagation method (RHS; Terrarium Tribe). If a runner has already formed roots and a small plantlet, sever it from the parent and pot it separately.
A loose runner without roots is not ready to become an independent plant. Growing ferns from spores is possible but slow and less predictable for preserving a named cultivar, so it is rarely the simplest route for a houseplant owner.
Check for pests before treating
Inspect the undersides of fronds, the central crown, and where stems meet the mix when growth becomes speckled, sticky, pale, or unusually sparse. Spider mites may leave fine webbing and stippled leaflets; scale insects look like small fixed bumps, sometimes with sticky residue.
The RHS lists scale as a possible pest. Aphids can also appear on tender growth, though they are less common indoors than dry-air and watering issues.
Isolate a plant with suspected pests before nearby plants are exposed. Confirm what you see with a magnifier, rinse the foliage if the plant can dry quickly, and remove heavily infested fronds.
If you use insecticidal soap or another labeled product, follow its label exactly and test a small area first; ferns can be sensitive to products applied at the wrong concentration or in direct sun. Recheck after treatment because one rinse rarely removes every pest stage. Do not spray simply because fronds are brown—the cause may be environmental, and an unnecessary treatment adds stress.
Diagnose brown, yellow, or drooping fronds
Several stresses can look alike on a fern, so use the pattern and the potting mix together. A few outer fronds fading slowly is different from the whole clump collapsing in a week.
Check the newest growth, feel below the mix surface, and inspect the roots if the pot stays wet. Change one factor at a time; moving the plant, watering more, and adding humidity all at once makes it difficult to learn what actually helped.
Brown, crispy leaflets
Start with the mix. If it is dry well below the surface and the pot feels light, water thoroughly and let it drain; do not compensate with daily sips that wet only the top.
If the mix is already moist, look for direct sun, a hot vent, or cold dry airflow. If those are ruled out and crisping appears during a dry-heating season, measure room humidity and consider grouping or a humidifier. Humidity is not a substitute for watering, and watering is not a fix for hot sun.
Brown tips from old damage will remain brown, so judge the next several weeks of new growth rather than expecting damaged leaflets to recover. If crisping continues while the root ball stays wet, inspect for soft roots or a blocked drainage hole. A root problem requires better aeration and drainage, not extra water or a pebble tray.
Yellowing or wilting foliage
Yellow leaves can follow overwatering, low light, nutrient stress, or normal aging. If only the oldest outside fronds yellow while new ones remain green, trim those fronds and monitor the plant.
If many fronds yellow at once and the medium remains wet, stop watering until the mix begins to dry and check drainage. A sour smell or soft roots points toward root trouble. If the plant is in a dark corner, move it to brighter filtered light before increasing fertilizer.
A wilted fern in dry mix needs water; a wilted fern in wet mix may have roots that can no longer absorb it. Feel the medium before reaching for the watering can.
Sudden pale or scorched patches on the window-facing side suggest too much direct sun, while widespread limp growth after a cold draft suggests temperature stress. If the cause is not obvious, take a photo and note watering, light, and room conditions for a week instead of making several large changes at once.
 Firm roots can be left in place; remove only soft, dark roots when rot is confirmed.
Know what to expect around pets
The ASPCA lists Duffii Fern as non-toxic to dogs, cats, and horses, using the common name lemon button fern and the scientific name Nephrolepsis cordifolia ‘duffii’ (ASPCA plant entry). That is reassuring for a home with pets, but it does not mean a cat or dog should eat the plant. Any fibrous plant material can cause stomach upset or pose a choking risk if an animal chews enough, and plant identification can be uncertain when tags are missing.
Keep the fern where it can grow undisturbed, and call a veterinarian or animal poison-control service if a pet eats a large amount or develops symptoms. The ASPCA classification is for the identified Duffii fern; do not assume that every fern or a look-alike houseplant shares the same safety status. If you are unsure which plant your pet encountered, provide a clear photo or label rather than relying on the common name alone.
Use a simple seasonal care routine
In spring, check whether the fern is putting out new fronds, refresh the top of the mix if needed, and decide whether root crowding justifies repotting or division. Increase watering only as the pot begins to dry faster with warmer weather and stronger light.
Feed lightly during active growth according to the label and the plant’s response. If it remains healthy in its existing pot, leave it alone; routine repotting is not a requirement of spring.
Through summer, protect the foliage from harsh direct sun and check moisture more often during heat. In autumn, reduce fertilizer as growth slows and check whether indoor heating is drying the air.
In winter, water less often but do not allow the root ball to become bone dry, and move the pot away from cold glass and heating vents. A stable placement and a quick weekly check are often enough; the actual watering interval should change when conditions change.
Conclusion
A lemon button fern stays compact and attractive when you manage three things together: filtered light, an evenly moist but draining root zone, and air that is not persistently dry or drafty. The simplest routine is to feel the mix before watering, empty the saucer, feed only during active growth, and inspect the plant before treating browning as a humidity problem.
Repot only when roots fill the pot, and divide only a healthy clump with rooted sections. When fronds decline, identify whether the mix is dry, wet, or neither before changing care. That one check prevents the most common mistake with this fern: responding to every symptom by adding more water.