How to Grow and Care for Peppermint
Learn how to grow peppermint in a pot or garden, contain its runners, water and prune it well, and harvest flavorful leaves for tea and cooking at home.
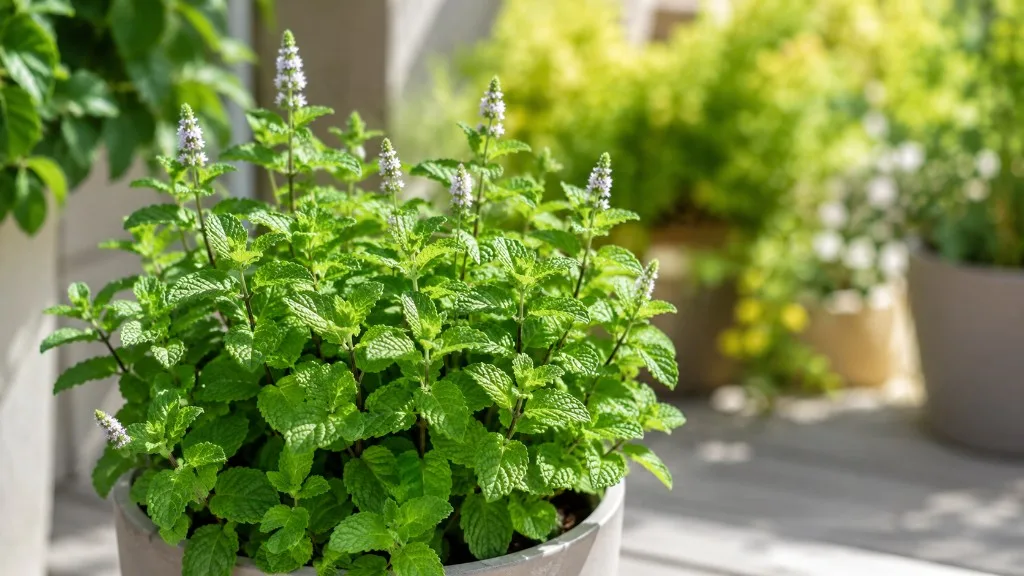
Peppermint is easy to grow because it tolerates a range of light and soil conditions. The part that catches many gardeners off guard is how readily its creeping stems take over open ground. Start it in a contained space, keep the root zone evenly moist, and harvest the young shoots often; those three habits do more for a healthy, useful plant than a complicated feeding schedule.
The botanical name is Mentha × piperita. It is a hybrid mint with spearmint and watermint in its parentage, and it is grown for its aromatic leaves and stems. North Carolina State Extension describes it as a fast-growing perennial that spreads by rhizomes, while the Royal Horticultural Society recommends a pot or sunk container to keep those underground stems out of neighboring beds. North Carolina State Extension’s plant profile and the RHS mint growing guide are useful references for planning a site.
Peppermint at a glance
| Growing need | Practical starting point |
|---|---|
| Plant type | Aromatic, herbaceous perennial mint |
| Light | Full sun to partial shade; provide afternoon relief in hot climates |
| Soil | Moist, fertile, and free-draining |
| Water | Water when the upper soil starts to dry; do not leave roots standing in water |
| Container | A 12- to 16-inch-wide pot with unobstructed drainage is a useful starting size |
| Spread | Rhizomes and creeping stems root readily where they touch moist soil |
| Harvest | Pick young leaves or cut stem tips through the growing season |
| Propagation | Rooted cuttings or division give the most predictable plants |
Peppermint is one member of the larger mint group, which also includes spearmint and many named forms. Labels matter if you want a specific flavor or growth habit. A plant sold as peppermint is not interchangeable with spearmint, and seed packets labeled “mint” may produce a different plant than the one you expect. Buying a named peppermint plant or taking a cutting from one you already like is a more dependable way to preserve its traits.
NC State lists peppermint as a perennial suited to USDA Zones 5 through 9, but local conditions and container exposure matter as much as the number on a map. A plant in the ground has a larger insulated root zone than one in a pot, so a container can need shelter during a severe freeze even where outdoor peppermint usually returns each spring.
Contain peppermint before planting
Peppermint spreads through underground rhizomes, which are stem-like structures that send out roots and new shoots. Aboveground stems can also root when they rest on damp soil. That combination makes a small plant become a broad patch: cutting off the visible top growth does not remove the underground network, and a fragment left in the soil can restart the plant.
For most home gardens, the simplest control is a pot that stands on a hard surface. Choose a container with drainage holes and do not let stems trail down into a nearby bed. Check the ground around the pot every few weeks during active growth; lift and trim any rooted runner before it becomes established. A saucer can catch drainage on a patio, but empty it after watering so the roots do not sit in collected water.
If you want peppermint in a border, sink a bottomless pot or purpose-made root barrier into the ground. Leave the rim an inch or two above the soil line. This catches rhizomes moving underground and makes it harder for stems to creep over the edge and root outside the barrier. Inspect it regularly anyway; containment reduces maintenance but does not make a vigorous mint impossible to escape. The RHS recommends this partly buried approach for gardeners who want mint in a bed.
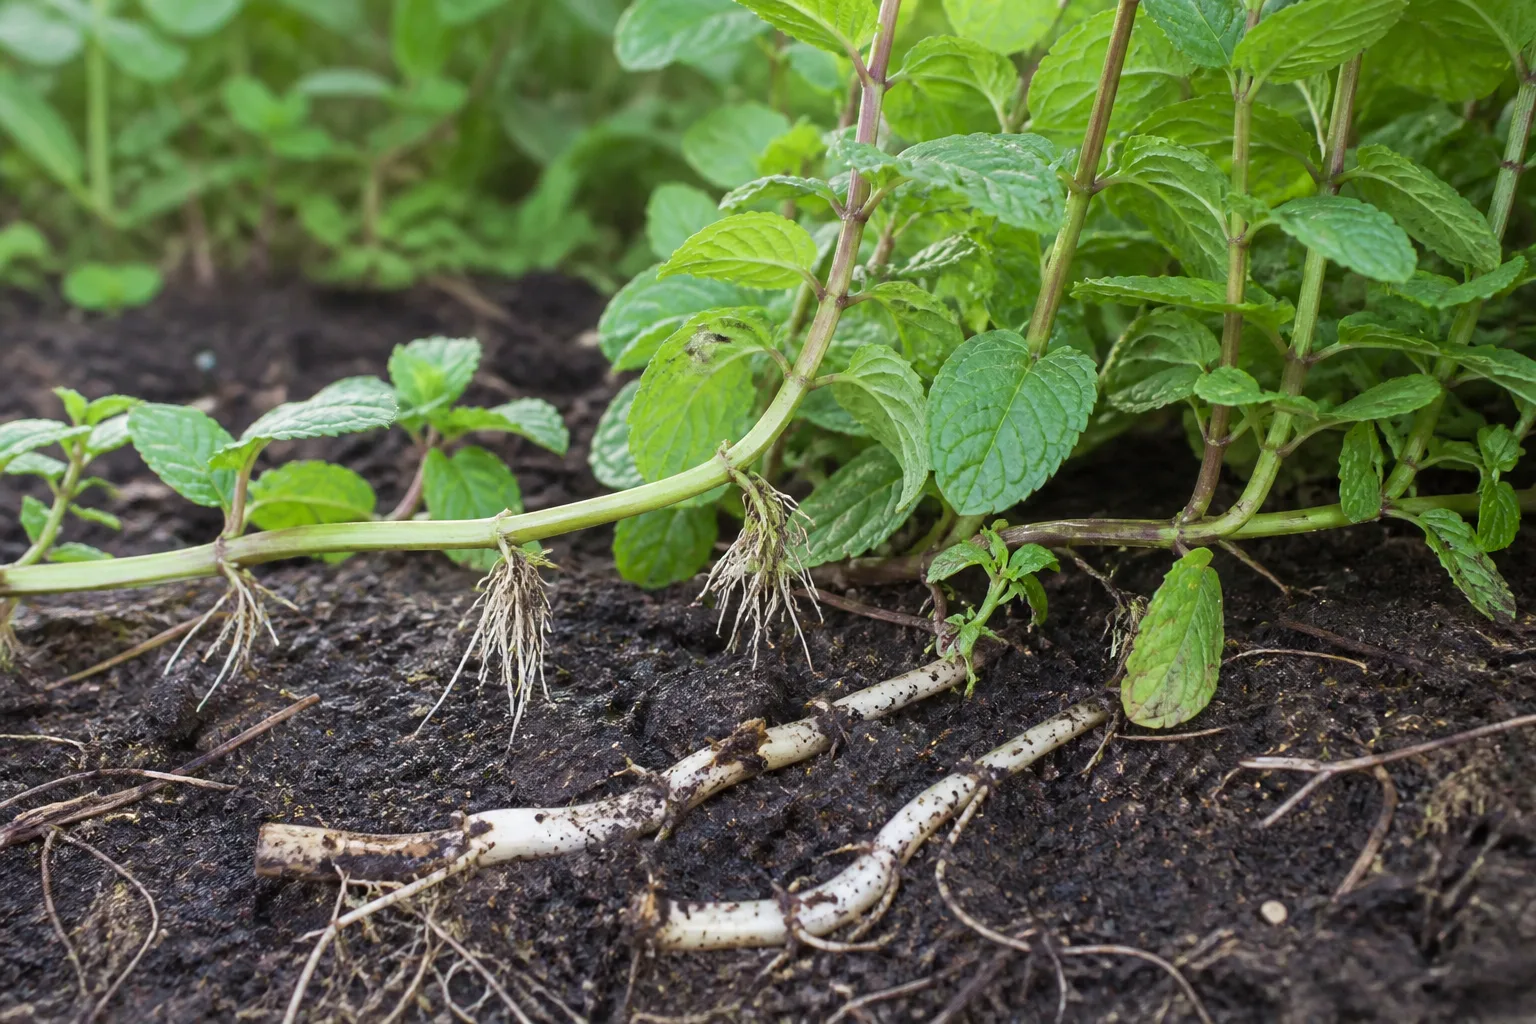
Avoid planting peppermint directly among slower herbs or perennials unless you are prepared to dig out runners repeatedly. It can be grown as a groundcover in a dedicated contained patch, but it is a poor neighbor in a mixed herb bed where you need to keep each plant in its own space.
Choose light, soil, and climate that suit peppermint
Peppermint can grow in full sun or partial shade. Aim for several hours of direct light, then adjust for heat: in a mild summer, a sunny position encourages dense growth; in a hot, exposed yard, morning sun and afternoon shade can reduce wilting and keep the container from drying too fast. If stems are long and sparse with widely spaced leaves, the plant may need more light. If leaves wilt repeatedly on hot afternoons while the soil is dry, give it some afternoon protection.
Use a loose, fertile potting mix that drains freely but still holds moisture. Garden soil alone can compact in a pot and slow drainage. A standard container mix with some finished compost is usually adequate; do not add a thick layer of gravel at the bottom because that does not fix poorly draining mix. Ensure the pot’s holes remain open and raise the container slightly if it sits on a flat surface where water pools.
In a garden bed, peppermint tolerates a wider range of soils than many herbs, but dry soil slows growth and waterlogged soil can damage roots. Incorporate compost across the planting area if the soil is sandy or depleted rather than filling just one small hole with a rich pocket. That keeps water movement more even and helps roots establish beyond the original rootball.
Temperature affects care more than the plant’s basic resilience. Peppermint can survive cold winters in suitable regions, but young plants need time to establish before the first hard freeze. In hot regions, containers heat and dry faster than beds; move the pot away from reflected heat off a wall or paving if the leaves wilt despite regular watering.
Water for moist soil without waterlogging
Peppermint likes consistent moisture, especially when it is actively growing, but “keep it moist” does not mean keep it saturated. Check the soil with a finger before watering. If the upper inch feels dry, water slowly until excess runs from the drainage holes; if it still feels cool and damp, wait and check again later. The interval changes with pot size, sun, wind, humidity, and season, so a fixed daily schedule can overwater it in cool weather and underwater it in a heat wave.
Small pots may need checks every day in midsummer. A larger pot or a shaded location may stay moist for several days. If water runs down the sides without wetting the rootball, the mix may have dried out and become difficult to rehydrate; water in two slow passes a few minutes apart. Empty standing water from saucers, and do not allow the pot to remain in a bucket of water.
In a bed, water deeply when the surface layer begins to dry rather than giving frequent shallow sprinkles. Mulch can reduce evaporation, but leave open space around stems so the base does not stay damp and crowded. A newly planted peppermint division needs closer attention than an established patch until new growth shows that roots have settled.
Both dry and overly wet roots can produce tired-looking leaves. Dry soil with limp stems usually calls for a thorough drink and a check of the next day’s recovery. Wet soil plus yellowing or collapsing lower stems calls for better drainage, not more water. Correct the moisture problem first; fertilizer will not repair root damage.
Feed lightly and refresh the container mix
Peppermint grows vigorously without heavy feeding. For a container, start with fresh quality potting mix; if growth is healthy and leaves are a good color, there is no need to add fertilizer on a strict calendar. In a garden bed, a light spring top-dressing of compost is often enough. Excessive nitrogen can produce fast, soft growth that needs more pruning and may be less robust in hot weather.
If a potted plant stays pale and weak despite adequate light and sound watering, check whether it has become root-bound before reaching for fertilizer. Dense roots, a crusted surface, and water running straight through can indicate that the pot is crowded or the mix has broken down. Repot into a larger container or divide the plant and replace the old mix with fresh potting medium.
Use a balanced, water-soluble fertilizer only when the plant is actively growing and the mix is depleted, following the product label at a conservative rate. Avoid feeding a stressed, waterlogged, or dormant plant. Correct the underlying issue first, then reassess new growth over the next few weeks.
Plant peppermint in a pot or outdoor bed
The easiest time to establish a nursery plant or rooted division is spring after the harshest frost risk has passed, or early fall while the soil is still warm enough for roots to settle. In mild climates, spring and autumn both work well. For a pot, choose one at least 12 inches wide; NC State gives 12 to 16 inches as a practical range for containing peppermint while allowing roots to fill out. Make sure the container has drainage holes and enough depth to hold a substantial rootball.
Water the nursery plant before removing it from its pot. Tease loose circling roots gently without tearing the root mass apart. Set the rootball at the same depth it was growing before, backfill around it with potting mix, and water until the mix is evenly damp. Keep the pot in its final spot if practical; moving a fully watered pot is harder and repeated relocation can interrupt a steady routine.
For a sunk container, dig a hole broad enough for the pot and set it so the lip remains visible above grade. Add soil around the outer wall to stabilize it, then plant the rootball inside. Do not bury the rim, and avoid a location where runoff can carry soil over that rim during heavy rain. Water the new plant at the root zone and check that the container drains freely.
Give peppermint enough room for airflow and harvesting access. Although a single plant can fill a roomy pot, avoid crowding it with another mint or a different herb in the same container. Separate pots make watering and pruning easier, and they stop one plant’s runners from dominating its neighbors.
Prune and harvest for compact, flavorful growth
Pinching young stem tips encourages branching and gives you leaves to use. Start once the plant is established and has several pairs of leaves; cut just above a leaf pair so new side shoots can grow from that node. Repeat as stems lengthen. This keeps the plant fuller and helps prevent a few tall stems from taking over the pot.
When to take leaves and stems
You can pick a few leaves whenever the plant is established enough to spare them. For a larger harvest, wait until the stems are roughly 6 to 8 inches tall, then cut several leafy stems above a pair of nodes. The RHS recommends regular harvest of young shoot tips to keep mint bushy; Gardener’s Path notes that a young plant can be harvested once it reaches about 4 to 5 inches, with the amount taken scaled to its size. Use the plant’s fullness, not a date, as your guide.
For the most tender leaves, pick shoot tips before flowering. Early morning after dew has dried is convenient because leaves are fresh and cool. Peppermint that has flowered is still useful: you can harvest it for leaves or let some flowers remain for pollinators, then cut the plant back if you want a fresh flush of growth. The flavor may change with plant age and conditions, so taste a leaf rather than discarding an otherwise healthy harvest.
Keep the plant healthy after a heavy harvest
Do not remove most of the leafy stems from a small or recently divided plant. A conservative rule is to leave at least two-thirds of its green growth in place at one time, especially during hot or dry weather. A strong, established plant can tolerate a harder cut, but it still needs leaves to fuel recovery. If you cut a large bundle, water the root zone if the soil is dry and give the plant a few weeks to branch again before taking another large harvest.
After flowering or when stems become tall and tired, cut back up to about one-third of the plant at a time. If the entire container is crowded and woody, take a more substantial rejuvenation cut once, then avoid repeated severe cuts while new shoots form. Trim damaged or diseased stems separately and clean pruners between plants when disease is suspected.
Propagate with cuttings or root divisions
Peppermint is easiest to reproduce from a rooted stem, runner, or division. A hybrid may not come true from seed, and a seedling labeled simply “mint” can differ from the flavor and habit you are trying to keep. The RHS recommends softwood cuttings and division for mint; those methods produce a plant with the same basic traits as the parent.
Root stem cuttings in water or soil
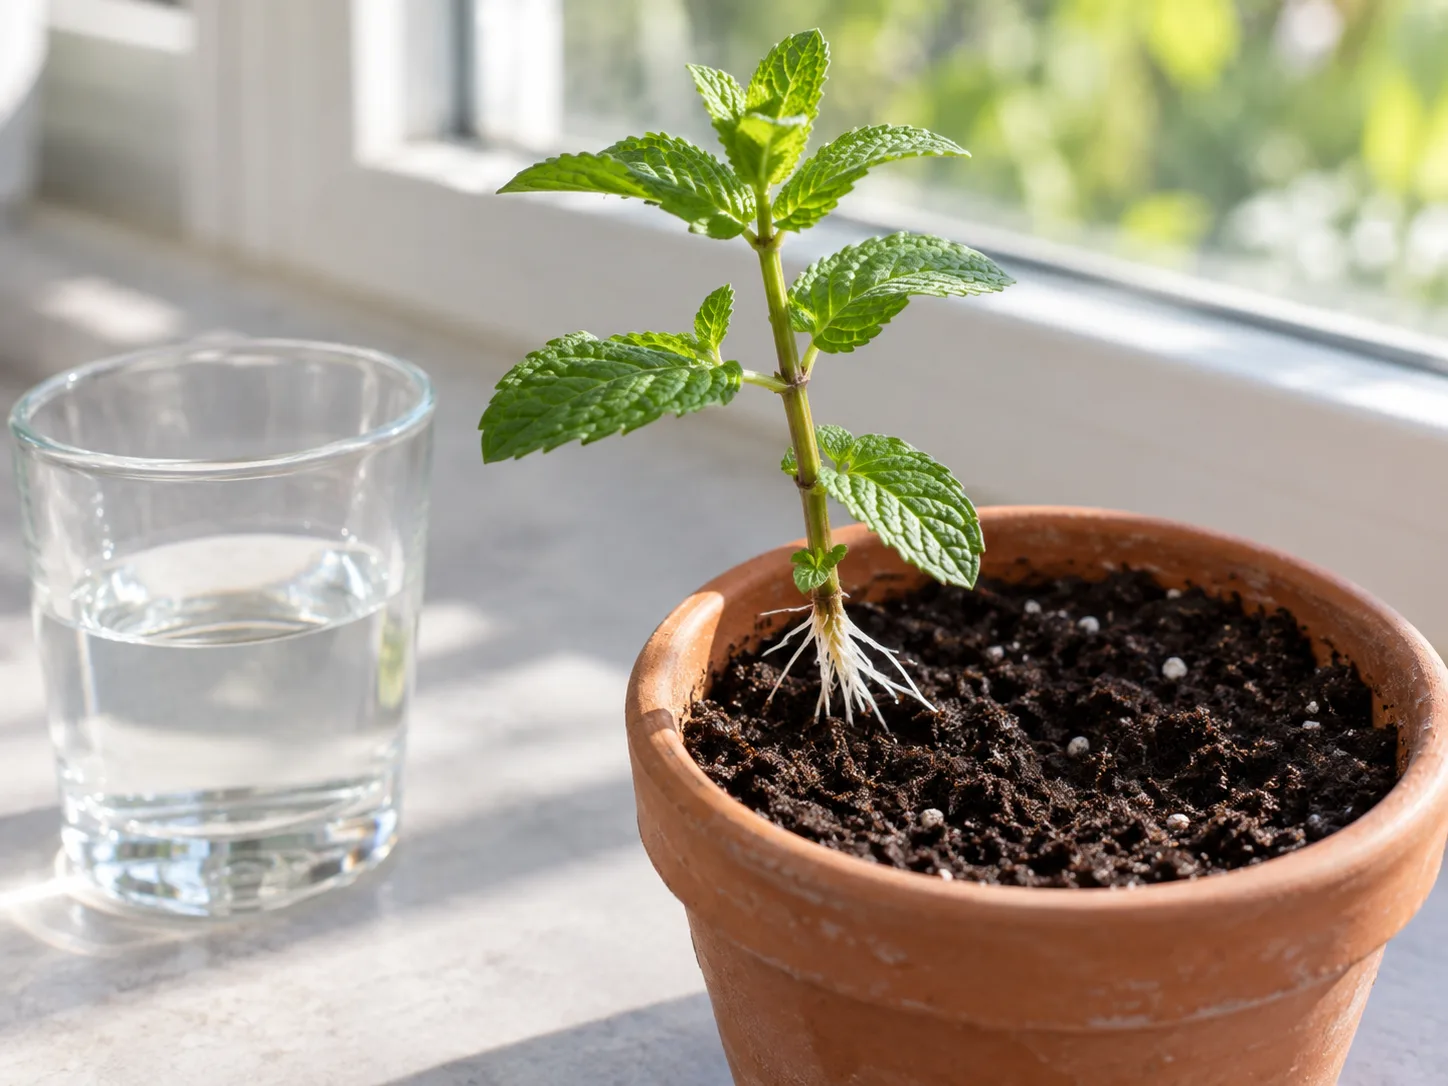
Take a healthy, nonflowering stem about 4 to 6 inches long and cut just below a leaf node with clean scissors. Remove the lower leaves so no foliage sits underwater or beneath the soil. Place the cutting in a clean glass with the lower node submerged, or insert that node into moist potting mix. Keep it in bright indirect light, not in hot direct sun, and maintain even moisture. Epic Gardening’s peppermint guide favors rooting directly in moist mix to avoid the transition from water to soil; water rooting remains useful when you want to watch the roots develop.
Water-rooted cuttings usually show new roots within a couple of weeks, but the timing varies. Wait until the roots are branching and a few inches long before potting the cutting. Move it into a small pot, water it in, then transition it gradually to brighter light over several days. For a soil-rooted cutting, a gentle tug that meets resistance and fresh new leaves indicate establishment; avoid pulling it up repeatedly to check.
Divide a crowded pot without spreading it
Divide peppermint when roots fill the container, the center is woody, or stems crowd one another despite regular pruning. Slide the rootball out and loosen it enough to see healthy pale roots and firm rhizomes. Separate it into sections that each have roots and several growing shoots. Discard dark, soft, or dried-out material rather than carrying it into the refreshed pot.
Replant one section in the original container with fresh mix, or move divisions into separate pots. Keep each new plant at the same depth it grew before, water thoroughly, and protect it from harsh midday sun while it re-establishes. Reuse extra divisions only if you have a planned contained spot for them; passing a small pot to a friend is better than placing unwanted runners loose in a garden bed.
Grow peppermint indoors and protect it over winter
A bright windowsill can extend the harvest, but indoor peppermint needs more light than many people expect. Put it close to a sunny window and rotate the pot when one side leans toward the glass. If stems become long, pale, and weak, move it to stronger light or use a grow light rather than increasing fertilizer. Indoor air can dry the pot quickly near heaters, so continue checking the soil instead of assuming that indoor plants need less water.
For winter, outdoor peppermint in a suitable climate usually dies back or slows, then regrows from the root system in spring. Leave the roots in the ground and remove dead top growth when it is easy to distinguish from new shoots. A potted plant is more exposed to temperature swings because its roots are above ground; in cold-winter regions, move it against a sheltered wall, into an unheated garage, or into another protected place before a severe freeze. Keep dormant soil from becoming completely dry, but water sparingly while growth is slow.
If you bring a pot indoors for winter leaves, expect a slower and sometimes less vigorous plant. Give it the brightest spot available, trim lightly, and keep it away from hot, dry air. Check foliage for pests before bringing the plant inside, since aphids or mites can multiply in a warm room. A few leaves turning yellow as outdoor stems die back is normal seasonal change; widespread soft, yellow growth in a wet pot is not.
Diagnose weak growth, pests, and mint rust
Mint is generally vigorous, but crowding, inconsistent water, pests, and fungal disease can reduce leaf quality. Start with the growing conditions before treating the plant. Look at the whole pot: Is it in hot reflected sun? Is the mix wet several days after watering? Are stems tightly packed, or is a root-filled pot drying within a day? Those clues help distinguish the cause of weak growth from a symptom that simply looks like “thirst.”
Distinguish water stress, crowding, and disease
If the whole plant wilts and the mix is dry, water thoroughly and move a container out of intense afternoon heat while it recovers. If it wilts while the mix is wet, make sure drainage holes are open and stop watering until the upper mix begins to dry. Yellow leaves at the base can also be ordinary aging when the top growth is healthy; remove the oldest leaves and watch the new tips rather than diagnosing the entire plant from one leaf.
Inspect the undersides of leaves and the newest stems for aphids, fine webbing, or stippling that can indicate spider mites. For a light infestation, isolate a potted plant, rinse the foliage with a firm but gentle stream of water, and remove heavily affected tips. Check again after a few days. If a pesticide is needed, use only a product labeled for the plant and intended use, and follow its directions; peppermint is a culinary herb, so avoid improvised sprays that are not labeled for edible crops.
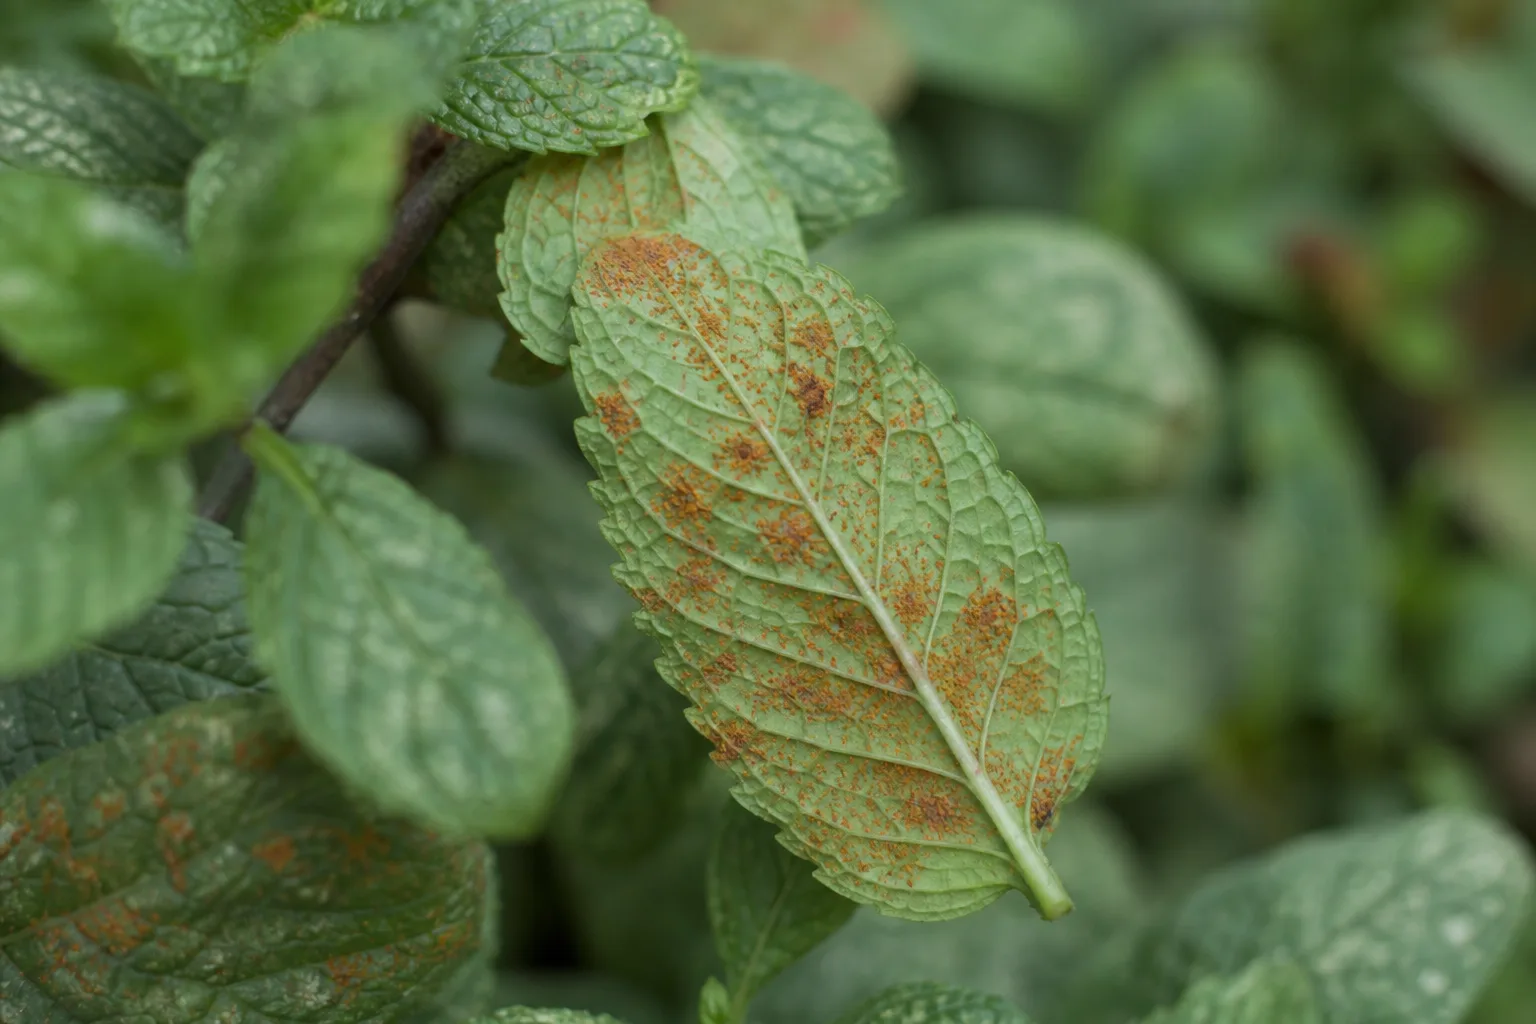
Mint rust appears as orange, yellow, or dark powdery spots, often first visible on leaf undersides. Remove infected stems and fallen leaves, avoid wetting foliage late in the day, and improve airflow by thinning dense growth. Do not put badly infected material in a home compost pile unless your local composting guidance confirms it reaches disease-killing temperatures. If rust returns repeatedly, start with clean, healthy divisions in fresh mix and avoid reusing contaminated potting soil. The RHS identifies mint rust as a common disease of garden mint.
If a pot remains stunted after you correct light, water, and crowding, inspect the roots. Healthy roots are firm and light-colored; a dense mat circling the pot needs division or fresh space. Dark, soft roots and sour-smelling mix point to prolonged saturation. Repot only healthy sections into a container with open drainage rather than moving the entire damaged rootball into another oversized pot.
Make the most of fresh peppermint
Use leaves soon after harvesting for the brightest aroma, or store short stems in a glass of water in the refrigerator for a few days. To dry a larger harvest, tie small bunches and hang them somewhere warm, dry, and out of direct sun, or use a dehydrator on a low setting. Store fully dry leaves in an airtight container away from heat and light; moisture left in the jar can spoil the batch.
Fresh peppermint works in tea, cold drinks, sauces, fruit, and savory dishes. Start with a few leaves and adjust to taste because the strength changes with cultivar, growing conditions, and leaf age. When you harvest more than you can use, freeze the leaves or chopped sprigs in small portions rather than leaving a large bundle to wilt in the refrigerator.
The plant can also flower if you leave some stems uncut. Small pink to lavender blooms are a useful food source for pollinators, and flowering does not make the leaves unusable. Keep one section flowering if you want the wildlife value, and continue clipping another section for tender growth. This split approach gives you flowers without sacrificing the entire harvest.
Conclusion
Grow peppermint in a roomy, well-drained container or behind a visible underground barrier, then place it where it gets several hours of sun without baking in reflected heat. Keep the soil evenly moist, check the pot before watering, and prune shoot tips regularly to encourage fresh branching. If growth slows, inspect moisture and root crowding before feeding; if rust appears, remove affected foliage and improve airflow.
The most reliable way to keep peppermint productive is also the simplest: contain the roots, harvest a little and often, and divide the pot when it becomes crowded. With those habits, you can enjoy fresh leaves through the growing season and carry healthy divisions or cuttings into the next one without letting the plant take over the garden.



