Philodendron Mayoi Care for Healthy Climbing Growth
Learn Philodendron Mayoi care with a simple guide to light, watering, airy soil, climbing support, propagation, and the leaf problems you can diagnose early.
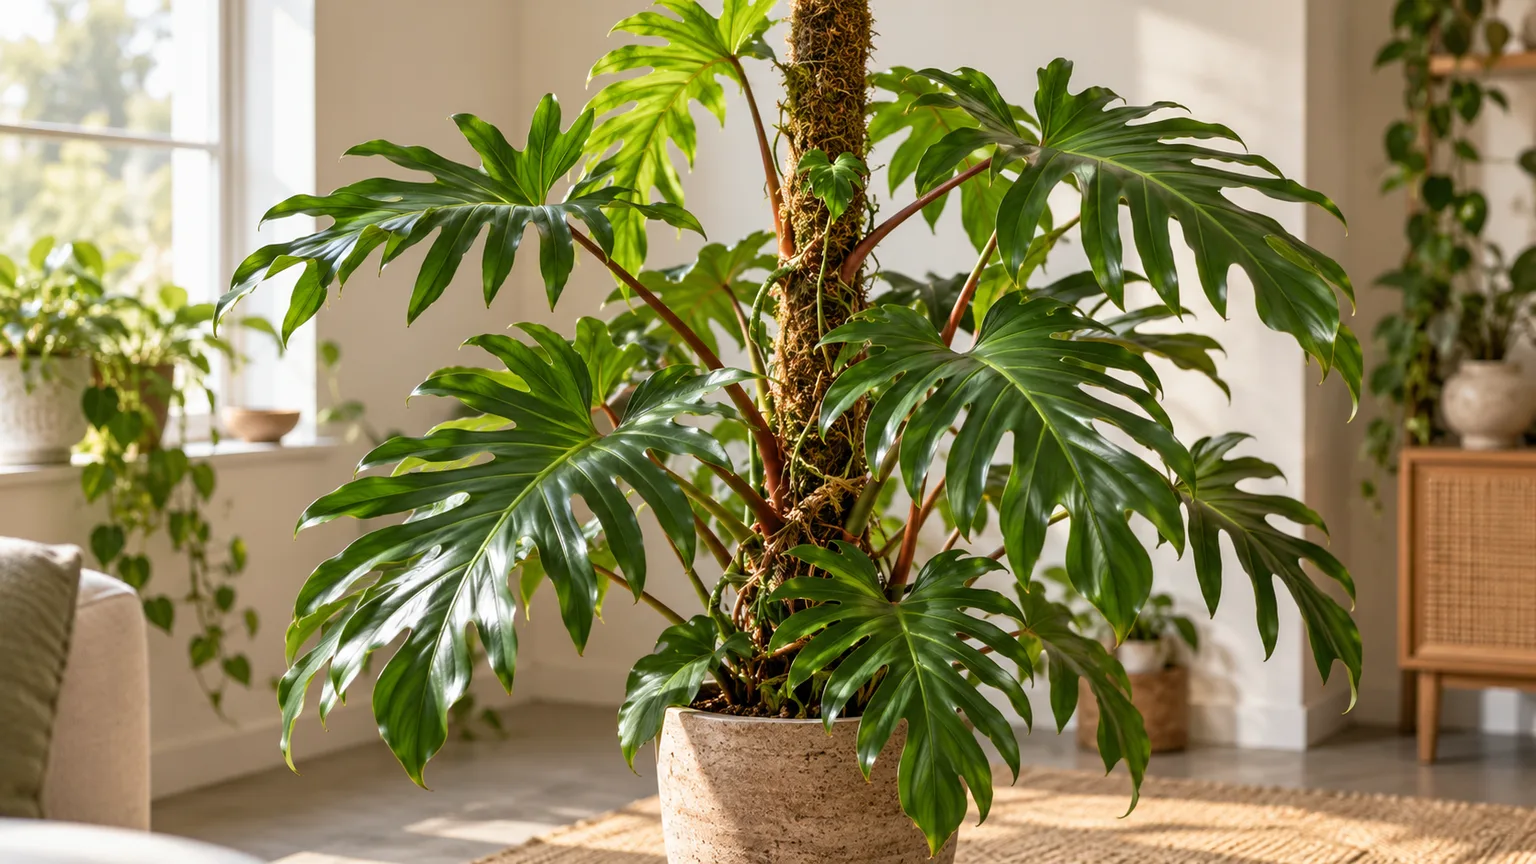
Philodendron mayoi is a climbing aroid with glossy, deeply lobed leaves that become more divided as the plant matures. It is a manageable houseplant when its roots get air, its light is bright but filtered, and watering follows the condition of the mix instead of a calendar. Kew records the accepted species as native to central-western Brazil, where it grows in a seasonally dry tropical biome (Plants of the World Online).
The useful starting point is not trying to recreate a rainforest indoors. Choose a warm, bright place, pot it in a mix that drains freely, and decide whether you want the stems to climb or trail. After that, let the plant’s soil, roots, and newest leaves tell you when to adjust care.
What to Know About Philodendron Mayoi
Mayoi stands out because its leaf shape changes with age. The Royal Horticultural Society notes that juvenile leaves are lobed, while mature leaves become sharply indented almost to the midrib; a young plant may therefore look less dramatic than a mature specimen. That change is normal development, not proof that the plant has been mislabeled or needs a special fertilizer.
The species is a climber or scrambling subshrub, not a self-supporting rosette. In a home it can use a pole or trellis, but it can also trail over a shelf if you are willing to prune long stems. The RHS lists a potential height of roughly 1.5 to 2.5 meters under suitable growing conditions, while actual indoor size depends on light, pot space, support, and how often you trim it (RHS plant profile).
Treat “fast-growing” as a possibility during a bright, warm growing season, not a weekly promise. New growth can pause in winter, after repotting, or when light drops; a plant producing one healthy leaf at a time may simply be adapting to the room. Stable conditions and sound roots matter more than pushing it with extra water or fertilizer.
Choose Light, Warmth, and Humidity It Can Live With
The most useful setup is a bright window with softened light and a spot away from cold drafts or heating vents. A Mayoi in steady conditions can adjust to ordinary indoor humidity; a humidifier may help in an unusually dry room, but it cannot compensate for weak light or saturated soil.
Give It Bright, Filtered Light
Place the pot near an east-facing window, or a few feet from a brighter south- or west-facing window where a sheer curtain softens the strongest rays. The RHS recommends bright but diffused light for this species. A short period of mild early sun may be tolerated after gradual acclimation, but strong midday sun through glass can bleach or scorch the leaves.
Too little light often shows up across several leaves rather than as one isolated mark: stems stretch toward the window, spaces between leaves lengthen, and new leaves may be smaller or slower to open. Move the plant closer to a bright window in small steps, then give it time to respond. If only the window-facing leaves develop dry pale patches, reduce direct exposure before changing the watering routine.
Rotate the pot when growth leans toward the glass, rather than treating weekly rotation as a rule. A quarter-turn now and then can even out the canopy, but frequent movement between very different light levels can cause extra stress. Clean dust from broad leaves with a damp soft cloth so the foliage can receive available light; avoid oily leaf-shine products.
Keep Conditions Steady
Mayoi comes from a tropical region, but that does not mean it needs a hot greenhouse or a fixed humidity reading to survive. Keep it in a comfortably warm room and away from a cold windowpane, exterior door, or direct blast from an air conditioner. If you move it outdoors in warm weather, choose bright shade and acclimate it over several days; bring it back in before nights turn cool.
Humidity is best treated as a comfort adjustment, not a target that overrides other care. If new leaves repeatedly dry at the edges while the soil moisture and light are appropriate, increase room humidity with a room humidifier or group plants together. Misting briefly wets foliage but does not hold room humidity, and a pebble tray should not leave the pot standing in water.
Plantophiles’ Mayoi care notes also describe the species as adaptable when growers cannot provide very high humidity (Plantophiles). That is a useful reminder not to chase a number: correct the conditions that are visibly causing stress, and avoid changing several variables at once.
Build an Airy Root Zone
Mayoi likes a root zone that holds some moisture after watering but does not stay dense and airless. A “chunky aroid mix” is only useful if it still wets evenly and supports the plant; very coarse bark alone can dry too fast, while a heavy peat-rich mix can remain wet for too long in a cool room.
Choose the Mix and Pot Together
For a practical starting mix, combine two parts quality peat-free houseplant compost with one part orchid bark and one part perlite or pumice. The compost stores moisture and nutrients, bark opens the structure, and perlite or pumice helps excess water move through. This is a workable home blend, not a species-specific formula; the RHS’s cultivation advice for glasshouse plants uses peat-free, loam-based compost with extra horticultural grit, and Plantophiles also favors a fast-draining mix with bark and perlite.
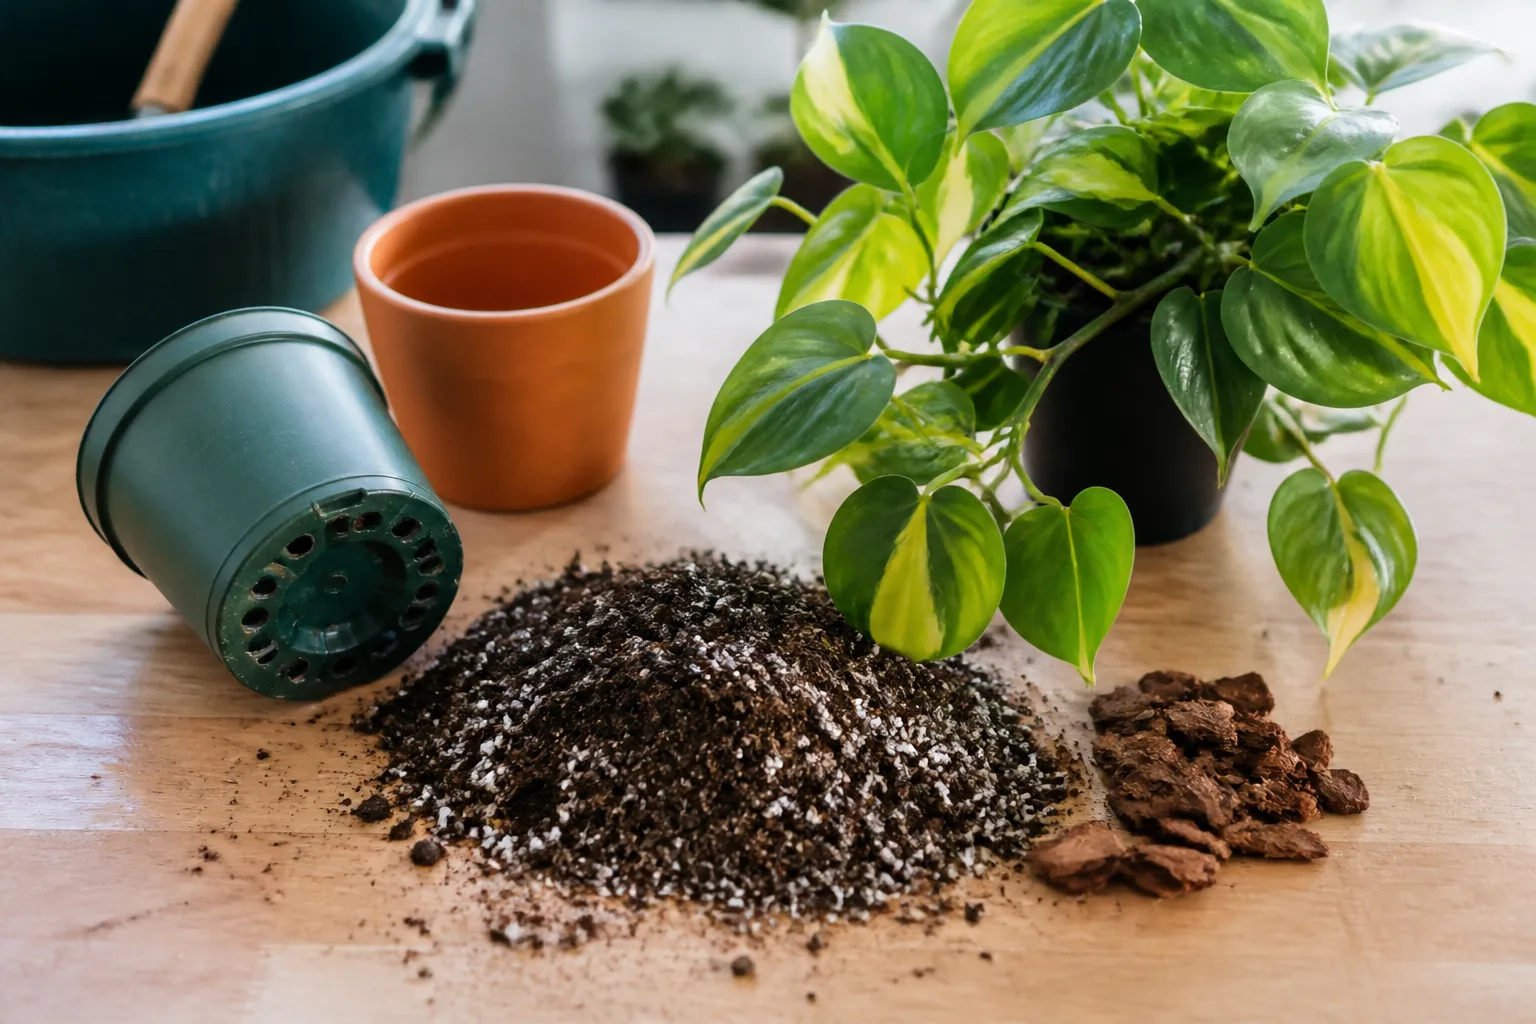
Choose the pot and mix as a pair. A pot with several drainage holes lets excess water escape, while a container only slightly larger than the root ball limits the amount of unused wet mix around the roots. If the plant is in a cachepot, lift the nursery pot out to drain after watering instead of letting it sit in pooled water.
Adjust the blend to your home rather than following recipes as exact chemistry. If a pot remains damp for many days in winter, increase the airy ingredients or use a smaller pot next time; if water rushes through and the root ball dries quickly in a warm bright room, use a little more compost or smaller bark pieces. Do not add a gravel layer to the bottom of a pot as a substitute for drainage holes.
Water by Soil Condition, Not a Calendar
Water when the upper layer of mix has dried and the root zone is beginning to lose moisture, not simply because a certain number of days has passed. The RHS recommends allowing the compost surface to become just dry, then watering thoroughly during the growing season; Plantophiles suggests checking a few inches into the soil. Together, those cues are more useful than a weekly schedule because pot size, temperature, light, and mix all change how quickly water is used.
Push a finger about 2 inches into the mix, or use a clean wooden skewer in a large pot. If that layer still feels cool and damp, wait and check again in a few days; if it feels dry and the pot is noticeably lighter, water. In a very large container, check closer to the middle of the root ball rather than relying on a dry surface crust.
When it is time, pour slowly across the surface until water runs from the drainage holes. Empty the saucer or outer pot after it drains. A small splash every few days leaves some roots dry while keeping other areas constantly damp, so a full soak followed by a measured dry-down is safer for the root system.
Expect the interval to change through the year. Bright summer conditions may dry the mix faster; short winter days and slower growth often extend the time between waterings. If your plant is in a cool room, a large pot, or a moisture-retentive mix, wait longer than a calendar suggests. If it is warm, brightly lit, and rooted through a small pot, check more often without automatically watering.
Train the Climbing Vine
Support is optional for keeping the plant alive, but useful if you want an upright silhouette and room for the vine to mature. The RHS describes Mayoi as a climbing plant, and the genus commonly uses aerial roots to attach to nearby surfaces. A support gives you a predictable direction for growth; it does not instantly make leaves larger if the plant is short on light or has unhealthy roots.
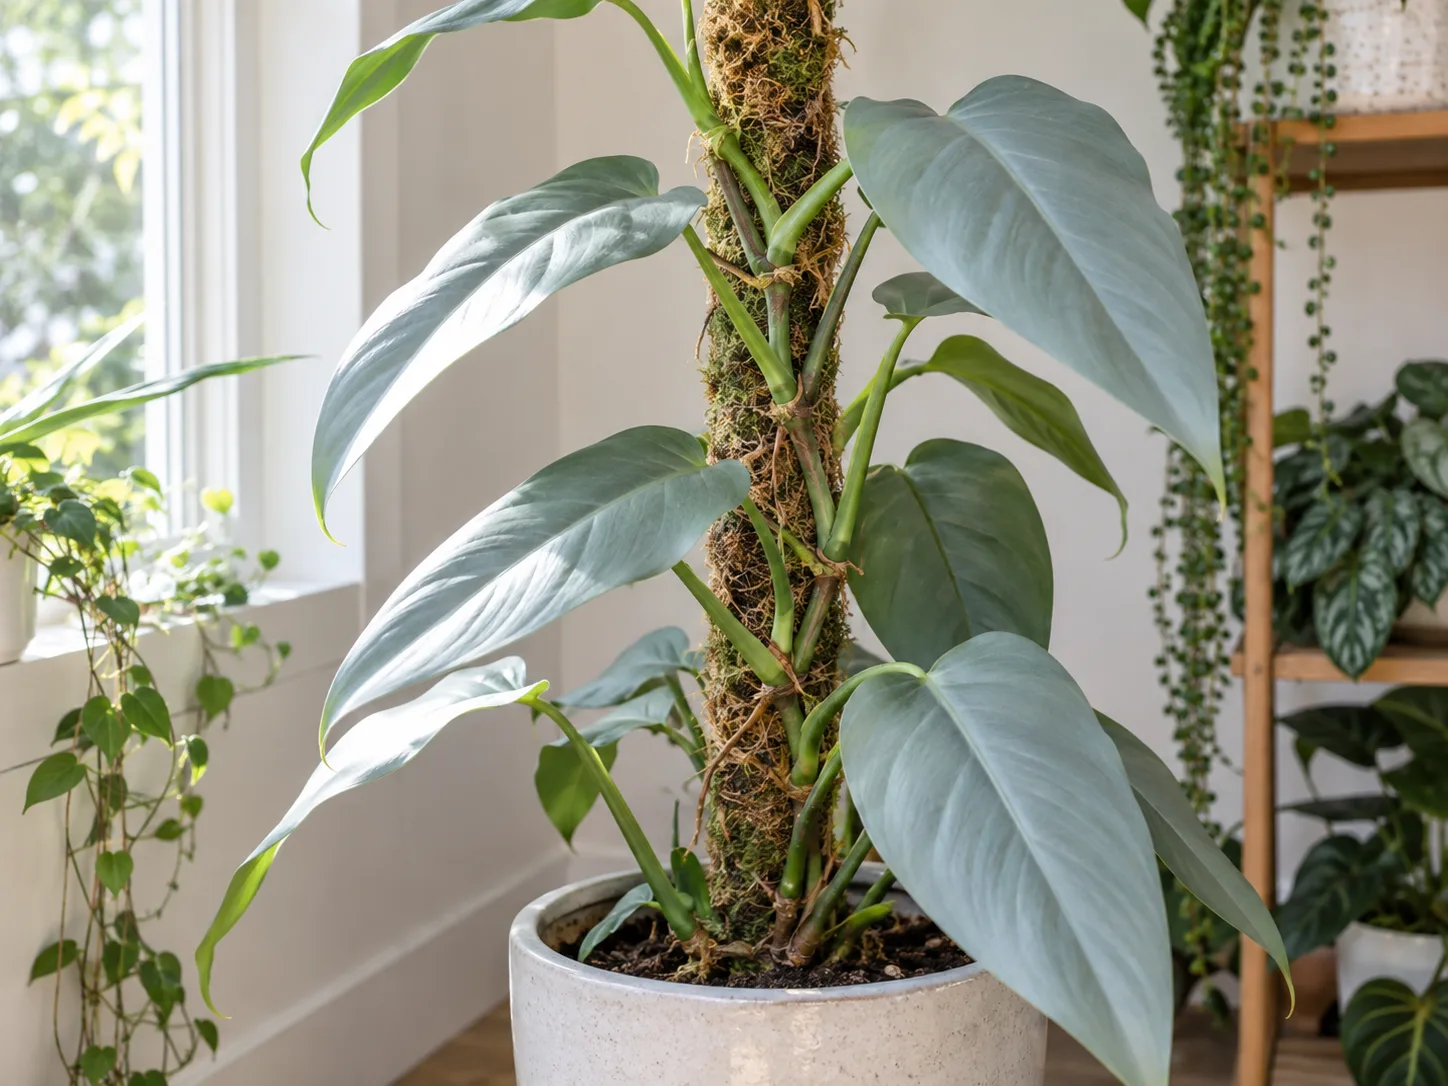
Set the support deep enough to stay stable, ideally when repotting so you do not drive it through a dense root ball. Keep the main stem against the support and use soft plant ties with slack. Tie around the stem at an interval or node, not around a leaf stalk; petioles need to move and turn toward light, and a tight tie can bruise the growing vine.
If the plant is already leaning, do not force a long woody stem upright in one bend. Add a stake beside the pot, attach the flexible upper growth first, then guide the older section gradually as it loosens. Direct the aerial roots toward the pole or potting mix if convenient, but there is no need to cut off every root that points into open air.
Choose a Moss Pole, Stake, or Trellis
A moss pole is useful when you want aerial roots to attach to a moist, textured surface and the plant to climb vertically. It needs occasional moisture only if you want those roots to grow into it; keeping a moss pole constantly wet can add moisture beside the stem and is not a substitute for watering the pot correctly. A coir or plastic pole can hold the vine upright without offering the same rooting surface.
A trellis or simple stake takes less maintenance and is a good choice when you mainly need to stop the plant from flopping. If you prefer a hanging or shelf-grown shape, allow stems to trail and prune them to fit the space. You do not need to buy a moss pole for a Mayoi that is healthy, well lit, and being grown as a compact trailing plant.
Feed and Prune Without Forcing Growth
Feed only while the plant is actively making new growth. The RHS recommends monthly liquid houseplant fertilizer during its April-to-September growing season under glass and stopping feed when growth slows in winter; indoors, use the product’s label and your plant’s growth as the guide. A conservative dose is safer than stacking multiple fertilizers or adding coffee grounds, tea leaves, or homemade mixtures with unknown nutrient levels.
Apply fertilizer to already moist mix, not to a bone-dry root ball, and pause if the plant has just been repotted, is sick, or is not growing. A white crust on the soil or pot rim can indicate salt buildup; flush the mix with plain water that drains freely, then resume at a lighter rate only when growth is active. Yellow leaves alone do not mean the plant is hungry, so check light and soil first.
Pruning can control the vine’s length or encourage a more compact outline, but it will not change a plant’s natural climbing habit. Use clean shears to remove a dead leaf at the base of its petiole, or shorten a long stem just above a node. A node is the joint where a leaf and aerial root may emerge; leave one on the parent vine below the cut if you want it to branch, and save the cut section only if it includes a node for propagation.
Wear gloves if the sap irritates your skin, and keep the cut surface away from eyes and mouths. Avoid removing a large amount of healthy foliage at once, particularly when the plant is already adjusting to a move or low light. One or two well-placed cuts are easier for the plant to recover from than a severe reshape.
Repot When the Roots or Mix Call for It
Repotting is usually appropriate when roots circle densely around the pot, emerge from several drainage holes, or the mix has broken down and stays wet or dries unevenly. One root at a drainage hole by itself is not an emergency; roots naturally explore openings. The RHS suggests repotting every two to three years, but timing varies with pot size and growth, so treat that as a check-in interval rather than a deadline.
Move up only one pot size, roughly 1 to 2 inches wider than the current pot. An oversized container leaves more damp mix around a modest root system, increasing the time it takes to dry. Keep the crown at its former soil line, loosen only roots that are tightly circling, and trim roots that are clearly mushy or dead with clean shears.
Repot during active growth if possible, and water the fresh mix until it drains. Do not fertilize immediately to “settle” the plant; fresh compost may already contain nutrients, and stressed roots do not need a strong feeding. Return it to a similar light level, then resume normal moisture checks once it has settled rather than watering on a new schedule.
Propagate a Stem Cutting
Stem cuttings are the simplest way to make another Mayoi. A leaf without a node cannot produce a new vine, so identify the stem’s joints before cutting; each viable cutting needs at least one node and ideally a healthy leaf. The RHS lists stem-tip and leaf-bud cuttings as propagation methods for this species, and Plantophiles describes rooting Mayoi cuttings in either water or a moist medium.
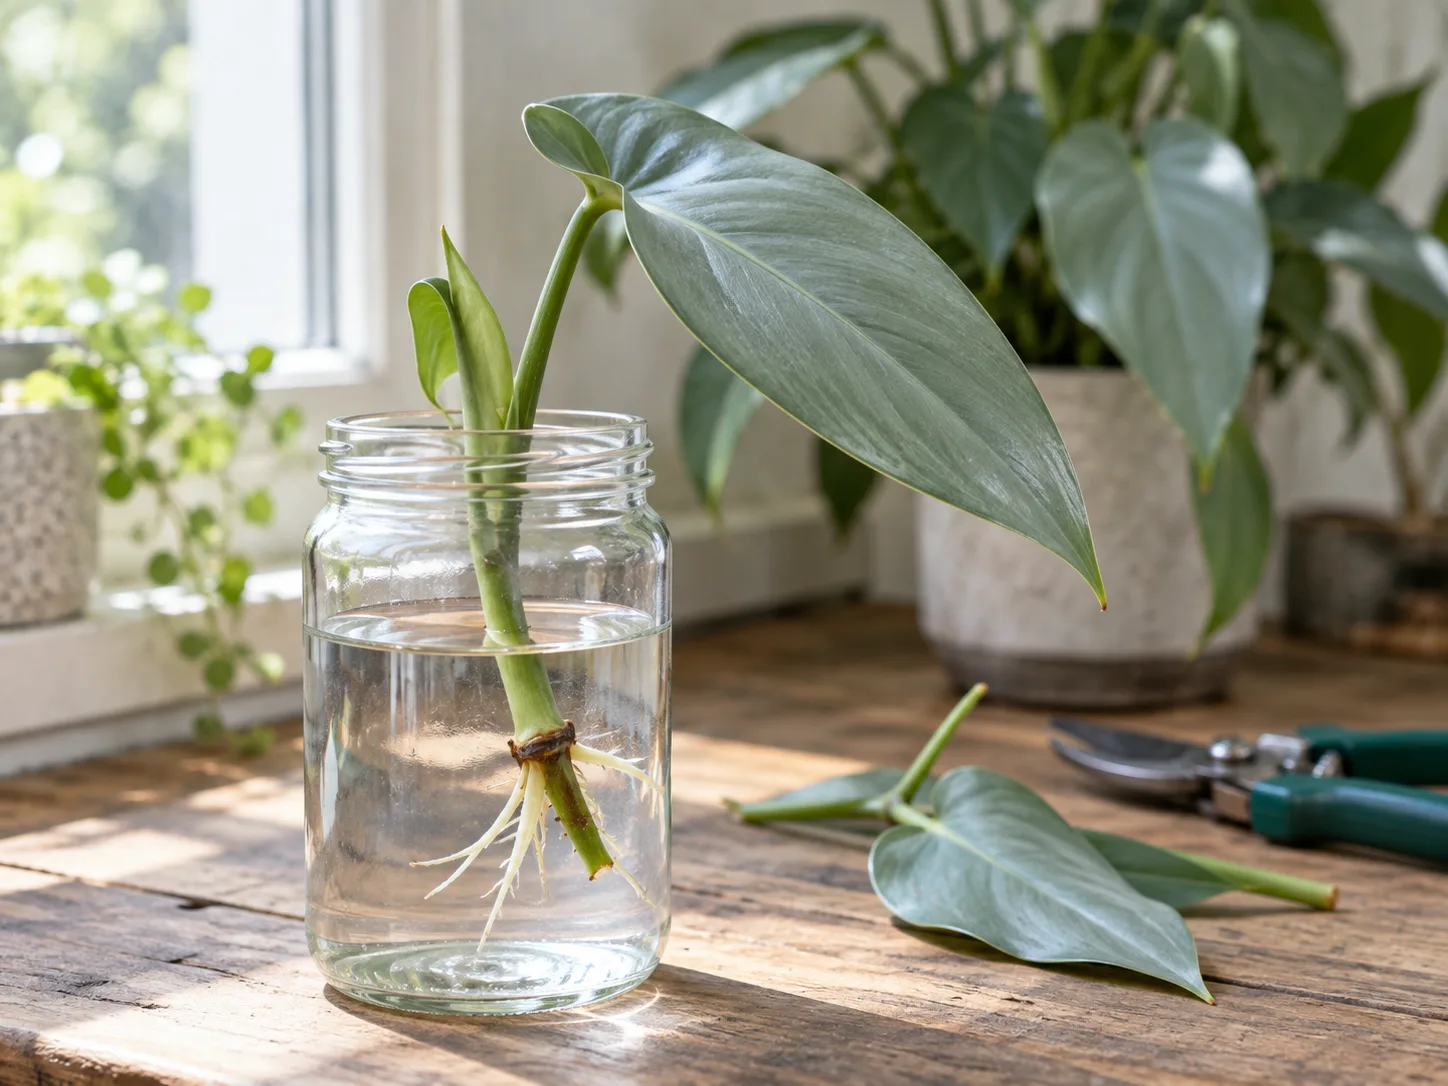
Choose a Node and Root It
Use clean sharp snips and take a healthy tip with at least one visible node. Make the cut just below the node, then remove any leaf that would sit under water or below the rooting mix. Handle the sap carefully and do not take a cutting from a plant with suspected pests or stem rot.
For water rooting, place the node under clean water while keeping the leaf above the surface. Put the jar in bright indirect light and refresh the water if it becomes cloudy or drops below the node. Roots may appear in a few weeks, but warmth, season, and the cutting’s condition affect the pace; move it to potting mix when it has several roots long enough to hold the cutting, rather than waiting for a tangled mass.
For direct rooting in mix, insert the node into lightly moist, airy medium and keep the leaf above the surface. Covering the pot is optional; if you use a clear cover, leave ventilation and remove it if condensation stays heavy. The mix should remain lightly moist during rooting, never waterlogged, and the pot needs drainage just like the mature plant.
After transplanting a water-rooted cutting, keep the mix evenly lightly moist for the first couple of weeks while new soil roots establish, then return to the normal dry-upper-layer check. Do not pull it out repeatedly to inspect roots; resistance, fresh growth, or a cutting that stays upright are better signs of establishment. Hold fertilizer until it resumes active growth.
Diagnose Problems From the Whole Pattern
Read the pattern before changing care. One aging lower leaf, several yellow leaves in damp soil, and pale patches on the sunny side point to different causes. Check the mix and recent changes first, then adjust one condition at a time so you can tell whether the plant is responding.
Yellow Leaves or Drooping
If several leaves yellow while the mix remains wet for days, check drainage and roots before adding fertilizer. A sour smell, soft stem base, or dark mushy roots suggests the root zone has stayed too wet; move the plant out of standing water and correct the pot or mix. Yellowing alone cannot confirm root rot, and an older lower leaf that yellows while new growth stays healthy may simply be reaching the end of its life.
If the mix is dry well below the surface and the pot feels light, water thoroughly and let it drain. Leaves that droop from thirst may improve after a good watering, while a plant in saturated mix can also droop because damaged roots cannot take up water. In that case, more water makes the original problem worse, so use the soil check rather than leaf posture by itself.
Pale or scorched marks on the side facing a bright window point toward excess direct sun. Long, weak stems and smaller leaves across the plant suggest too little usable light. Make the corresponding light change gradually, and give the plant a few weeks to show a growth response instead of moving it repeatedly.
Brown Tips, Slow Growth, and Small Leaves
Brown leaf tips can follow uneven watering, salt accumulation, a very dry room, or root stress; they are not a single-purpose humidity gauge. Check whether the mix swings from soggy to bone dry, whether fertilizer or hard water has left a crust, and whether the affected tips are limited to older leaves. Correct the root cause and trim only the dry tissue if the appearance bothers you; the brown part will not turn green again.
If new leaves stay small or the vine becomes leggy, look at light and support before feeding more. A climbing stem growing along a shelf may make smaller leaves than one trained upward, but low light can limit leaf size even on a pole. Confirm that the newest growth is healthy and that the plant is not in winter slowdown before deciding that it has stopped growing.
Humidity may contribute to crispy edges when indoor air is consistently very dry, especially while new leaves unfold, but misting is a short-lived fix. A room humidifier is more predictable if the problem repeats after watering and light are stable. Keep airflow around foliage and avoid trapping wet leaves in a cold, closed corner.
Check for Pests Before Treating
Inspect the undersides of leaves, the joints where petioles meet stems, and any new unfurling leaf. Mealybugs look like small cottony clusters, scale like fixed bumps, and spider mites can leave fine stippling or webbing. The RHS lists scale, glasshouse red spider mite, and mealybugs among pests that may affect Mayoi; another horticulturist-reviewed philodendron guide from Epic Gardening also describes these as common philodendron pests (RHS, Epic Gardening).
Isolate a plant with confirmed pests before they spread. Wipe or rinse off what you can see, then recheck the whole plant every few days; eggs and juveniles may be missed on the first pass. If you use an insecticidal soap or horticultural oil, choose a product labeled for indoor plants and the pest, follow its label, and test a small area first because some foliage can be sensitive.
Do not spray an unknown leaf problem as a precaution. Sun scorch, old-leaf decline, and root stress will not be fixed by pest treatment, and unnecessary applications can further mark foliage. If the symptoms keep spreading after the likely cause is corrected, inspect the plant again under good light or ask a local extension service or experienced nursery to help identify the problem.
Place It Safely Around People and Pets
Treat Philodendron mayoi as toxic if chewed or swallowed, and handle cut or broken stems with care. Poison Control explains that philodendrons contain calcium oxalate crystals that can cause painful mouth irritation and swelling when chewed, and that sap can irritate skin or eyes (Poison Control). The RHS also flags Mayoi as harmful if eaten and advises protective equipment when handling it.
Keep the plant and fallen leaves out of reach of children and pets, and wash your hands after pruning. If sap gets on skin, wash it off with soap and water; if it reaches the eyes, irrigate with water for 15 minutes. If a person or pet bites the plant, contact a poison center, veterinarian, or local medical service for advice rather than trying to diagnose the exposure at home. In the United States, Poison Control can be reached at 1-800-222-1222.
Conclusion
Philodendron Mayoi care is mostly about keeping the roots airy and the growing conditions steady. Give it bright filtered light, a draining pot and mix, and a thorough watering only after the upper layer has dried; reduce watering and feeding as growth slows in winter.
Support the vine if you want it to climb, prune it if you need to control its reach, and propagate only stem pieces that include a node. When leaves change, check the soil, light, and newest growth together before changing the whole routine. That simple order prevents most avoidable setbacks and gives the plant room to mature into its distinctive lobed foliage.