How to Grow Swiss Chard: Planting, Care, and Harvest
Learn how to grow Swiss chard from seed or transplants, space it for baby or full-size leaves, water steadily, prevent common problems, and harvest regrowth.
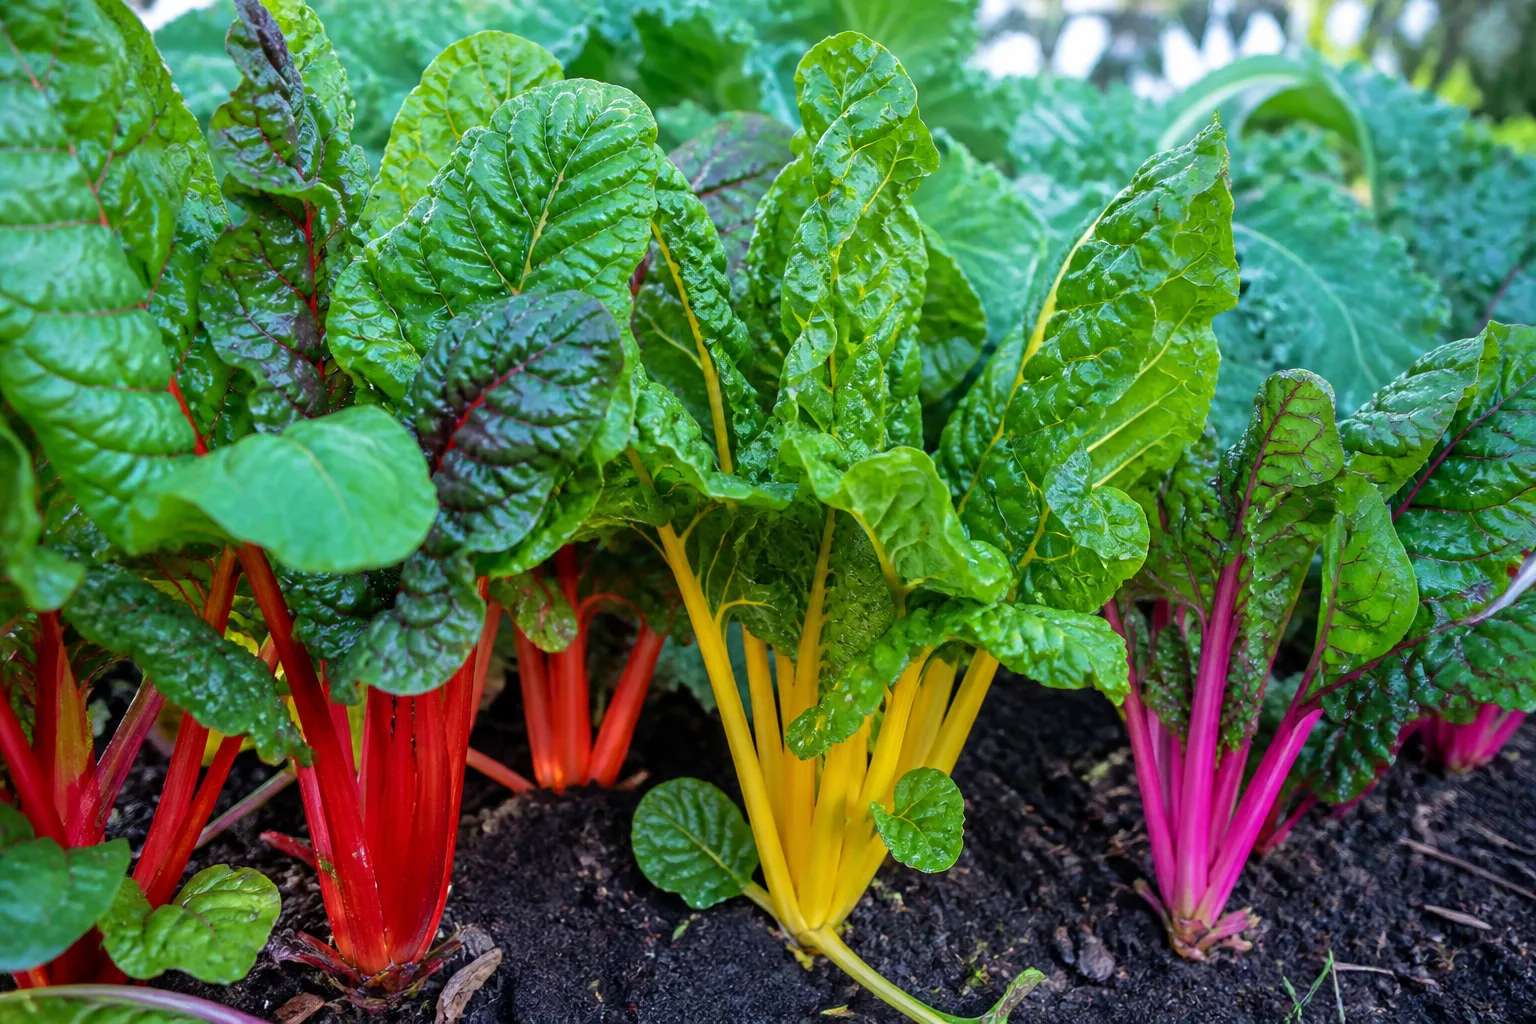
Swiss chard is a productive leafy vegetable when it gets a cool growing window, fertile soil that drains, and steady moisture. Direct-sow seed about one-half inch deep once the soil is workable and near 40°F, then thin the seedlings to match the size of leaves you want; harvest the outer leaves while leaving the center intact.
The crop is more flexible than a strict calendar suggests. In a cool-summer region it can grow from spring into fall, while a hot-summer garden often does better with a spring crop and another sowing for cooler weather; in mild-winter areas, established plants may live through winter and flower in their second season. Match the planting window to local frost risk, soil temperature, and the time your cultivar needs to mature.
Swiss Chard at a Glance
Swiss chard, also called chard or silverbeet, is grown for its broad leaves and fleshy leaf stalks. It is a biennial that most gardeners treat as an annual: the first season produces the harvest, and a plant that survives winter can send up a flower stalk in its second year.
| Growing need | Practical starting point |
|---|---|
| Light | Six to eight hours of sun; afternoon shade can help in hot climates |
| Seed depth | About one-half inch |
| Soil to sow | Around 40°F or warmer; germination is strongest in cooler-to-mild soil |
| Final spacing | About 6 inches for baby leaves; roughly 10 to 12 inches for full-size plants |
| Water | About 1 to 1.5 inches per week, including rainfall, adjusted to conditions |
| First full-size harvest | Often around 50 to 60 days, depending on cultivar and weather |
These numbers are starting points, not guarantees. Utah State University Extension recommends close spacing for chard in its regional guide, while horticulture references allow more room for larger plants; seed packets also differ in their “days to maturity” counts. (Utah State University Extension, Epic Gardening, Gardener’s Path)
Read the Climate Before You Pick a Planting Window
Chard grows most reliably when plants can establish before sustained summer heat. Utah State University Extension notes that seeds can be sown once soil reaches about 40°F, germination is best around 55–75°F, and soil above 80°F can reduce emergence; hot weather also slows growth and can make leaves less pleasant to eat. Those temperatures are useful benchmarks, but local soil, cultivar, and weather patterns matter more than a month printed on a generic calendar. (Utah State University Extension)
For spring planting, use your local last-frost guidance as a planning reference rather than a hard rule. Direct-sown chard can tolerate cool conditions better than a tender warm-season vegetable, but a prolonged freeze can still damage young plants, and cold, wet soil may delay germination; wait until the bed is workable and protect seedlings if a sharp cold snap is forecast.
For an autumn crop, count backward from the first likely hard freeze using the seed packet’s maturity estimate, then add a cushion for slower growth as days shorten. In regions with hot summers, sowing when the soil begins cooling can be more dependable than trying to germinate seeds in overheated ground; in mild-winter areas, the crop may keep producing longer, but it is not immune to hard freezes.
Give Chard Sun, Drainage, and Fertile Soil
Choose a spot with at least six hours of direct sun for sturdy stems and faster leaf growth. Swiss chard tolerates partial shade, and afternoon shade can reduce heat and water stress in a hot inland or southern garden, but deep shade usually means slower growth and smaller harvests. (Epic Gardening, Utah State University Extension)
The bed should hold moisture without staying saturated. Chard performs best in fertile, well-drained soil with organic matter; if a site puddles after rain, improve the bed or grow in a raised bed rather than trying to compensate with less watering. A soil test helps you decide whether the garden needs compost or fertilizer and prevents the common mistake of adding amendments simply because leafy crops look “hungry.” (Utah State University Extension)
Work mature compost into the surface if the soil is low in organic matter, and loosen compacted ground so roots can establish. Avoid fresh manure and heavy, unmeasured fertilizer applications near sowing: they can create uneven growth or salt stress, while chard in already fertile ground may need little extra feed.
Choose Direct Sowing or Transplants
Both methods work, so choose by the season and how much time you have. Direct sowing is simple and avoids transplant shock; transplants can give an earlier start when you need to get plants established before hot weather or a short autumn window.
Direct sowing
Chard “seeds” are actually dry seed clusters that can produce more than one seedling. Sow a cluster about one-half inch deep every few inches in a row, keep the surface evenly moist until emergence, and plan to thin later instead of trying to separate seedlings while they are tiny. In suitable soil, emergence may take roughly a week or two; cold, crusted, or hot soil can stretch the wait or leave gaps. (Utah State University Extension, Gardener’s Path)
Once seedlings have several true leaves, keep the strongest plant at each final spacing and snip the extras at soil level. Pulling crowded seedlings can disturb the roots of the plant you want to keep, especially in dry or compacted soil; the thinnings are edible if they are clean and healthy.
Starting and setting transplants
Start seed indoors in a clean seed-starting mix and give seedlings bright light so they grow sturdy rather than stretched. Utah State University Extension describes a transplant as ready when it has about four to six mature leaves and a developed root system; that can take several weeks, so use plant size and outdoor conditions together rather than relying on an exact countdown. (Utah State University Extension)
Harden seedlings by gradually exposing them to outdoor sun and wind over several days. Set them into moist soil at the same depth they were growing in the pot, firm the soil gently, and water them in; handle the root ball carefully and avoid burying the crown. A little temporary droop after transplanting is common, but persistent wilting usually points to poor root contact, dry soil, or heat stress.
Thin and Space for the Harvest You Want
Spacing is a harvest decision. For small, tender leaves, plants can sit closer together; for broad leaves and thick stalks, give each plant more room so it can form a full crown and so you can reach in to cut outer leaves without bruising the center.
Utah State University Extension gives six inches between plants and 12 inches between rows as a compact planting pattern. Gardener’s Path uses about 12 inches between full-size plants and 18 inches between rows, while also describing close spacing for baby greens; use the tighter layout for frequent young-leaf harvests and the wider end for large cultivars, airflow, and easier picking. (Utah State University Extension, Gardener’s Path)
Thin gradually if you are undecided: begin with plants about six inches apart, then remove or transplant a few to widen the spacing as you see how large the cultivar grows. Check the packet’s mature size before planting a whole bed, since a “rainbow” mix can contain plants with different vigor and leaf dimensions.
Water Often Enough to Keep Growth Steady
Aim for consistent moisture through the root zone, not a daily sprinkle that wets only the soil surface. A useful starting target is about one to one-and-a-half inches of water per week from rain and irrigation; Utah State University Extension gives a broader one-to-two-inch range, which reflects differences in heat, soil, and growing conditions. (Utah State University Extension, Epic Gardening)
Check the soil before watering. If the top inch is dry and the root zone feels only slightly moist, water deeply; if the bed is still wet from rain, wait, especially in heavy soil. Sandy beds and containers dry faster, and hot or windy weather may require more frequent checks than a mild week.
Moisture swings slow leaf production and can leave leaves tougher than steadily grown foliage. Mulch lightly after seedlings are established to reduce evaporation and weeds, leaving a small clear ring around each crown; water at soil level when practical so leaves dry quickly, particularly in humid weather.
Feed from Soil-Test Results
Chard is grown for leaves, but that does not mean it needs an automatic dose of high-nitrogen fertilizer. Start with soil-test recommendations; if the soil is already fertile and plants are growing steadily, skip extra feed, and if growth is pale or slow, check moisture, temperature, crowding, and root health before blaming nutrients.
Where a test shows low fertility, incorporate a balanced vegetable fertilizer or compost at the labeled rate before planting. Utah State University Extension recommends a modest nitrogen side-dressing after seedlings are established in its local production guidance, but the exact amount should follow your soil test and the product label rather than being copied to every garden. Keep fertilizer off leaves and stems, and water it into the soil. (Utah State University Extension)
Too much fertilizer cannot fix waterlogged roots, hot soil, or a crowded bed. It can instead push soft leafy growth that needs more frequent watering, so correct the growing condition first and reassess before feeding again.
Grow Swiss Chard in a Container
Use a container at least 12 inches deep with several drainage holes and enough surface area to space plants according to the leaf size you want. One plant in a medium pot is easiest to manage; a wide trough can hold more, but leave about 8–12 inches between plants for full-size leaves or grow them closer and harvest young. (Gardener’s Path)
Fill the pot with a quality container mix rather than garden soil, which can compact and drain poorly in a confined space. Set the pot where it receives several hours of direct sun, then check moisture more often than you would in a garden bed because wind and sun can dry the container quickly.
When roots fill the pot, growth and watering become less forgiving. Harvest outer leaves regularly, keep the center intact, and move the container into afternoon shade during a heat spell if the leaves wilt despite moist soil.
Choose a Variety for Color, Size, and Use
Pick a cultivar for the kind of harvest you want, not only for the color on the seed packet. ‘Bright Lights’ and ‘Rhubarb’ are popular for vivid stems, ‘Lucullus’ has pale stems and large green leaves, and ‘Fordhook Giant’ is known for broad, productive foliage; Utah State University Extension lists these among suitable options for its region. (Utah State University Extension)
For a decorative edible border, a mixed-color selection can make the bed look full even when plants are spaced for harvest. For cooking, green or white-stemmed cultivars can be practical if you prefer a milder appearance in the garden; for compact containers, choose a cultivar described as smaller or more upright and follow its stated mature size.
Look for days-to-maturity and bolting-resistance notes on the packet, but treat them as comparisons within a variety rather than promises for your location. A cultivar that reaches harvest quickly is useful where the cool season is short, while a long-season type can keep producing in a mild climate if moisture remains steady.
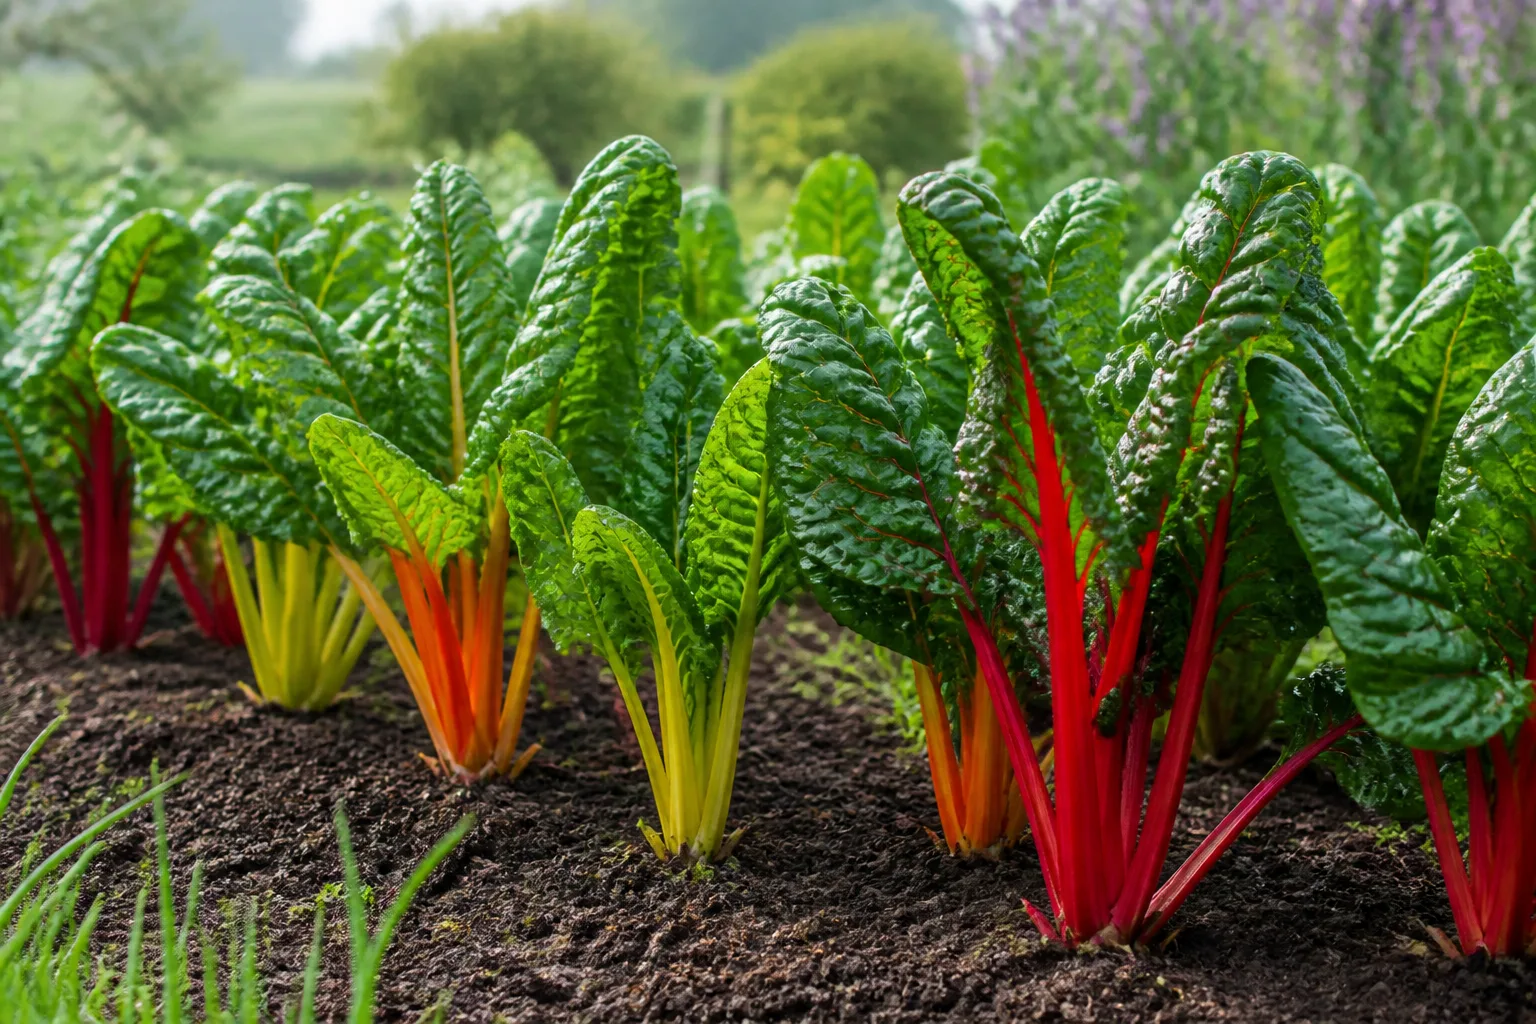
Harvest Outer Leaves Without Stopping New Growth
You can begin taking small leaves before the plant reaches full size, or wait for larger leaves and stalks for cooking. For the longest harvest, take the oldest outer leaves first and leave the young leaves and growing point in the center; Utah State University Extension notes that the plant can keep growing after leaf removal as long as the growing point is not damaged. (Utah State University Extension, Gardener’s Path)
Use a clean knife or snips to cut each outer stalk close to the base without slicing into the crown. Do not pull leaves upward, since that can loosen or tear the plant; on a young chard plant, take only a few leaves at a time so enough foliage remains to support new growth.
Pick in the cool part of the day when leaves are firm, and remove damaged or diseased foliage as you work. Rinse just before using, or dry the leaves well and refrigerate them in a bag with a paper towel; fresh chard keeps better when it is not stored wet, and the leaves and stalks can be cooked separately because stems take longer to soften. (Epic Gardening, Gardener’s Path)
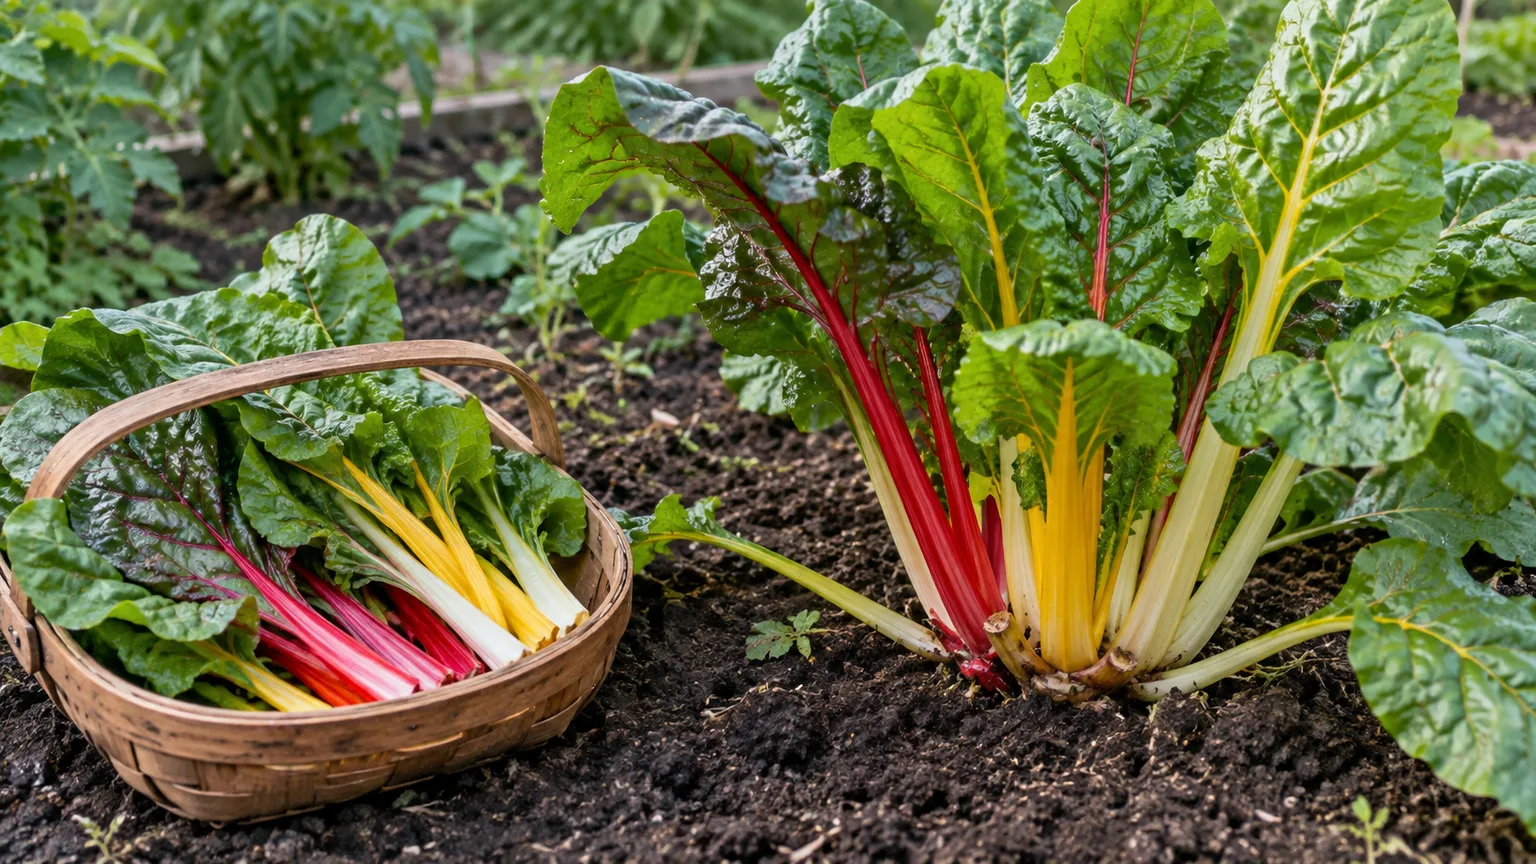
As a rough planning figure, Utah State University Extension estimates that a 10-foot row can produce about 8–12 pounds. Treat that as a regional guide rather than a yield promise: cultivar, plant spacing, soil, weather, and how often you harvest all change the total. (Utah State University Extension)
Plan a Fall Crop and Overwinter Carefully
Chard is often easier to establish when seeds can germinate in mild soil and the plants mature as temperatures cool. In a hot-summer climate, sow a small second batch when local soil begins to cool and there is enough time left for the cultivar to reach usable size; in cooler regions, continue sowing only while the remaining season can support growth.
Light frost may extend the harvest, but do not treat it as protection from a hard freeze. A row cover can buffer short cold snaps and help exclude some early-season insects, while mulch can reduce moisture swings; remove or ventilate covers if they trap excessive heat during a warm spell. (Utah State University Extension)
If plants survive winter in a mild climate, watch them closely when growth resumes. Chard is biennial, so an overwintered plant may shift from leaf production to flowers and seed; harvest usable leaves early in that second season and sow new plants if you want a longer supply. (Gardener’s Path)
Understand Bolting Before It Takes the Bed
Bolting is the plant’s transition from a low rosette of edible leaves to a tall central flower stalk. Swiss chard is less prone to day-length-driven bolting than spinach, but it is still a biennial: plants that live through winter can flower in their second year, and the leaves often become less tender as the stalk and buds develop. (Gardener’s Path)
Look for a central stem rising above the leaf canopy with clusters of small buds. Heat can slow leaf growth and lower quality without the plant actually bolting, so distinguish a flower stalk from ordinary large leaves before pulling a plant; if you see buds, cut the stalk and harvest tender leaves promptly, knowing that pruning may only slow the transition rather than reverse it. (Epic Gardening)
For a steady harvest, do not rely on one plant to last indefinitely. Sow a modest follow-up batch when the local season allows, and remove an old plant once the leaves are tough or seed production is underway.
Solve Pest and Disease Problems Early
Inspect the undersides and tops of leaves at harvest time, when damage is easiest to notice. Swiss chard problems are often recognizable by the pattern: winding pale tunnels suggest leafminers, pin-sized holes point toward flea beetles, larger ragged holes may be slugs or caterpillars, and round spots with dark borders are more consistent with leaf spot than with nutrient deficiency. (University of Minnesota Extension)
Start with the least disruptive response: remove heavily damaged leaves, clear weeds and debris around the bed, keep the soil draining, and avoid wetting foliage late in the day. Rotate chard to a different bed in the next planting cycle if disease has been a recurring issue; Utah State University Extension notes that rotation helps control many chard diseases. (Utah State University Extension)
Leafminers and flea beetles
Leafminer larvae tunnel inside leaves, leaving winding, pale trails that can widen into blotches. The damage is inside the leaf tissue, so washing alone will not remove it; cut off mined leaves and discard them rather than leaving them around the crop, then check nearby chard, beets, and spinach for fresh mines. (University of Minnesota Extension, UMN Extension’s leafminer guidance)
Flea beetles are small jumping insects that make many tiny “shot holes,” especially on seedlings and young leaves. Protect a new sowing with a floating row cover secured at the edges, and keep weeds down so young chard is not competing for moisture while it recovers; Utah State University Extension lists row covers as a way to exclude flea beetles. (Utah State University Extension, University of Minnesota Extension)
Slugs and aphids
Slugs tend to leave irregular holes and may feed at night or during cool, wet weather. Look under boards, mulch, and low leaves after dark, remove slugs by hand, and reduce hiding places; do not let the bed dry out to control slugs, because chard still needs consistent root moisture.
Aphids cluster on tender growth and leaf undersides, where their feeding can curl or distort new leaves. If a small colony appears, rinse the insects off with a firm stream of water and repeat checks over the next few days; remove badly infested leaves and avoid spraying a product on edible foliage unless its label specifically allows that use and the harvest interval is followed. (Utah State University Extension)
Leaf spots, wilt, and root rot
Cercospora leaf spot can produce small round brown-to-gray marks with reddish-purple edges, often appearing first on older lower leaves. Remove affected foliage, give plants enough space for air movement, water at soil level, and rotate the crop; University of Minnesota Extension’s chard diagnostic guide describes the spot pattern and distinguishes it from other leaf problems. (University of Minnesota Extension)
If leaves yellow and wilt while the soil is wet, inspect drainage and the roots before adding fertilizer. Dark, damaged roots or a soft crown suggest a root-rot problem; improve drainage, remove a severely affected plant, and avoid replanting chard in the same soggy spot until the underlying water issue is fixed. (University of Minnesota Extension)
Conclusion
For dependable Swiss chard, let local soil and weather set the planting window, sow into a moist but well-drained bed, and thin plants to match the leaves you plan to eat. Keep moisture steady, inspect leaves as you harvest, and cut outer stalks without damaging the center; that simple routine gives the plant its best chance to keep producing through the cool part of your season.



