Why Are My Monstera Leaves Turning Yellow?
Monstera leaves turning yellow? Learn how to read the pattern, check soil and roots, rule out light and pests, and fix the real cause without guesswork.
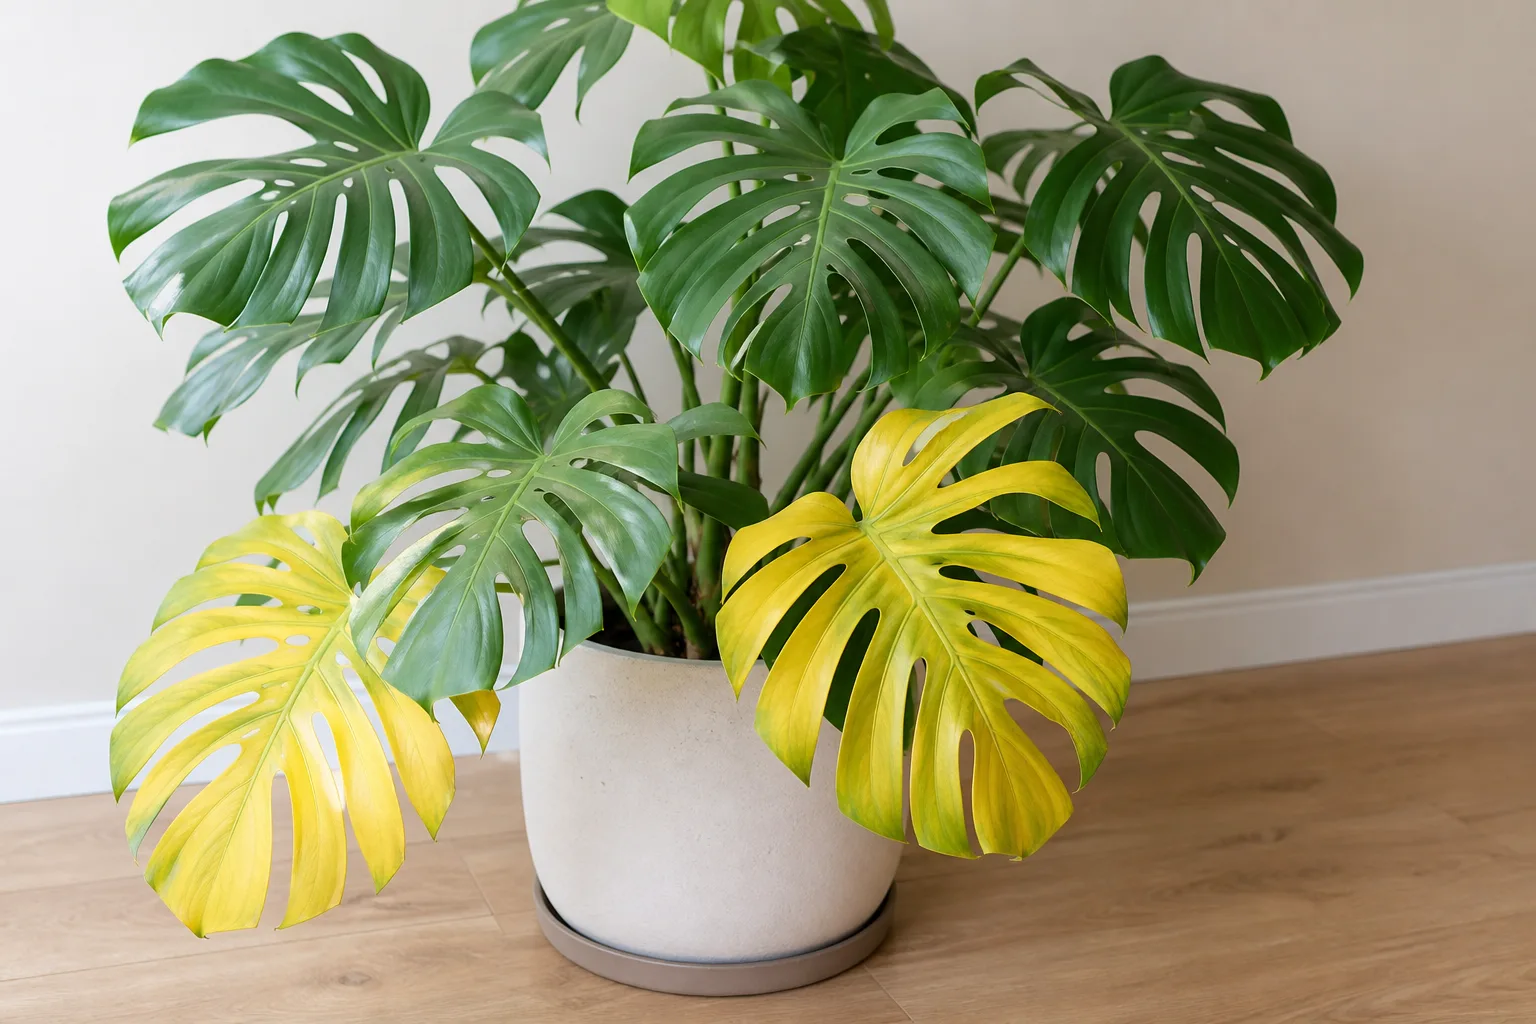
Yellow Monstera leaves are a symptom, not a diagnosis. One old leaf can be finishing its normal life, while several yellow leaves on a plant sitting in wet soil can signal root stress. The fastest way to find the cause is to inspect the soil and pot first, then compare the yellowing pattern with the plant’s light, temperature, humidity, and pest exposure.
Do not start by adding fertilizer or moving the plant into strong sun. Those quick fixes can make a stressed Monstera worse. Work through the checks below in order, change one major condition at a time, and use new growth—not a damaged old leaf—to judge whether the plant is recovering.
Start with the pattern, not the fertilizer
The location and texture of the yellowing are more useful than the color alone. Look at which leaves are affected, whether the soil is wet or dry, whether the leaf is soft or crisp, and whether the yellow area is uniform or mottled.
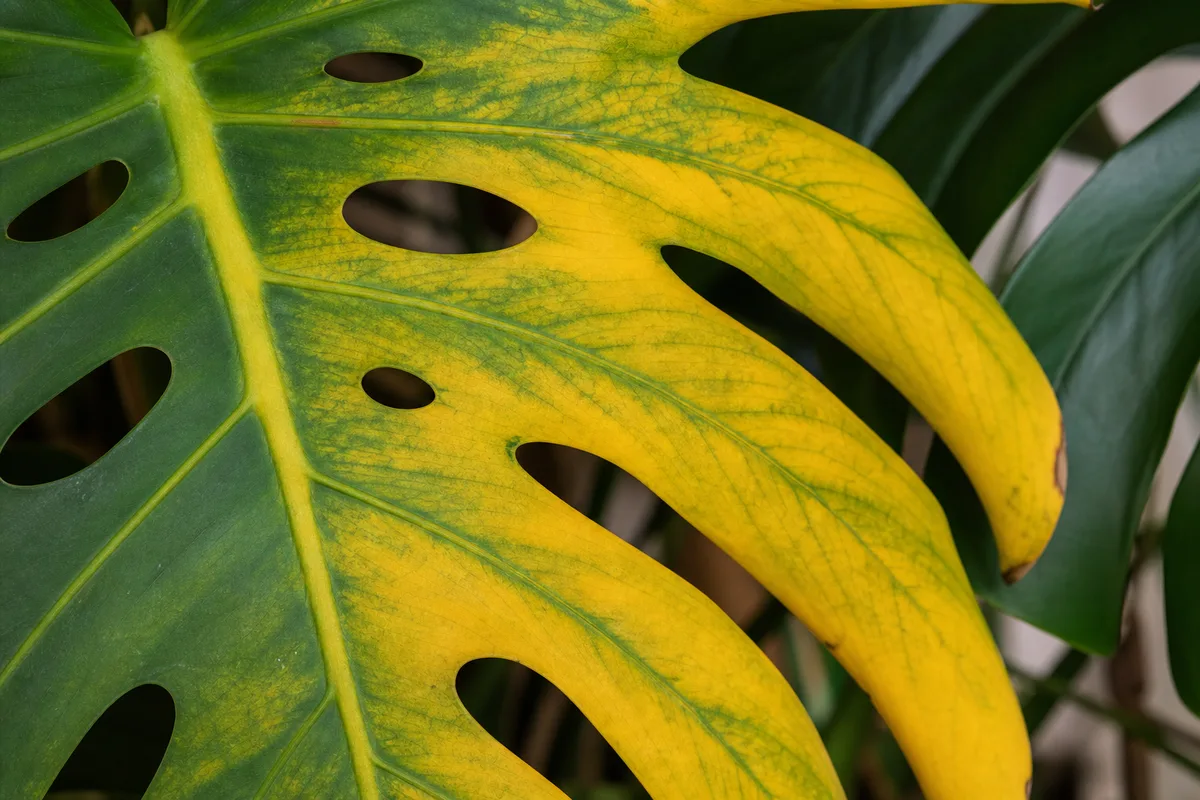
A yellow Monstera leaf with green veins can point toward a different problem than a uniformly yellow, waterlogged lower leaf.
What normal aging looks like
If one of the oldest, lowest leaves slowly turns pale yellow while the rest of the plant looks firm and green, the plant may simply be reallocating resources before dropping that leaf. A mature Monstera does not keep every leaf forever, and removing a single aging leaf will not solve anything because there may be nothing to solve.
Normal aging usually affects one leaf at a time, progresses gradually, and does not come with a sour smell, persistently wet mix, a soft stem, or a sudden flush of yellow leaves. If yellowing keeps moving upward, affects new leaves, or appears alongside drooping despite wet soil, treat it as a care problem rather than routine turnover.
When yellowing needs action
Act promptly when two or more leaves yellow within a short period, when the newest leaf is pale, or when the plant is losing color and firmness together. Wet soil, a pot that never seems to dry, a blackened stem base, and a musty smell make root trouble more urgent than a humidity adjustment.
Dull yellow patches that face a hot window suggest light or heat stress, especially if they later turn tan and papery. Fine speckling, sticky residue, fine webbing, or insects under the leaves moves pests higher on the list. The pattern narrows the possibilities; it does not prove one cause by itself.
A quick diagnosis you can do today
Before changing the plant’s routine, spend five minutes gathering evidence. Write down when you last watered, whether water drained from the pot, where the plant sits, and whether the yellowing is on old or new growth. This small record prevents the common cycle of watering a wet plant, then fertilizing it when it declines.
Check soil, pot drainage, and roots
Push a finger or a clean wooden chopstick into the mix several inches down, not just across the surface. Lift the pot if you can: a very light pot and dry mix point toward drought, while a heavy pot with cool, wet mix several days after watering points toward slow drainage or overwatering. A moisture meter can help, but it is only useful when you understand where in the root ball the probe is reading.
Confirm that the inner pot has open drainage holes and that the outer cover pot or saucer is not holding runoff. North Carolina State Extension describes Monstera deliciosa as a plant that prefers thorough watering followed by partial drying, while UF/IFAS notes that Monstera is not tolerant of flooded or excessively wet soil (North Carolina State Extension; UF/IFAS Extension).
Do not unpot a healthy-looking plant just because one leaf is yellow. Inspect roots when the soil stays wet, the stem base softens, the plant wilts while the mix is moist, or watering behavior has changed without an obvious reason. Firm cream, tan, or light-brown roots are generally a better sign than dark, soft roots that pull apart or smell sour.
Read leaf age, light, and pest clues together
Older lower leaves plus wet soil usually puts root stress near the top of the list. Older lower leaves plus bone-dry mix and crisp edges points more toward underwatering. Pale growth, long gaps between leaves, and fewer new fenestrations suggest the plant is not receiving enough usable light, while bleached or sharply browned areas on the window-facing side suggest too much direct sun.
Turn over several leaves and inspect the midrib, petiole joints, and newest growth. Spider mites can leave fine stippling and webbing; scale looks like small fixed bumps; mealybugs resemble white cottony clusters. If you see pests, isolate the Monstera before treating it so the diagnosis does not become a houseplant-wide infestation.
The main causes of yellow Monstera leaves
Several stresses can overlap. A plant in low light uses water slowly, so a watering routine that worked in a bright summer window may keep the pot wet in winter. A plant with damaged roots can look thirsty even though the soil is saturated because unhealthy roots cannot move water normally.
Overwatering and root stress
Overwatering is not simply “watering too often.” It is any setup that keeps the root zone wet for too long: a pot with no drainage, a dense mix, a decorative cachepot full of runoff, a pot that is far too large, or a low-light plant being watered on a summer schedule. Roots need both moisture and air; when the air spaces stay filled with water, root function declines and yellowing can follow.
Watch for lower leaves turning yellow, limp growth despite wet soil, a soft or dark stem base, and a mix that remains wet long after watering. Root rot is more likely when these signs arrive together than when a single leaf changes color. Epic Gardening’s Monstera problem guide likewise connects persistent wetness, poor drainage, yellow leaves, and dark mushy roots with root rot (Epic Gardening).
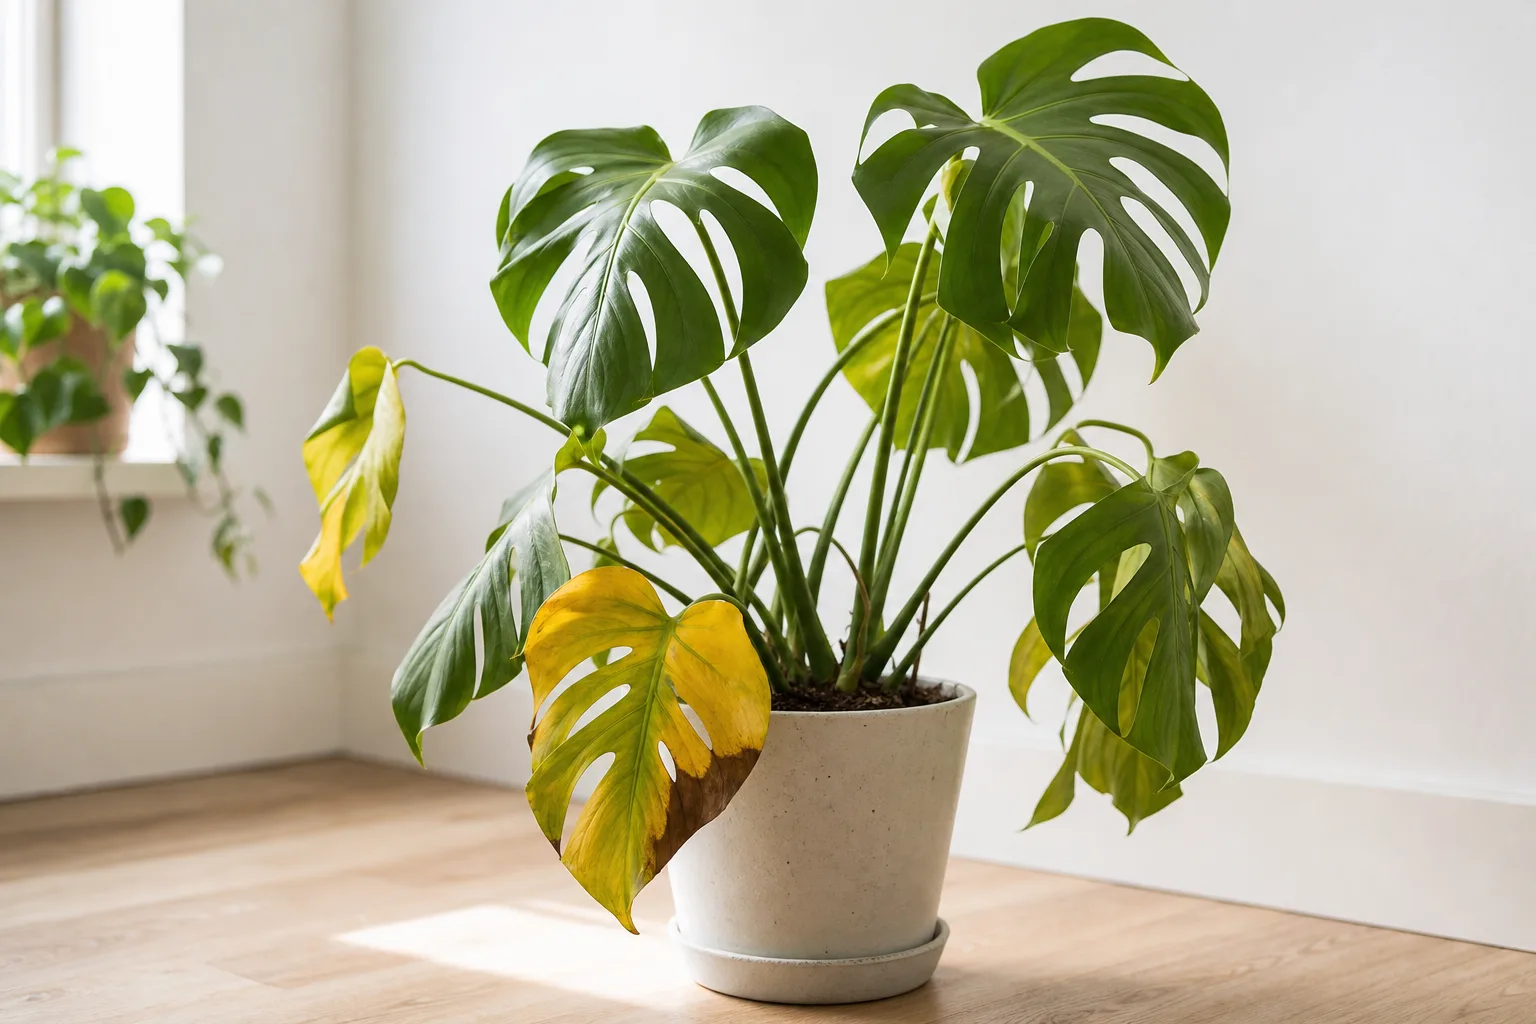
Yellow leaves, drooping, and wet soil together are a reason to inspect the root zone—not a reason to water again.
If only the surface is wet after a recent watering and the plant is otherwise firm, do not panic or repot immediately. Give the mix time to dry to the appropriate depth, increase airflow, empty standing water, and reassess. Repotting is useful for damaged roots or failing soil, but it is an additional stress when the roots are healthy.
Dry soil, poor light, temperature, and humidity stress
Underwatering can also cause yellowing, but the surrounding clues are different. The mix is dry deeper in the pot, the container feels light, leaves may curl or hang, and edges or tips often become crispy. A thoroughly dry Monstera needs a slow, complete watering until excess runs through the drainage holes; a few spoonfuls on the surface can leave the center of the root ball dry.
Watering frequency should change with light, season, pot size, and mix. University of Wisconsin–Madison recommends watering thoroughly and allowing the soil to dry slightly between waterings, with less water in winter; it also notes that low humidity can brown leaf edges (UW–Madison Extension). Fine Gardening makes the same practical point for Monsteras: check the soil before watering, and improve drainage if it stays wet too long (Fine Gardening). Use those conditions as a guide, not a calendar reminder.
Monsteras prefer bright, indirect light. In a very dim corner, the plant may produce smaller or paler growth and use water slowly; in intense direct sun, leaves can bleach, scorch, or develop dry brown patches. Move a plant out of harsh afternoon sun, but make any move into brighter light gradual so a previously shaded leaf does not scorch.
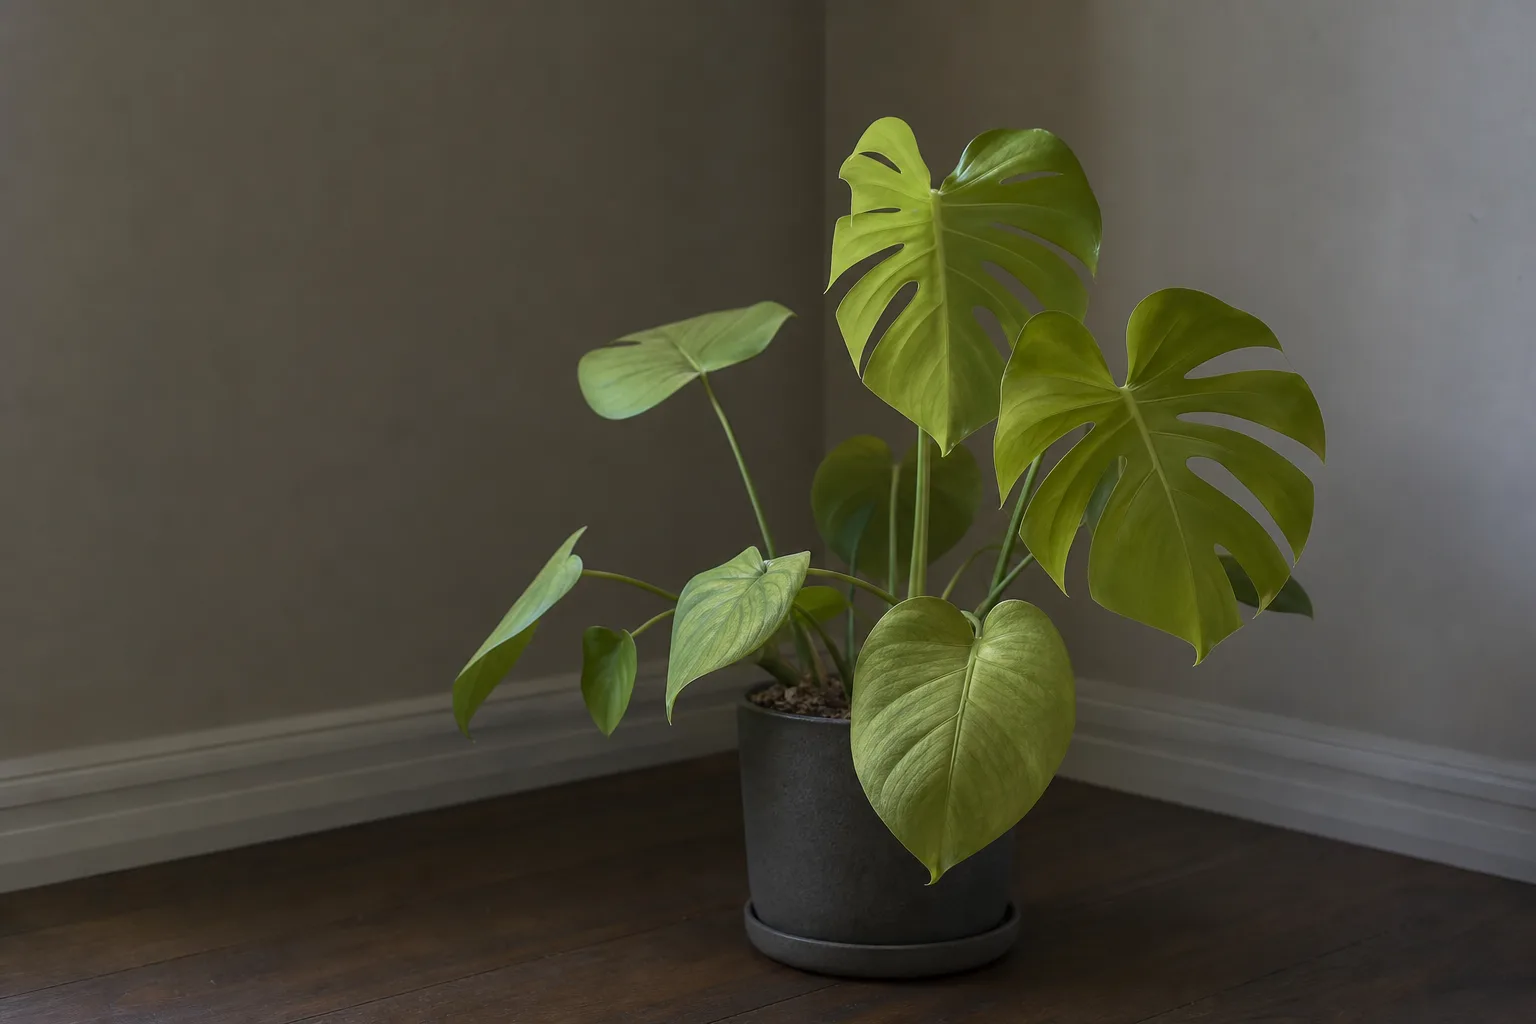
Low light can make leaves pale and growth weak, but a sudden move from deep shade to hot sun can create a second problem.
Cold drafts, heat vents, and abrupt temperature changes can add stress even when the watering is sound. NC State lists a preferred indoor range around 60 to 85°F, while UW–Madison notes that growth stops below about 50°F; keep the plant away from freezing windows, heating outlets, and air-conditioner blasts (North Carolina State Extension; UW–Madison Extension). Low humidity is more commonly associated with crispy brown margins than with a uniformly yellow leaf, so raise humidity after you have ruled out wet soil and light stress.
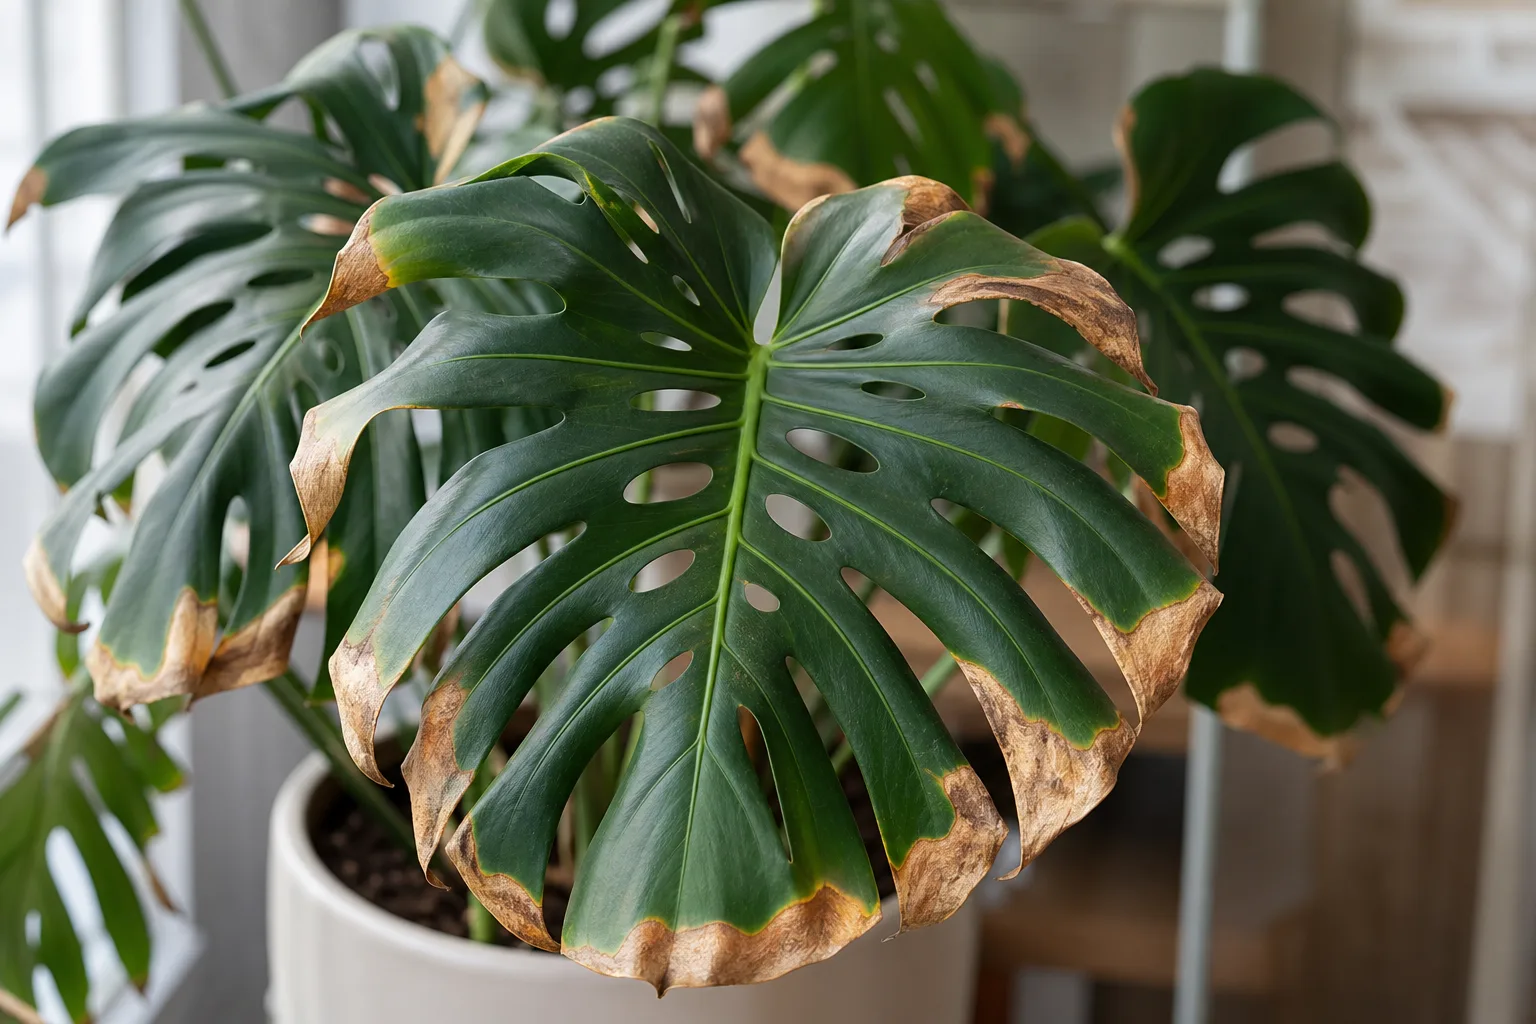
Dry-air stress usually shows at the edges first; yellowing throughout the leaf deserves a broader check.
Nutrients, salt buildup, pests, and root-bound plants
Nutrient shortage is possible when a Monstera has been in depleted mix for a long time, grows actively but receives no feed, or shows pale older leaves while light and watering are appropriate. Yellowing between green veins can point toward a nutrient-availability problem, but similar patterns can come from damaged roots or unsuitable soil chemistry. Do not use an iron or magnesium product just because the leaf is yellow; the plant must be able to access the treatment through functioning roots.
Salt buildup from repeated fertilizer or hard water can also stress roots. Look for a white crust on the soil or pot rim, brown tips, and a history of frequent feeding. Pause fertilizer, water thoroughly so excess drains away, and let the mix dry normally before deciding whether a fresh mix or a soil test is warranted.
Pests cause yellowing by damaging leaf tissue rather than by changing the watering need. Stippling, silvery scarring, webbing, sticky honeydew, or clusters on the undersides are more informative than yellow color alone. Isolate the plant, rinse accessible pests away, and use only a product labeled for the pest and plant; follow its label, test a small area first, and repeat only as directed.
A root-bound plant may dry unusually fast, have roots circling the root ball or emerging from drainage holes, and alternate between drought and saturation because water runs down the pot’s sides. A plant can be root-bound and overwatered at the same time if compacted roots leave little usable mix. That is a repotting problem, but choose a container only modestly larger so the new soil does not stay wet around a small root ball.
How to fix yellow Monstera leaves in the right order
The repair is usually a sequence, not one dramatic intervention. Correct the condition that is most clearly supported by the evidence, then wait long enough to see how the plant responds before stacking on a new pot, fertilizer, grow light, and humidity tray all at once.
Stabilize water and light first
If the soil is wet, stop watering until the root zone has dried to the depth appropriate for your plant and pot. Empty the saucer, improve drainage, and move the plant into bright indirect light if it is in a dim corner. Do not place a waterlogged Monstera in hot direct sun to “dry it out”; that can add scorch to root stress.
If the soil is dry, soak the mix thoroughly and let excess drain. Recheck the plant after a few days rather than repeating a small surface watering. If the potting mix has become hydrophobic and water runs straight down the sides, watering from below for a short period can re-wet it, but remove the pot from standing water and return to normal drainage afterward.
If light is the clear mismatch, relocate gradually. Sheer curtains, a few feet back from a bright window, or a properly positioned grow light can provide more usable light without exposing leaves to a sudden hot beam. Rotate the pot occasionally for even growth, but do not keep moving a stressed plant from room to room.
Treat root damage and repot only when needed
Unpot the Monstera over a washable surface when the evidence points to root rot or a failing container setup. Gently remove saturated mix, rinse or tease soil from the roots, and separate firm roots from black, brown, slimy, or collapsing tissue. Cut only damaged tissue with clean shears; removing healthy roots “just in case” reduces the plant’s ability to recover.
Use a clean pot with open drainage holes and fresh, airy houseplant mix. Set the plant at the same depth it was growing before, and avoid burying the stem or packing mix tightly around aerial roots. The new container should fit the remaining root ball with a little room, not be dramatically larger.
Water once to settle the mix, drain completely, and place the plant in stable bright indirect light. Do not fertilize immediately after major root pruning. A recovering root system needs time to resume function, and extra salts can add stress before the plant can use them.
Feed after the roots can use it
Fertilizer is a support for active growth, not emergency medicine for a yellow leaf. Once the plant has stable moisture, usable light, and firm roots, feed during the growing season with a complete houseplant fertilizer according to its label. If the plant is stressed or has not been fed for a long time, a conservative starting rate is safer than repeated full-strength applications.
UF/IFAS describes Monstera grown outdoors as a relatively light feeder and discusses fertilizer timing in relation to new growth, while indoor guidance from Epic Gardening emphasizes a balanced feed during the active season and less feeding in winter (UF/IFAS Extension; Epic Gardening). For a houseplant, avoid copying landscape quantities. The product label, pot size, growth rate, water quality, and season matter more than a universal tablespoon measure.
Never fertilize bone-dry soil, freshly damaged roots, or a plant you have not yet diagnosed. Water first when the mix is dry enough to need it, then apply diluted fertilizer as the label directs. If yellowing worsens after feeding and brown tips appear, stop feeding and flush the mix with plain water if the pot drains freely.
When to cut yellow leaves
Yellow tissue will not become green again after the underlying stress is corrected. Leave a leaf in place while it still has substantial green area; it can continue photosynthesizing and the plant may still be withdrawing nutrients from it. Remove the leaf when it is mostly yellow or brown, damaged beyond usefulness, touching diseased tissue, or making it difficult to inspect the plant.
Use clean, sharp shears and cut the petiole close to the main stem without slicing into the stem itself. Do not strip every imperfect leaf during a recovery. Removing too much foliage at once reduces the plant’s energy supply, and pruning cannot compensate for wet roots, poor light, or a pest that is still active.
A 30-day recovery plan
Today: Check the mix several inches down, empty standing water, inspect the drainage holes, and photograph the yellowing pattern. Look under the leaves for pests and note whether the plant is near a draft, heater, or harsh window.
Days 2–7: Make one primary correction. Let wet soil dry; thoroughly water genuinely dry soil; move the plant into stable bright indirect light; or isolate and treat a confirmed pest. Do not repot unless the roots, smell, stem, or drainage failure make it necessary.
Week 2: Recheck the root-zone moisture and look for progression. A damaged leaf may continue to yellow even after the cause is fixed, so judge the correction by whether new yellowing stops, the stems stay firm, and new growth begins normally. If the plant is still wet, wilting, or declining, inspect the roots and pot setup rather than adding fertilizer.
Weeks 3–4: Resume a normal care rhythm based on the plant’s light and season. Feed only if the plant is actively growing and the root system is functioning. Remove mostly yellow leaves, keep healthy green leaves, and compare the new photo with the first one.
If several plants develop the same symptom, suspect a shared environmental change such as colder rooms, a heating season, a new watering routine, water-quality buildup, or a pest introduced with a new plant. If the pattern includes rapidly spreading spots, stem collapse, or unexplained decline after isolation and basic corrections, take clear photos and contact a local extension office or qualified plant diagnostician.
Prevention that actually works
Water by checking the plant, not by following the same weekday every week. Learn how heavy the pot feels after a thorough watering and as the mix dries; that simple comparison is often more reliable than a generic schedule. Expect the pot to dry more slowly in low light, cool weather, and a large container, and more quickly in bright light, warm weather, terracotta, or a root-filled pot.
Give Monstera bright indirect light and acclimate it gradually to stronger conditions. Keep leaves away from heating and cooling blasts, use a hygrometer if dry-air problems keep recurring, and improve room humidity without sacrificing airflow. A humidifier can help a dry room; a pebble tray may modestly change the local air but cannot rescue a waterlogged root ball.
Use a loose, well-draining mix and a container with drainage holes. Repot when roots have genuinely outgrown the pot, the mix has broken down, or drainage has failed—not on an automatic annual schedule. Keep aerial roots intact unless they are damaged or interfering with the setup; they are part of the plant’s climbing adaptation.
Feed lightly and seasonally, clean dusty leaves gently, and inspect new plants before placing them beside an established collection. Quarantine newcomers for a couple of weeks when possible. Monstera also contains irritating calcium oxalate crystals and is listed by NC State as having poisonous characteristics, so keep leaves and clippings away from children and pets and seek professional medical or veterinary advice after ingestion (North Carolina State Extension).
Conclusion
The best answer to yellow Monstera leaves is usually found in the plant’s pattern and root-zone conditions. Check whether the soil is wet or dry, confirm drainage, compare old and new leaves, inspect light and pests, and only then decide whether the plant needs a watering correction, a gradual move, root treatment, repotting, or feeding.
One aging lower leaf can be normal. Repeated yellowing is a signal to slow down, diagnose the condition that is actually present, and give the plant a few weeks to show recovery through firm stems and healthy new growth.



