Neem Pruning Guide: When, Where, and How Much to Cut
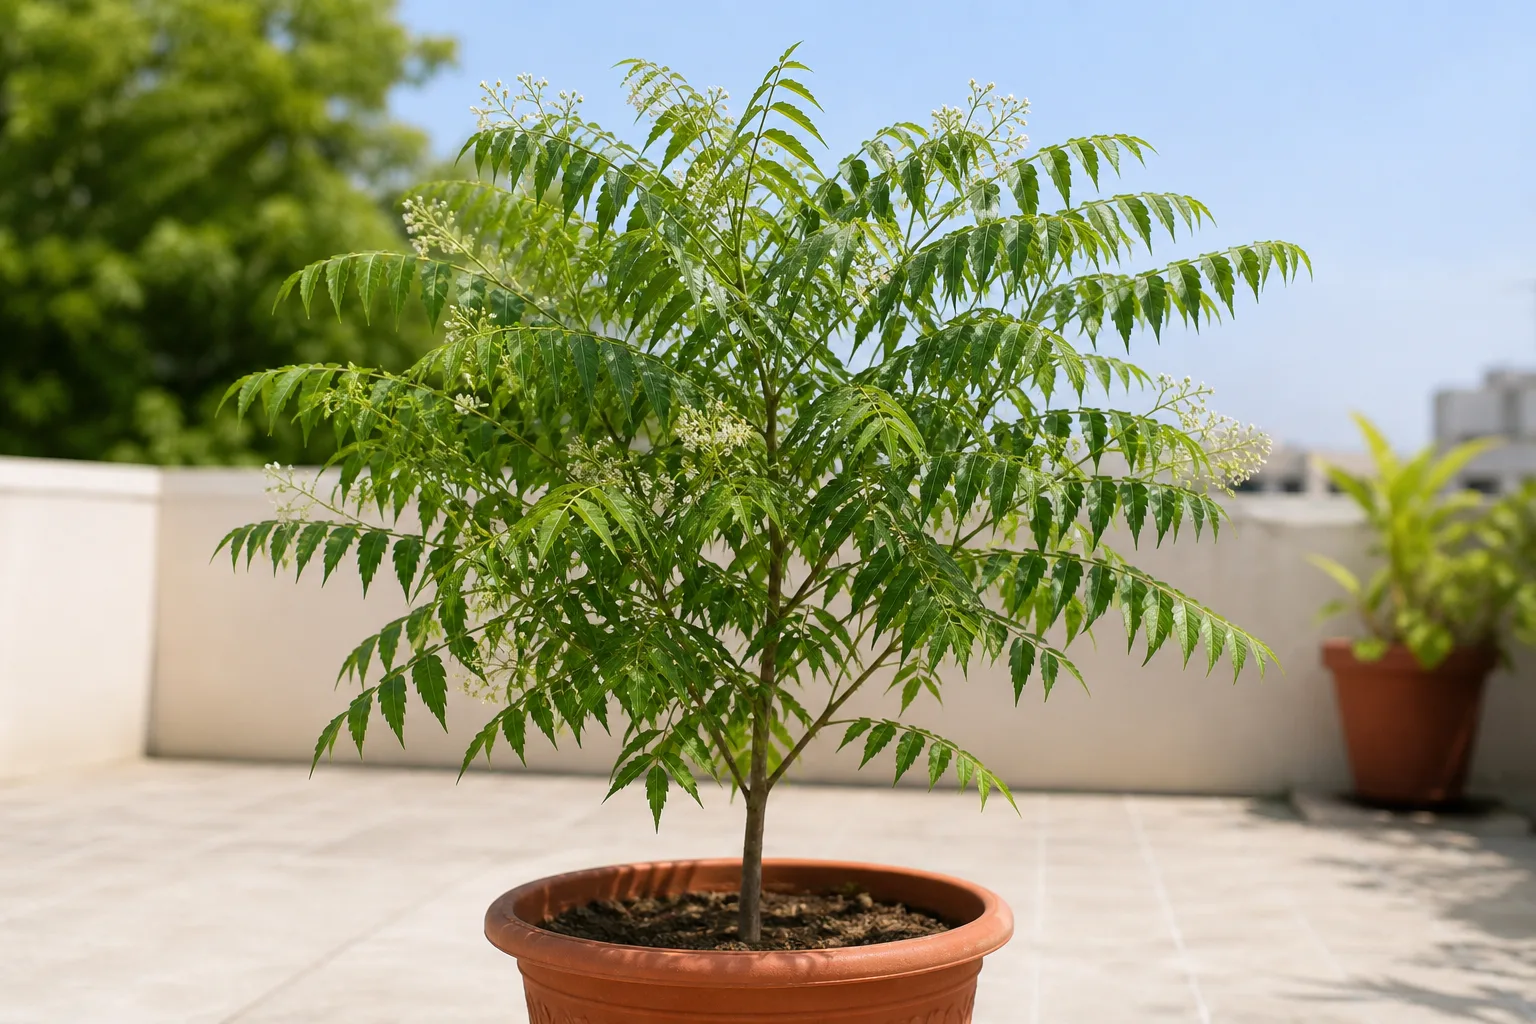
Neem Pruning Guide: When, Where, and How Much to Cut
Neem Pruning Guide: When, Where, and How Much to Cut
First action: Walk the canopy and remove only dead, damaged, crossing, or clearly diseased wood with clean bypass pruners—finish that cleanup before you shorten healthy leaders or reshape the crown. That order matters on neem because the tree responds strongly to hard cuts; you want a clear map of live buds before you decide how much height to take.
For whole-plant context—sun needs, watering rhythm, and container limits—see the Neem overview.
Reviewed by LeafyPixels Review Board · Author: sai-ananth
Quick answer
Prune neem (Azadirachta indica) to keep a manageable patio or balcony tree, open a crowded crown, and remove failing wood—not to “fix” weak light or wet soil. Missouri Botanical Garden notes that container plants can have size controlled by pruning, while open-ground trees reach roughly 50–75 ft with a dense round to oval crown. (Missouri Botanical Garden)
Make structural cuts just outside the branch collar (or just above an outward-facing bud on thin stems), limit live canopy removal to about one-third per session on pots, and schedule major shaping for warm active growth. Neem recovers well from hard cuts in the field, but patio trees still need full sun and a dry-down watering rhythm after pruning—see the Neem light guide and watering guide before you expect a topped plant to refill densely.
What pruning does for neem
Neem is a fast-growing mahogany-family tree (Meliaceae) with compound pinnate leaves and wide, spreading branches. Oregon State describes a subtropical tree to about 50 ft (15 m) with glabrous spreading branches, hardy around USDA Zone 10. (Oregon State University)
Left alone in the ground, it becomes a shade tree. In a pot on an Indian terrace, the same growth habit races past railings and doorways. Pruning redirects apical dominance, keeps height within reach, improves light and airflow through the crown, and lets you harvest healthy tip wood for cuttings when you want them.
Four jobs show up repeatedly:
- Cleanup removes dead twigs, storm breaks, and rubbing branches whenever you spot them.
- Formative training keeps one strong leader on young trees and shortens upright competitors so the trunk stays useful.
- Size control shortens leaders and long laterals so a container plant stays roughly 1.5–3 m instead of becoming a miniature street tree.
- Hard reduction (pollarding-style cutbacks) is tolerated biologically, but use it sparingly on pots and only when the plant is warm, sunny, and root-healthy.
Pruning cannot replace full sun or fix chronic wet feet. If the canopy is sparse because the pot stays dark and soggy, fix placement and soil drainage first.
Why neem responds so strongly
Winrock’s agroforestry profile notes that neem responds well to coppicing and pollarding for poles, posts, and fuelwood, and that the stem typically branches a few metres up into a broad crown. (Winrock International) Useful Tropical Plants likewise records that trees coppice freely—with early coppice growth often faster than seedling growth—and that the plant withstands pollarding well. (Useful Tropical Plants)
That resilience is why patio growers can keep neem small with regular cuts. It is also why a careless hard scalp on a stressed, cold, or waterlogged pot can still set the plant back: the biology allows recovery, but the roots and remaining leaves still have to rebuild the canopy.
What to check before you cut
Before any structural session, inspect in good light:
- Live vs dead wood — scratch lightly; green cambium means live; brittle brown pith means remove to healthy tissue.
- Crossing or rubbing branches — mark these for cleanup first.
- Leader status — one straight main stem versus several competing uprights.
- Bud placement — outward-facing buds where you want new shoots to go.
- Stress signs — recent cold injury near 4°C, wet sour soil, or a plant still settling after repotting. Delay hard cuts until the plant is stable.
- Tools — sharp bypass pruners for stems under about 2 cm; loppers or a pruning saw for thicker wood. Wipe and sterilize blades between plants if disease is present.
Plan the goal before the first cut: cleanup only, formative training, or intentional height reduction.
When to prune neem
Best window for structural cuts
Time major shaping for active growth in warm weather. In most Indian climates that means late winter into early spring—just before or as the main flush begins—so buds below a cut break quickly. Light tip work and thinning can continue through the hot growing season while the plant is drinking and pushing leaves.
Avoid hard canopy removal during cold snaps. Missouri Botanical Garden states neem is intolerant of temperatures below about 40°F (4°C). (Missouri Botanical Garden) A hard prune followed by chill leaves fewer leaves to buffer stress and slows bud break.
Cleanup anytime
Dead, broken, or diseased wood can come off whenever you find it. Do not wait for a calendar date if a branch is cracked, bark is peeling from a break, or a twig is fully dry.
Young-tree timing
Start formative pruning in the first two to three growing seasons while wood is still flexible and the tree is setting its permanent scaffold. Clemson Extension’s tree-pruning guidance emphasizes selecting a strong central leader early and removing upright laterals that would compete with it. (Clemson HGIC) That advice maps cleanly onto young neem destined for a single patio trunk.
The first cut to make
Remove only dead, damaged, crossing, or diseased growth first. Work from the top of the canopy downward so cut pieces do not snag on wood you still need to evaluate. Cut each failed branch back to a healthy lateral or to just outside the branch collar on the parent stem—never flush into the trunk swelling, and never leave a long stub.
After cleanup, step back. If height and shape already look balanced, stop. If the leader still overshoots your target, move to size-control cuts next—not fertilizer, not repotting, and not a second aggressive pass the same afternoon.
How to prune neem step by step
- Sanitize and stage tools. Sharp bypass pruners, loppers for mid-size wood, pruning saw for thick limbs. Clear a path around the pot so you can see the full silhouette.
- Cleanup pass. Dead, broken, rubbing, and diseased wood only.
- Choose the leader. On young plants, keep the straightest strong upright as the main trunk; shorten or remove competing leaders that grow nearly as tall and vertical.
- Size-control cuts. Shorten the main leader and long laterals to just above an outward-facing bud or to a side branch that can take over as the new tip. Aim for a balanced, slightly open crown rather than a flat hedge top.
- Thin crowded interior. Remove a few inward-growing or overlapping laterals so sun and air reach the center—useful on terrace plants that stay wet after monsoon rains.
- Stop at about one-third live canopy for container plants. Bag debris; keep seeds and leafy waste off floors if pets explore the area.
Where exactly to cut
On woody laterals, cut just outside the branch collar—the slightly swollen junction where the branch meets the trunk or parent stem. Clemson notes that this collar region helps the tree wall off decay, so cuts should begin outside the branch bark ridge and finish just outside the collar swelling, not flush and not with a leftover stub. (Clemson HGIC)
On green pencil-thick shoots, cut about 5–10 mm above a visible bud, angled slightly so water does not sit on the bud face. Neem does not sprout reliably from random mid-internode stubs; leave a bud or a living lateral below every structural cut.
How much you can safely remove
Field neem can take severe pollarding and coppicing cycles. Container neem cannot match that reserve. As a practical home rule:
- Light maintenance: tip cuts and a few laterals anytime during active growth.
- Moderate reshape: up to about one-third of live leafy canopy in one session.
- Hard reduction: possible on a vigorous, sunny plant, but split it into two sessions a few weeks apart and keep remaining foliage healthy.
If the plant is newly moved, recently root-bound and struggling, or recovering from cold leaf drop, stick to cleanup only.
Pruning for shape and size control
Missouri Botanical Garden explicitly notes that neem may be grown in containers where size is controlled by pruning, and that container plants generally have less drought tolerance than wild trees. (Missouri Botanical Garden) That is the core patio strategy: prune on a schedule, not once every few years when the tree hits the balcony ceiling.
Formative years (years 1–3)
- Keep one central leader.
- Remove or shorten upright forks that create co-dominant stems.
- Encourage a few well-spaced scaffold laterals rather than a dense mop of shoots from one point.
- Tip-prune soft leaders that race ahead of the rest of the canopy.
Established patio trees
- Shorten the tallest leaders each warm season before they lignify out of reach.
- Thin crowded laterals to keep the crown open.
- Avoid shearing into a perfect ball; neem looks and recovers better from selective cuts to buds and laterals.
Hard field-style pollarding—cutting all major limbs back to short stubs—is biologically tolerated, but it is a biomass management tool, not a default balcony technique. Use lighter, repeated cuts to hold 1.5–3 m.
Aftercare and recovery
After pruning:
- Return the pot to full sun as soon as the plant is stable—weak light after a hard cut produces soft, stretchy regrowth.
- Water only when the top few centimetres of mix are dry; do not keep the pot constantly wet “to help it recover.” Follow the Neem watering guide.
- Skip heavy fertilizer for a week or two after a major cut; resume light feeding only when new leaves are expanding and roots are active. See the fertilizer guide for seasonal timing.
- Do not repot on pruning day unless roots are failing.
Recovery timeline
In warm sun, expect buds below cuts to swell within one to three weeks and a noticeable flush within a few weeks of active growth. Cooler weather, low light, or wet soil stretches that timeline. Signs pruning worked: firm new shoots from buds you intended to keep, a more balanced silhouette, and no progressive dieback past the cut.
Signs you cut too hard or at a bad time: extensive leaf drop on remaining shoots, soft blackened tips after cold nights, or no bud break for many weeks while the mix stays wet and cold. Pause further cuts and stabilize light and watering first.
Healthy tip wood from a warm-season prune can become cuttings—use the Neem propagation guide if you want to root them rather than composting everything.
Mistakes to avoid
- Skipping cleanup and topping first — you lose orientation and may remove the only good scaffold wood.
- Flush cuts into the trunk — remove the branch collar’s natural barrier.
- Long stubs — stubs die back and invite decay.
- Hard pruning before frost or during a cold snap — neem’s cold limit is near 4°C.
- Scalping a shaded, wet pot — regrowth will be weak; fix light and drainage first.
- Waiting years between cuts — neem grows fast; small regular sessions beat emergency topping.
- Confusing neem with Chinaberry — confirm Azadirachta indica before you invest years of training.
When not to prune
Skip structural pruning when nights are near freezing, when the plant is wilted from root failure, within a week of a stressful move or hard repot, or when you cannot give strong sun afterward. Cleanup of dead wood is still fine. If scale or other pests are heavy on soft tips, treat the infestation and remove only the worst coated twigs until the plant is feeding again.
Related Neem guides
- Neem overview — identity, size expectations, and placement for Indian climates
- Neem light — full-sun needs before you expect dense regrowth
- Neem watering — dry-down rhythm after canopy loss
- Neem soil — drainage that prevents post-prune stress
- Neem propagation — using healthy pruning wood as cuttings
- Neem repotting — when a top-heavy canopy needs a larger pot, not just more cuts
- Neem fertilizer — light feeding only after new growth resumes