How to Grow Cauliflower: Planting, Care, and Harvest
Learn when to plant cauliflower, how to keep seedlings growing without stress, when to blanch white heads, and how to harvest before curds loosen.
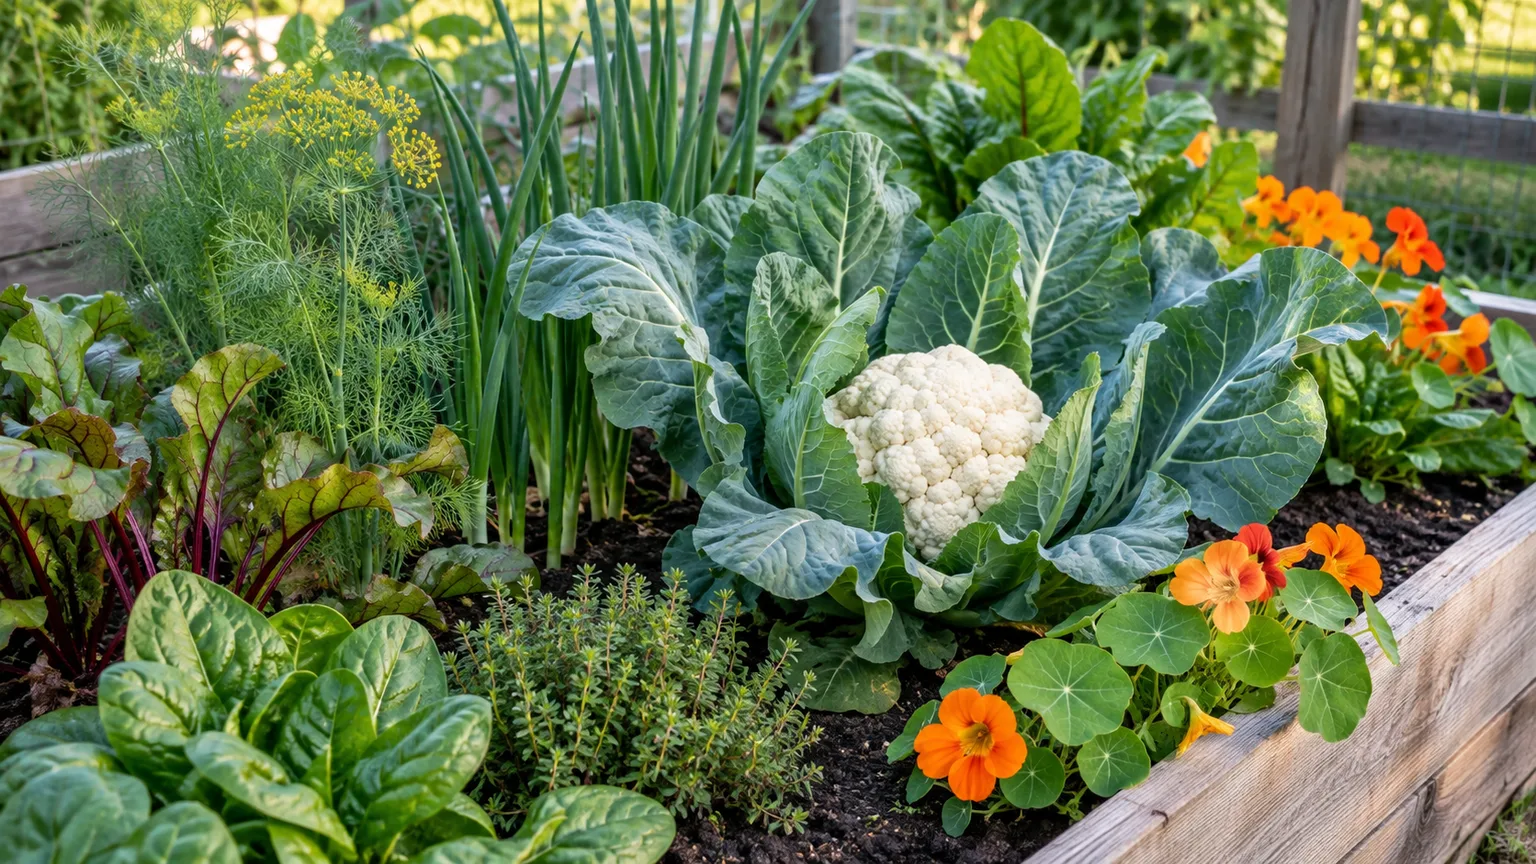
Cauliflower is easiest to grow when its whole season is planned around steady, cool growth. The plant needs time to build a broad leaf canopy before it makes its edible curd, and a check from heat, cold, dry soil, root disturbance, or pests can leave you with a tiny head or none at all. Choose a planting window that lets the curd mature in mild weather, then keep the young plant growing without stops.
The most reliable starting point is your local frost calendar plus the variety’s days to maturity. Those numbers are estimates, not a guarantee: a cultivar labeled for 60 days may take longer if it grows slowly in cool conditions, while hot weather can damage a curd before the calendar says it should be ready. This guide walks through the decisions that matter from seed to harvest, including when to tie leaves over white heads and how to diagnose a disappointing crop.
Understand the crop before you plant
The rounded part you harvest is a curd, a mass of immature flower buds. A cauliflower plant generally makes one main curd, so a healthy head depends on the plant having enough leaves to supply it with energy before curd formation starts. That is why a small transplant, a root-bound start, or a plant stalled by drought can produce a small head even after conditions improve.
Cauliflower is a cool-season crop in the cabbage family. It does best when the plant can grow steadily and form its curd before either summer heat or severe cold becomes a problem. Utah State University Extension’s cauliflower guide notes that low or high temperatures reduce growth and head quality and advises avoiding summer heat. Treat its temperature range as a planning guide: cultivar performance and local conditions still matter.
Think of cauliflower as a crop with two stages: first grow a sturdy plant, then protect the curd as it develops. Gardeners often focus on tying up leaves or feeding heavily, but neither can compensate for poor timing or a seedling that was already stressed. The practical goal is uninterrupted growth, not maximum fertilizer or daily watering.
Choose a cultivar and harvest window
Start with the harvest season you can provide, then choose a variety that fits it. Seed packets often list days to maturity and may distinguish days from transplanting from days from sowing; read that wording carefully before counting backward. If it is unclear, treat the number as an estimate and leave a cushion for cool spells, transplant recovery, and the slower growth that can occur in a home garden.
Choose an early-maturing cultivar for a short spring window, especially where late spring heat arrives quickly. For a fall crop, select a variety with enough time to reach maturity after summer planting and before hard freezes; some cultivars tolerate a wider range of conditions than others. A local garden center or cooperative extension office can suggest varieties already tested in your area, which is more useful than assuming a variety recommended for another climate will behave the same way.
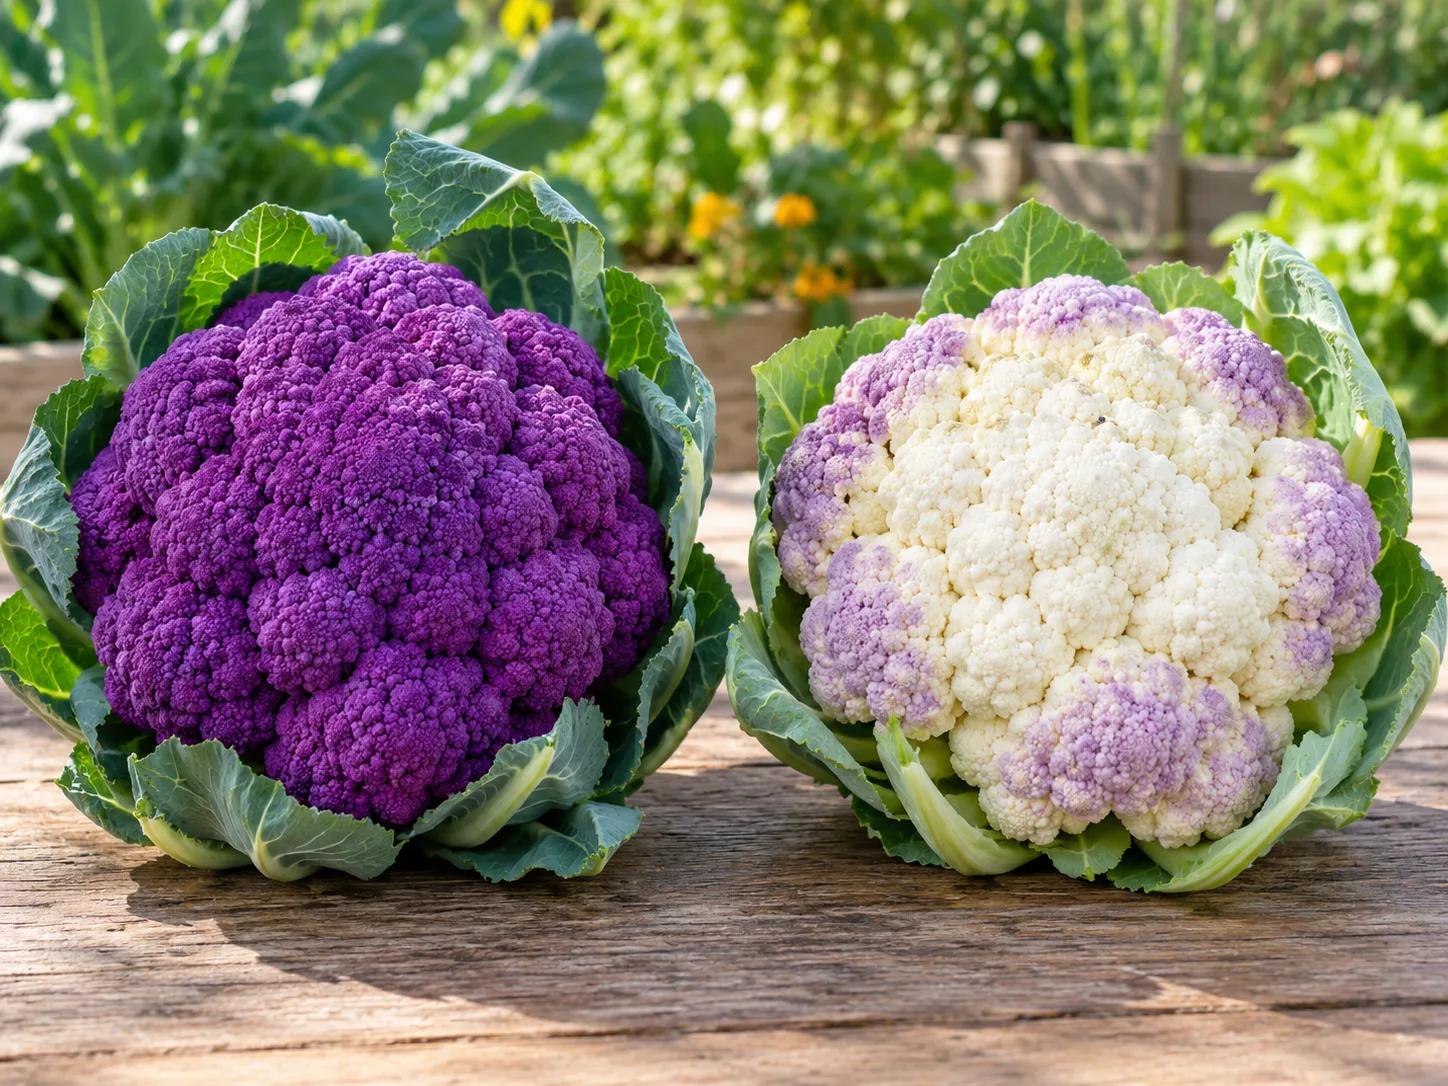
White cauliflower is familiar but may need leaf cover to stay pale. Many newer white varieties are self-wrapping: their leaves curl around the developing curd, reducing the need for you to tie them. Purple, orange, and green cultivars are also available; color is a variety trait, and colored types usually do not need the same manual blanching as white types. Compare the plants and the curds rather than shopping by head color alone: maturity time, expected plant size, heat tolerance, and whether the variety self-wraps all affect how much care it needs.
Spring, fall, or mild-winter planting
In a cold-winter climate, you can aim for an early-summer harvest or a fall harvest. For spring, start seeds indoors about four to six weeks before the planned transplant date; set out young plants a couple of weeks before the average last frost if your local conditions allow, while keeping frost protection ready. For fall, count backward from the average first fall frost by the variety’s stated growing time, then add a buffer for slow growth and transplant recovery. Begin the crop early enough that it is established before the hottest part of summer.
In mild-winter regions, cauliflower may fit a fall-to-winter schedule better than a spring schedule. Use a regional planting calendar to select a window with cool days and nights, and check how the cultivar handles both warmth at establishment and cold near harvest. The Royal Horticultural Society notes that cauliflower timing varies by type and may range from three to six months from sowing to maturity; the RHS cauliflower growing guide is a useful reminder to plan around cultivar and season rather than a single universal number.
Avoid starting a crop just because a calendar says it is time if the forecast points to sustained heat or a long stretch of cold. A floating row cover or cloche can buffer short cold spells, but it cannot make a hot season suitable for curd formation. If your only available window overlaps heat, choose a heat-tolerant cultivar and be realistic that head quality may be lower, or grow another crop that better matches the season. Fine Gardening also recommends trying a fall-grown hybrid when heat and drought have made cauliflower unreliable, because the timing can keep the early growth phase away from summer temperature spikes (Fine Gardening’s brassica guide).
Start seeds or buy transplants
Starting your own cauliflower gives you more variety choices and lets you time the crop, but it requires a bright growing area and close attention to moisture. Use a clean seed-starting mix and sow seeds roughly a quarter to half an inch deep, following the packet if its directions differ. Keep the mix evenly moist rather than saturated; after germination, give seedlings bright light and cool, steady conditions so they develop compact leaves instead of stretching toward a window.
Most home gardeners have an easier time setting out a young transplant than direct-sowing into a garden bed. Seedlings are vulnerable to drying, insects, and spring weather swings, and they need a relatively long season. If you buy plants, choose compact, actively growing starts with several healthy true leaves and no yellowing, tight roots, or curd already forming in the center. A large plant that has been sitting in a small nursery cell for weeks is not necessarily a head start; root-bound or stunted transplants may fail to recover.
Raise young plants without a growth check
Move seedlings into larger pots if they are crowding one another or the roots are filling the starter cell well before planting time. Handle the root ball gently and avoid tearing roots apart. University of Illinois Extension recommends using young, active transplants and warns against plants that were started too early and held too long; University of Illinois Extension’s cauliflower advice explains why steady growth from the seedling stage onward matters.
Before transplanting outdoors, harden seedlings off over about a week. Set them outside in a sheltered, shaded spot for a short time at first, then gradually increase their exposure to sun and wind. Bring them in if a sharp cold snap or strong wind is expected. Hardening is not intended to stunt plants; it helps leaves adjust to outdoor light and air so the move does not become another growth interruption.
Prepare a sunny, fertile planting site
Choose a spot that gets at least six hours of sun, preferably more in cool climates, with soil that drains while holding moisture. Cauliflower has a wide leaf canopy and will shade nearby plants, so avoid squeezing it into a narrow corner or behind taller vegetables. In a hot region, light afternoon shade can reduce heat load, but it should not replace the cool-season planting window.
Work mature compost into the bed before planting if the soil needs organic matter, and use a soil test to determine pH and fertilizer needs. Do not automatically add lime, boron, or a high-nitrogen product based on one symptom; the correct amendment depends on the soil and the problem. Utah State University Extension advises testing soil first and applying fertilizer according to the result rather than guessing at a recipe. A well-prepared bed makes it easier to keep roots moist without leaving them waterlogged.
Rotate cauliflower away from beds that recently held cabbage-family crops such as cabbage, broccoli, kale, Brussels sprouts, collards, or radishes. Rotation cannot eliminate every pest or disease, but it reduces the chance that crop-specific problems persist where the next brassica is planted. Remove old brassica roots and leaves at the end of the season rather than leaving an infected plant to break down beside the next crop.
Transplant and space for full-sized plants
Set plants outdoors when they are sturdy and the weather fits the crop window, not simply when a particular date arrives. Water seedlings before transplanting, plant them at about the same depth they were growing in their pot, firm soil around the root ball, and water again to settle the soil. If you are moving a seedling from a tray, keep the root ball intact; if a plant is badly root-bound, gently tease only the outside roots loose rather than stripping them bare.
Space standard cauliflower plants roughly 18 to 24 inches apart, with about 2 to 3 feet between rows when room allows. Compact varieties can be planted closer if the packet says so, while wider spacing improves air circulation and makes it easier to inspect the undersides of leaves. Utah State’s general spacing range is narrower than Illinois Extension’s; that difference reflects cultivar and growing-system choices, so use the packet’s mature plant size as the deciding factor rather than forcing every variety into one spacing rule.
Put a row cover over the planting soon after transplanting if cabbage-family moths, flea beetles, or birds are common in your garden. Install it before pests find the plants and secure the edges so insects cannot crawl underneath. If temperatures climb, lift or remove the cover as needed to prevent trapped heat; insect netting can provide protection with less warming in hot weather.
Keep water and nutrition steady
Aim for about 1 to 2 inches of water per week from rain and irrigation combined, then adjust for soil type, wind, heat, and the plant’s growth. A rain gauge or straight-sided can helps you see whether a storm actually supplied enough. Water deeply enough to moisten the root zone, then check the soil before watering again; sandy soil may need more frequent watering than heavier soil, while a clay bed that stays wet should not be watered on a fixed schedule.
Do not let the bed alternate between very dry and saturated. Inconsistent moisture can slow growth, make the curd small, and contribute to rough or loose heads. A 2- to 3-inch mulch layer can reduce evaporation and moderate soil temperature once the ground has warmed, but keep mulch from pressing against the stem and avoid adding a thick, cold layer around young seedlings in spring.
Cauliflower needs fertile soil, but feeding more is not a substitute for diagnosing the soil. If a soil test or local vegetable-garden recommendation calls for fertilizer, apply it as directed; some gardeners side-dress nitrogen when plants are established and growing strongly. Avoid repeated heavy feedings, especially late in the season. Excess nitrogen can encourage lush leaves and rapid, uneven growth, and some hollow-stem problems are linked to excessive nitrogen rather than a simple micronutrient shortage.
Protect white heads only when needed
Blanching means shading a developing white curd so it stays creamy rather than developing a yellow or green cast in the sun. It is cosmetic and can help maintain tender texture, but it is not a step every cauliflower needs. Self-wrapping varieties naturally cover the curd, and many colored cultivars are grown for their color; do not tie their leaves just because a white cauliflower guide says to blanch.
When a white curd is about 2 to 3 inches across and the surrounding leaves have not already covered it, fold a few large outer leaves loosely over the head. Secure them with a soft tie or clothespin, leaving enough space for the curd to grow. Start only when the leaves are dry, and check beneath the cover every few days for insects, moisture, or a curd that has outgrown the leaf canopy. The University of Illinois Extension guide describes this timing and the value of self-blanching varieties.
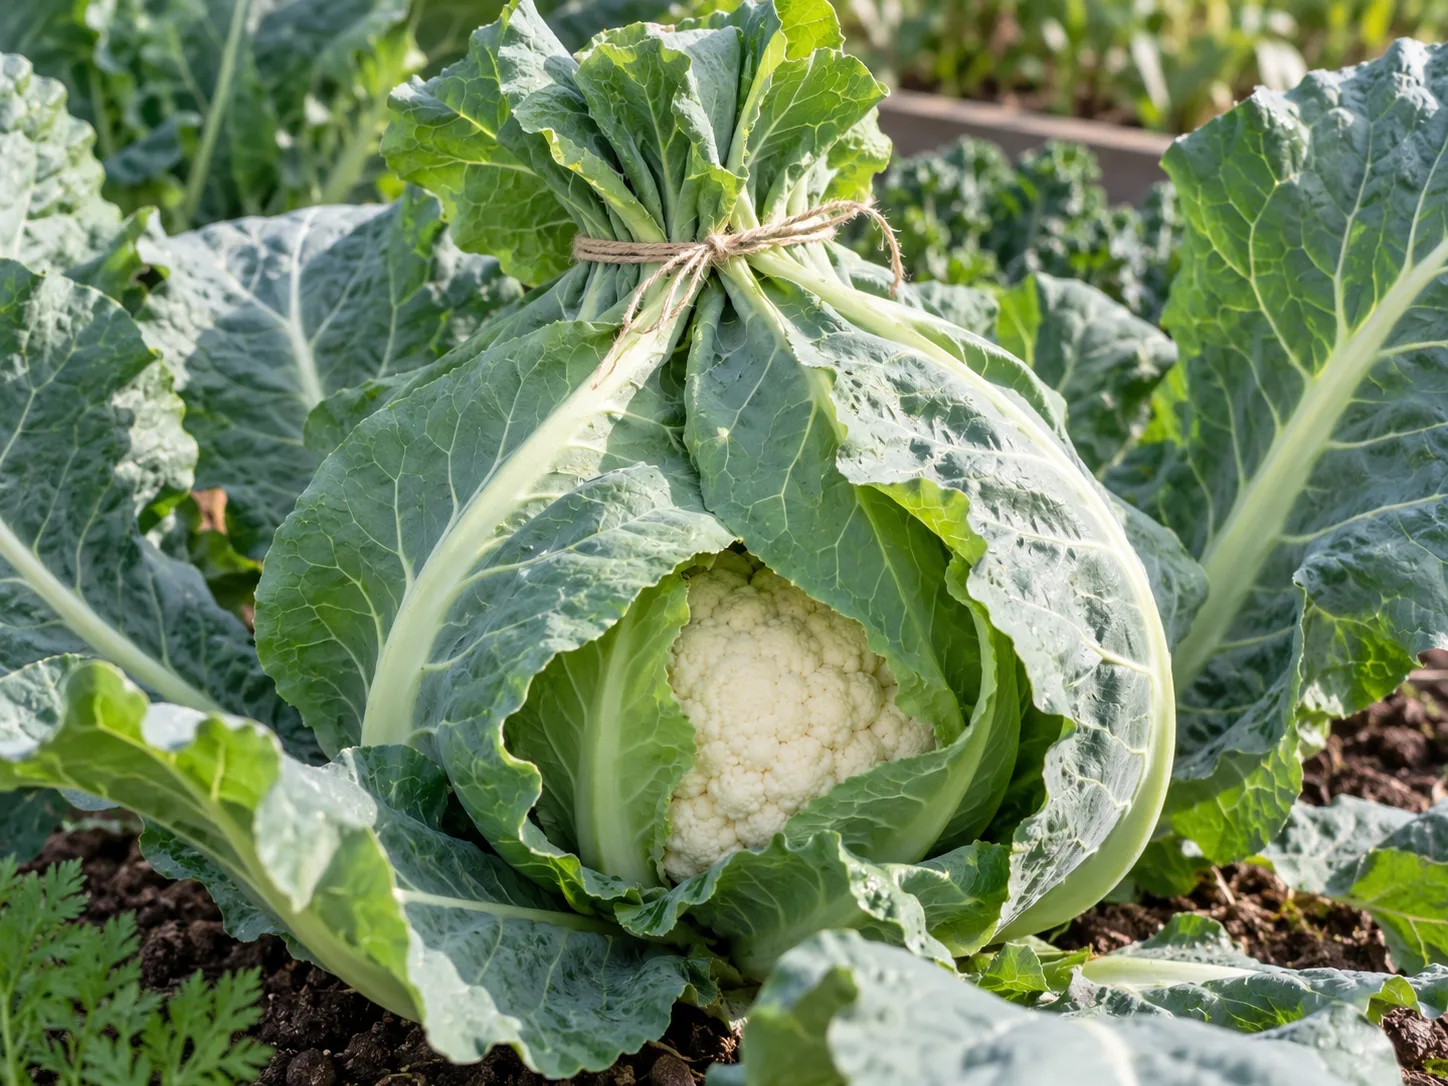
If your garden is hot or humid, keep the leaves loose and inspect more often; tight, wet leaves can trap moisture against the curd. If the curd develops a slight cream or yellow tint, it is usually still edible, even if it is no longer bright white. Harvest promptly if the curds begin to separate rather than leaving a mature head covered while waiting for a larger size.
Harvest while the curds are tight
Harvest when the head feels firm and compact, with tightly closed buds. Do not use a fixed diameter as the only signal: small or mini cultivars naturally make smaller heads, and plant stress may stop a head before it reaches the size shown on a seed packet. A curd that begins to look coarse, ricey, or loosely separated is past its best texture, so cut it as soon as you notice the buds opening.
Use a clean, sharp knife to cut through the stem below the curd, leaving a few protective leaves around the head if you plan to store it. Check plants daily once a curd is swelling; the change from a small head to a harvestable one can be quick in good conditions. The RHS recommends cutting when the head is firm and compact and not waiting for the curds to separate; Garden Organic likewise advises beginning harvest while heads are still fairly small. Savvy Gardening’s harvest guide stresses firmness over size and notes that the curd can lose density as the buds separate (Savvy Gardening).
Most plants provide one main head rather than a series of large side shoots. Once it is cut, clear the plant if it is finished or diseased; there is little benefit in keeping a spent plant in the bed at the expense of the next crop. Refrigerate the head soon after harvest, keeping some leaves attached to protect it, and use it within several days for best quality. For longer storage, cut into florets, blanch them briefly, cool quickly, drain well, and freeze.
Grow cauliflower in a container
Container-grown cauliflower is possible, but a small pot makes it harder to keep the root zone cool and evenly moist. For one standard plant, use a sturdy container around 5 gallons or larger and at least 10 inches deep, with generous drainage holes and a quality container mix. Colorado State University Extension lists cauliflower among the vegetables needing about 5 gallons per plant and 10 inches of depth; the Colorado State University Extension container-growing guide emphasizes that frequent water and light feeding are part of growing vegetables in pots.
Choose a compact or mini cultivar if space is tight, and follow the variety’s spacing and maturity notes. Put the pot where it gets strong light but can be moved or shaded during an unusual heat spell. A container may dry out faster than an in-ground bed, so check moisture daily in warm or windy weather and water thoroughly when the top inch begins to dry. Do not let the pot sit in a saucer of water; consistently damp soil is different from roots standing in stagnant water.
Use a balanced container fertilizer according to its label or a soil-less mix that includes a starter charge, and avoid doubling up on fertilizer. Nutrients wash through a pot more readily than a garden bed, but overfeeding can still harm the plant. If the pot dries in a few hours, the answer is usually a larger container, a cooler placement, or more attentive irrigation—not a stronger dose of fertilizer.
Troubleshoot small, loose, or discolored heads
Look backward from the curd to the weeks before it formed. Cauliflower problems often appear at harvest, but the cause may have occurred during seedling growth or transplanting. Ask whether the plant was root-bound, exposed to a sharp cold period, set out into heat, allowed to dry, damaged by insects, or planted in soil that was too poor or waterlogged. Correct the condition that is still present, but do not expect a buttoned head to grow into a full-size one.
Use the visible pattern to narrow the possibilities. A tiny head on a small plant points toward early maturity or a growth check; a curd that is loose or ricey points toward heat, direct sun, fast growth, or harvest delay; an off-color white head may have received too much sun. If several plants show the same unusual deformity, review the soil test, irrigation, and weather record before adding a micronutrient product. The University of Maryland Extension cole-crop production recommendations describe how temperature, moisture, growth rate, cultivar, and nutrition can contribute to head disorders.
Buttoning, ricing, and hollow stems
Buttoning is a prematurely formed, undersized curd. It is commonly associated with stress or a transplant that was already too old or too large when set out. Keep young plants growing steadily, choose a cultivar suited to the season, and avoid transplanting into severe heat or a prolonged cold spell. If a button head has formed, harvest it while the curd is still usable; it will not usually resume normal growth.
Ricing describes florets that lengthen and separate, giving the curd a grainy surface. High temperature, direct sun, excess moisture or humidity, fast growth, and high nitrogen can all contribute, so do not assume one cause from appearance alone. Shade a white curd with leaves, keep moisture even, avoid excessive nitrogen, and harvest when it is firm rather than waiting for maximum size. Heat-related texture changes cannot be reversed once the curd has loosened.
A hollow stem needs a little more diagnosis. If the stem is hollow but the inside is clean and not brown, the issue may be a growth or cultivar trait; rapid growth, excess nitrogen, and wider spacing can also be involved. If the hollow area is brown or corky and the curd is discolored, boron deficiency is one possibility, but other stresses can look similar. Utah State University Extension recommends using soil and tissue tests to confirm boron levels; do not apply borax or another boron source without a test-based recommendation because the useful range is narrow.
Prevent pests and disease through the season
The main insect problems are cabbageworms and loopers, flea beetles, aphids, and cabbage root maggots. Check leaf undersides and the center of the plant at least weekly, looking for eggs, small caterpillars, clusters of aphids, or fresh feeding damage. Remove caterpillars and egg clusters by hand when practical, and keep the bed free of old brassica leaves that can shelter pests between crops.
Row covers work best as prevention. Put insect netting over young transplants before moths arrive, seal the edges, and leave enough slack for the plant to grow. If you cover after eggs are already on the leaves, you can trap the insects with the crop, so inspect and remove pests first. Open the cover when you need to weed, water, or check the plants, then secure it again.
Watch for persistent yellowing, wilting despite moist soil, blackened veins, or swollen, distorted roots. These symptoms can point to disease or root injury rather than simple thirst. Remove badly affected plants and do not compost diseased roots if the disease is unknown; clean tools and rotate brassicas into a different bed in following seasons. Good drainage, adequate spacing, and keeping the crop growing without stress help, but they do not guarantee that disease will be absent.
Cover plants early and rotate brassicas
For a spring crop, lightweight covers can reduce insect damage and help buffer brief cold weather. For a fall crop, put protection in place while plants are young rather than waiting until leaves are chewed. Covers can warm a bed, however, so monitor plants in sunny weather and open or remove the cover if it pushes temperatures too high. The goal is a protected but ventilated crop, not a sealed hot tent.
Rotate cabbage-family crops so the same bed does not host brassicas season after season. Keep a simple garden map with each bed’s crop family and year; that is easier to follow than trying to remember whether a bed held broccoli or kale last spring. If clubroot or another persistent soil disease has appeared, ask your local extension service how long to keep susceptible crops out of the affected bed, since the right rotation period depends on the problem and the site.
Conclusion
For a good cauliflower harvest, work backward from the weather the curd will face. Pick a spring or fall window that gives your cultivar time to mature in mild conditions, start with a young vigorous transplant, and avoid interruptions from rough transplanting, dry soil, heat, cold, or pests. The leaves are not decoration: they build the plant’s capacity to make a head, and in white varieties they can also shade the curd.
Keep moisture and nutrition steady without overcorrecting, protect young plants before insects arrive, and inspect developing heads often. Harvest by firmness and tight buds rather than a calendar or a target diameter. If a small head does form, the season still provides useful information: record the cultivar, planting date, weather, and stress points, then shift the next crop window or transplant timing to address the earliest problem.



