How to Propagate a Jade Plant: 3 Methods That Work
Propagate jade plants from stem cuttings, leaves, or water with callousing rules, soil mix, timelines, and fixes for rot, slow roots, and transplant shock.

Jade plants (Crassula ovata) are among the easiest houseplants to multiply — if you respect one non-negotiable rule: the cut surface must callous before it meets moisture. Skip that step and even a healthy parent plant will hand you a mushy cutting within a week. The three reliable methods are stem cuttings in soil, whole leaf cuttings in soil, and stem cuttings in water. Each has a different speed, success rate, and end use, and picking the right one upfront saves you a month of waiting on leaves that never root.
Wisconsin Extension notes that jade is especially easy to propagate from stem or leaf cuttings, and that pieces allowed to dry for a few days root more readily and rot less often (Wisconsin Horticulture). University of Maine Extension lists jade among succulents propagated by both stem tip and whole leaf cuttings (Bulletin #2615). This guide walks through all three methods with the timing, soil, and aftercare details that turn those facts into plants you can actually pot up.
Which Propagation Method Should You Use First?
Stem cuttings in soil are the default choice for most people. They root faster than leaves, produce a recognizable mini-tree sooner, and match what you get when a branch breaks off and heals on its own in nature. Choose stem cuttings when you are pruning a leggy plant, shaping a bonsai-style trunk, or want a giftable baby jade in four to eight weeks during the growing season.
Leaf cuttings make sense when you have intact fallen leaves, want many small plants from one parent, or do not want to remove a branch. They work — jade is on UMaine Extension’s whole-leaf cutting list — but expect a slower timeline and smaller starts. A single leaf can produce one or more plantlets at the base, not a branched specimen on day one.
Water propagation is best when you want to see root progress or you are nervous about soil rot. It works well for stem cuttings only. Leaves topple, submerge, and rot in water; keep leaves on dry soil instead. Water rooting is slightly faster for some growers in warm rooms, but those roots are adapted to water — moving them into soil requires a careful transition covered below.
| Goal | Best method | Typical timeline (warm, bright conditions) |
|---|---|---|
| Fastest plant with a trunk | Stem in soil | 3–6 weeks to firm roots |
| Many plants from one parent | Leaf on soil | 4–8+ weeks to visible plantlets |
| Visual root monitoring | Stem in water | 2–5 weeks in water, then soil transition |
| Salvage a broken branch | Stem in soil or water | Same as stem methods |
If you are new to succulent propagation generally, the broader framework in our succulent propagation guide applies here too — especially the callousing and dry-start watering rules.
Best Time to Propagate Jade Plants
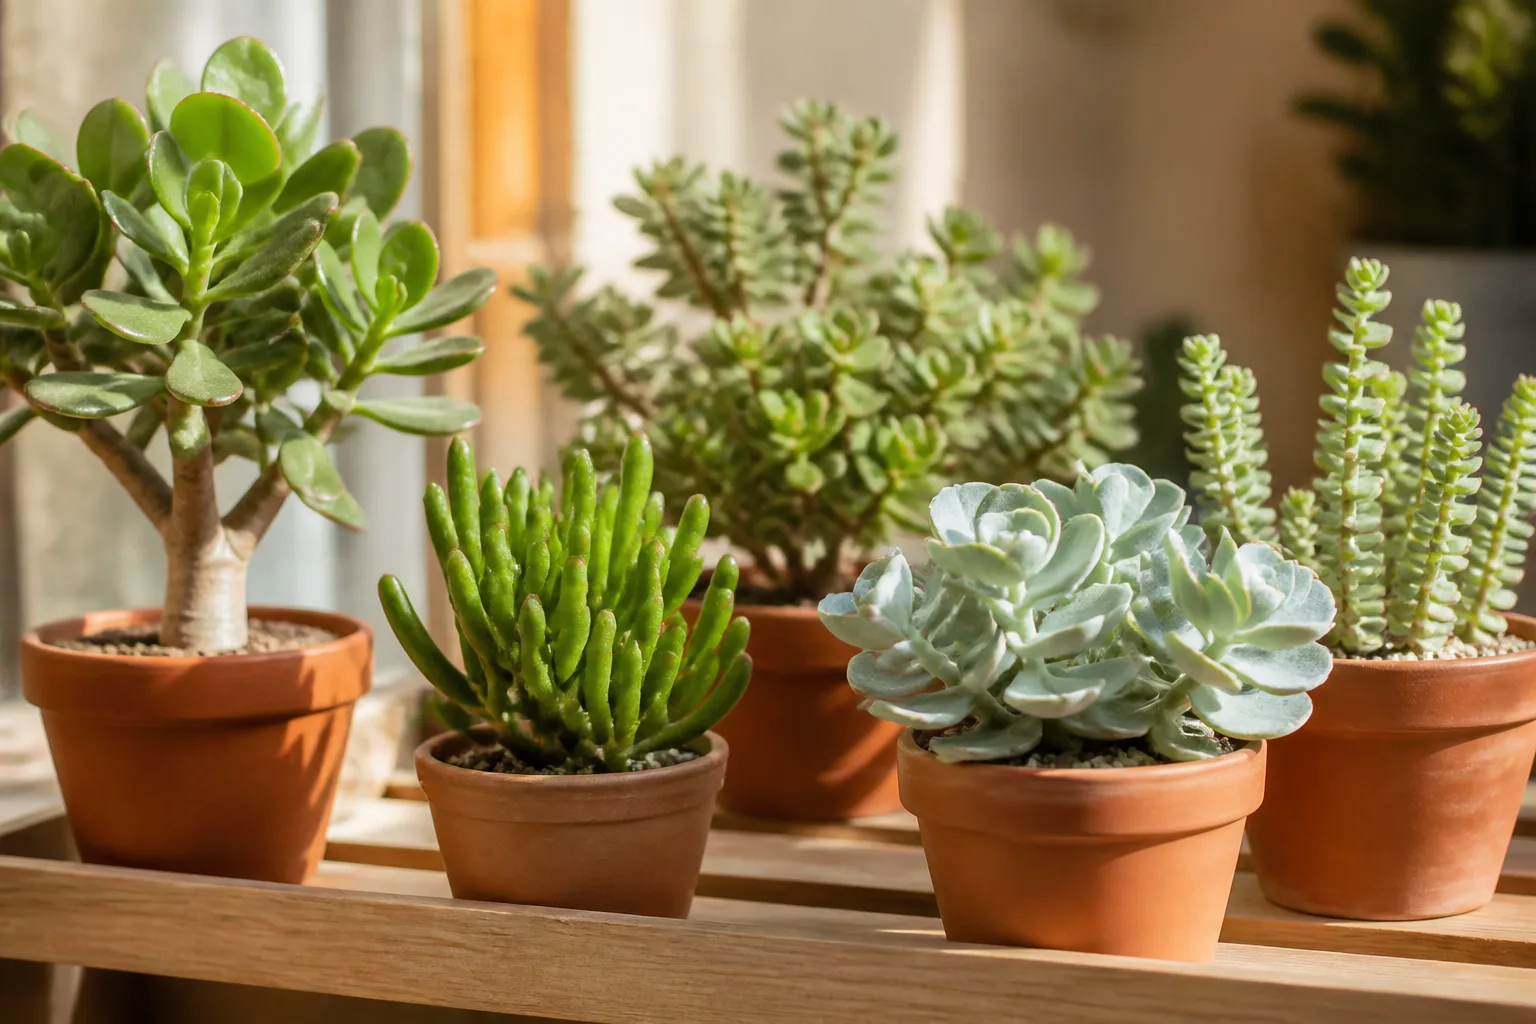
Late spring through summer is the sweet spot. Longer days and warmer temperatures push active growth, and Wisconsin Extension states that cuttings root most easily in summer, though jade can be propagated at any time of year (Wisconsin Horticulture). In practice, a stem cutting taken in June under bright light often shows roots in three weeks; the same cutting in January may sit unchanged for two months.
You can propagate in fall or winter, but treat it as a slow project. Cooler rooms and shorter days slow metabolism. Keep expectations low, avoid overwatering dormant cuttings, and do not interpret slow progress as failure. If your parent plant is actively growing — new leaves opening, stems firm and green — that is a better signal than the calendar alone.
Avoid propagating from a stressed parent. If the jade is dropping leaves from overwatering, recovering from root rot, or recently moved from a dark corner, let it stabilize for two to three weeks first. Cuttings mirror parent health.
What You’ll Need Before You Start
Tools, Cuttings, and Optional Rooting Hormone
Gather sharp, clean scissors or pruners, rubbing alcohol for wiping blades, and a small tray or plate for callousing. For stem work, target segments 3 to 5 inches long with at least two to three leaf pairs remaining on the top — UMaine Extension recommends stem tip cuttings in that range with three or four leaves total (Bulletin #2615). For leaves, you need the entire leaf including the point where it attached to the stem; a torn leaf without that base will not root.
Rooting hormone is optional for jade. Thick succulent tissue already roots readily once calloused. A light dust of powder on the cut end can help in cool seasons or if you have had rot issues before, but it does not replace callousing or dry soil discipline.
Soil Mix, Containers, and Water Setup
Use a fast-draining succulent or cactus mix amended with extra perlite or sharp sand if your bag feels heavy. Wisconsin Extension recommends high-porosity mixes designed for succulents and warns that standard peat-heavy potting soil holds too much moisture (Wisconsin Horticulture). Small terracotta pots or plastic pots with drainage holes work for individual stem cuttings; shallow trays or repurposed takeout containers suit multiple leaf cuttings.
For water propagation, choose a clear glass or jar tall enough to support the stem without submerging leaves. Room-temperature tap water left out overnight reduces chlorine shock in sensitive setups, though jade is less fussy than many houseplants.
Callousing Rules That Prevent Rot
Callousing means letting the cut end dry and seal before it touches soil or water. Place stem or leaf cuttings on a dry tray in bright, indirect light for three to seven days. The cut surface should look dry, slightly matte, and sometimes lightly browned — not wet or shiny.
Thick jade stems may need the full week, especially in humid kitchens. A calloused end resists fungal infection when you finally introduce moisture. Wisconsin Extension explains that in the wild, fallen leaves and stem pieces dry on the ground before roots form (Wisconsin Horticulture). Your indoor process mimics that pause.
Never skip callousing because the parent plant looked healthy or because you are in a hurry. Fresh cuts placed directly on damp soil are the number-one reason jade propagation fails.
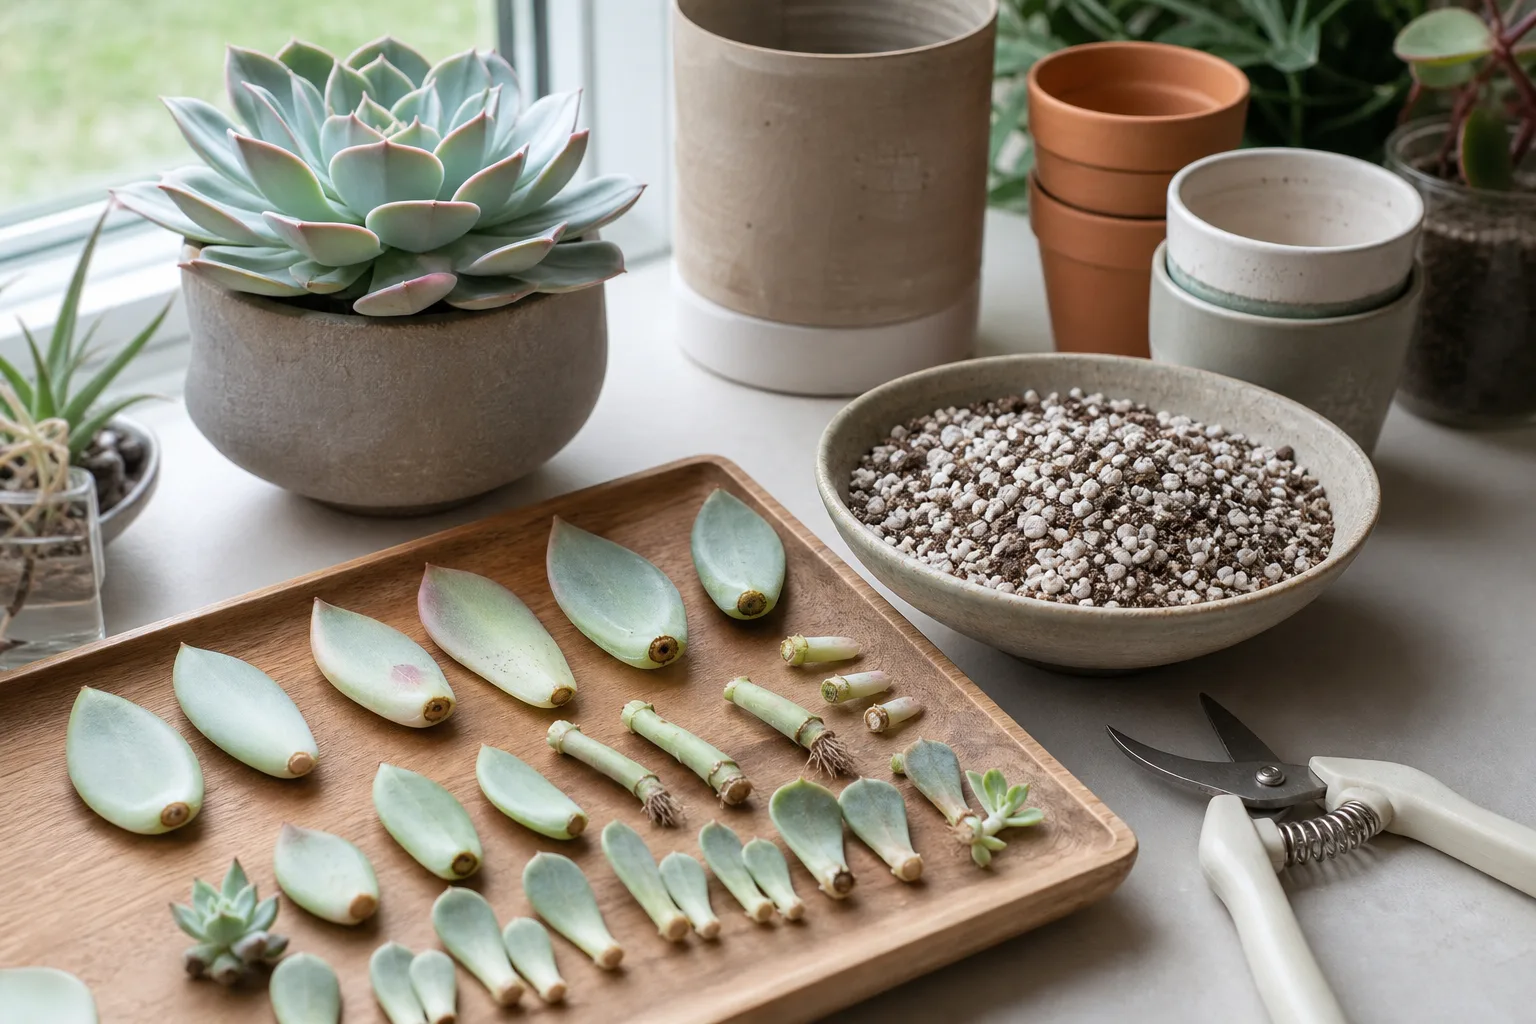
Method 1 — Stem Cuttings in Soil (Fastest for Most Growers)
Stem cuttings give you the fastest path to a plant that looks like a jade — woody stem, stacked leaves, room to branch. This is the method to use after pruning a leggy specimen or when a branch snaps off accidentally.
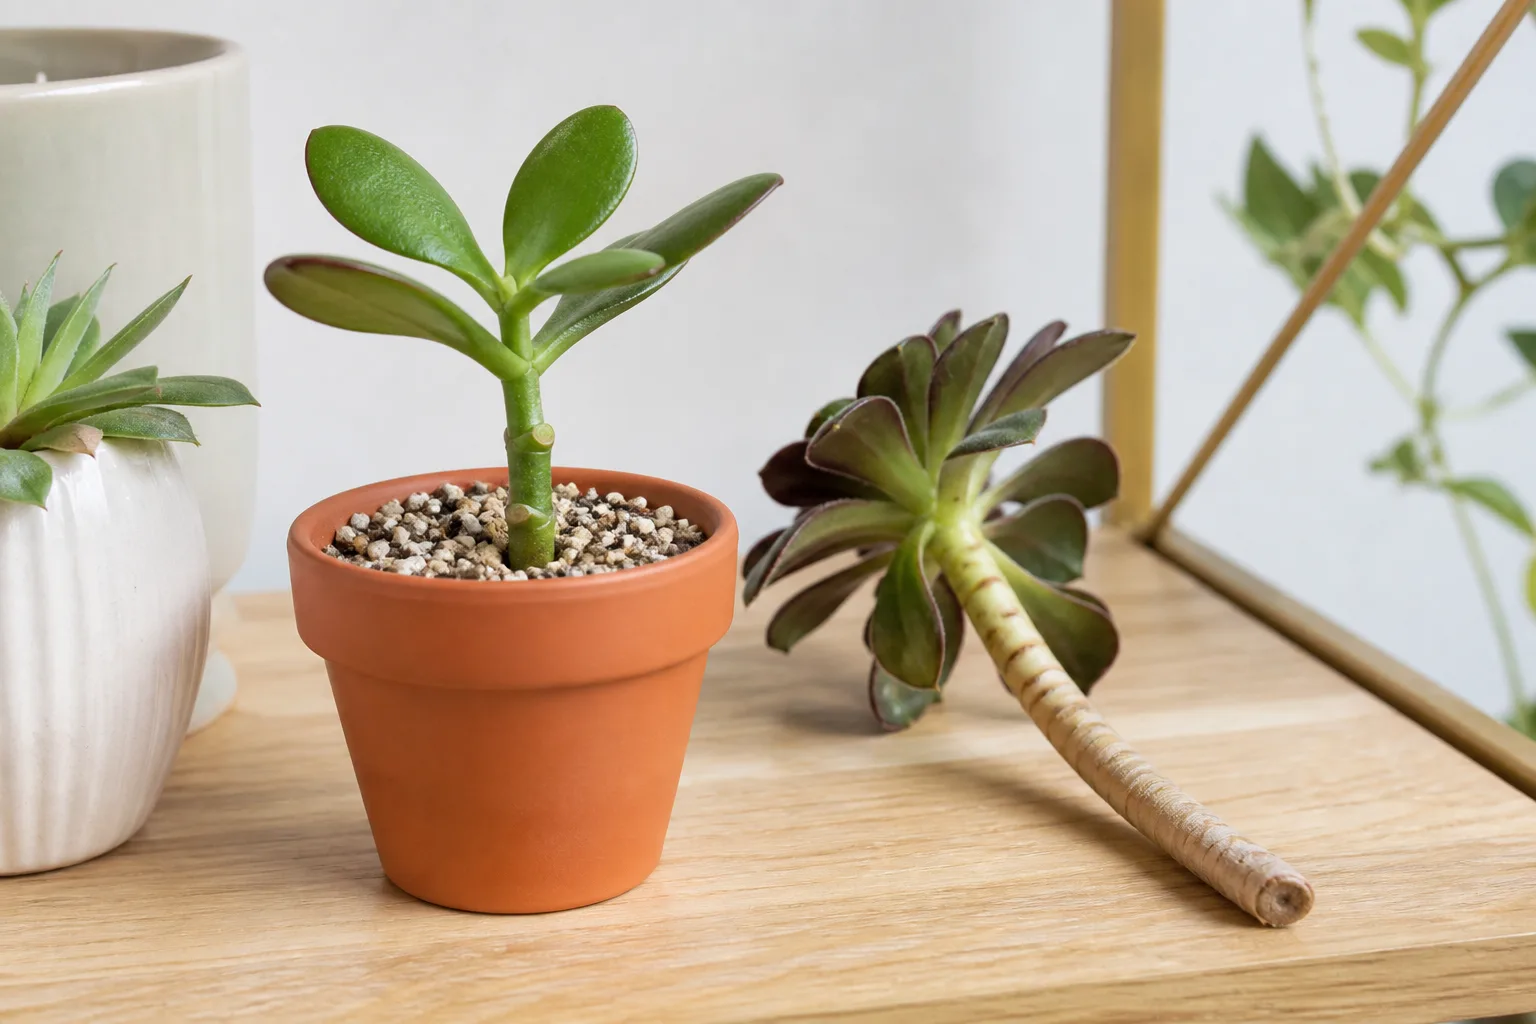
Step-by-Step Stem Cutting in Soil
Select and cut. Choose a firm, green stem. Cut just below a leaf node with sterilized blades. Remove the lower one to two pairs of leaves so two to three nodes sit bare on the bottom half of the cutting.
Callous. Lay the cutting on a dry tray for three to seven days until the cut end is sealed.
Plant. Fill a small pot with dry-to-barely-damp succulent mix. Poke a hole with a pencil and insert the cutting deep enough that the bare nodes are below the soil line. Do not water yet.
Wait, then water lightly. Keep the pot in bright, indirect light — a west- or south-facing window with no scorching midday sun is ideal. After seven to ten days, give a light soak around the stem base if the mix is completely dry. Thereafter, water only when the top inch of soil is dry.
Check for roots. Gently tug the stem after three weeks. Resistance means roots formed. You can also slide the cutting out briefly to inspect white or tan roots at the nodes.
Stem cuttings in soil typically root in three to six weeks during active growth. Once roots are an inch or longer, move to a slightly larger pot using the repotting rules for succulents — one size up, never soggy.
Method 2 — Leaf Cuttings in Soil (Best When You Have Spare Leaves)
Leaf propagation is slower, but it costs nothing when leaves drop naturally or you are cleaning up a dense plant. UMaine Extension classifies jade as a whole leaf cutting succulent: the leaf is snapped or cut cleanly from the stem and the base contacts rooting medium (Bulletin #2615).
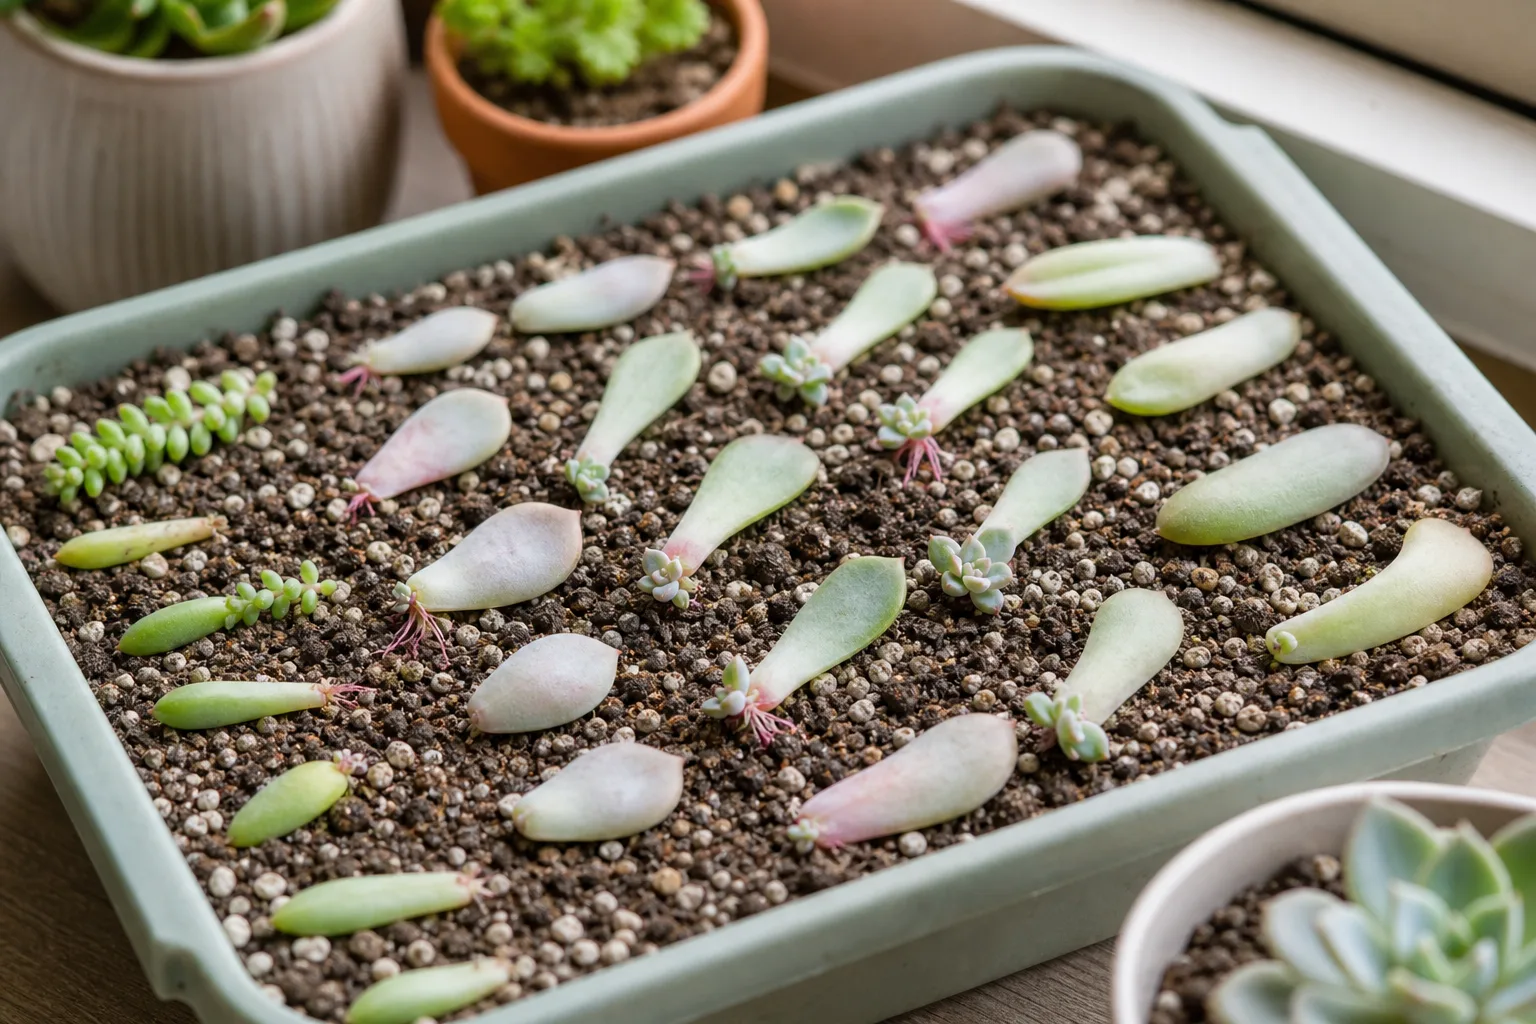
Step-by-Step Leaf Propagation
Remove whole leaves. Twist each leaf gently side to side until it separates with a clean snap at the base. You need the full attachment point — the tiny “hinge” that connected to the stem.
Callous. Let leaves sit on a dry tray for three to five days. The base should dry and callous like a stem end.
Place on soil — do not bury. Fill a shallow tray with dry succulent mix. Lay leaves flat on top or insert just the calloused base at a slight angle so the leaf rests mostly above the surface. Pressing the whole leaf into soil invites rot.
Hold off on water. This surprises beginners, but dry-start is correct. Mist or water only after you see pink root nubs or tiny leaves emerging from the base — often two to four weeks in summer, longer in winter.
Let plantlets develop. A rooted leaf may produce one or several small rosettes at the base. Wait until the new plant has its own inch-long stem and several sets of leaves before separating it from the mother leaf. The original leaf will shrivel as it donates stored water — that is normal.
Leaf propagation can take six to twelve weeks from lay-down to pot-ready plantlet. Patience beats frequent watering every time.
Method 3 — Water Propagation for Stem Cuttings
Water propagation trades a bit of transplant work for visible roots. It works for stem cuttings only — not leaves. Many growers like watching white roots expand in a clear jar, and it can be slightly faster in a warm room.
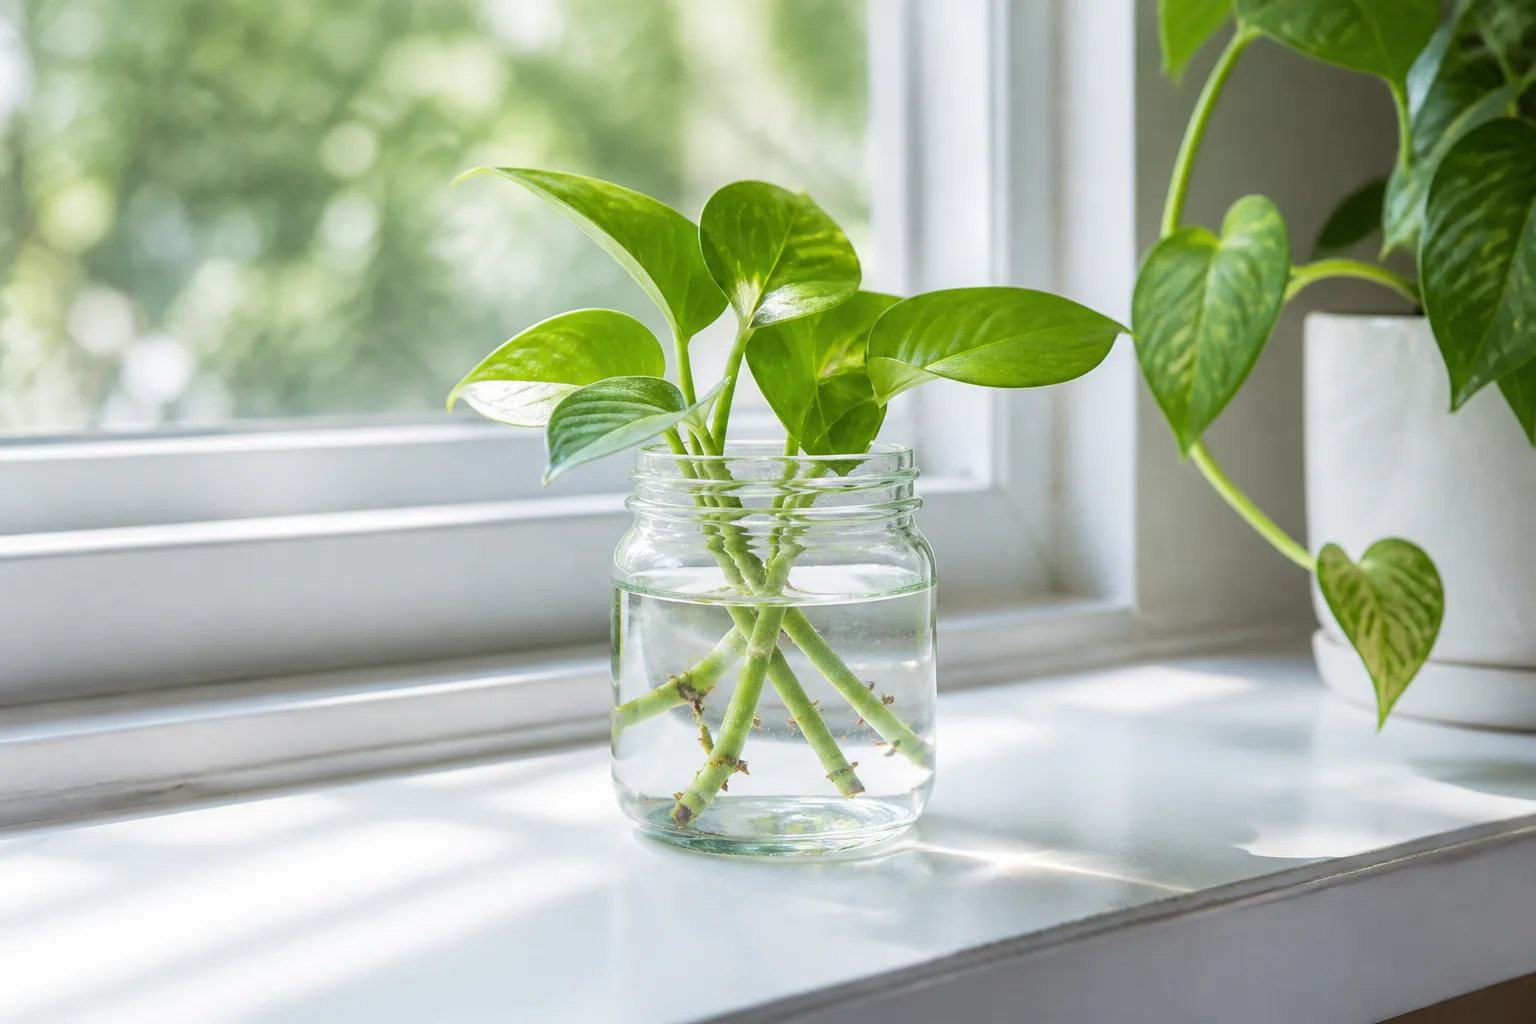
Prepare the cutting the same way as the soil method: three to five inches, lower leaves removed, three to seven days of callousing.
Add to water. Fill a clean glass with an inch or two of water. Suspend the stem so the calloused end sits in water and the remaining leaves stay above the rim. Use a narrow-necked jar or plastic wrap with a hole if the cutting wants to slide down.
Maintain the jar. Change the water every five to seven days or when it looks cloudy. Keep the setup in bright, indirect light. Roots usually appear in two to five weeks.
Do not wait for enormous roots. Two to three inches of roots is enough to pot up. Extremely long water roots break easily and struggle in soil.
Moving Water-Rooted Cuttings Into Soil
Water-grown roots are fragile and adapted to an oxygen-rich aquatic environment. Moving them straight into dry, gritty mix causes transplant shock — wilting, stalled growth, or rot.
Transition protocol: When roots are two to three inches long, plant into lightly moist — not wet — succulent mix. Water thoroughly once, then let the soil dry almost completely before the next soak. For the first two weeks, keep light bright but avoid hot direct sun. Our water vs soil propagation guide explains why this acclimation step matters for many succulents.
Some growers root in water only as a diagnostic step, then move to soil once roots appear. Others skip water entirely and stay in soil from the start — both are valid; soil roots tend to transition more smoothly to long-term pot culture.
Rooting Timeline — What to Expect by Season
Timelines vary with temperature, light, and cutting health. Use these ranges as guides, not guarantees.
Spring and summer (active growth): Stem cuttings in soil often root in three to six weeks. Water-propagated stems may show roots in two to four weeks. Leaves may sprout roots in two to four weeks and plantlets in six to ten weeks.
Fall and winter (slower metabolism): Add two to six weeks to every estimate above. Cuttings may look unchanged for long stretches while callus tissue and initial root primordia form underground. Resist watering idle cuttings — dry soil is safer than wet soil when nothing is growing.
Signs of progress before visible roots: A cutting that stays firm and green is alive. On leaves, a slight lift at the base or pink bumps means roots are starting. On stems, new leaf buds near the tip after potting often follow root formation even if you cannot see roots yet.
After Roots Form — Potting and First-Care Rules
Once a stem cutting resists a gentle tug or a leaf plantlet has its own stem, it is time for a permanent home. Choose a pot only one size larger than the root mass — oversized pots hold wet soil too long and invite rot. Confirm drainage holes.
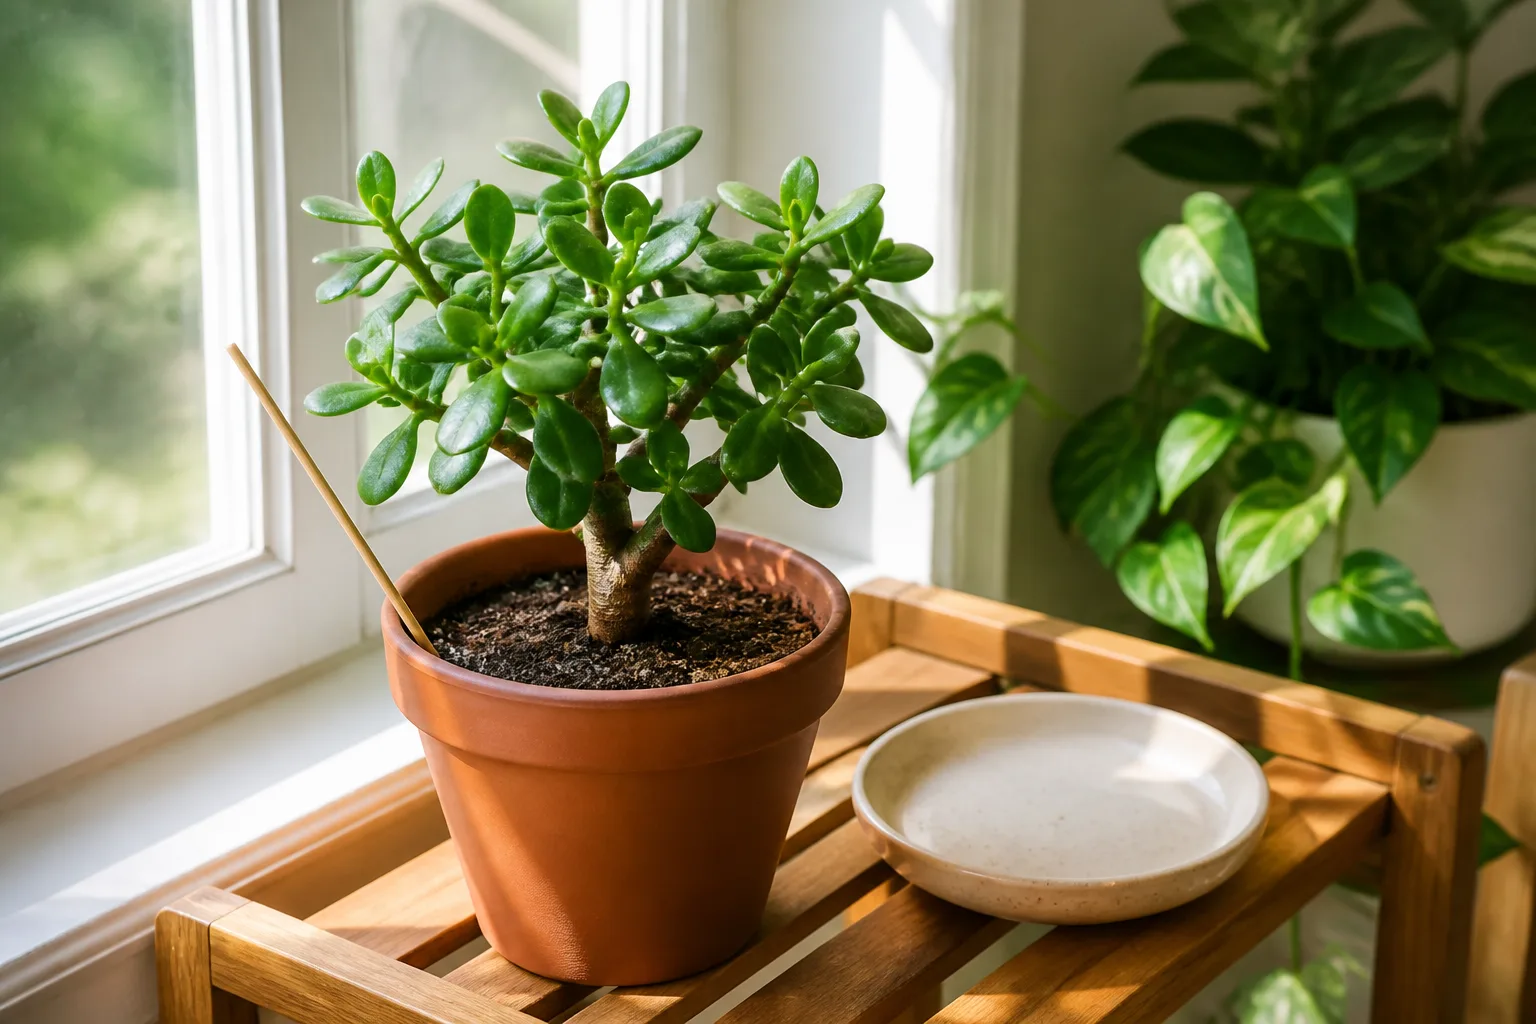
Potting mix: Same fast-draining succulent blend used for propagation. If you are unsure about composition, the jade soil guide covers grit ratios and drainage tests.
First watering after pot-up: Water thoroughly until a little drains out, then empty the saucer. Let the mix dry before the next soak — the same rhythm as mature jade care described in growing jade indoors.
Light: Four or more hours of direct sun daily produces compact growth and red leaf margins on many jades, per Wisconsin Extension (Wisconsin Horticulture). Newly potted propagations benefit from bright indirect light for a week, then gradual introduction to stronger sun.
First 60 days: Fertilizer is unnecessary until the plant is actively pushing new leaves. Focus on light and dry-side watering. A young jade in a four-inch pot may need water only every ten to fourteen days indoors — adjust for your room, not a calendar.
Troubleshooting Rot, Slow Roots, and Wilting Leaves
Black, mushy stem base: Rot from skipping callous, overwatering before roots formed, or burying the cutting too deep in wet mix. Discard the rotten section, take a fresh cutting higher up if tissue is still firm, and restart with a longer dry period.
Cutting shriveling but no roots: Often underwatering after roots started, or a cutting too small to sustain itself. For leaves, slight shrivel before rooting is normal. For stems, a light soil mist after week two may help — not a flood.
Leaves falling off the parent cutting: Normal if you removed lower leaves on purpose. If upper leaves drop, the cutting may be too wet, too dark, or rotting at the base. Inspect immediately.
No roots after eight weeks in summer: Check light — dim shelves stall succulents. Confirm the cutting is calloused and the soil is not staying damp. Try moving to a warmer spot (65–75°F). As a last resort, pull the cutting, re-callous a fresh cut, and retry.
Leggy tiny plantlets from leaf propagation: Increase light. Etiolated jade pups will not compact retroactively, but new growth under brighter conditions will stay tight.
Signs Your Cutting Is Ready to Pot Up
A stem cutting is ready when a gentle tug meets resistance, roots visible through a clear pot or drainage hole are at least one inch long, or new growth appears at the tip while the base stays firm. A leaf propagation is ready when the plantlet has its own roots and at least two sets of true leaves, and you can separate it without tearing.
Do not rush pot-up because roots look long in water. Wait until the plant can support itself and the root system is white or tan — brown, slimy roots need trimming and a restart.
Pet Safety and Handling Notes
Jade plants are toxic to dogs and cats if ingested, according to the ASPCA. Sap is mildly irritating to skin for some people. Wash hands after handling cuttings and keep propagations off floor-level shelves if you have curious pets.
Jade is sometimes called a money plant or friendship plant — charming names, but not a license to let pets chew leaves. Place new propagations in a pet-free zone until potted and moved to their final location.
For ongoing care after propagation — light, watering, pruning, and cultivar differences like Gollum or Hobbit — see our types of jade plant roundup and the dedicated jade propagation care page in the plant cluster.
Conclusion
Propagating jade is straightforward once you respect succulent logic: callous first, water later, bright light throughout. Stem cuttings in soil are the fastest route to a real miniature tree; leaves multiply plants for free at a slower pace; water lets you watch roots form on stems before a careful move into gritty mix. Start in warm months when you can, but winter attempts still work if you stay dry and patient.
The difference between a tray of rotten cuttings and a row of potted jades is rarely talent — it is timing the first drop of water and choosing the method that matches your goal. Take the cutting, let it heal, and let the plant tell you when it is ready.



