How to Grow and Care for May Night Salvia
Grow May Night salvia successfully with practical advice on planting, drainage, deadheading, division, containers, pests, and floppy stems.
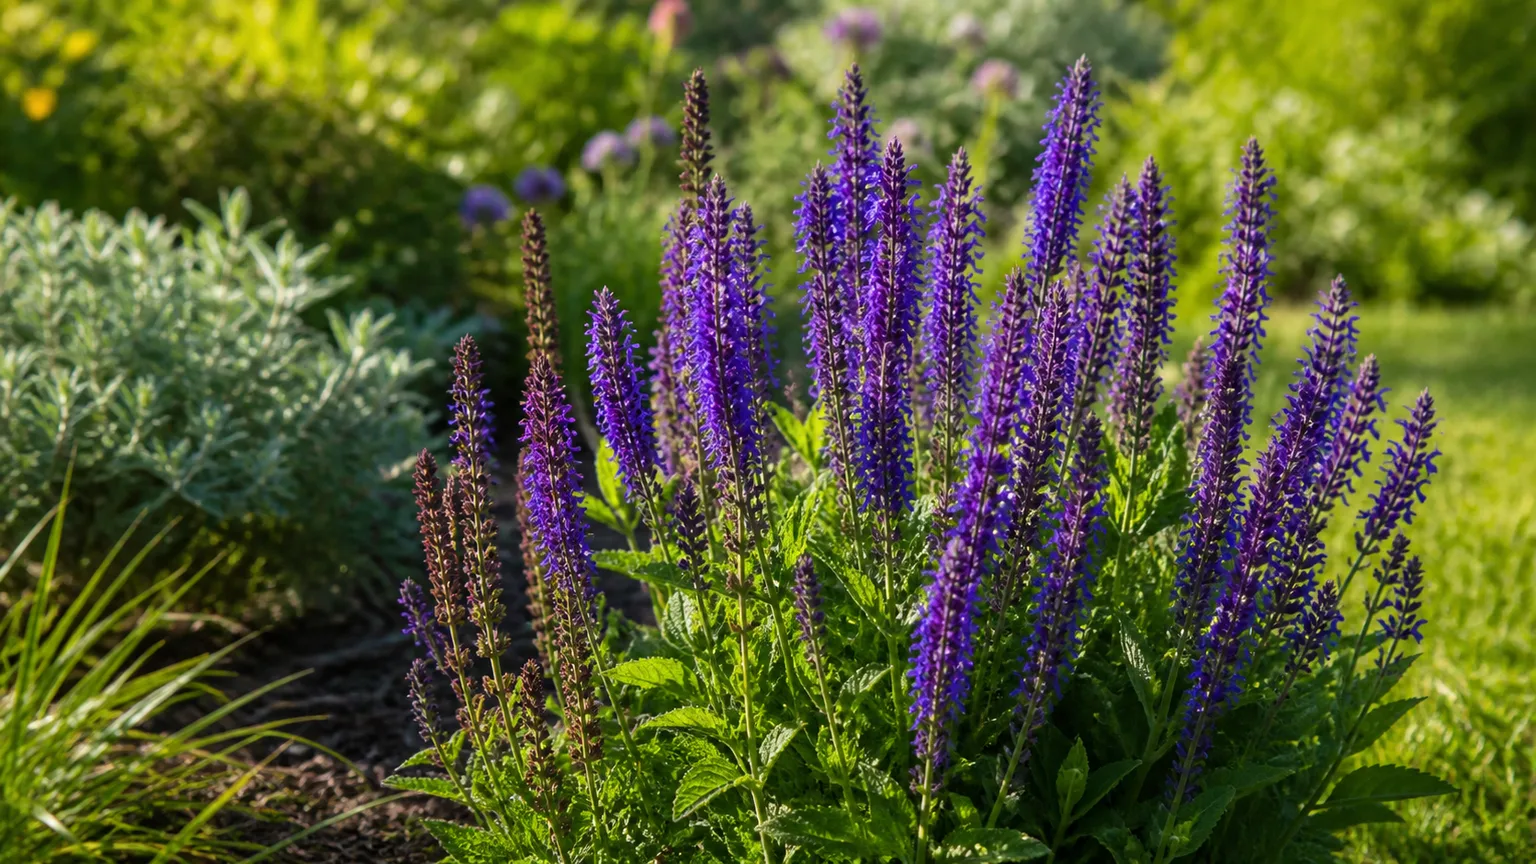
May Night salvia is a compact, clump-forming perennial that earns its space with upright violet-blue flower spikes, aromatic foliage, and a useful habit of reblooming after a timely cut. The plant is often sold under several botanical names, but the care is consistent when you treat it as a hardy herbaceous border salvia: give it strong sun, keep water moving away from the crown, and cut spent spikes before the plant spends weeks making seed.
The most common mistake is to think drought tolerance means neglect from the day it goes into the ground. A new transplant still needs a dependable root zone, while an established clump usually suffers more from heavy, wet soil or rich fertilizer than from an occasional dry spell. This guide gives you a full seasonal routine, including the decisions that determine whether May Night stays compact, flowers again, and returns next year.
May Night Salvia at a Glance
May Night salvia is generally sold as Salvia nemorosa ‘May Night’ or Salvia × sylvestris ‘May Night’; ‘Mainacht’ is another name you may see on a nursery label. The Royal Horticultural Society lists it as a clump-forming herbaceous perennial with dense deep-violet flowers, full-sun exposure, and moist but well-drained tolerance across loam, sand, and chalk. Its profile also records an Award of Garden Merit and recommends removing fading flower spikes to prolong flowering. (Royal Horticultural Society)
Expect a mature plant to occupy roughly 12 to 24 inches in height and width, with the exact dimensions changing by soil, climate, and nursery strain. The broader species profile from the Missouri Botanical Garden gives a taller possible range of 1.5 to 3 feet and a bloom window from May into September, while the named cultivar is usually the tidier, shorter choice sold for borders. (Missouri Botanical Garden)
In practical terms, May Night is a good fit for a sunny front or middle border, gravel garden, cottage planting, pollinator bed, pathway edge, or large container. It is not a wet-meadow plant, a shade perennial, or a plant that needs weekly feeding to perform.
The editorial plant reference Gardenia’s May Night profile also describes the selection as a clump-forming perennial for sunny borders and containers, with the compact habit and repeat-bloom potential that make it useful in small garden spaces. Use that as a design reference, then let your own soil and climate determine the final spacing.
Identify the Plant Before You Plant It
The name “salvia” covers annual bedding plants, culinary sage, tender hummingbird salvias, and woody shrubs as well as hardy meadow sages. May Night belongs to the herbaceous border group, so it forms a low leafy crown and sends up flowering stems rather than building a permanent shrub framework. That distinction matters later: a May Night clump can tolerate a strong post-bloom reset that would be risky on a woody Salvia greggii.
Look for a compact basal mound of textured, lance-shaped green leaves and upright stems carrying dense whorls of small two-lipped flowers. The Montana Natural Heritage Program describes the species as a rhizomatous perennial with erect aromatic stems and congested purple-bracted flower clusters. It also records the plant as introduced in Montana rather than a local native, a useful reminder that the cultivar’s garden performance should not be confused with native-plant status. (Montana Natural Heritage Program)
Check the botanical name on the label before copying advice from another salvia article. A soft, clumping S. nemorosa and a woody autumn sage may share a flower color but not a safe pruning depth, winter plan, or expected mature size.
Choose a Site With Sun and Drainage
Start with six or more hours of direct sun. Morning sun with some late-afternoon shade can be a reasonable compromise in a very hot climate, but a permanently dim border usually produces fewer spikes and looser stems. Strong light helps May Night stay upright; if the plant flops despite good drainage, light is one of the first variables to check.
Drainage is the second non-negotiable. The soil can be average, sandy, gravelly, or moderately fertile, and the plant can tolerate acid, neutral, or alkaline conditions. What it cannot tolerate for long is a crown sitting in cold, saturated soil. A low pocket beside a downspout is a poor site even if it receives full sun.
Test the bed after rain, not only on a dry planting day. If water remains around the planting hole for hours, raise the bed, move the plant, or work through the cause with a broad soil improvement rather than pouring a narrow column of gravel into the hole. In containers, use a pot with drainage holes and a porous mix; a decorative cachepot that holds runoff can recreate the same problem underground.
May Night handles exposed or sheltered positions, but crowded, humid plantings dry slowly after rain. Leave enough room for air to pass around the clump, and avoid packing tall neighbors directly against its foliage. For the fullest visual effect, plant three or five clumps in a drift rather than one isolated plant, while still respecting the mature spread.
Plant May Night Salvia for a Strong First Season
Spring and early fall are the easiest planting windows because the roots can settle before the most demanding heat or cold. In a cold-winter region, finish fall planting early enough for several weeks of root growth before the ground freezes. In a hot climate, spring planting is safer if the only available fall window would leave the crown waterlogged through winter.
Dig a hole about as wide as the root ball and no deeper than the existing soil level. Loosen circling roots, set the crown at grade, backfill with the excavated soil, and water slowly until the entire root ball is wet. Do not bury the crown under a cone of compost or mulch; the transition between stems and roots should stay open and able to dry.
Space plants 12 to 18 inches apart for a continuous border, widening the gap toward 18 to 24 inches in humid areas or heavy soil. Close spacing gives faster visual coverage but increases the time leaves stay wet and makes it harder to cut, inspect, and divide the clumps later. A little patience at planting usually saves a crowded, mildew-prone correction in year two.
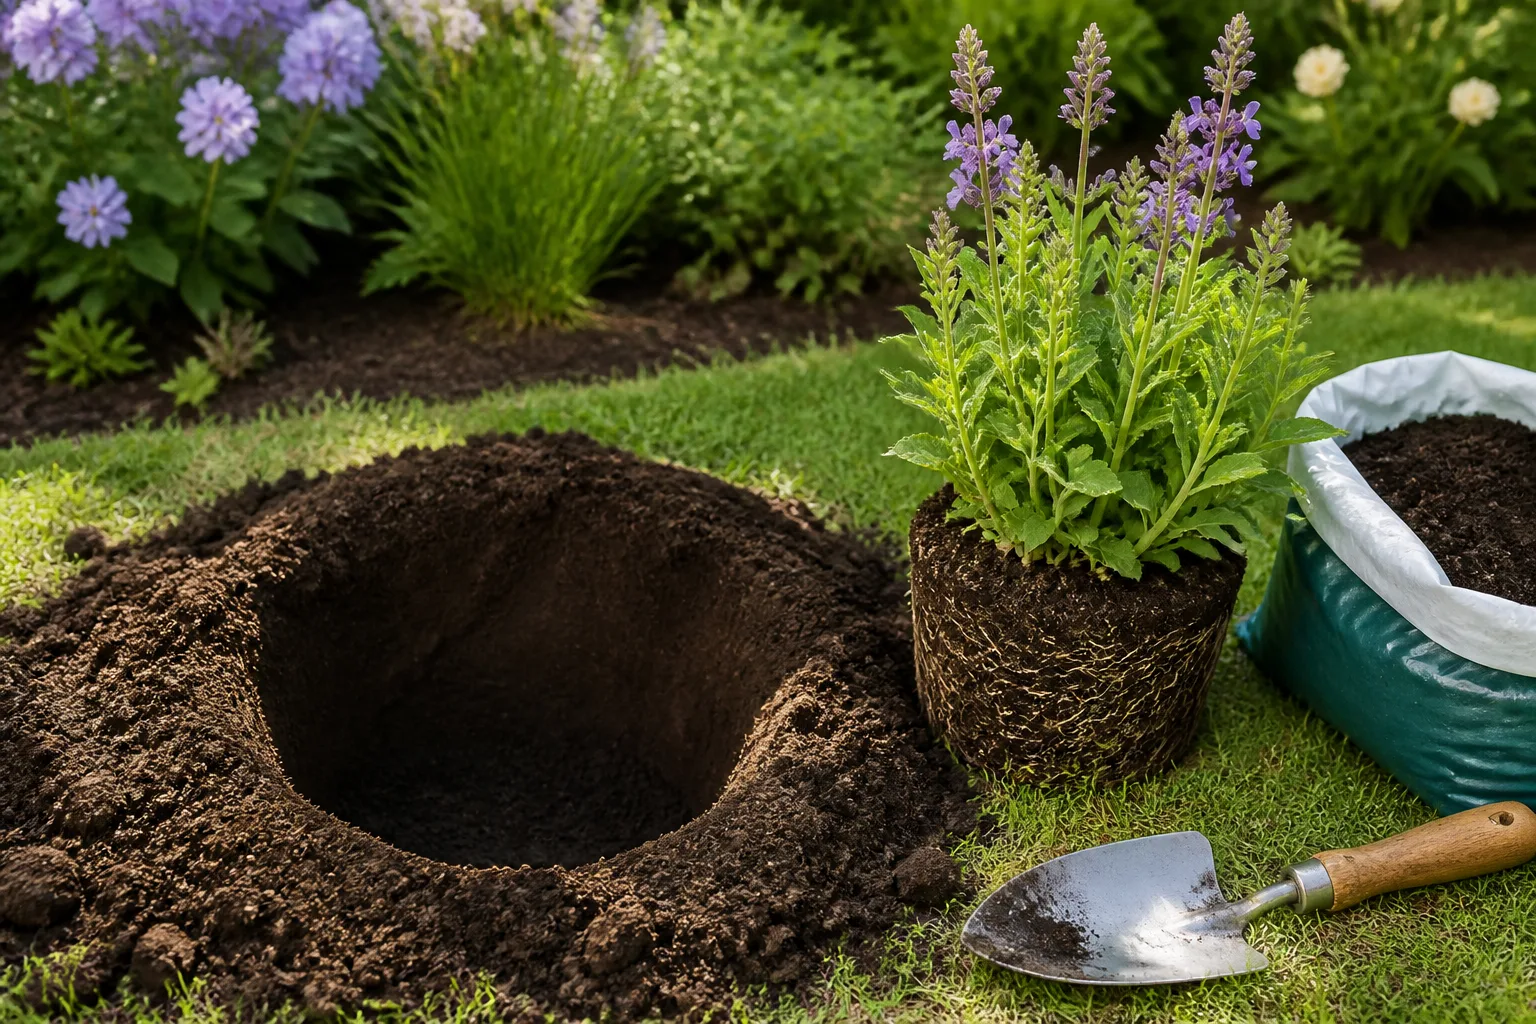
Apply a thin organic mulch layer after planting to slow evaporation and reduce weeds, keeping it a few inches away from the crown. Mulch should moderate the soil, not turn the base of the plant into a permanently damp collar.
Water and Feed Without Making It Floppy
Water newly planted May Night salvia whenever the upper soil begins to dry, aiming for a deep soak rather than a daily sprinkle. The schedule depends on soil, rainfall, wind, and container size, so use the root zone as your guide: a plant in sandy ground may need attention sooner than one in loam, but neither should stay saturated.
After the first growing season, let the soil dry moderately between deep waterings. During a prolonged heat wave, give an established plant a slow drink at the root zone, especially after deadheading if you want it to regrow quickly. The Missouri Botanical Garden describes woodland sage as drought tolerant and notes that repeat bloom is better with regular moisture and deadheading; drought tolerance is a survival trait, not a promise of maximum flower production without water. (Missouri Botanical Garden)
May Night is a light feeder. If the bed already contains reasonable soil, skip routine fertilizer and let the plant grow on its own. Excess nitrogen can produce lush, soft stems and leaves at the expense of flower density, and the extra growth may flop. A thin spring compost top-dressing is enough for most gardens; correct weak light, wet soil, or drought before reaching for a stronger feed.
In a container, nutrients leach faster, but that still does not justify repeated heavy feeding. Refresh the potting mix or apply a mild, label-directed fertilizer during active growth only if the plant is pale and the roots are otherwise healthy. Stop fertilizing as the plant enters dormancy so you do not encourage tender growth before cold weather.
Deadhead for a Second Flush of Flowers
Deadheading is the most useful summer chore for May Night. It removes a finished spike before seed production takes over, improves the plant’s appearance, and encourages fresh flowering stems from the crown or side shoots. The RHS specifically recommends removing fading spikes to prolong flowering, while Gardening Know How includes Salvia nemorosa among the perennials that can be cut back after the first flush for another wave of color. (Gardening Know How)
Do not promise yourself twelve weeks of uninterrupted peak bloom. May Night usually gives a strong late-spring or early-summer flush, then a lighter, intermittent repeat display. Hot weather, drought, short growing seasons, or a plant that is still establishing can shorten or delay the second round.
The three-cut deadheading method
- Wait until most flowers on a spike have faded, but inspect the stem before cutting. A lower side shoot or a pair of healthy leaves may already be developing.
- Follow the spent stem down to the first strong leaf pair or side shoot. Make a clean cut just above that growth instead of leaving a long bare stick.
- If nearly every spike has finished, cut the flowering stems back as a group to the leafy mound. Keep the basal foliage unless the entire clump is being renewed.
Use sharp, clean bypass pruners and remove the cut stems from the bed if they are diseased. Gardening Know How’s practical pruning guidance also stresses clean blades between plants; that small habit reduces the chance of carrying pathogens through a border. Water after a major cut only when the soil is dry, and keep irrigation at the soil line while new foliage is developing.
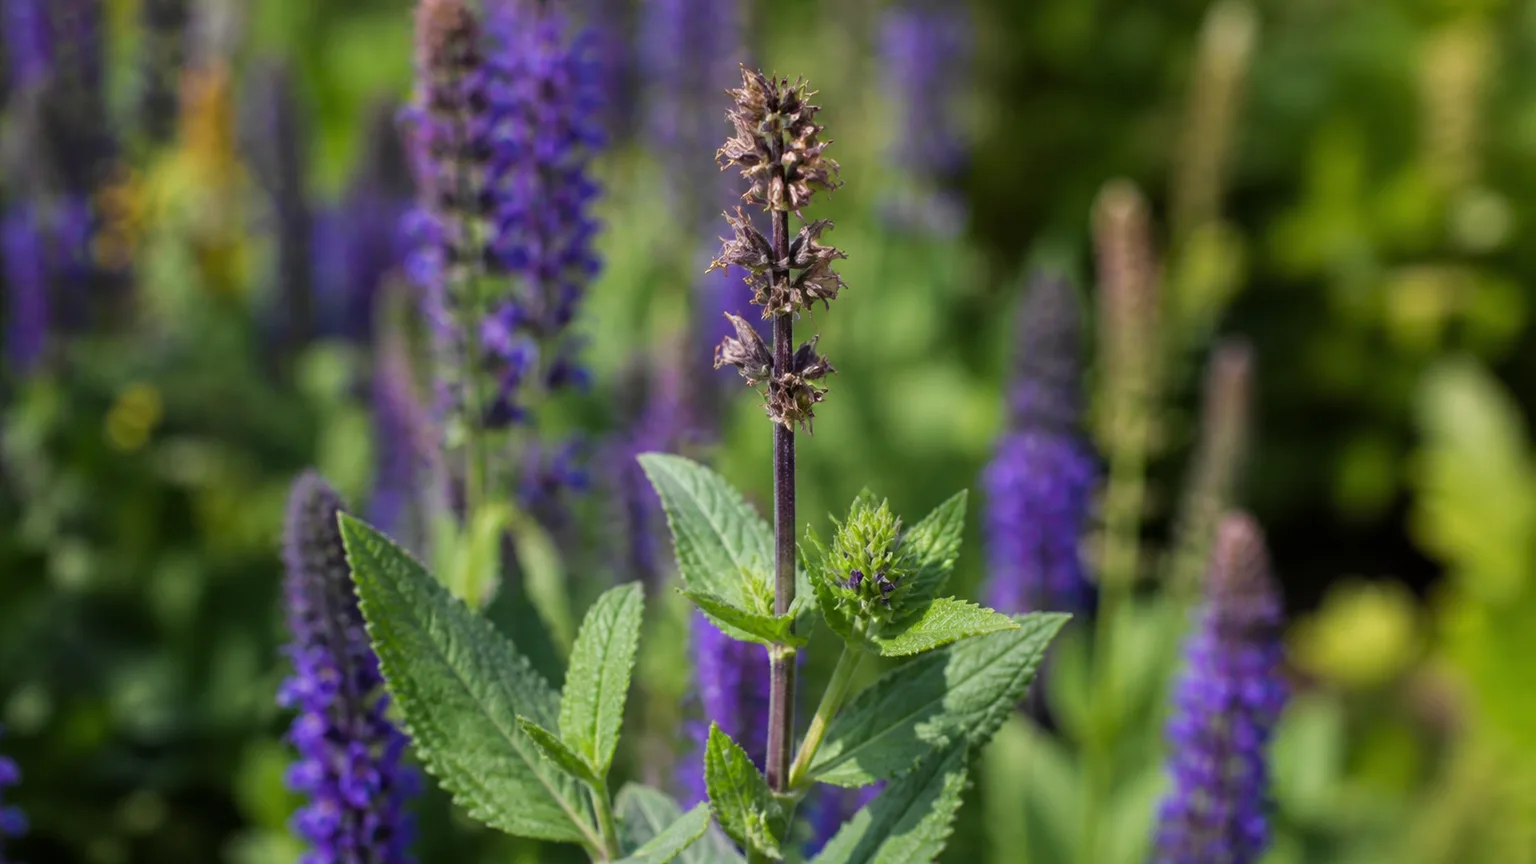
When to leave a few flower spikes alone
Leave selected late-season spikes if you want seed, winter texture, or food for birds and other garden wildlife. Named cultivars may not produce seedlings identical to ‘May Night’, so self-sown plants can vary in color, height, and habit. If you want a tidy, predictable border, deadhead most spikes and allow only a small portion to mature.
There is also no need to deadhead a spike that is still opening or one that you are saving for a cut-flower arrangement. Deadheading is a tool for directing the season, not a rule that every brown petal must disappear immediately.
Prune and Cut Back at the Right Time
The best time for a larger May Night cut is after the first major flush, when the stems are mostly spent and the plant still has enough warm weather to rebuild. Cut the flowering stems down to the basal foliage or to a few inches above the crown, taking care not to gouge the crown. In a healthy herbaceous clump, this reset can produce a fresh mound and another set of spikes.
Do not cut a drought-wilted plant hard on the same day you discover it. Water the root zone, wait for the foliage to regain firmness, and then remove the spent stems. A plant already short of water has less reserve for replacing leaf area.
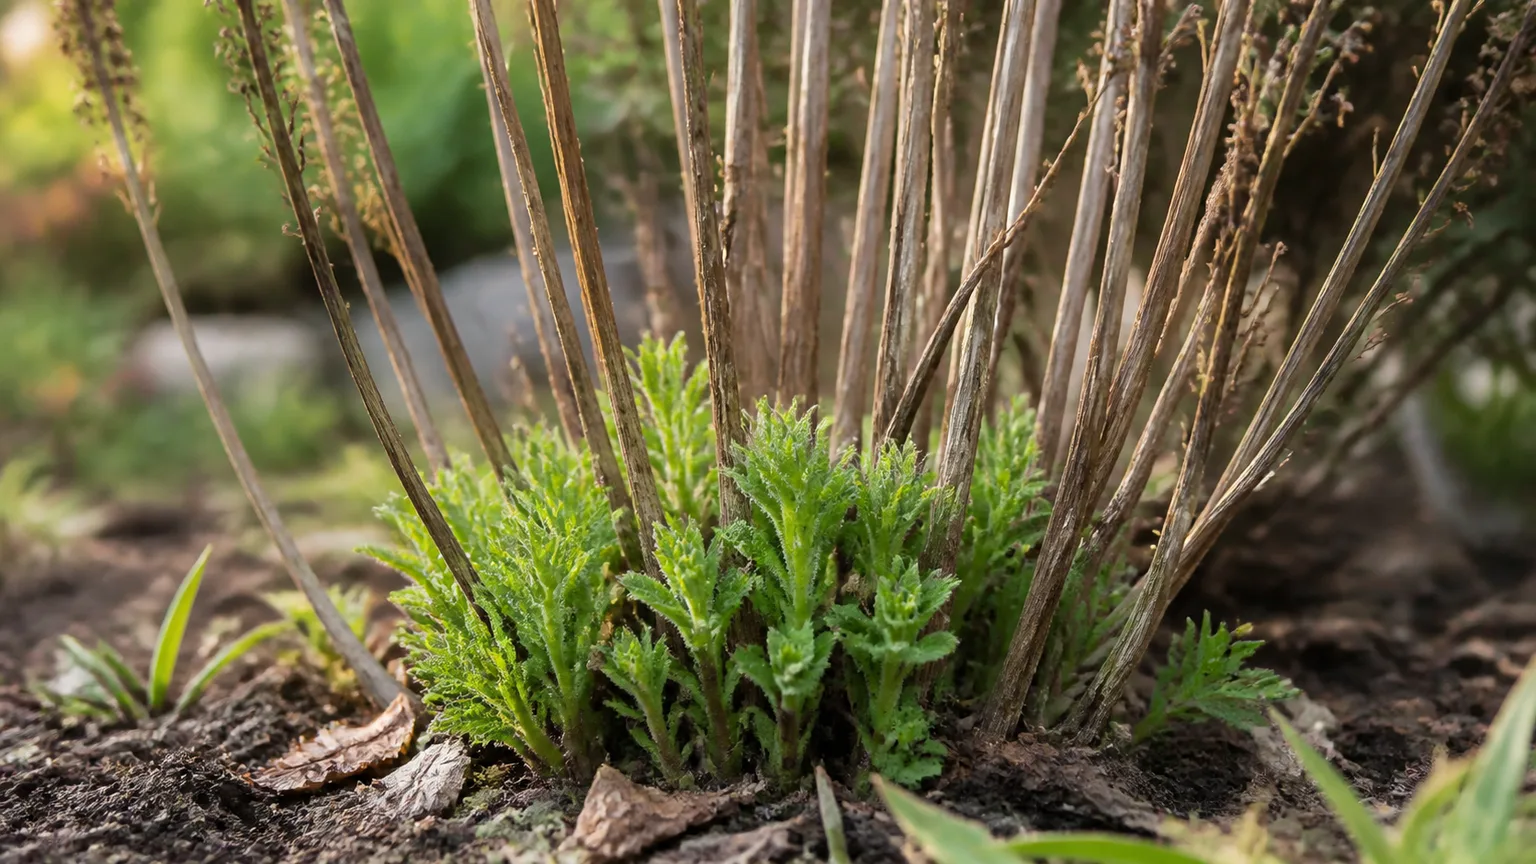
Fall cleanup is more flexible. In mild or wet climates, removing dead, diseased, or collapsed stems after flowering can improve sanitation. In a cold, exposed garden, leaving some dry stems until late winter or early spring gives the crown a little physical protection and helps you see where new shoots emerge. Cut old growth once spring growth is obvious, taking care not to remove the new basal shoots.
This is a different job from pruning a woody salvia. If a plant has a permanent woody framework, preserve visible green growth and side buds; do not assume every plant sold as salvia can be cut to the ground. For a broader guide to summer cut depth across salvia types, see our summer salvia pruning guide.
Propagate May Night Salvia
Propagation is easiest when the parent plant is vigorous, actively growing, and free of leaf disease. You can divide an established clump, root soft stem cuttings, or grow seedlings from collected seed. The first two methods are better if you want plants that match the named cultivar.
Division and stem cuttings
Division is the most dependable way to make several true-to-type May Night plants. Divide in spring as new shoots begin, or in early fall where there is enough time for roots to settle before hard freezes. Lift the clump with a spade, separate sections with healthy roots and several shoots, replant them at the original depth, and water them in. Avoid dividing a heat-stressed or flowering plant unless it must be moved.
Stem cuttings are useful when you want to preserve a favorite plant without digging it up. In late spring or early summer, take a 4- to 6-inch section of non-flowering green stem, remove the lower leaves, and insert it into a clean, lightly moist, free-draining propagation mix. Keep the cutting in bright indirect light while roots form, then acclimate it gradually to stronger sun. Constantly wet mix rots the stem; a cutting that wilts repeatedly is also unlikely to root well.
Growing from seed
Seed is possible, but seedlings may not reproduce the exact flower color, height, or compact habit of ‘May Night’. Allow a few spikes to dry, collect the small seeds, and sow them in a sterile seed-starting mix. Press them onto the surface or cover them only lightly, keep the mix evenly moist, and give seedlings strong light after emergence.
Start seedlings indoors early enough to produce sturdy plants, then harden them off over about a week before planting outside. Transplant only after the young plants can handle outdoor wind and direct sun. If you see volunteer seedlings in the bed, treat them as experiments rather than guaranteed duplicates of the parent.
Grow It in Containers and Protect It in Winter
May Night works in a container when the pot is large enough for its mature root mass and has multiple drainage holes. Choose a pot at least 10 to 12 inches wide for one young plant, use a porous potting mix, and leave room around the crown for watering without burying the stems. Containers dry faster than beds in summer and freeze faster in winter, so they need closer observation in both seasons.
Place the pot in full sun with enough air movement to dry foliage. Water deeply when the mix has dried moderately, then empty any outer saucer. If the plant wilts every afternoon despite correct watering, the pot may be too small or the roots may be circling densely; repot after flowering into a slightly larger container rather than jumping to an oversized pot that stays wet.
In USDA zones commonly listed for the plant, May Night returns from its crown when the soil drains well. The RHS rates this selection H6 in its system and lists it for full sun, while the Missouri Botanical Garden places the species in zones 4 through 8. Use those ranges as a starting point, not a guarantee for every garden microclimate. (RHS plant profile)
For an in-ground plant, keep fall mulch thin and off the crown. For a container in a colder climate, move the pot to an unheated, sheltered spot after dormancy, protect it from repeated freeze-thaw cycles, and water sparingly so the mix does not stay saturated. Do not bring it into a warm living room and keep it actively growing in low light; that combination creates weak shoots and pest pressure.
Prevent and Respond to Pests and Diseases
May Night is generally low maintenance, but stress, crowding, and wet foliage can expose problems. The RHS lists possible pests including sage leafhopper, slugs, and snails, and possible diseases including powdery mildews, Verticillium wilt, and foot and root rots. The Missouri Botanical Garden also notes occasional aphids, whiteflies, scale, powdery mildew, leaf spot, and rust. (RHS plant profile)
Insects and damaged leaves
Inspect the undersides of leaves and the newest growth before spraying. Aphids cluster around soft tips, whiteflies flutter when foliage is disturbed, scale looks like fixed bumps, and spider mites are more likely during hot, dry stress and may leave pale stippling or fine webbing. A few insects can be hand-removed or washed off with a firm water spray; repeat monitoring is more useful than a single dramatic treatment.
If a larger infestation persists, use an insecticidal soap or horticultural oil only if the product is labeled for the plant and pest, and follow its dilution, temperature, and reapplication instructions. Test a small area first, avoid spraying in hot sun or on drought-stressed foliage, and protect visiting pollinators by following the label. Do not assume “natural” means harmless to beneficial insects.
Root problems and foliar diseases
Root or crown rot usually begins with the site, not with a mysterious leaf symptom. Check whether the plant sits low, whether mulch touches the crown, and whether water drains after rain. If roots are brown and mushy, improve the site and remove badly decayed material; repeatedly replanting the same crown into wet soil will not solve the cause.
Powdery mildew looks like a pale coating on leaves and is more likely when plants are crowded, shaded, or stressed. Rust and leaf spots create more localized marks, but diagnosis from a single photograph is uncertain. Remove heavily affected leaves, improve airflow, water at the ground, and avoid moving diseased debris to the compost pile unless your compost reaches pathogen-killing temperatures.
Troubleshoot Flopping, Weak Bloom, and Decline
Use the symptom to choose the first correction instead of adding fertilizer to every problem. May Night that is floppy but green often needs more sun, less nitrogen, wider spacing, or a post-bloom reset. A plant that is yellowing and soft at the crown points more strongly toward wet roots than hunger.
| Symptom | First checks | First action |
|---|---|---|
| Long stems lean outward | Sun, rich soil, crowding | Move toward stronger light if possible; stop routine feeding; cut spent stems after the flush |
| Few or no flowers | Less than six hours of sun, young transplant, excess nitrogen, drought | Improve light and root-zone moisture; wait for establishment before judging the plant |
| Leaves stay wet or show mildew | Tight spacing, overhead watering, humid shade | Thin surrounding growth, water at soil level, and remove affected foliage |
| Plant wilts in wet soil | Blocked drainage, oversized pot, crown buried | Correct drainage and inspect roots before watering again |
| Flowers stop after the first flush | Spikes left to seed, heat, drought, late cut | Deadhead earlier next season and give a deep drink during prolonged heat |
If a clump repeatedly flops in the same bed despite six or more hours of sun and restrained feeding, move it to sharper drainage or choose a shorter cultivar. Some gardens simply provide more humidity, wind, or fertile soil than May Night prefers. If a plant declines after winter, wait for firm new shoots before declaring it dead; scrape a stem near the base to look for live green tissue, then remove only wood that is clearly dead.
Use May Night Salvia in a Pollinator Border
The upright spikes give a border vertical punctuation without the bulk of a shrub. Bees and butterflies use the flowers, and the aromatic foliage is commonly left alone by deer, although no plant is guaranteed deer-proof. The Montana field guide records bumblebee pollinators associated with the species, and the Missouri Botanical Garden lists butterflies among the plant’s attractions.
Pair May Night with plants that share its sun and drainage rather than choosing companions by color alone. Yarrow, lavender, catmint, coneflower, ornamental grasses, pale daisies, and daylilies can create a layered summer border, but check each plant’s mature spread and water needs. A silver-leaved neighbor can make the violet spikes look richer; a golden yarrow or grass creates stronger contrast.
Use May Night near the front or middle of the bed, where its 18- to 24-inch profile can be seen and reached for deadheading. Repeat it in small groups to make the color read as a deliberate drift. If your goal is a longer succession of flowers, combine it with later-blooming perennials rather than expecting one salvia to carry the entire border; our guide to perennials that bloom through summer can help with that sequencing.
For a wildlife-focused planting, leave a few late spikes standing and avoid broad, routine insecticide use. Add more habitat around the bed with our practical pollinator-garden tips. The strongest May Night display comes from the same fundamentals that support wildlife: sun, healthy roots, clean air movement, and flowers allowed to keep cycling.
Conclusion
Good May Night salvia care is mostly about placement and timing. Give the clump full sun, plant it at the correct depth in soil that drains, water regularly while it establishes, and resist the urge to feed it into oversized growth. Once the first flush fades, deadhead to live foliage or reset the soft stems so the plant can rebuild.
The payoff is a hardy, tidy perennial that returns in suitable climates, supplies violet-blue structure in early summer, and often offers another round of flowers when moisture and warmth remain. If the plant struggles, inspect light, drainage, spacing, and cut depth in that order; those four checks usually reveal more than another application of fertilizer or pesticide.



