Corsican Mint Care: Shade, Watering, Spread and Winter
Corsican mint care guide covering shade, watering, division, and the rooting stems that escape a bed, plus foot-traffic limits on paths and honest zone limits.
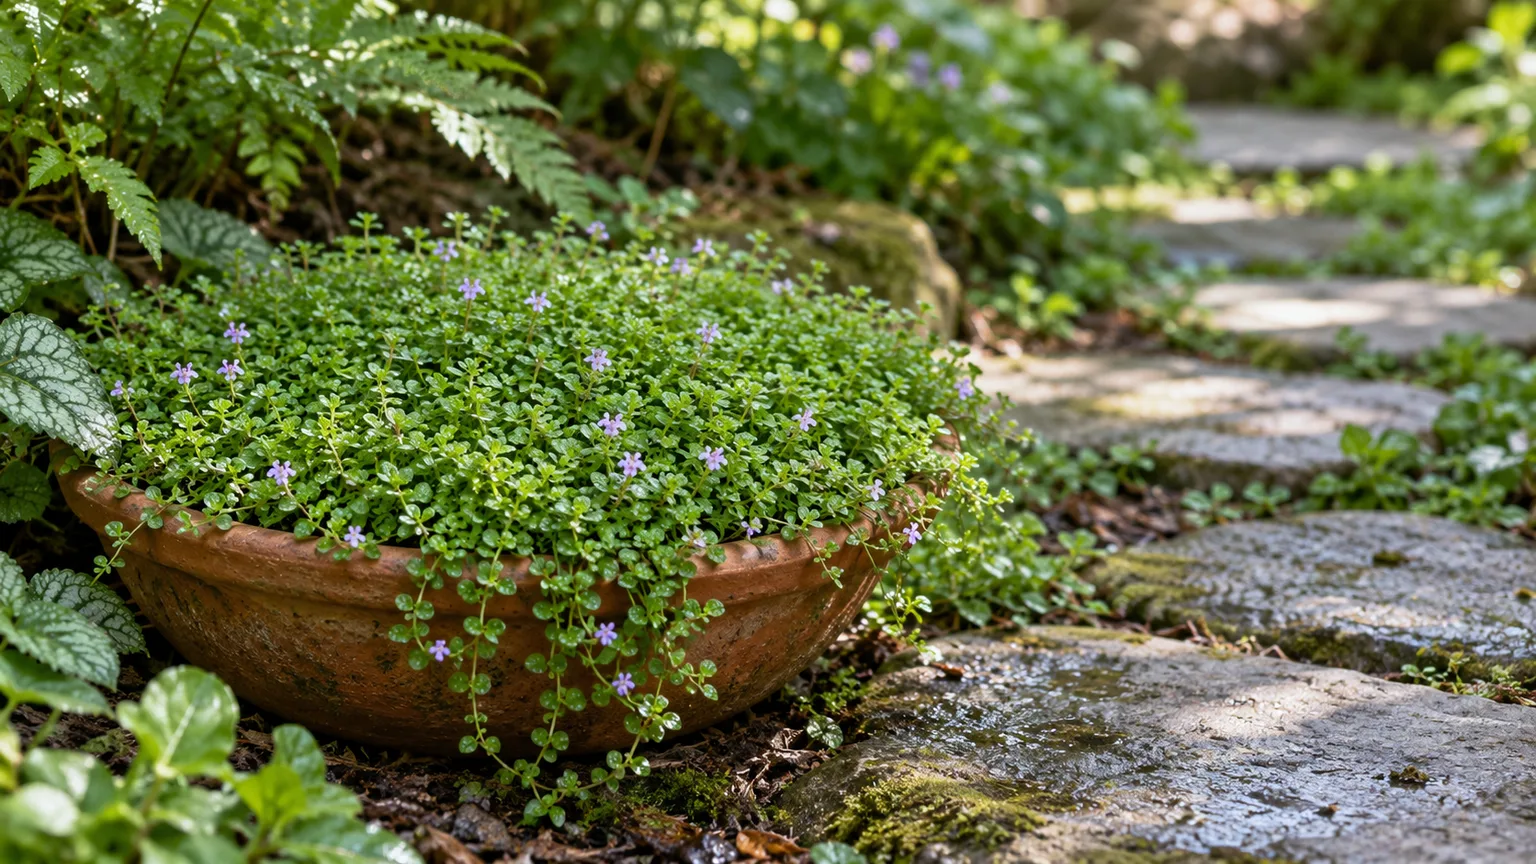
The first thing to understand about Mentha requienii, Corsican mint, is that it spreads by walking. The Missouri Botanical Garden describes the plant as spreading “by thread-like stems which creep along the ground rooting as they go” to a foot or more from the mother clump, and the Royal Horticultural Society warns that it “may have potential to become a nuisance” and advises restricting the root run. Everything else about this plant — pot or bed, edge or open border, division or seed — is downstream of that single behaviour. Choose the containment plan before you choose the site, because containment is the decision you cannot easily undo later.
The second thing to know is that this is a moisture plant. Corsican mint wants bright shade and soil that stays evenly moist while still draining freely, and it is unforgiving in both directions: dry it out and the fine foliage crisps and thins, keep it saturated and the crown goes soft and black. It is a good fit for the shaded joints between paving slabs, the damp edge of a rock garden, or a wide bowl on a step, and a poor fit for an exposed border that bakes in July.
The One Problem That Decides Everything: It Travels
The travel happens by three routes at once, and only one of them is obvious. The first is the runner: a slender stem that pushes out sideways, finds a damp patch of soil, and roots at the node. The Plants For A Future entry for the species describes the root pattern as stoloniferous, rooting from creeping stems above ground, and the Missouri Botanical Garden gives the same behaviour more plainly — thread-like stems that root as they creep, spreading the mat to twelve inches or more. The second route is seed: the Missouri Botanical Garden notes the plant “freely self-seeds in optimum growing conditions”, and Epic Gardening makes the same point while describing it as invasive in nature. The third is physical escape from a container, which is simply a runner crossing a rim.
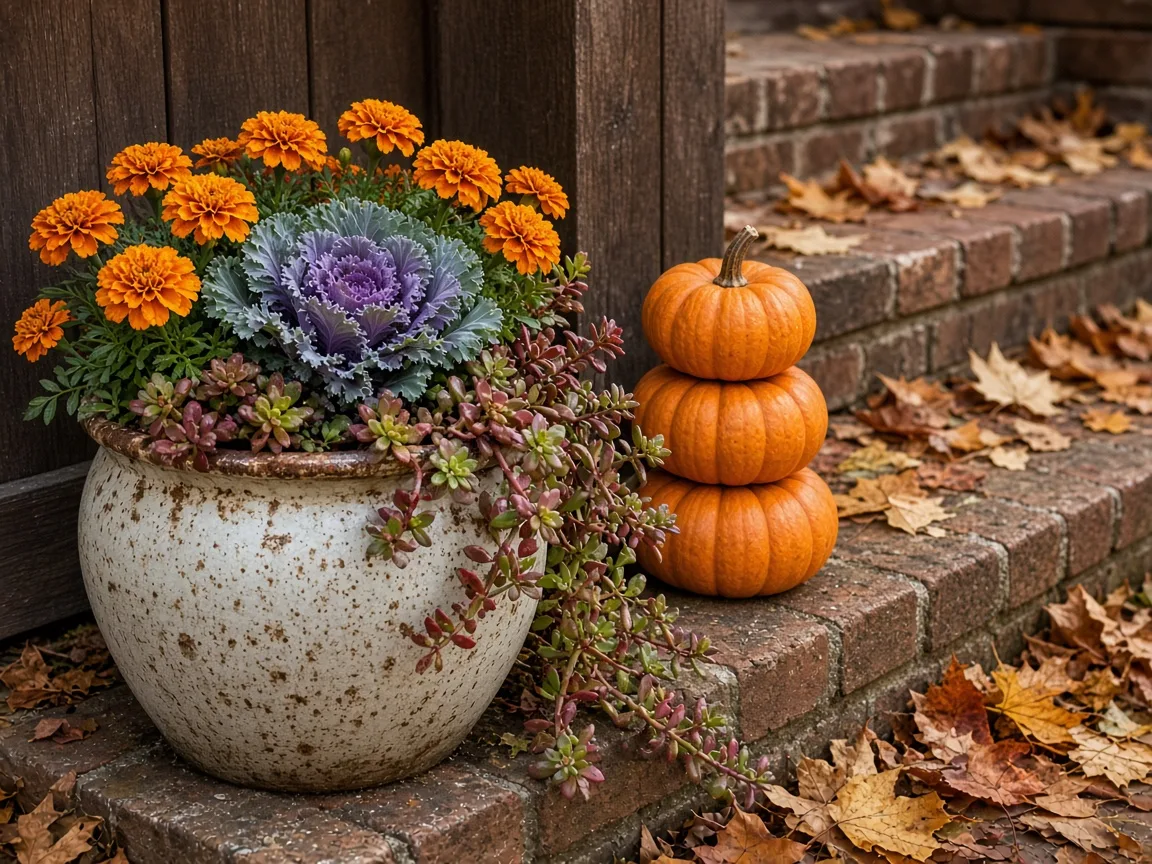
What this looks like in practice is a mat that quietly enlarges its own territory. A plant set out as a 20 cm plug becomes a 45 cm patch by the end of a warm season, the edge crossing into a neighbouring border without any visible stem crossing open ground, because every runner is short and the leaves close over it. Look at the rim of the bowl in the photograph below: the stems hanging over the edge are the same habit that puts a pot-grown plant into the bed next to it. A boundary you do not inspect is not a boundary, and if the plant is allowed to travel into a mixed border it will need to be dug out rather than trimmed. That is the situation covered in our guide to never growing mint in a garden bed, which applies to upright mints but describes the same escape mechanism in more detail.
The practical consequence is that you should never plant Corsican mint where you cannot see its edge, and you should treat the first season as a containment exercise rather than a planting exercise.
How to Keep Corsican Mint Inside Its Patch
There are four workable strategies, and they cost different amounts of attention. Which one fits depends on whether the spot has a hard edge, whether you can reach it, and how much you mind a plant that reseeds itself.
A sunken pot is the most reliable option for a border that has to look planted rather than potted. The RHS mint cultivation guidance advises planting mint in a bottomless container or a pot with large drainage holes sunk into the soil, leaving the rim slightly above the surface so shoots cannot root over the top. That single detail — rim above soil level — is what makes the method work, and it is worth checking every few months because soil settles and a buried rim quietly becomes a highway. Use a pot at least 30 cm deep for a mat this vigorous, and expect to divide or repot the contents every few years.
A container on a hard surface is the simplest option and the one most people should default to. Set a broad, shallow pot on feet or a stand so that the base never touches soil, keep it away from the edge of a bed, and sweep up any stem that hangs over the rim. Terracotta dries faster than glazed ceramic or plastic, so a terracotta bowl needs more frequent attention, but it also gives you a clear visual line where the plant ends.
A ground planting with a maintained edge works only if the edge is genuinely inspectable. Walk the perimeter every ten to fourteen days through the active growing season and pull any runner that has crossed. Pulling a runner before it roots takes seconds; pulling a rooted section means lifting it, and the plant often reappears from fragments left behind.
Letting it have a dedicated bed is a legitimate choice, not a failure. A patch of Corsican mint in a bed of its own, away from crocus beds, small bulbs and seedlings, is exactly the situation the RHS describes when it says to plant “in a well chosen site where it can grow unrestricted”. The cost is that you stop treating it as a groundcover and start treating it as a crop. If you are choosing a groundcover for a border that already has other perennials in it, the groundcover options worth comparing are worth reading before you commit to the one that spreads fastest.
Confirming You Have Mentha requienii
Getting the identification right saves trouble later, because a plant sold as “creeping mint” is often Mentha pulegium (pennyroyal) or a garden mint, and pennyroyal is a different plant with a different reputation for safety. Mentha requienii is a listed species: Kew’s Plants of the World Online accepts the name, records the native range as Corse and Sardegna in Italy, and gives the growth form as a subshrub. The RHS lists the older synonym Mentha corsica and labels the plant type as a herbaceous perennial while describing it as “a vigorous, mat-forming perennial, about 1cm tall”. Those two labels are not really in conflict: a plant that is 1 cm tall, creeps along the ground and roots as it goes behaves like a low, mat-forming perennial whatever the botanical habit category says. What matters for a gardener is the habit, not the label.
The practical description is consistent across sources. The RHS describes slender, creeping, rooting stems bearing rounded, peppermint-scented bright-green leaves to 7 mm across, with tubular lilac flowers in short spikes in summer. The Missouri Botanical Garden gives a slightly different leaf size, notes leaves to an eighth of an inch across, and adds the detail that the minute lilac flowers bloom from the leaf axils between late June and August and “are so small they are often not seen”. Treat the leaf size as a range of roughly 3–7 mm; the flowers as something you may only notice if you look for them in high summer.
Size, likewise, is a range. The Missouri Botanical Garden puts the mat at half an inch to an inch tall and notes that the leaves stay evergreen in mild winter climates but not in St. Louis. The RHS lists a maximum height of up to 10 cm, which accounts for flowering stems lifting above the foliage, a maximum spread of 0.1–0.5 metres, and one to two years to reach that spread. If you want the two extremes, the number that matters is the spread, not the height.
A quick field check takes thirty seconds. Crush a leaf: the scent is unmistakably peppermint. Look at a stem: mint family stems are square, with leaves in opposite pairs. Then look at habit: this is a plant that hugs the ground and forms a continuous felt of foliage a centimetre or two deep. Plants sold as Irish moss are a similar colour and texture in a path, and the difference is that Irish moss is a true moss with no scent, no flowers and no spreading stems, while creeping thyme has a woody, flowering habit and different flowers. If the plant smells of peppermint when you crush it, you have the right thing.
Choosing the Site: Bright Shade, Moist but Free-Draining Soil
The position advice from the sources is close enough to act on. The RHS lists full shade and partial shade as suitable positions, with east, north or west-facing aspects and either exposed or sheltered exposure. The Missouri Botanical Garden goes wider, recommending full sun to part shade while noting the plant “appreciates some afternoon shade in hot summer climates” and “tolerates shady garden areas”, then warns against dry soils because it is intolerant of drought. Gardenia.net also favours partial shade and describes the plant as evergreen in mild winter climates, useful in rock gardens and as an edging plant. Read together, that means bright shade is the safe default, morning sun with afternoon shade is the good outcome, and full afternoon sun is only acceptable where soil stays damp and air moves.
On soil, the sources agree on the important part. The RHS specifies moist but well-drained conditions, lists clay and loam, and records pH as acid, neutral or alkaline — that is, no narrow pH requirement. The Missouri Botanical Garden asks for rich, light, moist but well-drained soils and notes the plant adapts to a wide range of soils except dry ones. Plants For A Future records that it succeeds in most soils and situations “so long as the soil is not too dry”, grows well in heavy clay, and prefers a shady position. The practical test is a squeeze test: water the site, wait an hour, then take a handful. If it holds together as a ribbon it is too wet for this plant; if it crumbles dry in your hand it will not stay moist enough in August.
Where a site fails, it usually fails for one of two reasons: it dries faster than the rain can replace, or it holds water at the crown. Both are fixable before planting, and neither is fixable afterwards without lifting the plant.
Reading the Light Before You Dig
Judge shade on a sunny day rather than from memory. Walk the spot at midday and again in mid-afternoon and note where the shadows actually fall. What you are looking for is a surface that is bright but not baked: light under an open-canopy tree, the east side of a wall, the shade of a fence with a strip of sky above it. Deep shade directly under tree roots is a different proposition, because the roots are also taking the water, and a new plant there competes for both at once.
Two details repay attention. First, hard surfaces change the picture completely: paving and stone store heat in the afternoon and radiate it back at the foliage, so a “shaded” path beside a sunlit wall can still dry out in July. Second, the plant’s light requirement is easier to meet in a pot than in a bed, because a pot can be moved out of an afternoon blaze and back into spring light. If the only spot you have is questionable, plant it in a container for the first season and move on from there.
Acclimatise nursery plants before they go into their final position. A plant that has spent its life under glass or in a plastic pot will scorch in bright light within days if it goes straight into full exposure. Set it in the intended spot for a few days, keep it watered, and only plant it out once the leaves stay soft and unblemished.
Planting Between Stepping Stones
This is where Corsican mint earns its place, and it is also where most advice on the internet is too confident. The Missouri Botanical Garden calls it “particularly effective as an aromatic filler growing around stepping stones where light foot traffic will release a pleasing mint/sage aroma”. The key phrase is light foot traffic. On the same page the Missouri Botanical Garden records that the plant “tolerates limited foot traffic”, and Gardenia.net describes it as tolerating limited foot traffic too, while Epic Gardening answers its own question with a “medium” level of foot traffic tolerance. The references do not agree, and the sensible reading of a disagreement between a botanical garden and a garden blog is to follow the more conservative one: treat this as a plant for the joints around a path, the edges of a path, and the gaps beside slabs, not for the middle of a route people cross several times a day.
The rule that decides whether this works is what sits in the gap, not what sits on top of it: a plug needs moisture-retentive soil around its roots, not a layer of gravel. Clear enough of the joint material to accept the plug, backfill with compost and soil, and water it in. Below that, the path has to shed water, because where runoff gathers against the base of a slab the crown sits in water and rots, and extra watering only makes it worse. Leave enough stone showing to walk on, since a mat that climbs over the edge of a slab becomes a slip risk as well as a scent. Where the gap is too tight for a root system, or where the slabs sit on a deep dry base of hardcore and sand, a plant may look damp on top for weeks and still never establish.
Where the gaps between slabs are already occupied by weeds and you are trying to solve that problem directly, the guide to keeping weeds out between pavers covers the wider technique, including the difference between a joint that has soil in it and one that does not. And if the slabs themselves need to be level before a mat will sit properly in the joint, making stepping stones that stay level is the step that comes first.
Watering by Condition, Not by Calendar
The trigger is simple enough to apply without any equipment: water once the surface of the compost or soil has started to dry and the layer just underneath is close to dry as well. If both are still wet, wait. This is more reliable than a schedule because a shallow terracotta bowl on a warm step can be in crisis in two days while a shaded bed in heavy soil is still moist in a week.
The RHS makes the same point about containers generally: plants in containers dry out more quickly than those in the ground, so check them regularly during the growing season, especially in hot, dry weather, and add enough water to keep the compost evenly moist. Their further advice for a hot spell is to move pots to a shadier spot rather than to keep them on the same watering rhythm. That is a better answer than watering more often, which mostly produces a wet surface and a dry root ball.
Water the compost, not the leaves, and give it time to soak in rather than a quick blast across the surface. For a container, water until a little comes out of the drainage holes, wait a minute for the mix to settle, and empty the saucer afterwards. If the top of the pot is dry while the rim stays wet, the water is running down the inside wall and missing the root ball: water in two slow passes, and if that still fails, stand the pot in a shallow tray of water for twenty minutes so the mix wets from below. A moisture meter gives a more objective reading than a fingertip, which is worth the cost if you have several pots of this size and cannot judge by weight.
Worked Example: One 30 cm Pot, One Summer, Two Failures
Here is a worked example with the numbers attached, so you can compare them against your own pot. It is assembled from the conditions the cited references describe and the sequence those conditions produce; treat it as a model of a failure chain rather than as a recorded trial.
The planting: a 30 cm diameter, 12 cm deep unglazed terracotta bowl; peat-free multipurpose compost with roughly a fifth of its volume replaced by garden compost, no gravel layer at the base; a saucer left under the pot; positioned on a paved step in a hot inland city at about USDA zone 7b, where afternoon temperatures regularly reach 33–36 °C and July brings almost no rain. Timeline: potted in late April, established by June, first failure in the third week of July, second failure in the first week of August.
The first failure was drought stress that did not look like drought. The pot surface had dried by 10 a.m., but the compost in the centre of the root ball stayed damp because water poured onto dry compost ran down the inside wall of the bowl. The foliage crisped along the sunny rim while the middle of the mat still looked green, which reads as a disease rather than a watering problem. What fixed it: the pot was lifted onto a stand so it no longer drew moisture from below, watered in two slow passes until water ran from the base, and moved to morning-only sun for the rest of August. The saucer was emptied after every watering.
The second failure came from the opposite direction. A heavy thunderstorm in early August filled the saucer and it stayed full for two days, because a 12 cm-deep pot has a shallow root zone that the top few centimetres of compost cannot dry out quickly. The centre of the mat went soft and black, and a fortnight later that patch did not recover while the outer growth carried on. What fixed it: the saucer was removed entirely, the pot was lifted and tilted to drain, the affected section was cut back to firm tissue, and a small rooted division was replanted at the edge of the pot in fresh compost. The lesson is not that the pot was too small — it was that a shallow container amplifies both mistakes, one week of drying and two days of standing water, into a total failure.
If your situation is a bed rather than a pot, the same two failures exist in a milder form: a bed under a wall that dries out from the wall side, and a bed that catches roof runoff in a corner.
Planting and Getting Through the First Season
Plant after the last hard frost has passed and the soil is workable, or in early autumn where the roots have time to establish before the ground freezes. The Missouri Botanical Garden suggests spacing starter plants six to ten inches apart, and the choice of spacing is a containment decision in disguise: plant them at the closer end if you want the gaps to close quickly, and at the wider end if you want an edge you can see and reach.
Fork over only the ground you are actually planting into, and set each plug so its top sits level with the soil around it rather than down in a hole. Press the soil down around the roots and water generously straight away so it makes contact, then look at it every few days. What matters over those first weeks is that the roots never dry out; what does not matter is keeping the crown under water. A plant that wilts within a fortnight of planting has usually been set too deep or put into ground that holds water, not one that needs more drinks.
Do not bury the growing points under mulch. A thin layer of organic matter around the planting reduces moisture loss, but the tiny stems need to stay visible, and a thick mulch over a low mat suffocates it. Leave a narrow, bare strip of soil at any edge you intend to monitor, so that a runner crossing into the next bed is visible against clean soil rather than hidden in mulch.
The first summer is when the plant tells you whether the site suits it. Growth that stays low and dense means the light and water are right. Growth that stretches, gaps in the middle of the mat, or a patch that thins on the sunward side means the site is too dry or too bright, and moving the plant early is much easier than rescuing it the following July.
Propagating Corsican Mint by Division
Division is the method to use. The RHS specifies propagation by division in spring or autumn, when the plant is growing actively but the weather is cool enough to keep fresh divisions hydrated, and the Missouri Botanical Garden states that propagation is usually done by division. Epic Gardening agrees that division is the easiest route and adds the point that it also lets you thin a patch and replace weak sections without starting again.
The method is straightforward. Give the parent patch a drink the day before, so the soil lifts cleanly instead of breaking into dust around the roots. Cut under a healthy outer section with a trowel, take up a generous slice of soil with it, and break that slice into portions that each carry both roots and shoots. Set each portion back into the same soil at the depth it came from, press the ground down around it, water, and keep the spot evenly damp while the pieces take. Resist the urge to divide more than you need: every rooted portion grows on its own, so a tight cluster of new plants is harder to see, harder to pull out and easier to drown.
Seed is possible but a different proposition. The Missouri Botanical Garden notes the plant self-seeds freely in optimum conditions, and Plants For A Future observes that it “usually self-sows even when the parent plant is killed by frost” — useful information for a cold climate, because it means the species may reappear even when the parent does not survive. What self-seeding does not give you is a predictable plant. Seedlings vary, germination depends on warmth and moisture, and a packet is not the way to fill a path in a season. If you want the same fragrance and the same habit, division is the reliable route.
For the general mechanics of mint propagation, including rooting stems in water, our guide to propagating mint covers the technique in more detail. If you also grow mints for the kitchen, the guidance on when to harvest mint is worth reading before you start cutting: Corsican mint’s leaves are the source of crème de menthe flavouring, but the taste is concentrated enough that a cautious first pinch is sensible.
Container or Ground: Choosing Your Containment Strategy
The four options are not equally good for every site, and the table below is the short version of the reasoning in the sections above.
| Option | Best for | Main watch-out | Ongoing work |
|---|---|---|---|
| Wide bowl on a hard surface | Almost every gardener; step, patio, balcony | A runner over the rim rooting in nearby soil | Sweep stems weekly, keep the pot off the ground |
| Pot sunk into a border | A bed that has to look planted | Soil settles and buries the rim | Re-check the rim height each season |
| Open bed with an inspectable edge | A patch that has space to itself | Seedlings and runners in neighbouring beds | Walk the edge every ten to fourteen days |
| Between paving stones | Paths used occasionally | Water collecting at the slab base; foot traffic | Keep stone exposed, check drainage after heavy rain |
The decision comes down to one question: can you see the edge? If yes, a bed is fine and will look better than a pot. If no, use a container. The wider question of whether a mint belongs in a bed at all is covered in growing mint in pots or in the ground, and the general care routine for mint plants is set out in the mint care guide.
Feeding is not a lever worth pulling. A plant in reasonably fertile soil needs little, and in a container, fresh compost at repotting time does more than a bottle of liquid feed. Apply a balanced fertiliser only if growth is weak despite correct light, water and drainage, and follow the product label rather than estimating. Heavy feeding produces soft growth that is more attractive to pests and does nothing about a site mismatch.
Winter: What Zone 6 Does and Does Not Tell You
The sources disagree, and the disagreement matters more here than in most care guides, because the wrong reading means a plant you thought was permanent is lost in a bad winter. Here is what each one actually says.
| Source | Rating | Additional note |
|---|---|---|
| Missouri Botanical Garden | USDA Zone 6 to 9 | ”May be grown as annuals north of Zone 6, with plants continuing to appear in the garden for several years by self-seeding” |
| Epic Gardening | USDA Zone 7 to 9 | Recommends mulching to protect from freezing temperatures |
| Gardenia.net | Hardiness 6 to 9 | Evergreen in mild winter climates |
| Plants For A Future | USDA 5 to 9; hardy to UK zone 6 | ”Not hardy in all areas of Britain”; usually self-sows even when the parent plant is killed by frost |
| Royal Horticultural Society | H7 | Accepts exposed or sheltered exposure |
Read those numbers as a comfort range rather than a boundary. A hardiness zone describes average winter minimums; it says nothing about a single cold snap, a wet winter, or a pot sitting in freezing wind above ground. The Missouri Botanical Garden’s own wording is the most useful of the set, because it turns the range into a plan: in zones 6 and colder you can grow it as an annual and let self-seeding carry the planting over from year to year.
By zone, that suggests the following. In zones 8 and 9, plant it in the ground and treat winter as a non-event, though an exposed position in a wet winter can still take a toll. In zone 7, reliable in a sheltered bed and in a pot that is not left outdoors in a freeze. In zone 6, treat a ground planting as a bonus and keep a division somewhere protected as insurance, because a single wet freeze can finish the parent plant. North of zone 6, grow it as an annual and expect it to return from seed, exactly as the Missouri Botanical Garden describes.
Containers need their own winter plan, because their roots sit above the surrounding soil and feel temperature swings that a rooted plant never experiences. Move the pot to an unheated porch, garage or cold frame before hard frost, insulate the container if the ground itself freezes, and cut watering back sharply because cold compost dries slowly and stays wet for long periods. Do not let a pot go bone dry for weeks, and do not bring it into a heated room, where it will leaf out early and then suffer when it goes back out.
Troubleshooting Two Common Failures
Change one thing at a time and judge the result by new growth, not by the old leaves. A scorched patch will not turn green again, and a plant that has been stressed for a fortnight may need a fortnight of good conditions before it looks like itself again.
Scorched, Crisping or Thinning Patches
Edges that go crisp and pale, or a mat that thins on the sunward side, are almost always a heat-and-water problem rather than a disease. Work through the causes in order: is strong afternoon light reaching the plant, is the ground dry a little way down, and is stone or a wall bouncing sun back into the foliage. Where the light is at fault, move a pot into brighter shade or add afternoon cover over a bed. Where the water is at fault, soak the ground slowly and lay a thin mulch ring around the plant, leaving the crown and the growing tips uncovered.
The RHS also flags powdery mildew as a particular risk “especially during drought conditions”, which means a white dusty coating on a Corsican mint mat is often a moisture problem rather than a fungal one that needs spraying. Fix the water first and watch for new growth. Where rust appears, avoid moving infected divisions into a clean part of the garden, and remove badly affected material rather than trying to save it.
Black, Limp Growth in Wet Soil
Stems that turn soft and dark, and a mat that collapses in patches, point to a root zone that never drains: dense garden soil, or a pot whose holes have been blocked by a stale plug of compost. Stop watering and find out how quickly that spot actually drains by pouring on a litre and watching. If the decline continues, lift a small corner of the planting and look at the roots, because firm, pale roots mean the plant is worth saving and soft, brown roots mean the rot has already taken that section.
A patch that fails while the rest of the mat carries on is telling you something specific about one spot. The usual culprits are a downpipe that discharges there, a hose connection that drips, a hollow where water collects, or a saucer that has been left full. Fix that single water source, then give the planting several weeks of correct conditions before deciding that any of it needs replacing. Replant firm divisions into fresh, open compost rather than back into the pocket that failed.
Pests, Disease and Keeping Pets Away
Corsican mint is not a pest magnet, but it is not immune. The RHS lists sage leafhopper and caterpillars among possible pests, along with powdery mildews — particularly in drought conditions — and mint rust. Inspect the undersides of leaves, the growing points, and any crowded or stressed section of the mat rather than treating preventively, and identify what you are looking at before choosing a product, using only a product labelled for the plant and the pest in question.
On pet safety, use the primary source. The ASPCA lists mint as toxic to dogs, cats and horses, with essential oils as the toxic principle and vomiting and diarrhoea as the clinical signs of a large ingestion. The important limit on that listing is that the ASPCA does not identify Mentha requienii separately, so this is a genus-level entry, not a species-specific risk assessment. Treat it as a reason to keep the plant out of reach of a nibbling pet rather than as a precise prediction of what would happen. If an animal eats it, contact a veterinarian and the ASPCA Animal Poison Control Center on (888) 426-4435 rather than waiting for symptoms.
Related Guides for Corsican Mint and Other Mints
- Mint care guide - light, water, soil and containment for mint in general.
- How to propagate mint - cuttings and divisions, including rooting stems in water.
- Never grow mint in your garden - why upright mints take over a mixed bed.
- Should you grow mint in pots or in the ground? - the containment decision for a whole genus.
- How to keep weeds from growing between pavers - preparing joints that a groundcover can actually live in.
- 12 ground cover plants for shade - alternatives where spread is a deal-breaker.
- How to grow an Irish moss lawn - the closest lookalike, and a very different plant.
- How to use a moisture meter - an objective read for containers and beds.
- All LeafyPixels guides - the full library.
Conclusion: A Five-Point Decision Checklist
Before you buy another plant, answer these five questions.
Site. Bright shade with air movement, soil that stays evenly moist and drains freely, and no hot afternoon wall radiating heat back at the foliage. Test the soil with a handful of water before you plant, not after.
Container or ground. If you can see and reach the edge of the planting, a bed will look better than a pot. If you cannot, use a wide bowl on a hard surface, or a sunken pot with the rim left above the soil. Do not plant it in a mixed border with bulbs and small perennials.
Watering trigger. Water as soon as the surface starts to dry and the soil underneath is close to dry as well, not on a weekday. Check containers daily in hot weather, empty the saucer, and move pots into shade rather than watering more often.
Division timing. Divide in spring or autumn, in cooler weather, into pieces that each have roots and leaves, and replant fewer pieces than you think you need. Division is also your tool for thinning a patch and replacing weak sections.
Winter plan. Check which of the published ranges applies to you: 8 and 9 are comfortable, 7 is reliable in a sheltered spot, 6 needs a protected division as insurance, and colder than 6 means growing it as an annual and letting it self-seed. Move containers to unheated shelter before a hard frost and cut their watering right back.
Corsican mint is a good plant for the small, specific jobs that other groundcovers fill badly: the shaded joint, the damp rockery edge, a bowl by the door. It asks for one thing in return, which is a decision about where its edge goes. Make that decision first and the rest is straightforward gardening.