How to Grow and Care for Dill Successfully
Grow productive dill with the right sowing depth, spacing, watering rhythm, container setup, harvest timing, and plan for flowers and seeds.
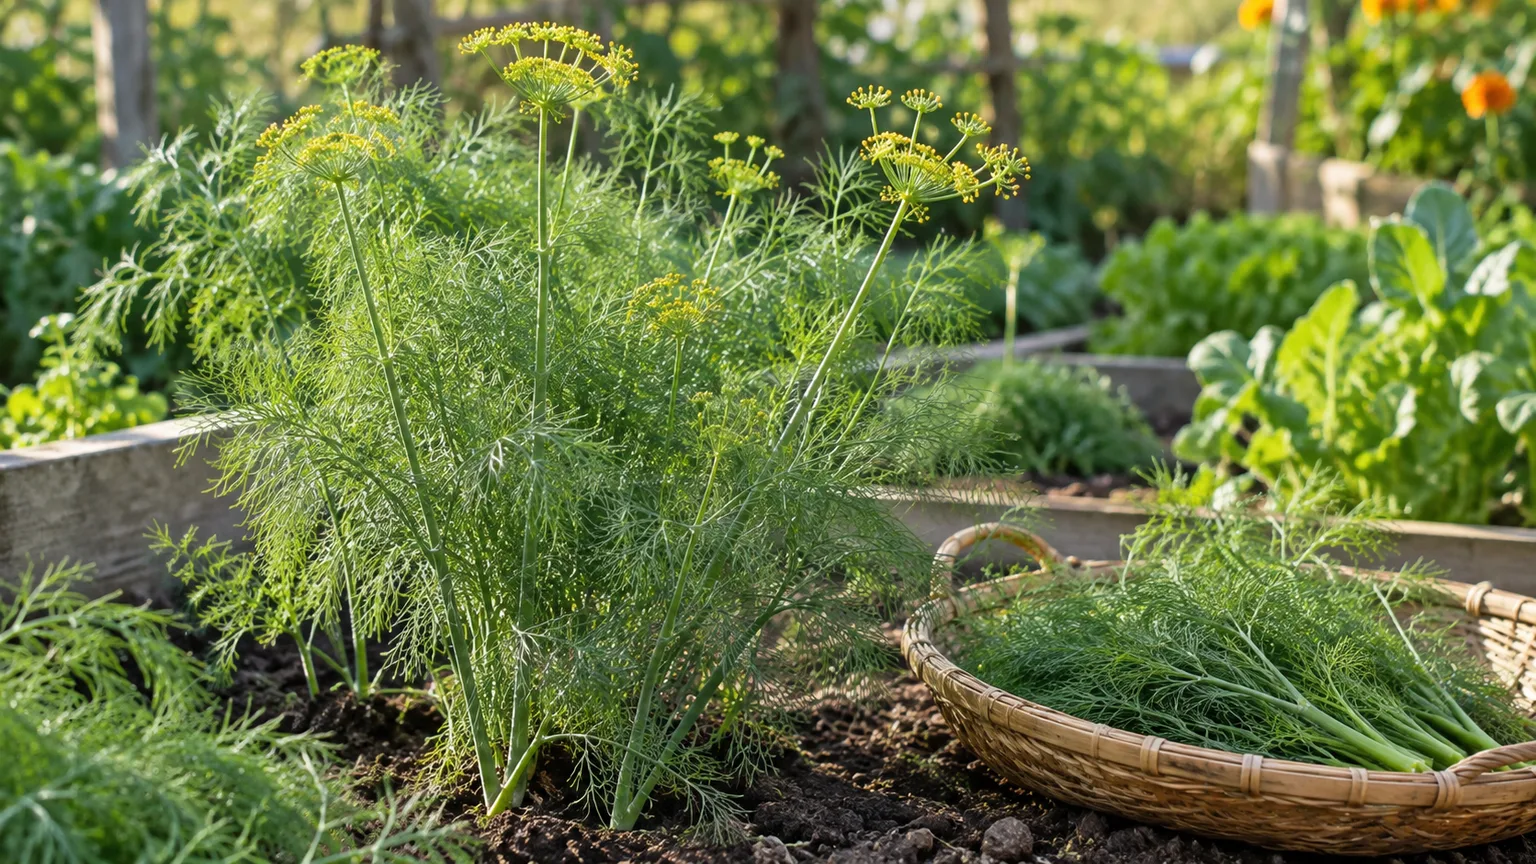
Dill (Anethum graveolens) is one of the easiest culinary herbs to grow from seed, but it rewards a little planning. It develops a long taproot, grows quickly in a sunny bed, and naturally shifts from soft leafy growth to yellow flowers and seed. That life cycle is not a care failure. It is the key to deciding when to sow, when to harvest, and whether to keep or remove the flower heads.
The most reliable approach is to direct-sow dill in loose, well-drained soil, keep the root zone evenly moist, and make several small sowings instead of expecting one planting to stay leafy all season. A single plant can give you fresh leaves, edible flowers, and seed, but usually not all three at their peak at the same time. Plan the harvest you want first, then let the plant’s stage guide your care.
Start With the Harvest You Want
If your priority is dill weed for salads, potatoes, sauces, or fish, sow several small batches and harvest leafy stems before the flower buds open. If you want dill for pickling, allow some plants to form broad yellow flower heads. If you want seed for cooking or next year’s garden, leave selected umbels on the plant until the seeds turn tan to brown.
This division of labor solves a common frustration: a gardener cuts every plant back to delay flowering, then has no flowers or mature seed later. Keep the leafy plants in one row and mark one or two plants as your flower-and-seed plants. You can also sow a late batch for leaves while an earlier batch flowers.
Extension guidance from NC State Plant Toolbox and Penn State Extension supports treating dill as a sun-loving annual that prefers moisture without standing water. The practical addition is to match the sowing schedule to the kitchen job rather than trying to hold every plant in the same stage.
Choose the Right Dill Site
Start with light, soil, and drainage. Dill grows best with roughly six to eight hours of direct sun. In very hot climates, light afternoon shade can slow stress, but deep shade produces thin stems and less aromatic growth. Place tall dill where it will not shade lettuce, seedlings, or low herbs as the flower stalk rises. In the Northern Hemisphere, a bed edge or the north side of a mixed planting is usually safer than the middle of a short crop.
Use loose soil that drains after rain. Dill has a dominant taproot, so a compacted or shallow bed can restrict the root before the top growth looks crowded. Work finished compost into poor soil, but do not turn the bed into a rich, soft reservoir that stays wet. A moderately fertile, crumbly soil supports flavorful growth and reduces the floppy, overly lush habit that can follow excess nitrogen.
Soil pH is rarely the first dill problem to solve. Drainage, light, moisture, and root space matter more in an ordinary home garden. If plants repeatedly struggle, test the soil before adding amendments rather than guessing from leaf color.
Spacing and support
Follow the seed packet for the specific cultivar, but as a starting point thin seedlings so individual plants have about 8 to 12 inches of room, widening the spacing for tall types or humid gardens. Dense seedlings compete for light, dry unevenly, and create a tangle that is difficult to harvest.
Tall dill can reach 3 to 5 feet, especially in rich soil. If a plant is healthy but leans when its flower head forms, add a slim stake before the stem bends sharply. Support should keep the plant upright without cinching the stem or tying it to a neighboring crop. Pinching leafy shoots gives a bushier shape, but it cannot permanently prevent flowering; flowering is the plant’s next life stage.
Sow Dill Directly for Strong Roots
Timing, depth, and thinning
Direct sowing is usually better than buying a large nursery plant. Dill dislikes having its taproot disturbed, and a plant that has been held in a small pot may pause or sulk after transplanting. If you start indoors, use a deep cell, move the seedling while it is young, and disturb the root ball as little as possible.
In spring, sow after the soil has warmed enough for reliable germination and after the most damaging frost risk has passed. A soil temperature around 60 to 70°F is a useful target. In suitable climates, a fall sowing can provide a cool-season crop or early seedlings the following year. Germination commonly takes about 10 to 14 days, though cool, wet, or dry soil can stretch that window.
Scatter or place seeds about 1/4 to 1/2 inch deep and cover them lightly. Water gently so the seed is not washed into a clump. Once seedlings are easy to handle, thin them rather than leaving a carpet of plants. Thinning feels wasteful, but it is what turns weak, crowded stems into harvestable plants with airflow.
Succession sowing for steady leaves
For a continuing supply, sow a short row every two to four weeks while temperatures and day length remain favorable. Small sowings are easier to protect from heat and easier to harvest at the leafy stage than one large sowing that bolts together.
Leave space for the next row before the first one flowers. If you only have a container, sow a few seeds, harvest them hard while young, and start a second pot rather than disturbing established roots. In a larger bed, stagger rows so one is leafy, one is approaching flowers, and one is newly germinated.
Give Dill a Simple Care Routine
Water without keeping soil soggy
Water when the surface is beginning to dry and the root zone needs replenishment, not on an unchanging calendar. Young seedlings need consistent moisture because their roots are shallow. Established plants tolerate a brief dry spell better, but repeated drought followed by heavy watering can accelerate stress and flowering.
Apply water slowly at the soil line until the bed is moistened through the root zone, then allow excess to drain. Mulch lightly around, not over, the stems to reduce evaporation and splash. In a container, check more often because a small pot can move from adequately moist to dry in one hot afternoon.
Avoid the opposite mistake: soil that stays saturated deprives roots of oxygen and can lead to yellowing, weak stems, and root problems. “Keep dill moist” means steady access to water with air-filled pore space, not a permanently wet pot.
Fertilize lightly and protect airflow
Dill is not a heavy feeder. If the soil contains compost and the plant is producing normal green growth, additional fertilizer is usually unnecessary. High-nitrogen feeding can produce soft, tall growth that flops and may have less concentrated flavor. If growth is genuinely poor across the bed, use a soil test to guide fertility rather than feeding every symptom.
Give plants enough room for air to move after rain or irrigation. Remove yellowing leaves at the base and clear fallen debris. Good spacing will not stop every disease, but it makes the plant easier to inspect and the foliage easier to dry.
Grow Dill Successfully in Containers
Choose a container at least 12 inches wide and deep, with several drainage holes. A deep pot gives the taproot more usable soil than a shallow decorative bowl. Use a quality container mix amended with a modest amount of compost; garden soil alone can compact in a pot and drain poorly.
Sow directly in the final container and thin to the strongest seedlings. Do not plan to move a mature dill plant from one pot to another. Put the container in full sun, turn it occasionally if stems lean toward light, and water when the top layer is starting to dry while checking that water exits freely.
Dwarf ‘Fernleaf’ is a practical container choice because it stays more compact. ‘Dukat’ is valued for abundant leafy growth, while ‘Long Island Mammoth’ and ‘Mammoth’ are better suited to gardeners who have room for tall plants and want flowers or seed. Variety names are not a substitute for reading the packet: mature size, days to harvest, and local season all affect the result.
Container dill often fails for three reasons: the pot is too shallow, the mix dries completely, or the plant is kept in a dark spot. Fix those conditions before blaming the seed.
Keep Leafy Dill From Bolting Too Soon
Bolting means the plant shifts from leaf production to a flowering and seed-making phase. Heat, drought, long days, root disturbance, and normal maturity can all contribute. You can delay the transition with steady moisture, a little afternoon shade in very hot weather, regular harvest, and succession sowing, but no method keeps an annual herb leafy forever.
When you see a central flower stalk, decide rather than panic. Cut it out of plants reserved for leafy harvest, or leave it on a marked plant for flowers and seed. Do not remove every flower if pollinator habitat or seed saving is part of your plan. The best anti-bolting strategy is usually a new sowing, not increasingly severe pruning of an old plant.
Harvest Leaves, Flowers, and Seeds at Different Stages
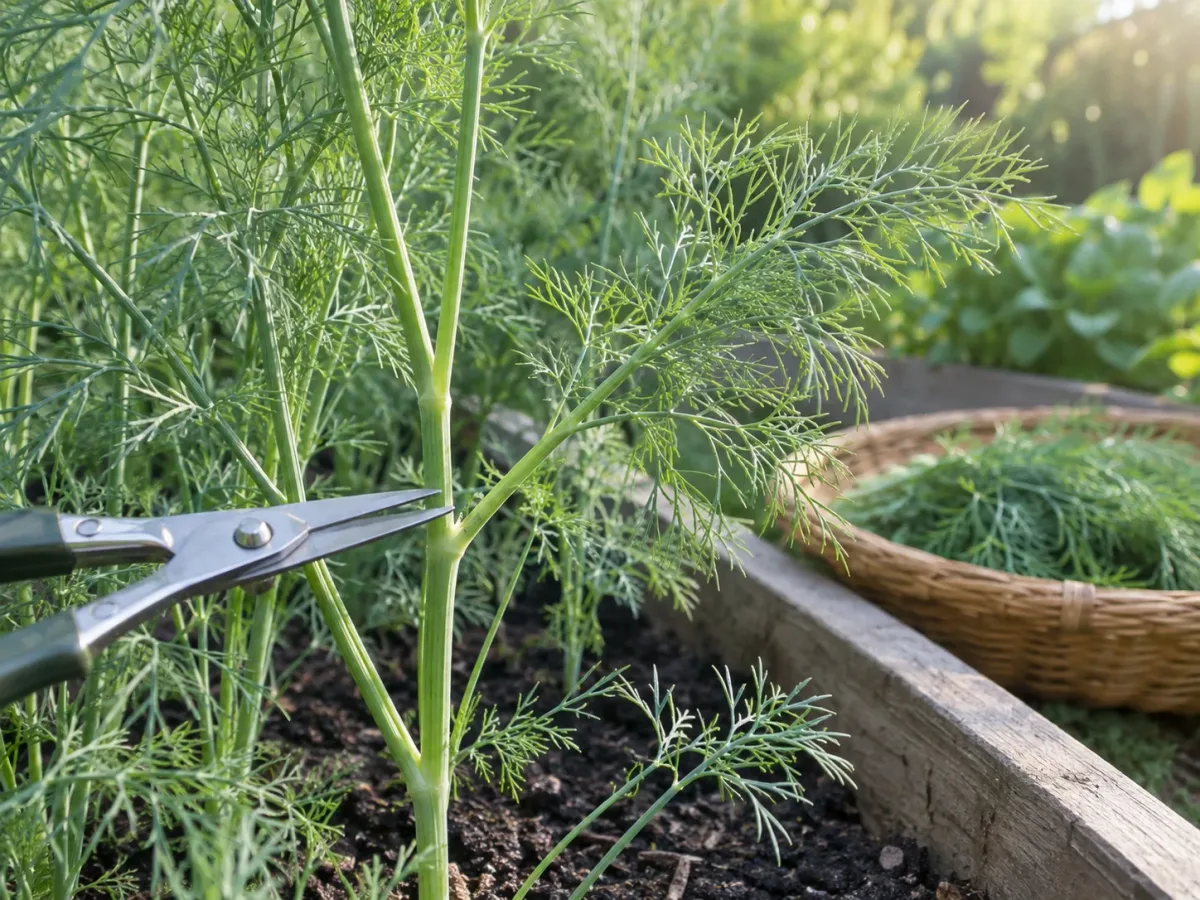
Harvest leafy sprigs when the plant is established and has enough side growth to replace what you cut. Snip above a branching point and take a portion of the plant rather than stripping it bare. Morning harvest is often convenient because foliage is hydrated and cool. If you need a large amount, harvest before flower buds open for the most tender leafy supply.
For flowers, cut the umbels when they are fully open or just beginning to develop seed, depending on whether you want them for a vase, pickling, or flavor. Leave some flowers attached for insects and seed. A flower head makes the plant top-heavy, so stake it before a storm rather than after the stem has split.
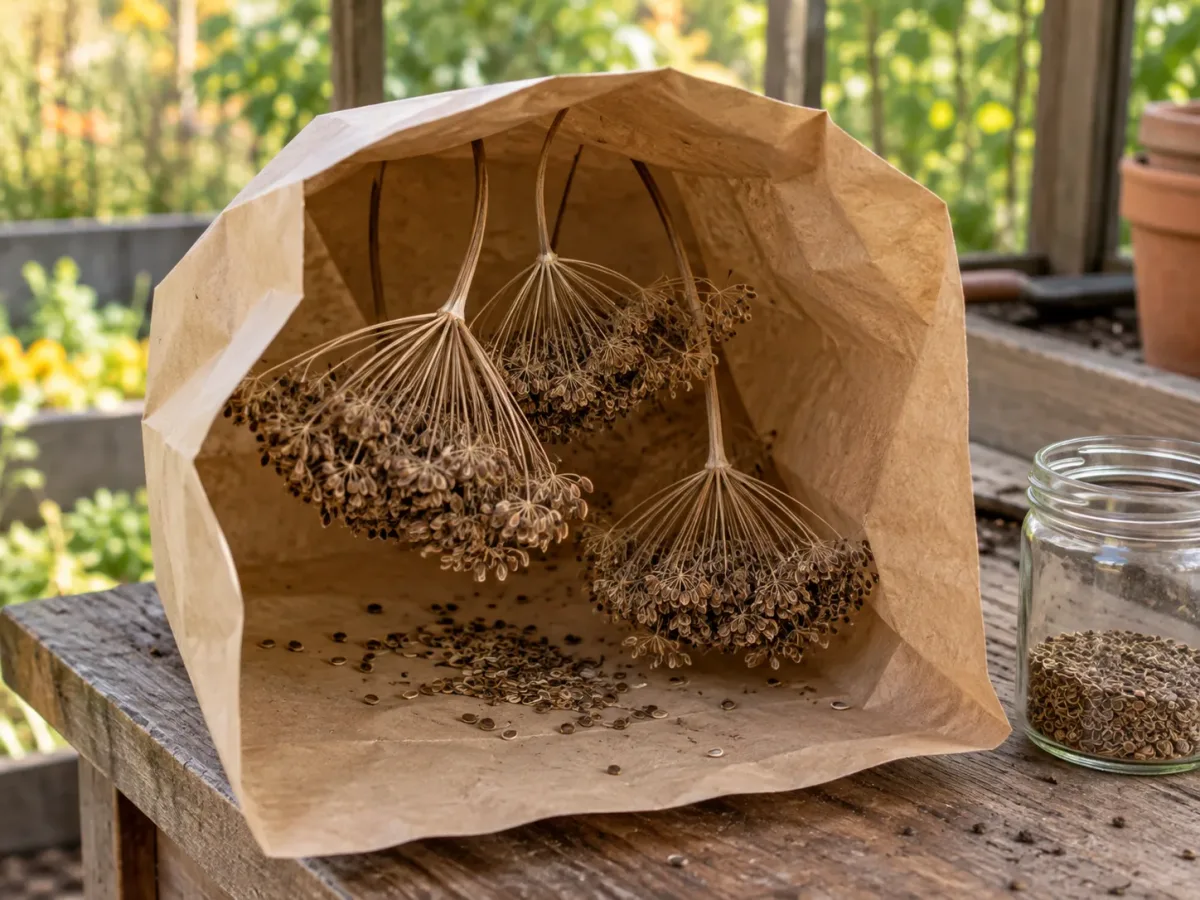
Harvest seed heads when the seeds have changed from green to tan or brown and feel firm. Cut the head with a length of stem, place it upside down in a paper bag, and let it dry in a cool, airy place. The bag catches loose seed without trapping as much moisture as a sealed container. Once dry, rub the heads gently, remove debris, and store the seed in a labeled airtight jar.
Preserve Dill Without Losing Its Character
Fresh dill is delicate. Refrigerate unwashed sprigs loosely wrapped in a slightly damp towel or standing in a small amount of water, then use them promptly. For longer storage, freezing generally preserves more of the fresh green character than drying. Chop leaves, place them in a freezer-safe container or ice-cube tray, and use the frozen portions in soups, sauces, potatoes, and pickling brines.
Drying is still useful when storage space is limited. Hang small bunches in a dark, well-ventilated place until crisp, then strip the leaves into an airtight container. Dried dill has a different, quieter flavor, so use it where that concentrated herbal note fits rather than expecting it to taste like fresh leaves.
Dill flowers and seeds are useful in pickling, but flowers are not interchangeable with seed in every recipe. Follow a tested food-preservation recipe for acidity, salt, processing, and storage. The herb supplies flavor; it does not make an unsafe canning process safe.
Choose a Dill Variety for Your Space
Choose a compact variety when you are growing in a pot, on a balcony, or in a narrow raised bed. Choose a tall variety when you have space for a stake and want substantial flower heads or seed. Leaf-focused types can be harvested repeatedly, while mammoth types create a stronger vertical presence and may be useful at the back of a border.
Regardless of the label, inspect the seed packet for mature height and days to harvest. If your summer becomes hot quickly, a succession of a compact and a tall cultivar can spread risk. One may give you early leaves while the other provides later flowers and seed.
Understand Dill Versus Fennel
Dill and fennel are both members of the carrot family and can look similar when young because both have fine, feathery foliage. Dill is generally a smaller annual herb with a fresh, grassy flavor. Fennel develops a stronger anise or licorice character, and many fennel types form a conspicuous swollen base or bulb.
The difference matters in the kitchen and in garden planning. Do not assume a feathery plant is dill by appearance alone; crush a leaf and compare the aroma, then check the label. Fennel can become much larger and more persistent than dill, so it needs a site that can accommodate its size and self-sowing.
Make Companion Planting Practical
Dill fits beside lettuce, brassicas, cucumbers, zucchini, beans, basil, onions, chives, and flowers when the light, water, and mature size work. Flowering dill can provide nectar and structure for a broader insect community. Penn State’s beneficial-insect guidance emphasizes varied flowering resources rather than relying on one plant to repel one pest.
Treat companion planting as habitat and layout, not invisible pest control. The Washington State University Extension review explains why aromatic-plant claims can look convincing yet perform inconsistently outdoors. Put tall dill at a bed edge, leave room to scout, and use row cover or other crop-specific controls when monitoring shows they are needed.
Handle Caterpillars and Other Pests Responsibly
Yellow, green, and black striped caterpillars on dill may be black swallowtail larvae, a normal and valuable use of the plant. If you want both herbs and butterflies, sow extra dill and reserve one marked plant for caterpillars. Move only if you are certain the caterpillar is a damaging species and you have a clear reason to protect the crop.
For aphids, mites, or unknown chewing damage, identify the pest before spraying. Inspect leaf undersides, stems, and new growth. A small aphid colony on a vigorous plant may be washed off or monitored; a rapidly expanding infestation may require a targeted, label-compliant response. Avoid broad-spectrum insecticides around flowering dill when a physical or selective option can solve the problem, because the treatment can harm the beneficial insects the flowers attract.
Fix Floppy, Yellow, or Sparse Dill
Floppy dill usually points to a combination of height, low light, crowded seedlings, rich soft growth, wind, or a heavy flower head. Improve light and spacing, add a stake early, and reduce excess nitrogen. Do not transplant a large plant just to straighten it; harvest it, support it, or let it flower and reseed.
Yellow leaves are more concerning when the soil is constantly wet, the plant is shaded, or roots are damaged. Check moisture at root depth before adding water. If the soil is dry, water deeply and adjust the rhythm. If it is saturated, improve drainage and pause irrigation. Sparse, pale growth in shade needs more light, not more fertilizer.
If the plant flowers sooner than expected, review the sequence: Was it kept dry? Did a small pot overheat? Was the root disturbed? Was it simply an older sowing reaching maturity? Correct the stress where possible, but start a new succession sowing rather than trying to reverse a mature flowering plant.
Save Dill Seed and Let Some Plants Reseed
Seed saving is simple when you let the heads mature fully. Allow the selected plant to dry toward brown, bag the head before the seeds scatter, and label the container with the variety and year. Store seed cool and dry. For the next season, direct-sow a portion and keep a backup packet if the weather turns poor.
Dill can self-sow generously. That is convenient in an informal herb patch and troublesome in a narrow vegetable row. Let one defined clump drop seed, then pull volunteers that emerge where they compete with carrots, lettuce, or seedlings. Removing spent heads before they shatter is the easiest way to keep the plant’s generosity under control.
Conclusion
To grow good dill, give it sun, loose soil, steady but not excessive moisture, and enough root room. Direct-sow it whenever possible, thin crowded seedlings, and make repeat sowings so one bout of heat does not end your leafy harvest. Use a deep, well-drained pot for container growing, support tall stems before they flop, and choose whether each plant is for leaves, flowers, or seed.
Flowering is not the end of the plant’s usefulness. It can mean pickling material, seed for the kitchen, habitat for beneficial insects, or food for black swallowtail caterpillars. With a small amount of succession planning and careful observation, dill becomes more than an easy herb: it becomes a flexible, productive part of the garden.



