How to Grow and Care for Autumn Sage
Get autumn sage care right with advice on sun, drainage, watering, pruning, winter survival, and propagation for a healthy, long-blooming Salvia greggii.
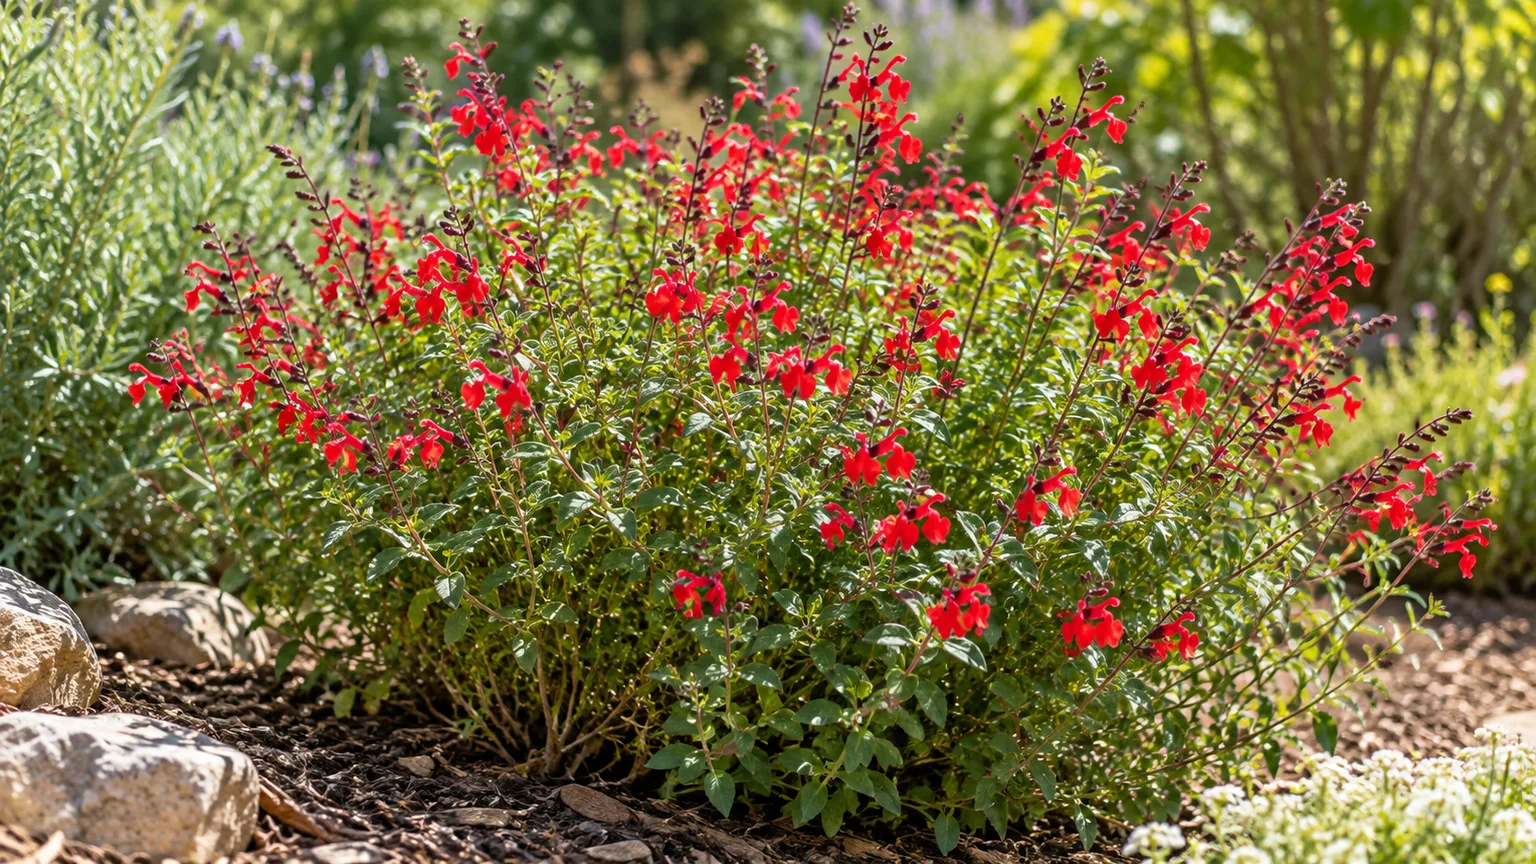
Autumn sage (Salvia greggii) is a small, woody-based salvia that earns its place with a long run of tubular flowers and a strong tolerance for heat and dry spells once established. Give it sun, soil that drains freely, and a measured spring prune; the mistake most likely to shorten its life is keeping the crown wet through winter or cutting the whole plant hard before cold weather.
The easiest way to grow it successfully is to match the site to its natural habits. Autumn sage comes from rocky, relatively dry parts of Texas and Mexico, so a sunny border, gravel garden, slope, or raised bed is a better fit than a low, persistently damp pocket of clay.
What Autumn Sage Is (and Isn’t)
Autumn sage is a compact member of the mint family, Lamiaceae, and a native of Texas and adjacent Mexico. It is often described as a perennial, but it develops a woody framework at the base and may keep some leaves through a mild winter, making “subshrub” a useful description. Expect a rounded plant roughly 2 to 3 feet tall and wide, with finer or more compact growth in some cultivars; regional references give smaller dimensions for particular selections.
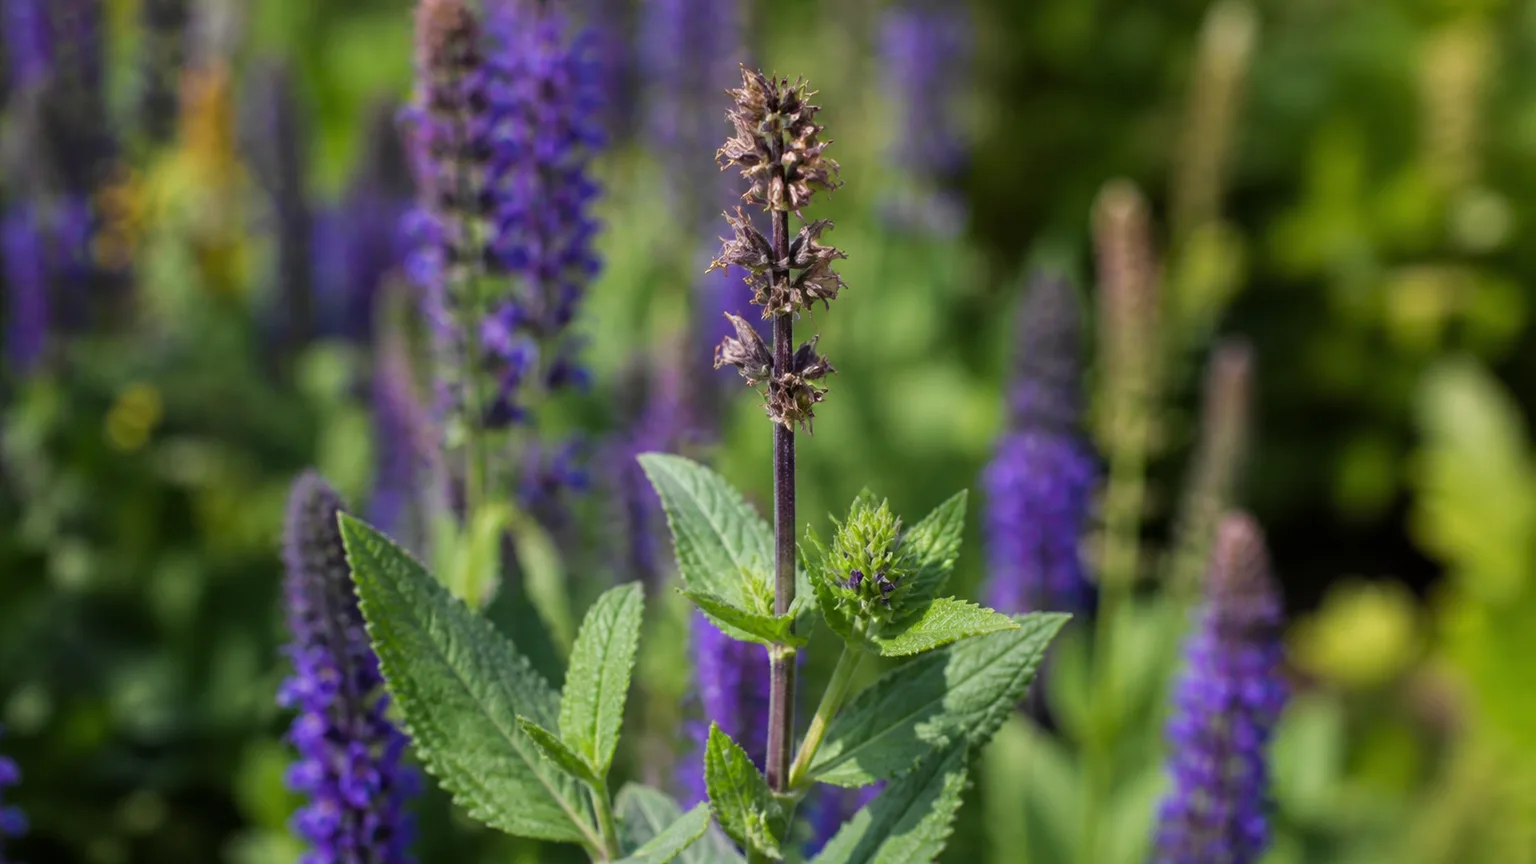
Its small aromatic leaves sit opposite one another on branching stems, and its tubular, two-lipped flowers are produced in clusters. Reds and pinks are common, but cultivars also offer purple, coral, salmon, and white. NC State Extension notes that the species attracts hummingbirds and butterflies and that seed-eating birds use its seeds; a mature plant can therefore serve as a pollinator stop as well as a low-water accent. The NC State Extension plant profile describes the native range, habit, site needs, and wildlife value.
Common names can cause confusion. “Texas sage” sometimes means Salvia greggii, but it is also widely used for cenizo (Leucophyllum frutescens), a different shrub. Plant labels may also group autumn sage with little-leaf sage (S. microphylla) or their hybrids, Salvia × jamensis; these plants can look alike and share many garden uses, but size and cold response vary. Check the botanical name and cultivar on the tag rather than choosing a plant by common name alone.
Choose a Site Autumn Sage Can Live With
Think first about what happens to the soil after a heavy rain. A position where water drains away within a reasonable time is more important than enriching the bed, because roots and the woody crown are vulnerable when the surrounding soil stays saturated. Air movement also helps the plant dry after rain and keeps the compact shrub from being crowded by neighbors.
Sun and summer heat
Aim for at least six hours of direct sun a day for sturdy growth and abundant flowering. NC State Extension describes full sun as the preferred exposure but notes tolerance for partial shade; UF/IFAS Extension’s autumn-sage profile also advises some shade in the warmest climates. In a mild or cool-summer garden, open sun is usually the best choice. Where the afternoon sun is punishing, morning sun with light afternoon shade can reduce leaf scorch without putting the plant in deep shade.
A plant that receives too little light often stretches toward the brightest side, opens up in the center, and flowers less. If it gets scorching afternoon exposure during a heat wave, a few browned outer leaves are not automatically a reason to move it; check whether the root zone is dry and whether the plant perks up after cooler evening temperatures. Repeated scorch in a very hot, reflective location is a signal to provide filtered afternoon shade next season.
Soil and drainage
Autumn sage is comfortable in sandy, rocky, or gravelly ground, and it can adapt to ordinary garden loam if water does not linger. The Oklahoma State University Extension profile lists very well-drained soil as its preference. A heavy clay bed is not an automatic failure, but a flat, compacted spot that stays wet in winter is a poor bet.
Do not try to fix a small planting hole by filling it with a dramatically different, loose mix. In dense clay that can create a basin that collects water around the root ball. Instead, choose a naturally better-drained location, build a broad raised or mounded bed with suitable garden soil, or use a container with drainage holes. Keep the root crown at the surrounding grade or slightly proud of it; burying the woody base under wet soil or mulch increases the chance of rot.
Soil pH is usually not the make-or-break factor. UF/IFAS Extension’s species profile lists acidic and alkaline soils among the tolerances, so focus your effort on drainage and exposure unless a soil test points to a specific nutrient problem. Avoid placing it where roof runoff, a leaking irrigation line, or a low spot keeps sending extra water to the roots.
How to Plant Autumn Sage
Planting when weather is moderate gives roots time to settle before the hardest stress of summer heat or winter cold. In colder parts of its range, spring planting after severe frost risk has passed is the conservative option. In mild-winter climates, a nursery plant can establish in fall if the soil is warm enough for root growth and the site drains well; avoid late planting just before a freeze or the wettest part of winter.
Water the nursery pot before planting if the root ball is dry, then slide it out and inspect the roots. Loosen tightly circling roots gently with your fingers; if a dense mat has formed, make a few shallow vertical cuts so new roots can grow outward. Dig a hole about as wide as the root ball and no deeper, set the plant so the top of its root ball is level with or just above surrounding soil, backfill, and water slowly to settle the soil around the roots.
Planting in a garden bed
Space plants about 2 to 3 feet apart if you want separate, rounded shrubs with airflow between them. Use the wider end of that range for naturally loose cultivars or where humid summers encourage foliage to stay wet; use closer spacing for a mass planting only if you can still reach between plants to weed and prune. A new planting may look sparse for a season, but crowding mature plants can reduce air movement and make maintenance harder.
Apply a thin layer of mulch to moderate soil temperature and slow weeds, but keep it a few inches away from the stems. Coarse gravel or a modest organic mulch both work; the key is not to bury the crown or create a damp collar around the woody base. If the site is exposed to cold, wet winter winds, planting near a sunny wall or among low, compatible companions can offer some shelter without shading the plant.
Growing autumn sage in a container
A container is useful when garden soil drains poorly or when you want to move the plant to a more sheltered place in winter. Choose a sturdy pot with several unobstructed drainage holes and enough room for the root ball plus a little growth; an oversized pot full of wet mix can stay damp longer than a modestly sized one. Use a free-draining outdoor potting mix rather than dense garden soil, and raise the pot slightly so water can escape from the base.
Pots dry faster in heat and wind than garden beds, so check the mix every few days during hot weather rather than relying on a calendar. Water when the upper portion of the mix has begun to dry, then let excess water drain completely. Do not leave the pot sitting in a saucer of water. In cold regions, container roots experience more temperature swings than roots in the ground; move the pot to a protected, unheated spot or insulate it before a hard freeze, while keeping the mix on the dry side.
A container-grown autumn sage still needs outdoor light and airflow. It is not a houseplant that benefits from spending the winter in a warm living room, where low light and indoor warmth can produce weak, stretched growth.
Water by Establishment Stage, Not by Calendar
Watering changes as the plant moves from a small root ball to an established shrub. Right after planting, soak the root ball and the surrounding soil. For the first several weeks, Gardening Know How’s establishment advice; check the soil every couple of days in hot or windy weather and water when the root zone begins to dry, not when it is still wet.
Once new growth is steady and the plant is rooted into the bed, let rainfall do most of the work. Water deeply when a prolonged dry spell has left the soil dry several inches down, then wait for the soil to dry again before watering. A plant that droops briefly in hot afternoon sun but recovers overnight may be responding to heat; one that stays limp in the morning deserves a root-zone check. If the ground is wet, adding water is likely to make the problem worse.
There is no useful universal “one inch every week” rule for every autumn sage. A sandy slope in full sun, a dense loam, a new transplant, and a glazed pot lose water at different rates. Feel the soil beneath the mulch, consider recent rain, and water the root zone rather than wetting foliage every day. In the first year, drought tolerance should not be mistaken for a reason to leave the root ball bone-dry during establishment.
Reduce irrigation as temperatures cool and growth slows. A dry winter period is usually safer than repeated soaking, especially where cold soil drains slowly. If the plant is in a container, keep checking it through winter because wind can dry a pot even when the surrounding garden looks damp, but avoid watering before a freeze or when the mix is already wet.
Fertilizer and Mulch: Keep Both Light
Autumn sage is not a heavy feeder. If it grows at a steady pace and has healthy leaves, skip routine fertilizer; adding nitrogen to force growth can produce a leafy plant with fewer flowers and soft shoots that are less prepared for cold. NC State Extension and RHS cultivation guidance both emphasize ordinary, well-drained conditions rather than intensive feeding.
If a soil test identifies a deficiency, correct that issue according to the test rather than guessing with a high-nitrogen lawn product. In a poor but well-drained bed, a light spring application of a balanced, slow-release fertilizer may help, but it is not a substitute for sun or healthy roots. A thin layer of finished compost around the root zone can improve surface structure without burying the crown.
Keep mulch shallow and open around the stems. Organic mulch can help during a hot, dry summer, while gravel suits a dry, rocky planting and will not hold moisture against the crown. If the lower stems stay dark or damp beneath mulch, pull it back and let the base dry.
Pruning Autumn Sage Without Losing the Woody Base
Prune to keep the plant compact and encourage leafy, flowering shoots, not to remove every old stem on a fixed date. Advice about autumn sage pruning differs because gardens differ: mild-climate gardeners may shape it in fall, while colder places benefit from waiting until spring. The Royal Horticultural Society’s profile places pruning in spring and recommends deadheading to extend flowering; Oklahoma State Extension also advises an early-spring cutback. Landscape designer Francesca Corra describes a harder fall prune for autumn sage in Southern California in her Fine Gardening pruning report; that approach is climate-specific and should not be treated as a universal winter rule.
Make the main renewal cut in spring
In a cold-winter garden, leave stems in place through winter and wait until late winter or early spring, when the worst freezes have passed and new growth begins to show. This lets you distinguish live wood from winter damage and avoids prompting tender regrowth just before a freeze. Cut out dead or broken stems first, then shorten the remaining framework to shape the plant.
A lightly overgrown shrub can usually be reduced by about one-third to one-half, cutting just above visible buds or healthy leafy growth where possible. Oklahoma State Extension gives a more severe option—cutting back to around 6 inches in early spring—while RHS recommends spring pruning without prescribing that exact height. Reserve a low renewal cut for a healthy, established plant that has previously regrown well in your climate; do not assume every old, bare stem will sprout again. If the center has become woody and leafless, shorten gradually over more than one season rather than shearing the entire plant to the ground at once.
Use clean, sharp pruners, and remove the cut debris from around the crown. If you are unsure how much wood survived a hard winter, wait for buds to break and prune back to the point where stems show living growth. That small delay is safer than cutting healthy framework because it looks brown during dormancy.
Deadhead or shear after a flower flush
For tidier plants and another flush of bloom, trim spent flower stems back to a pair of healthy leaves or a branching point after the main display fades. On a plant that has flowered heavily in spring, a light shear of the leafy outer growth can encourage fresh shoots that carry later flowers. Keep the cut within green, leafy growth; repeated deep cuts into old, bare wood can leave gaps that fill slowly.
Deadheading is optional. Remove flower spikes if you want to limit self-sown seedlings or keep the plant looking neat, but leave some seed heads if you want seed for sowing or food for birds. Do not shear every stem late in the season in a cold climate; the fresh growth may not have enough time to harden before frost. A quick trim of a few ragged branches is enough until the spring renewal window.
Protect Autumn Sage Through Winter
Hardiness labels for autumn sage vary across references and cultivars, so treat a zone number as a starting point rather than a guarantee. NC State Extension lists the species for USDA zones 6a through 9b, Oklahoma State Extension lists zone 7, and UF/IFAS Extension publishes a warmer profile for its Florida context. Local winter wetness, wind exposure, drainage, and the specific cultivar can change the result; a plant that survives a brief cold snap in dry, well-drained soil may fail in a warmer zone if its crown sits wet for weeks.
For the best odds, plant it where winter water drains away, avoid fall fertilizing that stimulates tender growth, and do not cut the framework back before the coldest weather. In areas with occasional hard freezes, a loose layer of dry leaves or evergreen boughs can buffer the base after the soil cools, but do not pack wet mulch tightly against the stems. Remove temporary cover once severe cold passes so the crown does not remain damp.
If a forecast freeze is coming, water a dry in-ground plant earlier in the day before the ground freezes; do not saturate already wet soil. A container can be moved against a sheltered wall or into an unheated garage for a short cold spell, as long as it receives some light and the soil is not kept warm and wet. After winter, wait before replacing a top-killed plant: the woody base may look lifeless while roots remain alive, and new shoots can emerge late in cool regions.
Why Autumn Sage Is Not Blooming
Start with light. If the plant receives only a few hours of direct sun, move it when practical or reduce nearby shade; a large dose of fertilizer will not compensate for too little light. A plant that was sheared hard in spring may also flower later because it needs to rebuild stems before setting buds.
Next, check water and soil. Persistently wet roots, drought during establishment, and heavy nitrogen can all interfere with steady flowering, though wet roots may also produce yellow leaves and decline. Wait for the soil to begin drying before watering, stop unnecessary feeding, and keep the crown uncovered. If the plant is growing lots of soft stems but few flowers, cut back on fertilizer and use only a light post-flush trim instead of repeated shearing.
Finally, allow for the weather. Autumn sage may bloom in waves rather than as a solid sheet of flowers, and high summer heat can slow flowering until cooler conditions return. A recently planted shrub may need a season to build roots and branching before it looks full. Give it sun and drainage, prune at the right stage, and judge success by new growth and repeated flower clusters rather than expecting every stem to bloom continuously.
Pests, Yellow Leaves, Wilting, and Decline
Autumn sage usually has few serious pest problems, but check new growth for aphids and the undersides of leaves for leafhoppers. Slugs and snails may chew foliage in damp, sheltered beds; rosemary beetle is a possibility in some regions. The RHS lists these pests, while NC State Extension reports no serious recurring insect or disease issue. Identify the pest before treating it, and avoid spraying open flowers when bees and hummingbirds are visiting.
Yellow leaves and a soft, collapsing stem base point first toward excess moisture or poor drainage. Pull mulch back, feel the soil several inches down, and check whether water drains after rain. If the ground remains saturated, stop routine irrigation and consider moving or lifting the plant into a better-drained bed once conditions allow; adding fertilizer to a plant with damaged roots will not fix the cause.
Wilting requires a quick soil check before you reach for the hose. If the soil is dry below the surface and the plant remains wilted in the cool morning, give it a deep drink; if the soil is wet, improve drainage and wait. A few leaves may brown during an extreme heat spell or after a hard freeze, but widespread branch dieback calls for checking the base for living buds and ruling out chronic wetness.
Powdery mildew or other leaf spotting can appear when foliage stays crowded or wet, although these problems are not usually the main threat to autumn sage. Remove badly affected leaves, improve spacing and airflow, water at soil level, and avoid overhead watering late in the day. If the crown is blackened, mushy, or smells sour, crown or root rot is more likely than ordinary seasonal leaf drop; a better-drained replacement site matters more than repeated top growth trimming.
How to Propagate Autumn Sage
Choose the method based on what you want to keep. A cutting is the most reliable way to preserve the exact flower color and habit of a named cultivar. Seed is a reasonable experiment for the species, but seedlings can differ from the parent—especially when the original plant is a named selection or a hybrid.
Root softwood cuttings to preserve a cultivar
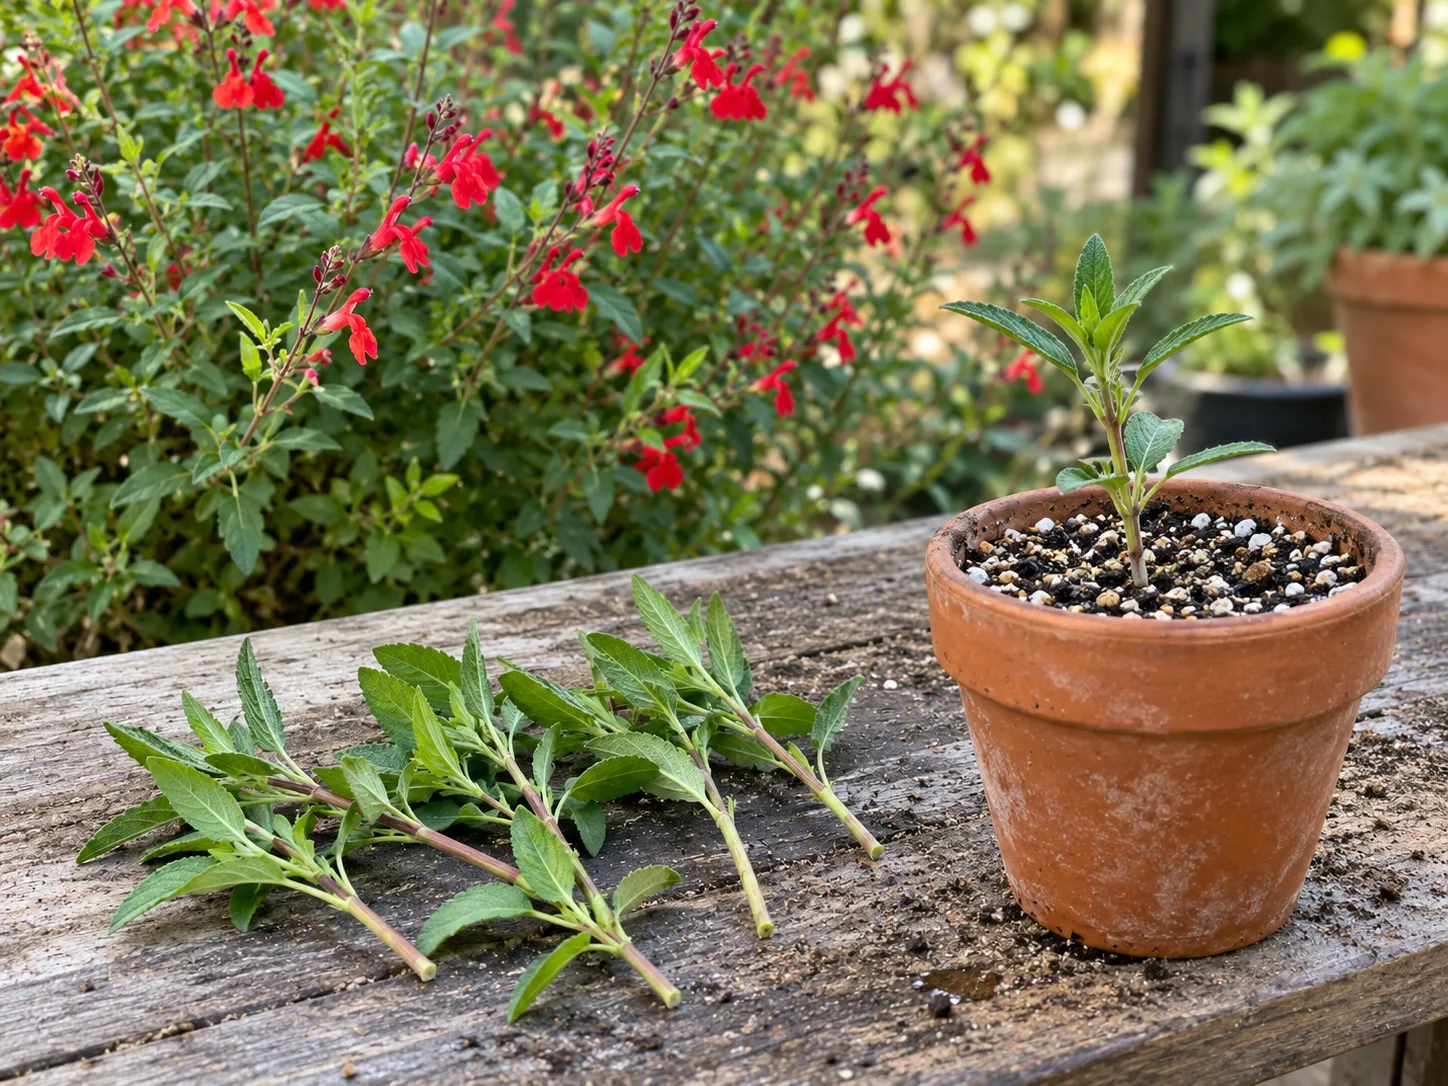
Take several cuttings so one failure does not end the project. Choose a healthy, non-flowering shoot from the current season, preferably when the stem is firm enough to hold its shape but still flexible. Cut 3 to 4 inches below a node with clean snips, remove the lower leaves, and leave a small tuft of foliage near the tip. The RHS recommends basal or softwood cuttings in spring or early summer and semi-ripe cuttings in late summer or autumn; its later-season method uses bottom heat.
Fill a small pot with a clean, airy propagation mix that drains freely, moisten it, and make a hole for each stem so the base does not scrape off. Insert the cutting far enough to bury at least one leaf node, then firm the mix lightly around it. Cover the pot loosely with a clear dome or bag to slow moisture loss, but keep the leaves from pressing against the plastic and vent it if condensation stays heavy.
Set the pot in bright indirect light, away from hot direct sun, and keep the mix lightly moist rather than waterlogged. Warmth can help rooting, but a hot, sealed bag can cook a cutting; lift the cover briefly each day for airflow. After a few weeks, check gently for resistance rather than pulling repeatedly. When roots hold the mix together and new growth appears, pot the young plant on or acclimate it gradually outdoors, protecting it from cold until it is established.
Use seed or division when the trade-off fits
To grow from seed, let a few flowers mature instead of deadheading every spike. Collect the dry seed heads when they begin to brown, crumble them over a labeled envelope, and store the dry seed cool until sowing. Sow in a clean seed-starting mix, cover only lightly, and keep it evenly moist in a bright, sheltered place. Germination and flower color can vary, so seedlings are best when you want more plants for a naturalistic border rather than exact copies of a special cultivar.
Division is most useful when a mature plant has a separable, multi-stemmed crown and you can lift it without tearing a single large woody root system. Divide in cool weather when growth is just beginning, replant each section promptly at the original depth, and water while it re-establishes. If the plant is old and woody with few rooted shoots, take cuttings instead; division can set it back and may not produce viable pieces.
Conclusion
Autumn sage grows best when you recreate the conditions it is adapted to: sun, open air, and soil that dries between waterings. Establish a new plant with regular checks and deep watering, then step back as its roots spread; the long-term routine is light feeding, occasional post-bloom shaping, and a careful spring renewal cut.
The main adjustment is winter care. Keep water away from the woody crown, avoid a hard fall cut in cold regions, and wait for new growth before removing stems that may still be alive. If you want to repeat a favorite flower color, root cuttings instead of relying on seed. With those choices, Salvia greggii can bring recurring blooms and pollinator activity to a sunny border or a well-drained patio pot.