How to Grow and Care for Alocasia Black Velvet Indoors
Get clear Alocasia Black Velvet care guidance: when to water, how to prevent root rot, when to repot, and how to propagate offsets and corms through winter.
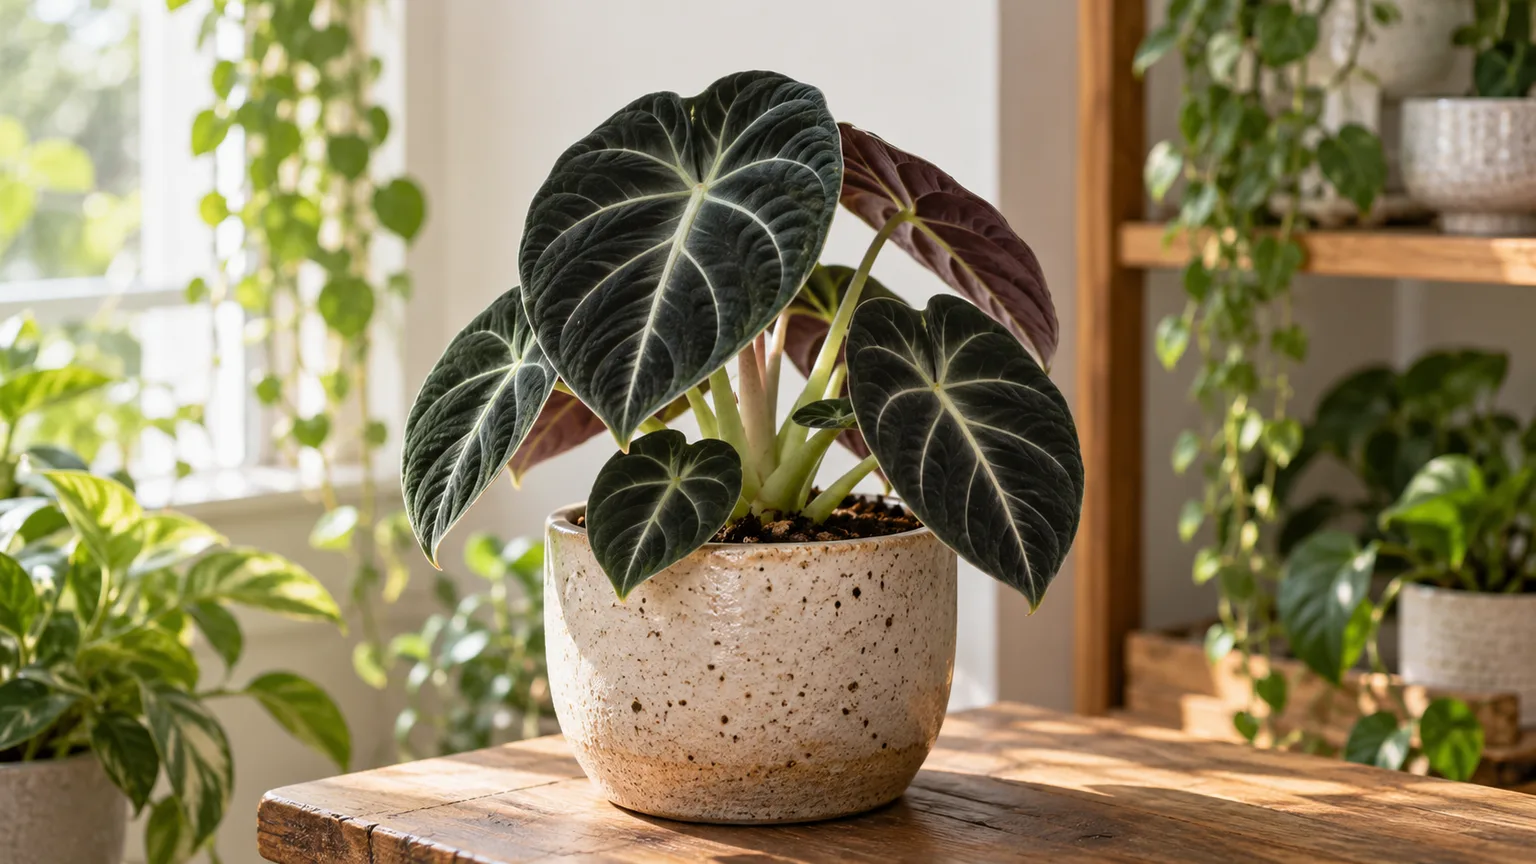
Alocasia Black Velvet (Alocasia reginula) is a compact tropical foliage plant with thick, nearly black leaves traced in silvery veins. It grows more slowly and stays smaller than many elephant-ear relatives, but it still needs steady warmth, bright filtered light, and a potting mix that drains freely. The most useful care adjustment is to water by checking the mix instead of relying on a weekly schedule.
A healthy plant may replace an older leaf as it grows, and it can slow down when winter light drops. Those changes are not automatically signs of trouble. Check the plant’s overall pattern—how many leaves are affected, whether new growth is continuing, and how damp the root zone remains—before making a drastic correction.
Know which plant you have
Black Velvet is the common name for Alocasia reginula, a small jewel Alocasia grown for its dark, velvety foliage and bright veins. The University of Arkansas Division of Agriculture describes it as a compact, slow-growing plant with a branched, rhizomatous stem; it is usually less than a foot tall and can spread wider as it produces growth points. Its mature size varies with age, light, and growing conditions, so a small plant is not necessarily stunted. University of Arkansas Extension’s profile describes the characteristic dark leaves and silver contrast.
Do not confuse Black Velvet with Alocasia micholitziana ‘Frydek’, often called Green Velvet. Frydek usually has longer, more arrow-shaped leaves and a greener blade, while Black Velvet has shorter, rounded heart-shaped leaves with a deep charcoal-green surface. Individual leaves can look lighter when young, and cultivars sold under collector names may vary, so use the whole leaf shape and growth habit rather than color alone.
This is a foliage plant, not a reliable flowering display. Indoor plants may rarely produce an aroid flower, but a bloom is not a measure of success; steady leaf growth and a firm, healthy base are more useful signs. If you want a quick reference for the plant’s care beyond this overview, LeafyPixels also has focused guides to Black Velvet light and watering.
Set the room before adjusting care
Choose a stable indoor spot first, then adjust watering and humidity around it. A warm room with bright indirect light and no cold draft is easier to manage than a plant moved repeatedly between a dim corner, a hot window, and an air-conditioning vent. Keep it away from exterior doors and heating or cooling outlets that create sharp temperature and moisture swings.
Treat the plant as tropical but not as a bog plant. It likes ambient moisture in the air while its roots still need oxygen; high humidity does not make waterlogged soil safe. A small digital hygrometer placed near the leaves can tell you whether the room is consistently dry, and a room thermometer helps distinguish a cool-night slowdown from thirst.
If the room falls below about 60°F (16°C), move the plant to a warmer location and allow the mix to dry more slowly before watering again. Avoid setting the pot directly on a heater or radiator to compensate; localized heat can dry the root ball unevenly and crisp the foliage. A steady, moderately warm room is more valuable than chasing a precise temperature reading.
Give it bright, filtered light
Place Black Velvet where it receives bright, indirect light for much of the day. An east-facing window often works well, while a brighter south- or west-facing window may need a sheer curtain or a position set back from direct midday rays. The RHS Alocasia growing guide recommends bright but indirect light for Alocasia generally, and Fine Gardening’s indoor Alocasia advice also cautions that strong direct sun can scorch foliage.
Too little light usually causes gradual, stretched growth rather than an overnight collapse. Petioles may lean toward the window, new leaves may come in smaller, and the plant may take longer to unfurl a leaf. Move it closer to the brightest filtered window in small steps over a week or two; a sudden switch from shade to direct sun can add scorch to an existing light problem.
In winter, shorter days can slow growth even when the plant is healthy. Keep it in the brightest suitable spot and rotate the pot occasionally so new leaves do not all lean in one direction. If natural light is weak, a grow light can supplement it, but do not place the fixture close enough to warm or dry the leaves. Consistency matters more than a few hours of intense sun.
Keep warmth and humidity steady
A comfortable indoor temperature is usually enough for Black Velvet as long as it stays consistently warm and avoids cold drafts. RHS guidance for Alocasias calls for warmth above 60°F during active growth and a cooler, drier winter rest that still avoids temperatures below 50°F. For a potted Black Velvet, err toward the warmer end of the room’s normal range rather than deliberately chilling it to force dormancy.
The plant appreciates medium to high humidity, but a specific number is not a pass-or-fail threshold. If the air is very dry and leaf edges repeatedly turn crisp while the soil is moist, raise room humidity with a humidifier or group plants together. A pebble tray may slightly humidify the air close to the pot, but it will not transform a dry room; keep the pot base above the water and empty standing water from the cachepot.
Avoid routine misting as a humidity strategy. It raises humidity only briefly, can leave droplets on the textured leaves, and does not replace room-level moisture. Wipe dust gently with a soft brush or a barely damp cloth while supporting the leaf underneath; the leaves are thicker than they look but can crease or tear if bent.
Use an airy, fast-draining mix
The roots need a mix that holds some moisture without staying compact and saturated. Start with a quality indoor potting mix, then add coarse orchid bark and perlite or pumice to open the structure. A simple starting blend is roughly two parts potting mix to one part bark and one part perlite or pumice by volume; adjust the proportions if the mix remains wet for many days or dries almost immediately.
Use a pot with open drainage holes. Do not place stones or gravel in the bottom as a substitute for drainage, and do not leave the nursery pot sitting in a full decorative cachepot. After watering, let excess water run out and empty the saucer. A clear plastic pot can make root inspection easier, but an ordinary nursery pot inside a cover pot works just as well if the drainage remains unobstructed.
Avoid both extremes: dense peat-heavy soil that stays wet, and an oversized pot filled with coarse material that leaves the fine roots dry between waterings. If you want a plant-specific recipe and component options, use the Alocasia Black Velvet soil guide alongside this overview. The goal is predictable drying, not a particular ingredient list or a mix that never holds moisture.
Water by checking the root zone
Water when the upper inch or two of mix has begun to dry, then soak the root ball evenly until water drains from the bottom. Empty the saucer or cachepot after the pot has drained. The RHS guide gives a similar top-layer check for Alocasia generally, while University of Arkansas Extension warns against leaving Black Velvet standing in water.
A calendar interval cannot account for pot size, root density, room temperature, light, or substrate. In a bright warm room, a small plant in a chunky mix may dry much faster than a larger plant in a cool room. Check the mix with a finger or wooden stick before watering; if it is still cool and damp below the surface, wait and check again later rather than adding a small sip.
When watering is due, water thoroughly instead of giving repeated shallow splashes. A full soak wets the whole root zone and allows salts to flush through; a tiny amount can leave some roots dry while the lower mix remains wet. Do not let the plant become bone dry for long, especially during active growth, but never compensate for a drooping leaf by watering before checking whether the soil is already wet.
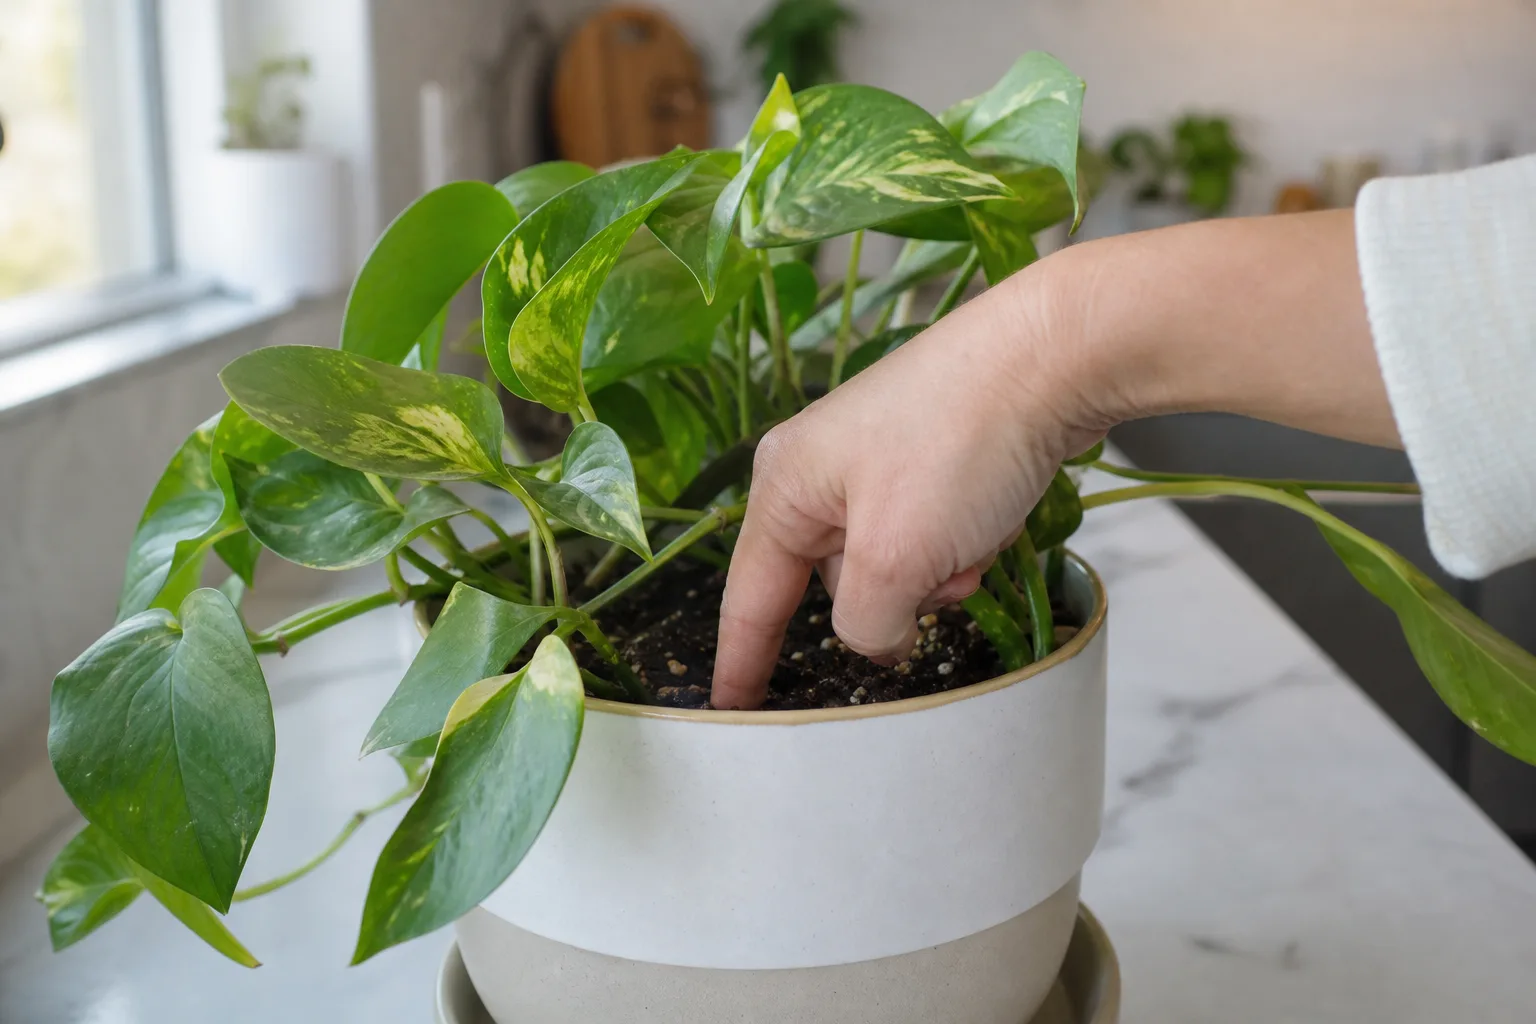
If the pot stays heavy and wet long after watering, check the drainage holes and mix before changing the schedule. If the mix dries in a day or two, inspect for a severely root-bound plant, unusually hot placement, or a mix that contains too little water-holding material. The same plant may need a different rhythm in winter, so reassess rather than carrying a summer routine forward unchanged.
Manage its winter slowdown
Black Velvet can slow down markedly when days are short and the room is cooler. It may stop making leaves or shed an older leaf; some plants lose most or all of their foliage for a period while the underground growing point rests. The RHS notes that seasonal leaf loss can happen with Alocasias and recommends reducing water in winter, especially when growth pauses.
When growth slows, stop fertilizing and water less often, but do not leave the root ball bone dry for months. Let more of the mix dry before watering and use the pot’s weight and soil feel to judge when it needs a drink. Keep a leafless plant in a warm, bright place and check that the base or corm remains firm; a firm resting plant may simply be dormant, while a soft, foul-smelling base suggests rot.
Do not dig up or repot a resting plant just because it has no leaves. Mark the pot or leave the plant in its usual place so it is not mistaken for an empty container, and resume normal watering gradually when a new shoot appears. If the room remains warm and bright, it may continue growing through winter; follow the plant’s actual growth rather than forcing a dormant period.
Fertilize lightly while it grows
Feed only when the plant is producing leaves. Use a balanced liquid houseplant fertilizer diluted to half the label strength, applied every four to six weeks during active spring and summer growth. The RHS recommends a general liquid fertilizer during Alocasia’s growing season; a modest dose is enough for a slow-growing plant in a pot.
Skip fertilizer if the plant is dormant, newly divided, recovering from root rot, or sitting in dry, damaged mix. Fertilizer cannot correct poor light or replace healthy roots, and adding more because growth is slow can increase soluble salts around sensitive roots. If a pale crust develops on the soil or pot rim, pause feeding and flush the mix with plain water only if it drains freely.
Restart feeding after new growth resumes, not automatically on a date. If you recently repotted into a pre-fertilized mix, wait before adding liquid feed because the substrate may already contain nutrients. Avoid strong doses and frequent fertilizer changes; stable light, warmth, and moisture will do more for leaf production than pushing the plant with extra food.
Repot only when roots need space
Black Velvet grows slowly, so it rarely needs a much larger pot each year. Repot when roots densely circle the root ball, emerge from several drainage holes, or the mix has broken down and remains wet for too long. A plant that is merely small or slow is not automatically root-bound, and a snug pot usually dries more predictably than a container with a large volume of unused soil.
Repot in spring or early summer if possible, when the plant is actively growing and can recover. Choose a pot only one size larger, loosen the outer roots gently, and set the crown at the same height it was growing before. Do not bury the base deeply; keep the growing point and leaf stems above the mix to reduce the chance of rot.
If you are repotting to divide offsets, prepare separate pots and fresh airy mix before lifting the plant. Keep healthy roots intact and remove only tissue that is clearly dead or mushy. Afterward, water enough to settle the mix and let it drain; do not keep the new pot constantly wet while disturbed roots recover. See the Black Velvet repotting guide for a closer step-by-step check.
Prune and clean delicate leaves
Routine pruning is minimal. Remove a leaf only when it is fully yellow, dead, or badly damaged, cutting the petiole near its base with a clean blade. A partly yellow lower leaf may still be feeding the plant, so wait until it has mostly faded unless it is diseased or collapsing.
Wear gloves when cutting or dividing Alocasia and avoid touching your face; sap can irritate skin. The RHS advises gloves when handling the genus because its sap can be an irritant. Wash tools and hands after trimming, and keep cut material away from curious pets.
Dust can collect on the textured leaves and reduce their appearance, but aggressive polishing is unnecessary. Support each leaf from below, then use a soft brush or a damp microfiber cloth with very light pressure. Do not fold a leaf to reach its underside or use leaf-shine products; a crease in a mature blade may remain after the plant is otherwise healthy.
Propagate without damaging the crown
There are two practical home routes: separate a rooted offset or rhizome section, or start a corm. A leaf by itself will not grow into a new Black Velvet plant because it does not contain the growing point or underground structure needed to make a complete plant. Spring and early summer are the easiest times to propagate because warmth and longer days support recovery.
Choose a healthy parent that is actively growing and has several leaves. Do not divide a plant that is badly dehydrated, infested, or losing leaves from suspected root rot. Wear gloves, use a clean sharp knife, and prepare the new pots before lifting the root ball so exposed roots are not left drying while you assemble supplies.
Divide offsets and rhizomes
The gentlest method is to separate a small offset that already has its own roots. Unpot the plant, brush away enough mix to see where the offset joins the main clump, and separate it at a natural point with a sterile blade. Keep a piece of rhizome and a few healthy roots attached to the offset; a leafless nub with no viable growing point is unlikely to establish.
Pot the division in a small container with drainage and fresh airy mix, positioning the crown at the same depth it was growing before. Water once to settle the medium, let it drain completely, and place it in warm bright indirect light. Keep the mix lightly and evenly moist while new roots establish, but do not seal the plant in a wet bag or enclosed container without ventilation.
Expect a pause before new growth rather than an immediate flush of leaves. If the division remains firm and the leaves do not deteriorate, give it time; disturbing it again to check for roots can cause more damage than waiting. The RHS propagation guidance recommends separating Alocasia offsets in spring and keeping the new plants warm and well lit while they establish.
Start corms separately
Small corms may be found among the roots or in the potting mix when a mature plant is lifted. Select firm corms and leave some attached to the parent; harvesting every corm can reduce the plant’s reserves. A soft, hollow, or foul-smelling corm is already rotting and should not be used.
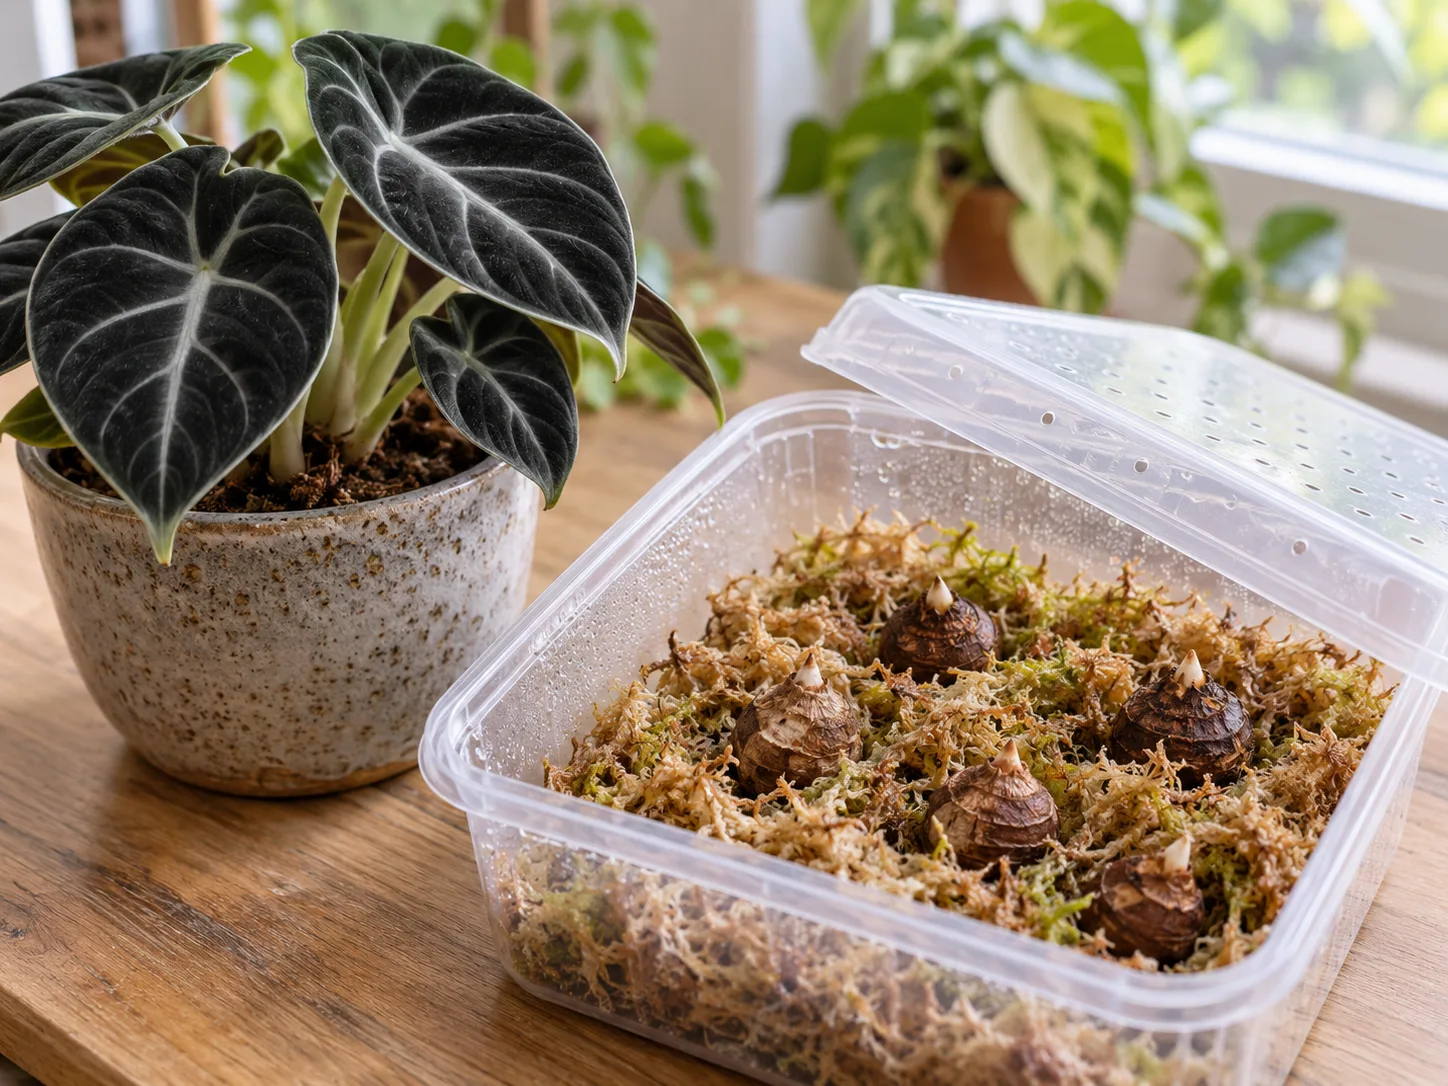
Set each corm on barely moist sphagnum or another clean, airy propagation medium inside a small clear container with a loose lid or vents. The aim is warm, humid air around the corm without submerging it or keeping the medium waterlogged. Place the container in bright indirect light and check it regularly for excess condensation, mold, or a corm that is softening; add a little moisture only when the medium starts to dry.
Corms can take several weeks or longer to form roots and a visible shoot, and some will fail even with careful handling. Wait until a corm has roots and a growing point before potting it into a small container of airy mix. Open the lid gradually over several days so the new plant adjusts to room air instead of moving abruptly from a humid box to a dry shelf.
Diagnose leaf and root problems
Do not diagnose a leaf by color alone. First look at where the damage starts, how many leaves are involved, whether the soil is wet or dry, and whether the plant is growing. The pattern usually narrows the likely cause faster than adding water or fertilizer immediately.
Yellowing, curling, crisp edges, and droop
One old lower leaf yellowing while the rest of the plant looks firm and new growth is healthy is often normal turnover. Several leaves yellowing together, especially with a persistently wet mix or a soft base, points toward waterlogged roots and possible rot. NC State Extension’s Alocasia profile lists overwatering, underwatering, insufficient light, and pests among common causes of yellowing, so check the conditions before choosing a fix.
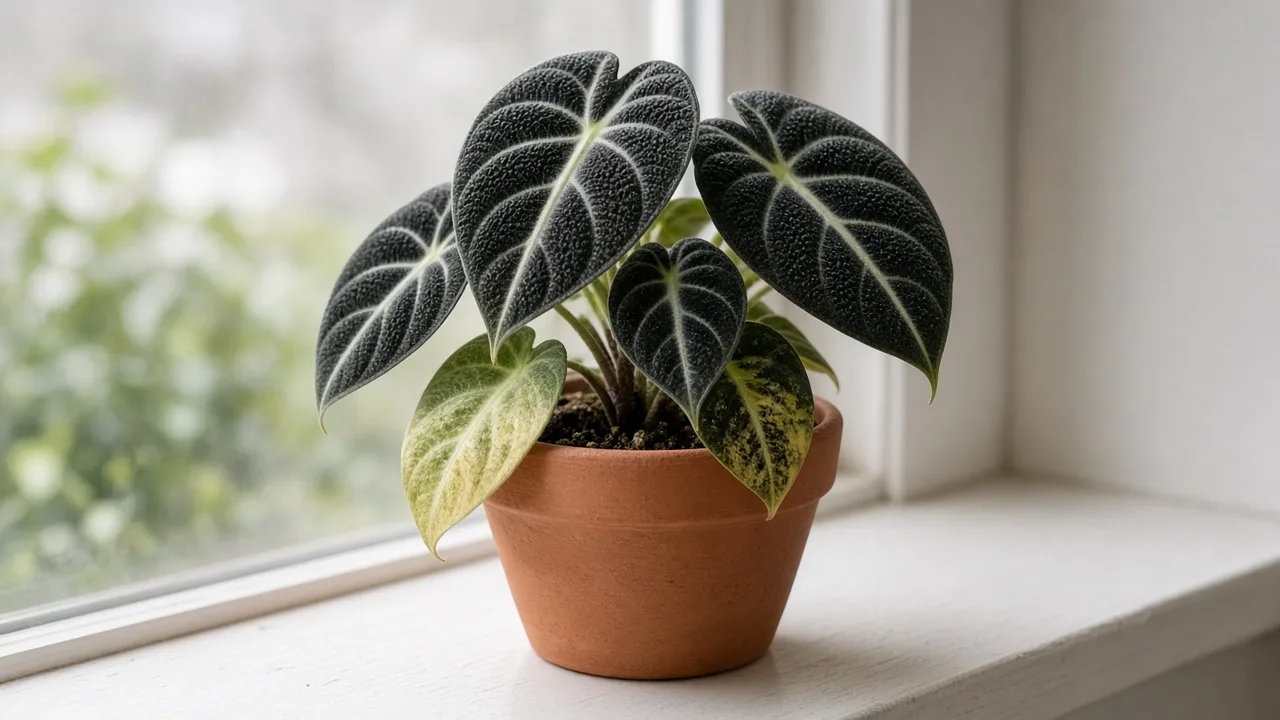
If the mix is wet and the plant is declining, slide it gently from the pot and inspect the roots. Healthy roots are firm; dead or rotting roots are soft and may smell unpleasant. Trim only dead tissue with a clean tool, repot in fresh airy mix, and correct the drainage or watering pattern that caused the problem. Do not “treat” suspected rot by leaving the plant dry for weeks if living roots remain.
Dry, curling edges can follow low humidity, a missed watering, direct sun, or root damage, and those causes can look similar. Feel the mix first, then review light and room humidity. Brown tips on more than one leaf may also reflect accumulated fertilizer salts; check for crusting and pause feeding before buying supplements. Change one condition at a time and watch the next leaf rather than expecting damaged tissue to turn green again.
Spider mites and other pests
Spider mites are common on indoor Alocasias, particularly when the air is warm and dry. Look for fine pale stippling, dull leaves, or webbing beneath the leaf and around petiole joints. Inspect both sides of every leaf and nearby plants; a single clean-looking upper surface does not rule out mites.
Isolate the plant as soon as you find a likely infestation. Rinse the foliage gently, supporting each leaf so it does not split, then use a product labeled for the pest and houseplants according to its label. Test the product on one leaf first, because the velvet surface can show marks, and repeat treatment at the labeled interval so newly hatched mites are addressed. NC State Extension also identifies spider mites and other sap-feeding insects as Alocasia pests.
A humidifier may make the room more comfortable for the plant, but it is not a mite treatment and should not replace inspection or control. NC State Extension also identifies spider mites and other sap-feeding insects as Alocasia pests. Check nearby plants and clean the shelf after treating. Keep the plant separated until new growth and leaf undersides show no continuing activity; avoid spraying a stronger concentration or mixing products to speed up the result.
Protect people and pets
Alocasia contains insoluble calcium oxalate crystals. Chewing or swallowing plant tissue can irritate the mouth and throat and may cause pain, swelling, drooling, vomiting, or difficulty swallowing; the risk applies to every part of the plant, not just the leaves. Poison Control’s Alocasia guidance advises keeping these plants away from children and pets, and the ASPCA lists Alocasia as toxic to cats and dogs.
Place the pot where a pet cannot chew fallen leaves or reach the potting mix, and do not rely on a high shelf if a cat can climb to it. Wear gloves for pruning, repotting, and propagation, then wash hands and tools. If a person or pet chews the plant, remove visible plant material and contact Poison Control or a veterinarian promptly for case-specific advice; do not wait for symptoms to worsen.
Conclusion
Give Alocasia Black Velvet bright filtered light, steady warmth, an airy draining mix, and a thorough drink only when the upper layer has begun to dry. In winter, follow its growth: reduce water and stop feeding when it pauses, but keep a resting corm warm and check that it stays firm.
For most problems, start with the roots and the moisture in the pot before changing several conditions at once. That simple check prevents a dry-looking leaf from triggering more water when the actual issue is saturated soil, and it keeps this compact, slow-growing plant easier to manage over time.