Orchid Care Tips for Healthy, Thriving Plants
Learn how to keep orchids thriving with practical Phalaenopsis care tips for light, watering, humidity, fertilizer, reblooming, repotting, and root health.
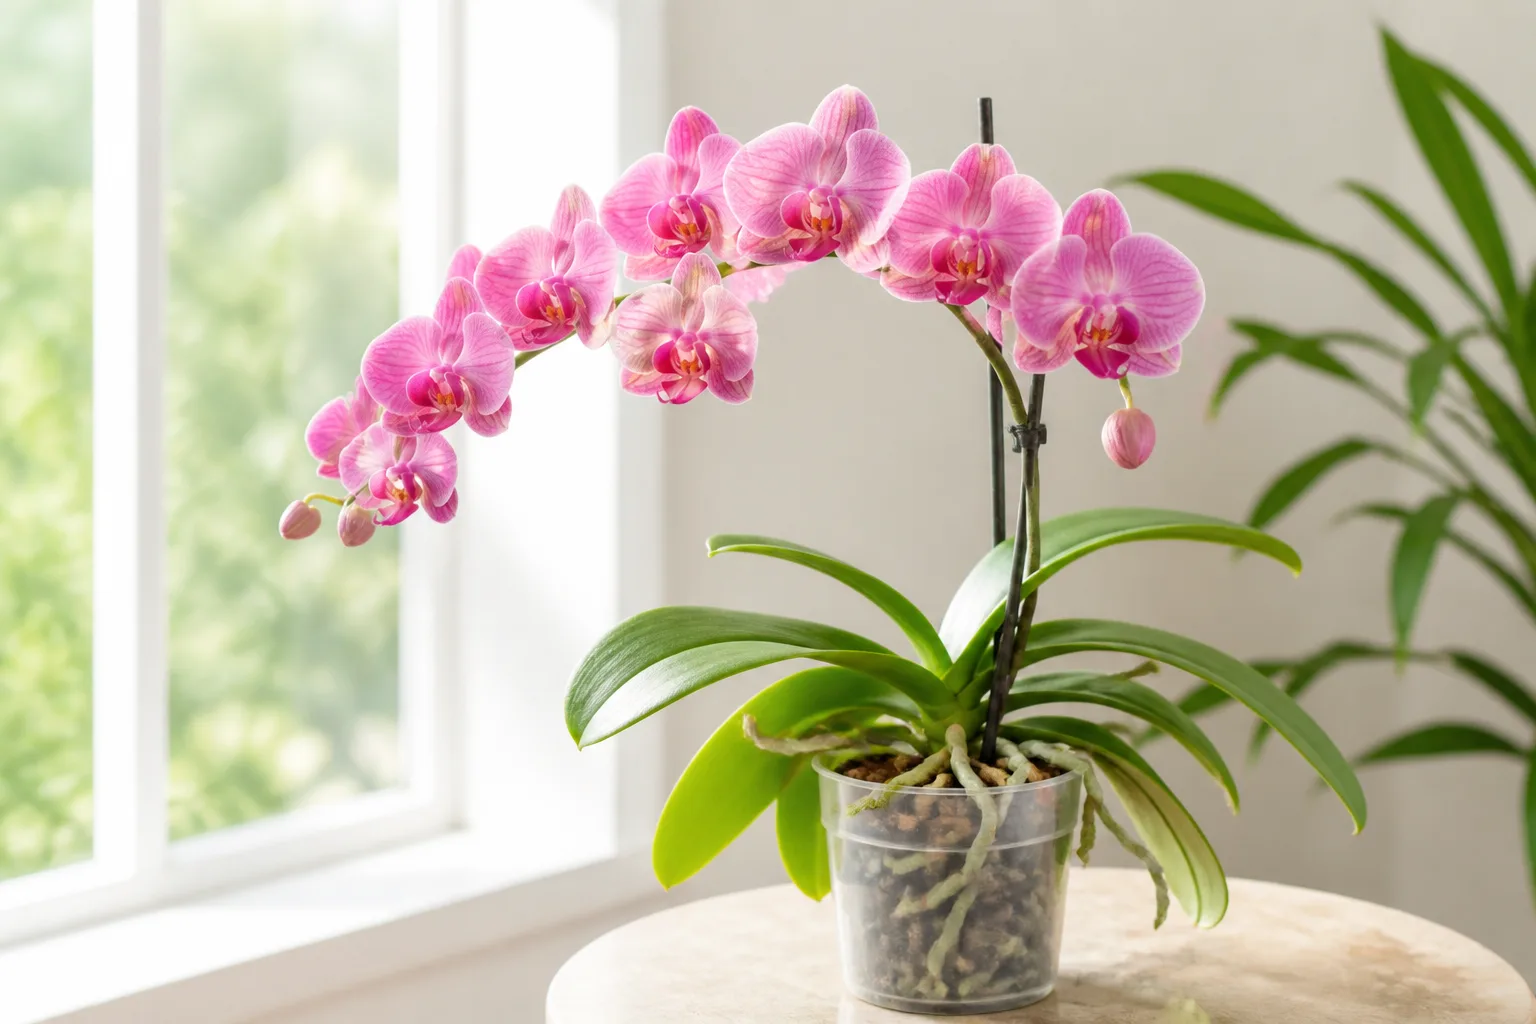
If your orchid arrived in full bloom and now looks stalled, do not assume you have failed. Most supermarket and gift orchids are Phalaenopsis, or moth orchids, and they are durable houseplants when their roots get the combination they actually need: moisture, air, light, and time to dry slightly.
The routine below is designed for a typical indoor Phalaenopsis. Other orchids can have different temperature, light, and watering preferences, so use the plant tag or botanical name before applying it wholesale. The goal is not a perfect weekly ritual; it is a small set of observations that tells you what to do next.
The orchid care rule that keeps most plants alive
Keep the orchid in bright filtered light, water the root zone thoroughly when the medium is nearly dry, and let every drop drain before the plant goes back into its decorative pot. That one sequence prevents the two most common failures: a plant that is chronically dim and a plant whose roots stay wet long enough to deteriorate.
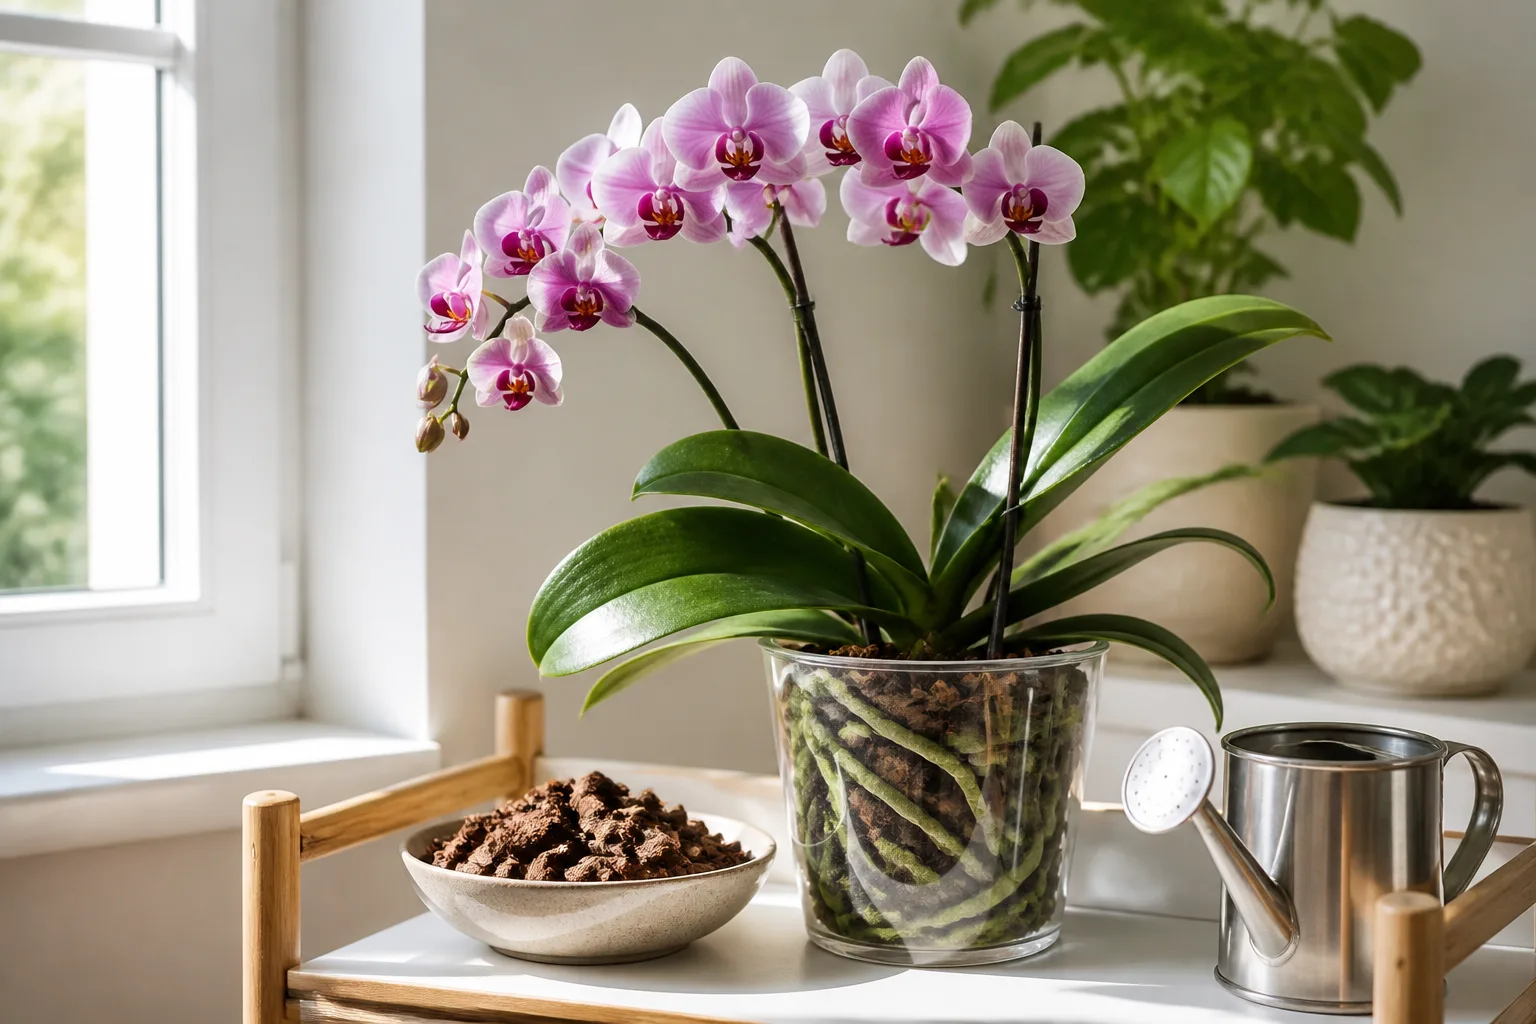
Phalaenopsis are epiphytes. In nature, their roots grip branches rather than sitting in garden soil, so the roots need access to air as well as water. The American Orchid Society’s Phalaenopsis culture sheet and NC State Extension’s plant profile both describe the warm, bright, porous, well-drained conditions that make this group manageable indoors.
1. Identify the orchid before you copy a schedule
Start with the flowers, leaves, and label. A broad-leaved orchid with arching sprays of rounded flowers is often Phalaenopsis, but a cane-form Dendrobium, a bulb-form Oncidium, and a terrestrial Paphiopedilum do not all want the same dry-down or temperature cue. A generic “water every Sunday” rule is therefore less reliable than identifying the plant first.
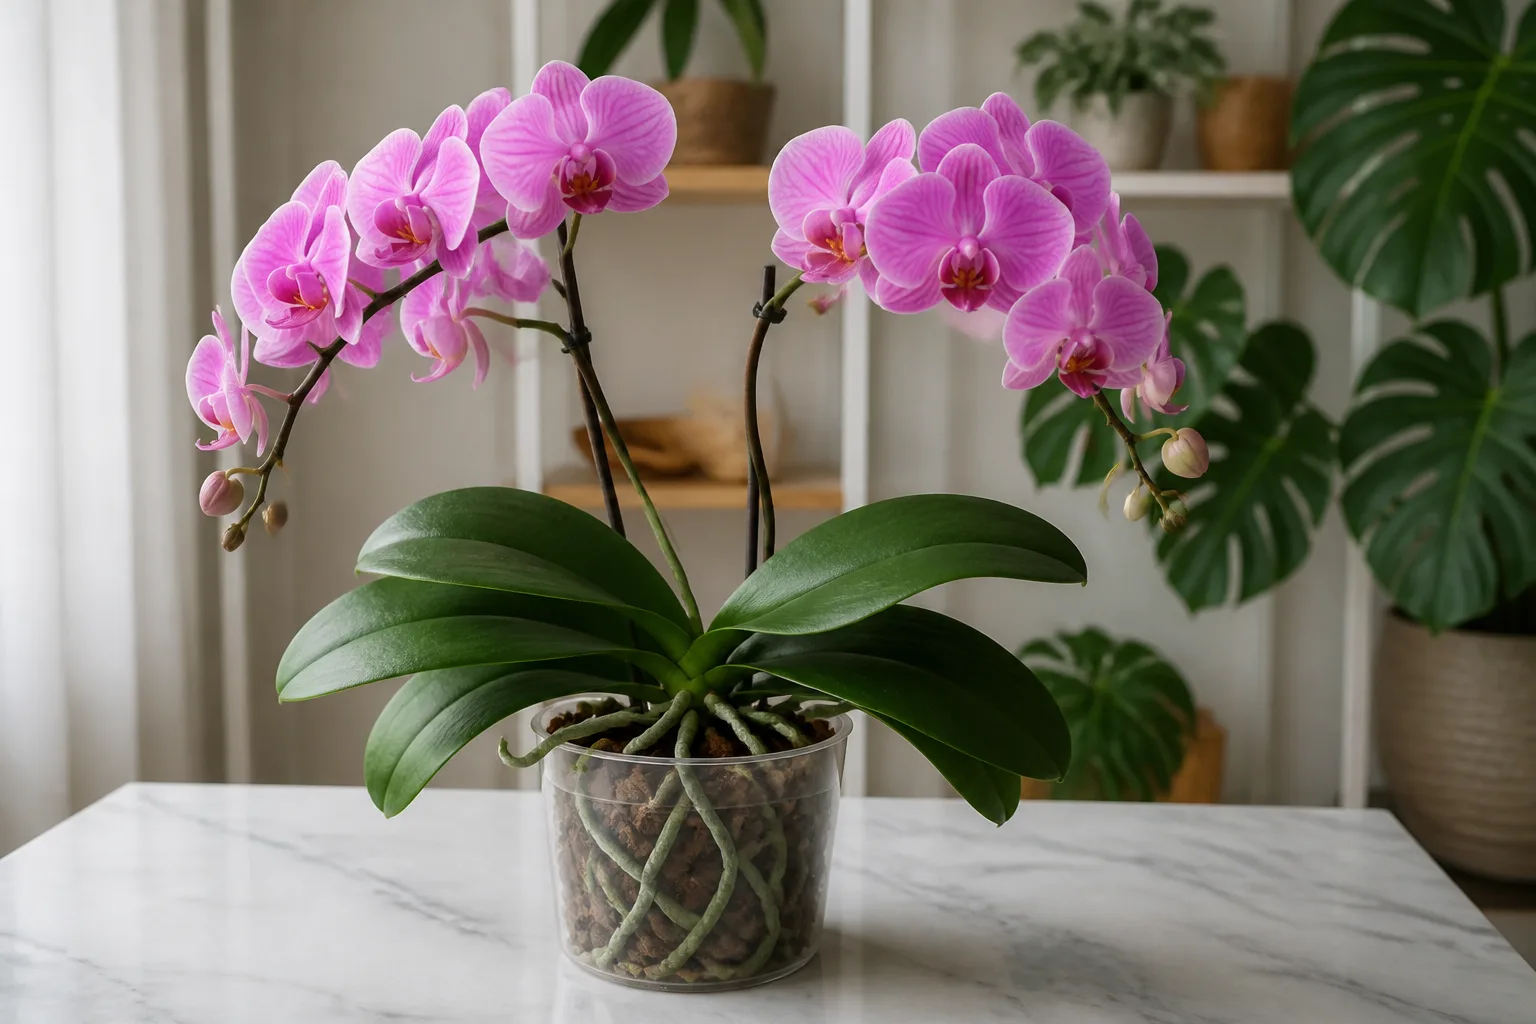
For a Phalaenopsis, expect thick, leathery leaves arranged in a low rosette and fleshy roots that may be visible through a clear pot or rise above the medium. The roots may look dramatic without being a problem: aerial roots are part of the plant’s epiphytic habit and should not be cut off simply because they leave the pot.
If the tag says only “orchid,” treat the care below as a starting point, then watch how the medium and roots respond. A plant that dries in three days beside a sunny window needs a different check interval from one in dense moss in a cool room.
Give a newly purchased orchid a short inspection before you rearrange it. Check for insects, a waterlogged sleeve, and a pot hidden inside a decorative container; many gifts are not actually draining until the inner pot is lifted out. Let it adjust in a bright, stable location for several days unless the medium is clearly failing or pests are present.
2. Put the plant in the right light
Give a moth orchid bright, indirect or filtered light. An east-facing window is an easy default; a bright west- or south-facing window can work when a sheer curtain or a little distance softens the strongest afternoon sun. The American Orchid Society notes that Phalaenopsis can grow in a bright window with little or no direct sun, while RHS guidance recommends brighter winter light and protection from harsh summer sun.
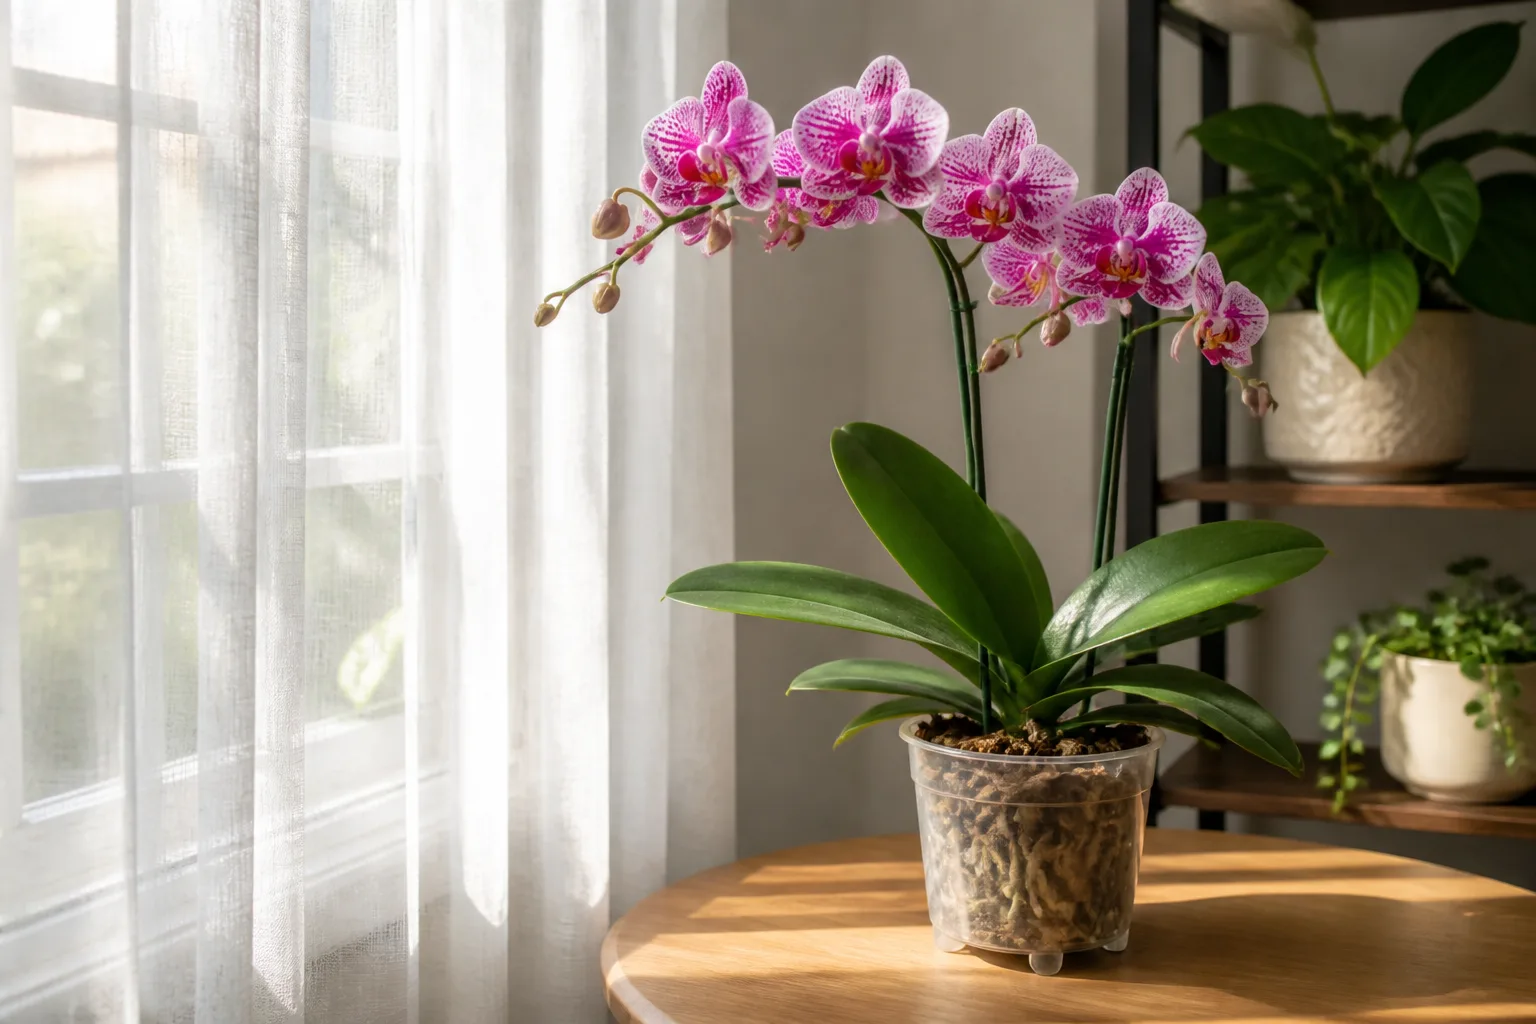
Keep the plant close enough to receive useful daylight, but not pressed against hot glass. A dark corner may preserve green leaves for a while, yet the plant may not make enough energy for new leaves or a flower spike. If your room has no bright window, a suitable LED grow light can fill the gap; keep it on a consistent schedule and follow the fixture’s distance guidance rather than placing it directly against the foliage.
Use the leaves as a light meter
Leaf color is a clue, not a laboratory measurement. Healthy leaves are usually medium green and firm. Very dark green leaves, long gaps between leaves, or a plant that produces leaves but never spikes can suggest insufficient light; a bleached patch or crisp tan area on the window-facing side points more toward excessive or abruptly changed light.
Change one variable at a time. Move the pot back from the glass or add a curtain if the leaf is scorching; move it closer gradually if the plant is very dark and inactive. Do not respond to a no-flower problem by adding fertilizer while leaving the plant in a dim spot—light is the energy source that makes both growth and flowering possible.
3. Water by the roots, not by the calendar
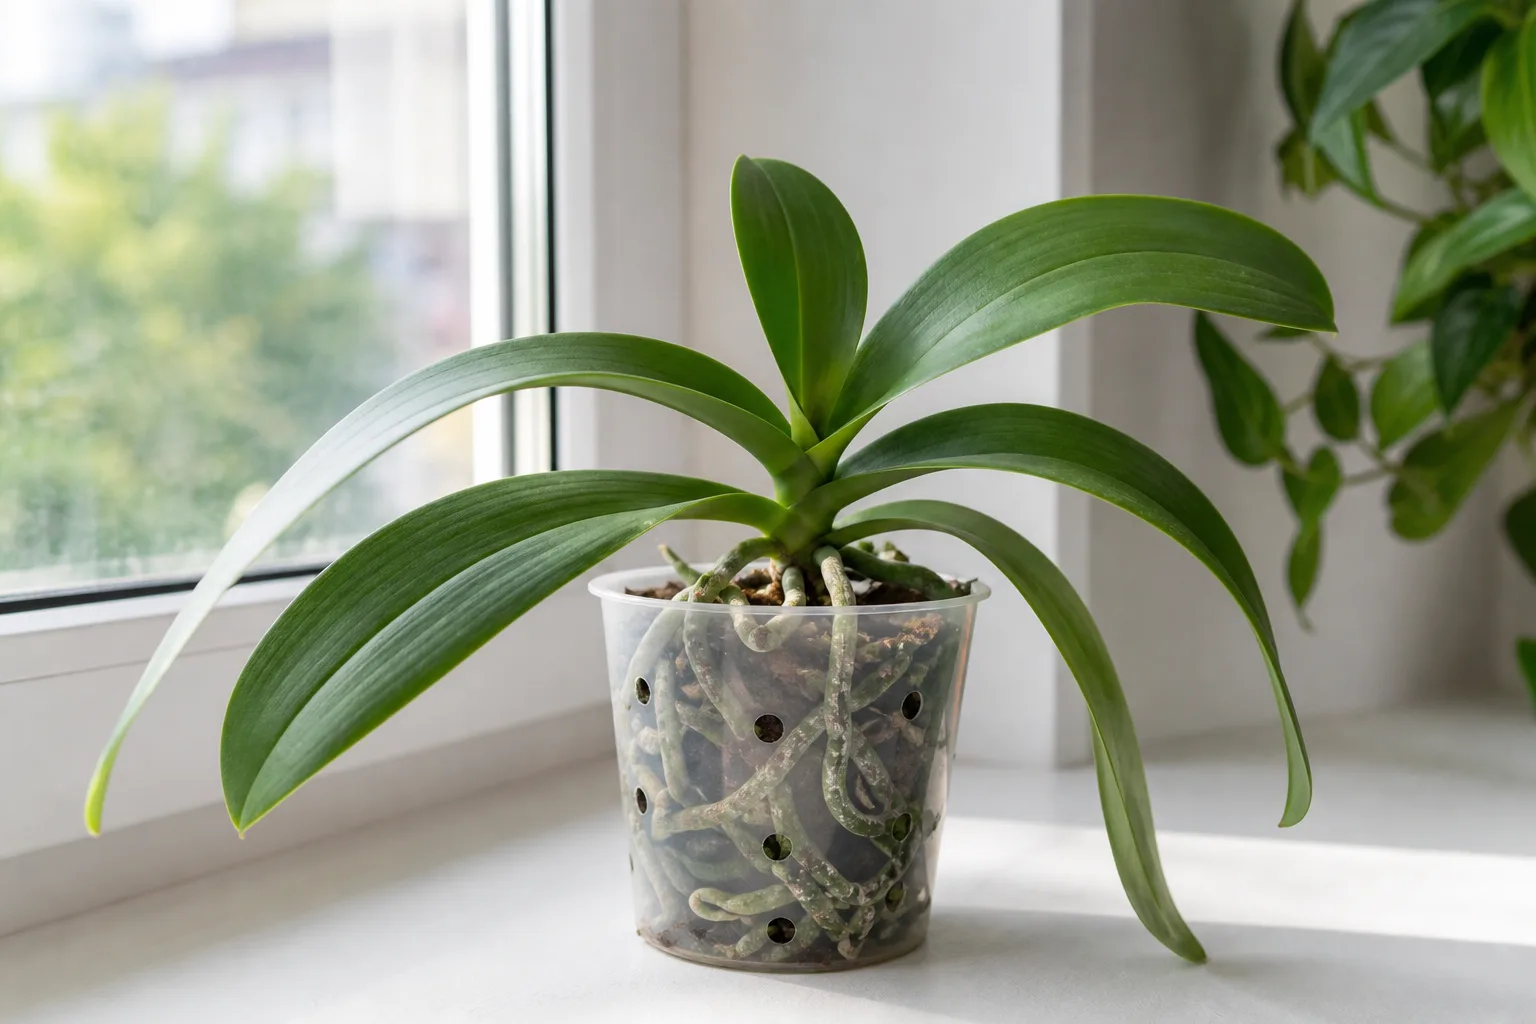
Water when the medium is nearly dry, not simply because seven days have passed. In a clear pot, roots that are green and plump have recently absorbed water; roots that look silvery or pale are drier. In an opaque pot, check the weight, feel the upper medium, or slide a wooden skewer into the bark and inspect what comes out.
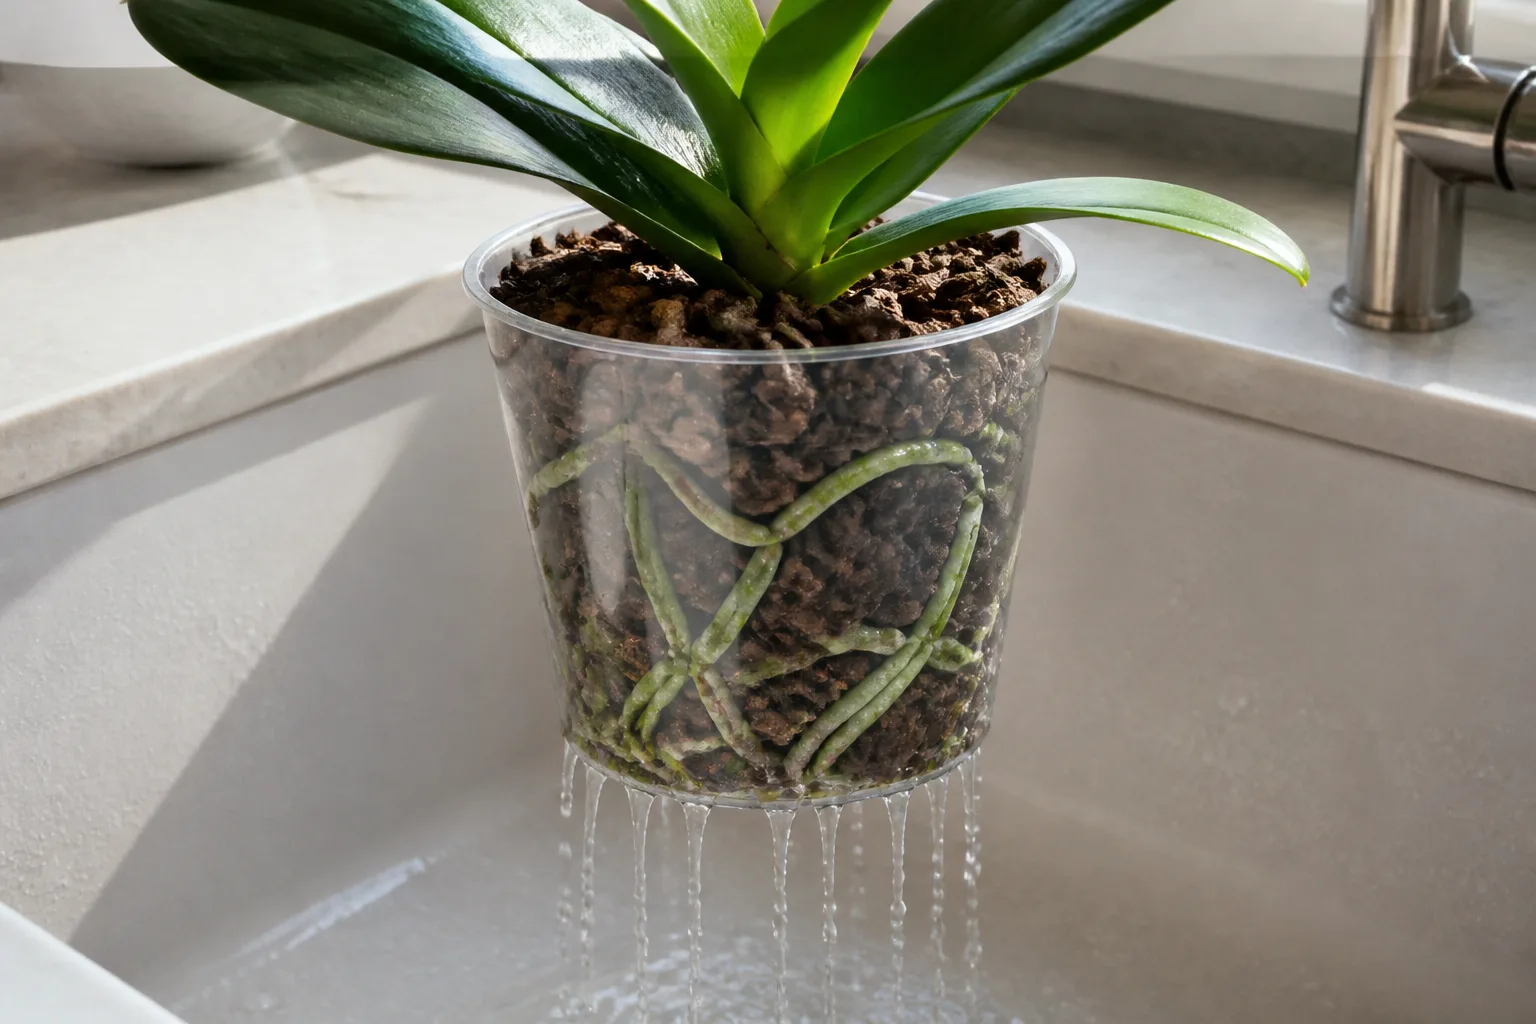
The interval can be several days in a hot, bright, dry room or closer to two weeks in a cool, dim room, especially when moss is packed tightly. NC State Extension gives weekly watering as a common mature-plant baseline while also noting that heat can require more frequent watering; the American Orchid Society makes the broader point that Phalaenopsis should be watered thoroughly and not again until nearly dry.
Do not wait until every root and leaf has collapsed. Phalaenopsis have no large water-storage organ besides their leaves, so a plant can be harmed by repeated complete drying as well as by standing wet. The useful target is a partial dry-down: enough air returns to the root spaces, but the plant is rehydrated before the leaves become permanently stressed.
If you are unsure, make the decision in two stages. First, test the center of the pot, because the surface can look dry while the roots are still wet; second, lift the pot again after watering so you learn the difference between a hydrated and a dry container. That small baseline is more dependable than copying a friend’s interval, especially when two orchids sit in different media.
The soak-and-drain routine
Take the inner pot to a sink or tub and use tepid water. Wet the bark or moss evenly until water runs from the drainage holes; if the medium has become bone-dry and water races down the sides, give it a second pass after the first wetting. Let the pot drain fully, then empty any water trapped in the cachepot or saucer before returning the orchid to its display spot.
Water in the morning when possible. This gives splashed foliage and the crown time to dry, and it makes it easier to notice whether the pot is still draining. Never leave the lower portion of the inner pot submerged as a shortcut to humidity: roots need oxygen, and prolonged saturation is a root-rot risk.
4. Match watering to bark, moss, or a mount
The growing medium changes the watering equation. Chunky bark has large air spaces and usually dries faster. Sphagnum moss can hold water for much longer, especially when it is tightly packed around a young plant. A mounted orchid has no pot reservoir at all and can dry very quickly; Ohio Tropics’ practical Phalaenopsis work shows why mounted plants may need much more frequent attention than potted ones. (Ohio Tropics)
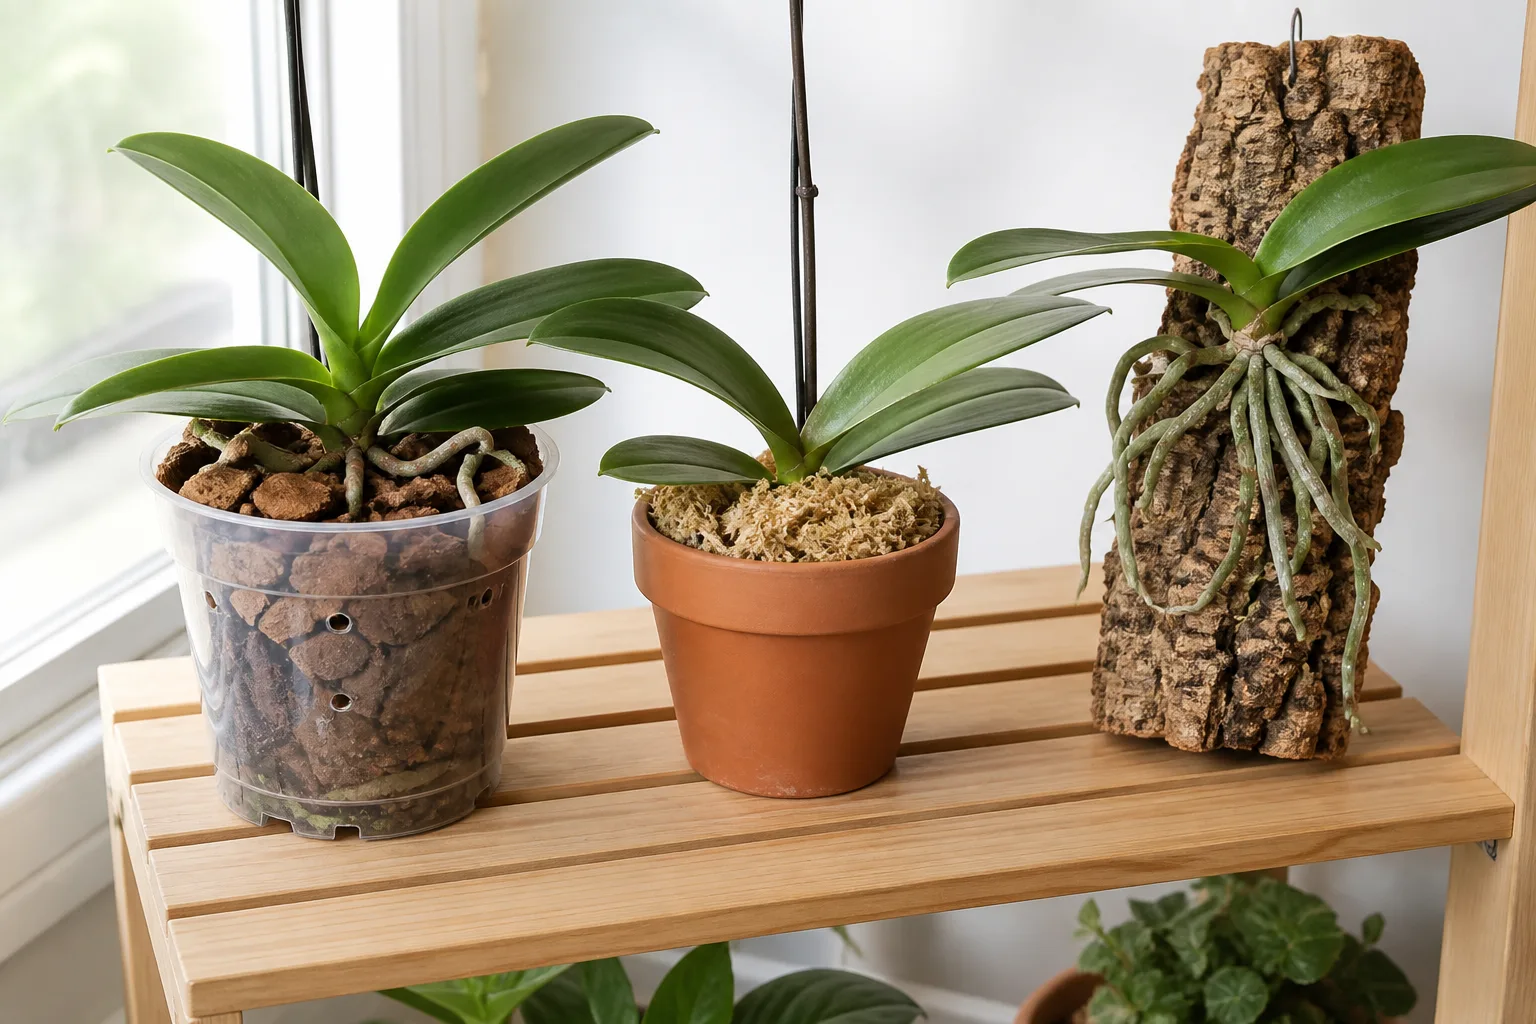
Neither bark nor moss is automatically the correct choice. Bark is often easier to inspect and forgiving for a beginner who tends to overwater. Moss can work well when it is loose, the pot drains freely, and the grower waits for the center to approach dryness instead of watering the surface alone. If the outside looks dry while the middle stays cool and wet, extend the interval or plan a repot into a more open medium.
Avoid ordinary garden soil or a dense all-purpose potting mix. The University of Florida IFAS orchid guidance describes the open structure provided by orchid media such as bark, tree-fern fiber, charcoal, and porous rock. The exact recipe matters less than reliable drainage and enough air around the roots.
The ice-cube question needs nuance. A small Ohio State study found no measured harm to Phalaenopsis flower, leaf, or root health under a specific three-ice-cubes-per-week bark setup, with the decorative pot emptied afterward. (Ohio State University) That does not make ice mandatory or universal: a fixed dose cannot account for pot size, moss, heat, light, or humidity, so a tepid soak-and-drain routine is easier to adjust when the plant’s actual roots need more or less water.
5. Keep water out of the crown and improve airflow
The crown is the central point where new leaves emerge. Water trapped there can encourage crown rot, especially in a cool room or when the plant stays damp overnight. Pour onto the medium rather than into the leaf rosette; if water does collect in the crown, wick it away gently with the corner of a paper towel and improve airflow around the plant.
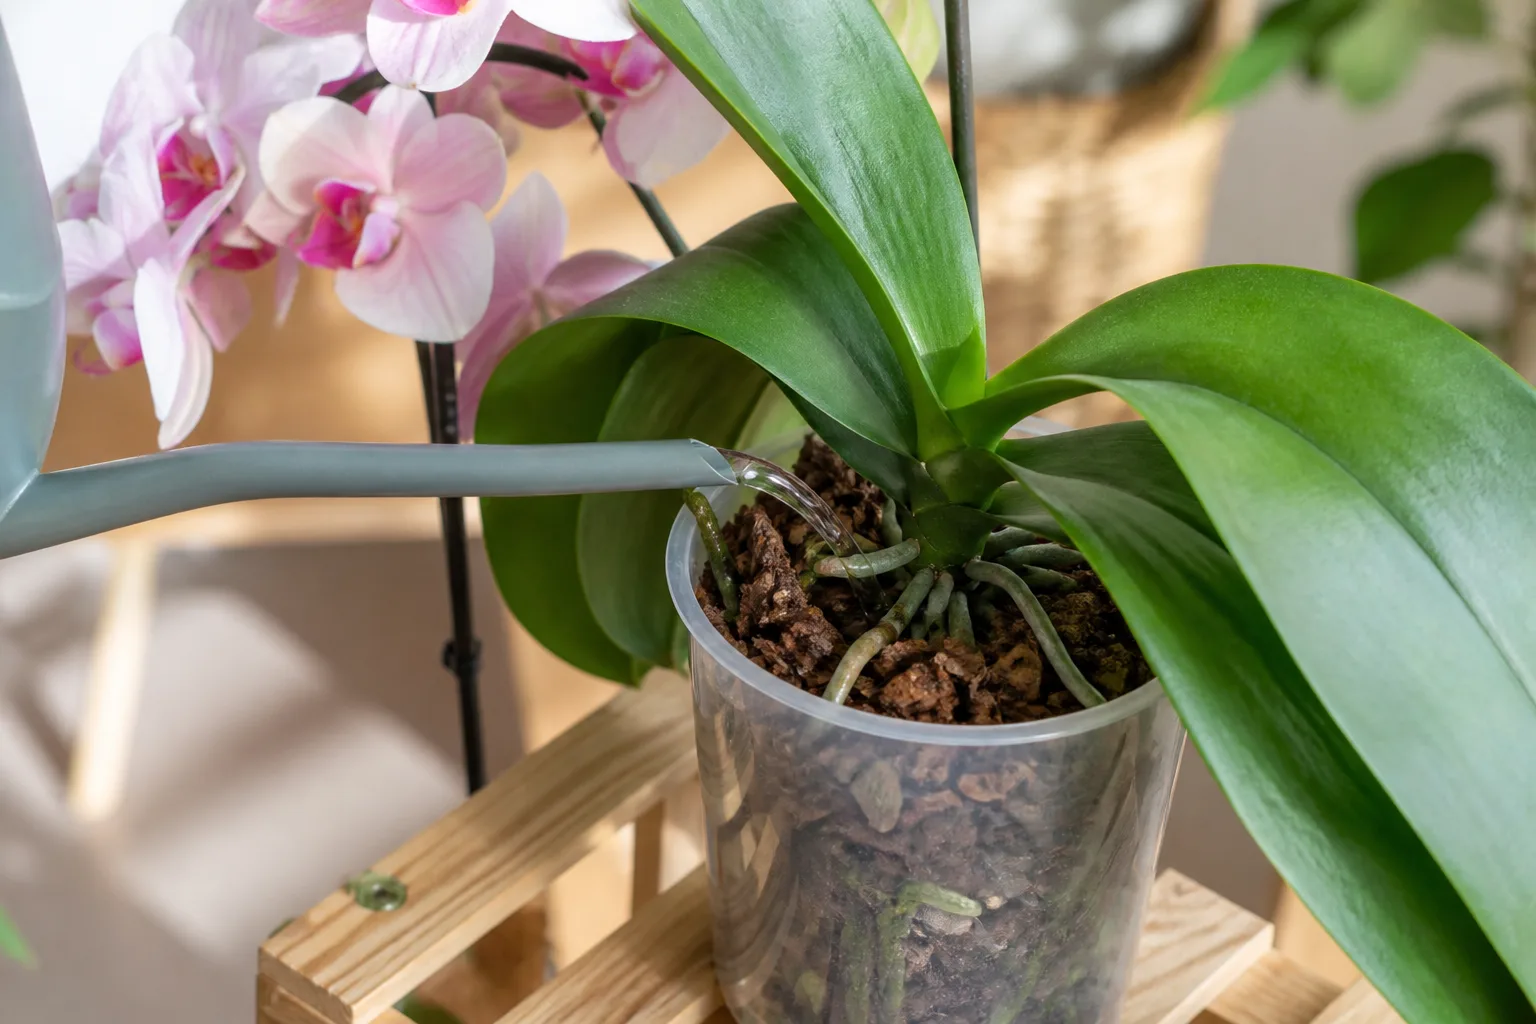
Good air movement does not mean a constant blast from a fan or HVAC vent. Use a gentle room fan, an open space between plants, or normal household circulation. Keep the orchid away from heating vents, cold drafts, and a drafty exterior door; sharp temperature swings can stress roots and developing buds even when the room’s average temperature looks acceptable.
Humidity is helpful but not a substitute for drainage. A pebble tray can raise moisture immediately around a plant when the pot sits above the waterline, never in it. If you use a humidifier, measure the room with a hygrometer and keep air moving; a closed, wet, stagnant corner invites disease.
6. Feed lightly while new growth is active
Fertilize during active growth, not automatically every week of the year. Use a fertilizer labeled for orchids or a balanced soluble fertilizer diluted according to its label. A weak, consistent application is safer than a strong dose intended to force flowers, and the American Orchid Society describes reduced-strength feeding schedules for bark-grown Phalaenopsis.
Never use fertilizer to compensate for poor light, rotted roots, or a medium that remains wet. A plant with damaged roots cannot use a heavy feeding well, and excess salts can accumulate in the medium. Follow feeding with occasional plain-water flushing when the medium and pot allow it, and reduce or stop feeding during a cool, dark winter rest.
7. Use temperature to support reblooming
An orchid that has dropped its flowers may simply be finishing a normal bloom cycle. Keep caring for the leaves and roots while the plant stores energy for its next one. The American Orchid Society’s reblooming guidance frames the problem usefully: the plant must be healthy, it must have made enough stored energy, and it must receive the seasonal cue particular to its genus.
For many Phalaenopsis, a modest drop in nighttime temperature in autumn helps signal flower-spike formation. Keep the plant warm overall, but let it experience a cooler night near a bright window if that spot remains safe from cold glass and drafts. Do not push a sick or recently repotted orchid into a temperature experiment; first restore firm roots, usable light, and steady watering.
If a healthy plant produces leaves but no spike, check light before buying a bloom fertilizer. Also consider whether the plant sits in a thermally constant interior room. The RHS suggests a slightly cooler location for a period when a large healthy moth orchid has not flowered, but a hybrid’s response can vary, so treat the cue as a gentle trial rather than a guarantee.
Do not confuse a normal rest between flower cycles with dormancy that requires neglect. Keep checking the roots and leaves while the plant is out of bloom, and adjust watering to the slower dry-down of your room. A healthy orchid can look quiet for weeks while it is making roots or storing energy for the next spike.
8. Prune flower spikes with a reason
Wait until the flowers have faded before making a major cut. A green flower spike may still branch from a node, while a spike that turns uniformly yellow or brown has finished and can be removed near its base. Cutting every spike immediately is tidy, but it removes a possible secondary branch; leaving a dead, dry spike serves no purpose.
Use clean, sharp pruners. For a healthy green spike, you can cut just above a strong lower node if you want to encourage a side branch, accepting that the plant will spend energy on that extra bloom attempt. If the orchid is weak, root-damaged, or crowded, cut the spike at the base and let the plant rebuild leaves and roots instead of asking it to support another flush of flowers.
Remove fully dead leaves only when they detach easily or have dried completely. Do not pull on a partly attached leaf or cut into the crown to improve appearance; unnecessary wounds create opportunities for infection.
9. Repot when the medium fails
Repot because the root environment has failed, not because the calendar says the plant deserves a larger pot. Good reasons include bark that has decomposed into a dense, slow-drying mass, a sour or constantly wet center, roots that are mostly dead, or a container that no longer supports the plant. A few aerial roots spilling over the rim are normal and do not, by themselves, require intervention.
Use a pot with drainage and choose a size that fits the remaining roots snugly. Overpotting adds a large volume of medium that stays wet longer; the RHS moth-orchid guide recommends avoiding excess compost for exactly that reason. Routine repotting is easiest after flowering, but urgent root or medium failure takes priority over a convenient season.
A safe repotting sequence
Prepare fresh orchid bark or another airy orchid medium, a clean pot, and sterilized cutting tools. Slide the plant out gently, remove old medium from the roots, and separate firm roots from roots that are brown, hollow, or mushy. Savvy Gardening’s Phalaenopsis repotting walkthrough is useful for the practical order of the job: inspect first, trim only what is unhealthy, then settle the plant into a modest container with drainage.
Keep the stem and crown at the same height they occupied before. Spread healthy roots through the medium without packing it into a solid mass, leave aerial roots exposed, and secure a wobbly flower spike or plant with a stake if needed. Water the fresh medium thoroughly once, let it drain, and wait to resume regular fertilizer until the plant has begun to reestablish; do not turn a routine repot into a chain of extra changes.
After repotting, place the orchid back in familiar light rather than adding direct sun to “speed recovery.” One thorough watering settles the medium; repeated watering because the roots were disturbed only reduces the air available to them. Watch for new green root tips or a new leaf over the following weeks, but do not unpot the plant again to check progress unless the mix stays wet or the plant declines.
10. Scout pests and diagnose decline early
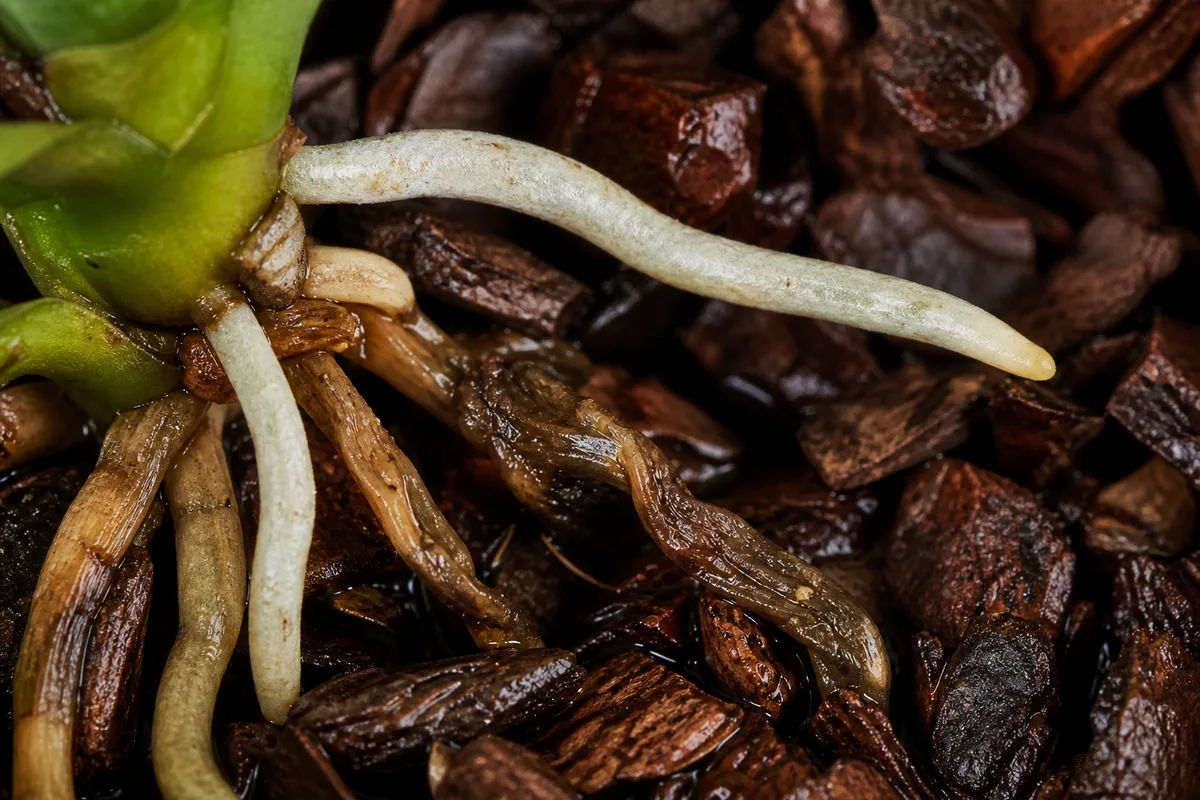
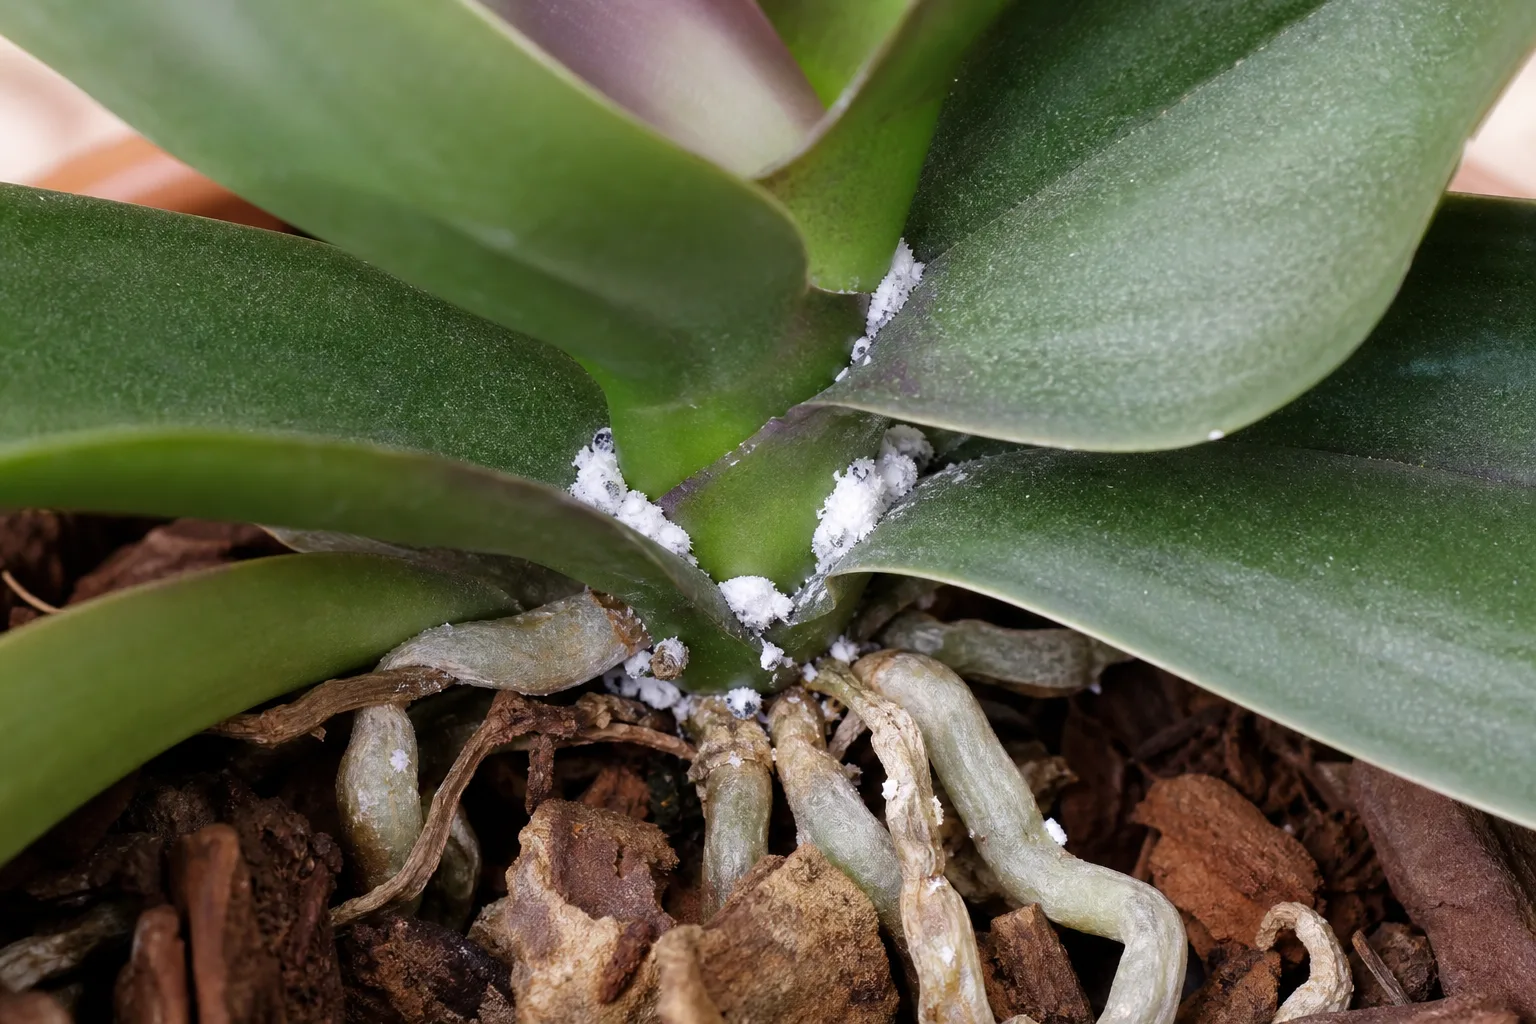
Inspect the leaf undersides, crown, flower stems, and root zone once a week. Scale can look like fixed bumps; mealybugs resemble white cottony clusters; thrips can scar flowers and leaves. Sticky residue, stippling, distorted new growth, or an unexplained loss of vigor is a reason to examine the plant closely rather than increase watering or fertilizer.
Isolate a suspected pest or disease problem from other plants. Wipe visible insects when practical, rinse the plant carefully, and use only a product whose label permits the crop and indoor use. UF/IFAS emphasizes sanitation, clean tools, dry foliage, and isolation as part of orchid disease management; those simple steps often matter more than reaching immediately for a strong spray.
Take a photograph before treating if the symptom is unfamiliar, and inspect again after several days. A pest that disappears from the top of a leaf may still be hiding in the crown, along the flower spike, or under a leaf fold. Repeated contact treatments may be needed for insects at different life stages, but the product label—not a homemade concentration—should determine the interval and application method.
Root rot, wrinkled leaves, and yellowing
Wrinkled leaves do not prove that the orchid needs more water. They can reflect genuine dehydration, but they can also appear when roots have rotted and can no longer move water into the plant. Check the medium and roots before watering again: a wet pot with brown or mushy roots needs an inspection and repot, while a light pot with silvery firm roots needs a thorough drink.
Yellowing is equally contextual. One old lower leaf that slowly yellows may be natural aging; several yellowing leaves, a soft crown, or a sour wet medium is more concerning. If the plant is declining, stop the calendar watering, inspect the roots, remove only rotten tissue with clean tools, and repot into fresh airy medium. Do not mist a failing root system and call that recovery—leaves cannot replace healthy roots.
Brown spots on flowers can be fungal or environmental, while crisp pale patches on leaves are more consistent with sun stress. When the visual pattern is spreading, isolate the plant and seek a diagnosis from an extension service or orchid society rather than treating every mark as overwatering.
A simple orchid care rhythm for each season
In spring and summer, place the orchid in bright filtered light, check the roots and medium every few days, water when nearly dry, and feed lightly while new leaves or roots are growing. Hot weather may shorten the interval; it does not justify leaving water in the decorative pot. In a dry room, improve ambient humidity and airflow together rather than spraying the crown.
In autumn, watch for the cooler nights that can help a healthy Phalaenopsis set a spike, but protect it from drafts. In winter, brighter light may be valuable while growth and water use slow; water less often only because the medium dries more slowly, not because a winter rule says the plant must be thirsty.
Once a week, make the same quick inspection: lift the pot, look at the visible roots, check the medium’s center, scan for pests, and look into the crown. This takes less time than rescuing a plant that has been watered blindly for a month, and it gives you a record of what changes when you move the orchid or the season shifts.
Conclusion
Keeping an orchid alive is mostly an exercise in matching care to evidence. Give a Phalaenopsis bright filtered light, an airy medium, a complete soak followed by full drainage, gentle feeding during growth, and enough seasonal variation to support reblooming. Then let the roots, leaf texture, pot weight, and medium—not a rigid calendar—tell you when to act.
The best intervention is often a small one: move the pot away from harsh sun, empty the cachepot, wait another few days, or isolate a pest before it spreads. When you do need to prune or repot, make the change for a clear reason and give the plant a quiet recovery period afterward.



