Sunburn on Houseplants: Scorched Leaf Signs & Fixes
Diagnose indoor leaf scorch in five minutes, stop the burn today, then acclimate over 1–2 weeks without guessing.
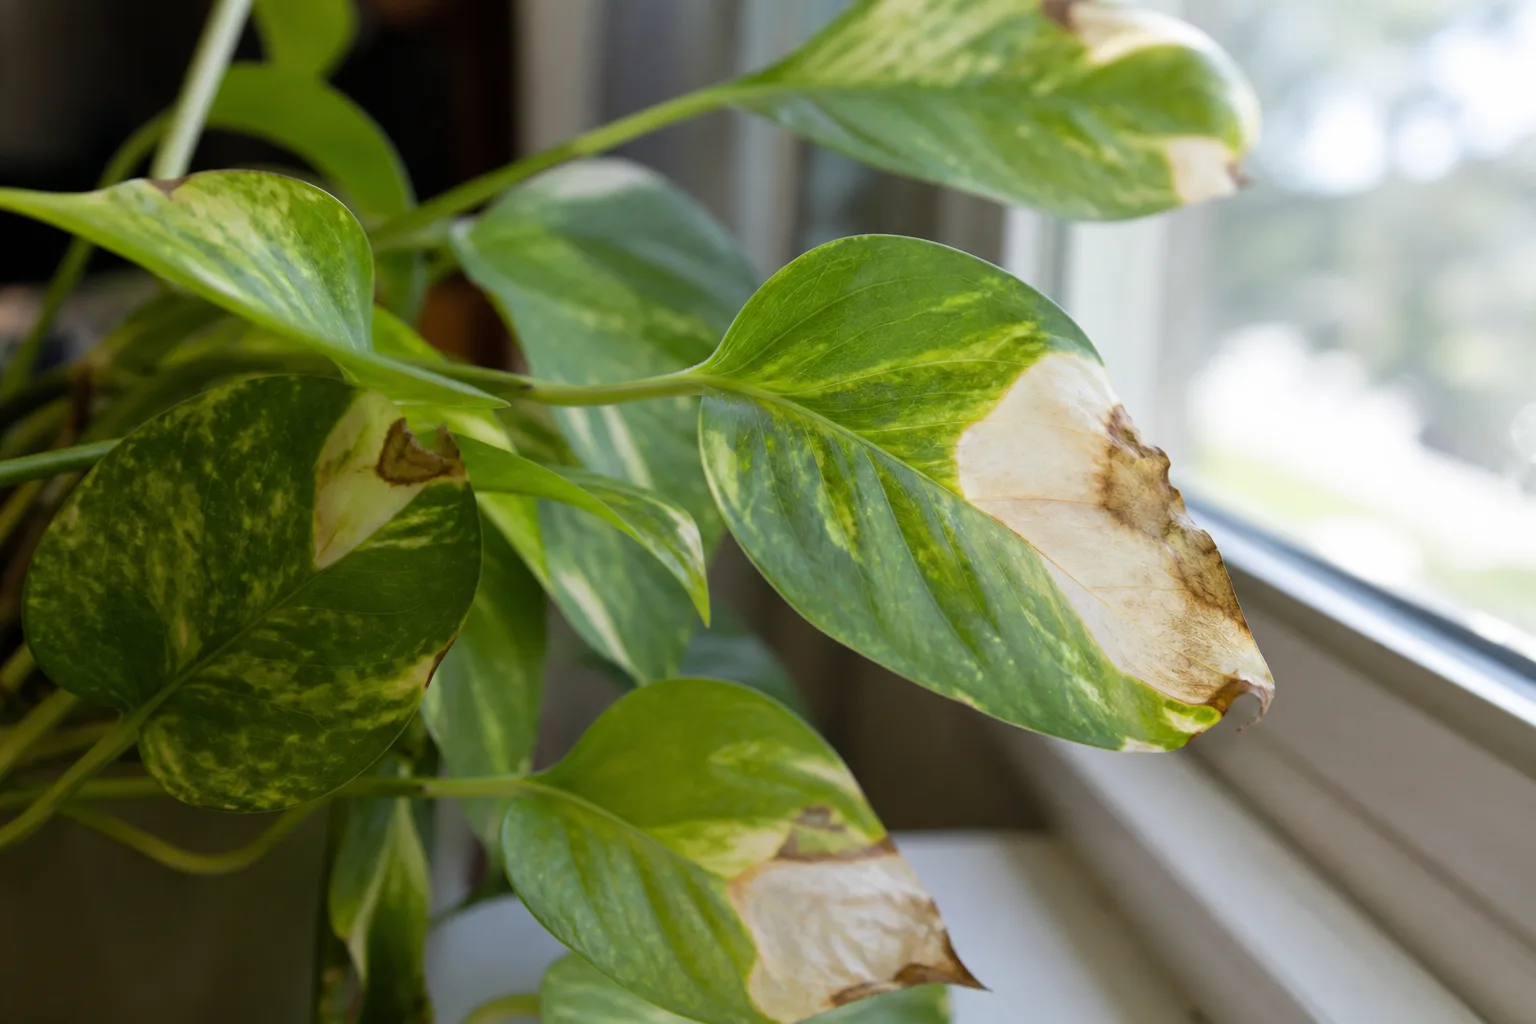
You moved a shade-grown pothos to a bright south sill to “fix” leggy growth. Three days later the window-facing leaves show chalky patches that turn papery brown. The shaded side still looks fine. That directional bleach-and-crisp pattern is classic sunburn — light injury, not a fungus you spray away.
Indoor scorch is usually sudden. Leaves grown under softer light cannot handle a leap into harsh direct rays through glass, a patio afternoon, or a grow light parked too close. Damaged tissue does not re-green. What you can do is stop the exposure, stabilize the plant, trim only what is fully dead, and raise light the slow way next time.
This hub covers signs, how to separate sun scorch from fertilizer burn and edema, first aid, acclimation, and prevention — including measured LeafyPixels cases so you can compare your room to something concrete.
What Sunburn and Leaf Scorch Mean Indoors
Sunburn (also called sun scald or light scorch on foliage) is tissue damage when light and heat load exceed what that leaf can tolerate in its current state. Missouri Botanical Garden’s broader scorch guidance describes browning, drying, and brittle tissue when plants lose water from leaves faster than roots can replace it — often under bright sun, heat, and wind — and notes sunburned patches on plants such as jade. Indoors the same physiology shows up as bleached or tan patches on the brightest face of the plant.
University of Georgia Extension is blunt about tropical foliage: many species evolved under forest canopies and are easily injured by strong light. Over-exposure shows as upright leaves and bleached, scorched foliage — their examples include Chinese evergreen (Aglaonema) and dumb cane (Dieffenbachia). Clemson HGIC adds that when a plant receives too much direct light, leaves bleach or scald and may die, especially after a move outdoors into full sun, and that light changes should be gradual.
Indoors, “too much light” rarely means the plant sat in a dark corner and somehow cooked itself. It almost always means a sudden increase in intensity: a new south window, summer angle shift, reflective patio door, or a bright LED dropped to a few inches above the canopy.
Why Window Glass Makes Scorch Worse
Clear glass does not block the intensity that burns shade-adapted leaves. Unshaded south and southwest windows often deliver “direct sunlight” conditions — UF/IFAS describes these as areas with nothing between plant and sun but clear glass, commonly over 1000 foot-candles at midday. Heat builds on the sill. Leaves pressed against the pane can cook even faster than leaves a few inches back.
Glass also creates sharp gradients. One side of the pot faces full sun while the far side stays in soft light. That is why sunburn is often one-sided. Cold glass can injure plants too, but the look differs — limp, water-soaked darkening rather than dry bleach. When blackening follows a chill, not a bright move, use the cold damage hub instead.
Sheer curtains, outdoor trees, and a few feet of setback convert harsh beams into the “high” or “bright indirect” band many tropicals prefer. You do not have to exile a plant to a hallway to prevent scorch; you need to break the midday blast.
What Scorched Leaves Look Like
Scorch announces itself with a timeline and a map. Damage appears within hours to a few days after a light jump. It concentrates on the brightest leaves and the parts of each leaf that faced the sun. Healthy shaded foliage nearby is the control sample that proves the diagnosis.
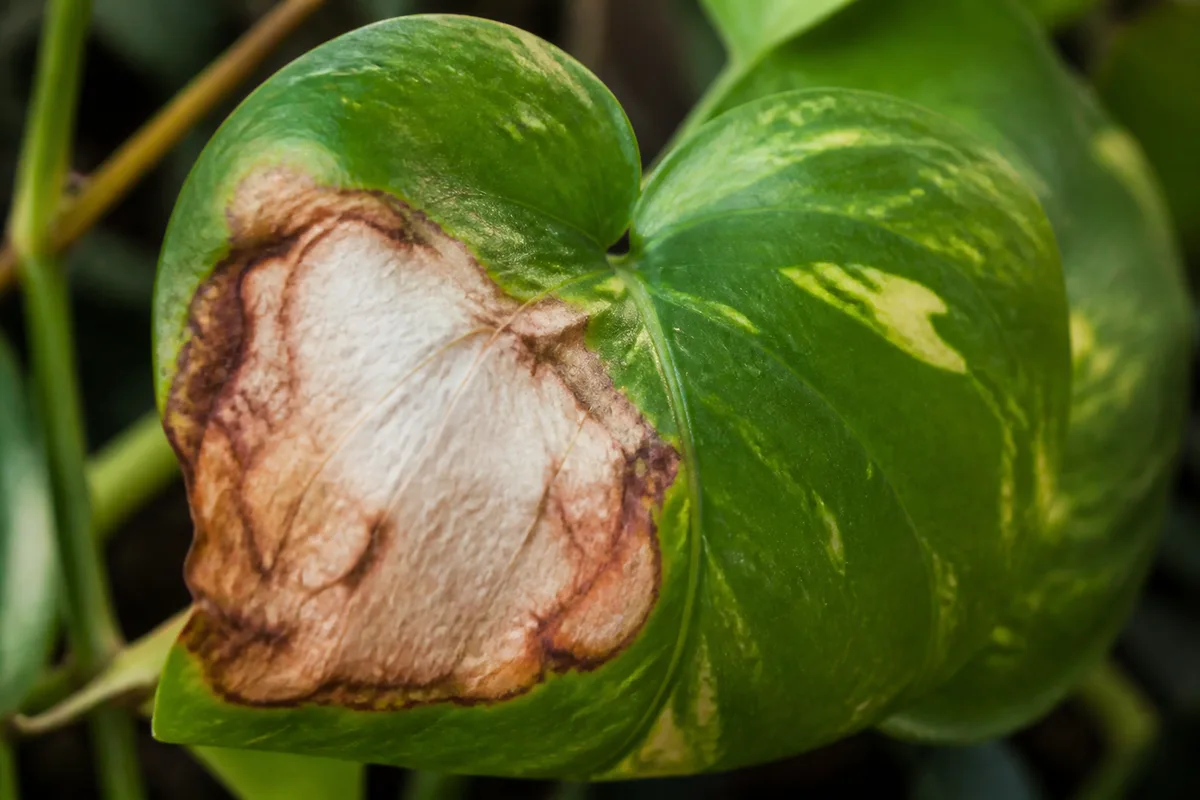
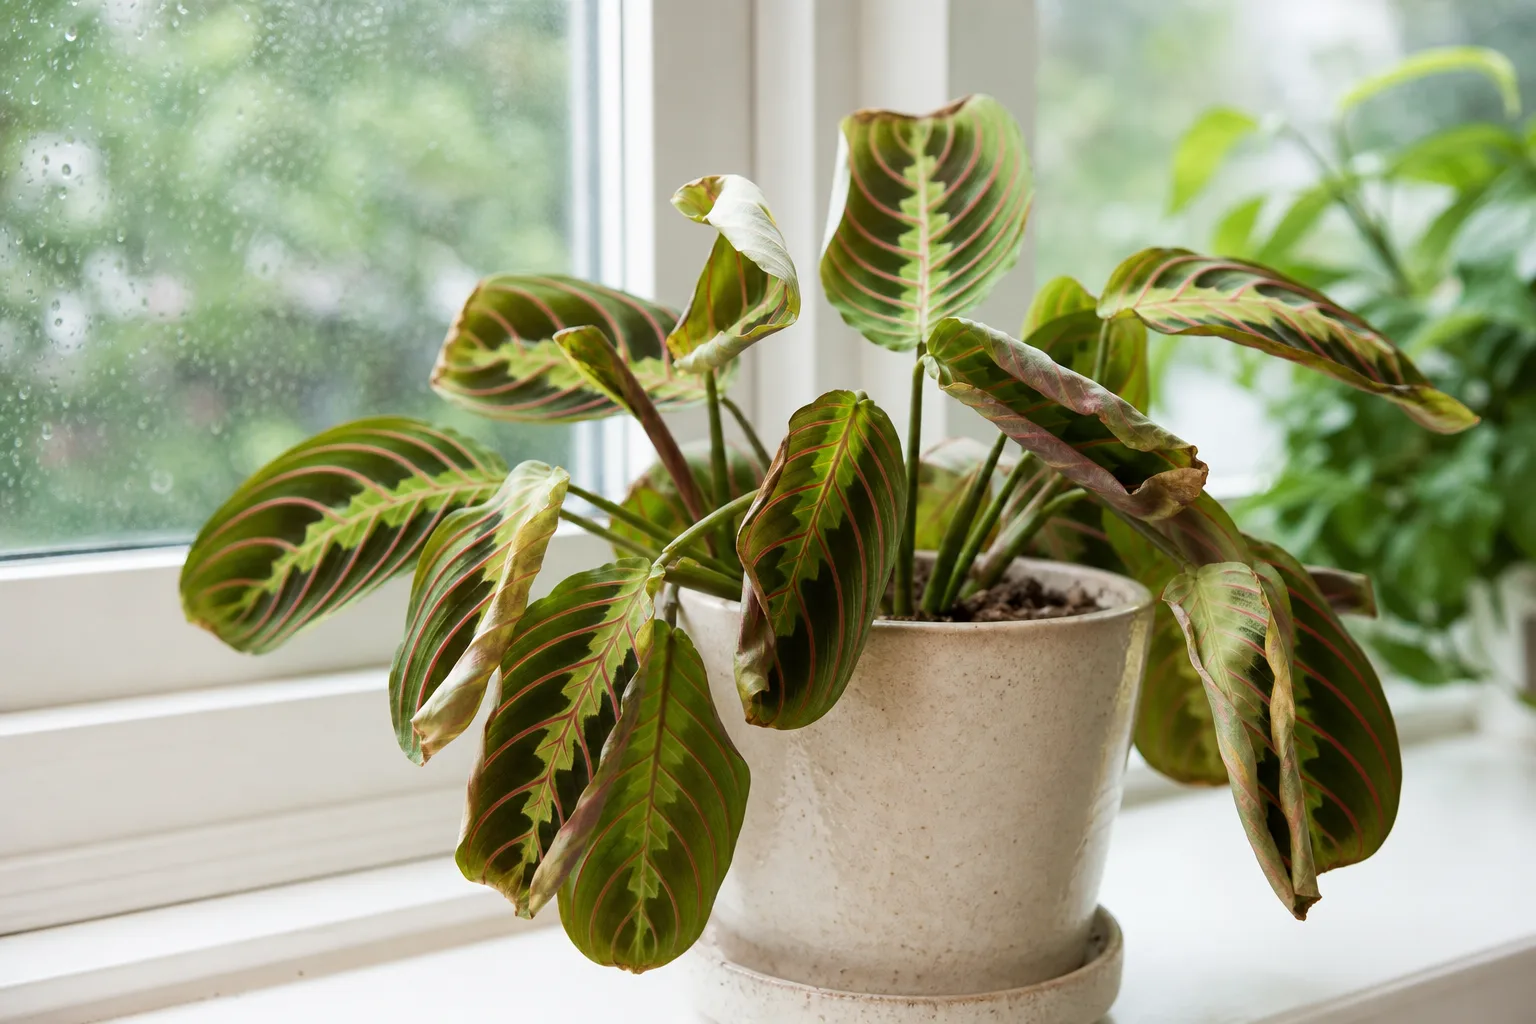
The Royal Horticultural Society describes the indoor pattern clearly: strong direct sun, such as a south-facing window in summer, can cause brown scorched patches and a washed-out look. Shade-loving plants may shrivel in positions that are too sunny. On variegated leaves, pale sections often burn first because they hold less protective pigment. RHS leaf-damage guidance also shows classic sun-scald patches on plants such as rubber plant (Ficus elastica) after too much direct sun.
Classic Bleached and Crispy Patterns
Expect some mix of these cues:
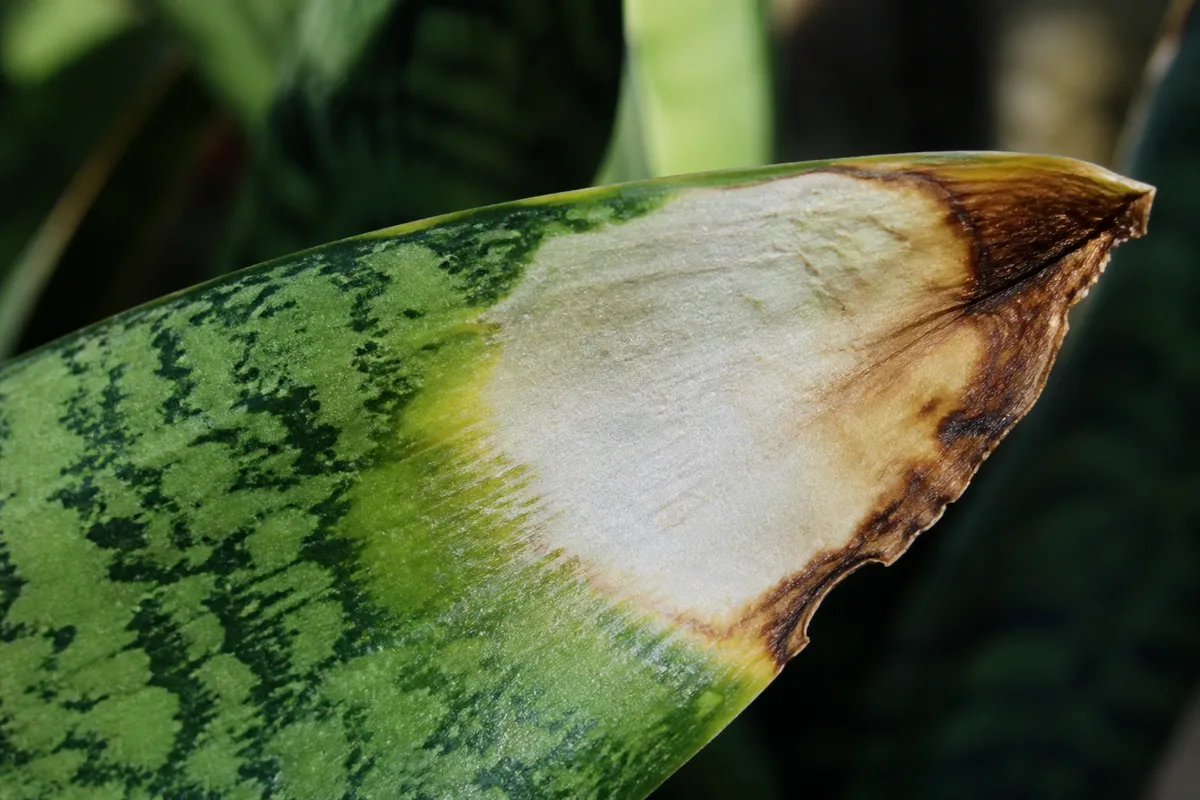
- Pale, white, tan, or yellow patches that later dry brown and papery
- Sharp edges between damaged and green tissue on the sunny face
- Damage worst on outer leaves or the window side of the canopy
- Soft new growth or thin variegated zones hit harder than tough older leaves
- No sticky residue, webbing, or spreading halo spots that scream pest or leaf-spot disease
Missouri Botanical Garden notes that plants getting too much sun may turn yellowish and develop tan or white patches in direct south or west exposure, and that moving a plant from shade into bright sun may cause sunburn — though sun-loving species usually adapt and produce better-adapted new leaves afterward.
If blooms look chalky on the glass side while foliage is only mildly stressed, petal bleach can outrun leaf scorch. Pair this page with faded flowers when open blooms washed out overnight after a bright move.
Scorch vs Nutrient Burn vs Edema
Brown crispy tissue is not always sun. Three common look-alikes — light scorch, soluble-salt (fertilizer) burn, and edema — need different first moves. Misreading them is how people fertilize a burned plant or shade an overwatered one.
| Pattern | Typical look | Where it sits | Timeline cue | First move |
|---|---|---|---|---|
| Sun scorch | Bleached → papery brown patches | Window / lamp-facing side | Hours–days after brighter light | Filter or pull back light; acclimate later |
| Nutrient / salt burn | Tip and margin browning, often even around the leaf | All around canopy; white crust on soil or pot rim | After heavy feeding or long salt buildup | Flush salts; stop fertilizer; check watering |
| Edema | Watery blisters under older leaves → corky tan scars | Mostly leaf undersides | Cool, humid, low-light, wet soil stretches | Water less; improve air and light |
Fertilizer and Salt Burn Look-Alikes
UGA Extension explains that over-fertilization dissolves into salty soil water that “burns” roots by pulling water from them. Soluble salt injury shows as leaf margin and tip burn; excess salts may form a whitish crust on the medium or pot rim. Clemson HGIC lists related symptoms: reduced growth, brown tips, lower-leaf drop, and wilting when salts build up, and recommends thorough watering with drainage so salts leave the pot.
Salt burn is rarely confined to the sunniest leaf face alone. If every leaf tip crisps while the plant never moved into brighter light, and you see crust on the soil, treat fertilizer load before you blame the window. For the dedicated salt path, use fertilizer burn on houseplants.
Edema Blisters Are Not Sun Scorch
Edema (oedema) is a water-balance disorder, not light cooking. Wisconsin Horticulture describes small translucent, fluid-filled blisters on the undersides of mostly older leaves, often starting at margins. Blisters can burst and scar into tan, corky tissue. It happens when roots take up water faster than leaves can lose it — warm moist soil plus high humidity, low light, cool air, or poor airflow.
University of Maine Extension likewise ties edema to excessive watering and low-light or humid stretches when plants cannot transpire fast enough. Scorch patches are dry and sun-mapped. Edema starts wet and blistered on the underside. Do not “fix” edema by blasting the plant with harsh sun; that stacks two stresses. Water less in cloudy periods, empty saucers, and improve spacing and light gradually.
Confirm Sunburn Before You Treat
Lock the diagnosis with three questions before you relocate, prune, or feed.
Did light intensity jump in the last week? New south sill, outdoor afternoon, sheer curtain removed, grow light lowered, or summer sun angle deeper into the room all count.
Is damage directional? Compare the brightest face to the shaded face. True scorch is asymmetric. Salt burn and many water problems are more even.
What does the tissue feel like? Sun injury goes dry and papery. Cold injury often looks limp and water-soaked first. Edema starts as raised blisters. Soft, foul stems point away from simple scorch entirely.
Penn State’s diagnostic lists include sunburn among causes of tip and foliage injury and remind growers that light can be too intense or insufficient — so confirm which extreme you have before you act.
Five-Minute Scorch Check
Run this pass before you change anything else:
- Photograph the window side and the room side of the same plant.
- Note any placement change in the past 14 days.
- Feel soil moisture at root depth and look for white salt crust.
- Flip older leaves and look for watery or corky underside blisters.
- Check for pests (webbing, sticky honeydew) that can mimic speckled damage.
If the cluster says low light — long internodes, small pale new leaves, lean toward the glass without bleach patches — you need more light, not less. That path lives on not enough light. If leaves blacken after a draft or porch delivery, open the cold-damage hub instead. For mixed browning without a clear light story, use indoor plant brown leaves and the houseplant symptom checker. For a short cross-species symptom overview once you already know you are looking at bleach patches, see the sunburn / scorched leaves symptom hub.
Common Triggers Indoors
Most houseplant sunburn traces to a short list of human moves, not mysterious disease. Knowing the trigger tells you whether to pull back permanently or only slow the transition.
Sudden Moves and Missing Acclimation
Shade-adapted leaves are thinner and less UV-hardened than leaves grown in brighter light. Yanking a nursery plant from a covered porch into unfiltered west glass, or sliding a shelf plant onto a summer sill overnight, is the classic burn script.
Clemson HGIC states that any changes in light intensity should be gradual. Maine Extension advises moving plants to sunnier outdoor spots gradually — for example increasing exposure over several days — because high heat and too much direct sun can cause sun scald. UGA’s acclimatization section is written mainly for greenhouse-to-home transitions, but the home lesson is the same: each big move is a new stress period, so raise intensity in steps.
A practical indoor schedule for many tropical foliage plants (staging guidance, not a universal species rule):
- Days 1–3: bright indirect only, or morning east light under a sheer
- Days 4–7: add 30–60 minutes of direct morning sun, then pull back
- Days 8–14: extend direct time slowly if the species actually wants it
- Watch new growth, not old scars, for success
If bleach appears at any step, hold or reverse one step. Do not fertilize during the transition to “help it toughen up.”
South and West Glass, Reflective Heat, and Grow Lights
South and west exposures deliver the longest and hottest direct beams in most homes. East light is usually safer morning sun. North light rarely scorches but often underpowers high-light plants.
| Window aspect (shade-leaning tropicals) | Midday risk | Safer first move |
|---|---|---|
| South / southwest, clear glass | Highest — often direct-sun band | Sheer, set back 2–3 ft, or east window |
| West, clear glass | High afternoon heat + late sun | Sheer or afternoon shade; watch sill heat |
| East | Usually gentler morning sun | Often fine; still acclimate after a dark room |
| North | Low scorch risk | Usually underpowers high-light plants |
Reflective floors, white walls, neighboring glass, and patio concrete can bounce extra light onto leaves that already sit in a bright band. Conservatories and sunrooms combine high light with heat stress — RHS notes leaves wilting, rolling, bleaching, and going crispy in very hot rooms.
Grow lights cause the same injury when intensity is too high or distance is too short. Full-spectrum LEDs feel cool to your hand and still bleach a canopy parked an inch below the bar. If leaf tops under the fixture pale while sides stay green, raise the light or shorten the daily hours before you change soil or fertilizer. For foliage houseplants, University of Minnesota Extension suggests a starting distance around 12–24 inches (adjust to your fixture and plant response); bleaching, curling, or crispy patches can mean the light is too intense or too close. Pair this with the deeper setup notes in our grow lights complete guide.
First Aid and Recovery Steps
Act on light first. Everything else is secondary.
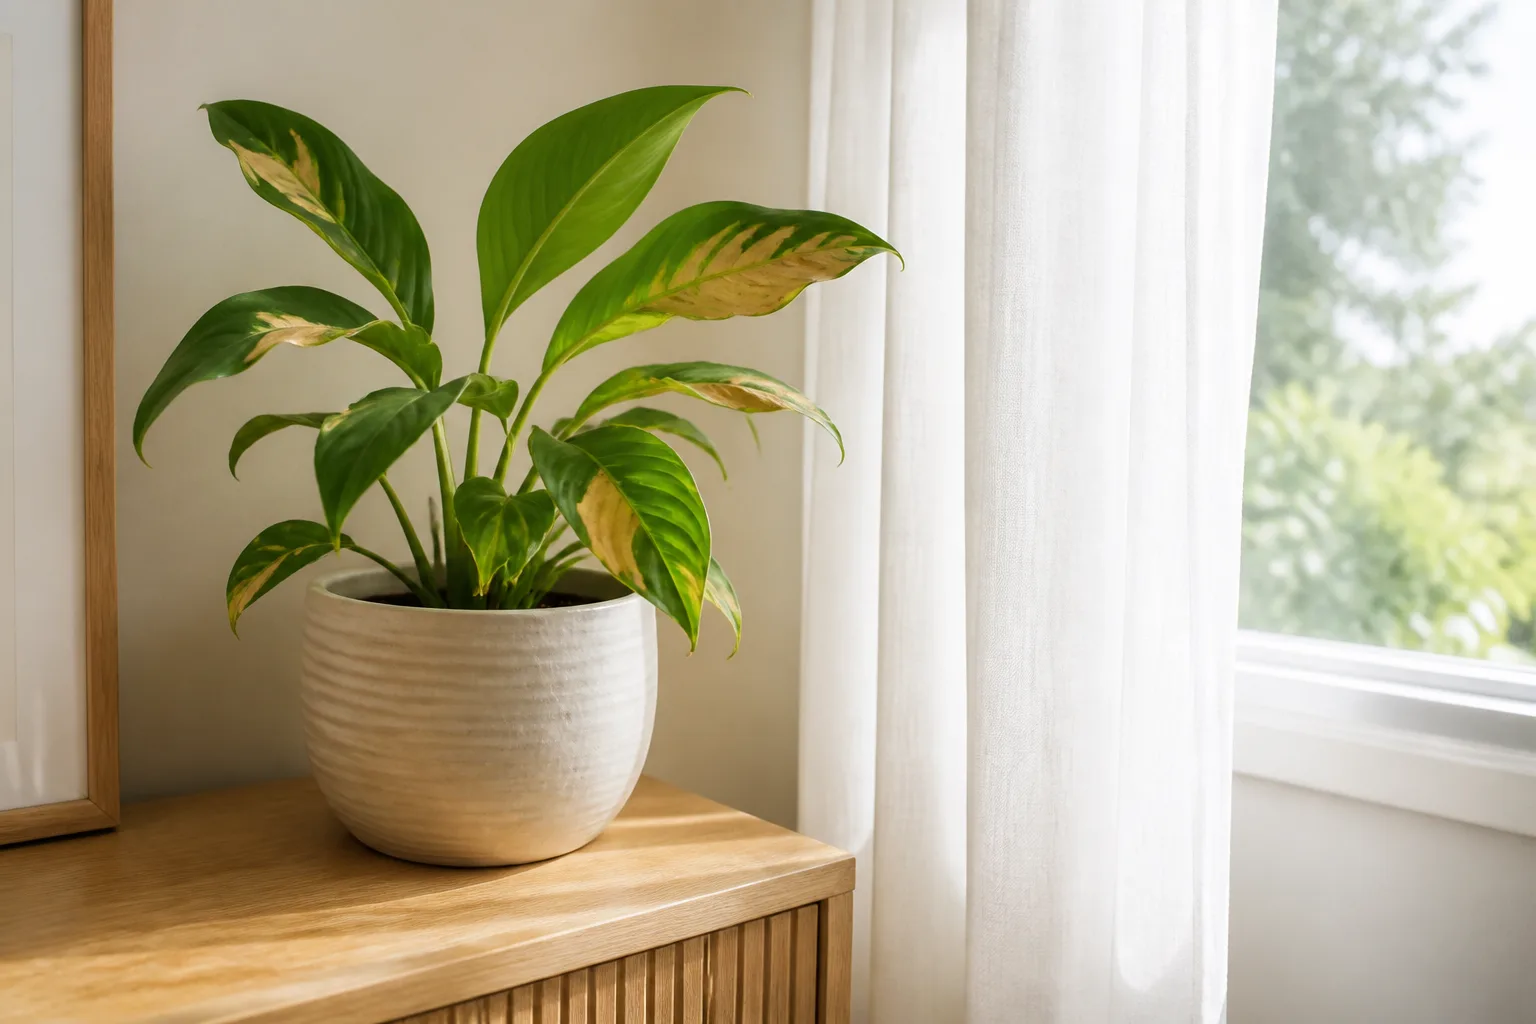
- Stop the burn today. Move the plant out of direct midday rays into bright indirect light, or add a sheer curtain. For grow-light burn, raise the fixture several inches — often toward the 12–24 inch foliage starting band if tops are bleaching.
- Do not fertilize. Soft, injured tissue and stressed roots do not need salt load. Resume dilute feeding only after healthy new growth appears.
- Water by soil, not by panic. Scorched leaves look dry, but the root ball may still be moist. Check depth before adding water. Heat and brighter placement may raise water use later — recheck after the move.
- Hold the pruning shears for a few days unless tissue is mushy or moldy. Wait until the live/dead line is obvious.
- Stabilize for 1–2 weeks. Keep temperatures steady, avoid another big move, and watch for new leaves. Recovery is measured in new growth quality, not in old patches turning green.
Missouri Botanical Garden notes that after shade-to-sun sunburn on a sun-capable plant, new leaves can perform well once the plant adapts. Your job is to create that adaptation without repeating the shock.
Recovery checkpoints we use in editorial follow-ups:
- Day 1: harsh direct exposure stopped; soil checked once
- Days 3–7: live/dead boundary clear enough to trim fully dry tissue
- Weeks 2–4: judge success by unmarked new leaves, not by old scars
What to Trim and When
Scorched patches will not regain chlorophyll. Trim when:
- The damaged zone is fully dry and brown
- You can cut into healthy tissue cleanly, or remove a whole ruined leaf at the base
- The plant still has enough green canopy left to photosynthesize
Leave partially green leaves that still support the plant, especially on slow growers. On vines such as pothos or Philodendron Brasil, you can tip-prune burned leaves and redirect energy into new nodes once light is stable. On snake plant, cut individual ruined leaves at the soil line rather than shearing half a blade into an ugly stub unless cosmetics matter more than remaining green tissue.
Sanitize blades between plants. Do not strip a plant bare on day one “to stimulate growth.” That only removes the food factories it still has.
Prevention for Windowsills and Seasonal Shifts
Prevention is placement plus pacing. Match the species to the window, then change light on a schedule when seasons or furniture layouts shift.
Summer sun sits higher; winter sun often reaches deeper into a room. A spot that was safe in July can scorch in February when low-angle rays hit the same sill for more hours — or the reverse can happen when a shaded summer window becomes a blast furnace after outdoor trees drop leaves. Recheck bright exposures at each seasonal turn.
Keep foliage an inch or more off hot glass. Use sheers on south and west exposures for shade-leaning tropicals. Rotate pots weekly so one face does not take every hit.
When you bring outdoor plants back inside, reverse-acclimate them to lower indoor light instead of trading scorch for stretch overnight: spend about a week stepping them into brighter shade outdoors, then into the brightest indoor spot that still lacks harsh midday beams, then into the final room. Water less as light drops. UGA’s home acclimatization advice — a bright staging area for several weeks before the final darker spot — is useful in reverse when intensity falls.
UF/IFAS foot-candle bands help you stop guessing from eyeball brightness:
- Low: roughly 25–100 ftc midday
- Medium: 100–500 ftc
- High: 500–1000 ftc (some softened direct)
- Direct sunlight: often over 1000 ftc with clear glass and multi-hour sun
Clemson’s placement sketch pairs high-light plants with west/south glass, medium-light plants near those windows or in east exposures, and low-light plants farther back or in north light. Shade plants cannot tolerate excessively high light; high-light plants may stretch in a north bedroom. Measure at leaf height midday, not at standing eye level across the room.
If readings sit far below what the species needs, fix deficit with a closer seat or a grow light — using the not-enough-light playbook — instead of leaping straight into unfiltered noon sun.
First-Hand Notes: Measured Burns and Recoveries
These are LeafyPixels editorial observations from plants we tracked in bright rooms (Bengaluru / warm subtropical indoor climate). They are single-setup notes, not universal thresholds.
Case 1 — Golden pothos, south sill, three-day bleach. A nursery-grown golden pothos that had lived on a bright east shelf (~350–450 ftc midday at leaf height on a phone light-meter app) was moved flush to an unshaded south sill. Midday reading at the front leaves jumped past 1,100 ftc. By day three, glass-facing blades showed chalky patches that dried papery; the room-facing side stayed green. We pulled the pot 30 inches back behind a sheer (~500–650 ftc). Old patches never re-greened. Unmarked new leaves appeared in week three once we stopped fertilizing and held the sheer.
Case 2 — LED bar too close on a snake plant. A white full-spectrum bar hung about 2 inches above a snake plant shelf bleached the uppermost leaf faces while lower sides stayed striped and green. Raising the bar to roughly 14–16 inches stopped new bleach within a week. We waited until the dead line was dry before cutting one ruined leaf at the soil line. Cue that mattered: bleach mapped to the lamp, not the window.
Case 3 — “Safe summer” west sill that burned in winter. A watermelon peperomia sat unharmed on a west sill in July when outdoor trees filtered afternoon sun. After leaf drop in January, the same spot delivered longer low-angle beams and sill heat. Window-facing leaves developed pale, then crispy patches while the room side stayed intact. A sheer plus a 18-inch setback fixed new growth; we did not treat it as disease.
Shared lesson across all three: the map (bright face vs shaded face) and the timeline (hours to a few days after a light jump) diagnosed faster than any spray.
Species Notes for Common Houseplants
Shade-leaning tropicals (pothos, Monstera adansonii, many philodendrons, maidenhair fern, watermelon peperomia): thin leaves bleach in a flat, directional patch on the sun face — often chalky first, then papery. Prefer bright indirect. Direct south/west sun commonly burns. Acclimate slowly if you want morning sun only.
Variegated cultivars (Brasil philodendron, highly variegated pothos): pale leaf zones burn sooner and sharper than the green sectors on the same leaf. Give bright indirect light without harsh midday beams; watch the white or yellow sectors after any move.
Tougher sun candidates (adenium, many cacti and succulents, yucca): can use stronger light once hardened, but indoor-grown specimens still burn — often as discrete tan or brown patches on the brightest faces — if moved outdoors or onto raw concrete reflections without a week or two of staging. Succulents are not immune indoors.
Flowering sill plants: petal bleach can appear before leaf scorch. If open blooms go chalky on the glass side, see the faded-flowers hub while you also filter light for the foliage.
Species pages under /plants/{slug}/sunburn-scorched-leaves/ carry plant-specific photos and nuances when you already know the ID.
Related Guides When Scorch Is Not the Answer
Use this hub when patches are dry, bleached, and sun-mapped after a light increase. Switch paths when the story changes:
- Not enough light — stretch, small pale new leaves, lean, no scorch patches
- Cold damage — limp, water-soaked, then black after chill or shipping
- Fertilizer burn — even tip burn plus salt crust after feeding
- Grow lights complete guide — distance, hours, and bleach cues under fixtures
- Houseplant symptom checker — multi-symptom triage when several problems overlap
Conclusion
Use this as your close-out card:
5-minute scorch check: photo both faces → list any light change in 14 days → check soil moisture and salt crust → flip undersides for blisters → rule out pests.
If it is sunburn: stop harsh direct exposure today → skip fertilizer → water from soil checks → wait for a clear live/dead line before trimming → rebuild light over 1–2 weeks.
2-week recovery scoreboard: day 1 exposure stopped; days 3–7 trim only fully dry tissue; weeks 2–4 judge unmarked new leaves. Old scars stay scars. If damage is even tip burn with crusty soil, or watery underside blisters under wet low light, leave this hub and follow the salt or edema path instead.