Swedish Ivy Care Guide: Full Baskets Without Root Rot
Stop sparse Swedish ivy baskets and yellow leaves: pair bright indirect light with wet-dry watering, tip pinching, and early mealybug checks.
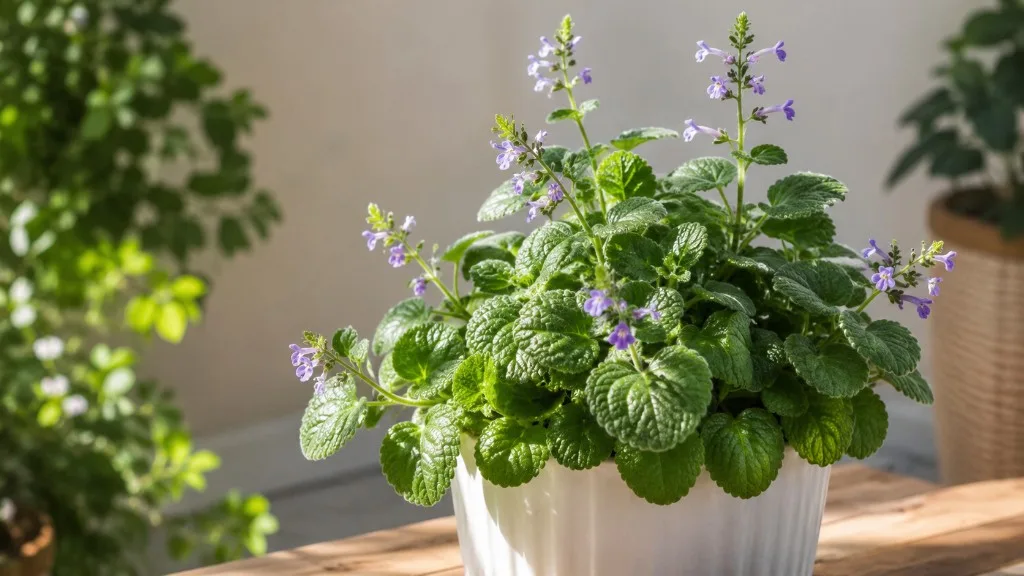
Swedish ivy care succeeds when you treat the plant as a fast-growing African trailer in the mint family — not as a true ivy and not as a low-light survivor. Glossy scalloped leaves cascade beautifully from hanging baskets, but that cascade stays full only when bright indirect light, a wet-dry watering rhythm, and regular tip pinching work together. Miss the light or keep the mix soggy, and you get yellow leaves, a hollow crown, and soft stems long before the tips look “thirsty.”
Most indoor failures follow one pattern. The basket hangs far below a window, soil stays wet for days, stems stretch toward the light, and mealybugs or root stress show up before anyone connects placement to watering. Light sets how fast the pot dries. Watering and soil decide whether roots stay oxygenated. Pinching only fills a basket when new shoots have enough light to stay short and leafy.
Healthy Swedish ivy should look glossy and leafy at the crown, not only long at the tips.
Who This Guide Is For
Use this page when you want one complete Swedish ivy framework — identity, light, watering, soil, pinching, pests, pet safety, and first-line fixes — without jumping between five tabs. When a single symptom needs its own workflow, open the Swedish Ivy care hub for topic pages such as light, watering, soil, pruning, propagation, and problem pages like yellow leaves or mealybugs.
If indoor watering logic still feels fuzzy, pair this with how to water indoor plants the right way. The check-the-soil mindset transfers directly because Swedish ivy forgives brief dryness far better than chronic sogginess.
What Swedish Ivy Actually Is (Not Ivy, Not From Sweden)
Swedish ivy is a trailing evergreen perennial grown for cascading stems and rounded, glossy, scalloped leaves — not for dramatic flowers, though pale white to light purple blooms appear off and on under good conditions. UF/IFAS Gardening Solutions calls it an ideal beginner plant that thrives across a useful range of soil, watering, and light conditions when basic drainage and brightness are in place. The plant earns hanging-basket fame because stems lengthen quickly and root easily from cuttings, so one healthy parent can fill a pot or supply friends within a season.
Despite the common name, Swedish ivy is not from Sweden and is not a true ivy (Hedera). It is a soft-stemmed member of the mint family (Lamiaceae) that behaves like a semi-succulent groundcover outdoors in frost-free climates and like a cascading houseplant everywhere else. Missouri Botanical Garden lists it as a fast-growing South African perennial hardy outdoors only in USDA zones 10–11, with white to pale purple flowers and a preference for part shade and medium moisture in well-drained soil. Indoors, that biology translates to bright filtered light, thorough soaks with dry-down between drinks, and protection from frost.
Swedish ivy-specific traps to absorb first:
- Crown thins while tips look fine — judge the pot rim and newest internodes, not trailer length alone.
- Soft leaves are ambiguous — soft on a light pot usually means thirst; soft on a heavy wet pot means root stress.
- Mealybugs often hit Swedish ivy first — treat cottony fluff as an early warning for the whole plant shelf.
- Pinching without light just makes longer bare shoots — fix placement before you hard-prune for fullness.
Naming Traps and Lookalikes
In commerce, the plant sold as Swedish ivy is usually labeled Plectranthus australis or Plectranthus verticillatus. The Royal Horticultural Society treats P. australis as a misapplied synonym of Plectranthus verticillatus, and Missouri Botanical Garden notes the same nomenclature confusion around the trade name Swedish ivy. For home care, both tags usually point to the same glossy, scalloped trailer. Keep a photo of the nursery tag anyway — other Plectranthus species share shelves and common names.
SANBI PlantZAfrica describes P. verticillatus as a perennial semi-succulent groundcover native to woodland and forest margins in southeast Africa — frost-free sites from Knysna through KwaZulu-Natal to Limpopo — and notes that silver-marked P. oertendahlii is sometimes sold overseas under the Swedish ivy nickname. NC State Extension similarly groups related hanging-basket Plectranthus (including silverleaf spurflower and other “Swedish ivy” trade labels) as plants that want well-drained soils in part sun to shade, with mealybugs, spider mites, leaf spots, and root rot as the recurring problem cluster.
| Plant / label | What you usually see | Care note |
|---|---|---|
| Trade Swedish ivy (P. verticillatus / misapplied P. australis) | Glossy green scalloped leaves; may have purple underside | Bright indirect light; top-inch wet-dry watering |
| ‘Variegata’ Swedish ivy | White margins on green leaves | Same care; protect from harsh sun that bleaches variegation |
| P. oertendahlii (silverleaf spurflower) | Smaller leaves with silvery markings | Same broad care band; do not force identical ID |
| Lawn “creeping Charlie” (Glechoma hederacea) | Groundcover weed, not a hanging mint trailer | Different plant — ASPCA’s “Creeping Charlie” alias for Swedish ivy is a naming trap, not a lawn ID |
Another naming trap: “creeping Charlie” appears on some pet-toxicity lists for Swedish ivy and also names unrelated lawn weeds. If your plant has glossy mint-family leaves on trailing stems and lives in a hanging basket, you are in Swedish ivy care territory for practical purposes.
Quick Care Snapshot
For healthy indoor Swedish ivy, place the plant in bright indirect light, water when the top inch of mix feels dry, use a well-draining potting mix with drainage holes, pinch soft tips regularly during active growth, and watch for mealybugs and spider mites. UF/IFAS recommends watering thoroughly when the top inch is dry and never letting the pot sit in water.
| Care factor | Baseline target | Deeper guide |
|---|---|---|
| Light | Bright indirect; shade from hot afternoon sun | Swedish Ivy light guide |
| Water | Top inch dry, then soak and drain | Swedish Ivy watering guide |
| Soil | Well-draining indoor mix + aeration | Swedish Ivy soil guide |
| Pinch/prune | Tip pinch for branching; remove spent blooms | Swedish Ivy pruning guide |
| Feed | Light balanced fertilizer in active growth | Swedish Ivy fertilizer guide |
A Swedish ivy in Bengaluru, Phoenix, London, and Toronto will not dry at the same speed. Pot material, root mass, hanging height, and room conditions change the interval. Good care is less about memorizing a calendar and more about making the right small decision each time you check the plant.
LeafyPixels observation (east-window hang, spring 2026): In a 6-inch plastic hanging basket under an east window, the top inch of mix dried in about 4–5 days. The same cultivar in a 5-inch terracotta on a nearby shelf dried in 2–3 days. We stopped calendar watering after that week and switched to finger depth plus pot weight — the plastic basket needed fewer drinks once it hung closer to the glass.
Light: Placement That Prevents Leggy Crowns
Swedish ivy does best in bright, filtered light — strong ambient brightness without long stretches of harsh midday sun on the leaves. Missouri Botanical Garden recommends part shade outdoors, with best performance in light shade or sun-dappled areas, and notes that indoor containers need bright, mostly sunny exposures while outdoor summer baskets must avoid leaf burn. The RHS places P. verticillatus in partial shade and advises shading from hot sun under glass. UF/IFAS adds the practical split: indoors prefer bright light; outdoors keep the plant shaded because direct sun burns leaves.
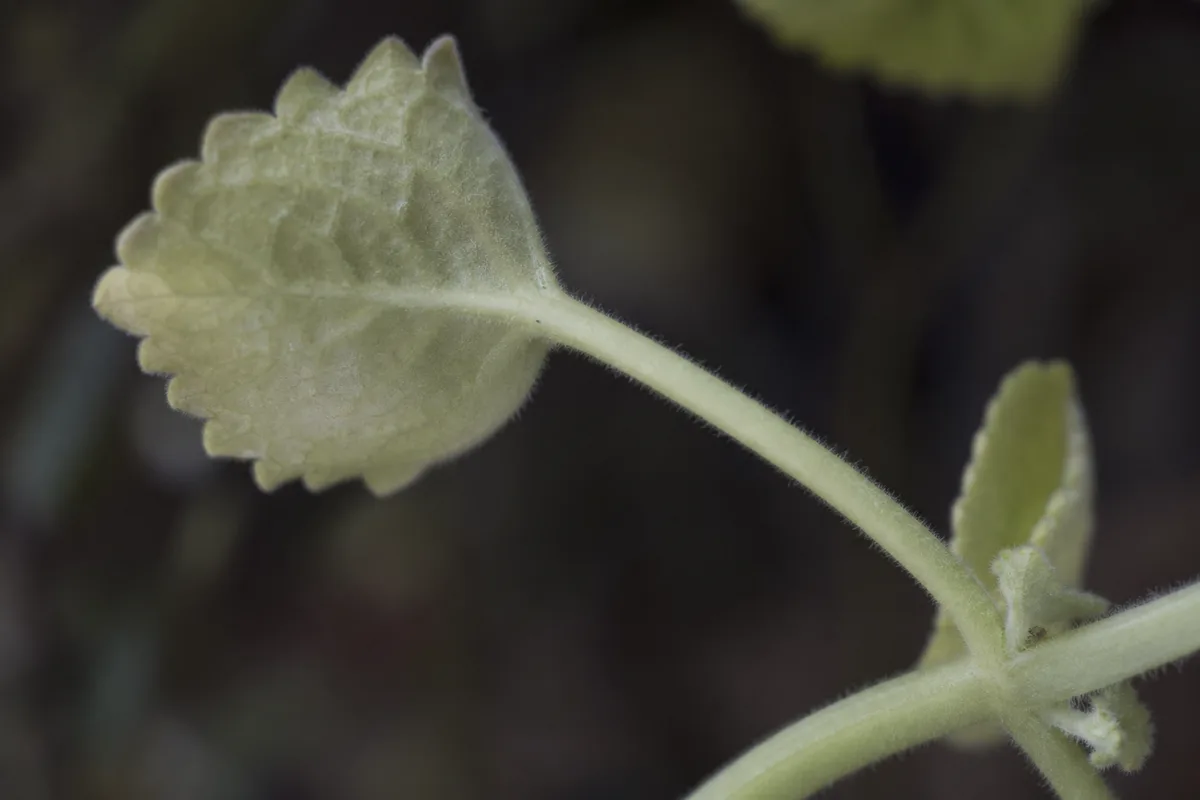
Light also sets the watering pace. A basket in correct light dries on a predictable rhythm and branches willingly after pinching. A dim plant grows slowly, stays wet longer, and invites root problems if you keep a summer watering schedule year-round. Treat light as the throttle for the whole care system, not a cosmetic detail you set once and forget.
Window Placement and Direct Sun Limits
In the Northern Hemisphere, an east-facing window is often the most reliable indoor spot: gentle morning sun, then bright indirect light the rest of the day. A bright north room can work if the pot sits on or near the sill. South and west exposures succeed with a sheer curtain or a pull-back from hot glass during peak hours. Keep the crown close enough that usable light reaches the leaves — a hanging basket three feet below a window often etiolates at the hanger while the tips still look acceptable.
Limited morning direct sun is fine for acclimated plants. Hot afternoon sun through clear glass is the usual scorch risk, especially after a nursery plant leaves a shaded shop shelf. Outdoor patio time helps in frost-free months if the basket stays in bright shade; bring it indoors before nights approach stressful cool temperatures. If natural light is weak in winter, a full-spectrum grow light on a timer above the crown prevents the thin, sparse look that appears between late autumn and early spring. Placement diagrams live on the Swedish Ivy light guide.
Signs of Too Little or Too Much Light
Too little light shows as long gaps between leaf pairs, smaller pale new leaves, soft stems leaning hard toward the window, and a thinning crown even while trailers keep lengthening. That stretch is etiolation, not a fertilizer shortage. See not enough light and leggy growth when pruning alone fails to restore fullness.
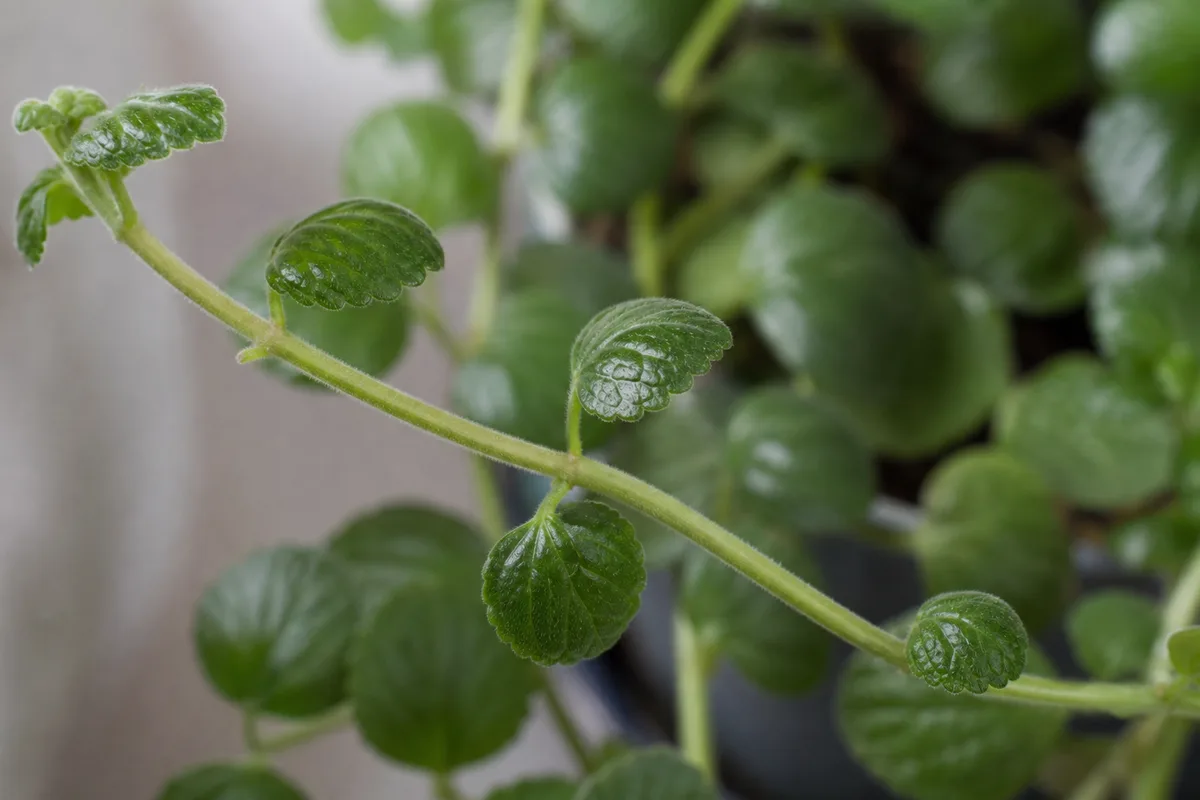
Long gaps between leaf pairs mean the plant wants more usable light before the next hard prune.
Too much harsh sun shows as bleached or dull patches, crisp brown edges on the window-facing side, midday curling, or leaves that look droopy despite moist soil. UF/IFAS lists dull, droopy foliage as a signal the plant may be getting too much light and should move to a shadier location. Scorched tissue will not green again; judge the new placement by the next flush of leaves after 10 to 14 days.
Watering: Top-Inch Rule, Pot Weight, Basket Reality
Water Swedish ivy when the top inch of soil feels dry, then soak thoroughly until a little water runs from the drainage hole and empty any saucer or basket liner. UF/IFAS states that rule plainly and warns never to let the plant sit in water. PlantZAfrica likewise warns that waterlogged plants develop root rot and that pot plants should be checked for drooping as a thirst cue after the surface has dried. Missouri Botanical Garden frames the target as medium moisture in well-drained soil with drought tolerance once established — healthy even moisture, not constant sogginess.
Clemson HGIC reminds indoor growers that overwatering is the main cause of death in potted plants because roots need oxygen as well as water, and that symptoms of overwatering and underwatering can look similar. Use finger depth, pot weight, and leaf firmness together. For hanging baskets, carry the pot to a sink, soak evenly, drain fully, then rehang so the crown does not sit in stale runoff.
Soft-Leaf Wet Pot vs Dry Pot Diagnostic
Soft, rubbery leaves on a light pot usually mean water now. Soft leaves on a heavy, wet pot mean root stress — adding more water makes recovery harder. Smell the mix: a sour odor plus yellowing lower leaves points toward oxygen-starved roots, not “more humidity.”
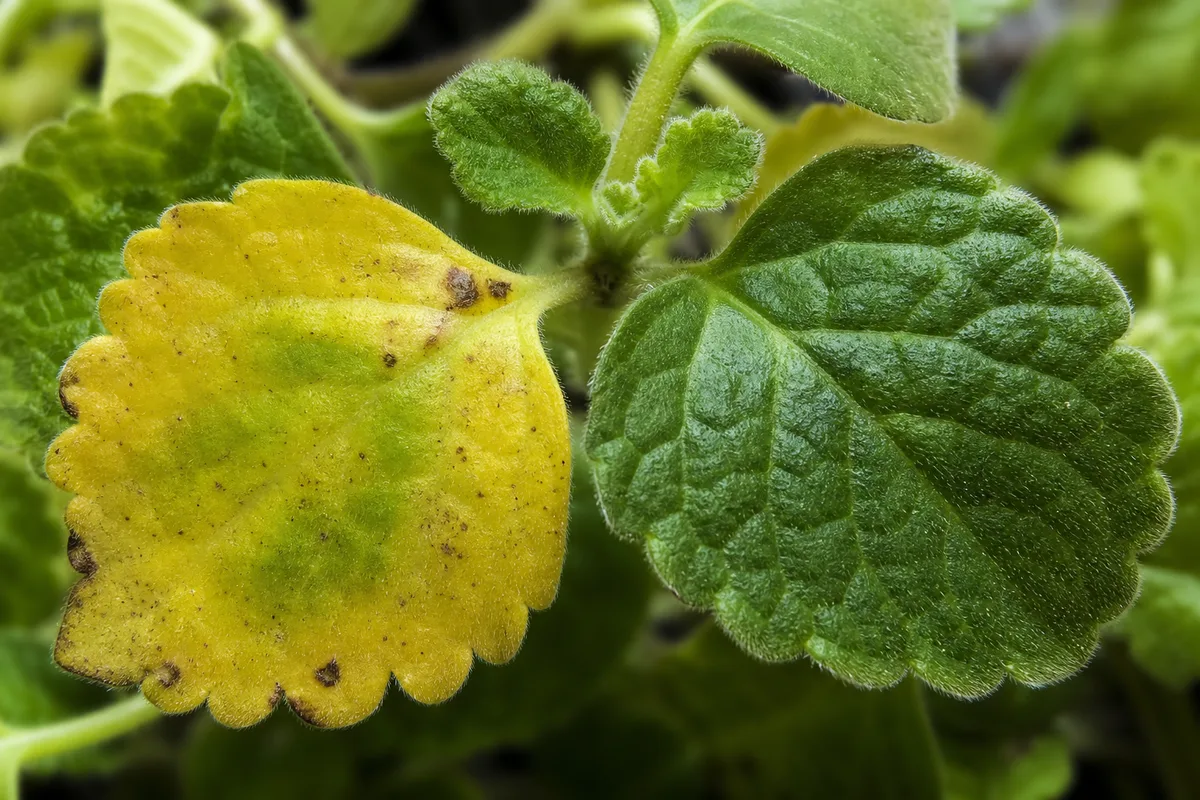
Yellow soft leaves with a heavy pot usually mean too much water, not fertilizer.
LeafyPixels observation (March 2026): After a cold, dim week, one plastic basket still felt heavy three days after a soak while leaves went soft. We skipped watering, moved the hang closer to east glass, and within a week new tips firmed up without a drink. The soft leaves had been a wet-root signal, not thirst.
Seasonal Watering Adjustments
During warm, bright months when stems are extending, many indoor baskets need a check every few days and a thorough soak roughly every 7 to 10 days, though small terracotta pots in hot rooms dry faster and large plastic pots in cool rooms hold moisture longer. In cooler, dimmer months, stretch the interval — often toward every 14 to 21 days — and let the mix dry deeper before soaking again. The classic winter failure is continuing a midsummer schedule in lower light, which keeps the mix waterlogged and leads to yellow lower leaves, fungus gnats, and root rot.
If you just bought the plant, stabilize light first before increasing water. Nursery peat-heavy mix dries on a different rhythm than your home mix. After any root rescue, water more conservatively until new growth proves the root system is working again. Full soak-and-drain technique lives on the Swedish Ivy watering guide.
Soil, Pot, and Drainage Choices
Use a light, well-draining potting mix that holds moisture without staying waterlogged for days. UF/IFAS recommends any good-quality well-drained potting media. PlantZAfrica’s greenhouse recipe uses peat, loam, and sand in a free-draining blend and stresses drying slightly between waterings. At home, a workable approach is quality houseplant mix amended with perlite or coarse grit so hanging-basket roots still get air after a soak. Missouri Botanical Garden warns against poorly drained clay soils outdoors and favors humusy, well-drained conditions.
Always plant in a container with a drainage hole. Decorative cachepots are fine only if you empty runoff after every watering. For hanging baskets, line sparingly to reduce mix washout, but never block drainage — a reservoir of stale water at the base will rot roots even when the surface feels dry. Terracotta dries faster and helps heavy-handed waterers; plastic holds moisture longer and suits bright, warm rooms or forgetful underwaterers. Upsize only one modest pot size when roots crowd, because excess wet mix in an oversized container raises rot risk in lower light. Mix recipes live on the Swedish Ivy soil guide.
Temperature, Humidity, and Bad Microclimates
Swedish ivy prefers average indoor temperatures and is intolerant of frost. Missouri Botanical Garden lists outdoor hardiness only in zones 10–11 and notes containers must be overwintered indoors where frost occurs. UF/IFAS says the plant does best in average temperatures year-round and can tolerate short dips toward about 40°F (4°C) but must come indoors before freezing. PlantZAfrica is blunt: the species does not tolerate frost in its native range. A practical indoor comfort band for active growth is roughly 60–75°F (16–24°C); treat sustained cool nights near 50°F (10°C) as a stress floor that slows water use and can trigger leaf drop.
Humidity is helpful but secondary to light and watering. Average household humidity in the 40–60% range suits most plants. Very dry winter air can encourage spider mites, especially when dust builds on leaf undersides and airflow is poor. Grouping plants, a humidifier, or a pebble tray with the pot elevated above the water line helps more than occasional misting. Avoid microclimates next to AC vents, cold glass that leaves touch in winter, or radiators that cook the crown. For broader dry-air tactics, see the houseplant humidity guide.
Pinching, Hard Pruning, and Filling Hollow Rims
Pinching is the difference between a sparse rope of stems and a full hanging basket. Missouri Botanical Garden recommends trimming new stem tips regularly to retain a compact shape and encourage branching, and removing flower spikes after bloom. The RHS likewise advises pruning young plants to create bushy growth. UF/IFAS notes that when flowers fade you should pinch stems back to encourage branching, that individual stems can be pruned any time of year, and that Swedish ivy tolerates even severe pruning — one reason it suits beginners.
Make shaping cuts just above a leaf node on firm green stem. During spring and early summer, pinch soft tips as they outgrow neighbors, and shorten bare trailers back to a leafy node closer to the pot. Root healthy tip cuttings and plant them around the crown if the rim looks hollow — same-pot fill is faster than waiting for one stem to branch everywhere. Pinching cannot replace light: if new shoots still produce long bare internodes, move to brighter filtered light before the next hard trim. Technique and timing are expanded on the Swedish Ivy pruning guide.
LeafyPixels observation (April–May 2026): On a sparse 8-inch basket, we pinched every soft tip once a week for three weeks, then planted four rooted tip cuttings around the hollow rim. Under bright east light, the crown looked full again in about five weeks. Pinch-only without the fill cuttings left a doughnut shape for much longer.
Fertilizer, Repotting, and Starter Propagation
Swedish ivy is a light to moderate feeder during active growth. PlantZAfrica fertilizes monthly with a balanced fertilizer in summer greenhouse culture and warns that overwatering still matters more than underfeeding. Indoors, a balanced liquid houseplant fertilizer at one-quarter to one-half label strength every four to six weeks from spring through early fall is enough for most baskets. Hold fertilizer in cool, low-light months, after major repotting until new growth appears, and while recovering from root or pest damage. UF/IFAS notes that too much nitrogen fertilizer plus insufficient light can suppress blooming — if flowers matter to you, improve light before pouring on feed.
Starter repot (when roots crowd): In spring or early summer, move up one pot size only, refresh draining mix, keep the crown at the same depth, water once to settle, then resume the top-inch rule. UF/IFAS recommends annual repotting in spring or midsummer for long life. Full workflow: Swedish Ivy repotting guide.
Starter tip cutting (5 steps):
- Cut a healthy 4–6 inch tip just below a node.
- Strip the lowest leaves so one or two nodes are bare.
- Root in water or moist, clean mix in bright indirect light.
- Pot up once roots are a couple of centimeters long (often within about a month in clean media, per UF/IFAS).
- Plant extras around the parent rim to fill hollow spots.
The RHS notes stem-tip cuttings can be taken any time of year. Depth and troubleshooting live on the Swedish Ivy propagation guide.
Common Problems: Yellow Leaves, Legginess, Root Rot
Most Swedish ivy problems are environmental before they are mysterious diseases. Missouri Botanical Garden flags mealybugs, spider mites, leaf spots, and root rot as the issues to watch. NC State Extension lists the same pest and disease cluster across Plectranthus grown in containers and hanging baskets. Start with soil moisture, light, and drainage before reaching for every remedy at once. When a whole plant wilts and does not recover after watering, UF/IFAS points to root rot and recommends taking healthy tip cuttings into clean media while disposing of the diseased parent.
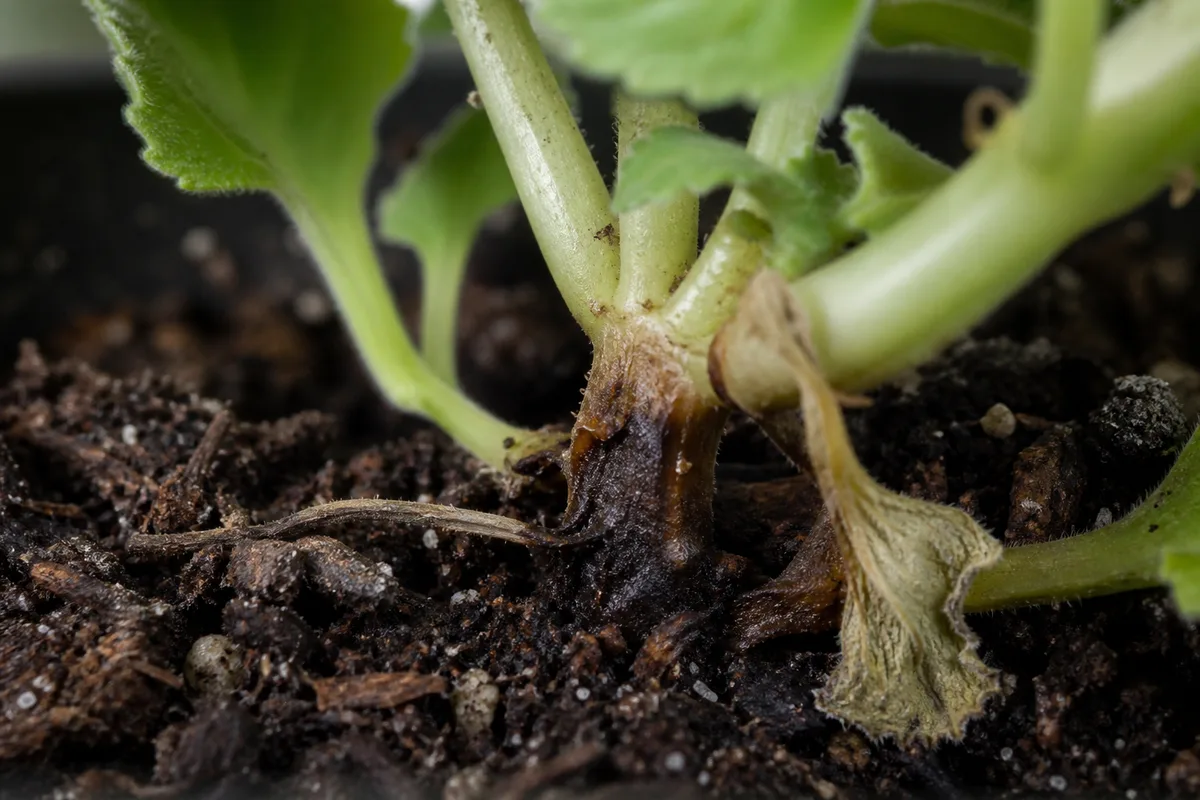
Yellow leaves often track overwatering, underwatering, low light, cold drafts, or natural aging of older lower leaves. Wet mix with soft yellow leaves suggests too much water and possible root rot. A light, dry pot with crisp yellowing suggests drought. One older yellow leaf at the base of a healthy trailer is often normal turnover; several yellow leaves at once with a sour, heavy pot need root inspection. See yellow leaves and overwatering.
Legginess is almost always a light-plus-pruning problem. Long internodes and bare mid-stems mean the plant is stretching or was never pinched. Move closer to bright filtered light, shorten bare trailers, and root cuttings into the crown. Fertilizer alone will not fix etiolation.
Root rot shows as wilting despite wet soil, mushy stem bases, and foul mix. Stop watering, trim soft tissue, and restart from cuttings if the crown is gone — Clemson’s oxygen-and-roots warning applies directly here. If cultural fixes fail and decline continues, contact your local cooperative extension or a plant clinic with clear photos of roots, mix, and newest growth.
Pests: Mealybugs, Spider Mites, Aphids
UF/IFAS notes Swedish ivy is often the first plant in an area to show mealybugs — cottony masses on stems and leaf undersides — and recommends insecticidal soap used according to the label. Pale leaves plus webbing on undersides point to spider mites, also treated with carefully applied insecticidal soap. Wisconsin Horticulture emphasizes inspecting new plants, checking leaf undersides, and treating early before soft-bodied pests explode in warm, dry rooms. Aphids can cluster on soft new growth; University of Minnesota Extension covers identification and non-chemical knock-down options for soft-bodied aphids on ornamentals.
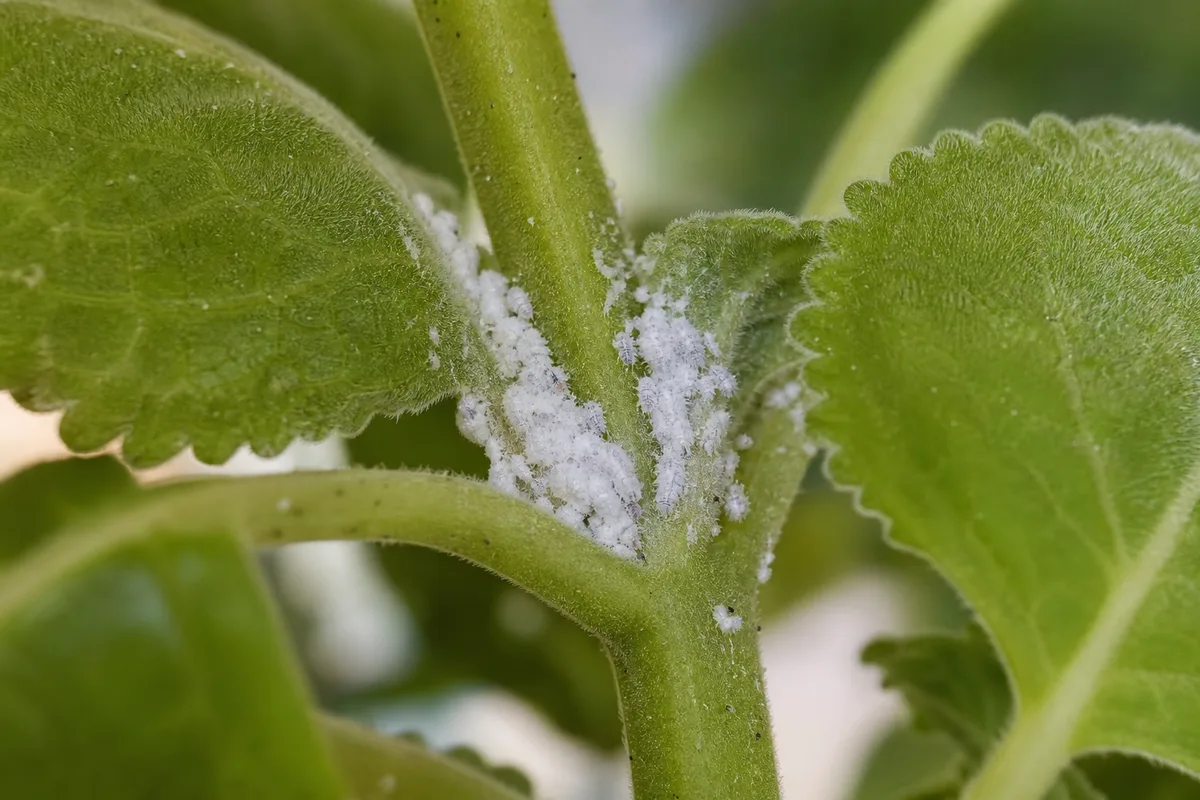
Cottony fluff in leaf axils is a mealybug signal — isolate the basket before treating the whole shelf.
LeafyPixels observation (March 2026): On one nursery basket, cottony fluff appeared in leaf axils about a week before neighboring pothos showed any pests — matching UF/IFAS’s early-warning note. Isolating that basket stopped spread across the shelf.
Isolate an infested basket, wipe or rinse reachable pests, treat thoroughly including undersides, and repeat on the label interval because eggs and hidden individuals remain. Keep pesticide-treated foliage away from pets and birds, and follow the product label. Persistent infestations live on mealybugs, spider mites, and aphids.
Pet Safety and Buying Tips
Swedish ivy is one of the better trailing choices for pet-aware homes. The ASPCA lists Swedish ivy (Plectranthus australis) as non-toxic to dogs, cats, and horses. Non-toxic does not mean chew-proof: large amounts of any fibrous plant material can still upset a stomach, so discourage habitual nibbling and keep pesticide-treated foliage away from pets and birds. If a pet shows persistent illness after eating plant matter, contact your veterinarian or ASPCA Animal Poison Control at (888) 426-4435 (a consultation fee may apply).
When buying, choose firm new growth, clean leaf undersides, and soil that does not smell sour. Avoid baskets with sticky residue, cottony fluff, collapsed crowns, or a pot that is wet in poor light. Photograph the botanical name on the tag so you can match care notes later. For the first month, quarantine the plant, learn how fast your pot dries, and resist stacking fertilizer, repotting, and hard pruning on day one unless the mix is already failing.
Swedish Ivy vs Other Easy Trailers
If you are choosing among beginner trailers, use this decision table rather than buying on leaf shape alone.
| Plant | Light need | Pet safety (ASPCA framing) | Fullness method | Drought forgiveness |
|---|---|---|---|---|
| Swedish ivy | Bright indirect; weak in dim corners | Non-toxic to cats/dogs/horses | Pinch + rim-fill cuttings | Moderate — prefers wet-dry, not bone-dry neglect |
| Pothos | Tolerates medium light better | Toxic (calcium oxalates) | Trailing/climbing; less tip-pinch dependent | Higher |
| Spider plant | Bright indirect to moderate | Non-toxic to cats/dogs | Plantlets / pups | Moderate–high |
| ZZ plant | Low to bright indirect | Toxic | Clump growth, not a cascade trailer | Very high |
Choose Swedish ivy when you want a glossy cascade in bright filtered light and a pet-safer hanging option than pothos. Choose pothos or ZZ when the room is too dim for a full Swedish ivy crown. Choose spider plant when you want plantlets instead of tip cuttings.
Related Guides
- How to water indoor plants the right way — soil checks and soak-and-drain habits that prevent Swedish ivy root rot
- Houseplant humidity guide — dry-air tactics that reduce spider-mite pressure on trailing baskets
- Pothos care — easy trailer for dimmer shelves (toxic to pets)
- Spider plant care — pet-safe trailing alternative with plantlets
- ZZ plant care — low-water option when a room is too dim for a full Swedish ivy cascade
- Swedish Ivy care hub — topic and symptom depth once you know what is wrong
Conclusion: First 30 Days Checklist
Swedish ivy rewards a simple system more than a complicated ritual. Use this first-month checklist instead of changing every variable at once:
- Week 1: Quarantine, photograph the tag, place in bright indirect light, learn pot weight after a thorough soak-and-drain.
- Week 2: Water only when the top inch is dry; run the soft-leaf wet-pot vs dry-pot check before every drink.
- Week 3: Pinch soft tips; inspect leaf axils and undersides for cottony mealybugs or mite stippling.
- Week 4: If the rim is hollow and light is good, root tip cuttings and plant them back into the crown; hold fertilizer until you see steady new growth.
- Ongoing: Keep frost away, empty saucers, and open the Swedish Ivy hub when a single symptom needs its own fix path.
Give it bright filtered light, water only after the top inch dries, keep roots in a draining mix and pot, and pinch so the basket fills from the crown instead of racing into bare ropes. When something goes wrong, start with light, moisture, and roots — those three usually explain the story before any product does.



