The Worst Thing for Orchids? Watering Them Wrong
The worst thing for orchids is watering them incorrectly. Learn how to read roots, soak and drain, avoid crown rot, and revive stressed plants.
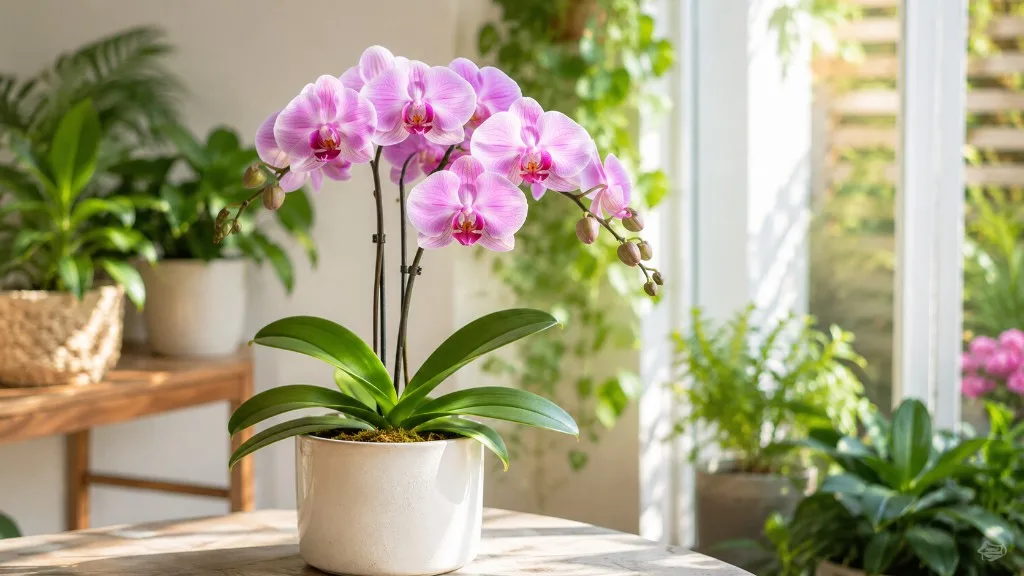
The most damaging habit for a typical indoor orchid is not forgetting one watering. It is treating the plant as if it were an ordinary houseplant and giving it moisture without checking whether the roots can breathe, whether the pot can drain, or whether water has collected in the crown. That mistake can look like thirst at first: leaves lose firmness, flowers fade, and the owner pours on more water.
For the Phalaenopsis orchids sold in grocery stores and garden centers, the practical answer is simple: water thoroughly when the bark or moss is nearly dry, then let every bit of excess water leave the pot. Keep water out of the leaf crown, use a porous orchid medium, and let the plant’s roots—not a calendar—tell you when the next drink is due. The RHS and University of Connecticut both describe the same balancing act: moth-orchid roots rot when kept too wet but can shrivel when kept too dry. (RHS Phalaenopsis growing guide) (University of Connecticut orchid care)
This guide is written for common indoor moth orchids, with enough context to help you pause when the label says Dendrobium, Cattleya, Oncidium, or Vanda. Those plants may have different storage organs, media, and drying needs. If you are unsure of the name, start with the root and drainage checks below instead of copying an exact schedule from another orchid.
The Short Answer
The worst thing you can do to an orchid is water it incorrectly—usually by keeping its roots wet and airless, watering too lightly for the roots to rehydrate, or allowing water to sit in the crown. “Overwatering” is often used as shorthand, but the amount of water is only half the story. A plant can rot because it is watered too often, because compacted media holds moisture for weeks, or because a decorative pot traps runoff underneath the root ball.
The safest default for a healthy Phalaenopsis in bark is a deep, room-temperature soak followed by a complete drain. Water through the medium until it is evenly wet, tip out water from the outer pot, and wait until the medium is approaching dry before repeating. This creates the wet-then-dry rhythm that the roots can tolerate.
Do not interpret that as “let every orchid become bone-dry.” Phalaenopsis has no large pseudobulb to store water, so a long drought can leave it unable to support leaves and flowers. The goal is almost dry, then fully watered, not permanently wet and not abandoned until the leaves look like raisins.
Why Watering Is the Main Failure Point
Most popular houseplant orchids are epiphytes. In their native habitats, they attach to branches or other plants rather than growing in a deep layer of garden soil. Rain wets their roots, water moves away, and air returns around the root surface. Even orchids that are not strictly epiphytic still need a medium that balances moisture with oxygen.
That is why ordinary potting soil is a poor default. Fine particles pack around the roots, remain wet after the surface looks dry, and leave fewer air spaces for the root tissue. The University of Connecticut recommends a formulated orchid mix containing bark, perlite, and horticultural charcoal, and warns that roots packed in wet sphagnum or poorly draining media can rot. (UConn orchid care and repotting)
Why Epiphytic Roots Need Air
An orchid root is not just a straw that delivers water to the leaves. Its outer covering can absorb and hold moisture, but the living tissue underneath still needs oxygen. When the root stays saturated, it loses function and becomes vulnerable to decay; once enough roots fail, the leaves may wrinkle even though the pot is wet.
This is the trap behind many rescue attempts. A plant with damaged roots can appear thirsty because it cannot move water upward. Adding more water does not repair the roots. It extends the conditions that caused them to fail. Before watering a limp orchid, inspect the pot, the medium, and any visible roots.
Four Watering Mistakes That Hurt Orchids
These mistakes overlap, but separating them helps you choose the right first action.
- Watering too often. A weekly reminder can become harmful when the room is cool, light is weak, the plant is in dense moss, or the pot is sitting inside a cachepot that holds runoff. Frequency must change when drying speed changes.
- Watering too little or too narrowly. A small splash on one side of a dry bark mix may wet the surface while leaving the root ball dry. Misting the leaves may make them look fresh for an hour, but it does not reliably rehydrate the roots in a potted orchid.
- Watering into the crown. The crown is the central pocket where new leaves emerge. Water trapped there can soften the growing point and lead to crown rot, especially in cool, still conditions.
- Ignoring the container and medium. A watering technique cannot compensate for a pot without drainage holes, decomposed bark, or a tight plug of moss that stays wet in the center. The same volume of water behaves differently in a clear slotted pot and a sealed decorative container.
A fifth mistake is reacting to symptoms without confirming the root zone. Yellow leaves, limp leaves, and dropped flowers can follow both drought and root rot. The next section turns those clues into a decision.
Read the Roots Before You Water
If your orchid is in a clear inner pot, you have a useful moisture gauge at eye level. If it is not, you can still use pot weight, a wooden skewer, and the condition of the medium. These checks are more reliable when used together.
Root Color and Texture
Healthy Phalaenopsis roots are firm rather than hollow or slimy. After watering, roots commonly look green because their outer covering is hydrated. As they dry, they often shift to silver or gray. That color change is a timing clue, not a command to water every root the moment one surface root turns pale.
Brown, black, or tan roots are not automatically dead, because old roots can discolor with age or fertilizer deposits. Squeeze or gently bend a suspect root instead. A viable root remains firm; a rotted root collapses, feels mushy, or has a papery sheath with an empty strand inside. The Ohio State ice-cube study used the same practical visual distinction: well-watered roots appeared green, drier roots appeared silvery, and unhealthy roots became brown or tan. (Ohio State University orchid watering trial)
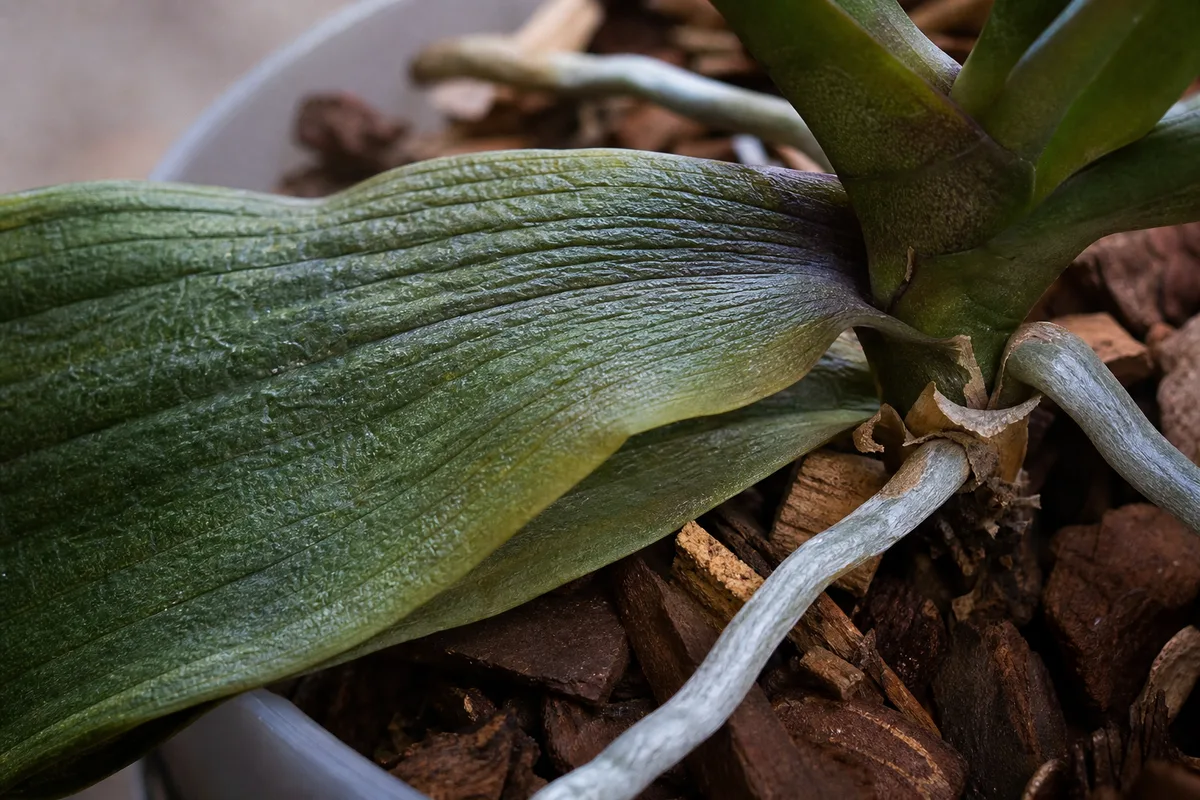
Wrinkled leaves plus silvery roots and dry bark usually point toward underwatering. Wrinkled leaves plus a heavy, wet pot and a mass of collapsing roots point toward root loss. The leaf tells you the plant is under water stress; the roots tell you why.
Potting Medium, Condensation, and Pot Weight
Look through the side of a clear pot for condensation. A few droplets do not mean the plant is drowning, and a dry-looking top layer does not prove the center is dry. Moss can stay damp around the roots while its surface appears pale; chunky bark can look dry while retaining moisture in its lower pieces.
Lift the inner pot before and after watering so you learn its normal weight. A dry orchid is often noticeably lighter than a watered one. A bamboo skewer pushed gently into the center of a bark mix can reveal whether the interior is cool or damp, but do not use the skewer as a daily stabbing routine that damages roots. Check at several points over time, especially after a change in season or location.
If the plant is in an opaque pot, slide it out only when other clues conflict. A quick root inspection is more helpful than repeatedly adding small amounts of water to an unknown root zone. It also reveals whether the orchid is still sitting in the compact retail moss that often causes inconsistent drying.
The Reliable Soak-and-Drain Routine
For a typical indoor Phalaenopsis in a draining pot, use this sequence:
- Check first. Water when most of the medium is nearly dry, the pot feels light, and the roots are largely silver rather than when the calendar says it is watering day.
- Move the pot to a sink or basin. Keep the leaves and flowers supported, and do not let the plant tip so water runs into the crown.
- Use room-temperature or tepid water. Run it slowly over the bark until water exits the drainage holes and the medium has had time to absorb moisture.
- Let it drain completely. Wait until the flow slows, then empty the saucer or decorative outer pot. Do not return the inner pot to a reservoir of runoff.
- Dry the crown. If water collected between the leaves, wick it away with the corner of a clean paper towel. Put the plant back where it receives bright filtered light and gentle air movement.
The point is not to make the orchid stand in water for hours. It is to wet the whole root zone once, then remove the water that the medium cannot safely hold. The RHS recommends watering in a way that wets the plant without leaving roots in water, while the Connecticut guidance emphasizes soaking and draining and keeping water out of the crown. (RHS moth-orchid guide) (University of Connecticut orchid care)
Top-Watering Versus Soaking
Both methods can work when the pot drains well. Top-watering is convenient and lets you flush fertilizer salts through the medium; run water around the bark rather than into the leaf center. A short immersion wets dry bark more evenly, but it also makes poor drainage more dangerous because the pot absorbs a larger volume of water.
If you bottom-soak, keep the water level below the leaves and crown, use a clean container, and do not share the same water among plants when disease is suspected. Five to twenty minutes may be enough for bark to wet, but the clock is less important than the medium being evenly hydrated and the pot draining afterward. A plant with compacted moss may need repotting rather than a longer soak.
How Often to Water an Orchid
For many indoor Phalaenopsis plants, once a week is a useful starting estimate, not a rule. The RHS describes weekly watering through active growth with a slight winter reduction, while UConn also describes a weekly soak-and-drain rhythm. Those recommendations assume a plant in appropriate media and a home where the pot can dry somewhat between waterings. (RHS Phalaenopsis growing guide) (UConn orchid care and repotting)
Your orchid may need water sooner when the pot is small, the bark is very coarse, the plant receives stronger light, air is moving, or the room is warm and dry. It may need water less often when it is in dense moss, a large pot, low winter light, cool temperatures, or a humid, stagnant corner. A plant that has lost many roots also dries differently from a plant with a full root system.
Use this adjustment rule: if the medium is still damp when the usual watering day arrives, wait. If it is bone-dry well before the usual interval and the leaves are losing firmness, shorten the interval or improve the medium rather than merely pouring more at each visit. Change one variable at a time so you can see what helped.
Ice Cubes: What the Evidence Actually Says
Ice cubes are not automatically a disaster for every Phalaenopsis, but they are a poor substitute for understanding the plant. In a controlled Ohio State University and University of Georgia trial, 48 Phalaenopsis orchids were observed for four to six months. Plants receiving three ice cubes weekly had similar flower life, display life, leaf health, and root health to plants receiving the equivalent amount of room-temperature water under that trial’s bark-media conditions. The study also found that the bark medium cooled temporarily but did not expose roots to freezing temperatures. (Ohio State University ice-cube trial)
That evidence answers a narrow question: a measured ice-cube treatment can be tolerated by a Phalaenopsis in bark when the amount, plant, medium, and environment resemble the test. It does not prove that three cubes are enough for every pot, that ice works for every orchid genus, or that it can fix a root problem. It also does not replace flushing fertilizer salts or checking whether the medium is dry.
The Gardening Know How discussion reaches a practical middle ground: ice can limit the amount of water a beginner adds, but regular watering with good drainage is more adaptable. (Gardening Know How on watering orchids with ice cubes) If you use ice because it helps you avoid flooding a plant, keep it on the medium rather than on leaves or roots, empty collected water, and watch for chronically silvery roots or wrinkled leaves. If you want one default routine, choose a room-temperature soak and drain because it lets you adjust volume to pot size and dry-down.
Use room-temperature or tepid water rather than water that is very cold from the tap. Cold water is unnecessary stress, and warm water straight from a heater can damage tissue. Rainwater or filtered water can be helpful when tap water leaves a heavy mineral crust, but many orchids tolerate ordinary tap water if the medium is flushed regularly.
Water in the morning when you can. That gives splashed foliage and the crown more time to dry before the cooler part of the day. The Connecticut Agricultural Experiment Station advises avoiding overhead sprinkling and improving air circulation because wet foliage and high humidity can help some diseases spread. Its orchid disease guidance also stresses clean pots and sterile media when rot is involved. (Connecticut Agricultural Experiment Station orchid diseases)
Fertilizer changes the watering conversation. A weak fertilizer solution applied in active growth can support new leaves and roots, but repeated feeding without plain-water flushing can concentrate salts in the medium. The RHS recommends regular light feeding and a plain-water flush every fourth watering to reduce buildup. (RHS moth-orchid growing guide) Do not try to compensate for poor roots with stronger fertilizer; damaged roots are more likely to be injured by excess salts.
The Pot and Medium Are Part of Watering
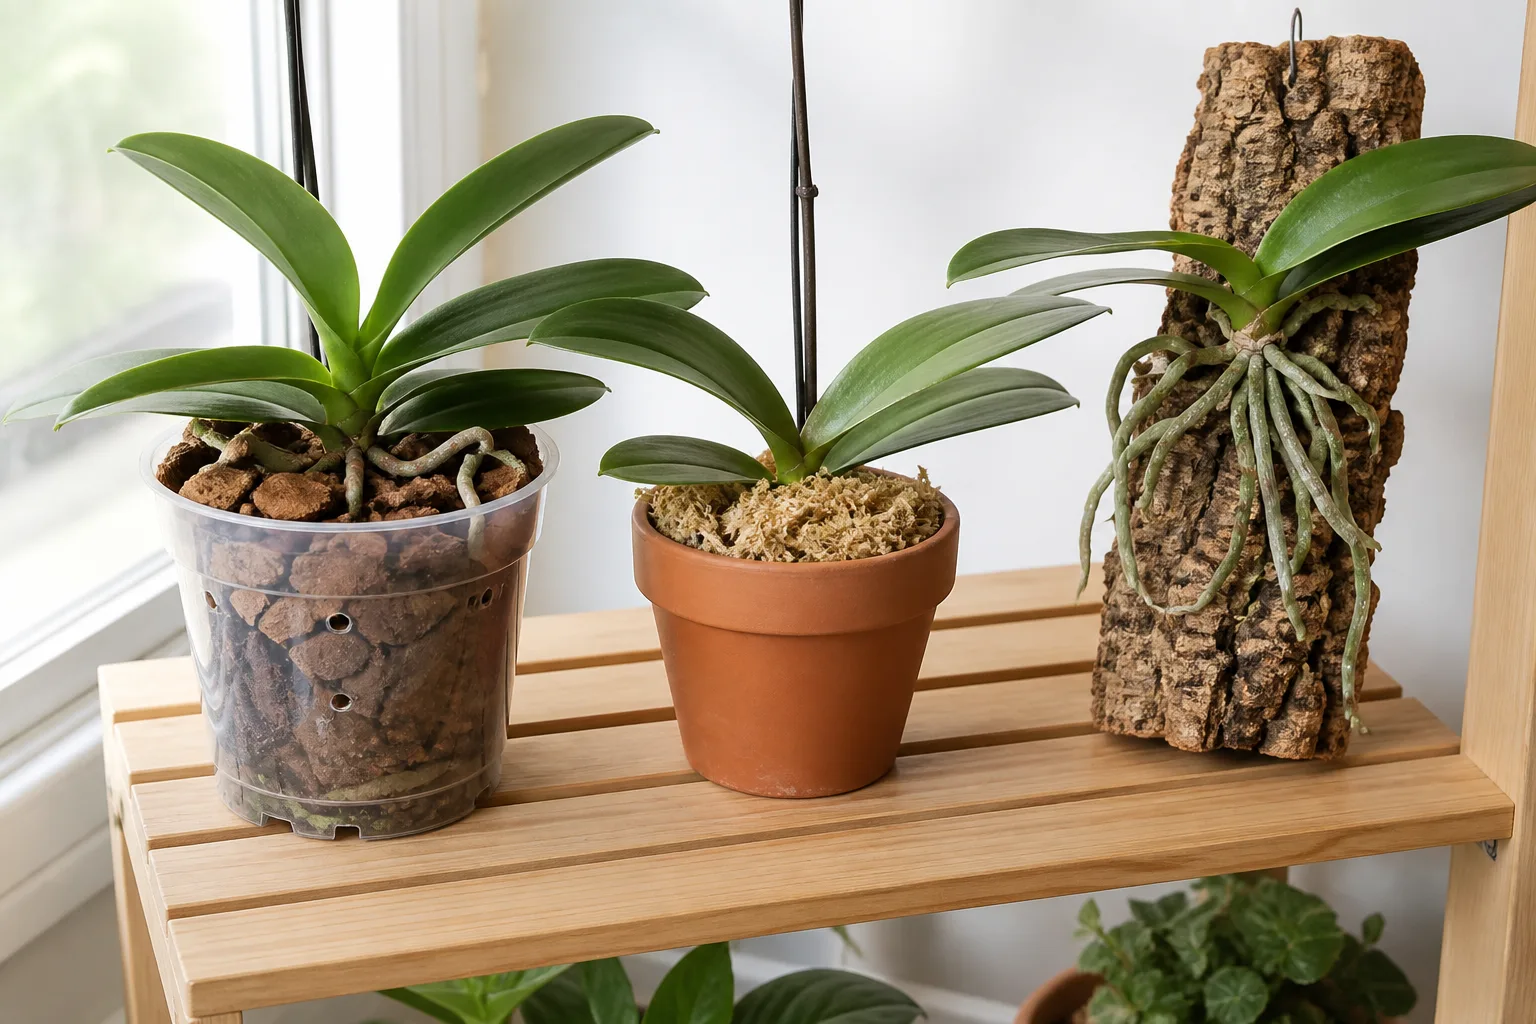
A good watering routine starts with a container that lets water leave. Use a pot with drainage holes, and choose an orchid medium made for air movement—usually bark-based, with perlite, charcoal, or another open ingredient as appropriate for the plant. Keep the crown at the surface and leave healthy aerial roots exposed rather than burying them in wet mix.
Sphagnum moss is not inherently wrong, but it holds water longer than chunky bark and needs a lighter hand. It can suit a dry home or an experienced grower who checks the interior, but a tight plug of moss around the roots is a common retail problem. If the center stays wet for weeks while the outer bark dries, the issue is the structure of the potting mix, not a failure of your pouring technique.
Avoid oversized pots. A large container filled with extra medium can stay wet around a small root system long after the top looks dry. A snug pot makes it easier to see the dry-down cycle, especially when the pot is clear.
When to Repot
Repot when the bark has broken down into fine, soft particles, the pot remains wet too long, the plant is packed in a deteriorating moss plug, roots are rotting, or the plant has clearly outgrown its container. Do not repot a stable orchid simply because a flower dropped; flowering naturally ends, and unnecessary disturbance can remove healthy roots.
The best time for routine repotting is often after flowering, when the plant can focus on roots and leaves. Remove the plant and old medium gently, soak stubborn bark if needed, and cut only roots that are mushy, hollow, or clearly dead with a clean tool. Set the plant into fresh orchid mix at the same depth, secure it if loose, and keep the crown above the medium.
University of Connecticut’s repotting sequence uses fresh bark mix, a clean container, careful root trimming, and a tepid soak followed by thorough drainage. It also notes that old bark deteriorates over about two years, so the condition of the medium matters more than an arbitrary repotting date. (UConn orchid care and repotting)

Match Symptoms to the First Fix
Orchid symptoms are clues, not diagnoses. Start with the root zone and the recent care history: Was the pot heavy for a week? Did the plant sit in a cover pot? Was the room moved near a heater? Did the bark change from chunky to fine? Those details often separate a correctable watering mismatch from disease or environmental stress.
If Overwatering Is the Problem
Suspect overwatering when the pot stays wet, the medium smells sour, the roots are brown and mushy, or several leaves weaken while the root zone remains damp. A single old yellow leaf can be normal aging, but widespread yellowing alongside failed roots deserves attention.
Stop adding water and unpot the orchid if rot is likely. Remove the wet medium, rinse enough to see the roots, and cut away only soft or hollow tissue with sterilized scissors. Move the plant into a clean, appropriately sized pot with fresh, airy orchid mix. Do not water by habit just because the plant has been repotted; let the new medium and remaining roots establish a dry-down pattern, then resume careful soak-and-drain watering.
If most roots are gone, the plant may not be able to use much water. Keep humidity moderate, provide bright filtered light and gentle airflow, and avoid sealing the plant in a constantly wet enclosure. Recovery is measured in firming leaves, new root tips, or new growth—not in an immediate return to flowers.
If Underwatering Is the Problem
Suspect underwatering when the bark is dry through the pot, the container is very light, roots are mostly silver and firm, and leaves are wrinkled or limp without mushy roots. A severely dry bark mix can repel water, so a quick pour may run down the sides and leave the center dry.
Rehydrate by watering slowly and evenly or by briefly immersing the pot, then drain it completely. Repeat a second wetting only if the medium remains dry inside. Do not leave the pot submerged overnight as a rescue shortcut. Once the roots are hydrated, wait for the next almost-dry cycle instead of keeping the medium continuously wet to make up for lost time.
If leaves remain wrinkled after the roots are green or the medium is moist, stop assuming thirst. Look for root loss, crown damage, very low humidity, excessive heat, or a pest problem. An orchid cannot restore leaf tissue instantly, so the absence of immediate visual improvement is not proof that more water is needed.
If Water Is Trapped in the Crown
If water has collected in the center of the plant, wick it out with a clean, absorbent corner and move the orchid into brighter, gently moving air. Do not blast it with a fan or rub the tender growing point. Watch for a softening center, dark spreading tissue, foul smell, or a new leaf that fails to emerge.
Crown rot is more urgent than a wet outer root. Remove standing water first, keep the crown dry afterward, and isolate the plant from orchids if the tissue is spreading. The Connecticut Agricultural Experiment Station links disease reduction with avoiding leaf wetting, improving airflow, and maintaining sanitation. If the growing point has collapsed, recovery becomes uncertain because Phalaenopsis grows new leaves from that central crown rather than from multiple independent stems. (Connecticut Agricultural Experiment Station orchid diseases)
Care After Flowering and Reblooming
Flowers fading does not mean the orchid needs more water. It may simply be finishing a normal display. Continue checking roots and medium, keep the plant in bright filtered light, and avoid the common post-bloom swing from neglect to several heavy waterings.
Once the flowers have fallen, inspect the spike. A green Phalaenopsis spike may branch from a lower node, although the second display can be smaller and the plant may benefit more from a full rest. A brown, dry spike is finished and can be cut near the base with a clean tool. If the plant is weak or has root damage, prioritize roots and leaves over coaxing a side branch.
Light and temperature can matter as much as water for reblooming. Fine Gardening notes that a healthy moth orchid needs enough light to store energy and that a seasonal drop in night temperature can help initiate a new spike; its practical warning is not to confuse a safe cool period with a freezing draft. (Fine Gardening orchid rebloom guidance) University of Connecticut likewise describes cooler autumn nights around 55°F as a flowering cue for moth orchids while warning that large temperature fluctuations can cause buds to fall. (UConn orchid care and repotting)
Give a recovering plant one stable routine before adding bloom products, moving it repeatedly, or changing fertilizer. New roots, firm leaves, and a stable crown are evidence that care is working. A new spike is a later outcome, not the first measure of recovery.
Conclusion
The worst thing for orchids is not one missed watering or a single imperfect pour. It is a repeated pattern of wet roots without air, dry roots without a full rehydration, water trapped in the crown, and a pot or medium that prevents you from seeing what is happening.
For a typical indoor Phalaenopsis, check the roots and medium first, water with room-temperature water when the mix is nearly dry, wet the whole root zone, and let it drain completely. Keep the crown dry, use an airy orchid medium, adjust the interval to your home, and inspect before escalating a symptom. When you treat watering as a cycle of moisture, oxygen, and observation, the plant becomes much easier to read—and far less likely to fail for a problem you can prevent.



