13 Best Tips for Planting and Growing Tomatoes
Grow healthier tomatoes with 13 practical tips for variety choice, planting time, containers, watering, feeding, support, pruning, and harvest.
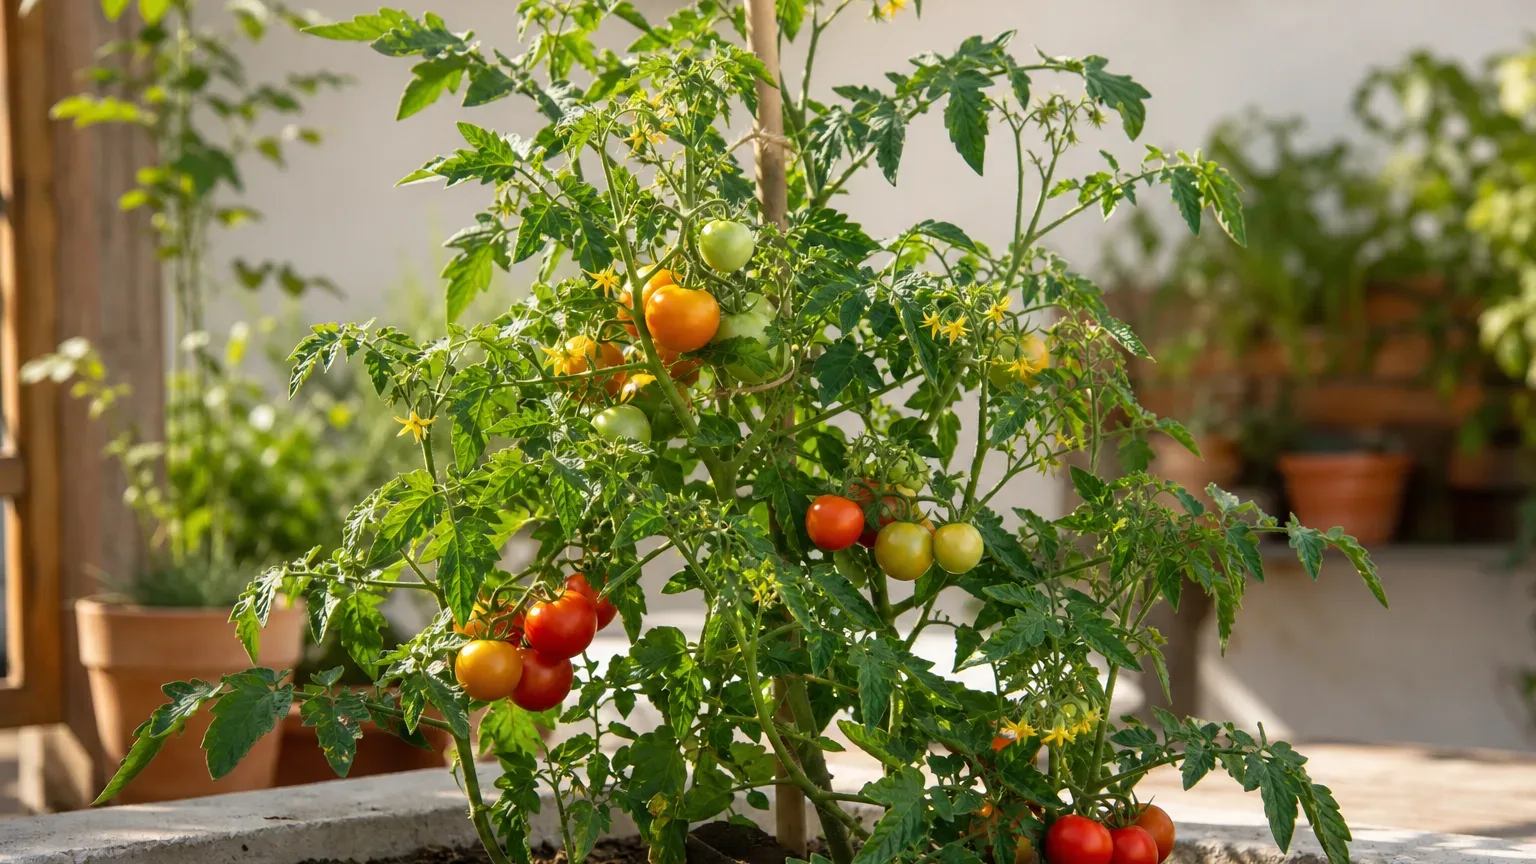
Tomatoes reward good decisions made early. The variety determines how much space and support you need, the planting date determines whether the plant gets established before heat or cold, and the watering routine often decides whether ripe fruit stays smooth or splits. If you are growing your first edible crop, the tomato plant profile is a useful companion for the basics. Treat these choices as a connected system instead of isolated hacks, and tomato care becomes much easier.
Choose a variety that fits your season and space
Read the plant tag or seed packet before you buy. Look for the growing habit, days to maturity, disease-resistance codes, mature size, and whether the variety is suited to outdoor growing in your climate. A tomato described as “compact” may still need a substantial pot, while an indeterminate variety can outgrow a short balcony trellis in a few weeks.
Determinate versus indeterminate tomatoes
Determinate, or bush, tomatoes make a more compact plant and tend to set a concentrated crop. They are often the most forgiving choice for a large patio container, a short growing season, or a gardener who does not want to spend every week tying and pruning. They still benefit from a cage or short support once fruit-laden branches begin to lean, but their side shoots generally stay.
Indeterminate, or cordon, tomatoes keep growing and flowering along an extended stem until weather or the gardener stops them. They can provide a long harvest, but they need a tall, strong support and regular training. Removing every side shoot is not automatically “better care”; it is a way to keep an indeterminate plant to a manageable number of stems. The RHS describes these two habits as requiring different training, so type should be the first pruning decision you make.RHS tomato-growing guide
Match fruit type to climate and the way you eat
Cherry tomatoes usually reach harvest sooner and set more reliably than very large beefsteaks, making them a sensible first crop or a useful insurance plant in a short season. Plum and paste tomatoes are productive choices when your goal is sauce, while slicers and beefsteaks make more sense when fresh sandwiches and salads are the priority. Growing one of each can be more satisfying than planting several varieties that all ripen at the same time.
In hot regions, choose varieties described as heat-tolerant and pay attention to disease resistance recommended by local growers. In a cool or short season, early varieties can matter more than a slightly superior flavor that arrives after the first autumn frost. A hybrid may offer useful vigor or resistance but will not reliably reproduce the same traits from saved seed; choose open-pollinated or heirloom seed if seed saving is part of your plan. In very bright, hot conditions, lighter-colored or smaller fruit can also be less vulnerable to sunscald than dark, large fruit.Epic Gardening’s tomato tips
Plant by conditions, not a calendar date
Tomatoes are warm-season plants, not spring decorations. Set them out after the danger of frost has passed and after the soil and overnight air have warmed. Your local last-frost date is a starting point, but a low garden pocket, cold balcony, exposed roof, or unusually cool spring can make the actual planting window later.
For a useful rule, wait until the forecast shows a stable warm trend rather than trusting one sunny afternoon. The RHS recommends protecting tender tomatoes from frost and planting in a warm, sunny, sheltered place; its seed-starting guidance also uses warm germination conditions rather than a fixed outdoor date.RHS tomato-growing guide If a late cold snap is possible, keep a row cover or old sheet ready, but do not let fabric rest heavily on wet foliage or leave a covered plant baking in strong sun.
Start seeds only when it buys you time
Starting indoors is worthwhile when it extends a short growing season or lets you grow a variety that needs a long, warm run. It is not a contest to produce the tallest seedling. Seedlings started too early often become thin, root-bound, or stressed because indoor light and container space cannot match their growth rate.
Use a clean seed-starting mix, keep it evenly moist rather than waterlogged, and move seedlings into strong light as soon as they emerge. Once the first true leaves develop, pot them on if roots have filled the starter cell. A small fan on a low setting can improve air movement and help seedlings develop sturdy stems, but the goal is gentle movement, not wind damage.
Harden off seedlings and plant the stem deeply
Harden off over roughly one to two weeks by gradually increasing outdoor exposure. Start in bright shade protected from wind, then add morning sun and longer periods outside; bring the plants back in if nights are cold or conditions are harsh. A sudden move from a sheltered windowsill to full sun can scorch leaves even when the air temperature looks suitable.
At planting time, remove the lowest leaves and bury the stem so the first remaining leaves sit above the soil. Tomato stems can form additional roots where they contact moist soil, which helps a leggy transplant establish. Lay a very tall seedling sideways in a shallow trench if that is easier, but mark where the root ball and buried stem are so a stake or cage does not pierce them later. Water the root zone thoroughly after planting to settle soil around the roots.
Prepare the root zone before planting
The best tomato “fertilizer” is often a site that does not force the plant to alternate between drought and saturation. Choose soil that drains after rain but holds enough moisture for the roots to access it between waterings. Loosen only what you need to plant, remove competing weeds, and work in finished compost or other mature organic matter rather than fresh manure.
Build an in-ground bed that drains and holds moisture
Before planting, check whether water disappears slowly, stands in a puddle, or runs off a hard surface. If the bed is heavy clay, improve structure gradually with organic matter and consider a raised bed rather than filling a small hole with a different soil. A pocket of rich, loose soil surrounded by compacted ground can behave like a bowl and keep roots too wet.
Tomatoes tolerate a modestly acidic soil; a soil test is more useful than guessing with lime, eggshells, or a handful of salts. The attached competitor’s pH range is a reasonable reminder to test, but do not change pH or add nutrients without knowing what the soil needs. Space plants according to the tag and support system, commonly around 18 to 24 inches for many garden varieties, with more room for vigorous vines or humid climates. Good spacing leaves room for air to move and for you to inspect the undersides of leaves.
Avoid planting tomatoes in the same bed immediately after tomatoes, peppers, eggplants, or potatoes when you can rotate crops. These relatives can share soil-borne disease pressure. Rotation will not solve every disease problem, but it reduces the chance that old infected debris becomes the first source of trouble for the new crop.
Choose a container that can keep up
Containers work well when they are large enough, stable enough, and easy to water consistently. A practical starting point is one tomato in a pot about 12 to 18 inches wide and deep, with generous drainage holes; vigorous indeterminate plants may need more volume or a very sturdy grow bag. The RHS and BBC Gardeners’ World both describe 30 cm or larger containers as suitable, but the plant label and local heat should settle the final choice.RHS tomato-growing guide BBC Gardeners’ World tomato guide
Use a quality container mix, not plain garden soil, which can compact and drain poorly in a pot. The detailed small-space tomato guide can help you adapt the setup when a full bed is not possible. Set the container where it will receive full sun, but remember that a dark pot on a heat-reflecting patio can dry and heat the root zone faster than a bed. A saucer can protect a surface, but do not leave the pot standing in runoff; empty excess water after it drains.
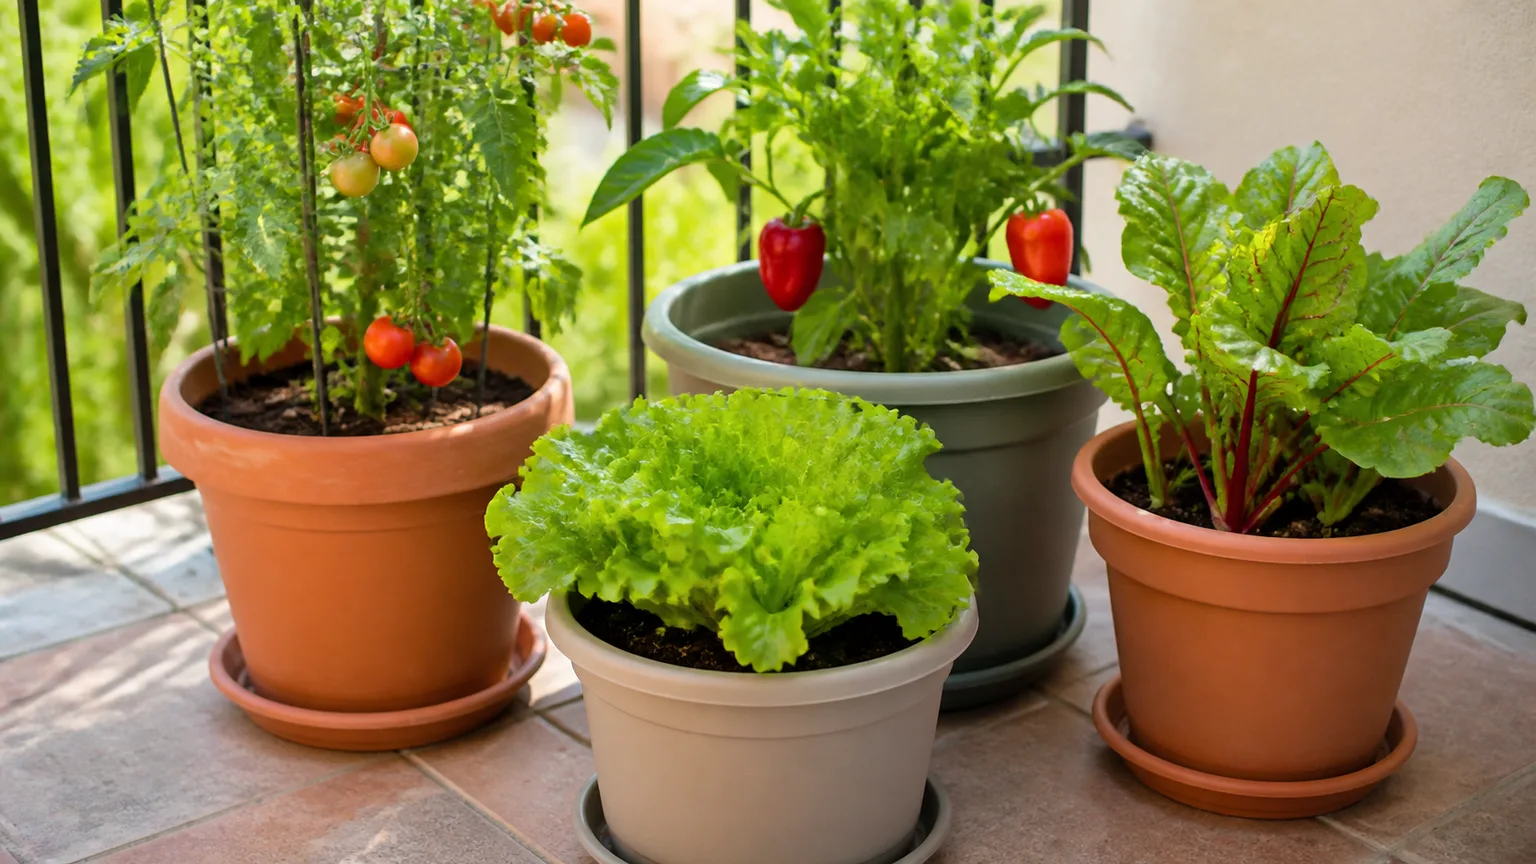
One plant per large container is usually easier to manage than crowding two or three vines into the same volume. If you use a grow bag, confirm the number of plants it is designed to hold and place support before the plants become top-heavy. Container tomatoes may need checking every day during hot weather, not because a calendar says so but because their smaller root volume loses moisture quickly.
Set up sun, water, mulch, and air circulation
Aim for at least six hours of direct sun, with more often helpful for flowering and ripening. Watch the site for a full day before planting: a spot that looks sunny at breakfast may be shaded by a wall or tree by midafternoon. In very hot climates, a little afternoon shade can protect blossoms and fruit, provided it does not leave the plant in dim light or stagnant air.
Air circulation is part of disease prevention. Do not squeeze plants between a wall and a dense hedge, and do not let foliage form an impenetrable tunnel. A cage, trellis, or stake that keeps stems and fruit off the soil also makes leaves easier to inspect and allows them to dry faster after dew or rain.
Water the root zone and watch the soil
Water deeply enough to moisten the active root zone, then let the surface begin to dry before watering again. Check with a finger or trowel several inches down rather than wetting only the top crust. The exact frequency changes with soil, container size, rainfall, wind, temperature, and plant size, so “every Tuesday” is less reliable than looking at the plant and soil together.
Water at the base with a slow stream, drip line, or soaker hose. Wet leaves are not automatically a disaster, but repeated splashing spreads soil onto foliage and leaves that stay damp are more vulnerable to disease. Morning watering gives the surface time to dry, and a slow application is less likely to run away from a compacted root zone.
Keep moisture reasonably even once flowers and fruit are developing. A severely dry plant followed by a heavy soaking can contribute to cracking and blossom end rot, but adding calcium blindly will not fix a root system that cannot take up water consistently. Use this tomato watering guide when you need a closer look at timing and technique. The RHS watering guidance specifically connects fruiting crops such as tomatoes with thorough, consistent moisture and warns that excess water can also encourage root and lower-stem rot.RHS watering guidance
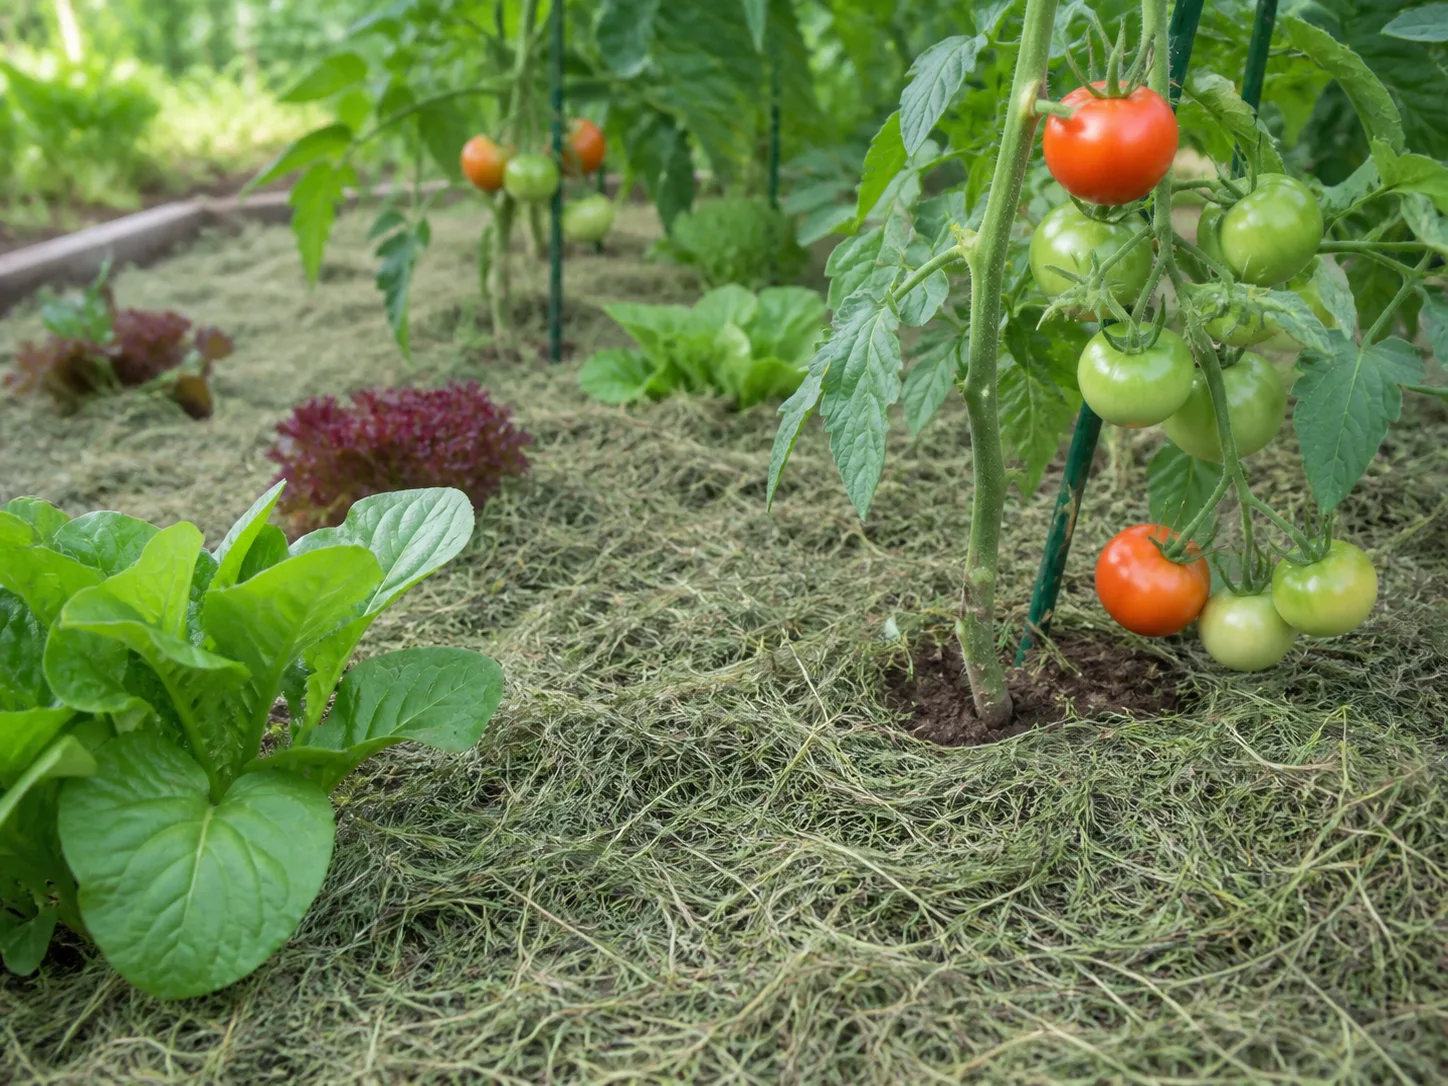
Mulch after the soil has warmed. Apply a two- to three-inch layer of clean straw, shredded leaves, compost, or another suitable organic mulch, leaving a small gap around the stem. Mulch reduces evaporation, buffers soil temperature, suppresses weeds, and keeps rain from splashing soil onto lower leaves. In wet climates, pull back or thin mulch if the soil remains constantly damp or slugs become a problem.
Feed for fruit instead of forcing foliage
Start with a soil test or the nutrient guidance on a reputable tomato fertilizer label. Plants growing in amended ground may need little beyond compost and a measured feeding, while container plants gradually use nutrients that leach through drainage. The goal is not the darkest green plant; it is a healthy balance between leaves, flowers, roots, and fruit.
Too much nitrogen can create an impressive wall of foliage with delayed flowering and fruit maturity. California’s crop fertilization guidance notes that excessive nitrogen can produce lush growth and increase susceptibility to disease or insects, while much of the crop’s nitrogen demand occurs from early fruit set through early red fruit rather than all at once before planting.California Crop Fertilization Guidelines For a home garden, that translates to restraint: avoid stacking compost, manure, fish emulsion, and granular fertilizer simply because the plant looks hungry after a cool week.
If you feed, follow the product’s rate and timing, apply it to moist soil, and keep fertilizer off the stem and leaves. Our tomato fertilizing guide covers the label-reading and timing decisions in more detail. Container tomatoes commonly benefit from a balanced or fruiting formula once fruit begins to form, but “high phosphorus” is not a universal cure for flowers that do not set. A soil or tissue problem, cold nights, heat, drought, or overgrown roots may be the real constraint.
Support plants early and prune with a purpose
Put the support in place on planting day. Trying to force a mature, fruiting vine into a cage later can break stems, disturb roots, and knock off green fruit. Tie stems loosely with soft material, leaving room for expansion, and check the ties as the plant thickens.
Match the support to the tomato type
For determinate tomatoes, a sturdy cage or short stake is often enough to hold fruit-laden branches off the soil. For indeterminate tomatoes, use a tall cage with strong legs, a trellis, a stake-and-string system, or an overhead string that can carry the mature plant. A thin decorative cone may look adequate at the nursery but fold when a vigorous vine is full of wet foliage and fruit.
Support should be strong enough for the variety, the container, and your weather. A top-heavy pot on an exposed balcony may need a wider base, a heavier container, or a position against a sheltered wall. The practical benefit is not just appearance: supported plants are easier to water at the base, inspect for pests, and harvest without dragging fruit across soil.
Remove side shoots only when the type calls for it
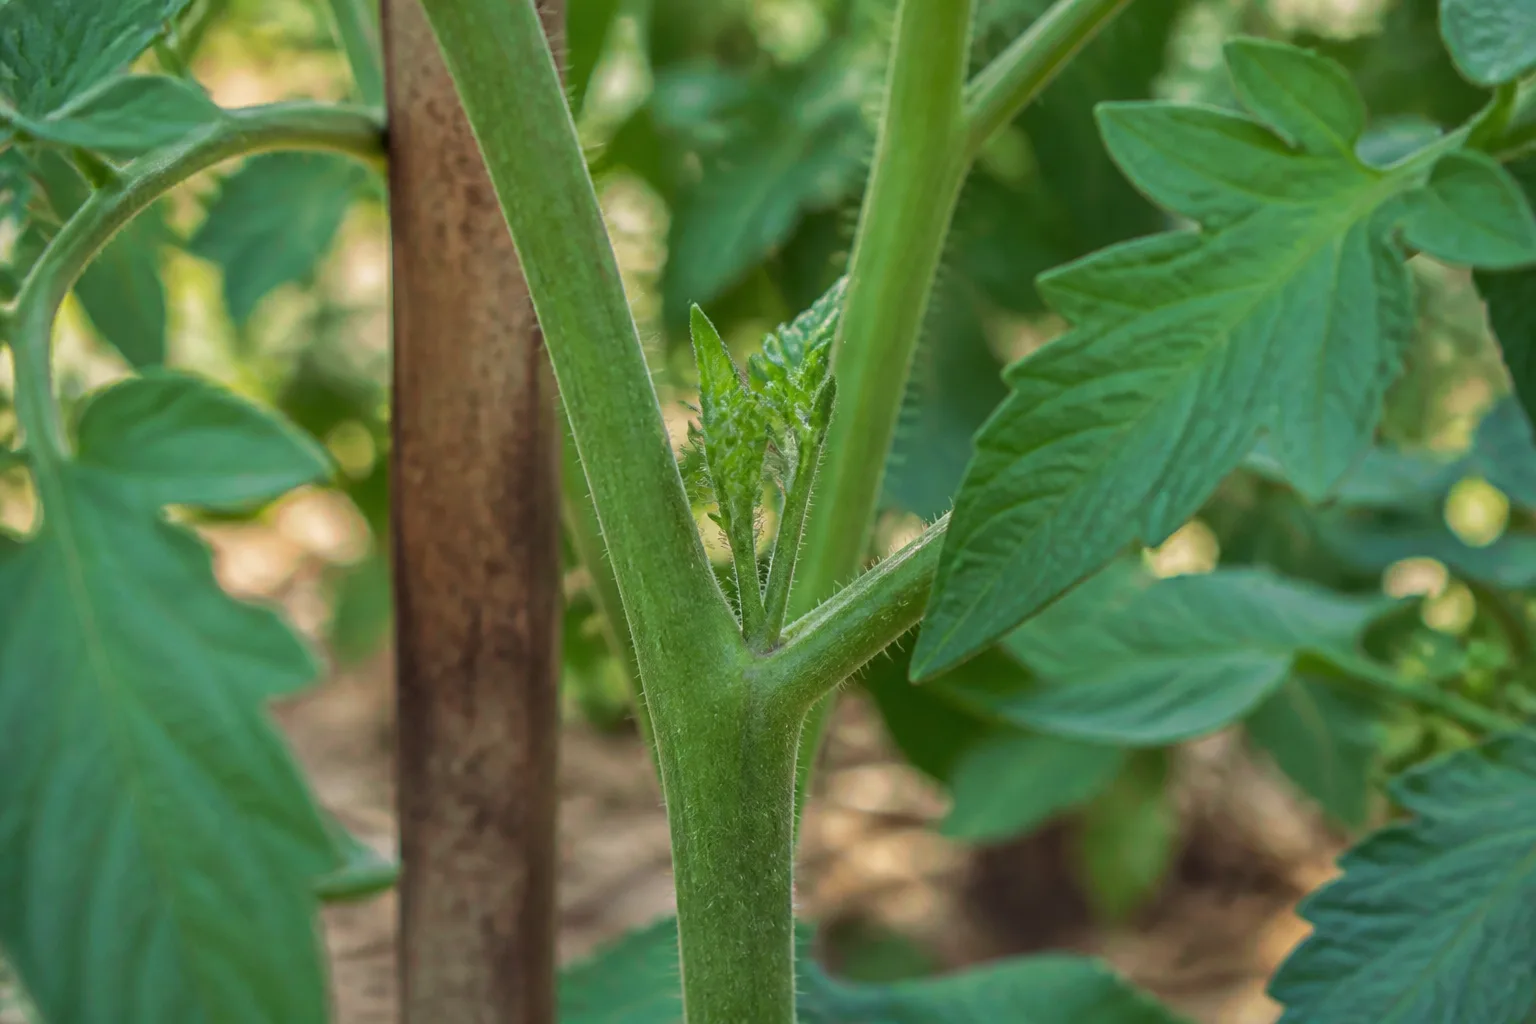
Indeterminate plants can be trained to one or two main stems by removing small shoots that emerge in the angle between a leaf and the main stem. Check weekly while watering and pinch the shoots when they are small. If you miss one, remove it while it is still manageable rather than stripping half the plant in a single stressful session.
Determinate and trailing varieties usually do not need routine sucker removal. Their side shoots are part of the plant’s fruiting framework, and aggressive pruning can reduce leaf area and crop. You can remove yellow leaves touching the soil and thin a dense, diseased section, but do not treat every branch as wasted energy. The dedicated tomato pruning guide can help you identify the shoot junction. The BBC Gardeners’ World guide likewise separates regular cordon training from the lighter touch needed for bush and trailing plants.BBC Gardeners’ World tomato guide
Troubleshoot early, before a small problem spreads
Inspect plants at least twice a week, looking at new growth, leaf undersides, stems, soil moisture, flowers, and fruit. A plant that wilts on a hot afternoon but recovers by evening may be heat-stressed; one that stays wilted in moist soil needs a different investigation. Start with conditions before reaching for a spray or a supplement.
Yellow lower leaves can reflect age, overwatering, poor drainage, nutrient imbalance, or disease. Brown spots that enlarge, fuzzy growth, and rapid collapse deserve prompt removal of affected material and better air movement; the tomato disease guide is a useful next step when symptoms persist. Do not compost diseased plants unless your local system reaches temperatures appropriate for pathogen control. Caterpillars, including hornworms, can remove foliage quickly, so check for ragged leaves and dark droppings and hand-pick visible pests where practical.
Diagnose poor fruit set and cracked fruit by conditions first
A flowering plant without fruit is not always underfed. Tomato pollen and fruit set are sensitive to temperature swings; extreme heat, cool nights, drought stress, and poor air movement can all reduce the number of flowers that become fruit. In a greenhouse, ventilate and gently tap fully open flower clusters when conditions are still; outdoors, give the plant time if a heat wave or cold spell is clearly responsible. Avoid adding more nitrogen to a plant that is already producing lush leaves.
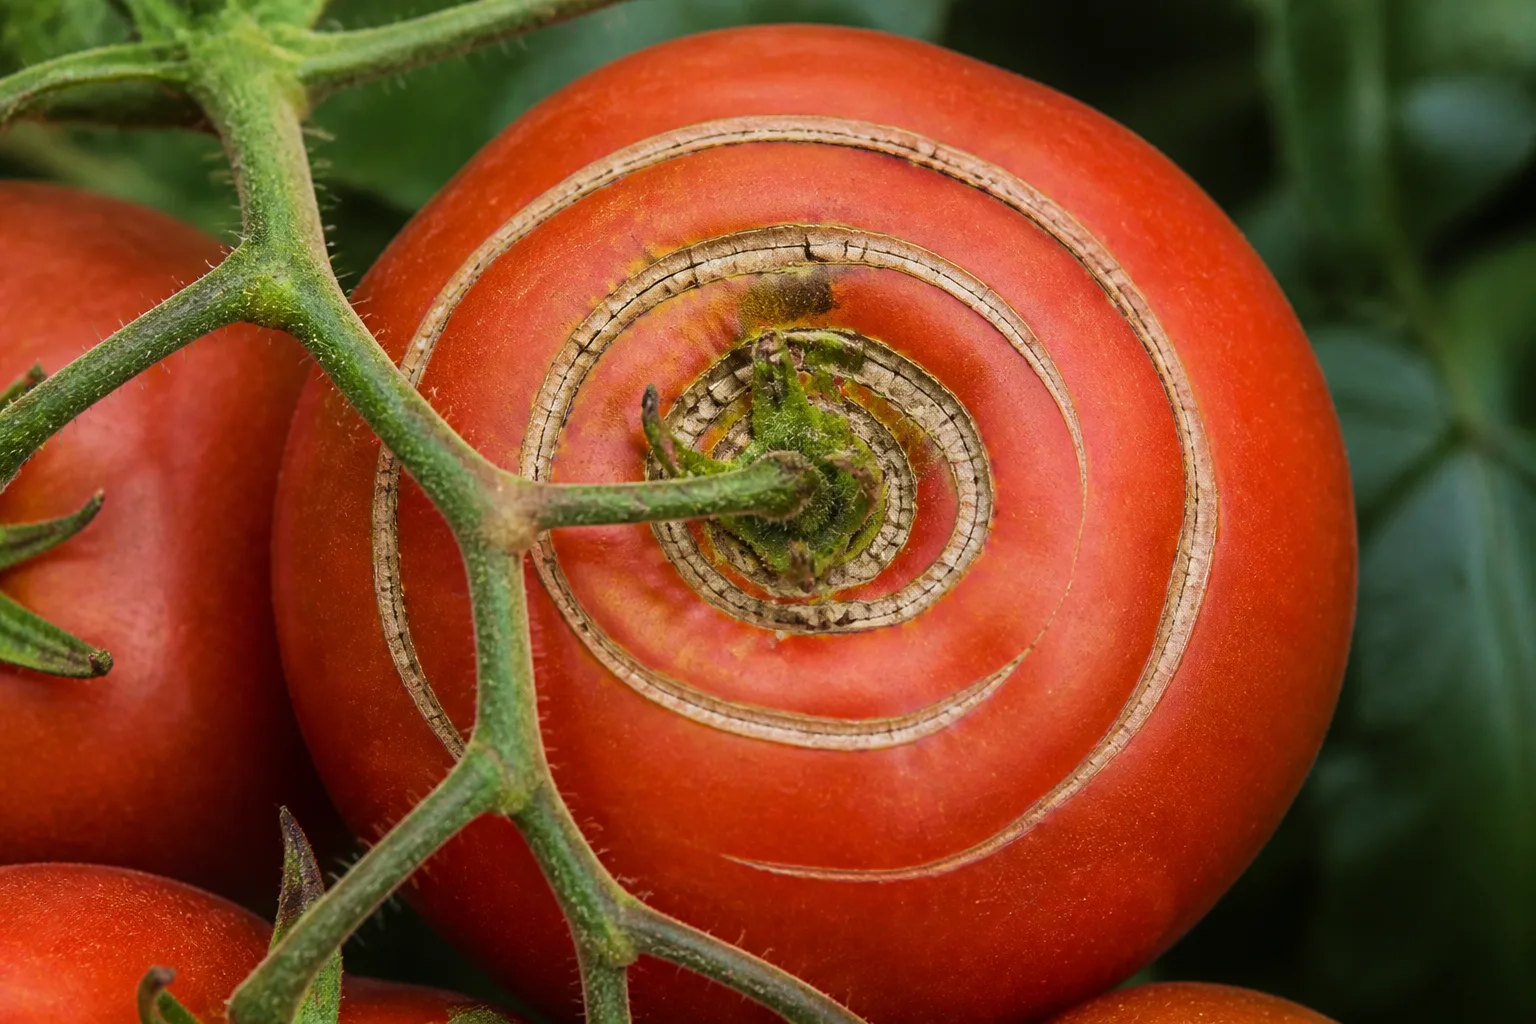
Cracks or splits usually point to a rapid change in water reaching the fruit, often after a dry period followed by heavy irrigation or rain. The tomato splitting guide explains the symptom in more detail, but the first actions are the same: keep watering steadier, mulch the root zone, harvest ripe fruit promptly, and choose less crack-prone varieties if the problem repeats. Large, thin-skinned fruit may still crack in difficult weather, so the realistic aim is to reduce the frequency, not promise a perfect skin every season.
Blossom end rot looks like a dark, sunken patch on the bottom of the fruit. It is associated with the plant’s inability to move enough calcium into developing fruit, often during uneven moisture or root stress; it is not proof that the soil contains no calcium. Remove affected fruit, correct watering and drainage, and test soil before changing pH or adding amendments. If several plants fail in the same way, inspect the shared irrigation pattern and root-zone conditions first.
Harvest at the right color and store for flavor
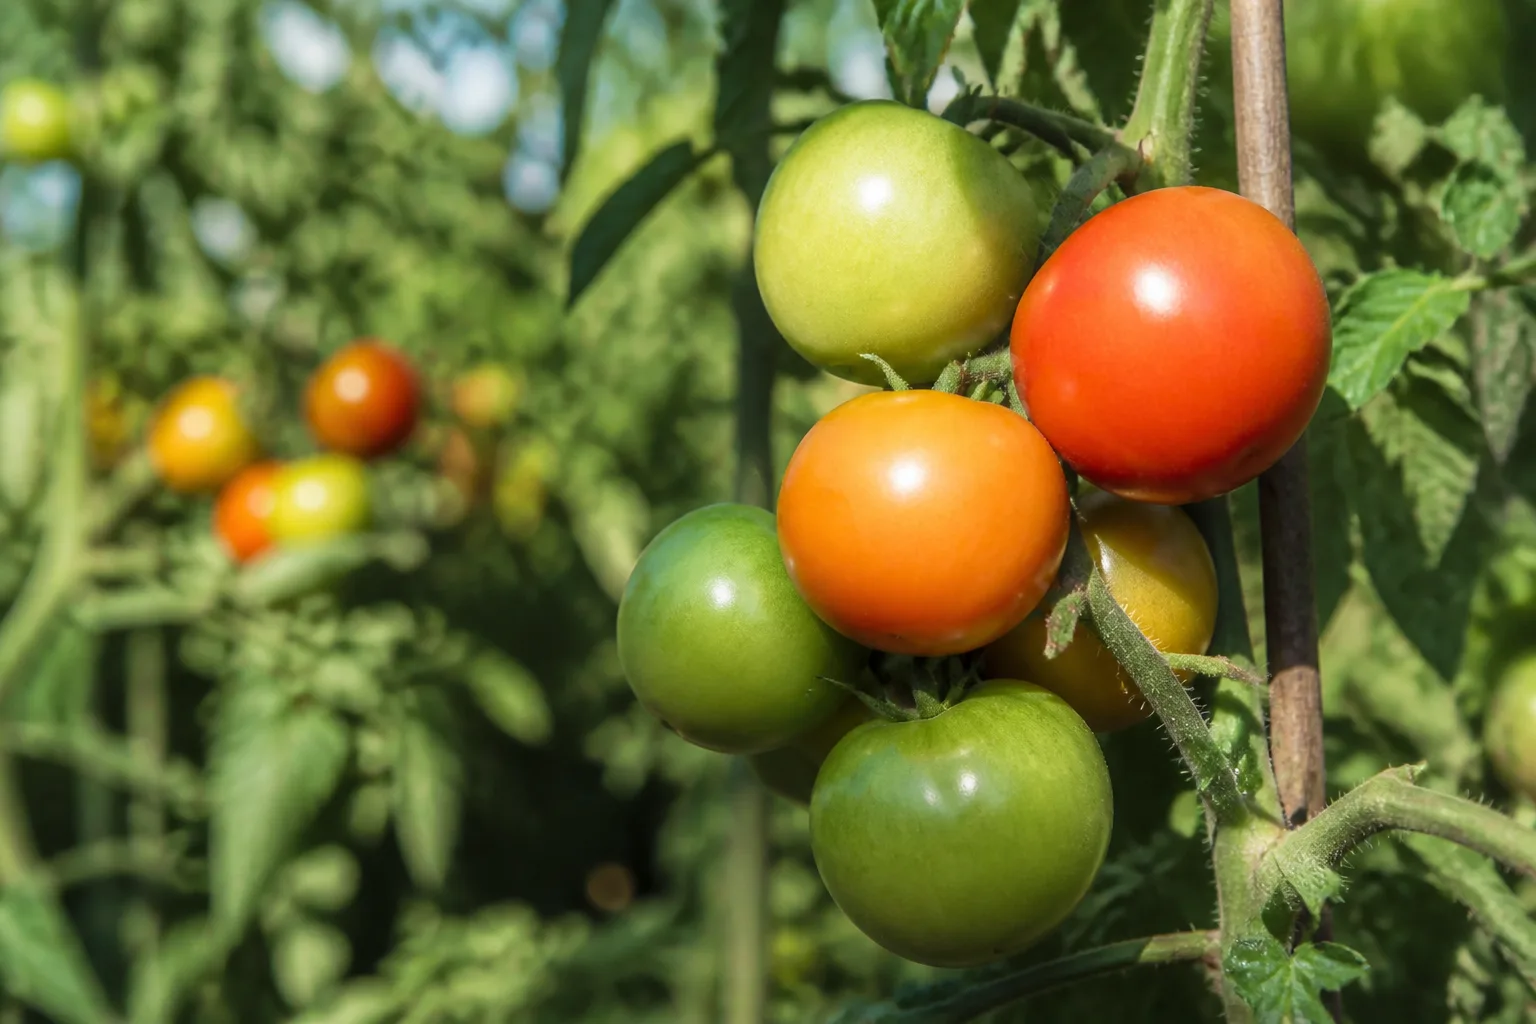
Harvest when fruit has reached its mature color and has a glossy, firm-but-not-hard feel. A ripe tomato should usually release with a gentle lift or twist rather than a hard pull. Check plants every day or two during peak season because an overripe fruit can split, attract pests, or spread decay to fruit touching it.
If birds, cracking, or disease threaten the crop, pick at the “breaker” stage, when the fruit has begun to change color, and let it finish indoors at room temperature away from direct sun. Fully green fruit may not develop the same flavor as vine-ripened fruit, although mature green tomatoes can still be useful for cooking. The RHS recommends checking fruit individually and bringing unripe fruit indoors at the end of the season, while BBC Gardeners’ World advises room-temperature storage and cautions that refrigeration can harm texture and flavor.RHS tomato-growing guide BBC Gardeners’ World tomato guide
Keep ripe tomatoes in a single layer on the counter, stem side up or down according to what prevents bruising in your setup. Do not wash them until you are ready to eat them, and use cracked or damaged fruit first. If the harvest becomes larger than your kitchen can handle, turn it into sauce, roasted tomatoes, or another prepared food and freeze that instead of expecting whole tomatoes to thaw with fresh texture.
Conclusion
Great tomatoes come from consistency more than secret ingredients. Choose a variety that fits the space and season, wait for warm planting conditions, bury the stem deeply, give roots a large and well-drained home, and install support before the plant sprawls. Then keep moisture even, feed with restraint, prune only the type that benefits, and inspect often enough to catch pests or disease while the first action is still simple.
If the season turns difficult, adjust the growing conditions before blaming the variety. Shade during extreme heat, protection during a cold snap, mulch during dry spells, cleaner spacing during wet weather, and earlier harvesting before heavy rain can each rescue part of a crop. The result may not be perfect every year, but a thoughtful sequence will give you healthier plants and far more tomatoes worth eating.