How to Grow and Care for Asiatic Lilies
Learn how to grow Asiatic lilies with the right planting depth, sun, drainage, watering, feeding, division, overwintering, and pest fixes.
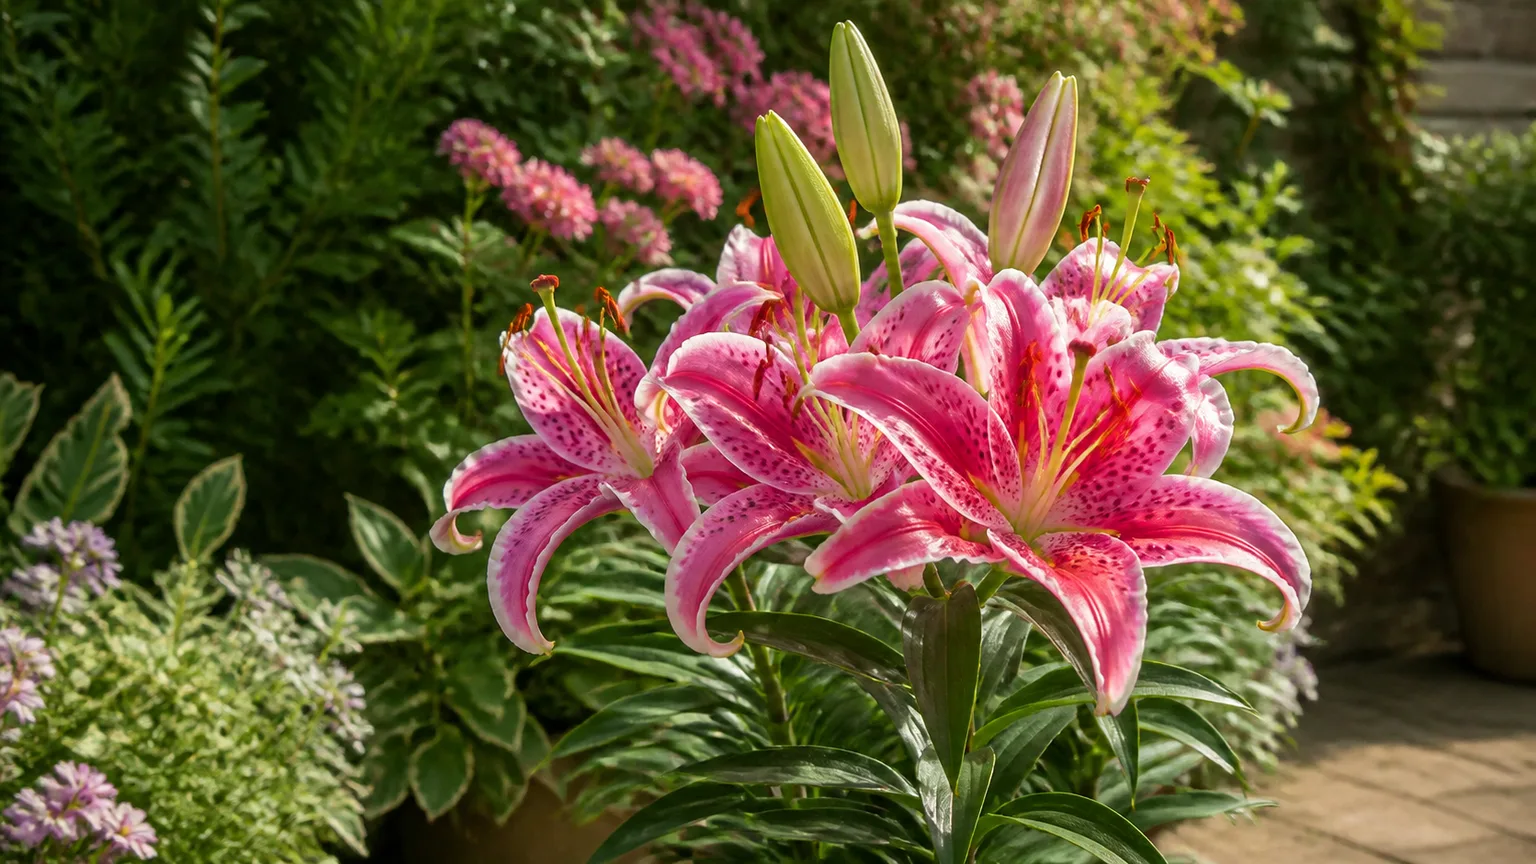
Asiatic lilies are among the easiest true lilies to grow when three conditions line up: a healthy bulb, fast-draining soil, and enough sun to power the leaves. Their upright, six-petaled flowers arrive in late spring or early summer in shades of orange, yellow, red, pink, white, and purple. Most cultivars have little or no fragrance, which makes them useful where a strong lily perfume would be distracting.
Unlike daylilies, Asiatic lilies grow from scaly bulbs and produce one season of flowering stems from those bulbs. The flowers are not the plant’s entire life cycle. After petals drop, the green stem and leaves continue building energy for next year’s bloom, so the most important maintenance often happens after the show is over.
Asiatic lilies at a glance
Most Asiatic lily hybrids grow about 2 to 5 feet tall, depending on cultivar and conditions. They are hardy perennials in roughly USDA zones 4 through 9, although local drainage, snow cover, and summer heat can matter as much as the zone number. Bloom commonly lasts about a month, with timing ranging from May through July.
They prefer full sun or light partial shade, fertile soil that drains promptly, and steady moisture without standing water. The upper leaves and flowers want light, while the bulb benefits from a cooler, mulched root zone. Planting low-growing companions nearby can shade the soil without hiding the lily’s foliage.
Asiatic lilies are toxic to cats. The ASPCA guide on lilies and pets included with the supplied reference warns about lilies and cats; do not bring cut stems or fallen pollen into a home with cats, and contact a veterinarian immediately if a cat may have chewed any part of a lily. Dogs may also become ill from plant material, so keep pets from eating ornamental flowers.
Choose healthy bulbs and the right variety
Buy bulbs that feel firm and heavy for their size, with intact scales and no sour smell, leaking tissue, or soft brown areas. A little loose papery skin is normal. A shriveled bulb may still grow, but it has fewer reserves and is more likely to produce a weak stem in its first season.
Choose the variety by mature height as well as flower color. Short cultivars work at the front of a border or in pots. Tall cultivars create a strong vertical accent and are better toward the back of a bed, where neighboring plants can disguise their lower stems later in summer. Double-flowered ‘Sundew,’ dark ‘Blackstone,’ orange-and-purple ‘Forever Susan,’ and ‘Apricot Fudge’ are examples of the wide range available, but tags vary by nursery and region.
If you want cut flowers, select strong-stemmed types and plant several bulbs in a group. For a small garden, a shorter variety is easier to support and less likely to lean toward a window or walkway. Remember that Asiatic hybrids are not the same as Oriental lilies: they generally bloom earlier and are far less fragrant.
Pick a site with sun and cool roots
Aim for six or more hours of direct sun in a site with good air movement. Morning sun is especially useful in humid climates because it dries leaves early. In very hot areas, a little afternoon shade can protect flowers and keep containers from overheating, but heavy shade produces thin stems, fewer flowers, and a greater chance of leaning.
Avoid low spots where rain collects. A lily can tolerate damp soil for a short time, but a bulb sitting in saturated ground has little oxygen around its roots and can rot. If your soil stays wet for days after rain, plant in a raised bed or mound instead of simply adding a shallow layer of compost to the planting hole.

Prepare soil and plant bulbs correctly
Loosen the bed at least 10 to 12 inches deep and mix in finished compost if the soil is compacted or low in organic matter. The goal is a crumbly bed that holds moisture but releases excess water. Do not pack rich compost into a small pocket around the bulb; that can create a wet basin in otherwise dry soil.
Plant bulbs in late summer or early fall so they can make roots before winter, or plant spring-purchased bulbs promptly. Set each bulb with the pointed growing tip upward and cover it with about 6 inches of soil. In loose, sandy soil, a slightly deeper planting can help keep bulbs cool; in heavy clay, improve drainage or plant on a gentle mound rather than burying the bulb deeper.
Space bulbs about 8 inches apart for a full display with enough room for air circulation. Water the bed thoroughly once after planting. Mark the location so you do not accidentally dig into dormant bulbs later in the season.
Water and feed without causing rot
Keep soil evenly and moderately moist while stems are growing. A useful starting point is about 1 inch of water per week, including rainfall, adjusted for soil and weather. Water deeply at the soil line when the upper layer begins to dry. Sandy beds and pots may need more frequent checks; cool clay beds may need less.
Do not water by calendar alone. If leaves droop while soil is wet, investigate roots and drainage before adding more water. If the top few inches are dry and the plant is flowering in hot weather, give a slow, deep soak rather than a daily splash.
Feed in spring as shoots emerge with a balanced slow-release fertilizer, following the product label. A small amount of fertilizer at fall planting can help establish new bulbs, but do not fill the hole with concentrated granules. Excess nitrogen encourages soft leafy growth and can make stems less sturdy without producing more flowers.
Keep stems upright and flowers useful
Tall stems may need a discreet stake, especially in windy locations or rich soil. Install the stake early, before roots and bulbs are disturbed by pushing it into the bed. Tie loosely with soft material so the stem can move.
For a vase, cut flowers when the lowest buds show color but have not all opened. Leave a substantial portion of the leafy stem on the plant. Removing every leaf along with the flower weakens the bulb’s ability to recharge.
Deadheading is optional. Snip a fading flower just below the swollen seedpod, but leave the stem and leaves attached. Removing the flower prevents seed production from taking energy, yet it will not make an Asiatic lily produce a second full flush of flowers that same season.
Grow Asiatic lilies in containers
Use a pot with several drainage holes and enough depth for roughly 6 inches of mix above the bulbs. A container about 7 inches wide can hold one regular bulb; wider pots can hold a group, provided bulbs are not touching. Use a quality potting mix amended for drainage rather than garden soil, which compacts in a pot.
Place the container where the plant gets strong light and where excess water can escape. Pots dry faster than beds, so check moisture with a finger several inches down during hot weather. Do not leave the pot standing in a saucer of water.
Container lilies can be more vulnerable to winter temperature swings. Move the pot to a sheltered, unheated location or insulate it where appropriate for your climate, while still allowing the bulb to experience a normal dormant period. Repot only when the container is crowded or the mix has broken down, ideally while the plant is dormant.
What to do after flowering
Once the petals fall, remove only the spent flowers or seedpods. Keep every green leaf in place until it turns yellow and pulls away easily. Those leaves are the bulb’s solar panels; cutting them down while they are green is one of the quickest ways to reduce next year’s flower count.
As the stem yellows, reduce watering if rainfall is low but do not let newly planted bulbs become bone dry. Once the foliage is completely brown, cut it at soil level and clear away the debris. A thin layer of leaf mold or shredded leaf mulch helps moderate soil temperature, but do not bury emerging shoots under a thick, wet mat in spring.
Divide crowded clumps
Asiatic lilies can multiply by producing new bulbs and bulblets. Divide a crowded clump in early fall after the foliage has died back, or in early spring before vigorous growth begins. Dig widely so the shovel does not slice through the bulbs, lift the clump, and gently remove loose soil.
Separate offsets by hand where possible. Replant firm bulbs immediately at the same approximate depth and spacing used for new bulbs. Water once to settle the soil, then keep it lightly moist while roots re-establish. A divided bulb may flower less strongly the following season while it rebuilds.
Raise bulblets or grow from scales
Small bulblets that form along an underground stem can be lifted and planted in a nursery bed or pot. They often need a year or more before reaching flowering size. Propagation from scales is possible but slower: remove a few healthy outer scales from a dormant bulb, keep them lightly moist in a sterile medium, and pot the tiny bulblets after roots form.
These methods are worthwhile when you have a special cultivar or want many plants. Division is the most forgiving choice for ordinary garden maintenance. Never sacrifice a healthy bulb just to experiment with propagation when the plant is already stressed by rot or disease.
Growing Asiatic lilies from seed
Seed-grown lilies are a long-term project. Hybrid seedlings may not resemble the parent, and flowering can take several years. Seed is best for breeding or for gardeners who enjoy the process, not for quickly filling a border.
Sow fresh seed in a clean, free-draining mix in early spring. Cover it lightly, keep it warm and evenly moist, and provide bright light after germination. As seedlings develop small bulbs, grow them on in pots or a protected nursery bed. Harden young plants before moving them outside, and protect their tiny root systems from drying out.
Overwinter bulbs successfully
In-ground bulbs generally overwinter best when soil drains well and a mulch layer buffers freeze-thaw cycles. Leave dormant bulbs where they are rather than digging them every year. In colder climates, add several inches of loose straw or shredded leaves after the ground cools, then remove or thin the mulch as shoots appear.
The biggest winter risk is often wet soil, not cold. If a bed freezes and thaws while remaining saturated, bulbs can deteriorate even when the variety is hardy. Container bulbs need extra protection because cold reaches them from every side; shelter the pot without placing it in a warm room that interrupts dormancy.
Prevent lily beetles and foliar disease
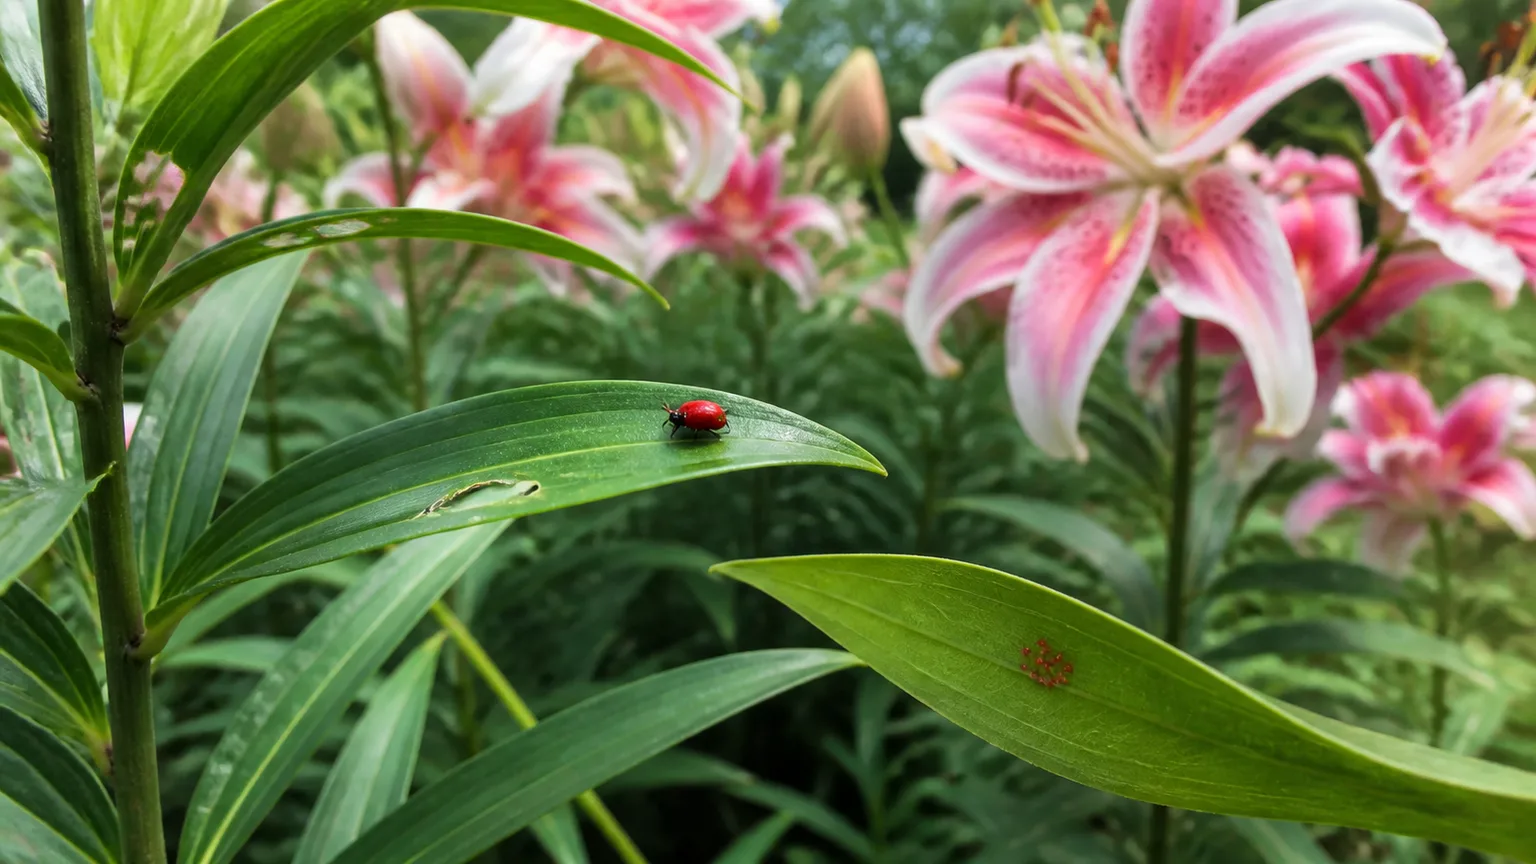
Inspect new growth and the undersides of leaves regularly. Red lily leaf beetles, their larvae, and egg masses can quickly turn healthy foliage into a lacework of holes. Hand-pick adults and larvae into soapy water, and remove orange egg masses before they hatch. Early inspection is more effective than waiting until the plant is stripped.
Aphids may cluster on tender tips and flower buds. A firm stream of water can dislodge small populations; repeat as needed and avoid spraying open flowers when pollinators are active. Use any labeled treatment exactly as directed, especially around flowering plants.
Botrytis can appear as tan or brown spots when foliage stays wet and crowded. Improve spacing, water at the base in the morning, remove badly affected leaves, and clear plant debris at season’s end. Basal rot is more closely tied to damaged bulbs or persistently wet soil; improve drainage and discard soft, rotting bulbs rather than replanting them.
Diagnose yellow leaves, holes, and brown spots
- Yellow leaves early in the season: check for saturated soil, poor drainage, or damaged roots before adding fertilizer.
- Yellow lower leaves after flowering: gradual yellowing is normal as the plant transfers energy back to the bulb.
- Holes or shredded edges: inspect for lily leaf beetles, larvae, and egg masses, especially on leaf undersides.
- Brown spots that expand in wet weather: remove affected tissue, improve airflow, and keep irrigation off the foliage.
- A weak, leaning stem: check light, spacing, wind exposure, and whether excessive nitrogen produced soft growth.
- No flowers: consider a bulb planted too shallow or too deeply, insufficient sun, premature foliage removal, overcrowding, or a bulb that has rotted.
Make next season more floriferous
The best bloom improvement is usually a sequence, not a single product: plant firm bulbs at the right depth, give them strong light, keep water moving through the soil, and protect the leaves after flowering. Deadheading helps redirect energy, but preserving green foliage matters more than removing every faded flower.
Divide when clumps become crowded rather than waiting for stems to weaken. Refresh mulch without covering crowns, stake tall plants before they lean, and inspect foliage weekly during the beetle season. If lilies repeatedly fail in one bed, move the bulbs to a raised, better-drained location instead of increasing fertilizer.
Conclusion
Asiatic lily care is mostly about respecting the bulb’s schedule. Plant in well-drained soil, give the stems sun and the roots an even supply of moisture, feed modestly in spring, and let the foliage finish its work after flowers fade. With those habits, these early-summer perennials can return for years, multiply into larger clumps, and remain far less troublesome than their dramatic flowers suggest.



