Pumpkin Plant Stages: From Seed to Harvest
Pumpkin growth stages explained with a week-by-week timeline, stage-ID cheat sheet, and fixes for flowers with no fruit, stalled vines, and early harvest mistakes.
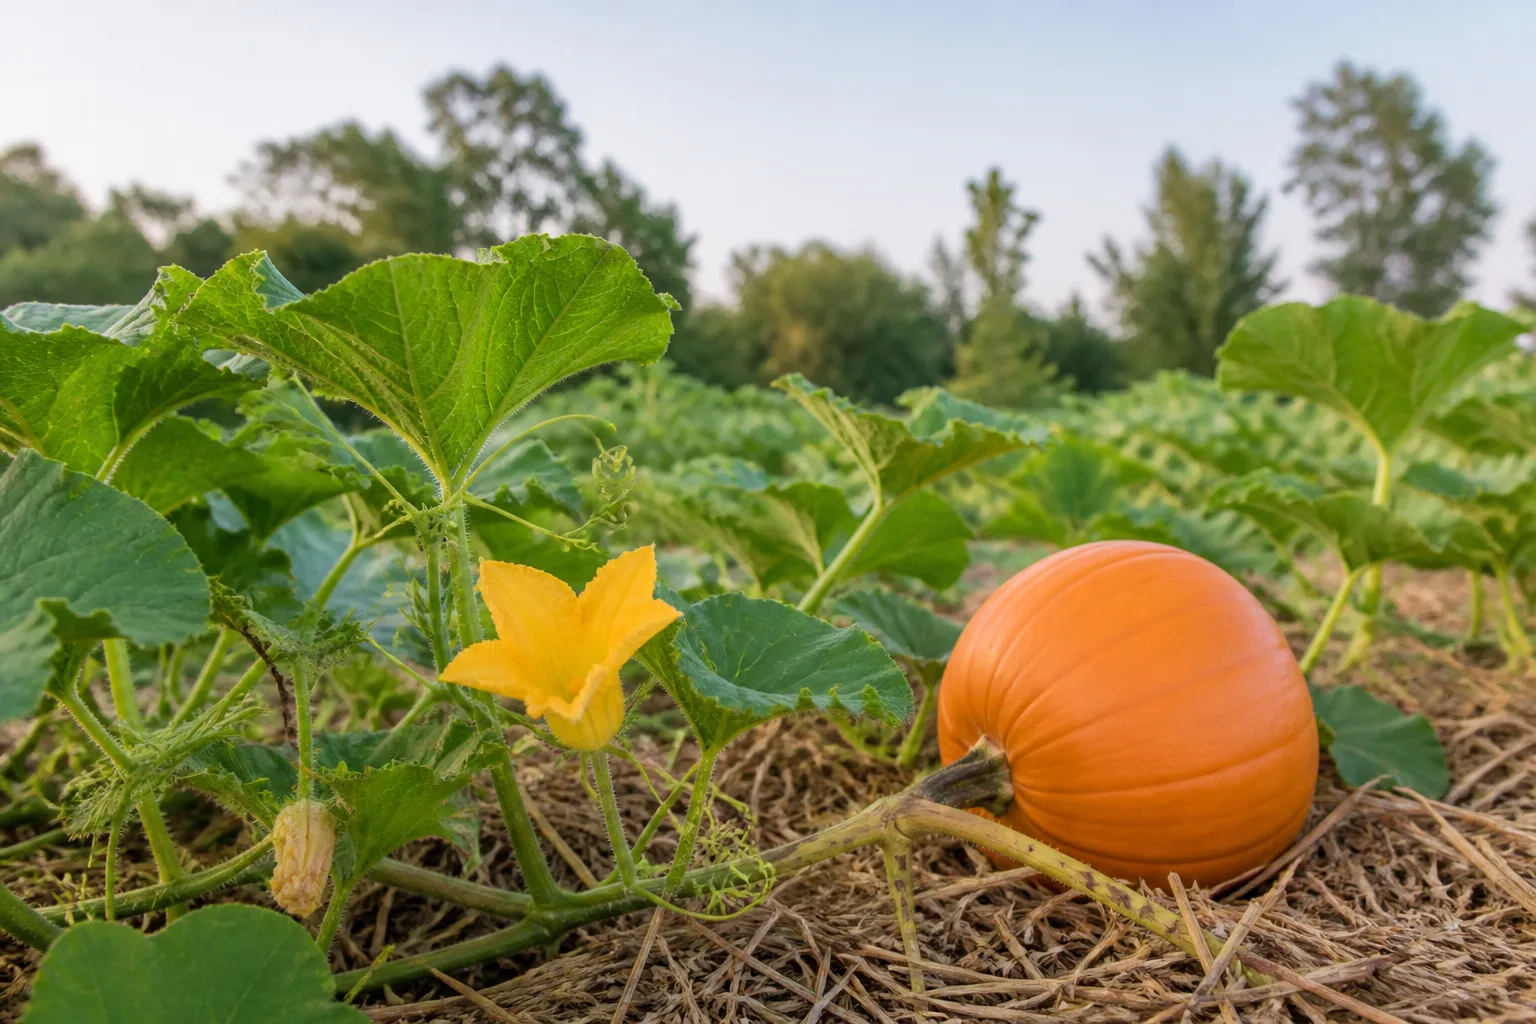
You planted pumpkin seeds three weeks ago, and now the patch looks like a tangle of broad leaves with yellow blooms that open and collapse overnight. Is that normal? Are you behind schedule? Pumpkin plant stages follow a predictable cucurbit rhythm—germination, seedling leaves, explosive vine growth, male-then-female flowering, pollination, fruit fill, and finally rind hardening—but the calendar shifts with soil warmth, variety, and whether you direct-sowed or started indoors.
Knowing which stage you are in matters because the right action changes completely. A seedling wants steady moisture and protection from wind; a flowering vine needs pollinators and even water; a swelling fruit needs deep irrigation and something clean under the rind. This guide walks through every pumpkin growth stage with the visible signs that tell you where you stand, plus what to do before small mistakes become a season without pumpkins.
If you are still at the seed-prep step, our guides on soaking seeds before planting and how long seeds take to sprout pair well with the early stages below.
Quick Stage ID Cheat Sheet
Use this table when you are standing in the garden trying to place your plant on the calendar. Days are approximate from sowing; check your seed packet days to maturity (DTM) because pie types, carving varieties, and giants do not run on the same clock.
| Stage | Typical timing | What you see | Priority action |
|---|---|---|---|
| Germination | Days 1–10 | Soil crack, hook-shaped sprout | Warm soil (65–95°F), even moisture |
| Seedling leaves | Days 10–21 | Oval cotyledons, then lobed true leaves | Full sun, thin or transplant |
| Vegetative / vines | Weeks 3–6 | Runners, tendrils, large leaves | Space, deep water, light feeding |
| Flowering | Weeks 6–9 | Yellow male blooms first, then females | Protect pollinators, avoid midday wilt panic |
| Pollination / fruit set | Weeks 7–10 | Tiny green fruit at female flower base | Steady water; hand-pollinate if needed |
| Fruit development | Weeks 9–14 | Rapid size gain, green rind | Deep irrigation, mulch under fruit |
| Ripening | Weeks 12–18+ | Color change, hard rind, dry stem | Reduce excess water; do not rush pick |
| Harvest & curing | When signs align | Corky stem, hollow thump, full color | Cut with stem; cure 7–10 days |
Most standard carving and pie pumpkins need roughly 90 to 120 days from seed to harvestable fruit. UF/IFAS Gardening Solutions notes that pumpkins generally take about four months in the ground, with some regional varieties stretching toward 120–150 days. Giant types and long-season heirlooms can push past that range—plan from the packet, not from memory.
What Counts as a Pumpkin Growth Stage
A growth stage is not just “it got bigger.” Each phase has a distinct job: the seedling stage builds leaf area for photosynthesis; the vegetative stage lays down vine length and root mass; flowering switches the plant toward reproduction; fruit development reallocates energy into one or a few pumpkins (unless you thin for size). Ripening is its own stage because color change and rind hardening happen after maximum size—picking during green-fruit development wastes weeks of flavor and storage potential.
Some gardeners split “first leaves” and “true leaves” into separate mental stages. That split is worth making: cotyledons feed the baby plant from stored reserves, while true leaves start the engine that powers vine growth later.
Stage 1: Germination (Days 1–10)
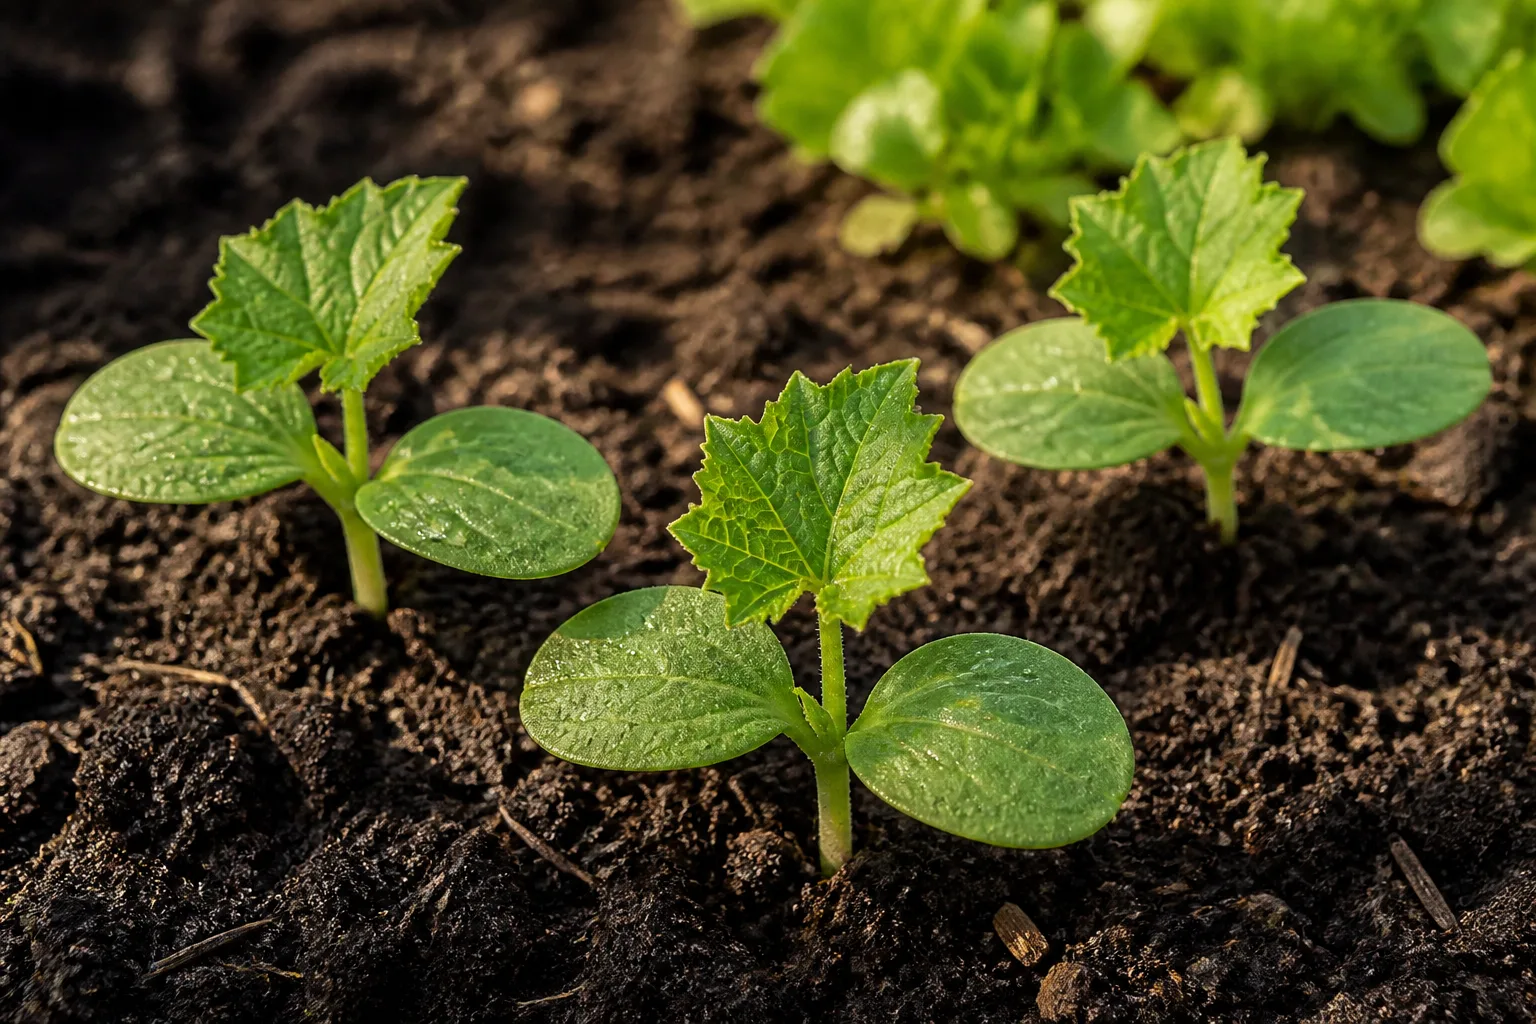
Germination begins when the seed coat takes up water and the radicle (first root) anchors into soil. Under warm conditions, pumpkin seeds often emerge in 5 to 10 days; cold or soggy soil stretches that window or kills the seed outright. The first above-ground sign is a bent hypocotyl—commonly called the “hook”—pulling cotyledons through the surface.
Pumpkin seeds germinate best when soil temperature sits roughly between 65°F and 95°F, with the sweet spot near 70–90°F. Below 60°F, germination slows sharply. That is why northern gardeners direct-sow after the last frost when soil has warmed, or start seeds indoors on a heat mat two to three weeks before transplant. If you are comparing sprout speed across crops, pumpkins behave like other large cucurbit seed—faster than carrots, slower than beans in cold dirt.
Soil Temperature and Moisture Cues
At germination, soil warmth matters more than bright sun on day one. Indoors, a seed-starting heat mat held near 80–85°F can shave days off emergence. Outdoors, planting into raised hills warms soil faster and improves drainage—Purdue Extension consumer horticulture specialist Rosie Lerner notes that hills warm up and shed excess water better than flat planting, which helps cucurbits that rot in cold, saturated seed beds.
Keep the seed zone evenly moist, not flooded. A light daily mist or gentle soak prevents crusting. Hard dry spells after sprouting can kill seedlings before true leaves expand. If nothing emerges after 14 days in warm soil, dig up one spot: rotted seed means too wet; intact seed means too cold or too dry.
Stage 2: Cotyledons and First True Leaves
The first leaves you see are cotyledons—smooth, oval, bean-sprout-looking pairs that do not resemble mature pumpkin foliage. They are embryonic leaves packed with stored energy. Within about 7 to 14 days after emergence, the first true leaves appear between the cotyledons, growing directly from the stem center.
True pumpkin leaves are rounded to lobed, rougher, and deeper green than cotyledons. Once you have two or three true leaves, the plant is actively photosynthesizing and outgrowing its seed reserves. This is the stage where seedlings look nearly identical to cucumber and squash cousins—same family, same cotyledon shape.
How to Tell Cotyledons From True Leaves
Use three quick checks. Shape: cotyledons are plain ovals; true leaves show lobes or teeth. Position: cotyledons sit opposite each other low on the stem; true leaves alternate higher up. Texture: true leaves feel slightly sandpapery; cotyledons are smooth and waxy. If you are thinning a hill sown with three seeds, keep the sturdiest seedling once true leaves appear and snip the others at soil level to avoid root disturbance.
Give seedlings full sun (6–8+ hours) and light, consistent water at the base. Overhead soaking that keeps cotyledons wet overnight invites damping-off. If you started indoors, begin hardening off a week before transplant so wind and direct sun do not scorch the first true leaves—our spring seedling transplant guide covers the gradual exposure schedule.
Stage 3: Seedling Hardening and Transplant Timing
Whether you direct-sowed or started indoors, the seedling stage ends when plants have three to four true leaves and roots fill a cell or hold a soil ball. Transplant after the last frost when soil is warm—usually when nighttime lows stay above 50°F and soil temperature at 2 inches depth reaches at least 60°F.
Space matters early. Pumpkin vines eventually need 8 to 15 feet of runway for full-size types; bush or semi-bush varieties like ‘Funny Face’ can work in tighter beds but still want several feet of spread. UF/IFAS recommends leaving room for long vines—some regional types exceed 20 feet. Planting into crowded beds now creates shade wars later.
At this stage, a light balanced fertilizer or compost incorporation is enough. Heavy nitrogen later is fine during vine run; pushing too much nitrogen on tiny seedlings produces floppy growth without improving fruit set down the line.
Stage 4: Vine and Vegetative Growth
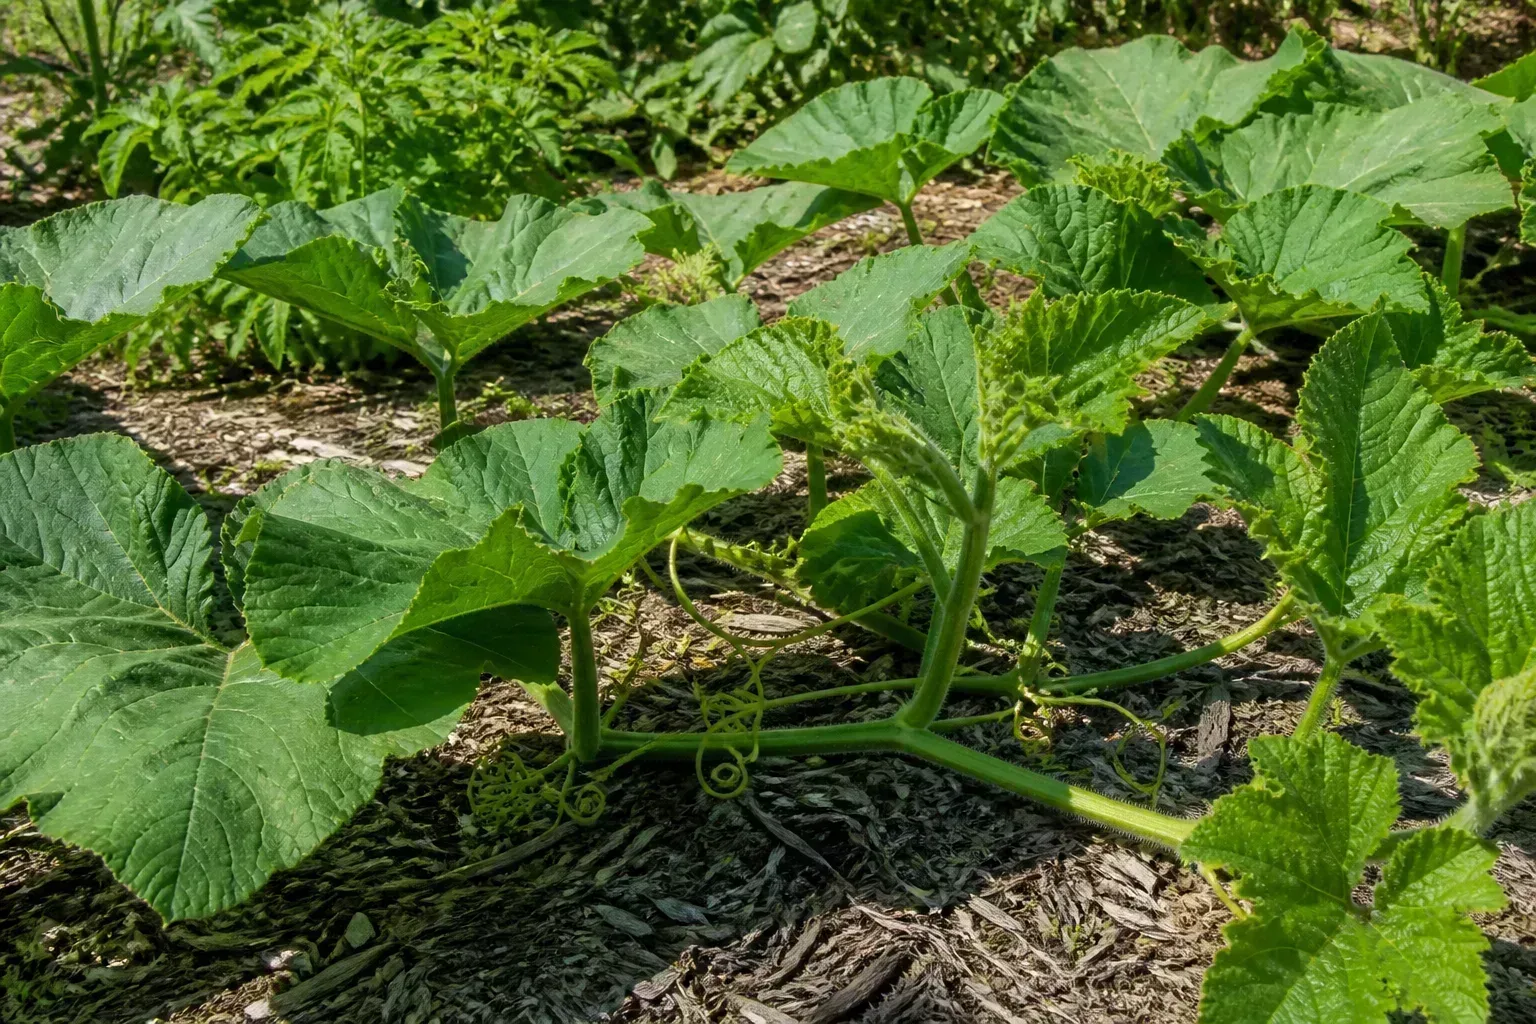
Vegetative growth is the dramatic middle act. Once true leaves multiply, the plant sends out runners—thick stems with curling tendrils that anchor and explore. In peak summer heat, pumpkin vines can add up to 6 inches of length per day, swallowing pathways and neighboring beds if you did not plan space.
Large leaves during this stage are assets, not clutter. They manufacture the sugars that later feed flowers and fruit. Purdue Extension guidance echoed in grower education emphasizes that big leaves support carbohydrate production—routine vine pruning for backyard patches is usually unnecessary unless you are limiting fruit number for giant pumpkins or reclaiming walkway space.
When Vines Run and How Fast They Grow
Expect major vine expansion roughly weeks 3 through 6 after sowing, depending on heat. Tendrils twist to support weight; secondary runners branch from the main vine. If you are trellising miniature pumpkins, train the leader early while stems are flexible. For ground culture, turn runners back into the bed rather than across lawn traffic.
Water deeply once or twice a week—about 1 inch of water weekly, more in sandy soil or heat waves—rather than daily sprinkles that shallow-root the plant. Afternoon leaf wilt on huge cucurbit leaves is often heat droop, not drought: if foliage perks up after sunset, do not drown the roots. If wilt persists into cool morning hours, then investigate dry soil or root issues.
Mulch with straw or shredded leaves to hold moisture and keep fruit off bare soil later. Companion planting for cucumbers and other cucurbits can help with pollinator diversity if you interplant flowers nearby—see our pollinator yard tips for low-spray strategies that keep bees working your pumpkin flowers.
Stage 5: Male and Female Flowers Appear
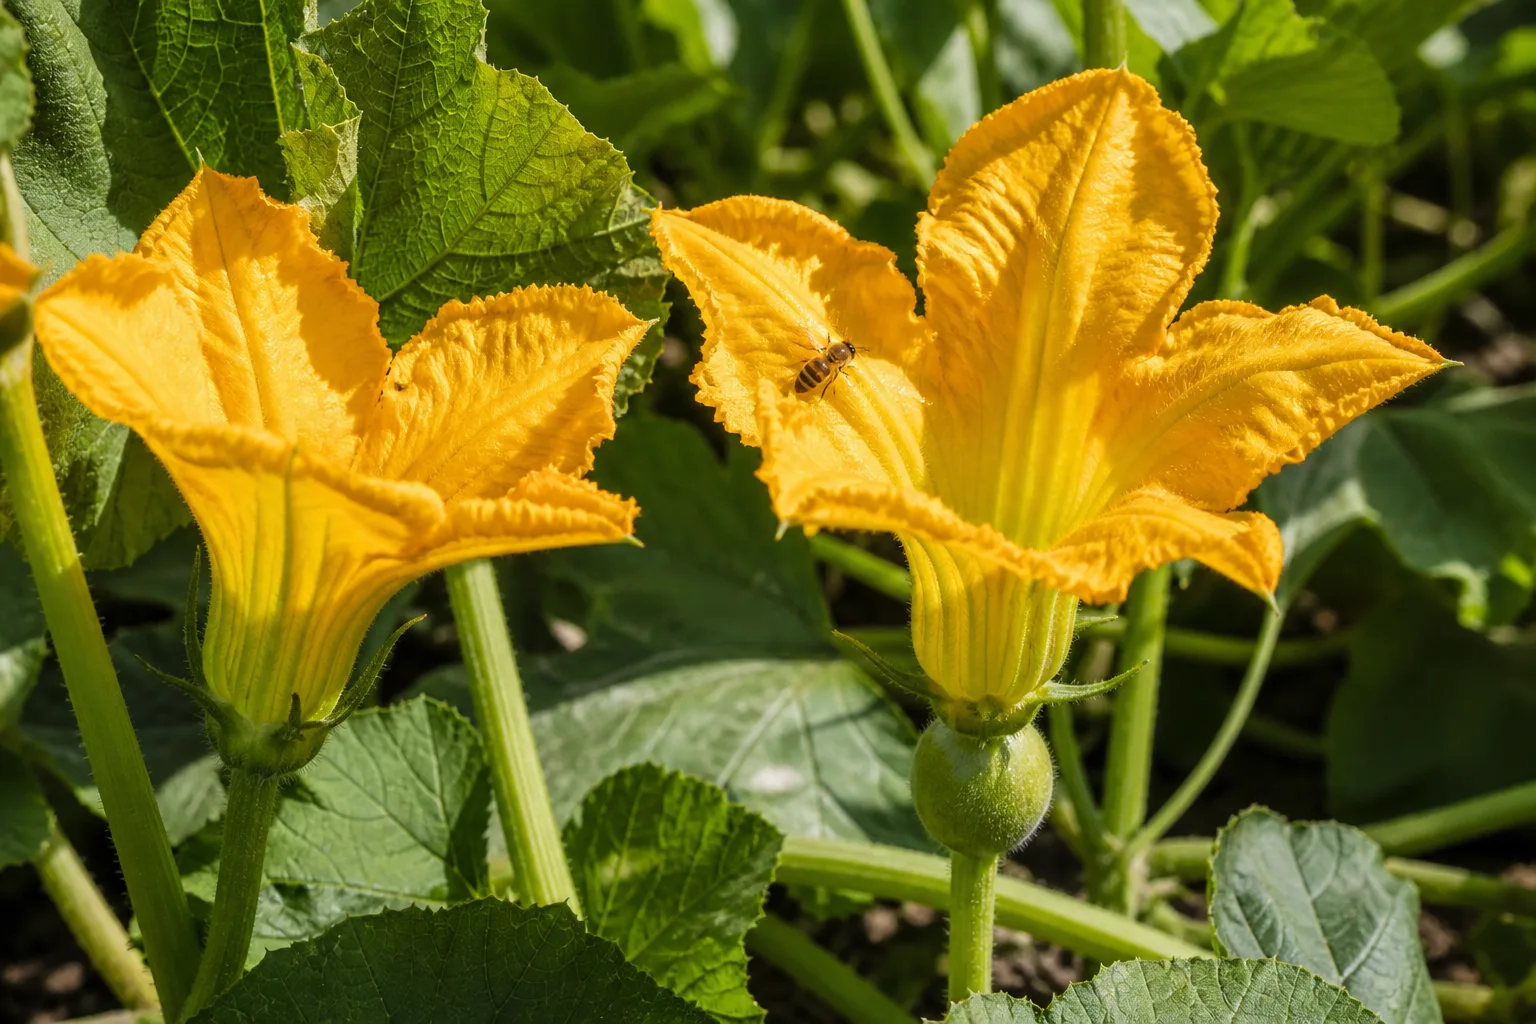
Flowering typically starts 8 to 10 weeks after planting in many climates—often mid to late summer for May sowings. The showy bright yellow blooms are impossible to miss, but the order matters: male flowers open first, sometimes for a week or two before the first female appears.
Male flowers sit on long, thin stems with a straight stalk and no swelling beneath the petals. Female flowers grow closer along the vine with a miniature green fruit (ovary) behind the blossom—that bump is a baby pumpkin waiting for pollen. Both flower types open for a single morning, then wilt by afternoon. Missing that morning window is a common reason gardeners think pollination “failed” when they simply checked too late.
Identifying Male vs Female Pumpkin Flowers
Peek inside an open male flower: you will see a central stamen dusted with pollen. Inside a female flower, the stigma is a multi-lobed cluster at the center of the ovary bump. If you only see males for days, the plant is still maturing—patience is normal. If females open with no males nearby, hand pollination needs pollen from another plant or stored male blooms.
Drought stress during flowering reduces pollen viability and can cause blossoms to drop. Keep soil moisture steady through bloom—irregular dry spells are a silent fruit-set killer in cucurbits, similar to what gardeners see on cucumber fruiting timelines.
Stage 6: Pollination and Fruit Set
Pollination happens when pollen moves from male stamens to female stigmas—usually via bees, but wind and human hands can help. After a successful pollination, the female flower may close and the ovary behind it begins to swell within 2 to 4 days. If the tiny fruit yellows and shrivels within a week, pollination likely did not take.
Male flower drop after they open is normal—the plant sheds spent males once their pollen is released. Do not panic at a carpet of wilted male blooms. Worry when females abort repeatedly while vines look healthy; that pattern points to pollination gaps, extreme heat, or inconsistent water.
Hand Pollination When Bees Are Scarce
In urban yards, sprayed landscapes, or rainy bloom weeks, you may need to intervene. Early morning is best, when flowers are freshly open:
- Identify a male flower open today and peel back petals to expose the pollen-covered stamen.
- Locate a female flower open the same morning.
- Gently brush pollen onto each lobe of the female stigma.
- Optionally tag that fruit with soft twine so you know which set succeeded.
You can also use a small clean paintbrush to transfer pollen between flowers on the same plant—pumpkins are monoecious (both sexes on one vine), so one vigorous plant can set fruit alone if both flower types overlap. For heavier sets, grow two plants to widen the bloom window.
Avoid insecticides during bloom hours. If you must treat for cucumber beetles or squash bugs, spray in late evening when flowers are closed and bees are gone.
Stage 7: Fruit Development and Sizing
Once fruit set holds, you enter fruit development—the 45 to 55 days many varieties need after successful pollination to reach maturity. The young pumpkin starts golf-ball small and can expand startlingly fast when nights stay warm and roots have steady moisture.
Uneven watering now causes growth cracks, flat sides, and blossom-end stress. Aim for deep, consistent irrigation rather than feast-or-famine cycles. Slide straw, cardboard, or a board under developing fruit so the rind does not sit on wet soil or rot on one side. Gently rotating fruit a quarter turn every week or two promotes even color if foliage shade is heavy—do not twist aggressively or snap the stem.
This is also when gardeners choose how many fruits to keep. A standard vine may carry several modest pumpkins; growers aiming for one large specimen thin to one or two fruits so the plant channels energy into size. Backyard carving patches often leave two to four fruits per plant without issue.
Foliar diseases and squash vine borers show up most during heavy fruit gain. Yellowing leaves with wilting runners may be disease, pest, or simply the plant redirecting resources—check stems for borer frass before assuming natural senescence.
Stage 8: Ripening, Harvest, and Curing
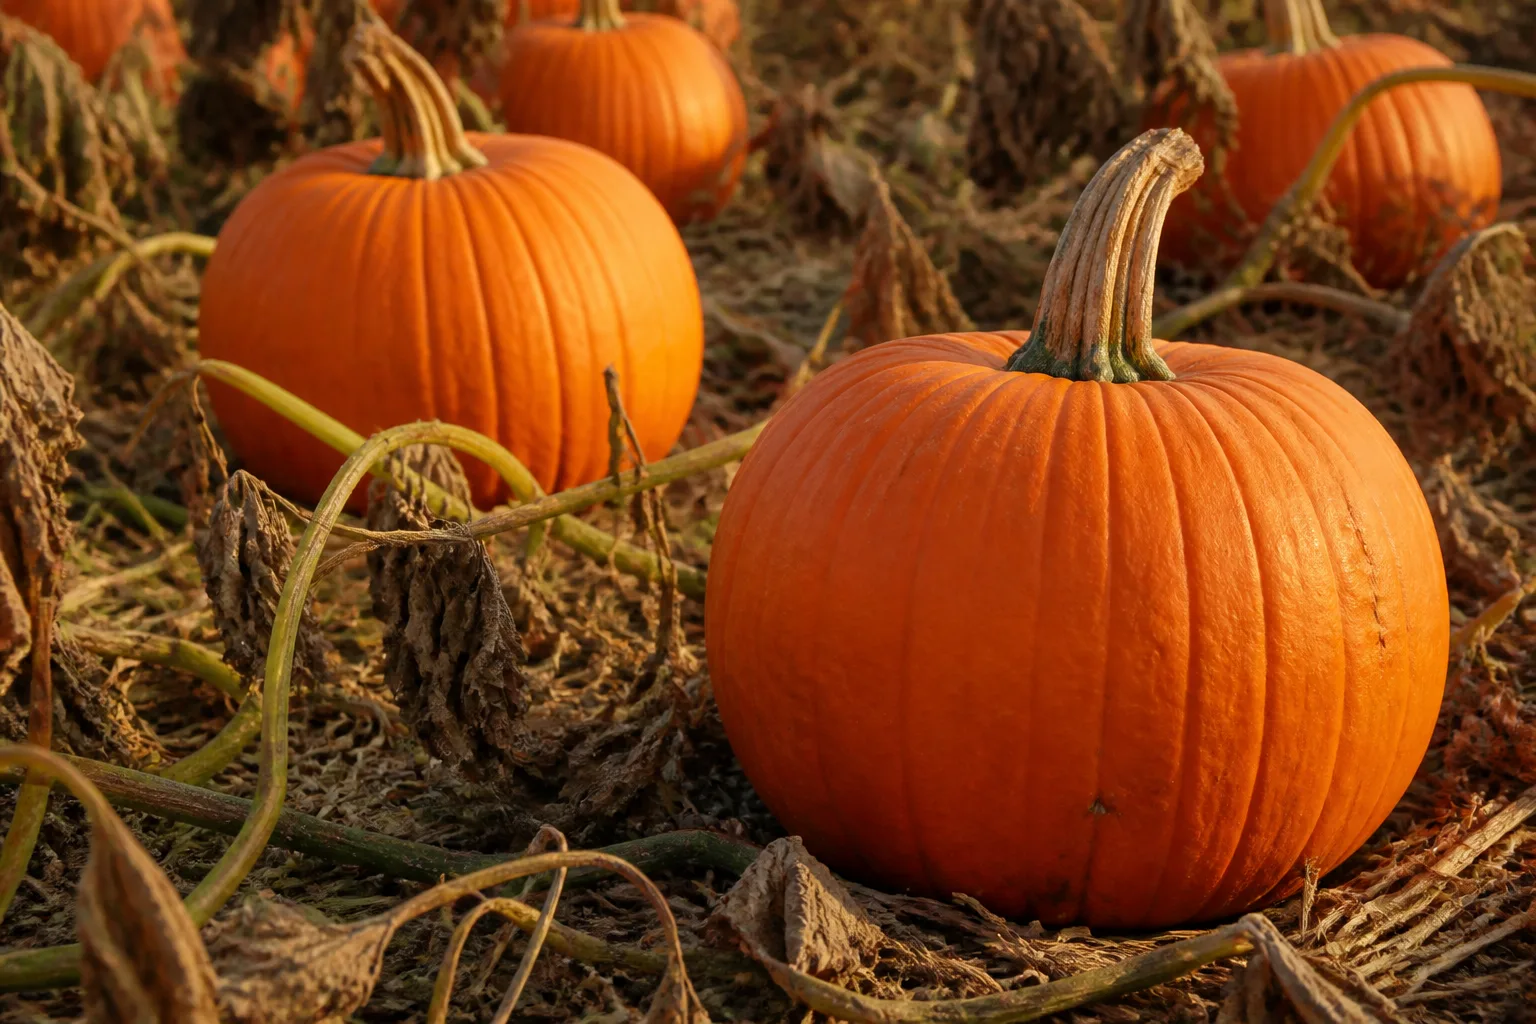
Ripening is more than turning orange. Mature pumpkins develop a hard rind that resists fingernail puncture, a dry, corky stem, and full varietal color—orange for most jack-o’-lantern types, but also white, blue-gray, or striped depending on cultivar. The classic hollow thump when you tap the side is a helpful secondary cue, not the only test.
Vines often begin to brown and die back as fruit finishes. That senescence is normal late season, not an automatic emergency—unless collapse happens while fruit is still small and green, which can signal disease or borer damage.
Harvest before a hard frost that damages rinds. Cut the stem with clean pruners, leaving 3 to 4 inches of handle attached. A intact stem reduces rot entry at the crown. Lift fruit from underneath; snapping stems shortens storage life.
Curing toughens skin for storage and heals minor harvest scratches. Place harvested pumpkins in a warm (around 80°F), dry, airy spot for 7 to 10 days—a covered porch or ventilated garage works. After curing, store cool and dry (ideally near 50–55°F) for months of display or kitchen use. Pumpkins may gain a little color off the vine if they were close to mature, but immature green fruit picked early will not become a long-keeping carving pumpkin—let color and rind hardness lead the decision.
For Halloween timing, count backward from your target date using packet DTM plus two weeks of cushion for slow autumns. A 100-day variety planted mid-July targets late October maturity in many zones.
Pumpkin Growth Timeline by Week
This week-by-week map assumes a 100-day variety sown directly into warm soil in late spring. Adjust forward or back for your packet DTM and local frost dates.
| Week | Stage focus | Key milestones |
|---|---|---|
| 1–2 | Germination | Sprout emerges; cotyledons open |
| 3 | Seedling | First true leaves; thin to strongest plant |
| 4–5 | Early vines | Runners start; leaves enlarge rapidly |
| 6–7 | Vegetative peak | Vine length expands; roots deepen |
| 8 | First flowers | Male blooms dominate |
| 9 | Female flowers | Pollination window opens |
| 10–12 | Fruit set & sizing | Young green pumpkins swell |
| 13–15 | Maturation | Color develops; rind hardens |
| 16+ | Harvest | Stem corks; vines die back |
Giants and long-season types may still be sizing at week 16 while compact pie pumpkins finish earlier. Track your fruit, not an internet calendar—weather shifts everything.
Troubleshooting Problems at Each Stage
No germination: Soil too cold, too wet, or seed too old. Replant with fresh seed when soil hits 70°F; improve drainage on heavy clay.
Seedlings collapse: Damping-off from wet, cool conditions. Reduce overhead water; improve airflow; sow thinly.
Vines huge, no flowers: Often insufficient light or excess nitrogen. Ensure full sun; shift fertilizer toward phosphorus and potassium as buds form.
Many flowers, no fruit: Pollination failure, heat above 90°F during bloom, or drought. Hand-pollinate mornings; add pollinator flowers; keep soil evenly moist.
Fruit starts then aborts: Usually poor pollination or water stress during early fruit set. Consistent irrigation and morning pollen transfer fix most cases.
Fruit stays small: Too many fruits on one vine, competition from weeds, or irregular water. Thin extras; mulch; water deeply.
Orange but soft rind: Harvested early or frost-damaged. Let future fruits mature longer on the vine until the nail test fails.
Vines wilt suddenly mid-season: Check for squash vine borer at stem base; slit stem to remove larva if found, bury node to reroot.
What to Do This Week Based on Your Stage
Match your plant to one line and execute only that task set—overcare at the wrong stage causes more problems than neglect.
- Sprout just visible: Protect from birds; maintain moist seed zone; do not fertilize yet.
- Two true leaves, still in tray: Harden off; transplant to sunniest bed within a week.
- Runners touching lawn: Redirect vines or install temporary barriers before stems harden.
- Yellow flowers, no tiny fruit: Hand-pollinate tomorrow morning; plant nectar flowers for bees.
- Fruit size of a tennis ball: Deep water; slide mulch under fruit; scout for borers.
- Color changing, stem still green: Wait—harvest readiness is stem and rind, not color alone.
- Stem corky, rind hard: Harvest with long stem; cure before indoor display.
Pumpkins reward observation more than constant tinkering. Walk the patch at dawn during bloom weeks, note which stage each vine is in, and intervene only when signs point to a specific bottleneck.
Conclusion
Pumpkin plant stages read clearly once you know the sequence: cotyledons, then lobed true leaves, then sprawling vines, male flowers before females, pollinated ovaries that swell for weeks, and finally hard rinds with dry stems that signal harvest. Most varieties need 90 to 120 days from seed, with fruit taking 45 to 55 days after pollination to mature.
Use the cheat sheet and week timeline to place your plants on the calendar, but let visible cues—true leaf count, flower sex, fruit swelling, stem corking—override generic dates. Steady moisture through flowering, pollinator-friendly mornings, and patient ripening on the vine separate a decorative October harvest from a patch of stalled green globes. When you align care with stage, pumpkins become one of the easier winter squash to read—and one of the most satisfying to carry out of the garden.



