How to Protect Tomato Plants From Pests
Protect tomato plants from pests all summer with resistant varieties, airflow pruning, mulch, and weekly scouting—before you reach for a spray bottle.
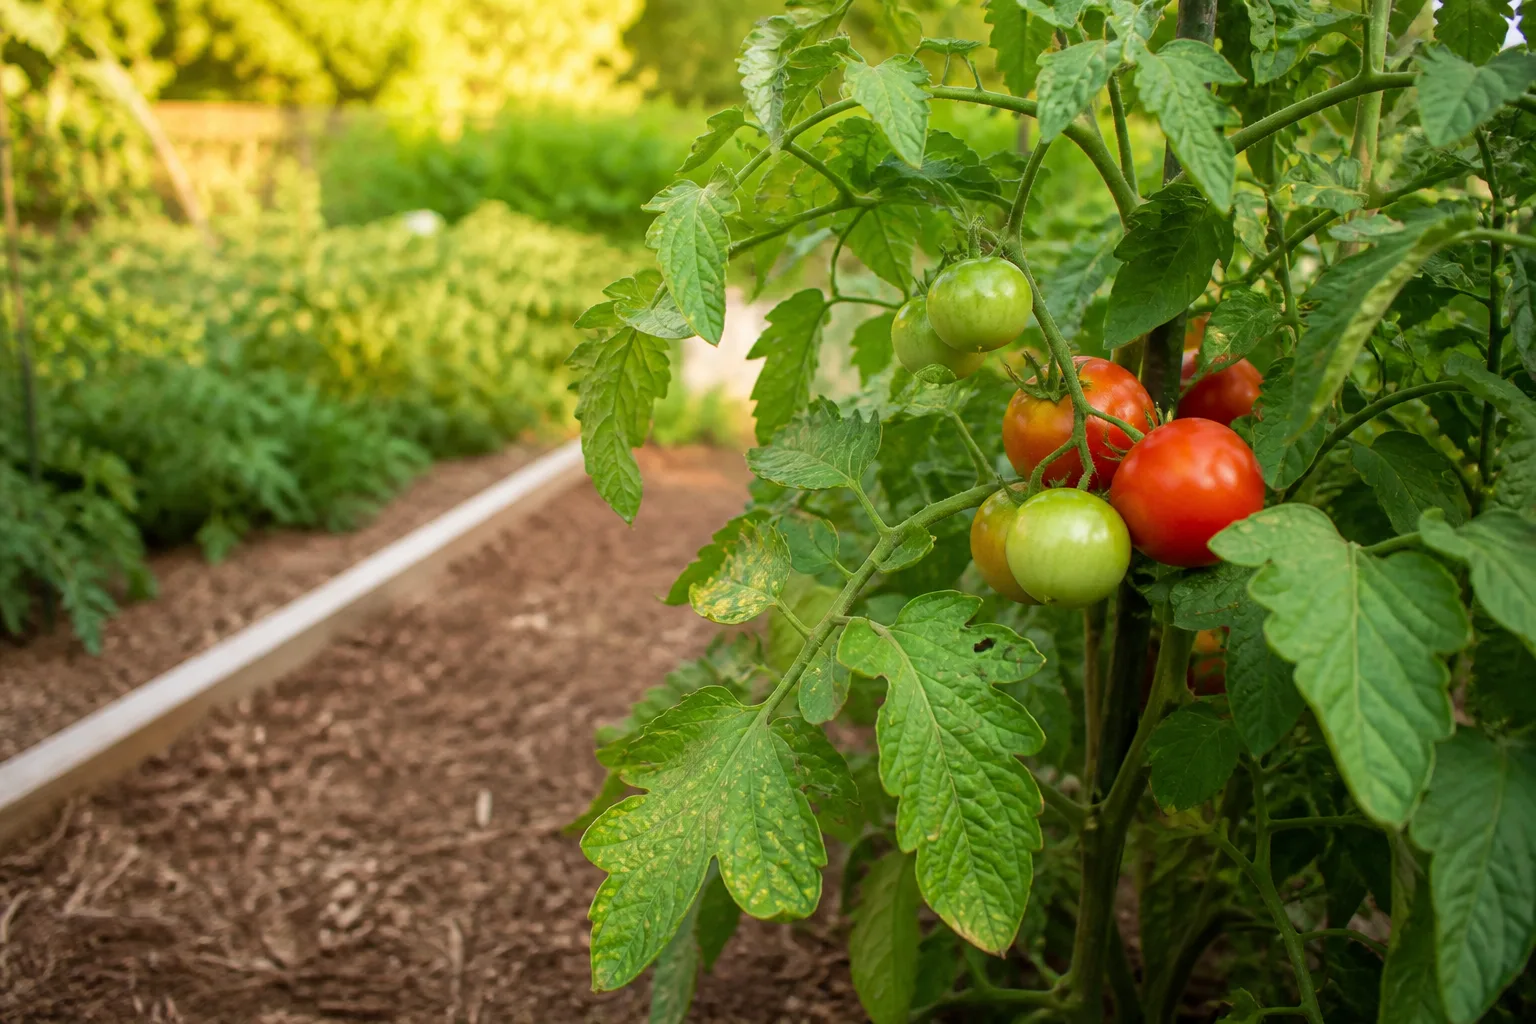
Tomato pest problems rarely start the day you notice a chewed leaf. They start weeks earlier — with a stressed transplant set too close to last year’s nightshade bed, vines dragging through wet soil, or a single aphid colony left unspotted until it spreads virus symptoms up the row. Protecting tomato plants from pests is less about one magic spray and more about a handful of habits you repeat from transplant week through harvest: choose resistant stock, lift fruit off the ground, mulch, prune with restraint, plant thoughtful companions, and scout on a schedule.
That sequence sounds simple because the individual steps are. The payoff is timing. Do them before July heat and you prevent the damage that sends gardeners panic-buying broad-spectrum insecticides — products that often kill the parasitoid wasps already controlling hornworms and the lady beetles cleaning up aphids. This guide lays out what to do now, what to maintain through early summer, and how to respond at peak season without undoing your prevention work. For pest identification once you spot damage, keep our tomato pests guide open beside this page.
Why tomato pest pressure spikes in warm weather
Tomatoes are heavy feeders with soft new growth, open flowers, and ripening fruit — exactly what aphids, whiteflies, fruitworms, stink bugs, and hornworms are built to find. Warm nights speed insect reproduction; humid foliage favors fungal leaf spots that weaken plants and make them more attractive to sap feeders. Clemson Cooperative Extension’s tomato insect factsheet notes that stressed plants tend to draw more insect pressure than vigorous ones, which is why cultural prevention matters as much as reaction.
Hornworms (Manduca spp.) strip foliage and scar fruit from midsummer onward. Tomato fruitworms (Helicoverpa zea) bore into green fruit. Aphids and whiteflies cluster on tender shoots and can vector viruses. Stink bugs and leaf-footed bugs pierce ripening fruit, leaving hard white or yellow corky spots under the skin. Many of these pests overwinter nearby — in weedy fence lines, garden debris, or soil — then migrate into your bed when wild hosts dry down. Leaf spots from soil-borne fungi are not insects, but they open the door to pest problems by defoliating plants; our tomato disease identification guide covers that overlap.
Uneven watering, root damage from late cultivation, nitrogen-heavy feeding, and overcrowding all produce the kind of soft, succulent growth aphids prefer. Fruit sitting on damp soil invites slugs, rots, and soil splash that carries spores onto lower leaves. Prevention is not about growing tomatoes in a bubble — it is about removing the easy entry points pests exploit first.
Your season-long prevention sequence
Think of tomato pest protection as three phases. Miss phase one and you spend phase three fighting problems that support and mulch would have prevented.
At transplant week: the non-negotiable setup
Before your last frost date passes and you set plants out, confirm full sun (six to eight hours of direct light), rotation (no tomatoes, peppers, eggplants, or potatoes in the same bed for at least three years), and support in the ground on planting day. Lay 2–3 inches of mulch after the soil warms, leaving a few inches of bare soil around each stem. Plant resistant varieties when your soil history includes wilt or root-knot nematodes. If you are new to the variety on the tag, read our things to know before growing tomatoes primer on determinate vs indeterminate growth — pruning and support rules change with the label.
Early summer: airflow and mulch maintenance
Once plants begin flowering, remove only the lowest leaves that touch soil or show spots, not the canopy shading fruit. Tie or clip vines to stakes every 10–12 inches on indeterminate types. Refresh mulch if bare soil shows through after heavy rain. Add companion flowers at the bed edge — not as a substitute for scouting, but to keep pollinators and predatory insects moving through the row.
Peak summer: scouting and targeted response
From July through harvest, inspect twice weekly — daily during heat waves or right after bringing home store-bought transplants. Hand-pick hornworms and fruitworms when you see them. Leave parasitized hornworms (white cocoons on the back) in place so Braconid wasps can emerge. Escalate to labeled insecticidal soap or spinosad only when damage is increasing after cultural steps. The EPA’s IPM principles describe this ladder: prevention first, least-toxic effective control last.
Start with clean, resistant transplants
Strong starts are the cheapest insurance policy in the garden. A seedling already hosting aphids, whiteflies, or virus mottling will not outgrow those problems once it is in your soil.
Seed packets and transplant tags list letter codes for bred-in resistance. Common ones include V (Verticillium wilt), F (Fusarium wilt), N (root-knot nematodes), EB (early blight), LB (late blight), and TSWV (tomato spotted wilt virus). Resistance is not immunity — it buys time while you manage water and airflow — but in nematode-heavy or wilt-prone soils, a VFN label is worth prioritizing. NC State Extension’s home tomato guide lists these codes on every serious variety description.
At the garden center, lift the pot and check the drain hole for aphids or fungus gnats. Scan leaf undersides for whitefly clouds, sticky honeydew, or silver stippling from spider mites. Reject plants with mosaic mottling, curled distorted new growth, or purple veins that may signal virus. Stems should be thick, not leggy and floppy. If one flat in the rack looks infested, skip the whole batch — pests travel between seedlings on shared benches.
Keep vines off the ground with the right support
Tomatoes allowed to sprawl on soil contact fruit with damp earth, invite slug damage, and keep lower leaves in the splash zone where fungal spores land. Elevating vines is one of the highest-return pest and disease moves in the garden.
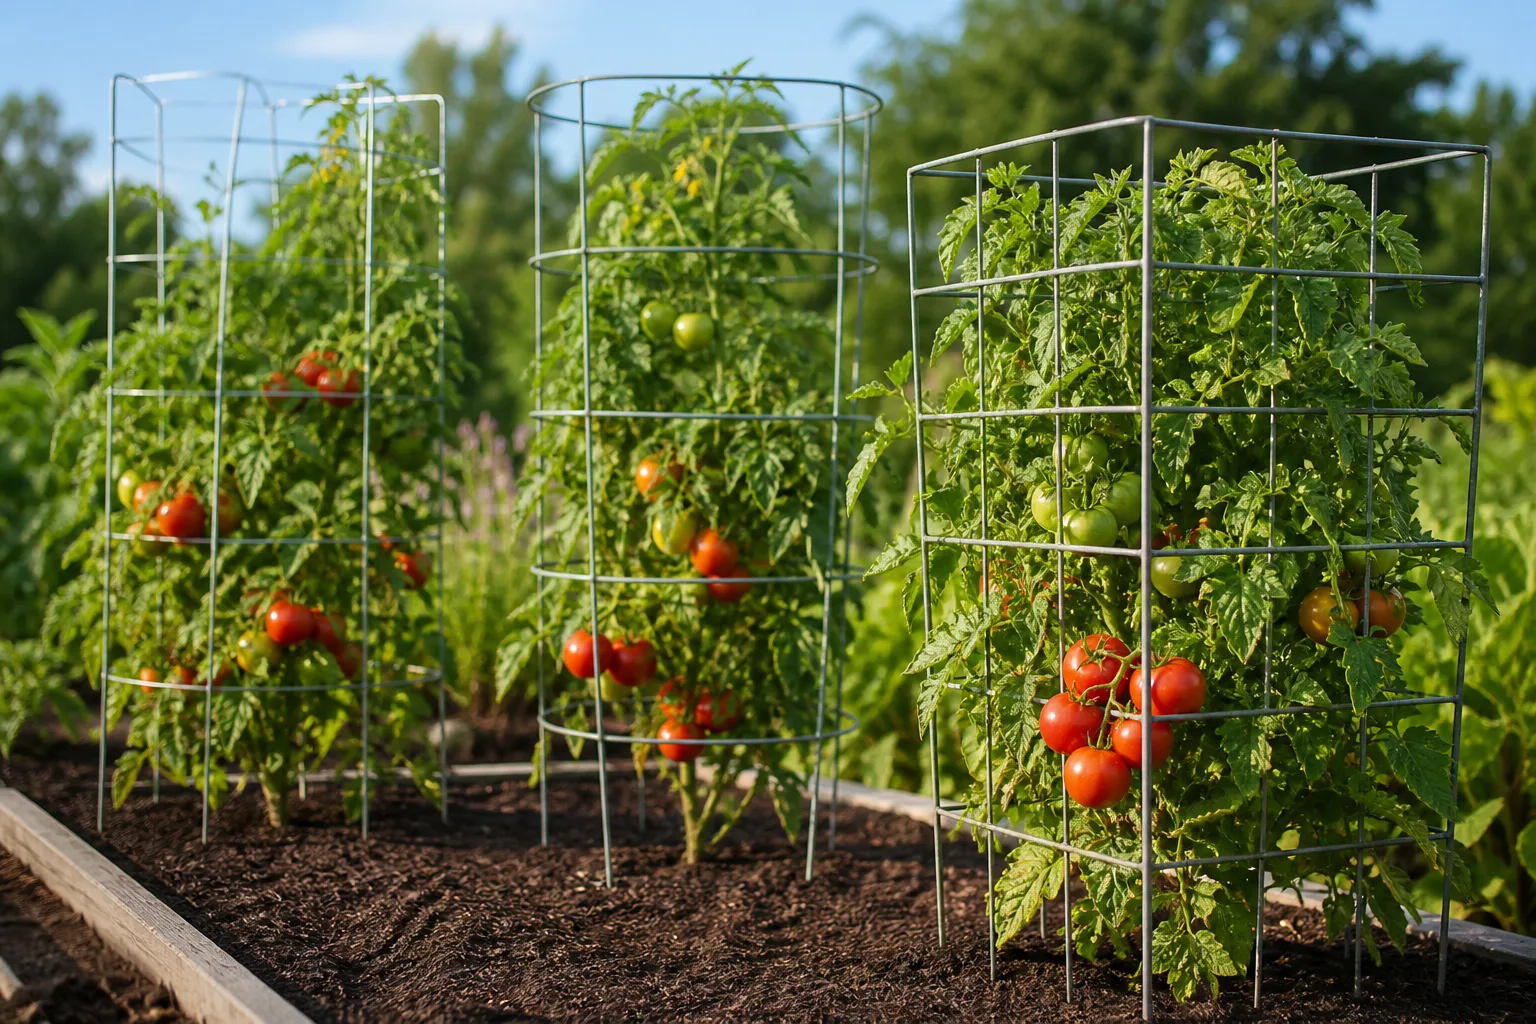
Cage, stake, or trellis: match support to tomato type
Determinate bushes fit sturdy cages 4–5 feet tall; do not over-prune them. Indeterminate vines need tall stakes, string trellises, or heavy cages rated for 6+ feet. Clemson HGIC recommends mulched, well-fertilized, properly watered plants on vigorous growth — support keeps that growth off the ground. In tight spaces, see our tomato spacing guide before you squeeze cages together; airflow matters as much as elevation.
Drive stakes or set cages when you transplant. Retrofitting support on a mature vine breaks stems and disturbs roots — exactly the stress that invites aphids. For indeterminate plants on stakes, prune to one or two main leaders and tie loosely every foot. For cage-grown plants, tuck stems inward as they grow rather than letting them escape through the cage wires onto the soil.
Mulch to block soil splash and steady the root zone
Mulch does three jobs that indirectly cut pest and disease pressure: it reduces soil splash onto lower leaves, keeps moisture even so fruit does not crack and attract insects, and suppresses weeds that host whiteflies and stink bugs.
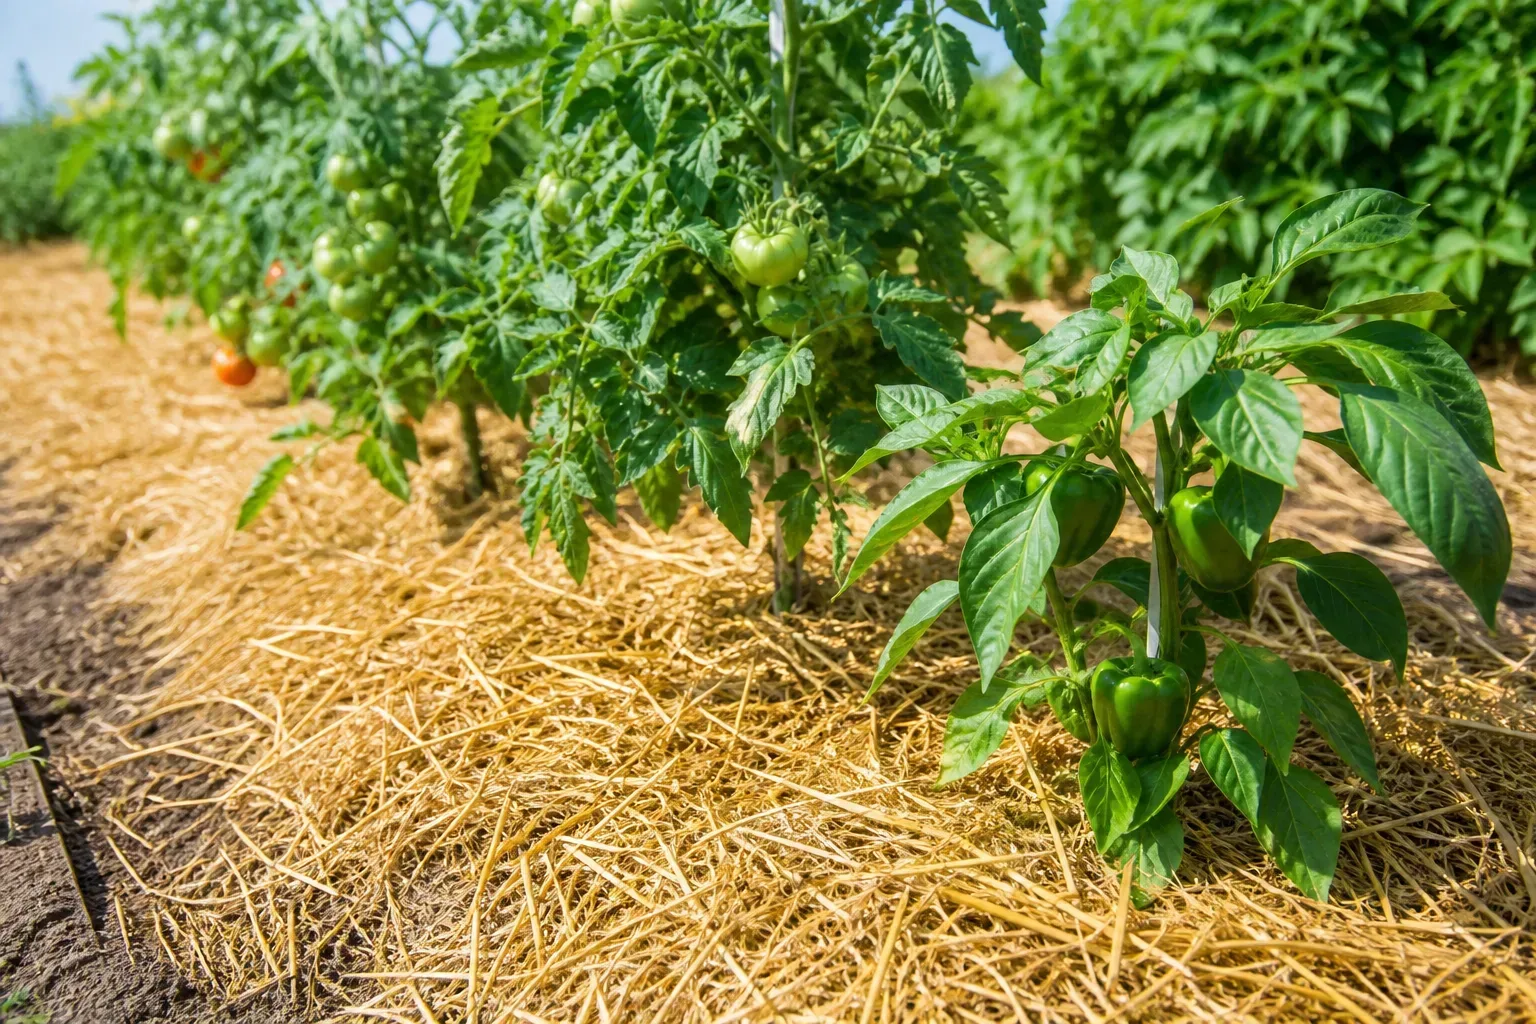
Straw (seed-free), shredded leaves, and finished compost work well in vegetable beds. Avoid fresh wood chips piled against stems — they tie up nitrogen as they break down. In hot climates, light-colored straw can keep soil slightly cooler; in cool northern springs, wait until soil warms before mulching so you do not slow root growth. Our mulch basics guide explains material trade-offs if you are choosing between options.
Apply 2–3 inches after the soil has warmed, in a ring that leaves 2–3 inches of bare soil around the stem — the “donut,” not a volcano mound touching the crown. Refresh thin spots after hard rains. Mulch that has collapsed into a mat can hold too much moisture against the stem; fluff or replace it if you see fungal growth at the soil line.
Prune for airflow without stripping sun protection
Pruning opens the canopy so leaves dry faster after rain — less favorable for leaf spots and the weak plants that follow. Over-pruning exposes fruit to sunscald and removes the leaves that feed developing tomatoes.
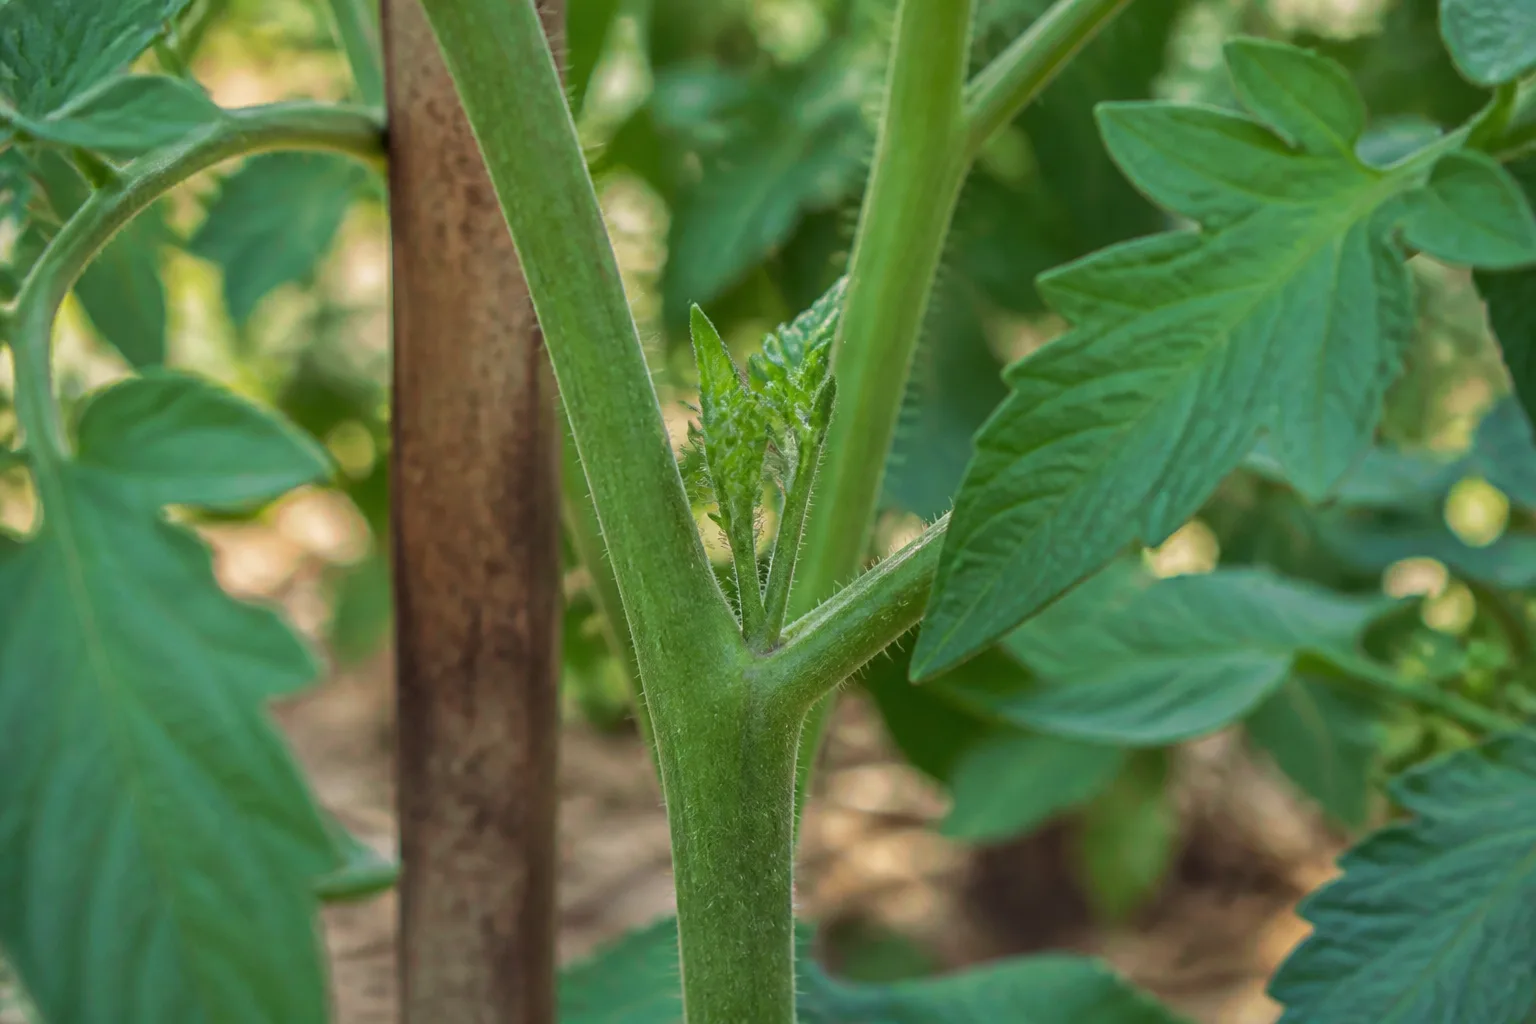
Remove lowest leaves that touch soil or show yellowing and brown spots — especially after the first fruit set. Work when plants are dry, pinch or clip cleanly, and bag diseased tissue rather than composting it if you suspect fungal or bacterial infection. Keep leaves directly above and shading fruit clusters unless they are clearly diseased. Progressive yellowing from the bottom up may signal wilt or blight, not normal aging; see our tomato disease guide before stripping half the plant.
On indeterminate tomatoes, suckers — shoots growing from the joint between main stem and leaf — divert energy and thicken the canopy. Pinch suckers when they are 2–4 inches long, ideally in the morning when stems snap cleanly. On determinates, remove only suckers below the first flower cluster. Never remove more than about one-third of foliage at once. For a full pruning walkthrough, use our how to prune a tomato plant guide.
Companion planting that helps — and what it cannot do
Companion planting is useful, but it is not a force field. The honest version: certain neighbors attract pollinators and predatory insects, mask host-plant scent, or fill space that would otherwise grow weeds — they do not make hornworms disappear.
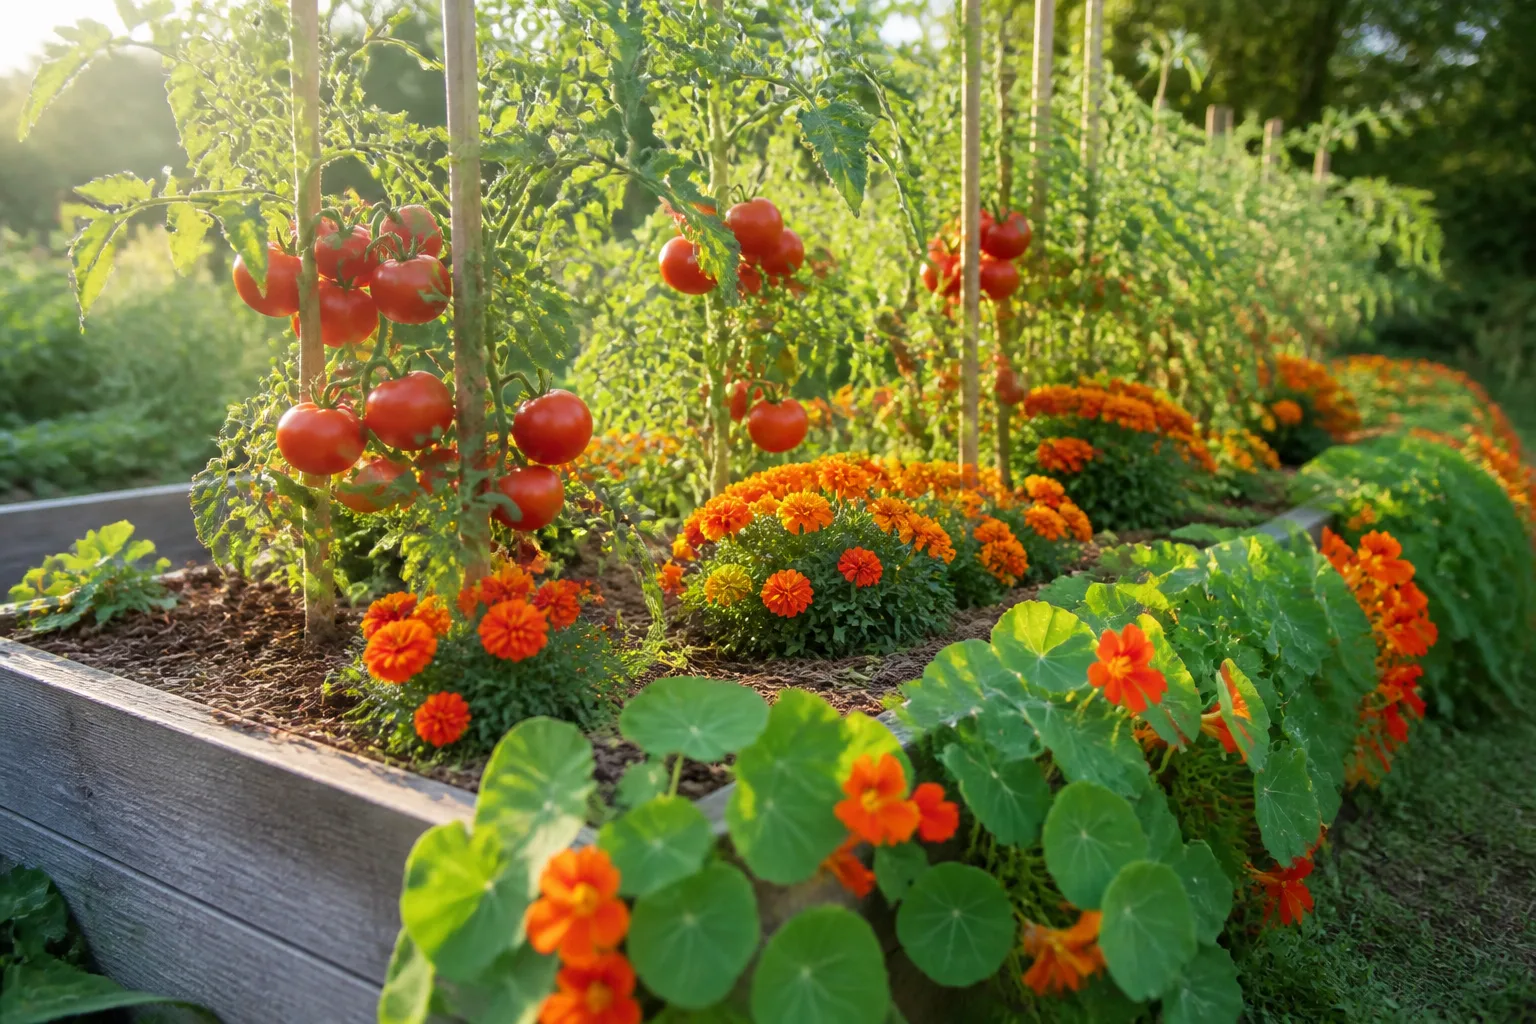
French marigolds (Tagetes patula) release compounds including limonene that may reduce whitefly landing on nearby crops, according to RHS companion planting guidance. Basil is a classic tomato neighbor for kitchen convenience and aromatic masking; bees visit both. Place companions at the row edge or between cages, not jammed against stems where wet foliage overlaps. For nematodes, marigolds work as a dense cover crop in the same soil for at least two months before tomatoes — not as three flowers beside an established cage. UF/IFAS publication NG045 is explicit on that distinction. Our marigold companion plants guide and whitefly companion guide go deeper.
Corn shares tomato fruitworm (Helicoverpa zea) pressure. Potatoes and peppers share blight and wilt pathogens. Fennel can inhibit tomato growth. Heavy cucurbits sprawling into tomato rows reduce airflow. If you love mixed beds, separate heavy feeders into the next row or alternate years in rotation rather than interplanting competitors in one root zone.
Build a weekly scouting habit that catches pests early
Prevention fails quietly when nobody looks under the leaves. A five-minute walk twice a week beats an hour of spraying in August.
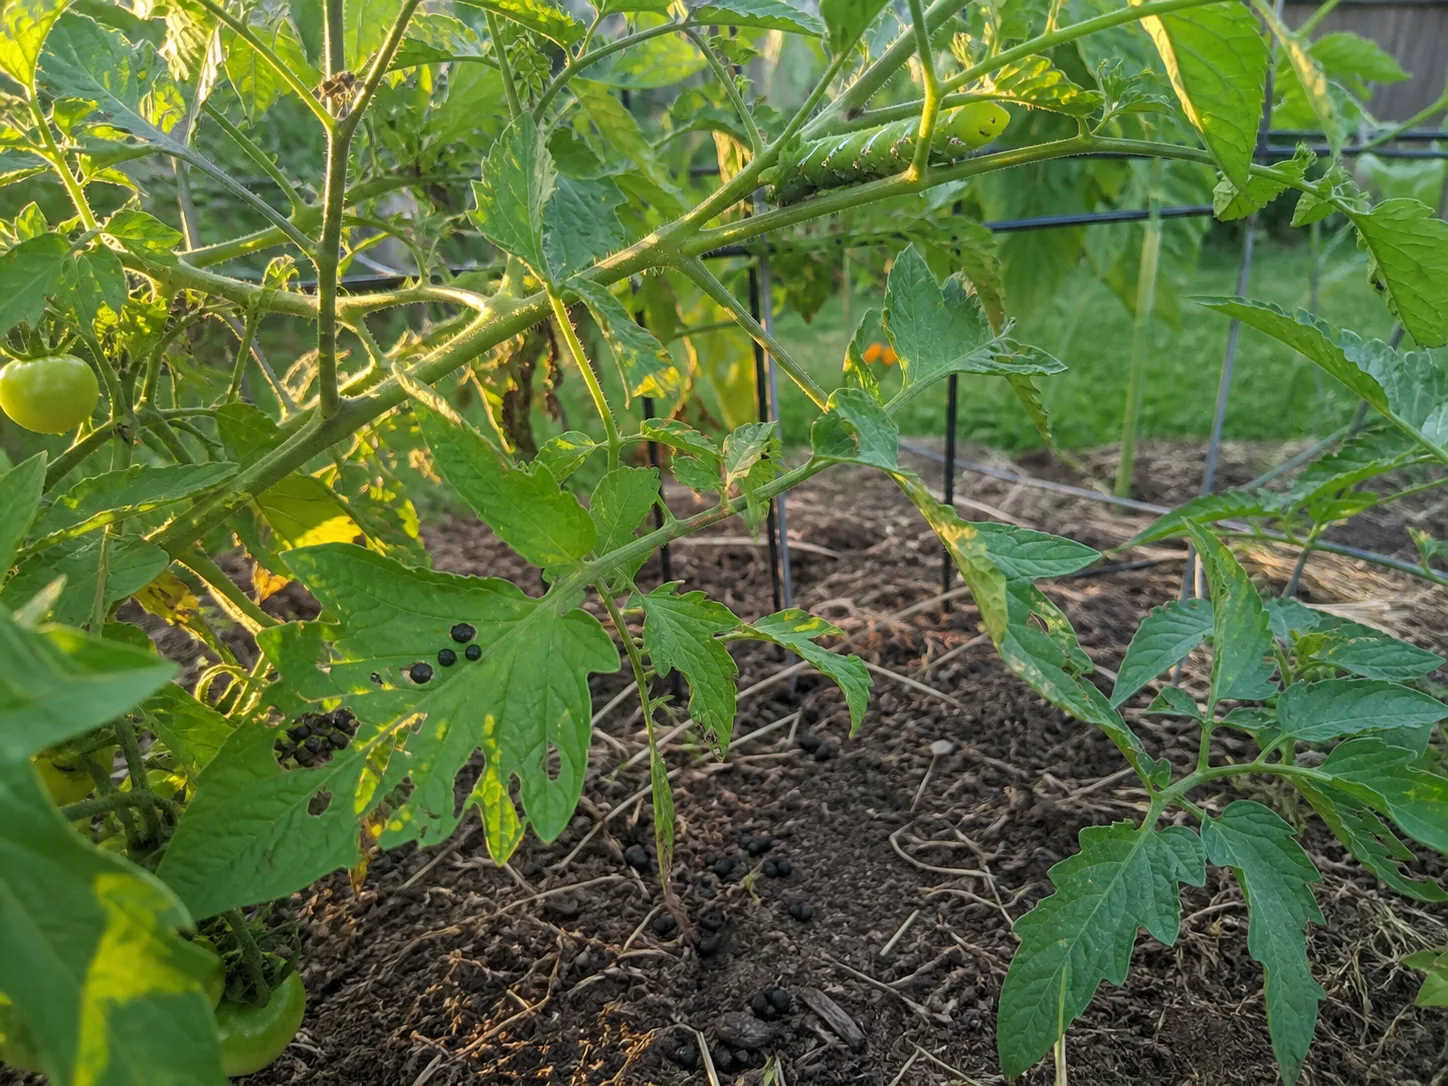
Check leaf undersides near the growing tip for aphids and whiteflies. Scan stems and leaf midribs for hornworm frass (dark droppings) — the caterpillar is often on the stem above the pellets. Inspect flower clusters and green fruit for fruitworm entry holes and stink bug damage. Look at the soil line for cutworm damage on young transplants. Shake a branch over white paper — spider mites show as moving specks. Clemson HGIC recommends inspecting transplants carefully before purchase for the same reason: infestations start small and hidden.
Photograph suspicious leaves with date and plant label. Compare week to week — a single hornworm is hand-pick territory; ten fruit with fresh holes is a different conversation. Treat when damage is increasing, not when you see one insect and panic. If you are unsure what you are looking at, identify the pest first in our tomato pests guide — the control for aphids is not the control for stink bugs.
When to intervene and when to wait
Not every insect requires action. A few aphids often disappear when lady beetles arrive. A parasitized hornworm is a biocontrol asset, not a crisis.
Hand-pick hornworms, fruitworms, and stink bug nymphs into soapy water. Blast aphids off with a firm water stream on a cool morning, then recheck in 48 hours. Row cover on young transplants excludes many insects until flowering — remove cover when plants bloom so pollinators reach flowers. Yellow sticky traps can monitor whitefly pressure but should not replace plant inspection; they also catch beneficials if overused.
When treatment is warranted, choose products labeled for tomatoes and the target pest. Insecticidal soap helps soft-bodied insects and mites; spinosad targets caterpillars. Read pre-harvest intervals before spraying near harvest. Never apply ordinary dish soap — it is not a labeled pesticide and can burn foliage.
Broad-spectrum contact insecticides kill parasitoid wasps, lacewings, and lady beetles along with pests — which is why preventive spraying often creates worse outbreaks two weeks later. Preserve beneficials by tolerating small aphid colonies until predators appear, leaving parasitized hornworms, avoiding unnecessary sprays, and planting flowering companions at bed edges. If you must treat, spot-spray affected shoots rather than drenching the whole plant unless the label requires full coverage for that pest.
Conclusion
Protecting tomato plants from pests all summer comes down to habits you can start this week: buy clean resistant transplants, lift vines off soil with support installed at planting, mulch with a stem donut, prune for airflow without stripping fruit shade, companion-plant with realistic expectations, and scout on a calendar instead of when damage is already severe. None of these steps eliminates every insect — nature does not work that way — but together they keep plants vigorous enough that hornworms are occasional hand-pick jobs, not crop failures, and sprays stay rare, targeted, and label-legal. When trouble shows up anyway, identify it first, protect the beneficial insects already on your side, and escalate control only as far as the damage warrants.



