Things to Know Before Growing Tomatoes
First tomato season? Learn watering, harvest timing, spacing, pruning, calcium myths, and crop rotation before you plant—so you skip the mistakes most beginners make.
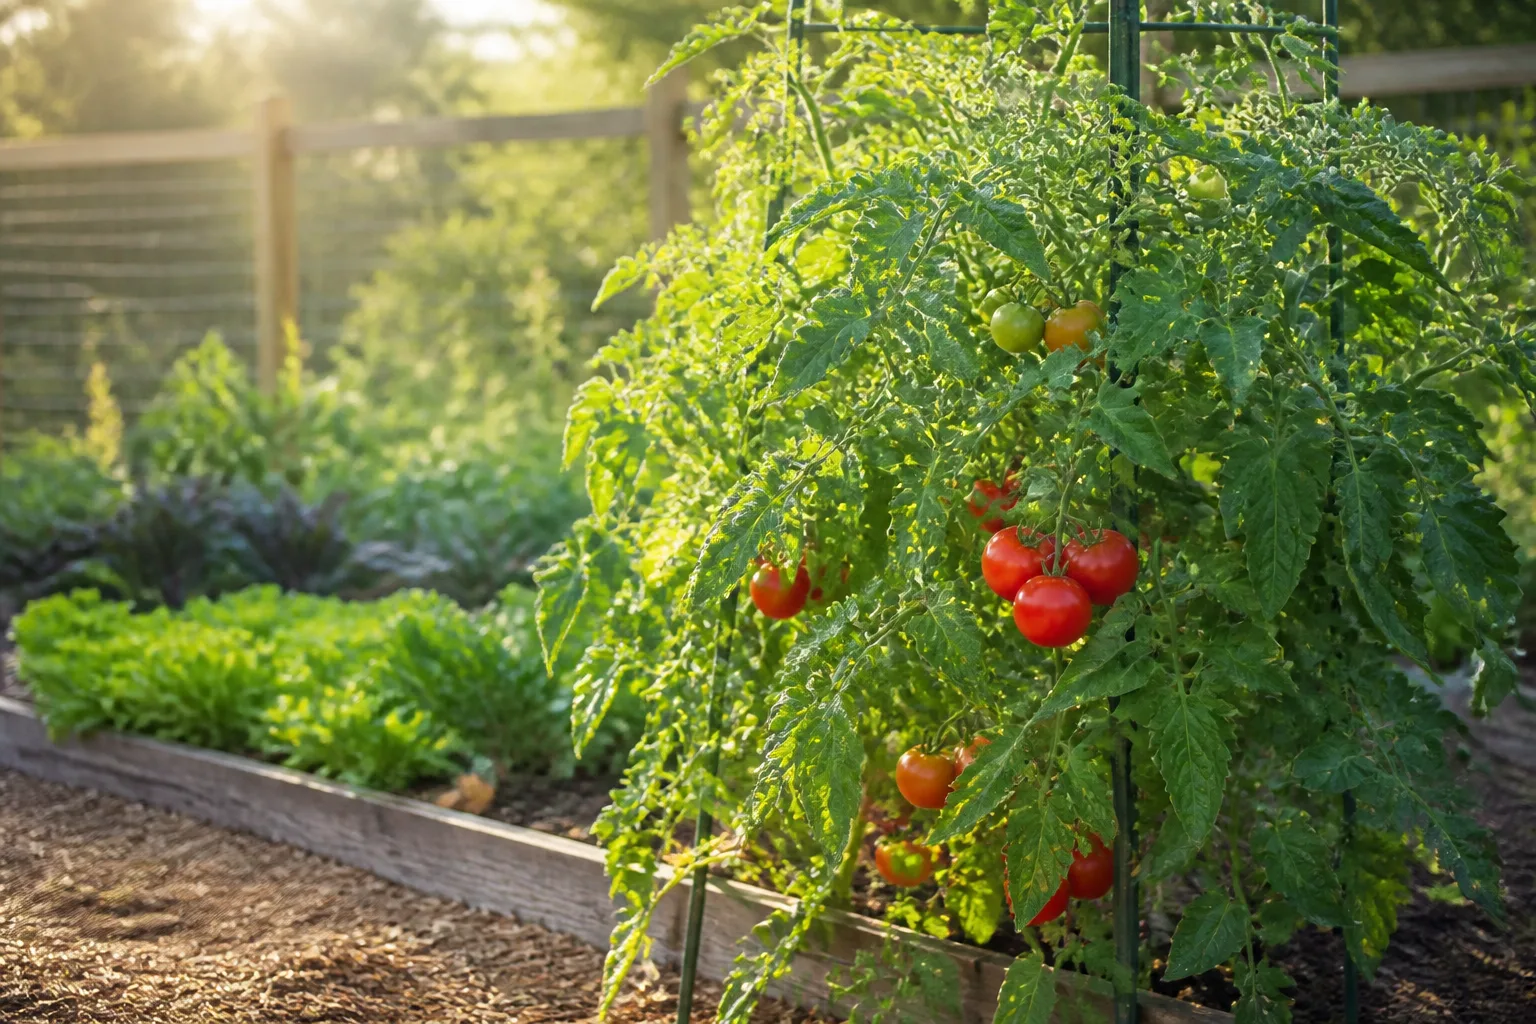
Tomatoes are the vegetable most first-time gardeners reach for—and the one that teaches the fastest lessons when something goes wrong. A week of soggy soil can wipe out flavor. A cluster of yellow leaves at the base gets shrugged off as “normal” until half the plant collapses. Fruit sits on the vine turning red while birds, cracks, and stink bugs take their share. None of that means tomatoes are impossible. It means a handful of decisions—type, spacing, water rhythm, harvest timing, and where you plant next year—matter more than any single product in the garden center.
Veteran growers rarely wish they had bought a fancier fertilizer first. They wish they had known which kind of tomato they planted, how to read early disease signals, when pink is ripe enough to pick, and why crop rotation is not optional for nightshades. This guide puts those lessons in one place so your first season ends with bowls of fruit, not a pile of regrets.
Why Your First Tomato Season Feels Harder Than It Should
Most beginner guides treat tomatoes like a generic crop: sun, water, wait. In practice, tomatoes are heavy feeders with brittle stems, shallow-sensitive roots, and a long list of shared diseases across the nightshade family. They also split into two growth habits that need opposite pruning advice. When you treat every plant the same, you either over-prune a determinate bush or let an indeterminate vine turn into an impenetrable wall of leaves.
The good news is predictability. Tomatoes respond visibly to water swings, crowding, and soil-borne pathogens. Once you know what to watch for, you intervene early instead of guessing in August. The sections below follow the order mistakes actually happen: choose the wrong type, plant in a weak site, water on autopilot, ignore leaf warnings, harvest too late, crowd and skip support, chase calcium shortcuts, and plant nightshades in the same bed year after year.
Know Your Tomato Type Before You Plant
Before spacing, pruning, or harvest talk makes sense, answer one question: Is this plant determinate, semi-determinate, or indeterminate? That label changes how tall the vine grows, how long it fruits, and whether you should remove suckers at all.
Determinate vs Indeterminate Changes Every Decision
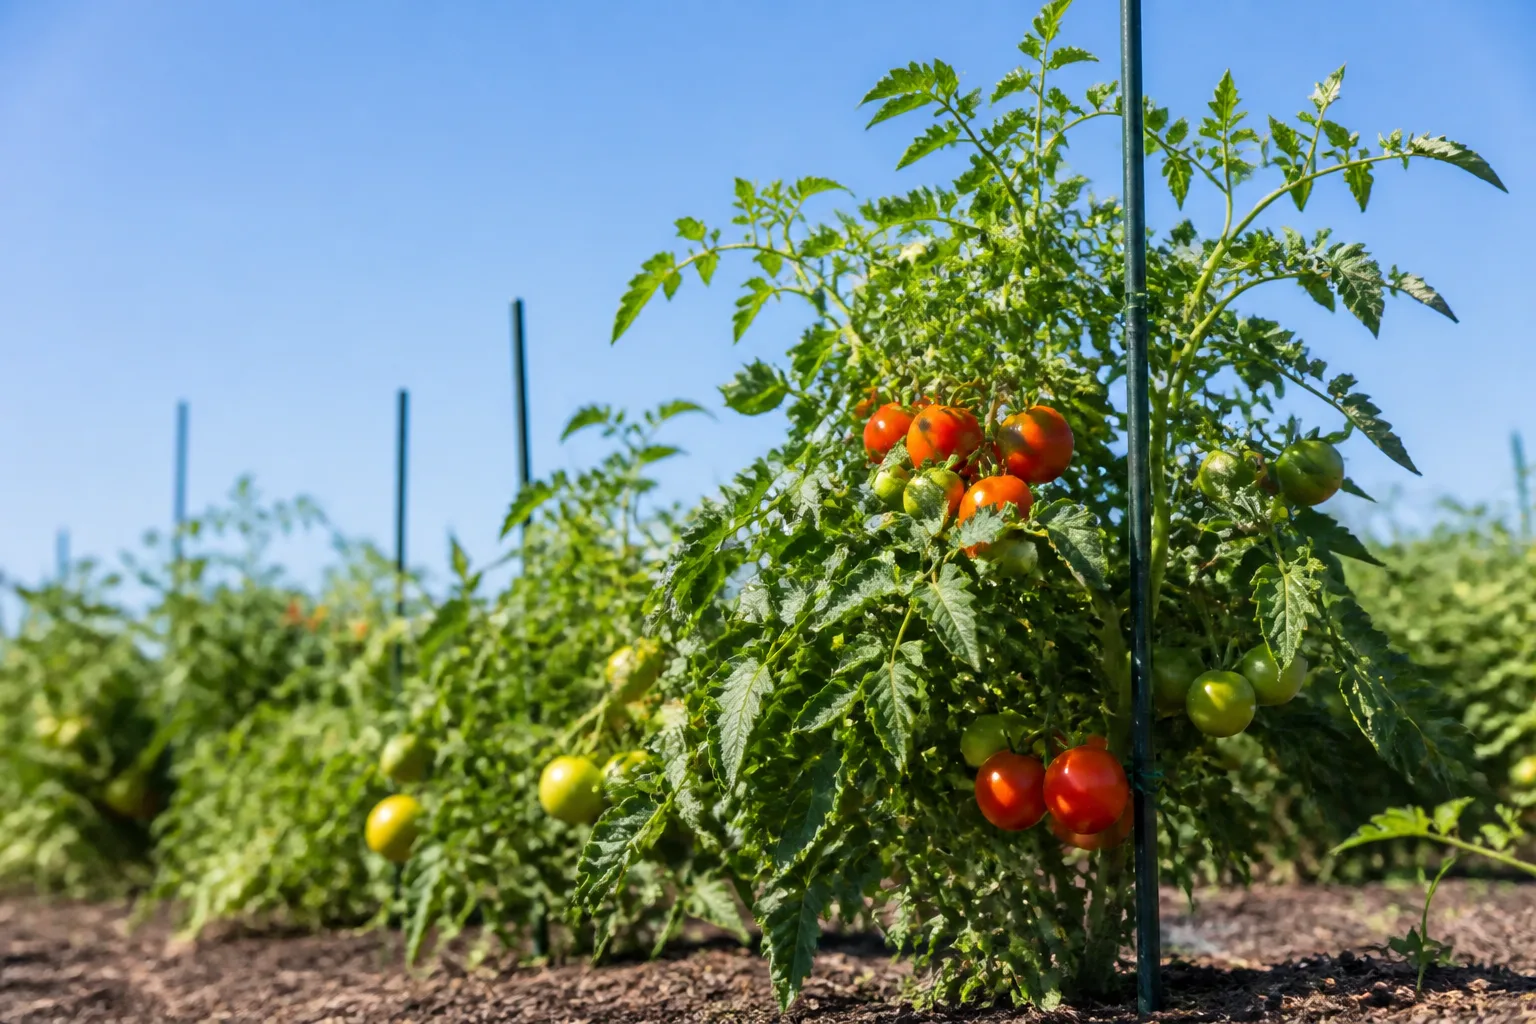
Determinate tomatoes are bushy plants that grow to a set size, flower, and set most of their fruit over a few weeks—then decline. They are built for cages, small gardens, and canners who want a big flush at once. Do not strip suckers aggressively on determinates; you are removing future fruiting stems. NC State Extension recommends only light sucker pruning when shoots are 2–4 inches long.
Indeterminate tomatoes keep growing, flowering, and ripening until frost or disease stops them. They can reach 10 feet on a strong trellis and need regular sucker management plus sturdy support. Most heirlooms and large slicing types are indeterminate. Leaving every sucker turns one plant into a thicket that ripens slowly and hides disease.
Semi-determinate types such as Celebrity stretch the harvest window without becoming full-season vines. Read the seed packet or transplant tag before you buy—if it says “compact” or “bush,” assume determinate rules until you verify.
Disease Codes on the Tag Worth Reading
Resistance codes are not marketing fluff. VFN on a label means resistance to Verticillium wilt, Fusarium wilt, and root-knot nematodes—three problems that survive in soil for years. Other common codes include EB (early blight), LB (late blight), TSWV (tomato spotted wilt), and ToMV (tobacco mosaic virus). NC State Extension lists these on every serious home-garden tomato guide.
First-time growers in humid regions should prioritize early blight and septoria resistance if available, then support and airflow. A resistant variety does not make you immune—it buys time while you manage water and spacing.
Sun and Soil Beat Every Tomato “Hack”
Tomatoes need direct sun—typically six to eight hours of unobstructed light on the leaves during the growing season, with more in cool northern summers. Bright shade keeps a plant alive but rarely delivers the energy budget fruiting vines need. If your only bed is marginal, read our tomato sun requirements guide before you invest in cages and fertilizer.
Soil preparation matters more than a planting-hole cocktail. Run a soil test and aim for pH around 6.5–6.7 for tomatoes. NC State Extension recommends incorporating 2–3 inches of compost into the top 6–9 inches of soil before transplanting. Deep, loose soil lets roots chase water without sitting in a hard pan.
Plant deep, but smart. Leggy transplants can be buried to the top leaf cluster in a shallow trench so roots form along the stem—except grafted tomatoes, which must keep the graft union above soil level. Our deep planting guide for tomato seedlings walks through trenching step by step.
Watering Mistakes That Flatten Flavor and Invite Rot
Water is the variable beginners mishandle most. Tomatoes want even moisture in the root zone, not a daily sprinkle on the leaves. Inconsistent swings—flooded Monday, bone-dry Friday—trigger blossom end rot, splitting, and bland fruit even when the soil “has calcium.”
Seedling Moisture vs Deep, Even Watering Later
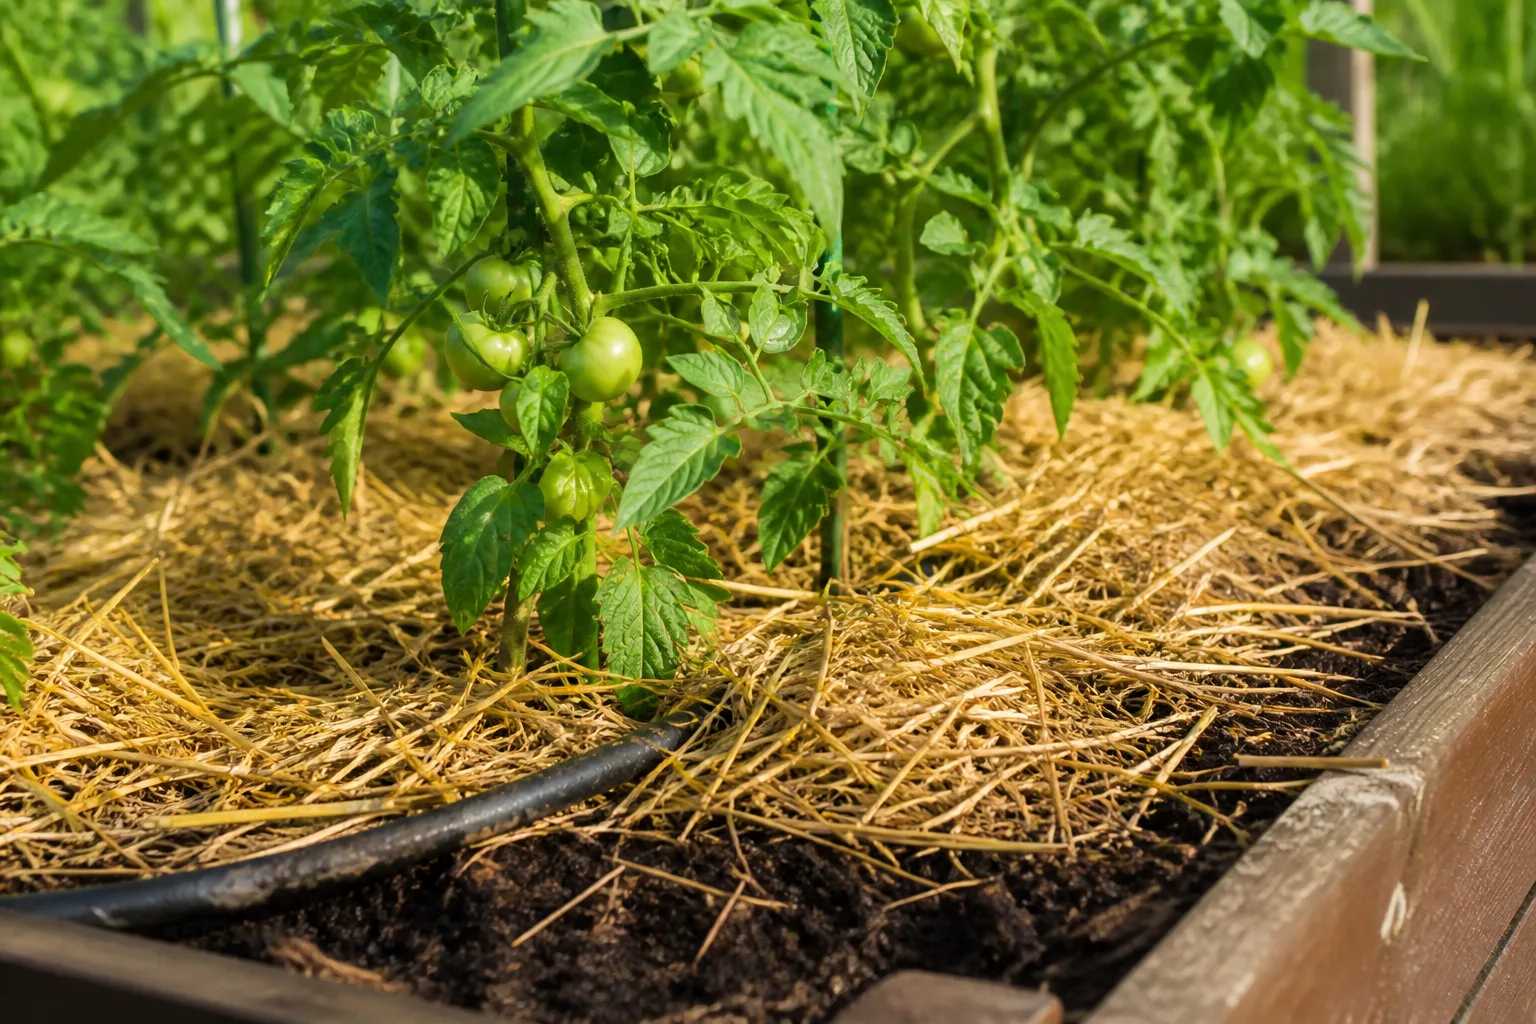
Seedlings need frequent light moisture so the surface does not crust and block emergence. Once transplants are established, shift to less frequent deep watering that soaks 6–8 inches of soil. NC State Extension suggests soaking to that depth about once every seven days during fruiting, supplemented by rain—roughly 1.5 inches of water per week total during peak production.
Water at the base in the morning when possible. Wet foliage overnight fuels early blight and septoria. Mulch with straw, shredded leaves, or compost to slow evaporation. If leaves look wilted at noon on a hot day but recover by evening, that is heat stress—not always a call for more water. If they stay wilted into the next morning, soak the root zone.
For a full seasonal rhythm, see how often to water tomato plants and signs of overwatering.
Late-Season Drydown for Better Flavor
Toward the end of harvest, heavy watering can dilute flavor and soften fruit on the vine—especially on mature plants with deep roots. Many experienced growers slightly stress plants in late summer: deep watering once a week instead of every few days, letting the top inch dry while deeper soil stays moist. The plant redirects sugars into existing fruit rather than pushing new growth.
This is not neglect. Mature roots can access deep moisture while you reduce surface irrigation. Skip drydown during active heat waves above 90°F when plants still set fruit—you risk blossom drop and sunscald. In cool, rainy stretches, drydown matters less because flavor dilution comes from excess rain, not your hose.
Lower Yellow Leaves Are a Warning, Not a Milestone
A common beginner myth: tomato plants naturally yellow from the bottom up as the season progresses. Healthy, well-managed plants often stay green from soil to tip. When lower leaves yellow, wilt, and die in clusters, suspect disease, root stress, or nitrogen imbalance—not “old age.”
Early Blight and Wilt vs What Healthy Plants Look Like
Early blight starts as small brown spots with yellow halos on lower leaves, then climbs the plant. Septoria leaf spot shows tiny dark spots with gray centers. Verticillium and Fusarium wilts yellow one side or one branch while vascular tissue browns inside the stem. All of these spread faster when plants are crowded, wet, and unstaked.
Action ladder for first-timers:
- Remove affected lower leaves as soon as you see spots—bag them, do not compost.
- Improve airflow by spacing correctly and pruning lower foliage on indeterminate vines.
- Mulch to reduce soil splash onto leaves.
- Rotate next year—many pathogens persist in soil.
Organic fungicides can slow early blight in humid climates if applied before outbreaks peak; reapply every 7–10 days when rain is frequent, or every two weeks in dry climates. They are prevention, not rescue on a collapsed plant. For identification photos and treatment paths, see our tomato disease overview or tomato leaf curling guide when symptoms look different.
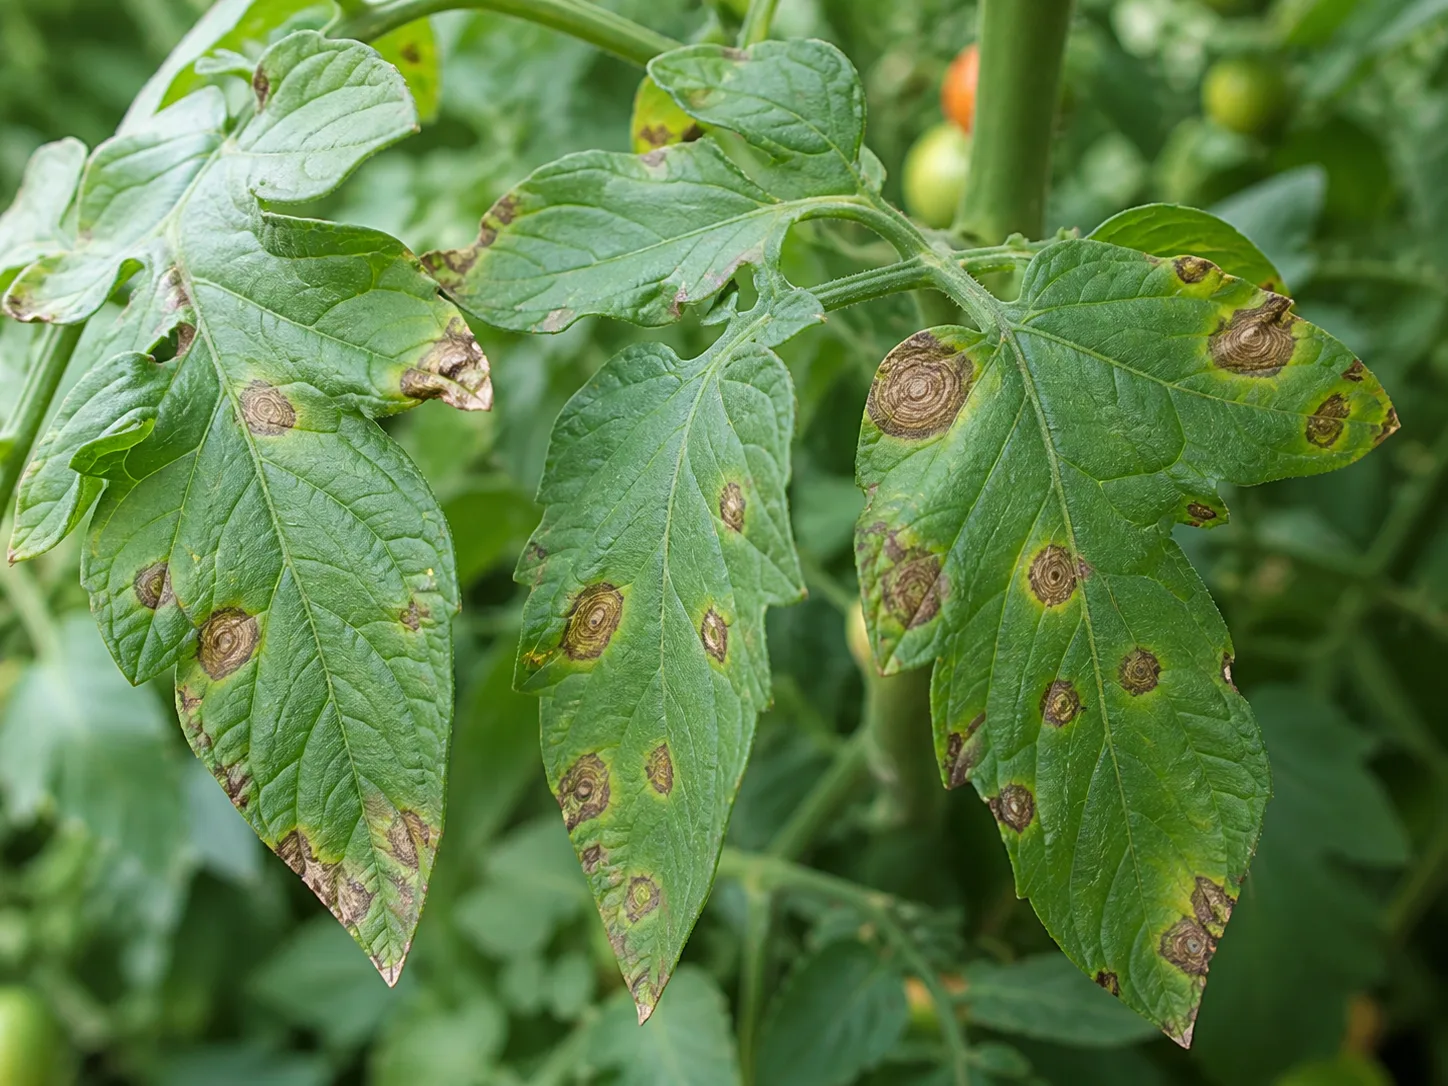
If only the very bottom leaf touches soil and looks pale, that may be contact shade—not disease. Progressive yellowing climbing the stem week after week is never “normal.”
Harvest at Breaker Stage to Beat Pests and Rain
Waiting until every tomato is fully red on the vine is optional—not required for flavor. Physiologically mature fruit can ripen off the plant once it reaches the breaker stage: visible color change at the blossom end, usually when about 10% of the skin has turned from green to pink or red. Penn State Extension classifies breaker-stage fruit as “vine ripe” because the plant has already triggered ethylene-driven ripening that continues without the stem attachment.
Benefits first-timers overlook:
- Less cracking when a thunderstorm hits—firm breaker fruit resists splitting better than soft ripe ones.
- Less bird and insect damage—pests target fully colored fruit.
- Less sunscald on exposed shoulders during heat spikes.
- Kitchen control—ripen a batch indoors at 68–77°F on a counter or in a single layer on newspaper.
Fully green, matte fruit without a glossy mature-green star at the blossom end will not ripen after picking. Emergency frost harvests only work if fruit had reached mature green or breaker. Our tomato growth timeline shows where breaker fits in the season.
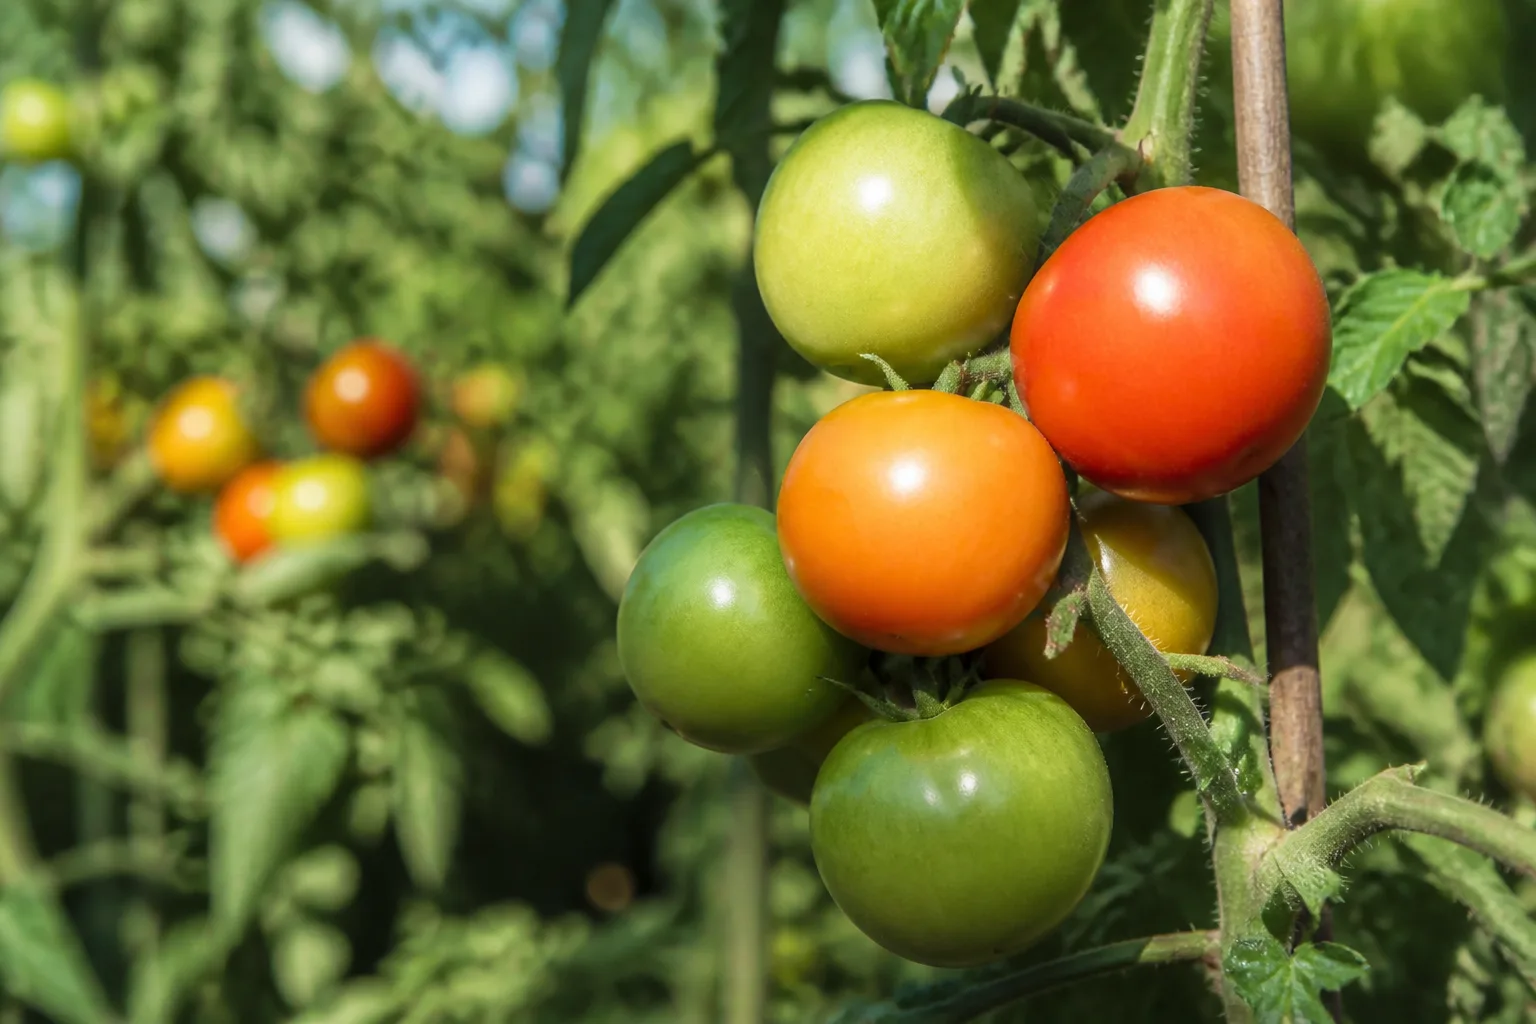
Texas A&M AgriLife and University of Georgia Cooperative Extension echo the same advice: harvest at color break to reduce pest exposure and cracking while preserving eating quality.
When Leaving Fruit on the Vine Makes Sense
Breaker harvest is the default—not a rule for every variety. Cherry tomatoes ripen quickly on the truss; pick individual fruits daily at peak color because they pass from perfect to mush overnight. Large heirlooms such as Brandywine may be best at light red (60–90% color) for texture before they go mealy at full red.
When nights stay cool (55–75°F) and pests are low, vine-ripened fruit is wonderful—especially for sandwiches eaten the same day. When heat exceeds 85°F for days, lycopene production slows and red color stalls; picking at breaker and ripening indoors in cooler air often produces better color and flavor than leaving fruit to struggle on the plant.
Spacing, Suckers, and Support Work as One System
Novice growers often space plants too far apart while skipping support, or cram plants together because “tomatoes are big.” Both waste space and reduce yield. Spacing should match training style and growth habit, not a generic “three feet everywhere” rule.
Spacing Rules That Match Your Training Style
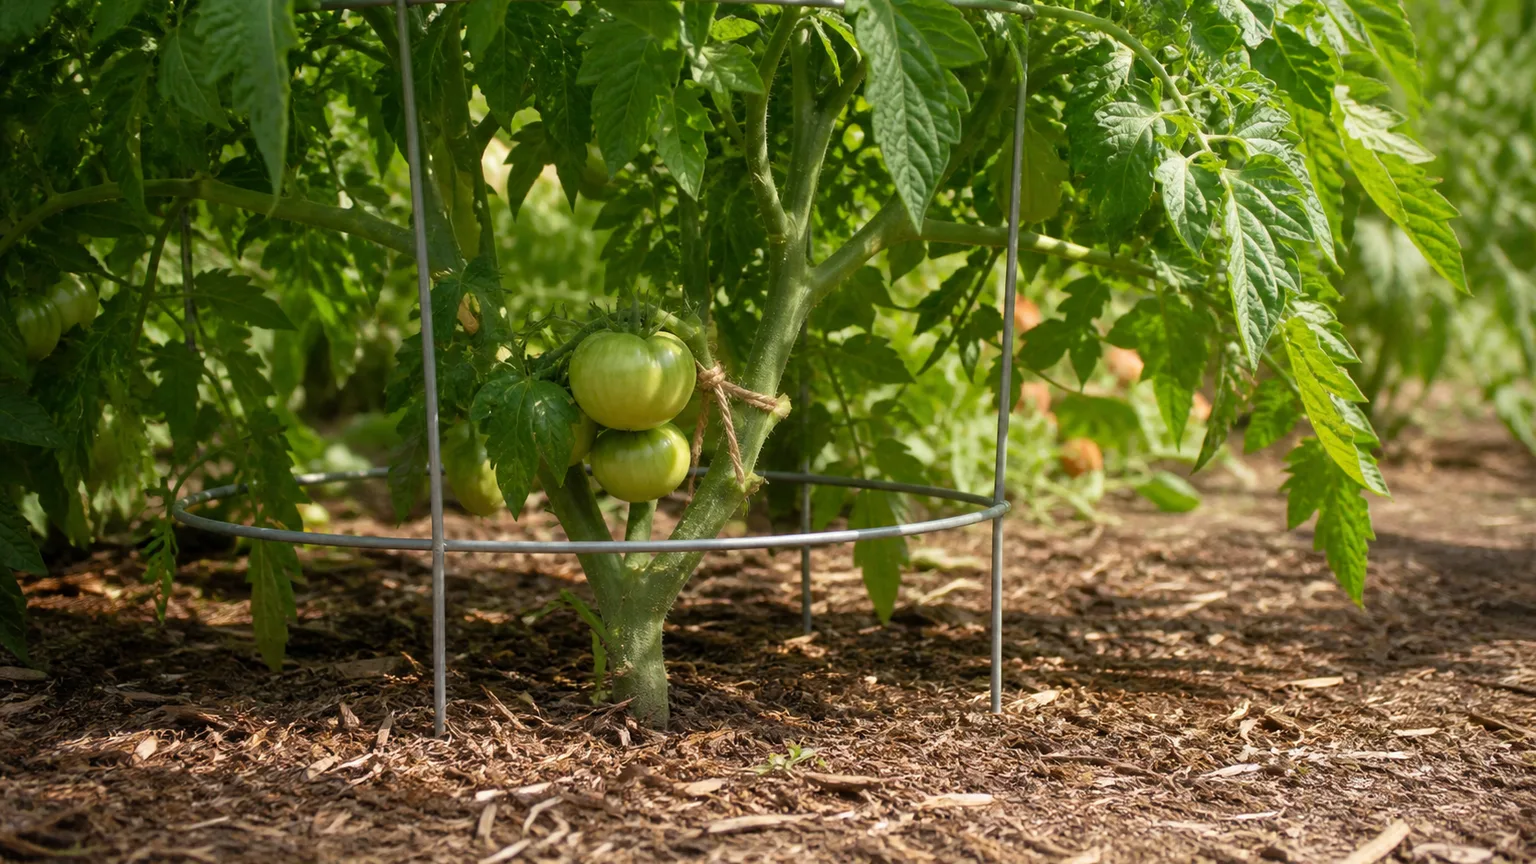
NC State Extension recommends 1.5–2 feet between plants in the row and 3–4 feet between rows for staked or caged in-ground tomatoes. Wire cages about 2 feet in diameter often use 3–4 feet between plants because each plant fills a cylinder without pruning.
Staked indeterminate rows: leave one to three main stems depending on spacing—three stems on a 3-foot spacing, two on 2-foot spacing. Weave-string systems for determinates use tight spacing with horizontal strings every 8–10 inches as plants grow.
Containers need at least 12 inches of soil depth and drainage holes; one large indeterminate per pot, or two determinates only in very large planters. Crowded pots compete for water and magnify disease.
Install stakes or cages within days of transplanting—not after the plant flops. Our stakes vs cages comparison helps match hardware to habit.
Pruning Suckers Without Slowing the Plant
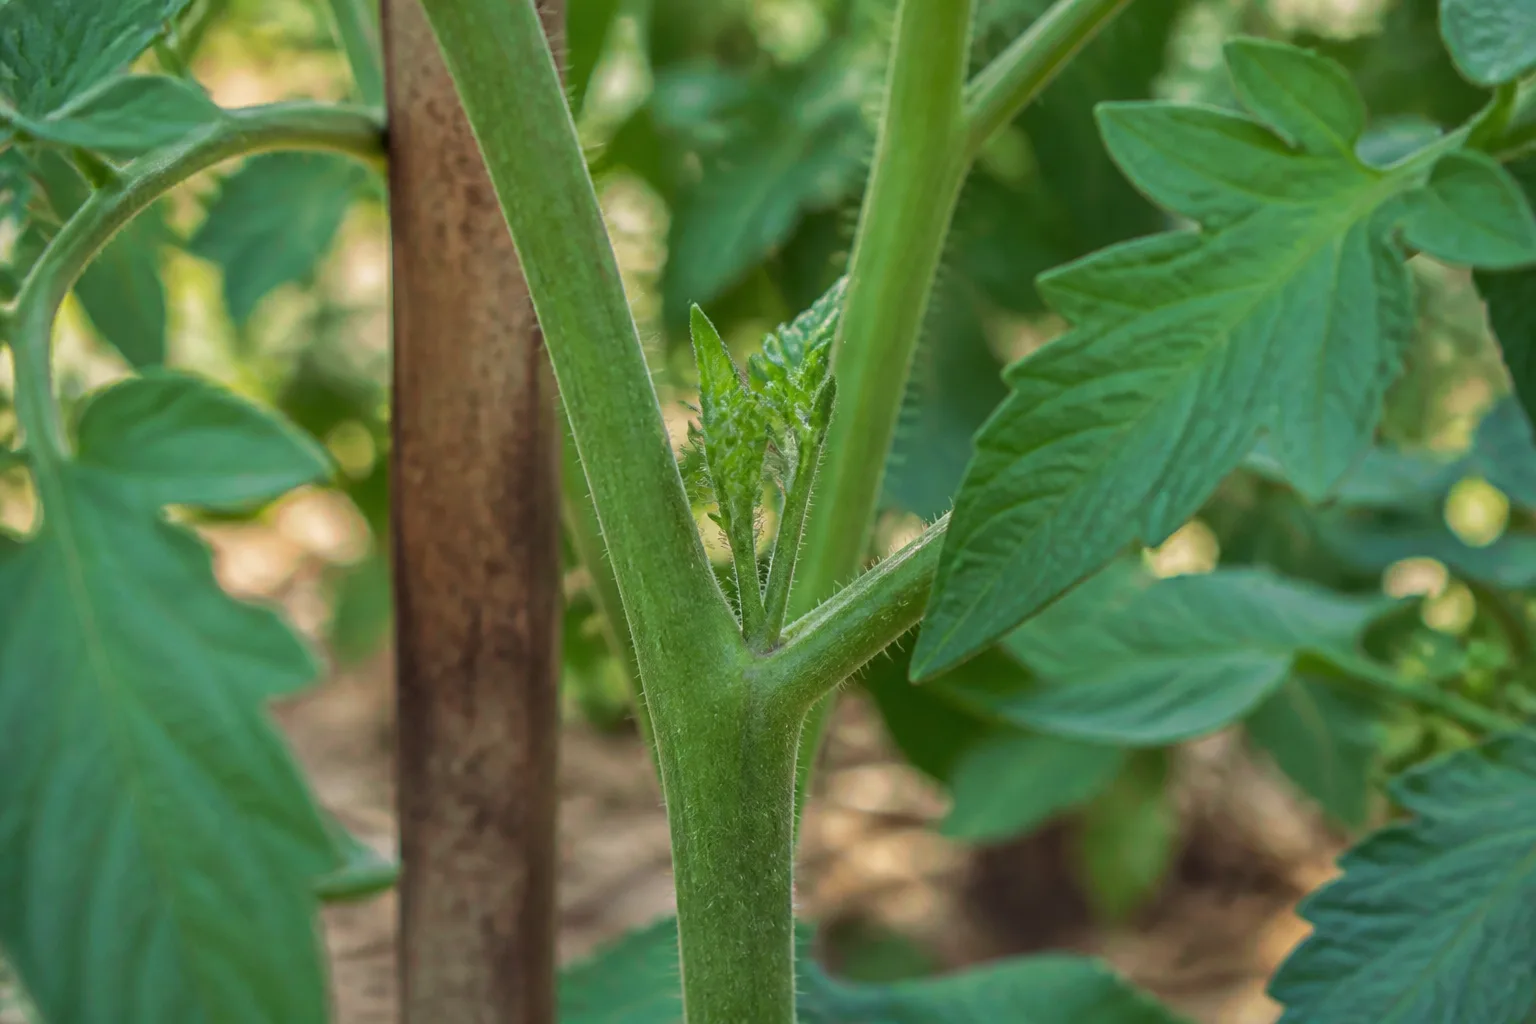
Suckers are shoots that grow from the joint between the main stem and a leaf branch, often at a 45° angle. On indeterminate plants, suckers become secondary vines that delay ripening and block air. Remove them when smaller than 3 inches by pinching or snapping—weekly is normal in peak summer.
On determinate plants, leave most suckers; you are pruning away future fruit clusters. Bottom pruning—removing the lowest leaves once fruit sets higher—still helps airflow and reduces soil splash.
Many growers remove the first four to seven suckers below the first flower cluster on indeterminate vines, then maintain one or two leaders up the stake. Late season, cutting the growing tip three to four weeks before expected frost redirects energy into sizing existing fruit when humid nights abort new flowers anyway. See removing lower leaves from tomatoes and is it too late to prune tomato plants for timing nuance.
Blossom End Rot Is Usually Water Stress, Not Empty Soil
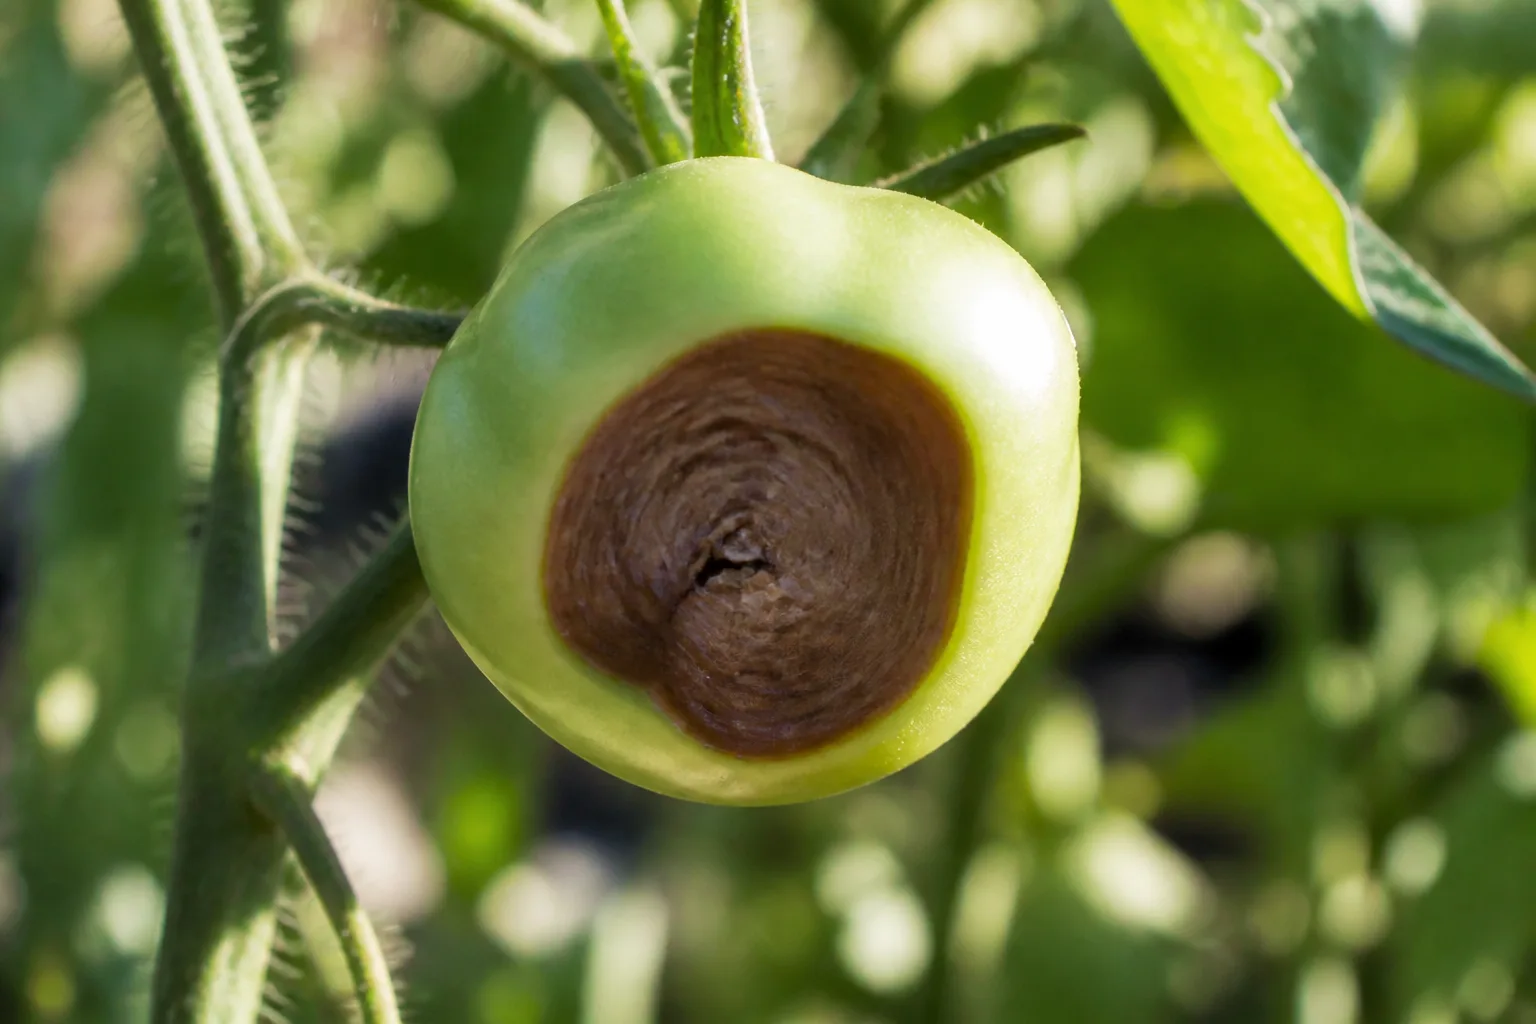
Blossom end rot—dark, leathery patches on the fruit bottom—panics new growers into dumping random calcium products on soil that already has enough. NC State Extension describes BER as a physiological disorder tied to insufficient calcium reaching the blossom end, often when soil moisture swings prevent uptake even if calcium is present.
Fix order that actually works:
- Stabilize watering—mulch, deep soak on a schedule, avoid flood-drought cycles.
- Soil test—correct pH to 6.5–6.7; extreme acidity or alkalinity locks up calcium.
- Avoid excess nitrogen early fruiting—it pushes leaf growth over fruit calcium delivery.
Eggshells can supply a small calcium boost at planting if dried, crushed, and mixed into the bottom of the transplant hole—about one eggshell per plant is a common home-garden measure cited by extension-linked growers. Dissolving shells in vinegar creates calcium acetate; acidity neutralizes in the reaction, but the vinegar pour is optional, not superior to lime from a soil test recommendation.
Eggshells do not fix BER on a plant already showing rot if watering remains erratic. Our blossom end rot guide goes deeper on prevention sequences.
Rotate Nightshades and Sketch Your Garden Map Now
Tomatoes share soil diseases with peppers, eggplants, potatoes, and tomatillos—all nightshades. Planting tomatoes in the same bed after potatoes or peppers reloads verticillium, fusarium, nematodes, and early blight spores waiting in residue and soil.
Minimum rotation: three years before tomatoes return to the same plot. NC State Extension advises moving tomatoes annually and destroying symptomatic plants at season end—not composting them. Sketch a simple four-bed map: tomatoes in bed A this year, legumes or greens in bed B, cucurbits in C, roots elsewhere—then rotate.
Better companions for the same season include basil, carrots, lettuce, and members of the mustard family—not because they magically repel every pest, but because they do not share the worst tomato soil pathogens. Our plants to never grow with tomatoes guide lists high-risk neighbors and safer alternates.
Clean tools between plants when disease appears—wipe pruners with 70% alcohol or a diluted bleach rinse. One infected stem dragged across a row spreads faster than any companion flower.
A Ten-Minute Pre-Season Checklist
Run this list before you buy transplants:
- Sun map the bed—six-plus direct hours? If not, plan containers or cherry types.
- Soil test and compost incorporation.
- Choose type—determinate for cages and canning flushes; indeterminate for summer-long harvest.
- Read resistance codes on labels.
- Plan spacing + support—stakes, cages, or weave strings bought and ready.
- Mark rotation—no nightshades in last year’s tomato bed.
- Mulch staged beside the row.
- Water plan—hose, drip, or soaker that hits soil, not leaves.
Skipping the checklist is how people end up with ten sprawling vines in a four-foot bed, wondering why fruit never turned red and leaves turned yellow “like everyone said would happen.”
Conclusion
Growing tomatoes for the first time is less about memorizing six tricks than about aligning type, site, water, harvest timing, and rotation before problems stack up. Pick the right habit for your space, give roots sun and tested soil, water deep and even, read yellow lower leaves as early warnings, harvest at breaker when pests and rain threaten, match spacing to your support system, fix blossom end rot with moisture stability—not panic calcium—and keep nightshades on a rotation map you actually follow.
Your first season will still teach you something. The goal is to make that lesson a fuller harvest instead of a hard reset. When you are ready to go deeper, our tomato cluster covers common first-season mistakes, pest ID, and variety picks for your goals—but the decisions on this page are the ones experienced growers say they wish they had locked in before they ever sunk a transplant in spring soil.



